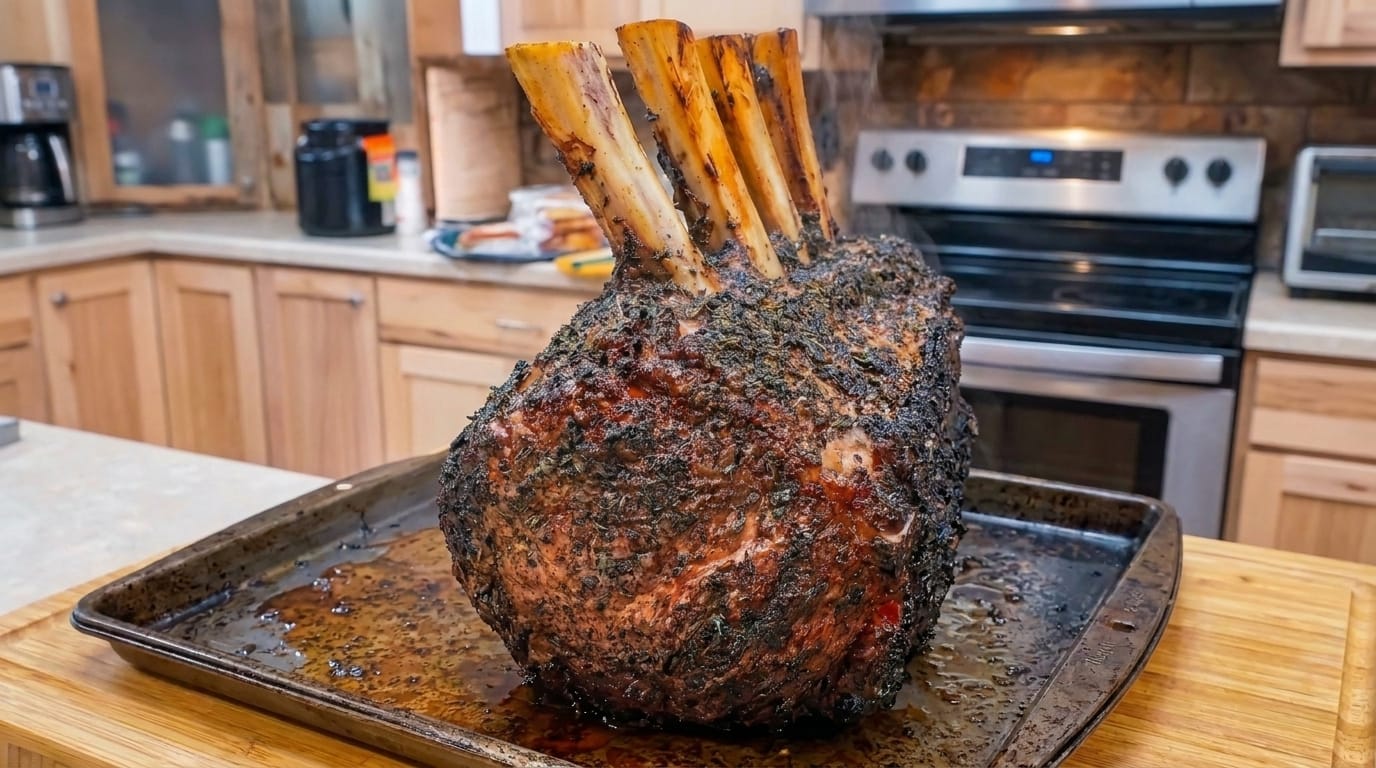
Ultimate Herb-Crusted Prime Rib Roast

Welcome to your ultimate, deeply comprehensive guide for preparing a show-stopping, majestic culinary centerpiece: Herb-Crusted Prime Rib Roast. If you want a masterclass in achieving a deeply caramelized, savory herb exterior while maintaining a succulent, buttery-soft pink interior that will amaze your family and guests, this extended guide is built for you.

Why This Roast is the King of Special Occasions

The prime rib roast—often referred to as a standing rib roast—is widely considered the ultimate crown jewel of holiday dinners, milestone celebrations, and epic weekend feasts. When treated with respect and cooked using precise temperature control, it delivers an eating experience unlike any other cut of beef.

  • Exceptional Marbling: Because prime rib is cut from the rib primal section, it features intricate marbling of fat throughout the muscle grain. As it cooks, this internal fat melts and bastes the meat from the inside out, guaranteeing phenomenal juiciness.
  • The Crust-to-Center Contrast: An herb-and-garlic paste roasted at high temperatures creates a dark, savory crust packed with flavor, contrasting perfectly with the tender, juicy beef slices inside.
  • Complete Showmanship: Serving a towering bone-in standing rib roast on a carving board instantly elevates any dining table into a fine-dining restaurant experience.

Comprehensive Ingredient Selection

To build a magnificent prime rib roast, quality and freshness matter immensely. Gather these ingredients before you begin:

  • The Beef: A 4 to 7-bone standing rib roast (prime grade or high-choice grade), preferably bone-in and Frenched (with the bone ends cleaned of meat for presentation).
  • The Herb Paste & Aromatics:
    • 1/4 cup extra-virgin olive oil or softened unsalted butter to bind the crust.
    • 6 cloves of fresh garlic, finely minced or mashed into a paste.
    • 3 tablespoons fresh rosemary leaves, finely chopped.
    • 3 tablespoons fresh thyme leaves, stripped and chopped.
    • 2 tablespoons coarse sea salt or kosher salt.
    • 1 tablespoon freshly cracked black pepper.
    • 1 teaspoon Dijon mustard (optional, for added tang and binder).

Step-by-Step Culinary Masterclass

Phase 1: Preparation and Dry Brining

  1. Bring to Temperature: Remove your prime rib roast from the refrigerator at least 2 to 3 hours before cooking. Allowing the meat to lose its chill ensures even cooking throughout the thick roast.
  2. Dry Brining (Recommended): Generously salt the entire surface of the beef with coarse salt 24 hours in advance, placing it uncovered on a wire rack inside the refrigerator. This draws out surface moisture, seasons deep within the muscle, and sets you up for an exceptional crust.
  3. Pat Dry: If you did not dry brine overnight, pat the roast completely dry with paper towels immediately before applying the seasoning paste.

Phase 2: Applying the Herb Crust

  1. Mix the Paste: In a small mixing bowl, combine the extra-virgin olive oil (or softened butter), minced garlic, chopped rosemary, chopped thyme, coarse salt, and black pepper until a thick, fragrant paste forms.
  2. Coat the Beef: Rub the herb paste thoroughly over all sides of the prime rib roast, pressing it firmly into the fat cap and exposed meat. If your bones are Frenched, you can wrap them in small squares of aluminum foil to prevent them from charring too darkly during roasting.

Phase 3: The Roasting Process

  1. Preheat the Oven: Preheat your oven to a high searing temperature of 450°F (230°C) for the first 15 to 20 minutes to lock in juices and build the outer crust, then drop the temperature down to 325°F (165°C) for slow, gentle cooking. Alternatively, use the low-and-slow reverse sear method.
  2. Monitor Internal Temperature: Insert a digital meat thermometer into the very center of the thickest part of the roast, avoiding bone contact.
    • Rare: Pull at 120°F to 125°F (49°C to 52°C)
    • Medium-Rare: Pull at 130°F to 135°F (54°C to 57°C)
    • Medium: Pull at 140°F to 145°F (60°C to 63°C)
  3. The Crucial Rest: Remove the prime rib from the oven when it is 5 degrees below your target temperature. Transfer it to a warm cutting board, tent loosely with aluminum foil, and let it rest for 25 to 30 minutes. This resting window allows the muscle fibers to relax and the juices to redistribute evenly across every slice.

Master Chef Pro-Tips for Perfection

  • Do Not Skip the Bones: Even though boneless roasts are easier to carve, cooking your prime rib bone-in acts as a natural insulation barrier, protecting the meat near the bone from overcooking while adding deep, savory flavor to the roast.
  • Make a Quick Au Jus: Deglace the roasting pan with a splash of red wine or beef broth, scraping up all those caramelized brown bits from the bottom, and simmer it down into a rich, savory au jus to drizzle over the slices.
  • Carving Technique: Slice the roast by cutting along the natural seam of the bone, removing the entire rack of ribs in one piece, and then slicing individual portions against the grain to your desired thickness.

What side dish do you prefer to pair alongside a magnificent prime rib roast, such as roasted garlic potatoes or creamed spinach?
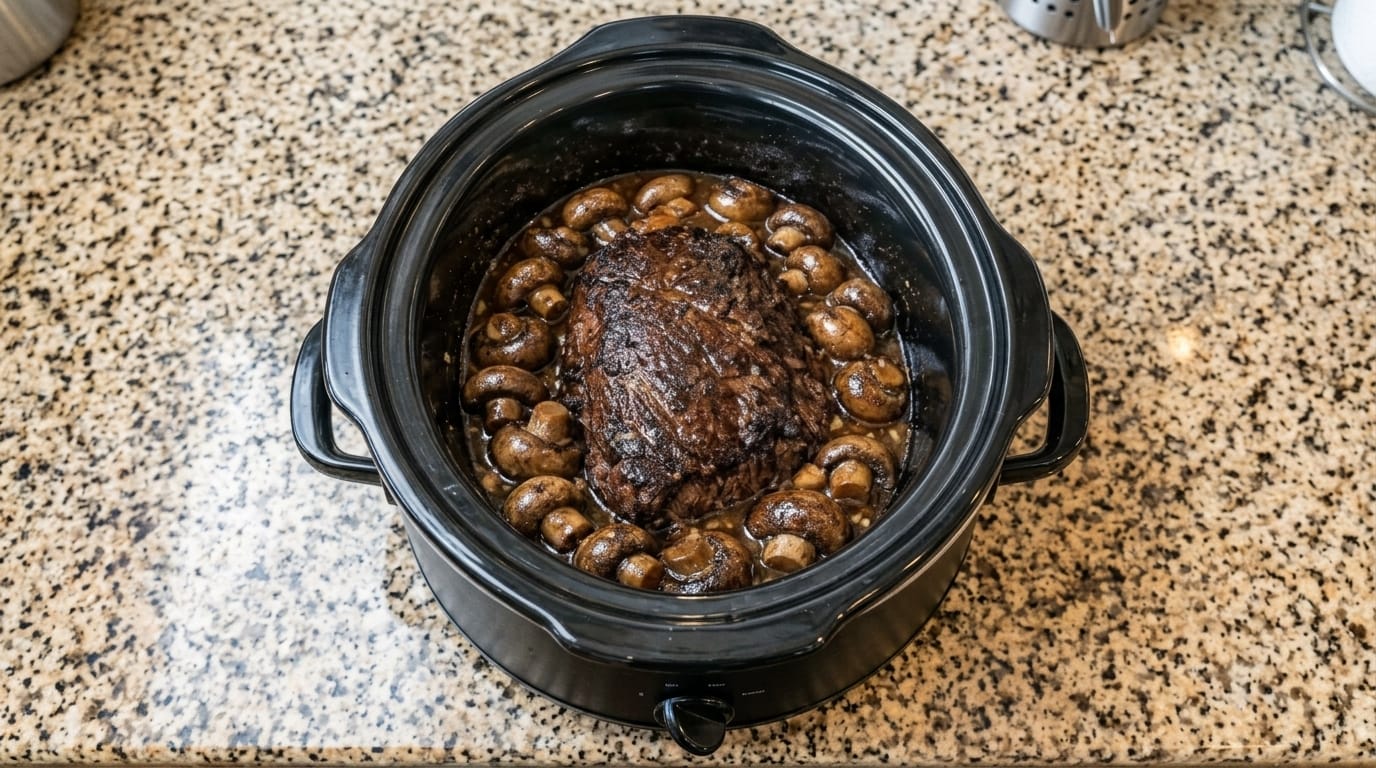
Ultimate Slow-Cooker Garlic Butter Mushroom Beef Roast

Welcome to your ultimate guide for preparing a rich, earthy, and exceptionally comforting slow-cooker masterpiece: Slow-Cooker Garlic Butter Mushroom Beef Roast. If you want a hands-off meal that delivers melt-in-your-mouth tenderness infused with savory garlic, rich butter, and caramelized whole mushrooms, this comprehensive recipe masterclass is designed just for you.

Why This Recipe Works

Cooking a roast low and slow in a crockpot is the gold standard for transforming tough cuts of meat into culinary perfection. By surrounding the beef with whole button mushrooms and a luscious garlic butter broth, every single bite absorbs an incredible depth of savory flavor.

  • Ultimate Tenderness: A well-marbled chuck roast breaks down completely over hours of gentle heat, yielding fork-tender meat that shreds effortlessly.
  • Rich, Earthy Flavors: As the whole mushrooms roast alongside the beef, they release their natural juices into the broth, creating an extraordinary gravy.
  • Effortless Convenience: With minimal active prep time, you can load your slow cooker in the morning and come home to a gourmet feast.

Essential Ingredients

To recreate this savory masterpiece in your own kitchen, gather the following high-quality ingredients:

  • The Beef: A 3 to 4-pound beef chuck roast, well-marbled for maximum moisture and flavor.
  • The Mushrooms: 16 oz whole white button mushrooms or cremini mushrooms, cleaned and trimmed.
  • The Aromatics & Sauce: 4 cloves minced garlic; 1/2 cup beef stock or broth; 2 tablespoons Worcestershire sauce.
  • The Fat & Richness: 1/2 cup (1 stick) of unsalted butter, cut into pats and placed over the roast.
  • The Seasonings: Salt, freshly cracked black pepper, garlic powder, and dried thyme or rosemary.

Step-by-Step Cooking Instructions

  1. Prep the Slow Cooker: Place your clean slow cooker insert on a stable countertop and ensure it is ready for loading.
  2. Season the Beef: Pat your chuck roast completely dry with paper towels, then season all sides generously with salt, black pepper, garlic powder, and dried thyme.
  3. Position the Roast: Place the seasoned chuck roast directly into the center of the slow cooker insert.
  4. Add the Mushrooms and Garlic: Scatter the whole button mushrooms all around the roast, filling the gaps in the slow cooker. Sprinkle the minced garlic evenly over the meat and mushrooms.
  5. Add Liquid and Butter: Pour the beef stock and Worcestershire sauce around the edges of the roast. Arrange the pats of butter directly across the top of the beef.
  6. Cook Low and Slow: Cover the slow cooker with its lid and cook on LOW for 8 to 10 hours (or on HIGH for 5 to 6 hours) until the beef is fork-tender and the mushrooms are tender and juicy.
  7. Serve: Spoon the tender mushrooms and rich garlic butter sauce generously over slices or shredded portions of the pot roast.

Chef’s Pro-Tips for Success

  • Do Not Overcrowd Liquid: Mushrooms naturally release a lot of moisture as they cook, so keeping the added beef broth to just half a cup ensures your sauce stays concentrated and flavorful rather than watery.
  • Thicken the Sauce: If you prefer a gravy consistency, ladle out the cooking juices into a saucepan, whisk in a cornstarch slurry, and simmer until thick and glossy.
  • Serving Suggestions: Serve this savory mushroom roast over a bed of buttery mashed potatoes, egg noodles, or alongside roasted asparagus.

What is your absolute favorite variety of mushroom to use in slow-cooked beef dishes?

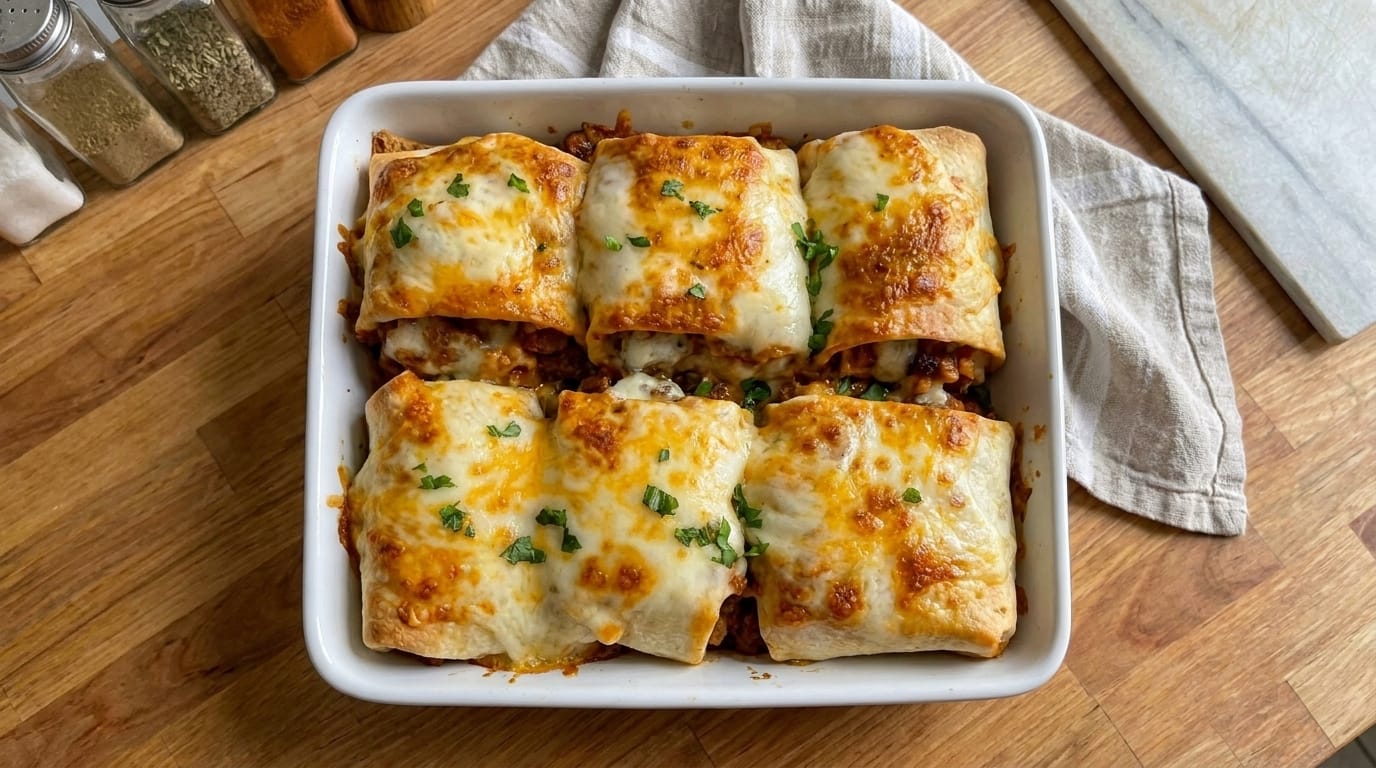
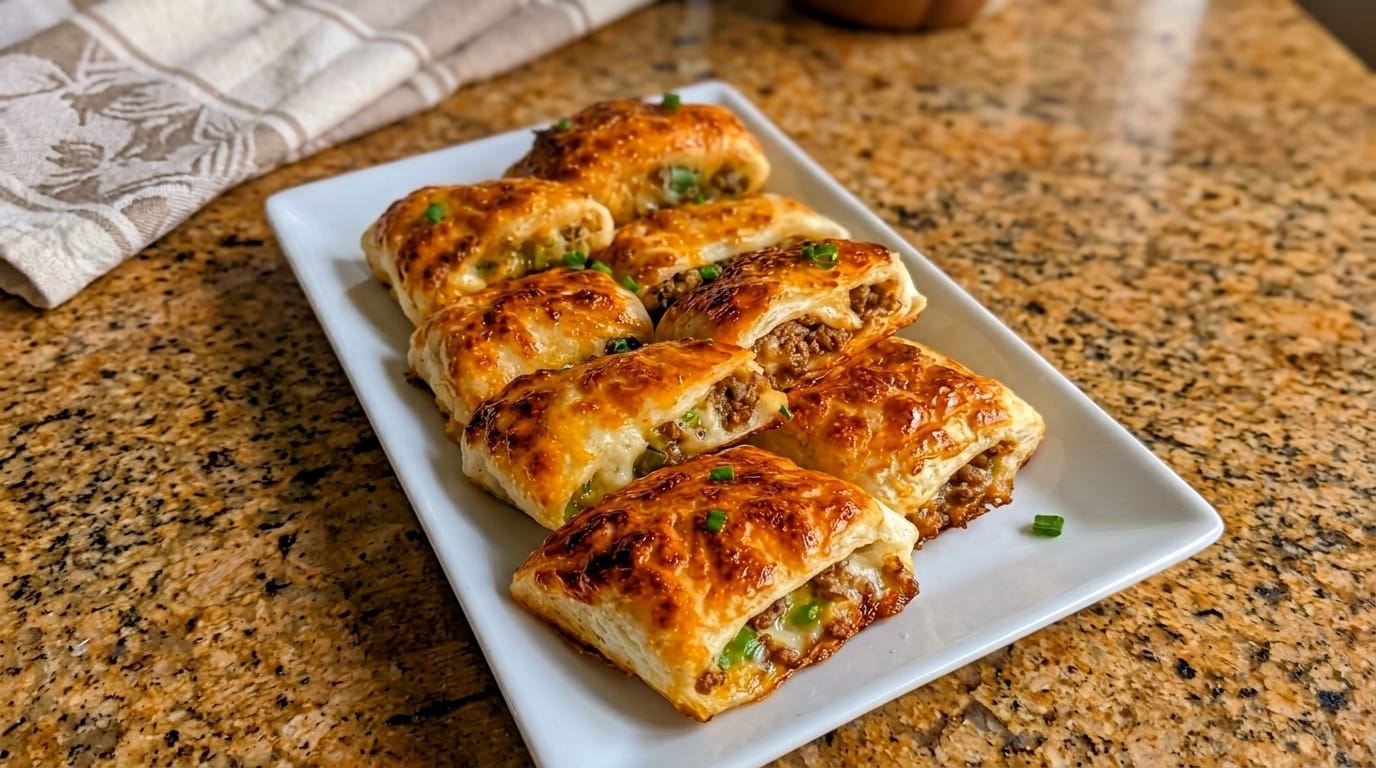
Ultimate Cheesy Beef Puff Pastry Pockets

Welcome to your ultimate guide for preparing a golden, flaky, and exceptionally savory comfort food masterpiece: Cheesy Beef Puff Pastry Pockets. If you want a show-stopping appetizer or hearty meal that delivers an incredible cheese pull and rich beef filling with minimal effort, this comprehensive recipe masterclass is designed just for you.

Why This Recipe Works

Puff pastry pockets are a favorite because they turn simple ingredients into bakery-quality treats. By wrapping seasoned ground beef and gooey cheese inside buttery, flaky layers of pastry, you get a sensational texture contrast that satisfies every craving.

  • Flaky Perfection: Baking high-quality puff pastry yields a golden, shattering crust that provides an incredible crunch with every bite.
  • The Ultimate Cheese Pull: Loaded with melting cheese that stretches and oozes, making every portion visually stunning and deliciously rich.
  • Effortless Convenience: With simple ingredients and straightforward steps, you can assemble and bake these golden pockets in no time.

Essential Ingredients

To recreate this savory masterpiece in your own kitchen, gather the following high-quality ingredients:

  • The Pastry: 1 sheet of store-bought puff pastry, thawed.
  • The Protein: 1 lb ground beef (or ground chicken), browned and seasoned.
  • The Cheese: 1.5 cups shredded mozzarella or cheddar cheese.
  • The Aromatics & Veggies: 1/4 cup diced onions, 1/4 cup chopped green bell peppers, and 2 cloves minced garlic.
  • The Seasonings: Salt, black pepper, garlic powder, and an egg beaten with a splash of water for the egg wash.

Step-by-Step Cooking Instructions

  1. Preheat and Prep: Preheat your oven to 400°F (200°C) and line a baking sheet with parchment paper.
  2. Cook the Filling: In a skillet over medium heat, brown the ground beef along with the diced onions, bell peppers, and minced garlic until fully cooked. Drain excess fat and season with salt, pepper, and garlic powder.
  3. Roll Out the Pastry: Gently roll out your thawed puff pastry sheet on a lightly floured surface. Cut it into uniform rectangles or squares.
  4. Assemble the Pockets: Spoon a generous portion of the seasoned beef mixture onto one half of each pastry rectangle, topping it generously with shredded cheese.
  5. Seal and Score: Fold the pastry over the filling to create pockets. Crimp the edges tightly with a fork to seal, and brush the tops with the egg wash for a golden shine.
  6. Bake: Bake in the preheated oven for 18 to 22 minutes until the pastry is puffed, golden brown, and crisp. Let cool slightly before slicing and serving.

Chef’s Pro-Tips for Success

  • Keep the Pastry Cold: If your puff pastry becomes too warm and sticky while working with it, pop it back into the refrigerator for 10 minutes before baking to ensure maximum flakiness.
  • Seal Securely: Make sure to press the edges down firmly so the melted cheese stays locked inside the pockets while baking.
  • Garnish and Serve: Sprinkle freshly chopped green onions or chives over the top right before serving for a pop of color and fresh flavor.

What is your favorite dipping sauce to serve alongside a warm, flaky pastry pocket?

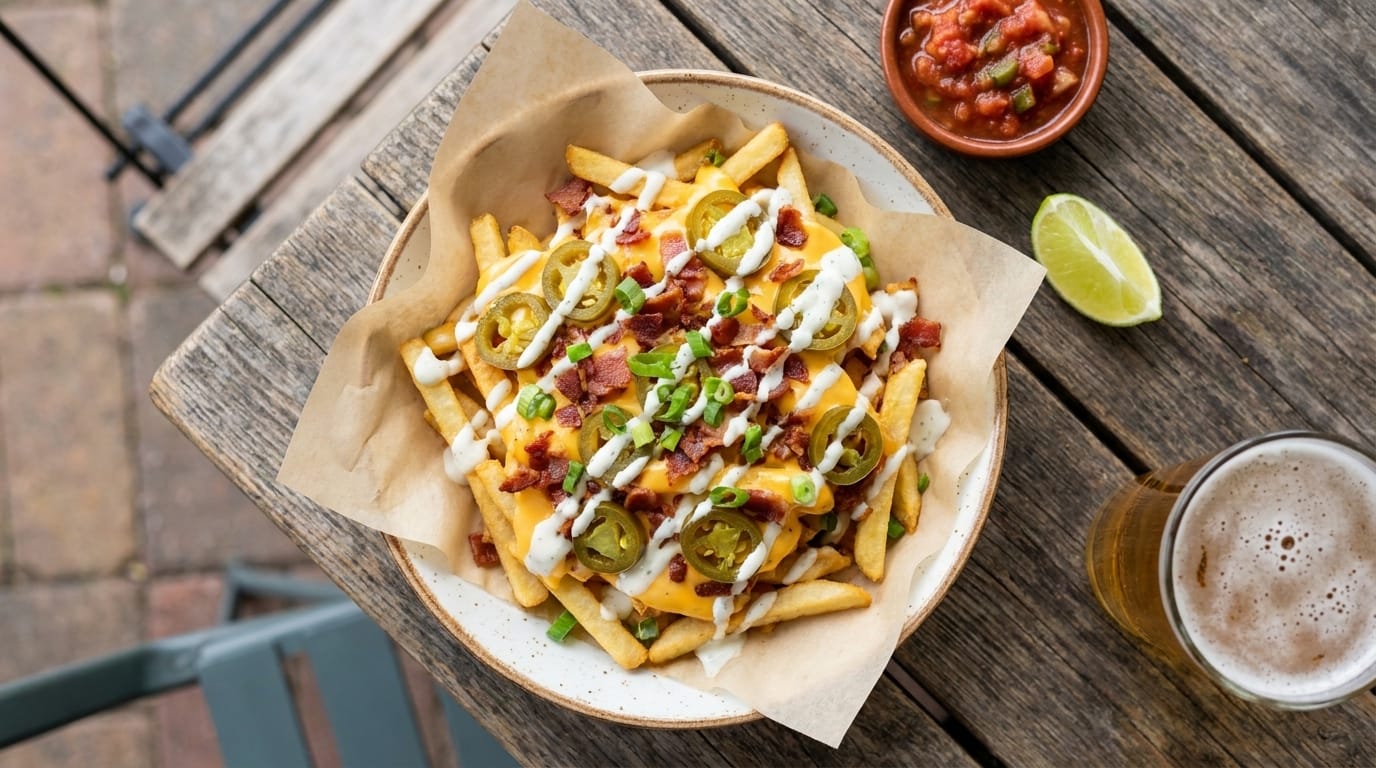
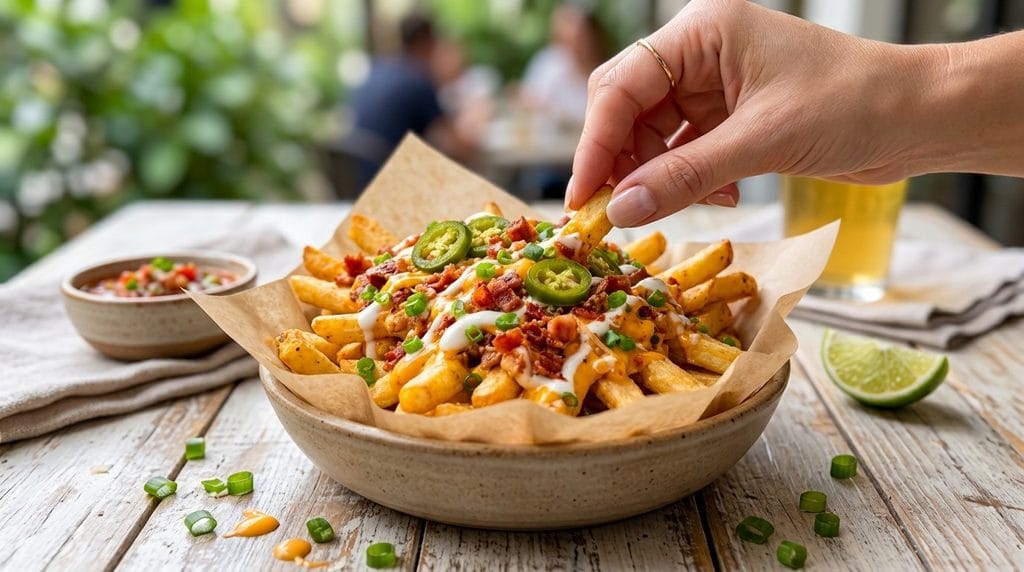
Easy Loaded Bacon Ranch Fries Recipe – Crispy Fries Topped with Cheese, Bacon, and Creamy Ranch Flavor

If you love crispy fries loaded with bold flavors, these Loaded Bacon Ranch Fries are the ultimate comfort food. Golden fries are covered with melted cheese, crispy bacon, fresh jalapeños, green onions, and a creamy ranch drizzle that makes every bite irresistible.

This easy loaded fries recipe combines the perfect mix of crispy, cheesy, smoky, and creamy flavors. It is a fun appetizer for parties, game nights, family gatherings, or a delicious weekend snack everyone will love.

Why You’ll Love These Loaded Bacon Ranch Fries

Crispy fries with a cheesy, flavorful topping.

Packed with smoky bacon and creamy ranch flavor.

Quick and easy to prepare.

Perfect for sharing with family and friends.

Customizable with your favorite toppings.

Great as an appetizer or comfort meal.

Ingredients

For the Fries

  • 2 pounds frozen french fries
  • 2 tablespoons olive oil
  • 1 teaspoon garlic powder
  • 1 teaspoon smoked paprika
  • 1 teaspoon salt
  • ½ teaspoon black pepper

For the Bacon Cheese Topping

  • 8 slices bacon, cooked and crumbled
  • 2 cups shredded cheddar cheese
  • 1 cup shredded mozzarella cheese
  • ¼ cup sliced jalapeños
  • ¼ cup chopped green onions

For the Ranch Drizzle

  • ½ cup ranch dressing
  • 2 tablespoons sour cream
  • 1 tablespoon milk
  • ½ teaspoon garlic powder
  • ½ teaspoon black pepper

Garnish

  • Fresh parsley or cilantro
  • Extra green onions
  • Cracked black pepper

How to Make Loaded Bacon Ranch Fries

1. Prepare the Fries

Preheat oven according to the package directions.

Spread fries evenly on a baking sheet.

Season with:

  • Olive oil
  • Garlic powder
  • Smoked paprika
  • Salt
  • Black pepper

Bake until:

25–30 minutes

or until golden and crispy.

2. Cook the Bacon

Cook bacon until crispy.

Drain excess grease and crumble into small pieces.

Set aside.

3. Prepare the Ranch Sauce

Mix together:

  • Ranch dressing
  • Sour cream
  • Milk
  • Garlic powder
  • Black pepper

Stir until smooth and creamy.

4. Layer the Loaded Fries

Place crispy fries on a serving tray or baking dish.

Add:

  • Shredded cheddar cheese
  • Mozzarella cheese
  • Crispy bacon pieces

5. Melt the Cheese

Return fries to the oven.

Bake for:

5–8 minutes

until the cheese is fully melted and bubbly.

6. Add Fresh Toppings

Top with:

  • Jalapeños
  • Green onions
  • Fresh herbs

Drizzle generously with ranch sauce.

7. Serve Immediately

Serve hot while the fries are crispy and the cheese is warm and melted.

What to Serve With Loaded Bacon Ranch Fries

Perfect pairings:

  • Chicken wings
  • Burgers
  • Grilled sandwiches
  • BBQ ribs

Fresh sides:

  • Coleslaw
  • Garden salad
  • Pickles

Drinks:

  • Iced tea
  • Lemonade
  • Cold soda

Tips for the Best Loaded Bacon Ranch Fries

Make Fries Extra Crispy

Bake or air fry fries until golden before adding toppings.

Use Freshly Shredded Cheese

It melts smoother and creates better cheese coverage.

Add Ranch After Baking

This keeps the fries from becoming soggy.

Serve Immediately

Loaded fries taste best right after assembling.

Layer Cheese Throughout

Adding cheese between layers gives every bite more flavor.

Easy Recipe Variations

Buffalo Chicken Ranch Fries

Add:

  • Shredded cooked chicken
  • Buffalo sauce

for a spicy twist.

BBQ Bacon Fries

Add:

  • BBQ sauce
  • Extra crispy onions

for smoky flavor.

Jalapeño Popper Fries

Add:

  • Cream cheese
  • Extra jalapeños
  • Bacon

for a creamy spicy version.

Cheeseburger Bacon Fries

Add:

  • Seasoned ground beef
  • Pickles
  • Burger sauce

for cheeseburger-style fries.

Loaded Garlic Parmesan Fries

Add:

  • Parmesan cheese
  • Garlic butter
  • Fresh herbs

for a savory upgrade.

Make-Ahead Instructions

Cook bacon and prepare ranch sauce up to:

2 days ahead

Store separately in the refrigerator.

Bake fries fresh before serving for the best texture.

How to Store Leftovers

Store leftover fries in an airtight container.

Refrigerate for up to:

2 days

Reheating Instructions

Reheat in an air fryer or oven at:

375°F (190°C)

until crispy.

Add fresh ranch drizzle after reheating.

Freezing Instructions

Freeze cooked bacon separately for up to:

3 months

It is best to prepare fries fresh rather than freezing fully assembled loaded fries.

Frequently Asked Questions

Can I use homemade fries?

Yes. Fresh-cut fries work perfectly.

Can I make these in an air fryer?

Yes. Air fry fries until crispy, then add toppings.

What cheese works best?

Cheddar and mozzarella create the perfect flavor and cheese pull.

Can I use turkey bacon?

Yes, turkey bacon is a lighter option.

How do I keep loaded fries crispy?

Add sauces right before serving and avoid too much liquid.

Can I add chicken?

Yes. Grilled or shredded chicken makes a great addition.

Final Thoughts

These Loaded Bacon Ranch Fries are crispy, cheesy, smoky, and packed with incredible flavor.

With golden fries, melted cheese, crispy bacon, fresh toppings, and creamy ranch drizzle, this recipe is the perfect crowd-pleasing snack for any occasion.

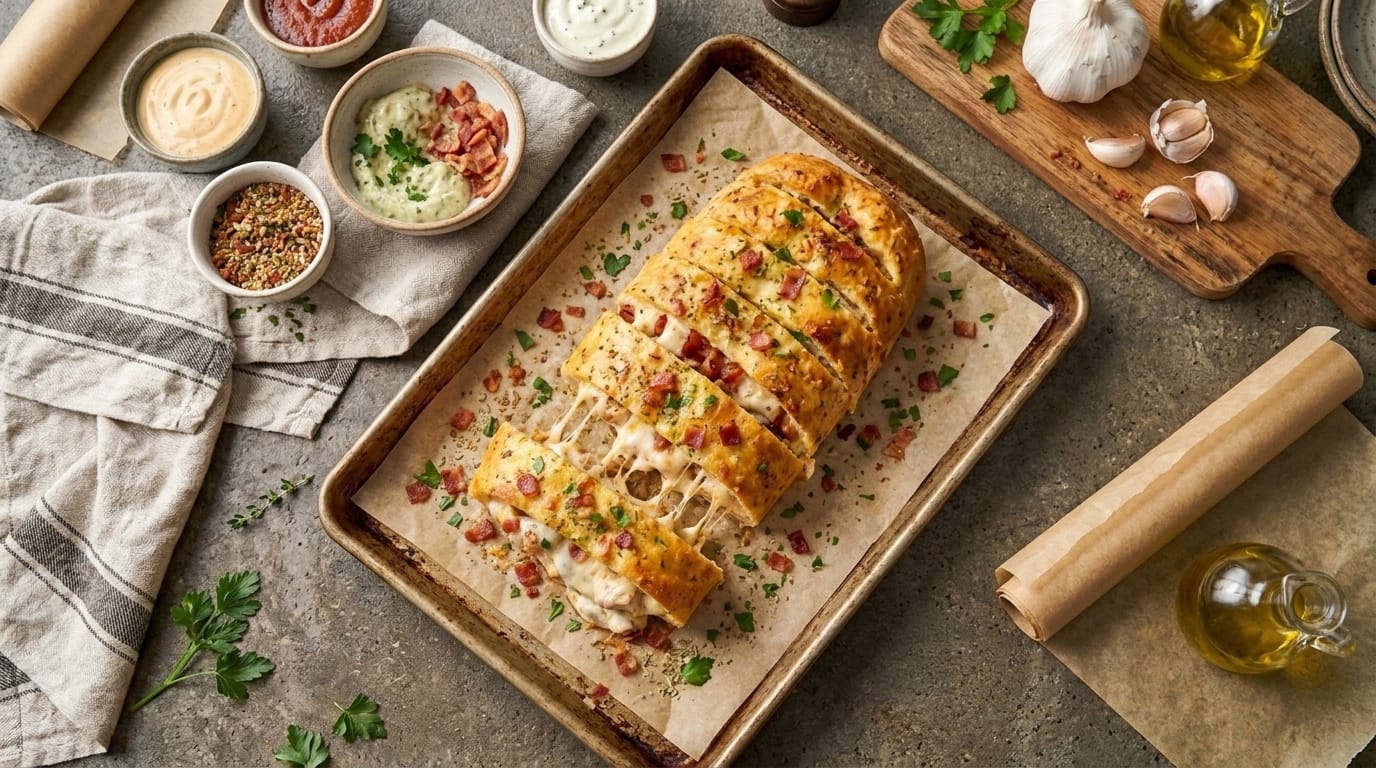
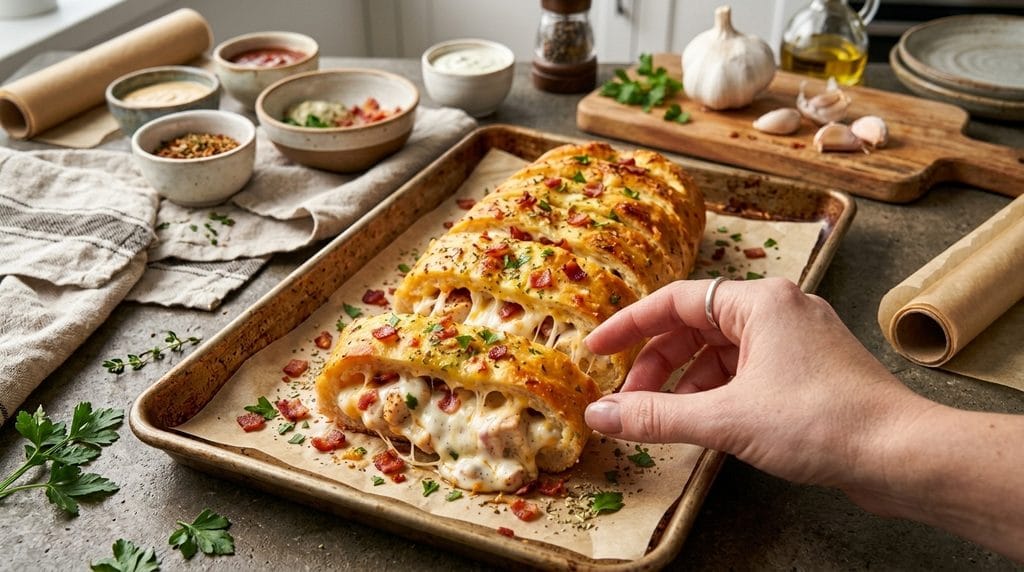
Easy Cheesy Garlic Chicken Bread Roll Recipe – Golden, Creamy, and Loaded with Flavor

If you love warm, cheesy comfort food, this Cheesy Garlic Chicken Bread Roll is the perfect recipe. Soft golden bread is filled with juicy seasoned chicken, creamy cheese, garlic, and herbs, then baked until beautifully crisp on the outside with a rich, melty filling inside.

Every slice reveals a delicious combination of tender chicken, stretchy melted cheese, and a creamy garlic filling wrapped in golden bread. It is the ultimate homemade comfort meal that feels like a bakery-style treat made right in your kitchen.

Perfect for family dinners, parties, game nights, lunch, or a satisfying snack, these stuffed bread rolls are guaranteed to be a favorite.

Why You’ll Love This Cheesy Garlic Chicken Bread Roll

The filling is creamy, cheesy, and packed with flavor.

The outside becomes golden and crispy.

Perfect combination of chicken, garlic, and melted cheese.

Great for meal prep and gatherings.

Easy to customize with your favorite fillings.

A delicious handheld comfort food everyone loves.

Ingredients

For the Chicken Filling

  • 2 pounds boneless chicken breast, cooked and shredded
  • 2 tablespoons olive oil
  • 1 medium onion, finely diced
  • 4 garlic cloves, minced
  • 1 teaspoon salt
  • 1 teaspoon black pepper
  • 1 teaspoon garlic powder
  • 1 teaspoon paprika
  • 1 teaspoon Italian seasoning
  • ½ teaspoon chili flakes (optional)
  • 2 tablespoons cream cheese
  • ½ cup mayonnaise
  • ½ cup sour cream
  • 1 tablespoon fresh parsley, chopped

For the Cheese Filling

  • 2 cups shredded mozzarella cheese
  • 1 cup shredded cheddar cheese
  • ½ cup Parmesan cheese

For the Bread Roll

  • 1 large pizza dough or bread dough
  • 2 tablespoons melted butter
  • 2 garlic cloves, minced
  • 1 tablespoon parsley, chopped
  • 1 teaspoon Italian seasoning

Optional Add-Ins

  • Cooked bacon pieces
  • Spinach
  • Mushrooms
  • Jalapeños
  • Bell peppers

How to Make Cheesy Garlic Chicken Bread Roll

1. Prepare the Chicken Filling

Heat olive oil in a skillet over medium heat.

Add onion and cook for:

3–4 minutes

until softened.

Add garlic and cook for:

30 seconds

until fragrant.

2. Season the Chicken

Add shredded chicken.

Season with:

  • Salt
  • Black pepper
  • Garlic powder
  • Paprika
  • Italian seasoning

Mix well and cook for:

3–5 minutes

3. Make It Creamy

Reduce heat.

Add:

  • Cream cheese
  • Mayonnaise
  • Sour cream
  • Parsley

Mix until the chicken becomes creamy and well combined.

Remove from heat and let cool slightly.

4. Prepare the Dough

Roll the bread dough into a large rectangle.

Keep the thickness even so it bakes properly.

5. Add the Filling

Spread the chicken mixture evenly over the dough.

Sprinkle mozzarella, cheddar, and Parmesan cheese on top.

Leave a small border around the edges.

6. Roll the Bread

Carefully roll the dough into a log shape.

Pinch the edges to seal.

Place seam-side down on a lined baking sheet.

7. Add Garlic Butter Topping

Mix:

  • Melted butter
  • Garlic
  • Parsley
  • Italian seasoning

Brush over the top.

8. Bake the Roll

Bake at:

375°F (190°C)

for:

25–30 minutes

until golden brown and the cheese is melted.

9. Rest Before Cutting

Allow the bread roll to rest for:

5–10 minutes

before slicing.

This helps the filling stay inside.

10. Serve Warm

Slice into pieces.

Garnish with fresh parsley.

Serve with your favorite dipping sauce.

What to Serve With Cheesy Garlic Chicken Bread Roll

Perfect pairings:

  • Garlic sauce
  • Ranch dressing
  • Marinara sauce
  • Caesar salad
  • Tomato soup

Other great sides:

  • French fries
  • Roasted vegetables
  • Coleslaw
  • Potato wedges

Tips for the Best Cheesy Garlic Chicken Bread Roll

Cool the Filling First

Warm filling can make the dough difficult to roll.

Don’t Overfill

Too much filling can cause the bread to split.

Use Fresh Dough

Fresh dough gives the softest texture.

Add Cheese Generously

Extra cheese creates a delicious melted center.

Seal the Edges Well

This keeps the creamy filling inside.

Rest Before Slicing

It helps create cleaner slices.

Easy Recipe Variations

Buffalo Chicken Bread Roll

Add:

  • Buffalo sauce
  • Ranch seasoning
  • Blue cheese

for a spicy twist.

Garlic Parmesan Chicken Roll

Add extra:

  • Parmesan
  • Garlic butter
  • Fresh herbs

for a rich flavor.

Chicken Bacon Ranch Roll

Add:

  • Crispy bacon
  • Ranch seasoning
  • Cheddar cheese

Spinach Chicken Roll

Add:

  • Fresh spinach
  • Extra mozzarella

for a creamy veggie version.

BBQ Chicken Roll

Mix chicken with:

  • BBQ sauce
  • Smoked cheddar

for smoky flavor.

Make-Ahead Instructions

Prepare the chicken filling up to:

3 days ahead

Store in an airtight container in the refrigerator.

Assemble and bake fresh when ready.

You can also prepare the full roll a few hours before baking.

How to Store Leftovers

Store leftover slices in an airtight container.

Refrigerate for up to:

4 days

Reheating Instructions

Oven:

350°F (175°C) for 10 minutes

Air fryer:

350°F (175°C) for 4–5 minutes

until warm and crispy.

Freezing Instructions

Wrap baked slices individually.

Freeze for up to:

3 months

Thaw and reheat before serving.

Frequently Asked Questions

Can I use rotisserie chicken?

Yes. It is a quick and flavorful option.

What cheese works best?

Mozzarella gives stretch while cheddar adds rich flavor.

Can I use puff pastry instead of bread dough?

Yes. Puff pastry creates a flakier texture.

How do I prevent the filling from leaking?

Avoid overfilling and seal the dough tightly.

Can I make this spicy?

Yes. Add chili flakes, jalapeños, or hot sauce.

Can I prepare it ahead?

Yes. Assemble and bake when ready.

What sauce goes best with this roll?

Garlic sauce, ranch, marinara, and cheese sauce are all delicious.

Final Thoughts

This Cheesy Garlic Chicken Bread Roll combines everything you love about comfort food: tender chicken, creamy garlic filling, melted cheese, and golden homemade bread.

It is simple enough for a family dinner but impressive enough for gatherings and celebrations.

Serve it warm and enjoy a delicious cheesy meal everyone will love.

Easy Cheesy Beef Stuffed Bread Rolls Recipe – Golden, Gooey, and Loaded with Savory Flavor

If you love warm homemade bread filled with cheesy, savory goodness, these Cheesy Beef Stuffed Bread Rolls are the perfect comfort food. Soft golden bread is packed with seasoned ground beef, melted cheese, and delicious Italian-inspired flavors, then baked until beautifully golden and bubbling.

Every bite delivers a crispy, buttery outside with a juicy beef and cheese filling inside. The melted cheese stretches perfectly while the flavorful beef filling makes these rolls taste like a homemade cheeseburger wrapped in fresh baked bread.

Perfect for family dinners, party appetizers, game nights, lunch boxes, or a satisfying snack, these stuffed bread rolls are easy to make and guaranteed to disappear quickly.

Why You’ll Love These Cheesy Beef Stuffed Bread Rolls

They combine soft homemade bread with a rich cheesy beef filling.

The golden crust is buttery, warm, and delicious.

The beef filling is savory, juicy, and full of flavor.

Perfect for serving as a meal or appetizer.

Great for kids, parties, and family gatherings.

Easy to customize with your favorite fillings.

Ingredients

For the Beef Filling

  • 1½ pounds ground beef
  • 2 tablespoons olive oil
  • 1 medium onion, finely diced
  • 4 garlic cloves, minced
  • 1 teaspoon salt
  • 1 teaspoon black pepper
  • 1 teaspoon garlic powder
  • 1 teaspoon onion powder
  • 1 teaspoon smoked paprika
  • 1 teaspoon Italian seasoning
  • 2 tablespoons Worcestershire sauce
  • 2 tablespoons tomato paste
  • ½ cup marinara sauce

For the Cheese Filling

  • 2 cups shredded mozzarella cheese
  • 1 cup shredded cheddar cheese
  • ½ cup shredded Parmesan cheese
  • 4 ounces cream cheese (optional for extra creaminess)

For the Bread Rolls

  • 1 pound pizza dough or homemade bread dough
  • 2 tablespoons melted butter
  • 2 garlic cloves, minced
  • 1 tablespoon fresh parsley, chopped
  • 1 teaspoon Italian seasoning

Optional Add-Ins

  • Bell peppers
  • Mushrooms
  • Jalapeños
  • Cooked bacon
  • Spinach
  • Extra cheese

How to Make Cheesy Beef Stuffed Bread Rolls

1. Prepare the Beef Filling

Heat olive oil in a large skillet over medium heat.

Add ground beef and cook for:

5–7 minutes

until browned and fully cooked.

Break the beef apart while cooking.

2. Add Aromatics

Add diced onion.

Cook for:

3–4 minutes

until softened.

Add minced garlic and cook for another 30 seconds.

3. Season the Beef

Add:

  • Salt
  • Black pepper
  • Garlic powder
  • Onion powder
  • Smoked paprika
  • Italian seasoning
  • Worcestershire sauce
  • Tomato paste

Stir well.

4. Finish the Filling

Add marinara sauce.

Simmer for:

3–5 minutes

until the mixture becomes flavorful and slightly thickened.

Remove from heat and allow it to cool slightly.

5. Prepare the Dough

Divide the dough into equal portions.

Roll each piece into a small circle.

Keep the center slightly thicker than the edges.

6. Add the Filling

Place a spoonful of beef mixture in the center.

Add:

  • Mozzarella cheese
  • Cheddar cheese
  • Parmesan cheese

Do not overfill to prevent leaking.

7. Seal the Rolls

Fold the dough around the filling.

Pinch the edges tightly to seal.

Place seam-side down in a greased baking dish.

8. Add Garlic Butter Topping

Mix:

  • Melted butter
  • Garlic
  • Parsley
  • Italian seasoning

Brush over the top of each roll.

9. Bake the Rolls

Bake in a preheated oven at:

375°F (190°C)

for:

20–25 minutes

until golden brown and the cheese is melted.

10. Rest Before Serving

Allow the rolls to cool for:

5 minutes

before serving.

This helps the filling set.

11. Garnish and Serve

Top with:

  • Fresh parsley
  • Extra Parmesan
  • Cracked black pepper

Serve warm.

What to Serve With Cheesy Beef Stuffed Bread Rolls

These rolls are delicious with classic comfort sides.

Serve with:

  • Marinara dipping sauce
  • Garlic butter sauce
  • Ranch dressing
  • Caesar salad
  • Garden salad

Other great pairings:

  • Tomato soup
  • French fries
  • Roasted vegetables
  • Potato wedges
  • Coleslaw

They also make a great party platter with:

  • Buffalo chicken dip
  • Cheese dip
  • Vegetable trays

Tips for the Best Cheesy Beef Stuffed Bread Rolls

Cool the Filling Before Stuffing

Hot filling can make the dough difficult to seal.

Don’t Overfill

Too much filling can cause the rolls to burst while baking.

Seal the Dough Well

Press edges firmly to keep the cheese inside.

Use Fresh Dough

Fresh dough creates the softest, fluffiest rolls.

Add Cheese Layers

Adding cheese above and below the beef creates extra gooey bites.

Brush With Garlic Butter

This creates a flavorful golden crust.

Serve Warm

The cheese is best when melted and stretchy.

Easy Recipe Variations

Cheeseburger Stuffed Rolls

Add:

  • Pickles
  • Mustard
  • Ketchup
  • Cheddar cheese

for a cheeseburger flavor.

Philly Cheesesteak Rolls

Replace ground beef with sliced steak.

Add:

  • Peppers
  • Onions
  • Provolone cheese

Pizza Beef Rolls

Add:

  • Pepperoni
  • Mozzarella
  • Pizza sauce

Spicy Beef Rolls

Add:

  • Jalapeños
  • Hot sauce
  • Red pepper flakes

Garlic Parmesan Beef Rolls

Add extra:

  • Parmesan cheese
  • Garlic butter
  • Fresh herbs

BBQ Beef Rolls

Mix barbecue sauce into the beef filling.

Top with cheddar cheese.

Make-Ahead Instructions

The beef filling can be prepared up to 3 days ahead.

Store covered in the refrigerator.

When ready:

  • Prepare dough
  • Fill rolls
  • Bake fresh

You can also assemble the rolls several hours before baking.

How to Store Leftovers

Allow rolls to cool completely.

Store in an airtight container.

Refrigerate for up to 4 days.

Reheating Instructions

Reheat in the oven at:

350°F (175°C) for 8–10 minutes

for the best texture.

Air fryer:

350°F (175°C) for 4–5 minutes

Microwave works but may soften the bread.

Freezing Instructions

These stuffed rolls freeze well.

Freeze baked rolls in a freezer-safe container.

Store for up to 3 months.

Thaw and reheat in the oven before serving.

Frequently Asked Questions

Can I use store-bought dough?

Yes. Pizza dough, crescent dough, or dinner roll dough works well.

Can I use leftover cooked beef?

Yes. Season and warm the beef before filling.

What cheese melts best?

Mozzarella, cheddar, and provolone create the best stretch and flavor.

Can I make these without beef?

Yes. Try chicken, turkey, or vegetables.

How do I prevent the rolls from opening?

Avoid overfilling and seal the edges tightly.

Can I make them spicy?

Yes. Add jalapeños, hot sauce, or chili flakes.

Can I prepare these ahead?

Yes. Assemble ahead and bake when ready.

What dipping sauce goes best?

Marinara, garlic butter, ranch, or cheese sauce are all delicious.

Final Thoughts

These Cheesy Beef Stuffed Bread Rolls are the perfect combination of soft golden bread, savory seasoned beef, and gooey melted cheese.

With a flavorful filling and buttery garlic crust, they make an amazing family dinner, party appetizer, or comforting snack.

Serve them warm with your favorite dipping sauce and enjoy a homemade recipe everyone will love.

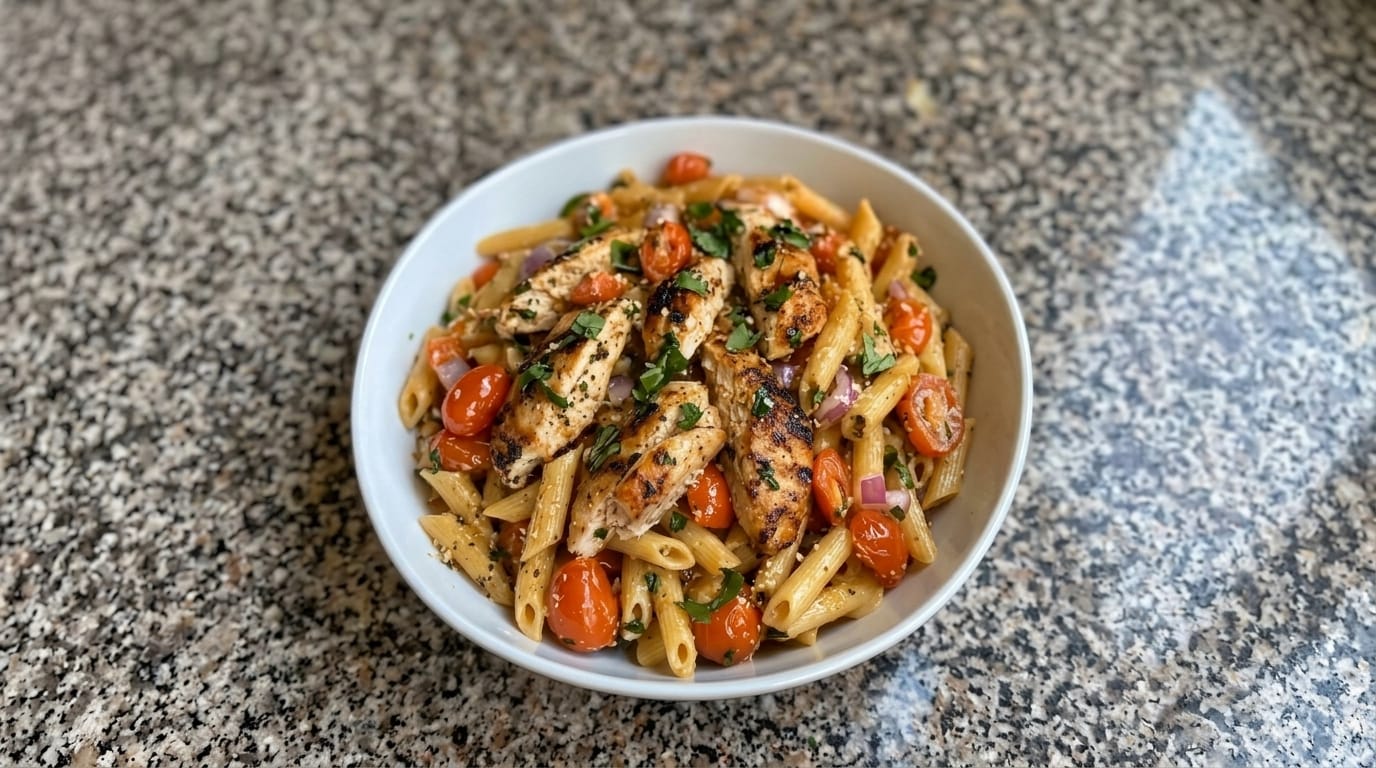
Ultimate Grilled Chicken and Tomato Penne Pasta

Welcome to your ultimate guide for preparing a vibrant, restaurant-quality meal right at home: Grilled Chicken and Tomato Penne Pasta. If you want a comforting yet fresh dish loaded with savory grilled chicken, sweet blistered tomatoes, and perfectly al dente pasta, this comprehensive recipe masterclass is designed just for you.

Why This Recipe Works

Pasta dishes are a universal favorite because they bring people together around the table. By combining smoky grilled chicken with fresh cherry tomatoes, aromatic red onion, and herbs, this recipe strikes the ideal balance between comforting indulgence and vibrant freshness.

  • Restaurant Quality at Home: The smoky char from the grilled chicken combined with the juicy sweetness of burst tomatoes creates layers of complex flavor.
  • Balanced and Satisfying: Featuring lean protein from the chicken and satisfying carbohydrates from the penne, it is a wholesome meal that keeps you energized.
  • Versatile and Customizable: You can easily swap out ingredients, add extra vegetables, or adjust the herbs to match what you have in your kitchen.

Essential Ingredients

To recreate this flavorful masterpiece in your own kitchen, gather the following high-quality ingredients:

  • The Protein: 2 boneless, skinless chicken breasts, seasoned with olive oil, garlic powder, dried oregano, salt, and black pepper.
  • The Pasta: 8 oz (half a box) of penne pasta, cooked al dente according to package instructions.
  • The Veggies & Aromatics: 1 cup cherry tomatoes, halved; 1/4 cup finely diced red onion; 2 cloves minced garlic.
  • The Sauce & Finish: 2 tablespoons extra-virgin olive oil; 1 tablespoon fresh lemon juice or balsamic vinegar; grated Parmesan cheese and fresh basil leaves for garnish.

Step-by-Step Cooking Instructions

  1. Cook the Pasta: Bring a large pot of salted water to a boil, add the penne pasta, and cook until al dente. Drain, reserving 1/4 cup of the pasta cooking water.
  2. Grill the Chicken: Preheat your grill or grill pan over medium-high heat. Season the chicken breasts with olive oil, garlic powder, oregano, salt, and pepper. Grill for 6 to 7 minutes per side until fully cooked and beautifully charred. Let rest for 5 minutes before slicing.
  3. Sauté the Tomatoes and Aromatics: In a large skillet, heat olive oil over medium heat. Add the minced garlic and diced red onion, sautéing until fragrant. Toss in the halved cherry tomatoes and cook until they begin to burst and release their juices.
  4. Combine Pasta and Sauce: Add the cooked penne pasta directly into the skillet with the tomatoes. Toss well, adding a splash of the reserved pasta water to create a glossy, cohesive sauce.
  5. Assemble and Serve: Divide the warm tomato penne pasta into bowls. Top with slices of the freshly grilled chicken.
  6. Garnish: Sprinkle generously with grated Parmesan cheese and freshly chopped basil leaves before serving.

Chef’s Pro-Tips for Success

  • Do Not Overcook the Pasta: Keeping the penne strictly al dente ensures it holds up perfectly when tossed in the warm tomato sauce without turning mushy.
  • Let the Chicken Rest: Allowing the grilled chicken breasts to rest before slicing locks in all the natural juices, keeping every bite tender and moist.
  • Boost the Freshness: A squeeze of fresh lemon juice right before serving lifts all the savory flavors and brightens the entire dish.

What is your favorite type of cheese to sprinkle over a warm bowl of chicken pasta?

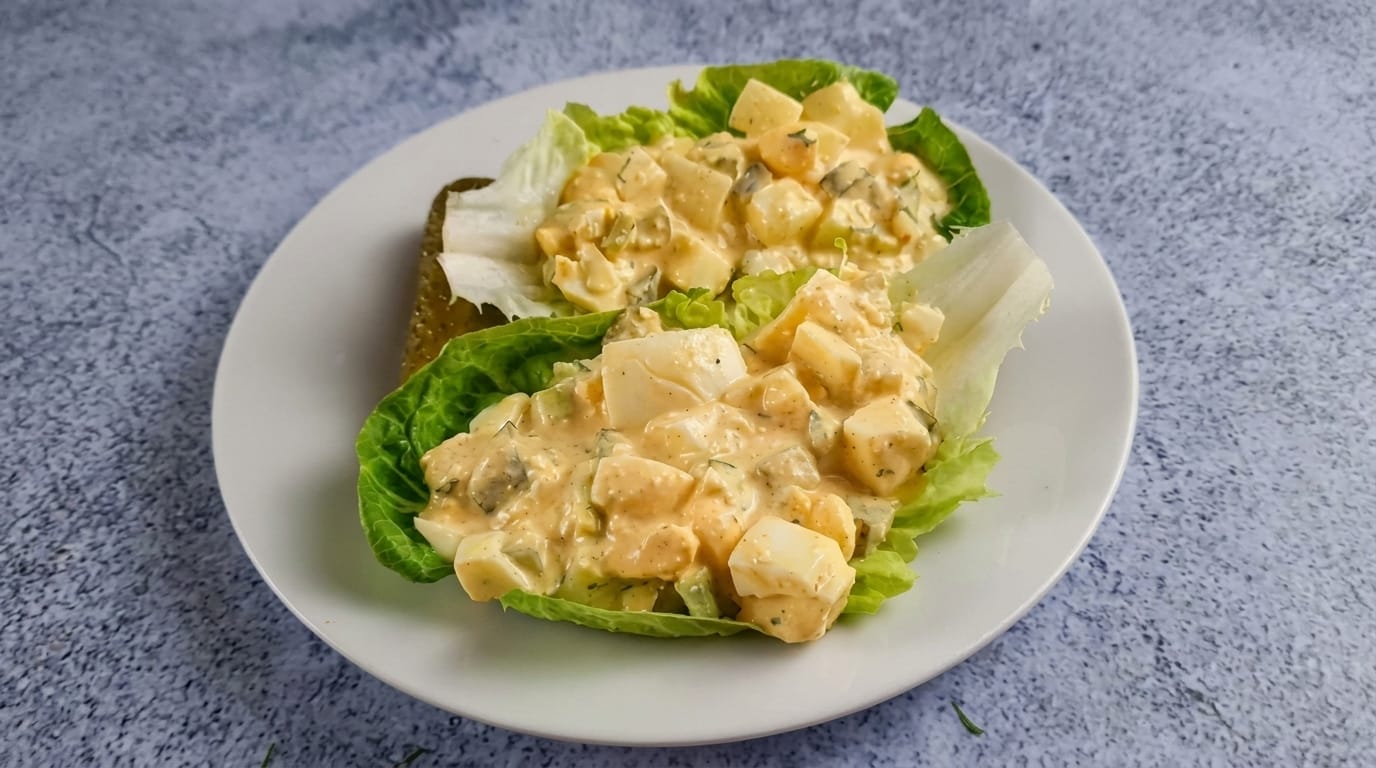
Ultimate Creamy Egg Salad Lettuce Boats

Welcome to your ultimate guide for creating a light, refreshing, and high-protein meal classic: Creamy Egg Salad Lettuce Boats. If you want a crisp, low-carb lunch that delivers rich, velvety flavor with minimal effort, this comprehensive recipe masterclass is designed just for you.

Why This Recipe Works

Egg salad has remained a lunchtime favorite for generations because of its simple ingredients and comforting taste. By pairing creamy, perfectly hard-boiled eggs with crisp lettuce boats, you get a modern, refreshing twist that satisfies your cravings without weighing you down.

  • Light and Low-Carb: Serving traditional egg salad in fresh lettuce leaves cuts out heavy bread while adding an incredible crunch.
  • The Perfect Texture Contrast: The smooth, creamy richness of the egg and mayonnaise mixture pairs harmoniously with the crisp, snappy texture of fresh lettuce.
  • Effortless Convenience: With just a few minutes of active prep time, you can whip up a batch of delicious egg salad and assemble your boats in moments.

Essential Ingredients

To recreate this savory masterpiece in your own kitchen, gather the following high-quality ingredients:

  • The Base: 6 large hard-boiled eggs, peeled and diced.
  • The Creaminess: 1/4 cup mayonnaise; 1 teaspoon Dijon mustard or yellow mustard.
  • The Crunch & Flavor: 2 tablespoons finely diced celery; 2 tablespoons finely chopped dill pickles or pickle relish.
  • The Seasonings: Salt and freshly cracked black pepper to taste; a pinch of paprika or dried dill.
  • The Vessel: Crisp leaves of romaine or butterhead lettuce, washed and dried.

Step-by-Step Cooking Instructions

  1. Boil and Cool the Eggs: Place your eggs in a saucepan, cover them with water, bring to a boil, then cook for 9 to 10 minutes. Transfer them immediately to an ice bath to cool before peeling.
  2. Chop the Eggs: Dice the peeled hard-boiled eggs into uniform pieces and place them into a medium mixing bowl.
  3. Mix the Dressing: In a small bowl, whisk together the mayonnaise, Dijon mustard, diced celery, chopped pickles, salt, and black pepper until smooth.
  4. Combine: Gently fold the creamy dressing into the diced eggs until every piece is evenly coated without breaking down the eggs too much.
  5. Assemble the Boats: Arrange your clean, crisp lettuce leaves on a serving plate. Spoon generous amounts of the creamy egg salad directly into the center of each leaf.
  6. Garnish and Serve: Dust lightly with paprika or extra black pepper, and serve immediately alongside pickles or your favorite fresh sides.

Chef’s Pro-Tips for Success

  • Perfect Peeling: Use older eggs for boiling, as they peel much easier than ultra-fresh farm eggs.
  • Add a Tangy Kick: A tiny splash of lemon juice or pickle juice adds an extra layer of brightness to the creamy dressing.
  • Meal Prep Friendly: You can make the egg salad ahead of time and store it in an airtight container in the refrigerator for up to 3 days before assembling your lettuce boats.

What is your absolute favorite herb or seasoning to mix into a classic egg salad?

I will now generate an extremely comprehensive, long-form blog post and recipe guide for Creamy Cucumber Salad with Red Wine Vinegar in a single file.

Creamy Cucumber Salad with Red Wine Vinegar GuideExport

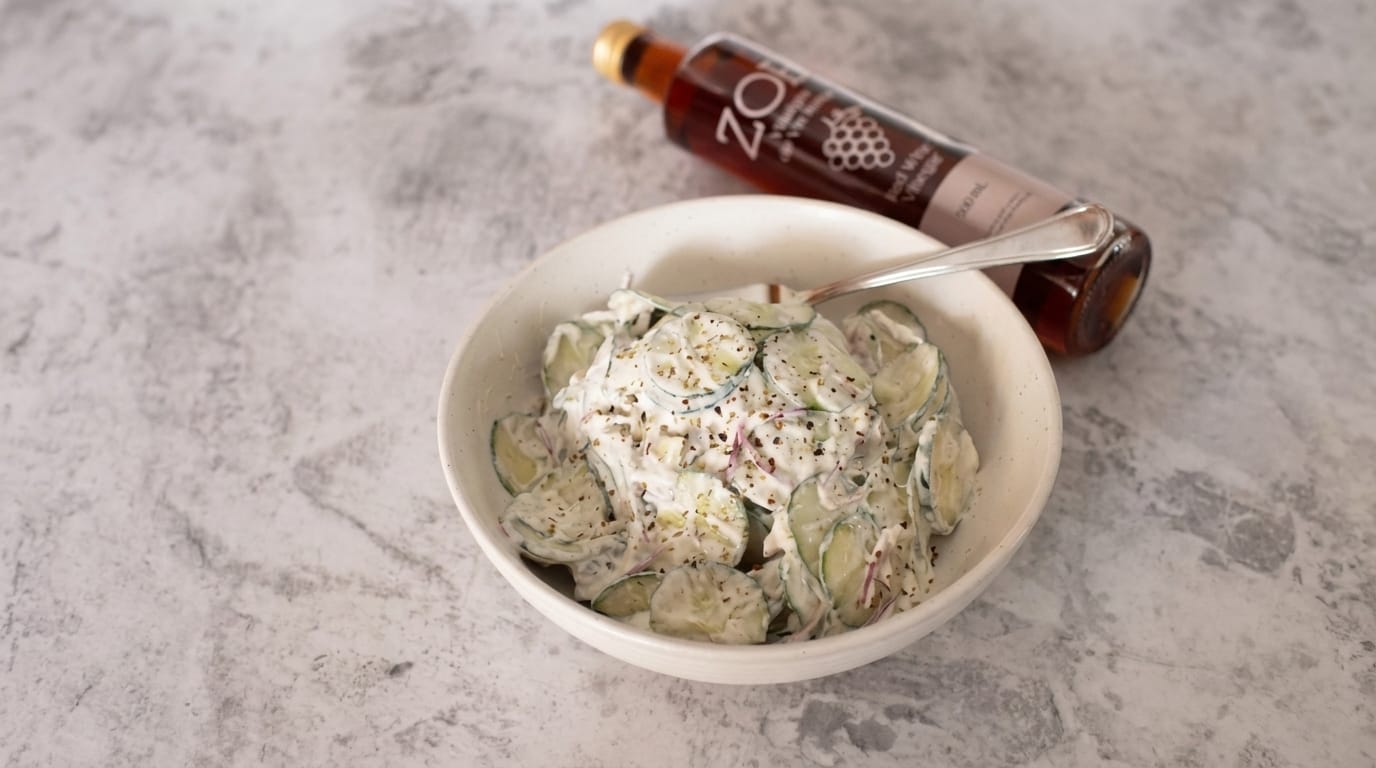
The Ultimate Creamy Cucumber Salad with Red Wine Vinegar: A Masterclass in Crisp, Tangy Refreshment

Welcome back to the kitchen, home cooks, culinary enthusiasts, and lovers of fresh, vibrant comfort food! If you are searching for a side dish that instantly revitalizes your palate, cuts through heavy main courses with bright acidity, and delivers a luxurious creaminess balanced by crisp, cooling crunch, your search ends right here. Today, we are elevating a timeless summer staple into an absolute masterpiece: The Ultimate Creamy Cucumber Salad with Red Wine Vinegar.

Forget everything you think you know about watery, bland cucumber salads from past picnics and backyard barbecues. This recipe is meticulously engineered to prevent sogginess while offering a harmonious balance of velvety sour cream (or Greek yogurt), pungent red wine vinegar, crisp red onion slivers, fragrant herbs, and freshly cracked black pepper. Whether you are hosting a lively summer backyard gathering, prepping a refreshing side for a heavy barbecue, or looking for a crisp, low-carb side dish that the whole family will rave about, this comprehensive guide will walk you through every single step to achieve absolute perfection.

Why This Recipe Will Become a Staple in Your Home

Every great dish starts with a purpose. While traditional cucumber salads can sometimes suffer from excess moisture release that turns the dressing into a watery pool, our specialized salting and draining technique ensures that every single bite remains crisp, vibrant, and thoroughly coated in a rich, tangy dressing.

  • Unmatched Crispness & Texture: By drawing out excess cellular water from the cucumbers through a brief resting period with salt, we ensure the cucumbers retain their signature snap rather than becoming limp and watery.
  • The Vinegar Zing: The sharp, fruity, and robust flavor profile of red wine vinegar provides an exquisite acidic counterpoint to the rich, creamy dairy base, elevating the flavor far beyond standard white vinegar or lemon juice.
  • The Flavor Balance: Combining garlic, onion, a hint of sweetness, and herbaceous notes creates a depth of flavor that turns a humble vegetable into a star attraction.
  • Make-Ahead Friendly: Unlike leafy green salads that wilt within minutes of dressing, this cucumber salad actually improves after resting in the refrigerator for a short while as the flavors meld together.

Understanding the Anatomy of a Perfect Cucumber Salad

Before we jump into the kitchen, let’s break down the essential components that make this recipe work so harmoniously:

  1. The Cucumber Foundation: Choosing the right cucumbers is paramount. English cucumbers (or seedless Persian cucumbers) offer thin skins, few seeds, and a naturally crisp, sweet flavor profile that eliminates the need for tedious peeling.
  2. The Salting Step (The Secret Technique): Salting sliced cucumbers and letting them drain in a colander for 15 to 20 minutes extracts unwanted liquid. This concentrates the cucumber flavor and prevents the dressing from diluting.
  3. The Creamy Dairy Base: A combination of sour cream and full-fat Greek yogurt provides a velvety texture with a pleasant tang, offering a lighter alternative to pure mayonnaise while maintaining rich mouthfeel.
  4. The Acid & Aromatics: Red wine vinegar brings color, acidity, and complexity. Thinly sliced red onions add a mild sharpness, while fresh dill or chives provide aromatic freshness.

Ingredients Checklist

Gather these high-quality ingredients before you begin your cooking journey:

For the Salad Base:

  • Cucumbers: 3 large English (seedless) cucumbers, sliced into uniform thin rounds (about $1/8$ inch thick), or 6 to 8 Persian cucumbers.
  • Salt: 1 tablespoon kosher salt (used specifically for drawing out moisture during the draining phase).
  • Onion:$1/2$ medium red onion, peeled, halved, and sliced as thin as possible into delicate half-moons.

For the Creamy Red Wine Vinegar Dressing:

  • Sour Cream:$1/2$ cup full-fat sour cream (provides classic richness and smooth texture).
  • Greek Yogurt:$1/2$ cup plain full-fat Greek yogurt (adds tang and balances the richness).
  • Vinegar: 3 tablespoons high-quality red wine vinegar (the star acidic component).
  • Sweetness: 1 to 2 teaspoons granulated sugar or honey (just a touch to balance the sharp bite of the vinegar).
  • Garlic: 1 small clove of garlic, minced into a paste or grated finely (optional, but adds wonderful savory depth).
  • Herbs: 2 tablespoons fresh dill, finely chopped (dill and cucumber are a match made in culinary heaven).
  • Seasoning:$1/2$ teaspoon freshly cracked black pepper and $1/4$ teaspoon kosher salt (adjust to taste).

Step-by-Step Instructions

Step 1: Prep and Slice the Cucumbers

Wash your English cucumbers thoroughly under cold running water and pat them dry. There is no need to peel English cucumbers since their skins are tender and bitter-free. Using a sharp chef’s knife or a mandoline slicer, slice the cucumbers into uniform rounds approximately $1/8$

inch thick.

Step 2: The Crucial Salting and Draining Process

Place your sliced cucumbers and thinly sliced red onions into a large colander set inside a bowl or directly in the sink. Sprinkle the 1 tablespoon of kosher salt evenly over the cucumber and onion mixture, tossing gently with your hands to ensure every piece is lightly coated.

Allow the mixture to rest at room temperature for 15 to 20 minutes. You will notice a significant amount of liquid pooling out as the salt draws out excess moisture.

Step 3: Rinse and Dry Thoroughly

After 20 minutes, rinse the salted cucumbers and red onions thoroughly under cold running water to remove the excess surface salt. Transfer the mixture to a clean kitchen towel or layers of heavy-duty paper towels. Gently pat and press the cucumbers to remove as much residual moisture as possible. (Note: Thorough drying is the secret weapon to keeping your dressing thick and creamy rather than watery!)

Step 4: Whisk the Creamy Red Wine Vinegar Dressing

In a large mixing bowl, combine the sour cream, Greek yogurt, red wine vinegar, sugar (or honey), minced garlic, and freshly cracked black pepper. Whisk vigorously until the dressing is completely smooth, glossy, and well-emulsified. Taste the dressing at this stage; it should have a bright, tangy kick balanced by rich creaminess.

Step 5: Combine and Toss

Add your thoroughly dried cucumber and red onion mixture into the bowl with the dressing. Fold everything together gently using a silicone spatula until every single cucumber slice and onion sliver is generously coated in the creamy red wine vinegar sauce. Fold in half of your freshly chopped dill.

Step 6: Chill and Meld Flavors

Cover the bowl tightly with plastic wrap and place it in the refrigerator for at least 30 minutes to 1 hour before serving. This chilling period allows the cucumbers to absorb the complex flavors of the dressing while remaining refreshingly crisp.

Step 7: Garnish and Serve

Right before serving, give the salad a gentle toss. Garnish the top with the remaining freshly chopped dill and an extra pinch of freshly cracked black pepper for a restaurant-quality presentation.

Chef’s Pro-Tips for Ultimate Success

  • Mandoline Safety: If you use a mandoline slicer to achieve perfectly uniform paper-thin cucumber rounds, always use the safety guard or cut-resistant gloves. Consistency in slicing ensures an even distribution of texture.
  • Adjusting the Acidity: Red wine vinegar varies in brand pungency. Start with 2.5 tablespoons, whisk into the dairy base, taste, and add the remaining half tablespoon if you prefer a sharper, more vibrant tang.
  • Herb Variations: While dill is the traditional and most complementary herb for cucumber salads, you can substitute or combine it with fresh chives, flat-leaf Italian parsley, or even a hint of fresh mint for an unexpected Mediterranean twist.
  • Storage and Longevity: Because of the salting technique, this salad holds up remarkably well in the refrigerator for up to 2 days stored in an airtight container, though it is at its absolute peak texture on day one.

Suggested Side Dishes and Pairings

This bright, creamy, and tangy salad acts as a wonderful palate cleanser alongside rich, savory, or grilled main courses. Here are some fantastic pairing ideas:

  • Garlic and Herb Grilled Steak: The crisp acidity of the cucumber salad cuts effortlessly through the rich, savory fats of a perfectly grilled ribeye or strip steak.
  • Barbecue Ribs or Pulled Pork: Traditional summer barbecue mains find their ideal partner in a cold, vinegar-forward creamy salad.
  • Lemon-Herb Roasted Chicken: The bright dill and red wine vinegar notes echo poultry seasonings, creating a cohesive, comforting weeknight dinner spread.
  • Grilled Salmon or Seafood: The cooling crunch of the cucumbers complements flaky, rich fish beautifully.

Nutritional Insights & Dietary Benefits

  • Low-Carb & Keto-Friendly: Naturally low in carbohydrates, making it an exceptional side dish for low-carb and ketogenic dietary lifestyles.
  • Hydrating: Cucumbers consist of over $95\%$ water, offering natural hydration while delivering essential vitamins like Vitamin K and potassium.
  • Customizable Dairy: Easily adaptable for dietary preferences by substituting dairy-free sour cream and plant-based Greek yogurt alternatives without sacrificing creamy texture.

What is your absolute favorite occasion or main course to serve alongside a crisp, refreshing, creamy cucumber salad?

Edit directly or with Gemini

Click anywhere to type and edit directly, or select text to prompt Gemini for changes.

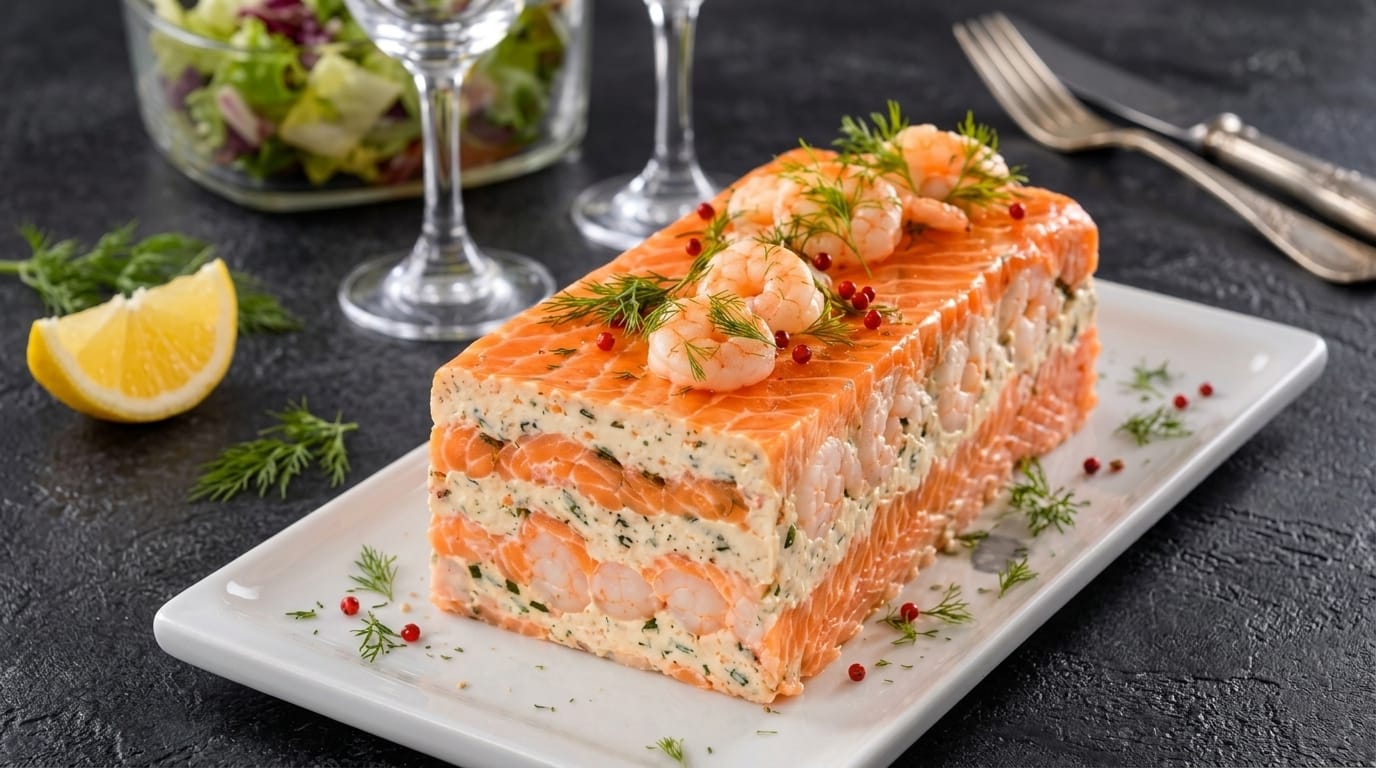
The Ultimate Guide to Crafting Layered Salmon and Shrimp Terrine at Home

Layered Salmon and Shrimp Terrine represents the absolute pinnacle of elegant entertaining and gourmet cold appetizers, marrying the rich, buttery luxury of smoked salmon with plump, tender cooked shrimp and velvety herb-infused cream cheese. Whether you are hosting a sophisticated dinner party or celebrating a special milestone, this visually stunning dish delivers an extraordinary explosion of flavors and textures. The secret to achieving perfection lies in the meticulous layering of ingredients: precise sheets of smoked salmon encasing creamy layers interspersed with succulent seafood. By breaking down every single step, from preparing the loaf pan to mastering the chilling technique, this comprehensive guide will elevate your home cooking and turn your kitchen into a five-star culinary establishment.


Understanding the Anatomy of the Dish

To truly master Layered Salmon and Shrimp Terrine, one must appreciate how each component interacts to create a harmonious final presentation. Every element plays a critical role in building flavor, texture, and visual appeal, ensuring that each slice is as refined as it is satisfying.

The Foundation: Lining and Structuring the Loaf Pan

The structural integrity of a terrine relies entirely on proper preparation.

  • Precision lining: Using plastic wrap to thoroughly line the loaf pan ensures the terrine releases effortlessly once chilled and set.
  • Even stacking: Alternating structural layers of sliced smoked salmon with whipped cream cheese and whole shrimp creates clean, architectural lines when sliced.

The Star Attraction: Sourcing Premium Seafood

High-quality seafood dictates the overall taste and texture of the terrine.

  • Smoked salmon selection: Premium sliced smoked salmon provides a rich, savory, and silky exterior and internal structure.
  • Shrimp quality: Properly peeled and deveined cooked shrimp offer a firm, meaty bite that contrasts wonderfully with the smooth cream cheese.

The Flavor Base: Cream Cheese and Fresh Herbs

Cream cheese and fresh dill form the creamy, aromatic binder of the dish.

  • Smooth blending: Whipping the cream cheese with fresh chopped dill, salt, and black pepper creates a luscious spread that unites the seafood layers.

Comprehensive Ingredient Blueprint

Achieving the ultimate flavor profile requires high-quality, fresh ingredients that complement rather than overpower one another. Here is the exact blueprint designed to yield a perfectly balanced portion:

  • Sliced Smoked Salmon: 1/2 lb (provides the rich, savory exterior and interior framing)
  • Cooked Shrimp: 1/2 lb, peeled (offers a tender, protein-rich bite throughout the layers)
  • Cream Cheese: 1/2 cup (creates the velvety, spreadable binder)
  • Fresh Dill: 1 tbsp, chopped (introduces a bright, herbaceous note)
  • Salt and Black Pepper: To taste (enhances every individual flavor note)

Step-by-Step Culinary Masterclass

Creating this masterpiece requires patience and precise assembly techniques. Follow these detailed steps to achieve professional results.

Step 1: Preparing the Pan and Base Layer

  1. Line a loaf pan completely with plastic wrap, leaving enough overhang on the sides to fold over the top later.
  2. Carefully lay slices of the 1/2 lb sliced smoked salmon along the bottom and up the sides of the plastic-lined loaf pan, ensuring no gaps remain.

Step 2: Layering the Cream Cheese and Seafood

  1. In a mixing bowl, season the 1/2 cup of cream cheese with 1 tbsp fresh dill, salt, and black pepper, mixing until smooth.
  2. Spread a layer of the seasoned cream cheese over the smoked salmon base, then press in a neat row of the 1/2 lb cooked shrimp.
  3. Add another layer of sliced smoked salmon and repeat the alternating layers of cream cheese and shrimp until the loaf pan is full.

Step 3: Chilling and Setting

  1. Fold the overhanging plastic wrap tightly over the top of the terrine to seal it completely.
  2. Place the loaf pan in the refrigerator to chill for at least 4 hours, or until completely firm and set.

Plating, Presentation, and Finishing Touches

Presentation elevates this gourmet appetizer into a true showpiece.

  • The Unmolding: Carefully peel back the top plastic wrap, invert the loaf pan onto a clean serving platter, and gently lift away the pan and plastic wrap.
  • The Slice: Use a sharp knife wiped clean between cuts to slice the terrine into clean, even portions showcasing the distinct layers.
  • The Garnish: Decorate the top of each slice or the platter with extra whole cooked shrimp, sprigs of fresh dill, and pink peppercorns.

Frequently Asked Questions

Can I make this terrine a day in advance?

Yes, making it a day ahead is actually recommended because it allows the terrine to set firmly in the refrigerator and the flavors to meld together completely.

What is the best way to slice the terrine cleanly?

Using a very sharp knife dipped in warm water and wiped dry between each cut ensures the layers of salmon and cream cheese do not smear.

Can I use fresh cooked salmon instead of smoked salmon?

Smoked salmon is traditionally used for its structure and cured flavor, but poached and flaked fresh salmon can be incorporated into the interior layers for a different texture profile.


Conclusion and Call to Action

Mastering Layered Salmon and Shrimp Terrine transforms your entertaining repertoire, giving you a stunning, show-stopping recipe that always impresses guests. The harmonious combination of silky smoked salmon, tender shrimp, and herb-infused cream cheese creates an unforgettable culinary experience.

Would you serve this elegant salmon and shrimp terrine as an appetizer at your next dinner party?

Save this recipe for your next gathering and drop a comment below!

#SalmonTerrine #ShrimpAndSalmon #SeafoodLovers #AppetizerInspo #ComfortFood