Greek Moussaka Recipe — The Ultimate Mediterranean Comfort Dish

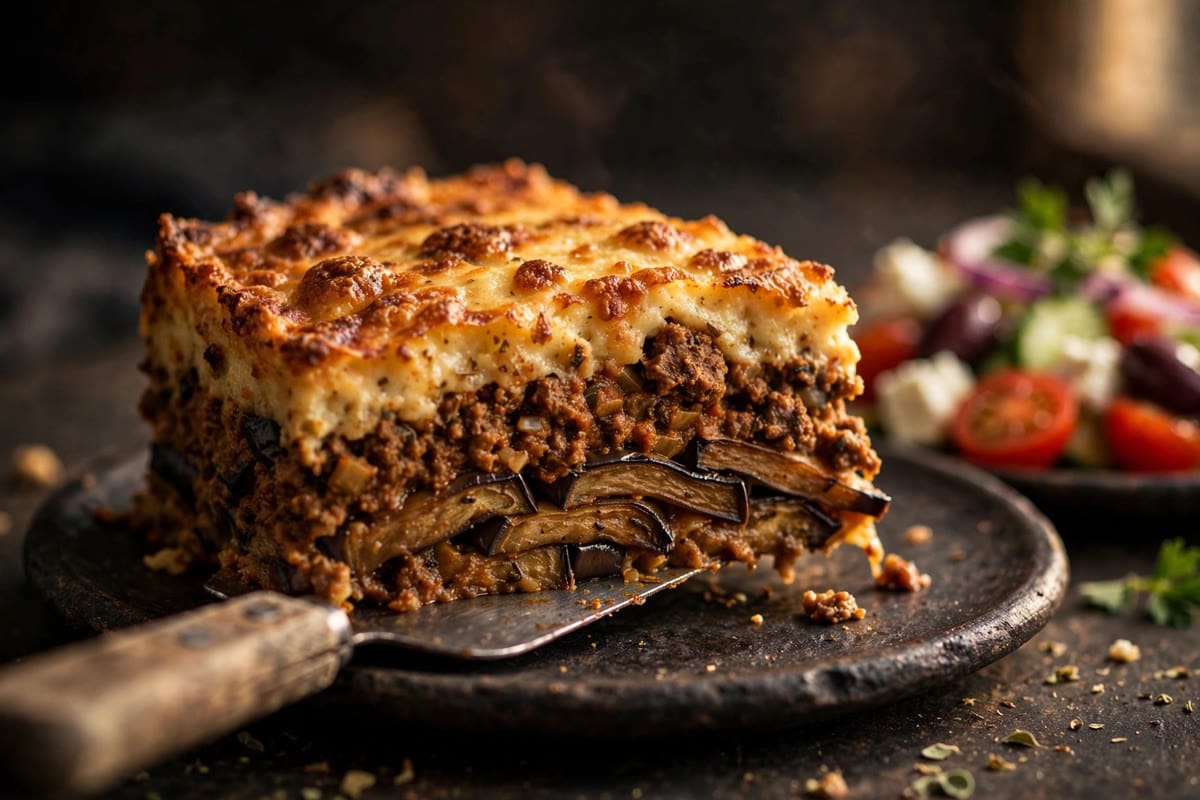
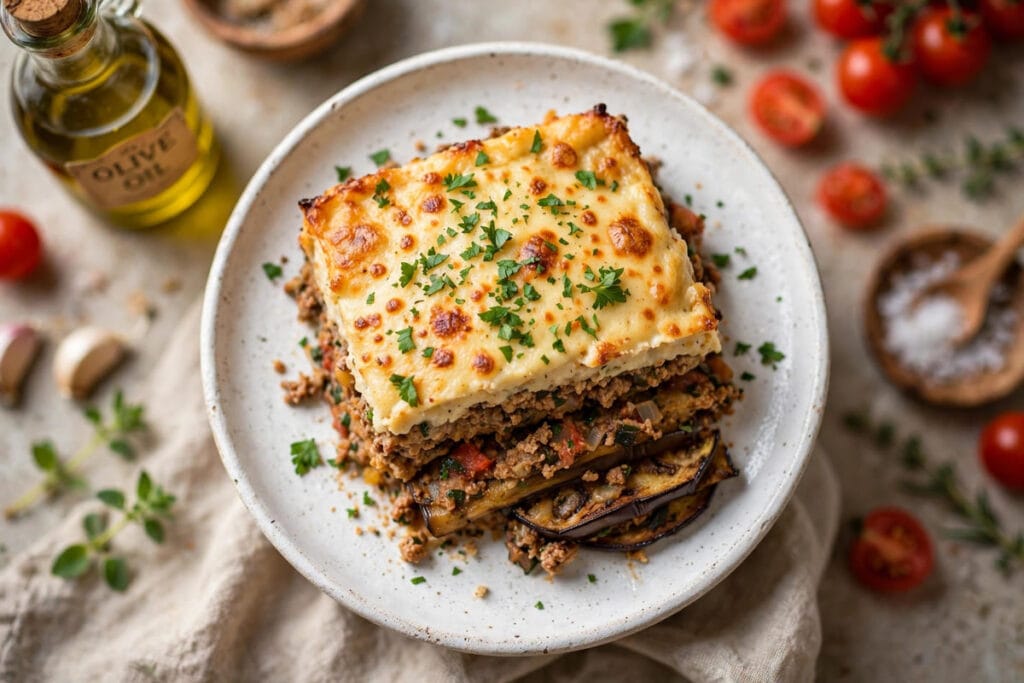
If there’s one dish that makes my whole kitchen smell like a tiny taverna on the Aegean coast, it’s moussaka. I still remember the first time I tasted the real thing — not the overly heavy restaurant version, but a homemade slice pulled straight from a well-loved baking dish, the bechamel golden and just barely wobbling. I knew right then that I had to learn how to make it at home.

And here’s the thing: this Greek moussaka recipe is easier than it looks. Yes, it has a few steps, but each one is simple, and the payoff is enormous. Layers of silky roasted eggplant, a cinnamon-spiced lamb sauce, and a thick, creamy bechamel that bakes up golden and bubbling — it’s the kind of dinner that makes people go quiet around the table. Let’s make it together.
Why You’ll Love This Recipe

First, let’s talk flavor. Moussaka is often called the Greek lasagna, and the comparison isn’t wrong — but honestly, I think moussaka wins. The eggplant turns almost custardy in the oven, the lamb sauce is warm with cinnamon and oregano, and that bechamel topping is pure luxury. It’s rich without being heavy, especially when you roast the eggplant instead of frying it (my preferred method, and far less fussy).

Second, it’s a showstopper. If you’re hosting friends or cooking Sunday dinner, this is the dish that makes everyone think you spent all day in the kitchen. It feeds a crowd, it reheats beautifully, and leftovers might be even better the next day.

Finally, it fits the Mediterranean diet beautifully — olive oil, lean-ish lamb, vegetables, and moderate dairy. This is comfort food you can actually feel good about.

Ingredients

For the eggplant:

  • 2 large eggplants (about 2 lbs total), sliced 1/4-inch thick
  • 2 tablespoons olive oil, plus more for brushing
  • 1 teaspoon kosher salt

For the spiced lamb sauce:

  • 1 lb ground lamb (ground beef works too)
  • 1 medium yellow onion, finely diced
  • 2 cloves garlic, minced
  • 1 can (14 oz) crushed tomatoes
  • 2 tablespoons tomato paste
  • 1 teaspoon ground cinnamon
  • 1/2 teaspoon dried oregano
  • 1/2 teaspoon sugar
  • Salt and freshly ground black pepper to taste

For the bechamel:

  • 3 tablespoons unsalted butter
  • 3 tablespoons all-purpose flour
  • 2 cups whole milk, warmed
  • 1/2 cup grated parmesan cheese, plus 2 tablespoons for the top
  • 1 large egg yolk
  • Pinch of nutmeg
  • Salt to taste

Instructions

  1. Salt the eggplant: Arrange the eggplant slices on a baking sheet, sprinkle generously with salt, and let them rest for 20 minutes. This draws out bitterness and excess moisture. Rinse, then pat completely dry with paper towels.
  2. Roast the eggplant: Preheat your oven to 425°F. Brush the slices lightly with olive oil and roast for 20 minutes, flipping once, until golden and tender. Set aside and reduce the oven temperature to 375°F.
  3. Brown the lamb: In a large skillet over medium-high heat, brown the ground lamb, breaking it up with a spoon, until no longer pink — about 8 minutes. Drain excess fat.
  4. Build the sauce: Add the onion to the lamb and cook 5 minutes until soft. Stir in the garlic, tomato paste, cinnamon, and oregano, cooking 1 minute until fragrant. Pour in the crushed tomatoes, add the sugar, and simmer for 15 minutes until thickened. Season with salt and pepper.
  5. Make the bechamel: Melt the butter in a saucepan over medium heat. Whisk in the flour and cook 1 minute. Slowly pour in the warm milk, whisking constantly, until the sauce thickens and coats a spoon. Remove from heat; whisk in the parmesan, egg yolk, nutmeg, and a pinch of salt.
  6. Layer it up: In a 9×13-inch baking dish, arrange half the eggplant in a single layer. Spread over all the lamb sauce. Top with the remaining eggplant. Pour the bechamel evenly over everything and smooth it out. Sprinkle with the extra parmesan.
  7. Bake: Bake at 375°F for 35–40 minutes, until the top is deeply golden and the edges are bubbling. Let it rest for 15 minutes before slicing — this is important, because it lets the layers set so you get those beautiful clean slices.

Tips for the Best Results

  • Don’t skip salting the eggplant. It takes 20 extra minutes, but it makes the texture silky instead of spongy, and the dish less watery.
  • Warm your milk before adding it to the bechamel. Cold milk in hot roux equals lumps, and nobody wants lumpy bechamel.
  • Let it rest. I know it’s hard — it smells incredible — but 15 minutes of resting is the difference between a gorgeous slice and a sloppy scoop.
  • Make it ahead: Assemble the whole dish up to a day in advance, refrigerate, and bake when ready. Add 10 extra minutes to the bake time.

FAQs

Can I use zucchini instead of eggplant?
You can, though it won’t be traditional. Slice zucchini 1/4-inch thick, salt and roast the same way. The result is lighter and still delicious — just a different dish at that point.

Can I make moussaka without meat?
Absolutely. Swap the lamb for 2 cups of cooked lentils or finely chopped mushrooms. The cinnamon-spiced tomato sauce works beautifully with lentils, and it’s a great vegetarian option.

Can I freeze moussaka?
Yes — it freezes wonderfully. Bake it fully, cool completely, then wrap tightly and freeze for up to 3 months. Thaw overnight in the fridge and reheat at 350°F until hot through.

Why is my moussaka watery?
Usually it’s one of two things: the eggplant wasn’t salted and dried well enough, or the dish was sliced before resting. Both fixes are easy — take your time with the eggplant and give it those 15 minutes.

Watch the quick video reel to see the layers come together in action — there’s nothing like watching that golden bechamel slice being lifted from the dish. If you make this Greek moussaka recipe, come back and tell me how it turned out. I read every comment, and your kitchen wins are my favorite thing. Happy baking — or as they say in Greece, kali orexi!
Homemade Chicken Shawarma Wrap (Better Than Takeout)

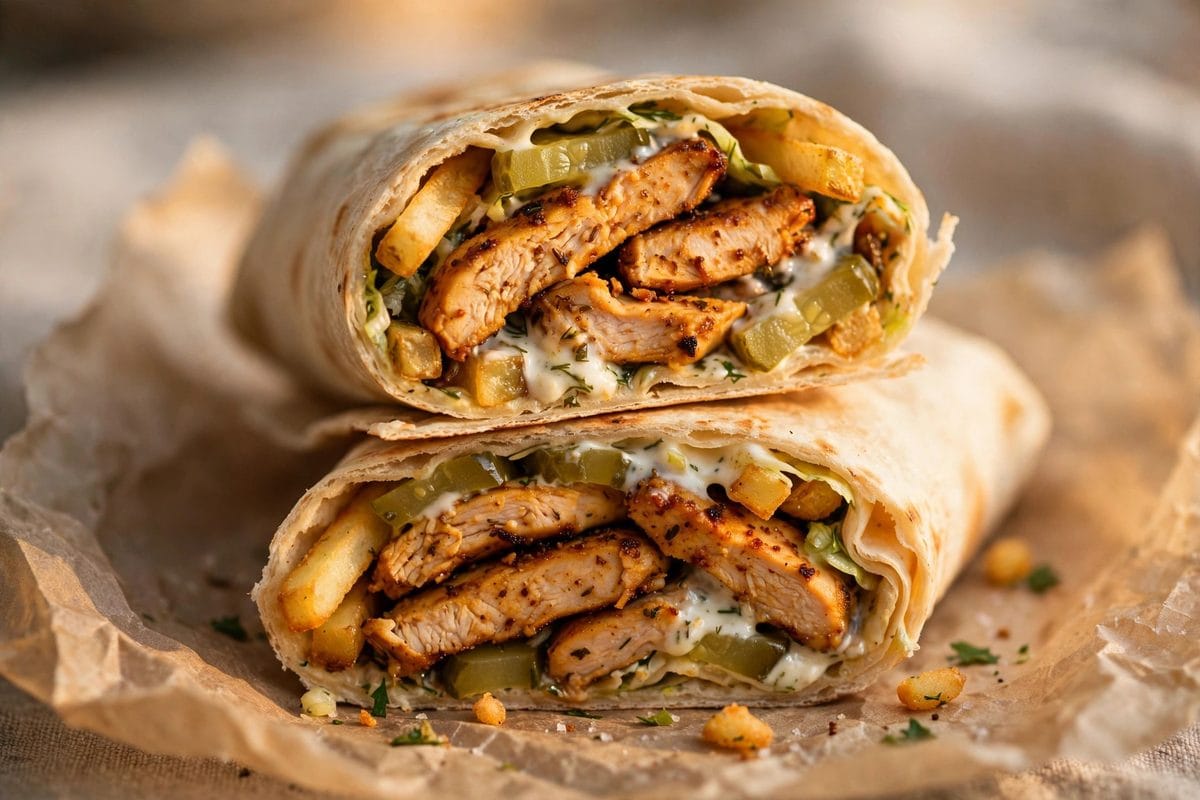
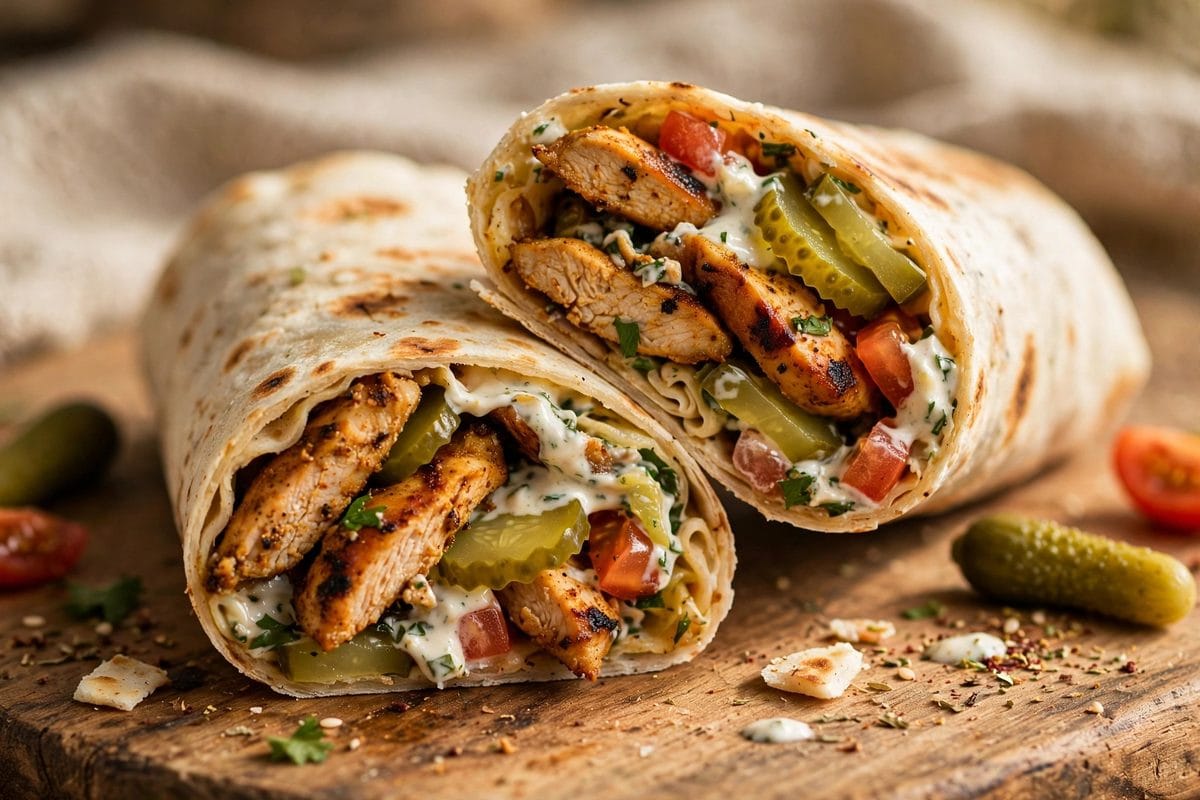
Homemade Chicken Shawarma Wrap with spiced chicken, pickles, tomato and garlic sauce in flatbread

There’s a special kind of joy in unwrapping a warm flatbread stuffed with spiced, seared chicken, cool pickles, juicy tomato, and a generous smear of garlic sauce. This Homemade Chicken Shawarma Wrap is my answer to takeout cravings — all the bold, savory, garlicky goodness of your favorite shawarma spot, made in your own kitchen in about 30 minutes, and honestly? I think it’s better than the restaurant version.

Homemade Chicken Shawarma Wrap with spiced chicken, pickles, tomato and garlic sauce in flatbread

Shawarma is one of those foods I could eat every single week and never get tired of. The magic is in the spice blend — warm cumin, smoky paprika, golden turmeric, and garlic — rubbed into chicken strips with yogurt and lemon, then seared on high heat until the edges get deliciously charred. Wrapped up with pickles for crunch, tomato for freshness, and garlic sauce for that creamy kick, it’s a handheld masterpiece.

Why You’ll Love This Recipe

Here’s what makes these wraps a weeknight hero:

  • Better than takeout. You control the ingredients, the spice level, and the sauce-to-filling ratio. No sad, soggy wraps here.
  • High in protein. A full pound of chicken plus yogurt in the marinade makes this a genuinely filling, protein-packed meal.
  • 30 minutes, one pan. The marinade does the heavy lifting; the cooking is just a quick, hot sear.
  • Authentic shawarma spice blend. Cumin, paprika, turmeric, and garlic powder — simple pantry spices that taste like the real deal.
  • Crowd-friendly. Set out the fillings and let everyone build their own wrap. Perfect for family dinners and casual gatherings.

Ingredients

For the shawarma chicken:

  • 1 lb chicken breast or thighs, cut into strips
  • 2 tsp ground cumin
  • 2 tsp paprika
  • 1 tsp ground turmeric
  • 1 tsp garlic powder
  • 1 tsp salt, plus black pepper to taste
  • 3 tbsp plain yogurt
  • Juice of 1/2 lemon
  • 2 tbsp extra virgin olive oil

For assembling the wraps:

  • 4 large flatbreads or pita breads
  • 1 cup dill pickles, sliced
  • 2 tomatoes, sliced
  • 1/2 cup garlic sauce (store-bought or homemade)
  • Optional: shredded lettuce, red onion, hot sauce

Instructions

  1. Marinate the chicken. In a bowl, toss the chicken strips with cumin, paprika, turmeric, garlic powder, salt, pepper, yogurt, lemon juice, and olive oil. Let it marinate for at least 30 minutes (or up to 4 hours in the fridge — the flavor only gets better).
  2. Sear on high heat. Heat a large skillet or grill pan over high heat until smoking. Add the chicken in a single layer and sear for 8–10 minutes, turning once, until cooked through with charred, caramelized edges. That char is flavor — don’t be shy with the heat.
  3. Warm the flatbreads and assemble. Warm the flatbreads in a dry skillet or directly over a gas flame for a few seconds per side. Spread a generous layer of garlic sauce down the center, pile on the hot chicken, then add pickles and tomato. Wrap tightly, tucking in the sides — and enjoy immediately!

Tips for the Best Results

  • Don’t crowd the pan. Sear the chicken in batches if needed. Crowding steams the meat instead of giving you those crispy, charred edges.
  • High heat is key. Shawarma gets its signature flavor from intense heat. Get the pan properly hot before the chicken goes in.
  • Warm your flatbreads. Cold, stiff flatbread cracks and tears. A quick warm-up makes them soft, pliable, and so much tastier.
  • Make extra garlic sauce. You’ll want it. Trust me. It also makes an amazing dip for fries and roasted vegetables.
  • Slice against the grain. If using chicken breast, slicing the cooked strips thinly against the grain keeps every bite tender.

FAQs

Can I use chicken thighs instead of breast?

Yes — thighs are fantastic here. They’re juicier and more forgiving. Sear them the same way, just make sure they reach 165°F inside.

What is in shawarma spice?

Traditional shawarma spice blends vary, but cumin, paprika, turmeric, and garlic are the core. Some versions add coriander, cinnamon, cardamom, or cloves — feel free to experiment!

Can I grill the chicken instead?

Absolutely. Grilled shawarma chicken is incredible — the open flame adds even more char and smokiness. Grill over high heat for 4–5 minutes per side.

How do I keep the wraps from falling apart?

Don’t overfill, warm the flatbread first, and wrap tightly — fold in the sides, then roll from the bottom. Wrapping in foil or parchment for a minute helps everything set.

This Homemade Chicken Shawarma Wrap is the kind of dinner that gets requested on repeat. If you want to see the sear, the char, and the all-important wrapping technique, check out my video reel. Make a batch this week — your kitchen is about to smell amazing.

Mediterranean Lemon Chicken Bowl (High-Protein Quinoa Power Bowl)

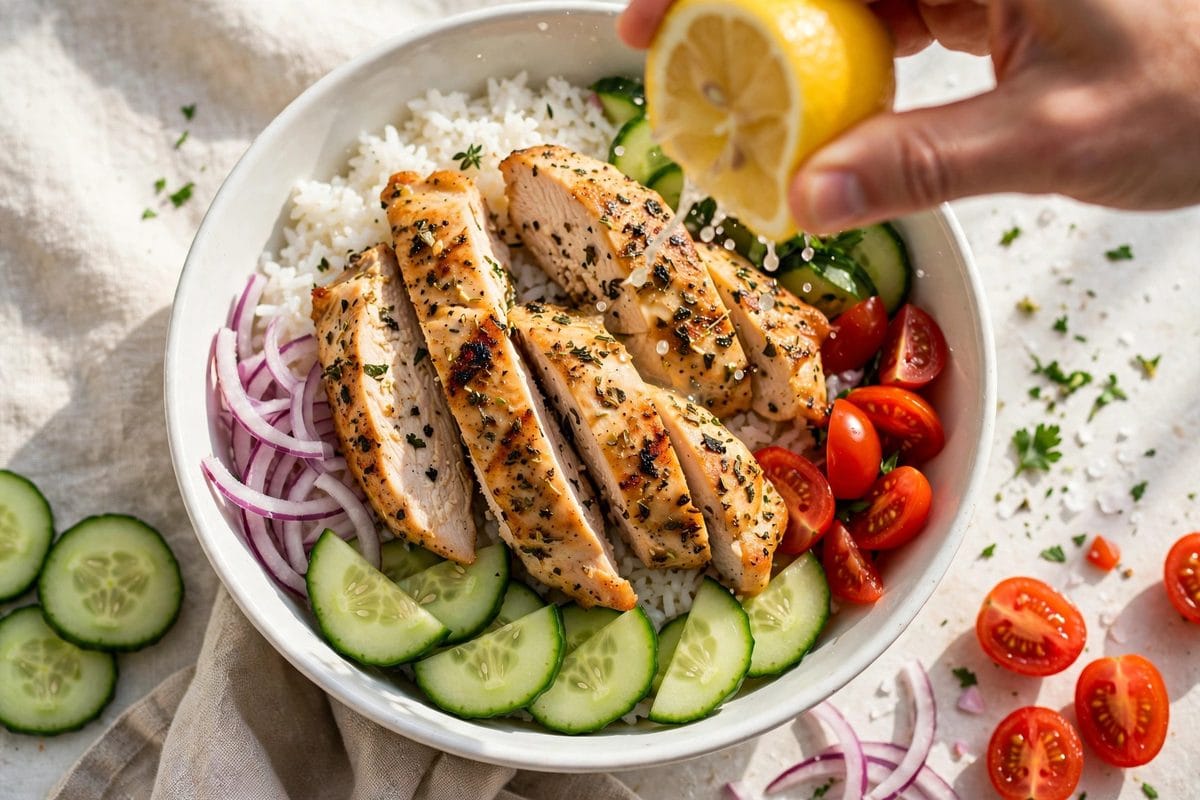
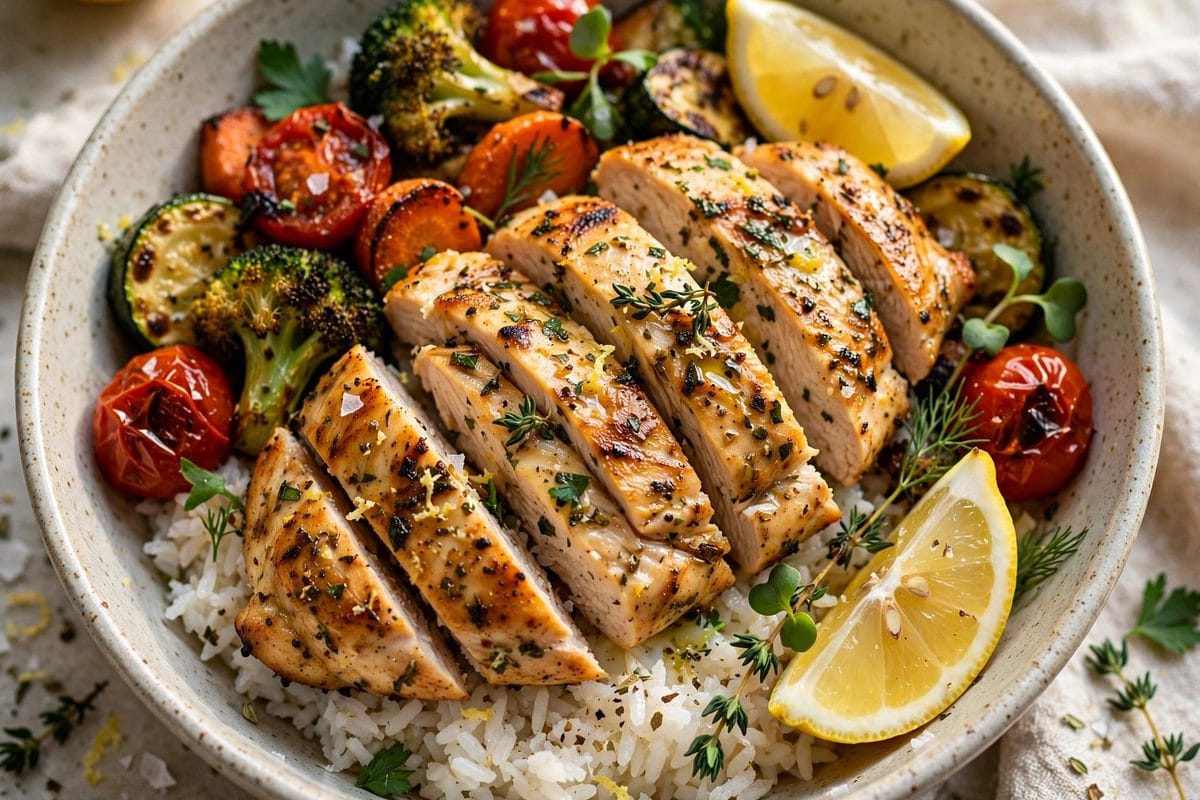
Mediterranean Lemon Chicken Bowl with quinoa, roasted vegetables, hummus and tahini drizzle

If I had to pick one meal that keeps me full, energized, and actually excited about healthy eating, it would be this Mediterranean Lemon Chicken Bowl. Picture this: juicy lemon-herb grilled chicken sliced over a fluffy bed of quinoa, surrounded by sweet roasted zucchini and peppers, with creamy hummus, a nutty tahini drizzle, and fresh parsley on top. It’s a high-protein power bowl that tastes like sunshine and keeps you satisfied for hours.

Mediterranean Lemon Chicken Bowl with quinoa, roasted vegetables, hummus and tahini drizzle

Bowls are my love language when it comes to weeknight dinners. Everything goes into one big, beautiful bowl — no fussy plating, no separate side dishes, just layers of flavor and texture that somehow taste even better together. This one leans fully into Mediterranean flavors: lemon, garlic, oregano, olive oil, plus the creamy one-two punch of hummus and tahini. It’s the kind of meal that makes you feel amazing after eating it.

Why You’ll Love This Recipe

Here’s why this bowl deserves a spot in your weekly rotation:

  • Seriously high in protein. Chicken breast, quinoa, hummus, and tahini team up for a meal that keeps you full for hours — perfect for weight loss or muscle fuel.
  • Meal-prep superstar. Cook the components on Sunday and assemble fresh bowls all week. It reheats beautifully.
  • Bright Mediterranean flavor. Lemon, garlic, and oregano marinate right into the chicken — every bite is zesty and fresh.
  • Completely customizable. Swap quinoa for rice or cauliflower rice, add any roasted veg you love, drizzle generously.
  • One bowl, zero fuss. A complete balanced meal — protein, whole grains, vegetables, healthy fats — in a single bowl.

Ingredients

For the lemon-herb chicken:

  • 2 boneless, skinless chicken breasts
  • Juice of 1 large lemon (about 3 tbsp)
  • 3 tbsp extra virgin olive oil
  • 3 cloves garlic, minced
  • 1 tsp dried oregano
  • Salt and freshly ground black pepper, to taste

For the bowls:

  • 1 cup cooked quinoa (about 1/3 cup dry)
  • 1 zucchini, chopped
  • 1 bell pepper (any color), chopped
  • 1 tbsp olive oil, plus salt and pepper for roasting
  • 3 tbsp hummus
  • Tahini, for drizzling (about 2 tbsp, thinned with a little water and lemon)
  • Fresh parsley, chopped, for garnish

Instructions

  1. Marinate and grill the chicken. Toss the chicken breasts with lemon juice, olive oil, garlic, oregano, salt, and pepper. Let them marinate for at least 15 minutes (30 is even better). Grill over medium-high heat for 6–7 minutes per side, until cooked through (165°F) with beautiful grill marks. Let rest 5 minutes, then slice.
  2. Roast the vegetables. While the chicken grills, toss the zucchini and peppers with olive oil, salt, and pepper. Roast at 425°F (220°C) for 15–18 minutes until tender and caramelized at the edges. (You can also grill them alongside the chicken.)
  3. Build the bowls. Start with a base of fluffy quinoa. Arrange the roasted vegetables and sliced chicken on top. Add a generous dollop of hummus, drizzle with tahini, and shower with fresh parsley. Serve warm and enjoy every single bite.

Tips for the Best Results

  • Don’t skip the rest. Letting the chicken rest for 5 minutes after grilling keeps all the juices inside where they belong.
  • Pound it even. If your chicken breasts are thick on one end, pound them to an even thickness so they cook uniformly.
  • Thin your tahini. Good tahini is thick — whisk it with a spoonful of water and a squeeze of lemon until it’s drizzle-able.
  • Roast extra veg. Make a double batch of roasted zucchini and peppers — they’re fantastic in wraps, salads, and omelets all week.
  • Warm the hummus slightly. A quenelle of room-temperature (not fridge-cold) hummus melts into the warm bowl so much better.

FAQs

Can I use chicken thighs instead of breasts?

Yes! Thighs are juicier and work wonderfully. Grill them 6–8 minutes per side until they reach 165°F inside.

How do I meal prep this bowl?

Cook the quinoa, chicken, and roasted veg, then store in separate containers for up to 4 days. Assemble bowls fresh, adding hummus and tahini after reheating.

Can I make this dairy-free or gluten-free?

It’s naturally both! Just check that your hummus and tahini labels are certified gluten-free if you’re sensitive.

What can I use instead of quinoa?

Brown rice, farro, bulgur, or cauliflower rice all work. Farro and bulgur keep the Mediterranean vibe going strong.

This Mediterranean Lemon Chicken Bowl is proof that healthy food can be the most crave-worthy food on the table. If you want to watch it all come together — the sizzle of the chicken, the building of the bowl — check out my video reel. Your future self will thank you for making this one.

Chicken Kebabs with Tzatziki & Greek Salad (20-Minute High-Protein Dinner)

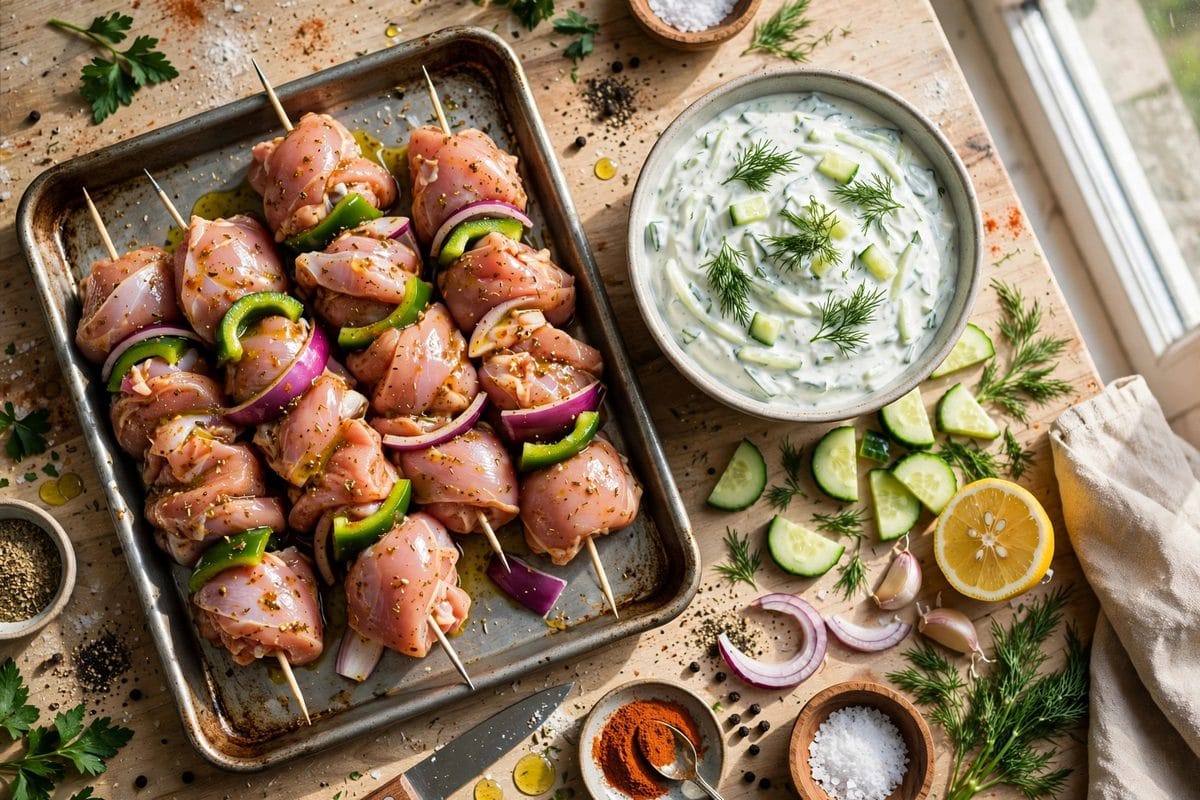
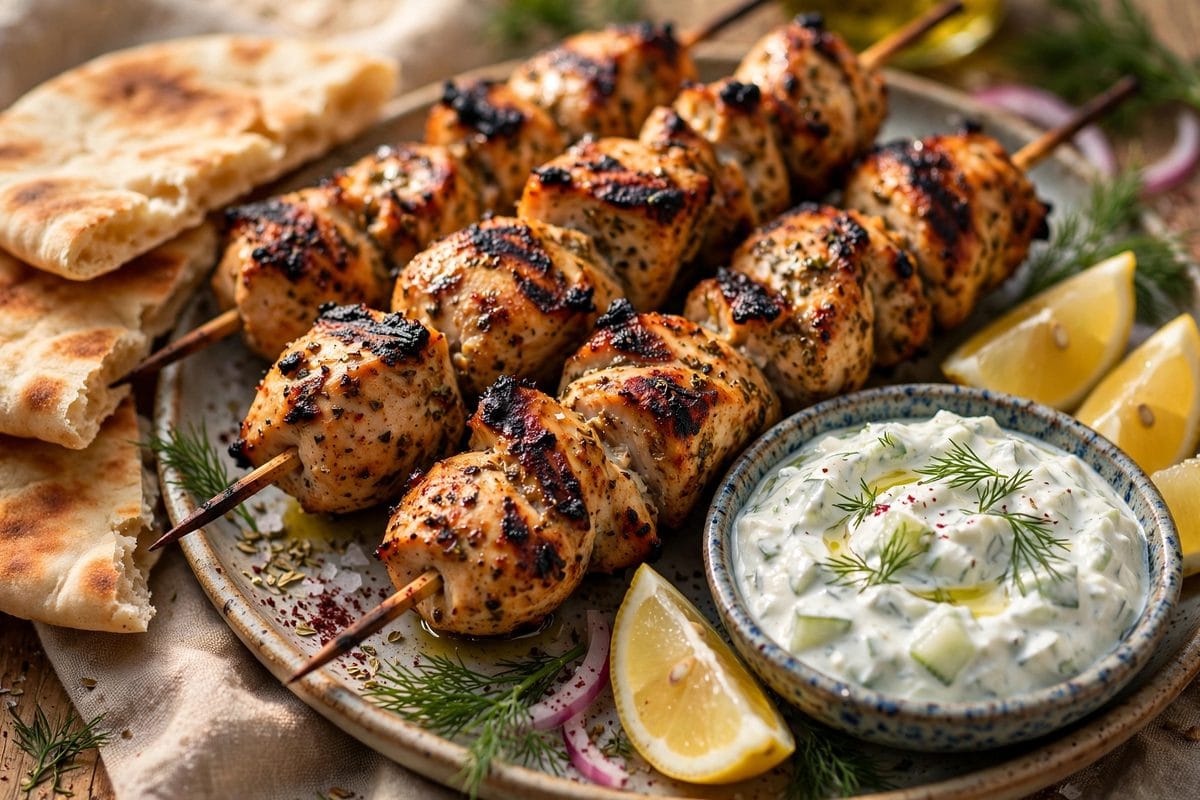
Chicken Kebabs with Tzatziki and Greek salad, grilled skewers on a platter

Some dinners just make you feel like you’re on vacation, and these 20-Minute Chicken Kebabs with Greek Salad and Tzatziki are exactly that kind of meal. Juicy, charred chicken skewers marinated in yogurt, lemon, and oregano, a pile of crunchy Greek salad, and a big swoosh of cool, garlicky tzatziki — it’s a high-protein Mediterranean dinner that tastes like a Greek island holiday and comes together faster than takeout.

Chicken Kebabs with Tzatziki and Greek salad, grilled skewers on a platter

I started making chicken kebabs at home when I realized how easy they are — and how much better they taste than anything from a restaurant. The secret is the yogurt marinade: it tenderizes the chicken and keeps it incredibly juicy, even if you accidentally overcook it a little (we’ve all been there). Threaded onto skewers and seared until golden with those beautiful charred edges, this is the kind of dinner that makes everyone at the table happy.

Why You’ll Love This Recipe

This plate has everything going for it:

  • High protein, minimal effort. Over 40 grams of protein per serving from the chicken and Greek yogurt, with about 20 minutes of actual cooking.
  • The yogurt marinade is magic. Just 15 minutes in yogurt, lemon, olive oil, and spices gives you the juiciest, most flavorful chicken.
  • Three components, one meal. Kebabs + tzatziki + Greek salad = a complete, balanced dinner with zero side dishes needed.
  • Perfect for meal prep. Grill extra skewers and portion them with salad and tzatziki for grab-and-go lunches all week.
  • Mediterranean diet approved. Lean protein, vegetables, olive oil, and yogurt — it’s a textbook Mediterranean plate.

Ingredients

For the chicken kebabs:

  • 1 lb boneless, skinless chicken breast or thighs, cut into 1-inch cubes
  • 3 tbsp plain Greek yogurt
  • 2 tbsp extra virgin olive oil
  • Juice of 1 lemon
  • 2 tsp dried oregano
  • 1 tsp paprika
  • 2 cloves garlic, minced
  • Salt and freshly ground black pepper, to taste

For the tzatziki:

  • 1 cup plain Greek yogurt
  • 1/2 cucumber, grated and squeezed dry
  • 1 clove garlic, minced
  • 1 tbsp fresh dill, chopped (or 1 tsp dried)
  • Squeeze of lemon juice
  • Salt, to taste

For the Greek salad:

  • 2 tomatoes, chopped
  • 1 cucumber, chopped
  • 1/4 red onion, thinly sliced
  • 1/3 cup kalamata olives
  • 1/3 cup crumbled feta cheese
  • Drizzle of olive oil and a pinch of oregano

Instructions

  1. Marinate the chicken. In a bowl, combine the yogurt, olive oil, lemon juice, oregano, paprika, garlic, salt, and pepper. Add the chicken cubes and toss to coat. Let it marinate for at least 15 minutes (or up to 4 hours in the fridge — the longer, the better).
  2. Thread and cook the kebabs. Thread the marinated chicken onto skewers. Grill over medium-high heat or pan-fry in a hot skillet for 10–12 minutes, turning occasionally, until golden, charred at the edges, and cooked through (165°F internal temperature).
  3. Mix the tzatziki and chop the salad. While the chicken cooks, stir together the yogurt, squeezed-dry cucumber, garlic, dill, lemon, and salt for the tzatziki. Chop the salad ingredients, toss with olives, feta, olive oil, and oregano.
  4. Plate it all up. Arrange the kebabs over or beside the Greek salad, add a generous dollop of tzatziki, and serve with warm pita if you like. High protein, minimal effort — dinner is done!

Tips for the Best Results

  • Don’t skip the yogurt marinade. The lactic acid in yogurt tenderizes the chicken gently without making it mushy — it’s the key to juicy kebabs.
  • Cut chicken evenly. Uniform 1-inch cubes cook at the same rate, so nothing dries out while other pieces catch up.
  • Get the pan or grill hot. High heat gives you that beautiful char and keeps the juices inside. Don’t crowd the skewers.
  • Squeeze the cucumber dry. For tzatziki, wring the grated cucumber in a clean towel — otherwise your sauce turns watery.
  • Soak wooden skewers. If using wooden skewers on the grill, soak them in water for 30 minutes first so they don’t burn.

FAQs

Can I use chicken thighs instead of breast?

Absolutely — thighs are juicier and more forgiving. Use the same marinade and cooking time, just make sure they reach 165°F inside.

How long can I marinate the chicken?

Minimum 15 minutes, but up to 4 hours in the refrigerator gives even better flavor. Don’t go past 24 hours — the yogurt can start to break down the meat’s texture.

Can I make this without skewers?

Yes! Just pan-fry or grill the marinated chicken cubes directly. You’ll miss the fun presentation but keep all the flavor.

How do I store leftovers?

Store kebabs, salad, and tzatziki in separate containers in the fridge for up to 3 days. The kebabs reheat well in a hot skillet or air fryer.

These Chicken Kebabs with Tzatziki and Greek Salad are the kind of dinner that makes healthy eating feel like a treat, not a chore. If you want to see the whole thing come together — the marinade, the sizzle, the plating — check out my video reel. Make it once, and it’ll be in your regular rotation.

Smoky Mediterranean Dipping Oil (The Appetizer Everyone Fights Over)

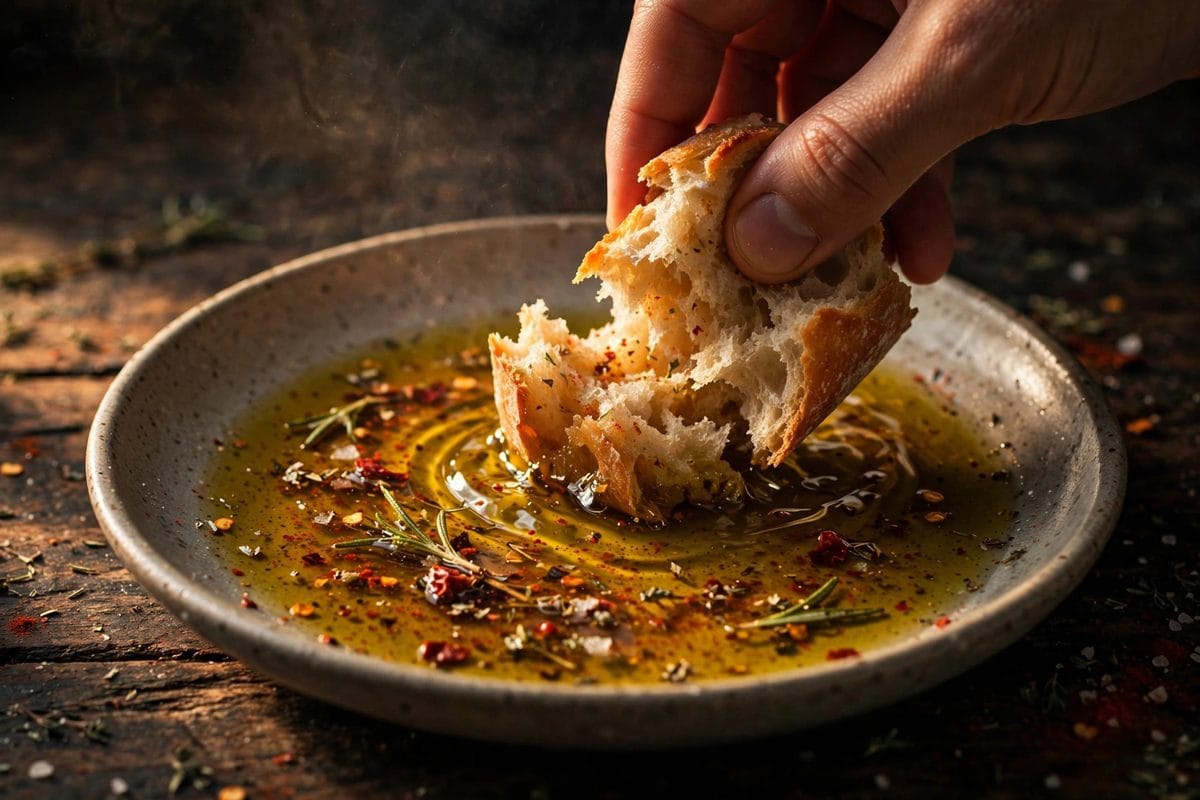
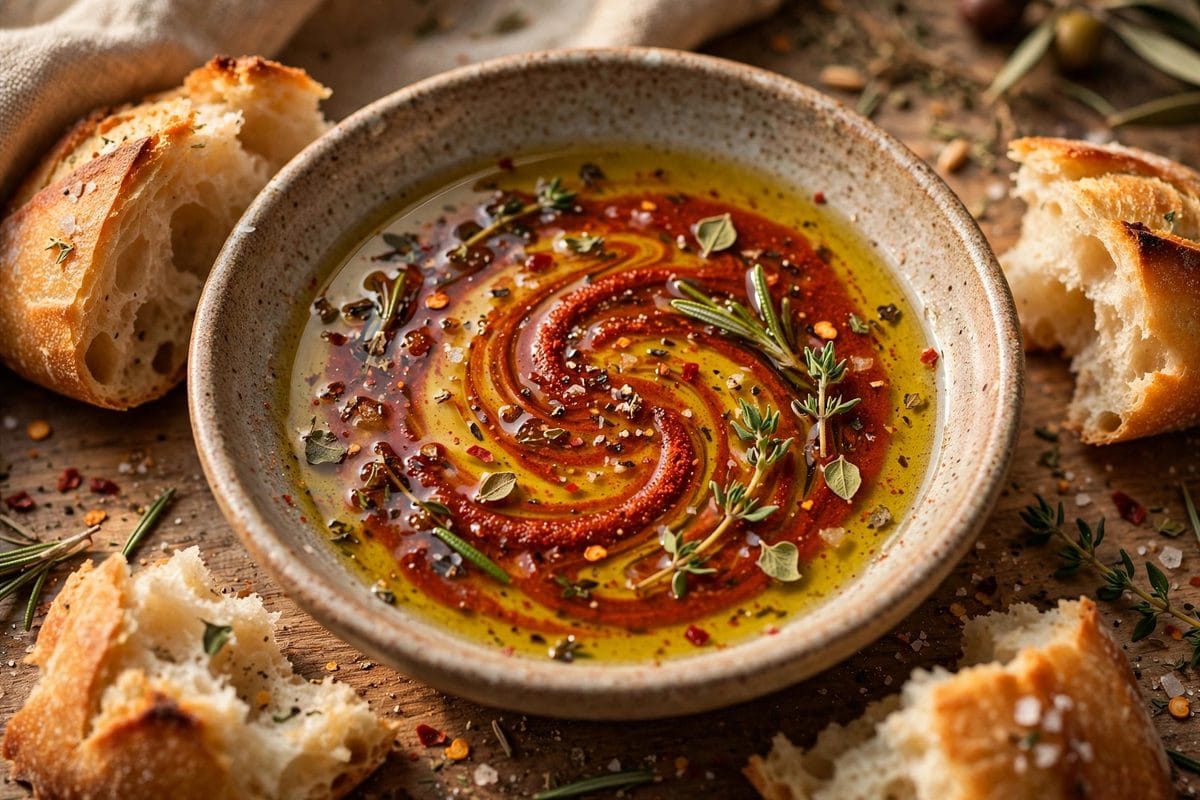
Smoky Mediterranean Dipping Oil with spices, garlic and lemon zest in a bowl with warm crusty bread

Every great dinner party I’ve ever been to had one thing in common: a bowl of something irresistible sitting on the table the moment guests walked in. For me, that something is this Smoky Mediterranean Dipping Oil. It’s the appetizer everyone fights over — warm, fragrant olive oil swirled with smoked paprika, chili flakes, garlic, and lemon zest, served with torn pieces of warm crusty bread for dipping. It takes five minutes to make and about thirty seconds to disappear.

Smoky Mediterranean Dipping Oil with spices, garlic and lemon zest in a bowl with warm crusty bread

I first fell in love with dipping oils at a little family-run restaurant on the coast, where they brought out bread and a shallow dish of seasoned olive oil before the meal. I came home determined to recreate that magic, and after a lot of delicious experimenting, this smoky version became the house favorite. The gentle warming blooms the spices, the garlic mellows into sweetness, and the lemon zest lifts everything up. It’s simple, it’s stunning, and it makes any meal feel like an occasion.

Why You’ll Love This Recipe

This isn’t just flavored olive oil — it’s an experience. Here’s why it works so well:

  • Ready in 5 minutes. Warm the oil, stir in the seasonings, and you’re done. It’s the fastest impressive appetizer I know.
  • Big, bold flavor. Smoked paprika and chili flakes give it a warm smokiness with a gentle kick; garlic and lemon zest keep it bright.
  • Crowd-pleaser. Put a bowl of this on the table with good bread and watch it vanish. It works for holidays, game nights, and Tuesday dinners alike.
  • Healthy fats. Extra virgin olive oil is a cornerstone of the Mediterranean diet — heart-healthy and full of antioxidants.
  • Endlessly versatile. Drizzle leftovers over roasted vegetables, grilled chicken, pasta, or pizza.

Ingredients

You only need a handful of pantry staples:

  • 1/2 cup extra virgin olive oil (use a good one — it’s the star)
  • 1 tsp smoked paprika
  • 1/2 tsp chili flakes (adjust to your heat preference)
  • 1 tsp dried oregano
  • 1 clove garlic, minced
  • Zest of 1/2 lemon
  • Flaky sea salt, to taste
  • Warm crusty bread, for serving

Instructions

  1. Warm the olive oil gently. Pour the olive oil into a small saucepan over low heat. Warm it until it’s just pleasantly warm to the touch — you should see the faintest shimmer. Do not let it boil or smoke; high heat will make the oil bitter and dull the flavors.
  2. Stir in the spices, garlic, and lemon zest. Remove the pan from the heat and stir in the smoked paprika, chili flakes, oregano, minced garlic, and lemon zest. Let it sit for a minute or two so the warm oil blooms the spices and infuses with all that flavor. The aroma at this point is absolutely incredible.
  3. Pour, salt, and serve. Pour the warm oil into a shallow serving bowl, sprinkle with flaky sea salt, and serve immediately with torn pieces of warm crusty bread. Tear, dip, repeat — that’s the whole ritual, and it’s perfect.

Tips for the Best Results

  • Use your best olive oil. Since the oil is the main ingredient, a fruity, peppery extra virgin olive oil makes all the difference. This is the time to use the good bottle.
  • Warm the bread too. A few minutes in a hot oven turns a good loaf into the perfect dipping vehicle — crisp crust, soft center.
  • Smoked paprika is essential. Regular paprika won’t give you that deep, campfire-like smokiness. Look for Spanish smoked paprika (pimentón) if you can.
  • Keep the heat low. Gentle warming is the key. If the oil gets too hot, the garlic turns bitter and the spices taste scorched instead of smoky.
  • Make it ahead. You can mix everything and store it in a jar in the fridge for up to a week. Warm it gently before serving.

FAQs

How spicy is this dipping oil?

It’s mildly spicy — the 1/2 teaspoon of chili flakes gives a warm background heat rather than a burn. Reduce it to 1/4 teaspoon for a gentler version, or bump it up to a full teaspoon if you like things fiery.

Can I make this without heating the oil?

You can stir everything into room-temperature oil, but warming it gently is what blooms the spices and melds the flavors. It only takes a minute and it’s worth it.

How long does it keep?

Stored in an airtight jar in the refrigerator, it keeps for about a week. The olive oil may solidify in the fridge — just let it come to room temperature or warm it gently before serving.

What else can I use it for?

So much! Drizzle it over hummus, roasted vegetables, grilled meats, flatbreads, or even a bowl of soup. It also makes a fantastic finishing oil for pasta.

This Smoky Mediterranean Dipping Oil is the kind of recipe that makes you look like a genius with almost zero effort. If you want to see how quickly it comes together, check out my video reel — you’ll see the spices bloom in the warm oil in real time. Make it for your next gathering, and don’t be surprised when someone asks for the recipe.

Honey Lemon Mediterranean Salad (Bright No-Lettuce Chopped Salad)

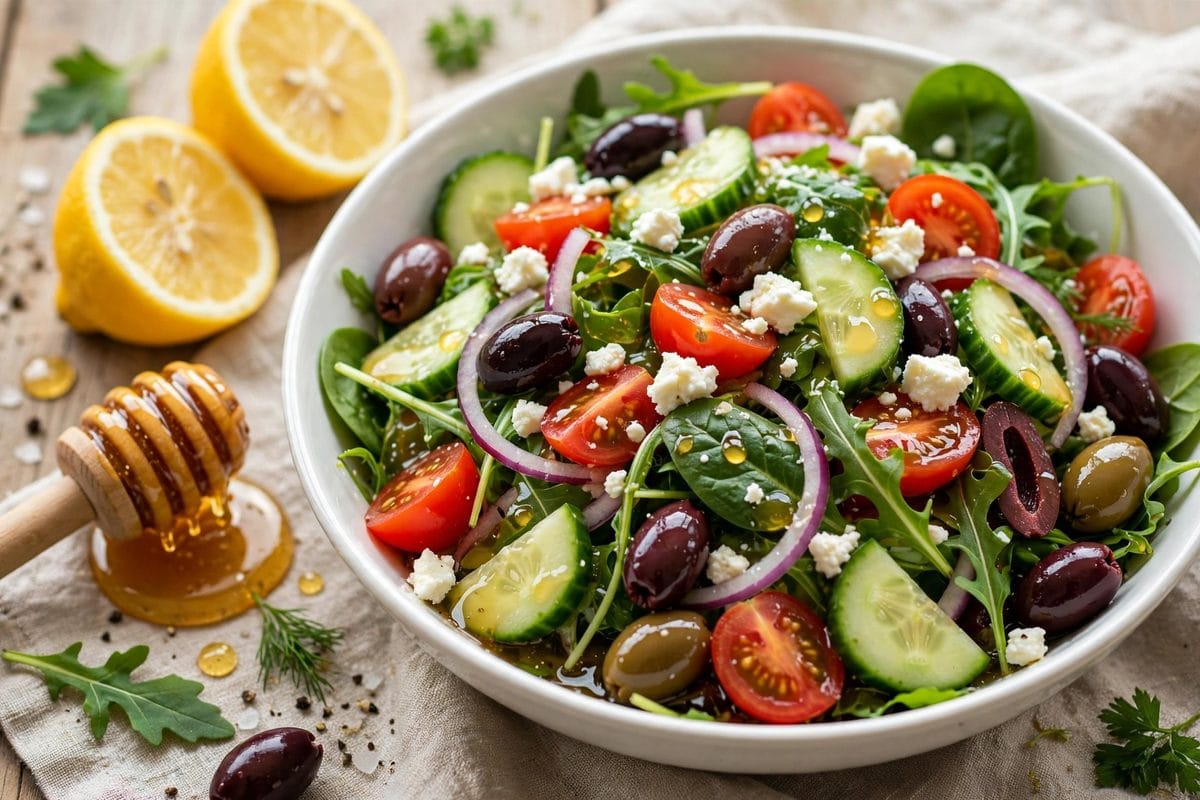
Honey Lemon Mediterranean Salad with chickpeas, feta, olives, tomatoes and cucumber

I’ll be honest with you: I used to think a salad needed lettuce to count as a salad. Then I started making this Honey Lemon Mediterranean Salad, and it completely changed my mind. No sad, wilted greens here — just a big, colorful bowl of crunchy cucumber, juicy tomatoes, briny olives, creamy feta, and hearty chickpeas, all tossed in a honey-lemon dressing that I could honestly drink straight from the jar.

Honey Lemon Mediterranean Salad with chickpeas, feta, olives, tomatoes and cucumber in a white bowl

This is the salad I make when I want something fresh and satisfying without turning on the stove. It takes about 15 minutes to chop and toss together, it keeps beautifully in the fridge, and it works as a light lunch, a side dish, or even a meatless dinner. If you’re following the Mediterranean diet — or just trying to eat more vegetables that actually taste good — this one is for you.

Why You’ll Love This Recipe

There are chopped salads, and then there’s this one. Here’s what makes it special:

  • No lettuce, no problem. Every bite is crunchy, juicy, and flavorful — nothing gets soggy or sad, even after a day in the fridge.
  • The honey-lemon dressing is magic. Sweet honey, bright lemon, good olive oil, and oregano — it’s the kind of dressing that makes you want to lick the bowl.
  • Ready in 15 minutes. Just chop, whisk, and toss. No cooking required.
  • Meal-prep friendly. Chickpeas and sturdy chopped vegetables hold up wonderfully for days, making this a lunch-prep hero.
  • Naturally vegetarian and gluten-free. It fits beautifully into a Mediterranean diet lifestyle.

Ingredients

Here’s everything you need for this bright, beautiful salad:

  • 1 cucumber, diced
  • 1 cup cherry tomatoes, halved
  • 1/2 red onion, diced
  • 1 cup cooked chickpeas (canned is fine — just rinse and drain them)
  • 1/2 cup kalamata olives, halved
  • 1/2 cup crumbled feta cheese

For the honey-lemon dressing:

  • 3 tbsp extra virgin olive oil
  • 2 tbsp fresh lemon juice
  • 1 tbsp honey
  • 1 tsp dried oregano
  • Salt and freshly ground black pepper, to taste

Instructions

  1. Chop everything into bite-size pieces. Dice the cucumber and red onion, halve the cherry tomatoes and olives. I like everything roughly the same size so you get a little of each ingredient in every forkful. Add it all to a large bowl along with the chickpeas and feta.
  2. Whisk the dressing. In a small bowl or jar, whisk together the olive oil, lemon juice, honey, oregano, salt, and pepper until smooth and emulsified. Taste it — this is your moment to adjust. Want it brighter? Add a squeeze more lemon. Sweeter? A touch more honey.
  3. Toss, chill, and serve. Pour the dressing over the salad and toss well so everything is coated. Let it chill for 10 minutes so the flavors meld together — the onion softens slightly and the chickpeas soak up that gorgeous dressing. Then serve and enjoy!

Tips for the Best Results

  • Use fresh lemon juice. Bottled lemon juice just doesn’t have the same bright flavor. One lemon gives you about 2 tablespoons of juice.
  • Don’t skip the chill time. Those 10 minutes in the fridge make a real difference — the flavors come together and the salad tastes so much better.
  • Salt the onion. If raw red onion is too sharp for you, toss the diced onion with a pinch of salt and let it sit for 5 minutes, then rinse. It mellows beautifully.
  • Add the feta last. Toss the vegetables with the dressing first, then fold in the feta so it stays in pretty crumbles instead of breaking down.
  • Make it a meal. Add grilled chicken, shrimp, or a scoop of quinoa to turn this side salad into a hearty main dish.

FAQs

Can I make this salad ahead of time?

Yes! This salad keeps well in the fridge for up to 3 days. The vegetables stay crunchy and the flavors actually get better. Keep the feta separate and add it just before serving for the freshest result.

Can I use a different sweetener instead of honey?

Absolutely. Maple syrup works well and makes the salad vegan if you also swap the feta for a plant-based alternative or leave it out.

What can I substitute for chickpeas?

White beans (cannellini) are a great swap. You could also use cooked lentils for a different texture and extra protein.

Is this salad good for the Mediterranean diet?

It’s a textbook Mediterranean diet dish — vegetables, legumes, olive oil, and a modest amount of feta, all seasoned with lemon and herbs.

This Honey Lemon Mediterranean Salad is proof that the simplest recipes are often the most loved. If you want to watch it come together, check out my video reel — you’ll see just how quick and easy that honey-lemon dressing is to whisk up. Make a big bowl this week; your lunches will thank you.

Greek Sheet Pan Chicken (Easy One-Pan Mediterranean Dinner)

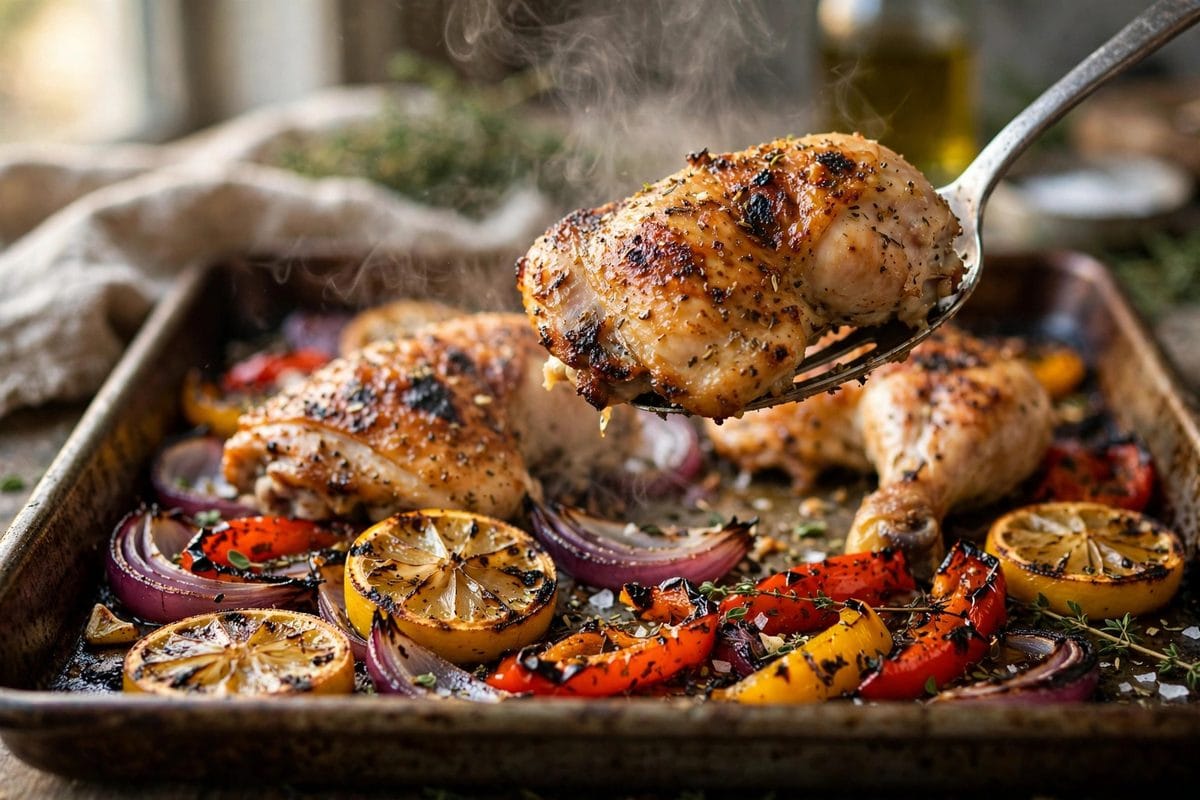
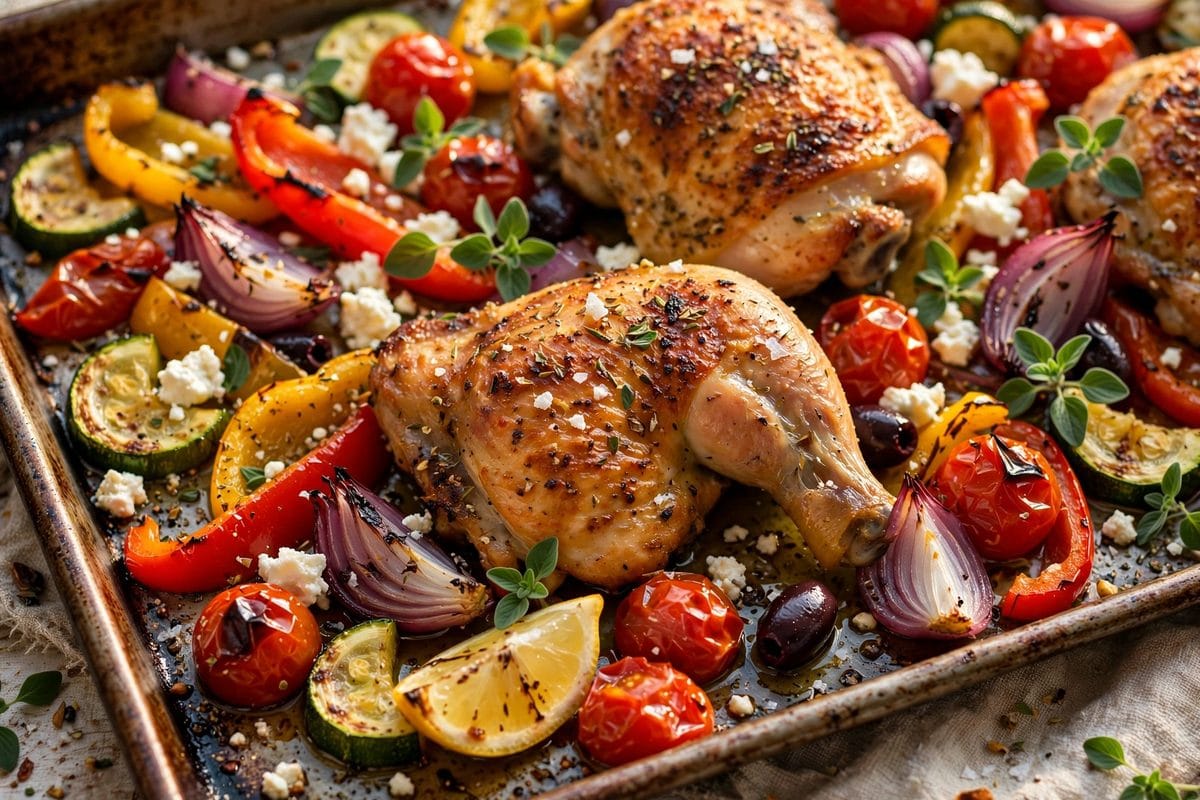
Greek Sheet Pan Chicken with roasted vegetables, lemon wedges and crumbled feta

If there’s one dinner I come back to again and again on busy weeknights, it’s this Greek Sheet Pan Chicken. I started making it last year when I wanted all the sunny, bold flavors of the Mediterranean without a pile of dishes to wash afterward, and honestly, it has never let me down. Everything — juicy chicken, sweet roasted peppers, zucchini, blistered cherry tomatoes — cooks together on a single pan, and the kitchen smells like a little Greek taverna while it roasts.

Greek Sheet Pan Chicken with roasted vegetables, lemon wedges and feta

This is the kind of meal that fits the Mediterranean way of eating perfectly: lean protein, loads of vegetables, good olive oil, and bright lemon and oregano. Whether you’re doing the Mediterranean diet or just want a healthy, satisfying dinner with almost no cleanup, this one-pan wonder deserves a permanent spot in your rotation.

Why You’ll Love This Recipe

There are sheet pan dinners, and then there are sheet pan dinners that taste like a vacation. Here’s why this one wins:

  • One pan, zero fuss. Everything roasts together on a single sheet pan. Dinner and cleanup are done in under an hour.
  • Big Mediterranean flavor. Oregano, garlic, lemon, and briny feta turn simple chicken and veggies into something crave-worthy.
  • Healthy and filling. High in protein, packed with vegetables, and naturally gluten-free — right in line with Mediterranean diet principles.
  • Flexible. Use chicken thighs for the juiciest result or breasts if you prefer leaner meat. Swap in whatever vegetables are in your fridge.

Ingredients

You probably have most of this on hand already. Here’s what goes into this Greek sheet pan chicken:

  • 4 chicken thighs (or boneless, skinless chicken breasts)
  • 2 bell peppers, cut into chunks
  • 1 red onion, cut into wedges
  • 1 zucchini, sliced into half-moons
  • 1 cup cherry tomatoes
  • 3 tbsp extra virgin olive oil
  • 2 tsp dried oregano
  • 1 tsp garlic powder
  • Salt and freshly ground black pepper, to taste
  • Lemon wedges, for serving
  • Crumbled feta cheese, for topping
  • Fresh herbs (parsley or dill), optional

Instructions

  1. Toss everything together. Preheat your oven to 400°F (200°C). In a large bowl, toss the chicken and chopped vegetables with the olive oil, oregano, garlic powder, salt, and pepper until everything is evenly coated. I like to really get in there with my hands so every piece gets some of that seasoning.
  2. Spread on the sheet pan and roast. Spread everything out in a single layer on a rimmed sheet pan — give the pieces a little breathing room so they roast instead of steam. Roast at 400°F for 30–35 minutes, until the chicken is cooked through (165°F internal temperature) and the vegetables are tender with caramelized edges. Those blistered cherry tomatoes are little flavor bombs, so don’t be tempted to pull the pan early.
  3. Finish with lemon, feta, and herbs. Squeeze fresh lemon wedges all over the hot pan, then scatter over the crumbled feta and fresh herbs. The feta softens slightly from the heat and mixes with the pan juices into the most incredible sauce. Serve straight from the pan — done!

Tips for the Best Results

  • Don’t crowd the pan. If everything is piled up, the vegetables steam instead of getting those delicious caramelized edges. Use two pans if needed.
  • Cut veggies to similar sizes. Even pieces cook evenly, so you won’t end up with raw peppers and mushy zucchini.
  • Chicken thighs vs. breasts. Thighs stay juicier and are more forgiving if you overcook them slightly; breasts are leaner. Both are delicious here.
  • Add the feta at the end. Feta goes on after roasting so it stays creamy and tangy instead of drying out in the oven.
  • Meal prep friendly. Divide leftovers into containers with some rice or quinoa — they reheat beautifully for lunches.

FAQs

Can I use chicken breasts instead of thighs?

Absolutely! Boneless, skinless chicken breasts work great. Just keep an eye on them — breasts can dry out faster, so start checking for doneness around the 28-minute mark.

What should I serve with Greek sheet pan chicken?

It’s a complete meal on its own, but it’s lovely with warm pita bread, a scoop of rice or quinoa, or a simple Greek salad on the side.

Can I prep this ahead of time?

Yes. Toss the chicken and vegetables with the oil and seasonings in the morning, cover, and refrigerate. When dinner time comes, just spread it on the pan and roast.

Is this recipe good for the Mediterranean diet?

It’s a perfect fit — lean protein, abundant vegetables, extra virgin olive oil, lemon, and herbs are all staples of the Mediterranean diet.

This Greek Sheet Pan Chicken is proof that the simplest dinners are often the best ones. If you want to see it all come together in action, check out my video reel — you can watch the whole one-pan process from toss to roast to that final sprinkle of feta. Make it once and I promise it’ll be in your weekly rotation.

Molten Chocolate Lava Cake — Easy Homemade Recipe

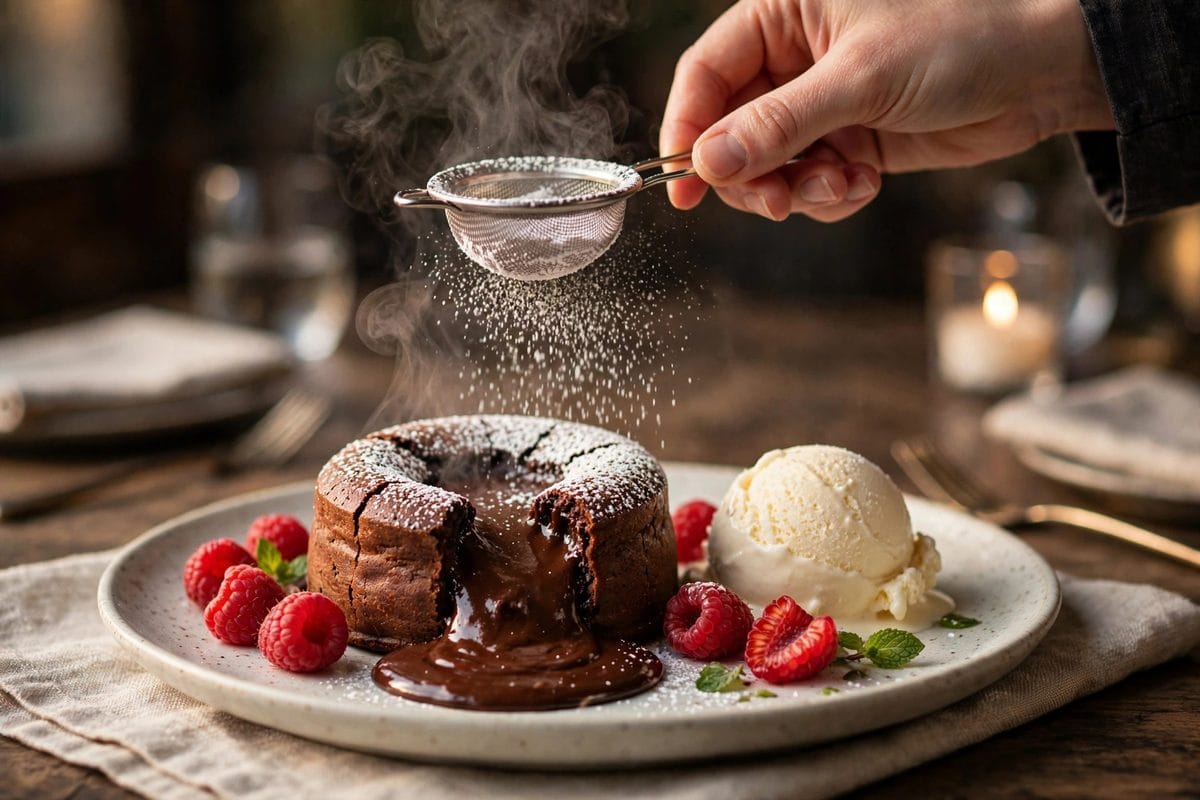
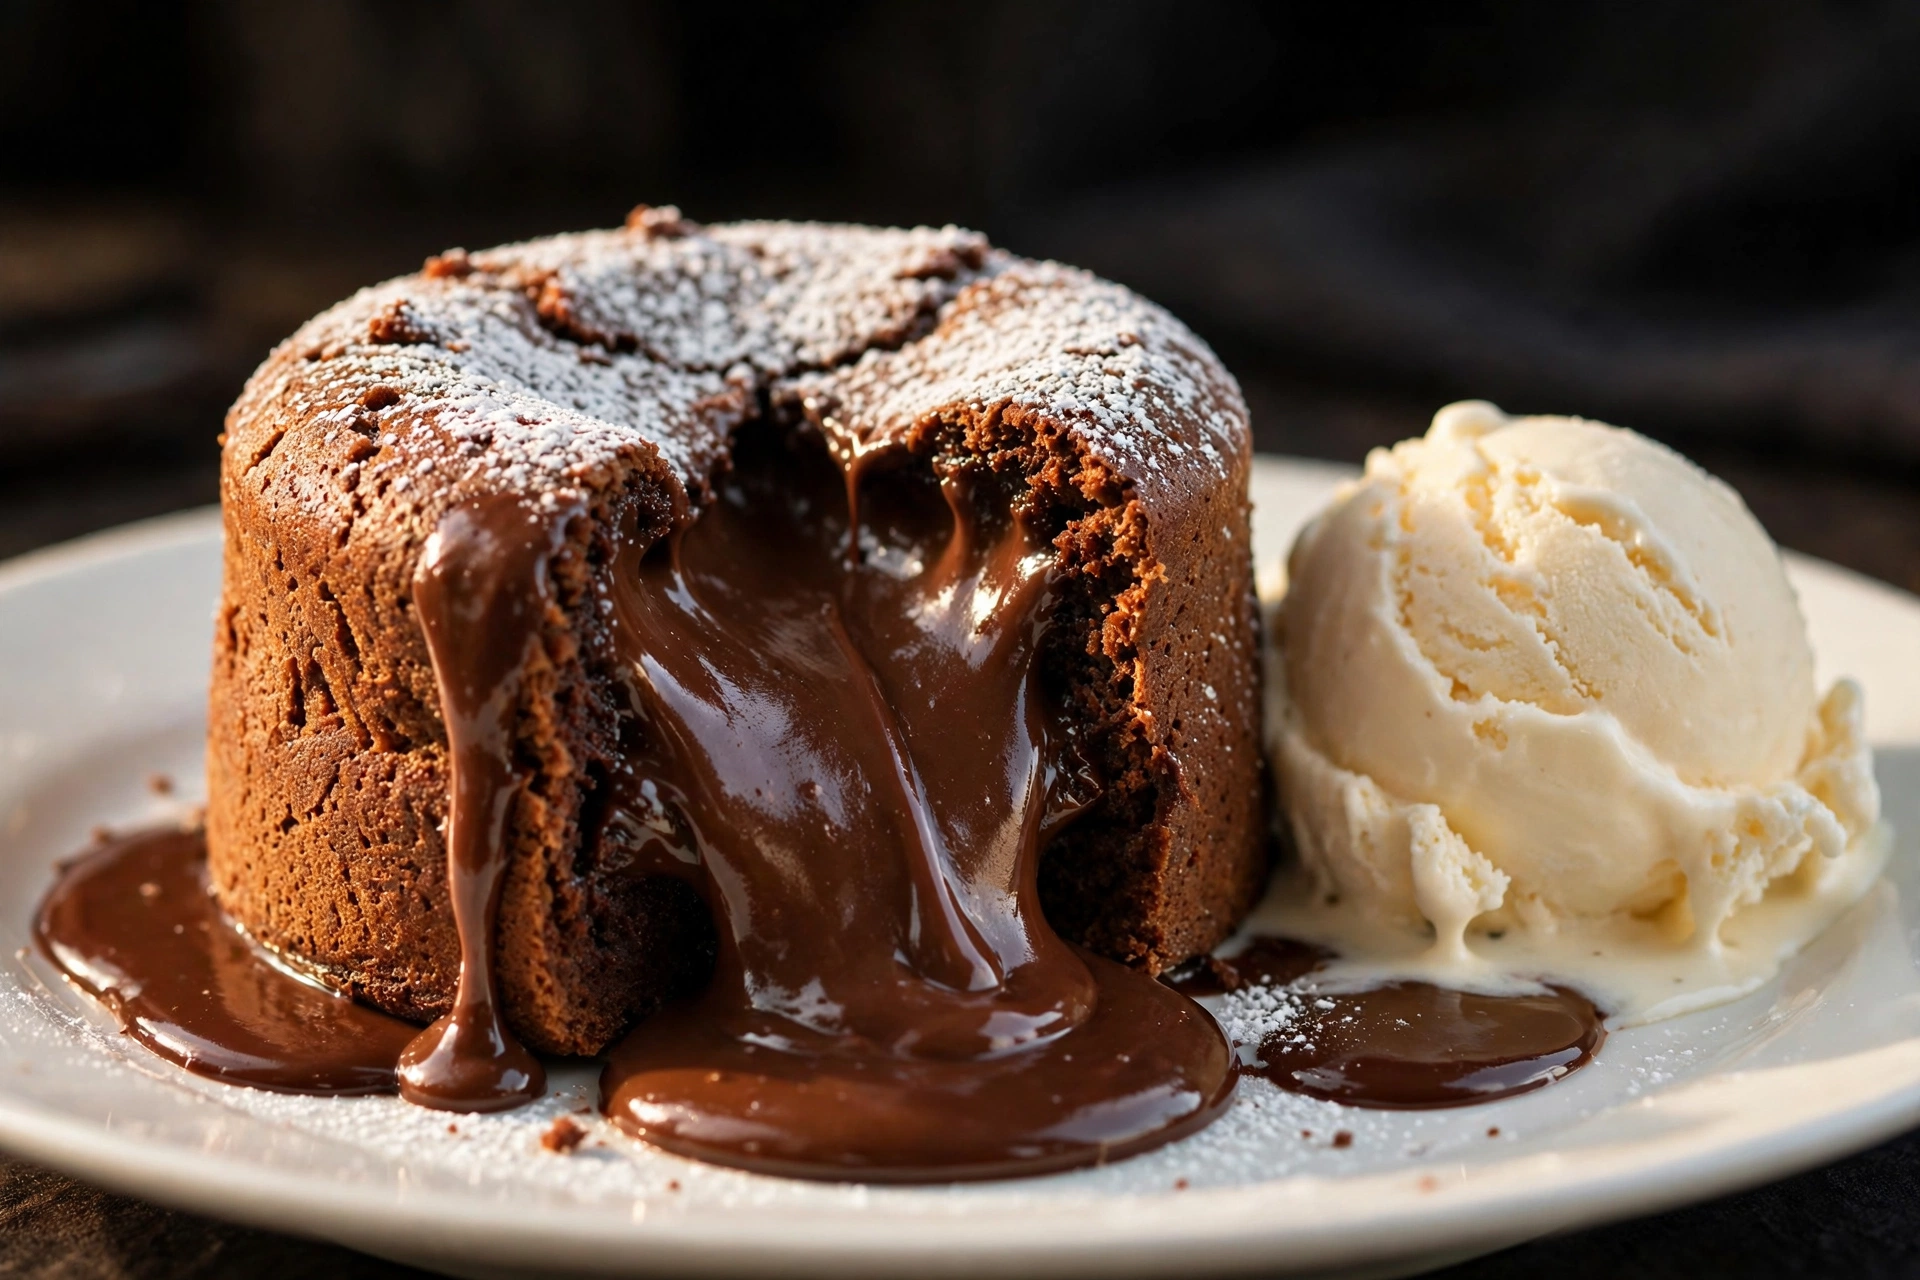
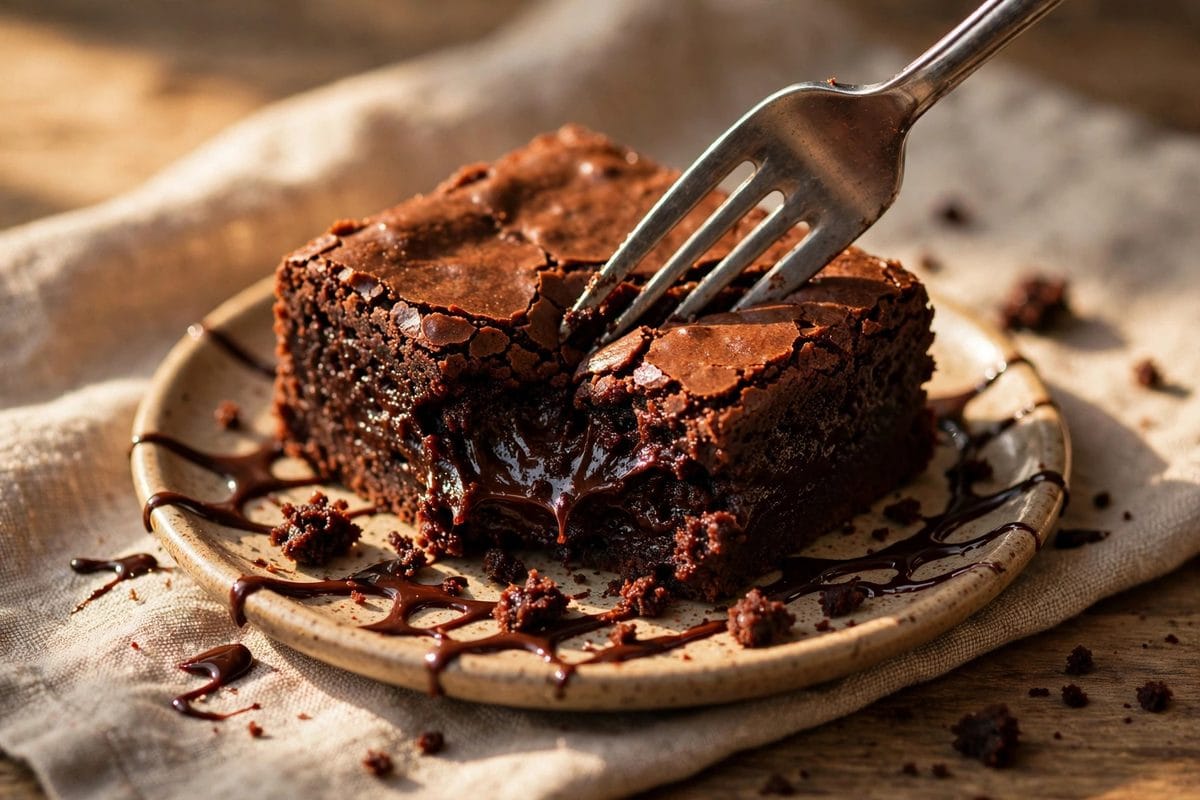
Molten chocolate lava cake, a different angle showing the dessert with berries

There are few desserts in this world as dramatic — or as delicious — as a Molten Chocolate Lava Cake. I’ll never forget the first time I ordered one at a restaurant: the waiter set down this unassuming little chocolate cake, I broke into it with my spoon, and out flowed a river of warm, gooey chocolate. I was completely hooked. I went home determined to recreate that magic in my own kitchen, and after a few (very delicious) rounds of testing, I landed on this foolproof recipe. Cut it open and watch that gooey chocolate flow out — pure dessert heaven, right from your own oven.

What I love most about this molten chocolate lava cake is how deceptively simple it is. The ingredient list is short — butter, dark chocolate, eggs, sugar, and just a little flour — and the whole thing goes from mixing bowl to table in about 25 minutes. It looks and tastes like something from a fancy restaurant, but there’s no special equipment or pastry-chef skills required. Whether it’s date night, a dinner party, or just a Tuesday that needs some chocolate, this lava cake never disappoints.

Molten chocolate lava cake with gooey chocolate center flowing out

Why You’ll Love This Recipe

If you’ve ever been intimidated by lava cakes, let me put your mind at ease. This recipe is genuinely one of the easiest impressive desserts you’ll ever make. The batter comes together in minutes, the baking time is wonderfully short, and the payoff — that glorious molten center — is pure theater at the table. Here’s why this molten chocolate lava cake has become my go-to dessert for every special occasion:

  • Only 5 core ingredients — butter, dark chocolate, eggs, sugar, and flour.
  • Ready in about 25 minutes, with just 12 minutes of baking.
  • Restaurant-worthy presentation with zero fancy skills required.
  • That showstopping molten center — cut it open and watch the chocolate flow.
  • Easily scalable — make two for date night or a whole batch for a party.

Ingredients

You’ll need just a handful of ingredients to make this molten chocolate lava cake. I’ve listed everything in US measurements — cups, ounces, and Fahrenheit — so there’s absolutely no guesswork involved:

  • 1/2 cup butter (1 stick), plus extra for greasing the ramekins
  • 4 oz dark chocolate, chopped (or dark chocolate chips)
  • 2 large eggs, at room temperature
  • 2 large egg yolks, at room temperature
  • 1/4 cup granulated sugar
  • 2 tbsp all-purpose flour
  • Butter and unsweetened cocoa powder, for dusting the ramekins

A quick note on the chocolate: use a dark chocolate you genuinely love to eat — something in the 60–70% cacao range is perfect. The chocolate is the entire flavor of this dessert, so quality really matters here. And don’t skip dusting the ramekins with cocoa powder; it keeps the cakes from sticking and adds an extra layer of chocolate flavor.

Instructions

Follow these steps and you’ll have perfect molten chocolate lava cakes with gorgeously gooey centers. The key is all in the timing — so read through once before you start:

  1. Preheat and prep the ramekins: Preheat your oven to 425°F (220°C). Generously butter four 6-ounce ramekins, then dust the insides with unsweetened cocoa powder, tapping out any excess. This double-coating is what lets the cakes slide out cleanly later.
  2. Melt the butter and chocolate: Combine the butter and chopped dark chocolate in a microwave-safe bowl. Microwave in 30-second bursts, stirring well between each, until smooth and glossy. (No microwave? Melt them together in a heatproof bowl set over a pot of gently simmering water.) Let the mixture cool for a couple of minutes.
  3. Whisk the eggs and sugar: In a separate bowl, whisk the eggs, egg yolks, and sugar together until the mixture is pale, thick, and slightly frothy — about 1–2 minutes of vigorous whisking by hand.
  4. Combine: Pour the slightly cooled chocolate mixture into the egg mixture and fold gently with a spatula until just combined. Sprinkle the flour over the top and fold again until no streaks remain. Don’t overmix — a light hand keeps the texture silky.
  5. Fill and bake: Divide the batter evenly among the prepared ramekins. Bake at 425°F for exactly 12 minutes — the edges should look set and firm, but the centers will still be soft and jiggly. That jiggle is exactly what you want.
  6. Serve warm: Let the cakes rest for 1 minute, then run a thin knife around the edges and invert each ramekin onto a serving plate. Lift the ramekin off, dust with a little extra cocoa or powdered sugar if you like, and serve immediately while the centers are gloriously molten!

Tips for the Best Results

Lava cakes have a reputation for being finicky, but they’re honestly very forgiving once you know these tricks — all learned from my own trial and (very tasty) error:

  • Watch the clock, not just the cake. Twelve minutes at 425°F is the sweet spot in most ovens. Set a timer — even one extra minute can turn molten into merely moist.
  • Every oven runs a little differently. If your first batch isn’t quite molten enough (or is a touch too molten), adjust by 1 minute next time. I keep a sticky note on my fridge with my oven’s perfect timing.
  • Room temperature eggs are a must. They whisk up thicker and incorporate far more smoothly into the chocolate. Cold eggs can make the batter lumpy and harder to blend.
  • Don’t skip the cocoa-dusted ramekins. Butter alone can let the cakes stick; the cocoa coating acts like a non-stick jacket and adds an extra whisper of chocolate flavor.
  • Serve immediately. Lava cakes wait for no one — the centers keep setting as they cool, so get them to the table within a couple of minutes of unmolding for maximum gooeyness.

FAQs

Here are the questions I get asked most often about this molten chocolate lava cake:

Can I make the batter ahead of time?

Yes! Prepare the batter, divide it among the buttered and cocoa-dusted ramekins, cover with plastic wrap, and refrigerate for up to 24 hours. When you’re ready to serve, bake straight from the fridge, adding 1–2 extra minutes to the baking time. It’s a lifesaver for dinner parties.

What if I don’t have ramekins?

A standard muffin tin works great as a substitute. Butter and cocoa-dust the cups generously, fill them about three-quarters full, and start checking at 10 minutes, since the smaller cakes bake a bit faster than ramekin-sized ones.

Can I use milk chocolate instead of dark?

You can, but the result will be much sweeter and less intense. If you go with milk chocolate, reduce the sugar to 2 tablespoons to keep the balance right. Personally, I think dark chocolate gives the best contrast — rich cake edges with a deeply chocolatey molten middle.

How do I know when they’re done?

Look for edges that are set and just starting to pull away from the ramekin, with a center that still jiggles softly when you nudge the pan. That gentle jiggle is the molten middle — if the center looks completely firm, they’ve gone about a minute too long (they’ll still taste wonderful, just less gooey).

So the next time you want a dessert that truly wows — for date night, a dinner party, or just because it’s Friday — make this Molten Chocolate Lava Cake. It’s quick, it’s deeply chocolatey, and that moment when you cut in and the center flows out never, ever gets old. If you try it, let me know in the comments how gloriously gooey yours turned out! And be sure to watch the full recipe come together in our video reel on the Dessert Recipes Facebook page. Happy baking!

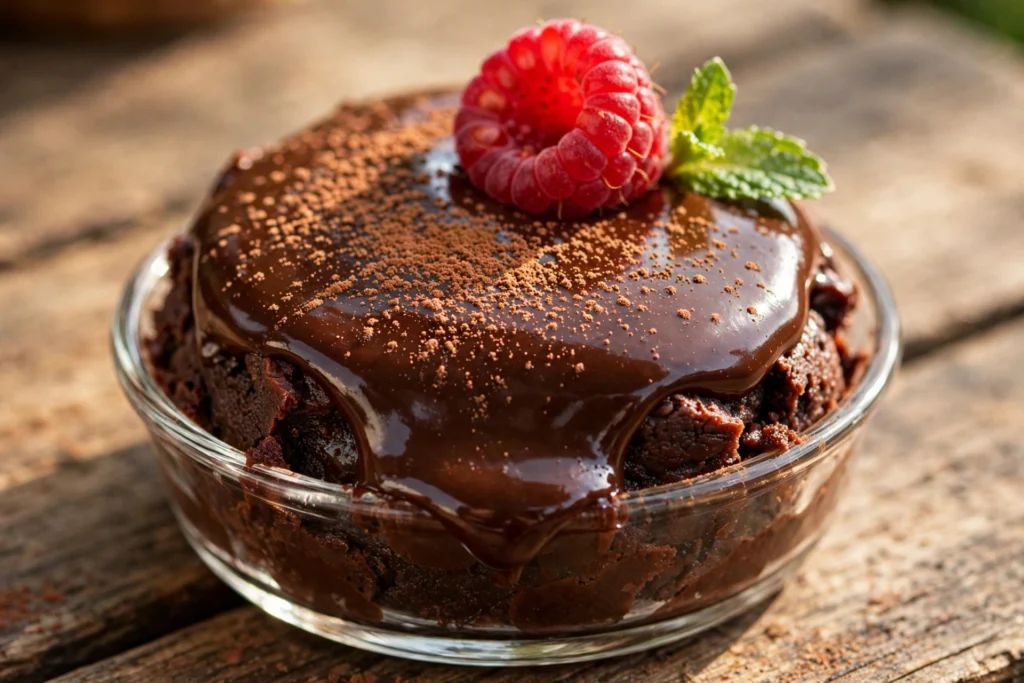
Rich, Fudgy Chocolate Dessert — Easy Homemade Recipe

Rich, fudgy chocolate dessert, a different angle of the homemade chocolate treat

If there’s one dessert that never, ever lets me down, it’s this Rich, Fudgy Chocolate Dessert. I first threw it together on a rainy Sunday afternoon when my kids were begging for “something chocolatey” and I realized I had barely any ingredients in the pantry — just chocolate chips, butter, sugar, eggs, and flour. What came out of the oven forty minutes later was pure magic: a dense, fudgy, deeply chocolatey dessert with the most incredible creamy center, loaded with colorful candies on top. My family went absolutely wild for it, and honestly, it’s been our most-requested treat ever since.

It’s creamy, chocolatey, and loaded with candies — truly the ultimate sweet treat for birthdays, potlucks, movie nights, or those late-night chocolate emergencies we all have. And the best part? You only need six simple ingredients and about 25 minutes of baking time. No fancy equipment, no complicated techniques — just one bowl and a whole lot of chocolate.

Rich, fudgy chocolate dessert topped with colorful candies

Why You’ll Love This Recipe

Let me count the reasons this rich, fudgy chocolate dessert has earned a permanent spot in my kitchen. First, it only needs six simple ingredients — most of which are probably sitting in your pantry right now. Second, it’s a true one-bowl wonder, which means cleanup takes about two minutes and you spend more time actually enjoying dessert. Third, the whole thing is ready in under 40 minutes, from the moment the craving hits to that first warm, gooey bite. And finally, that candy topping makes it an absolute showstopper for kids’ parties while still tasting rich enough for grown-up dinner guests. Whether you’re a beginner baker or a seasoned pro, this is one of those recipes you’ll find yourself making again and again.

  • Only 6 pantry-staple ingredients — no special shopping trip needed.
  • One bowl, minimal cleanup — more time for dessert, less time at the sink.
  • Ready in under 40 minutes, with just 25 minutes of baking.
  • Kid-approved candy topping that’s fun for parties and birthdays.
  • Foolproof method — if you can melt chocolate and stir, you can make this.

Ingredients

You’ll need just six simple ingredients to make this rich, fudgy chocolate dessert. I’ve listed everything in US measurements — cups and Fahrenheit — so there’s absolutely no guesswork involved:

  • 1 cup semi-sweet chocolate chips
  • 1/2 cup butter (1 stick)
  • 3/4 cup granulated sugar
  • 2 large eggs, at room temperature
  • 1/2 cup all-purpose flour
  • Candy pieces for topping (M&M’s, chopped candy bars, or your favorite)

A quick note on the chocolate: semi-sweet chocolate chips give this dessert its deep, rich flavor without making it overly sweet. If you prefer things on the sweeter side, milk chocolate chips work beautifully too — just know the final result will taste a little milder.

Instructions

Follow these simple steps and you’ll have a warm, fudgy chocolate dessert ready before you know it. I’ve broken everything down so even first-time bakers can nail it on the first try:

  1. Preheat and prep: Preheat your oven to 350°F (175°C). Grease an 8-inch square baking pan with butter, or line it with parchment paper leaving a little overhang for easy lifting later.
  2. Melt the chocolate and butter: Add the chocolate chips and butter to a microwave-safe bowl. Microwave in 30-second bursts, stirring well between each, until smooth and glossy. (No microwave? Melt them together in a heatproof bowl set over a pot of gently simmering water.)
  3. Whisk in the sugar and eggs: Let the chocolate mixture cool for a minute or two so it doesn’t scramble the eggs, then whisk in the sugar until combined. Add the eggs one at a time, whisking well after each addition, until the batter looks smooth and shiny.
  4. Fold in the flour: Switch to a spatula and gently fold in the flour until just combined. A few small streaks are perfectly fine — whatever you do, don’t overmix, or the dessert will turn out cakey instead of fudgy.
  5. Bake: Pour the batter into your prepared pan and smooth the top with the spatula. Bake at 350°F for 25 minutes, until the edges look set but the center still seems just slightly soft. It will firm up as it cools — that’s the secret to the fudgy texture.
  6. Load with candies and dig in: Let the dessert cool for 10–15 minutes, then pile on those candy pieces. Slice it up, serve it warm, and watch the whole pan disappear!

Tips for the Best Results

After making this dessert more times than I can count, here are my tried-and-true tips for getting it absolutely perfect every single time:

  • Don’t overbake — this is the golden rule. The center should look just barely set when you pull the pan from the oven. Remember, it keeps cooking a little as it cools, and that slightly soft center is what makes it fudgy instead of cakey.
  • Use good-quality chocolate. Since chocolate is the star of the show here, reach for a brand you genuinely enjoy eating on its own. Better chocolate in, better dessert out.
  • Bring your eggs to room temperature before you start. They mix into the batter much more smoothly and evenly. Forgot to take them out? Just place them in a bowl of warm water for 5 minutes.
  • Let it cool before adding the candies. If the dessert is piping hot, your beautiful candy topping will melt into a puddle. Ten to fifteen minutes of patience makes all the difference.
  • Line your pan with parchment paper with a little overhang on two sides. You’ll be able to lift the entire dessert out in one piece for clean, picture-perfect slices.

FAQs

Got questions? Here are the ones I hear most often about this rich, fudgy chocolate dessert:

Can I use milk chocolate instead of semi-sweet?

Absolutely! Milk chocolate will give you a sweeter, milder dessert that kids especially love. If you go this route, consider reducing the sugar to 1/2 cup so the final result doesn’t become overly sweet.

How should I store leftovers?

Store any leftovers — if you’re lucky enough to have them! — in an airtight container at room temperature for up to 3 days, or in the refrigerator for up to a week. Warm individual slices in the microwave for 15–20 seconds to bring back that fresh-from-the-oven gooeyness.

Can I make this dessert ahead of time?

Yes! Bake it a day ahead, let it cool completely, and cover the pan tightly with plastic wrap or foil. Wait to add the candy topping until just before serving so it looks fresh and colorful.

Can I freeze it?

You sure can. Let the baked dessert cool completely (without the candy topping), then wrap it tightly in plastic wrap followed by a layer of foil. Freeze for up to 2 months. Thaw overnight in the refrigerator, add fresh candies, and warm the slices before serving.

So the next time a chocolate craving strikes — and trust me, it will — skip the store-bought stuff and whip up this Rich, Fudgy Chocolate Dessert instead. It’s quick, it’s easy, and it’s guaranteed to make any ordinary day feel a little more special. If you give it a try, I’d love to hear how it turned out — leave a comment below and tell me which candies you loaded on top! And don’t forget to watch the recipe come together step by step in our video reel over on the Dessert Recipes Facebook page. Happy baking!

Easy Slow Cooker Garlic Butter Pot Roast Recipe – Tender Beef with Caramelized Onions

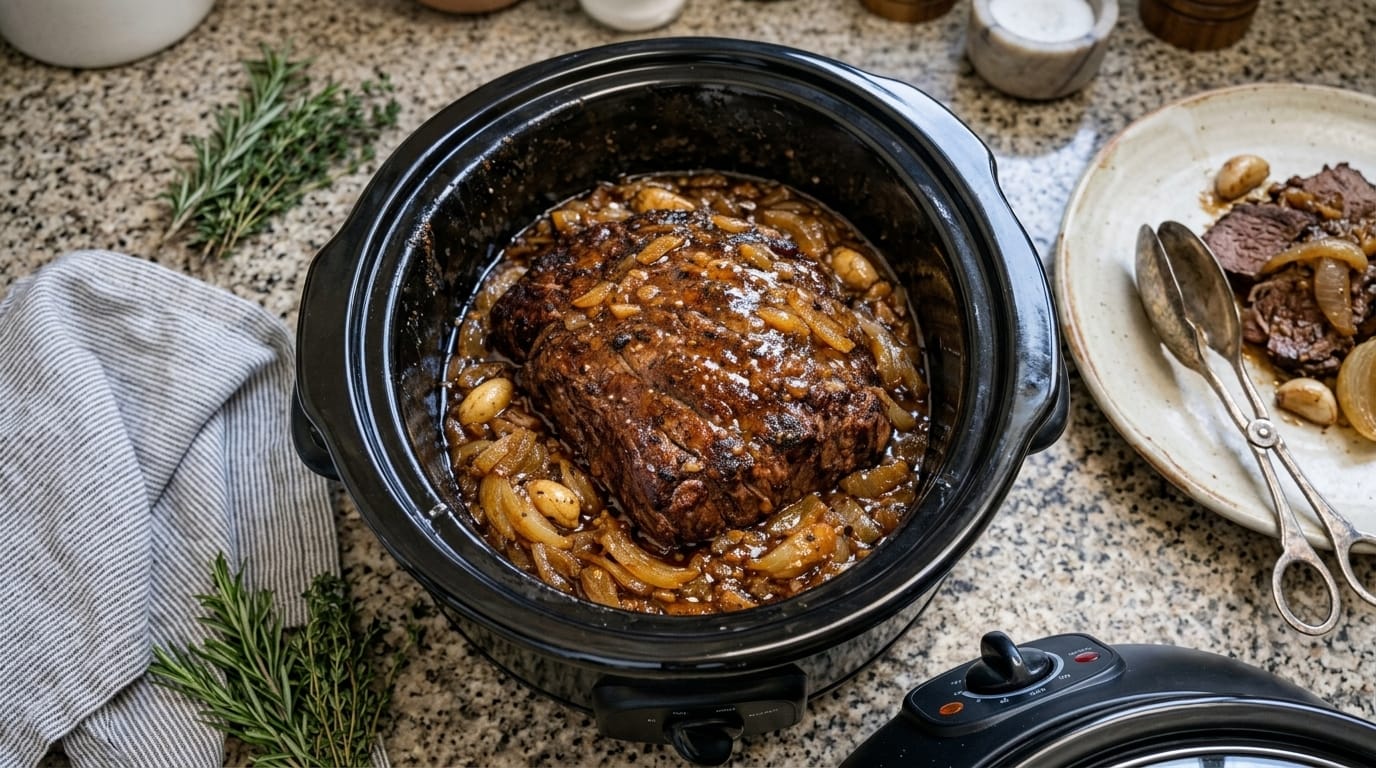
This Slow Cooker Garlic Butter Pot Roast is the ultimate comfort food recipe featuring a juicy, tender beef roast slowly cooked until it practically falls apart. The image shows a beautifully browned beef roast surrounded by caramelized onions and a rich, glossy garlic-infused cooking sauce. The slow cooking process creates incredibly flavorful meat with a deep roasted crust and a savory gravy-like sauce that makes every bite unforgettable.

Perfect for Sunday family dinners, holiday gatherings, or cozy weeknight meals, this recipe transforms a simple cut of beef into a restaurant-quality dish with minimal effort. The combination of garlic, butter, onions, herbs, and slow-cooked beef creates a classic homemade meal that fills your kitchen with an amazing aroma.


Why You’ll Love This Slow Cooker Garlic Butter Pot Roast

There are many reasons this pot roast becomes a family favorite:

  • The beef becomes incredibly tender and juicy
  • The garlic butter sauce adds rich, savory flavor
  • Caramelized onions create natural sweetness
  • The slow cooker does most of the work
  • It pairs perfectly with mashed potatoes and vegetables
  • Leftovers taste even better the next day

The secret to a great pot roast is patience. Cooking the beef slowly allows the tough fibers to break down, creating meat that is tender enough to shred with a fork.


Ingredients

For the Beef Roast

  • 4–5 pounds chuck roast or beef shoulder roast
  • 2 tablespoons olive oil
  • 2 teaspoons kosher salt
  • 1½ teaspoons black pepper
  • 2 teaspoons garlic powder
  • 1 teaspoon onion powder
  • 1 teaspoon smoked paprika
  • 1 teaspoon dried thyme
  • 1 teaspoon dried rosemary

Garlic Butter Sauce

  • 6 tablespoons unsalted butter
  • 8 cloves garlic, minced
  • 2 large yellow onions, sliced
  • 2 cups beef broth
  • 2 tablespoons Worcestershire sauce
  • 1 tablespoon soy sauce
  • 1 tablespoon tomato paste
  • 1 teaspoon Dijon mustard
  • 2 bay leaves
  • 2 sprigs fresh rosemary
  • 3 sprigs fresh thyme

Optional Vegetables

  • 4 large carrots, chopped
  • 1½ pounds baby potatoes
  • 3 celery stalks, sliced
  • Fresh parsley for garnish

How to Make Slow Cooker Garlic Butter Pot Roast

Step 1: Prepare the Roast

Remove the beef roast from the refrigerator about 30 minutes before cooking. Allowing the meat to come closer to room temperature helps it cook more evenly.

Pat the roast completely dry using paper towels.

Season all sides generously with:

  • Salt
  • Black pepper
  • Garlic powder
  • Onion powder
  • Smoked paprika
  • Thyme
  • Rosemary

Make sure the seasoning covers the entire surface because this creates the flavor foundation for the finished roast.


Step 2: Sear the Beef for Maximum Flavor

Heat olive oil in a large skillet over medium-high heat.

Place the seasoned roast into the hot pan.

Sear each side for about:

3–5 minutes per side

until a deep golden-brown crust forms.

This step is extremely important because browning creates rich roasted flavors through caramelization. The slow cooker will make the meat tender, but searing gives it that incredible steakhouse-style taste.

Transfer the browned roast into the slow cooker.


Step 3: Cook the Garlic Butter Onions

Using the same skillet, reduce the heat to medium.

Add butter and allow it to melt.

Add sliced onions and cook for:

5–8 minutes

until they become soft and lightly golden.

Add minced garlic and cook for another:

30 seconds

until fragrant.

The onions absorb the leftover beef flavor from the skillet, creating an incredibly flavorful base for the sauce.


Step 4: Build the Slow Cooker Sauce

Add the onion and garlic butter mixture over the roast.

Pour in:

  • Beef broth
  • Worcestershire sauce
  • Soy sauce
  • Tomato paste
  • Dijon mustard

Add:

  • Bay leaves
  • Fresh rosemary
  • Fresh thyme

The liquid should come about halfway up the roast. The beef will release additional juices as it cooks, creating a rich natural gravy.


Step 5: Slow Cook Until Tender

Cover the slow cooker with the lid.

Cook:

Low Setting:

8–10 hours

or

High Setting:

5–6 hours

The roast is ready when:

  • A fork easily slides into the meat
  • The beef pulls apart easily
  • The sauce becomes rich and flavorful

Avoid opening the slow cooker too often because heat escapes and increases cooking time.


Step 6: Add Vegetables (Optional)

If adding potatoes, carrots, and celery, place them around the roast before cooking.

The vegetables will absorb the garlic butter sauce and become tender and flavorful.

For firmer vegetables, add them halfway through cooking instead.


Step 7: Make the Final Gravy

Once the roast is finished, carefully remove the beef and place it on a serving board.

Let it rest for:

10–15 minutes

before slicing or shredding.

For thicker gravy:

Mix:

  • 2 tablespoons cornstarch
  • 3 tablespoons cold water

Stir into the slow cooker juices.

Cook on high for another:

10–15 minutes

until the sauce thickens.


Serving Suggestions

This garlic butter pot roast is delicious served with classic comfort food sides.

Creamy Mashed Potatoes

The buttery potatoes soak up the rich garlic sauce perfectly.


Roasted Vegetables

Serve with:

  • Green beans
  • Broccoli
  • Carrots
  • Brussels sprouts

for a balanced meal.


Dinner Rolls

Soft bread is perfect for soaking up every drop of the flavorful gravy.


Egg Noodles

The rich sauce turns simple noodles into a delicious complete meal.


Expert Tips for the Best Pot Roast

Choose the Right Cut of Beef

Chuck roast is the best choice because it contains enough marbling and connective tissue to become tender during slow cooking.

Other options:

  • Shoulder roast
  • Bottom round roast
  • Brisket

Always Sear Before Slow Cooking

While you can cook the roast without searing, browning adds a much deeper flavor.

The caramelized crust creates the foundation of the final dish.


Do Not Rush the Cooking Time

Pot roast becomes tender because collagen slowly breaks down during cooking.

If the meat feels tough, it usually needs more time.

Continue cooking until it easily pulls apart.


Let the Meat Rest

Resting allows the juices to redistribute throughout the roast, making every slice more tender and flavorful.


Storage Instructions

Store leftovers in an airtight container with some of the gravy.

Refrigerate for:

3–4 days

The flavor often improves overnight as the beef continues absorbing the sauce.


Freezing Instructions

Allow the roast and gravy to cool completely.

Place in freezer-safe containers.

Freeze for up to:

3 months

Thaw overnight in the refrigerator before reheating.


Reheating Instructions

For best results:

Stovetop:

Heat gently with extra broth or gravy.

Microwave:

Warm in short intervals while covering to prevent drying.


Final Thoughts

This Slow Cooker Garlic Butter Pot Roast is everything a comfort meal should be: tender beef, rich garlic butter flavor, sweet caramelized onions, and a delicious homemade sauce that brings everything together.

With simple ingredients and a slow cooker doing most of the work, this recipe is perfect for busy families who still want a warm, homemade dinner. Whether served for a special occasion or a relaxing weekend meal, this pot roast delivers incredible flavor that everyone will love.