Homemade Chicken Shawarma Wrap (Better Than Takeout)

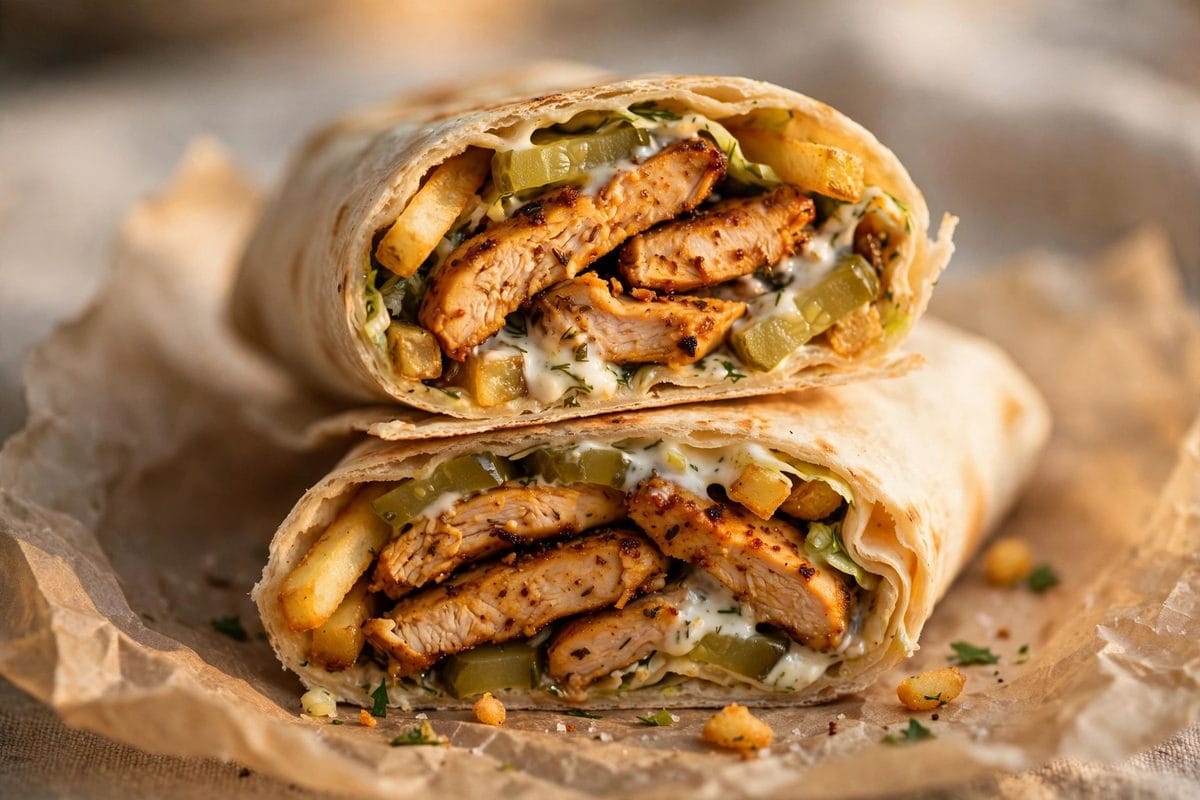
Homemade Chicken Shawarma Wrap with spiced chicken, pickles, tomato and garlic sauce in flatbread

There’s a special kind of joy in unwrapping a warm flatbread stuffed with spiced, seared chicken, cool pickles, juicy tomato, and a generous smear of garlic sauce. This Homemade Chicken Shawarma Wrap is my answer to takeout cravings — all the bold, savory, garlicky goodness of your favorite shawarma spot, made in your own kitchen in about 30 minutes, and honestly? I think it’s better than the restaurant version.

Homemade Chicken Shawarma Wrap with spiced chicken, pickles, tomato and garlic sauce in flatbread

Shawarma is one of those foods I could eat every single week and never get tired of. The magic is in the spice blend — warm cumin, smoky paprika, golden turmeric, and garlic — rubbed into chicken strips with yogurt and lemon, then seared on high heat until the edges get deliciously charred. Wrapped up with pickles for crunch, tomato for freshness, and garlic sauce for that creamy kick, it’s a handheld masterpiece.

Why You’ll Love This Recipe

Here’s what makes these wraps a weeknight hero:

  • Better than takeout. You control the ingredients, the spice level, and the sauce-to-filling ratio. No sad, soggy wraps here.
  • High in protein. A full pound of chicken plus yogurt in the marinade makes this a genuinely filling, protein-packed meal.
  • 30 minutes, one pan. The marinade does the heavy lifting; the cooking is just a quick, hot sear.
  • Authentic shawarma spice blend. Cumin, paprika, turmeric, and garlic powder — simple pantry spices that taste like the real deal.
  • Crowd-friendly. Set out the fillings and let everyone build their own wrap. Perfect for family dinners and casual gatherings.

Ingredients

For the shawarma chicken:

  • 1 lb chicken breast or thighs, cut into strips
  • 2 tsp ground cumin
  • 2 tsp paprika
  • 1 tsp ground turmeric
  • 1 tsp garlic powder
  • 1 tsp salt, plus black pepper to taste
  • 3 tbsp plain yogurt
  • Juice of 1/2 lemon
  • 2 tbsp extra virgin olive oil

For assembling the wraps:

  • 4 large flatbreads or pita breads
  • 1 cup dill pickles, sliced
  • 2 tomatoes, sliced
  • 1/2 cup garlic sauce (store-bought or homemade)
  • Optional: shredded lettuce, red onion, hot sauce

Instructions

  1. Marinate the chicken. In a bowl, toss the chicken strips with cumin, paprika, turmeric, garlic powder, salt, pepper, yogurt, lemon juice, and olive oil. Let it marinate for at least 30 minutes (or up to 4 hours in the fridge — the flavor only gets better).
  2. Sear on high heat. Heat a large skillet or grill pan over high heat until smoking. Add the chicken in a single layer and sear for 8–10 minutes, turning once, until cooked through with charred, caramelized edges. That char is flavor — don’t be shy with the heat.
  3. Warm the flatbreads and assemble. Warm the flatbreads in a dry skillet or directly over a gas flame for a few seconds per side. Spread a generous layer of garlic sauce down the center, pile on the hot chicken, then add pickles and tomato. Wrap tightly, tucking in the sides — and enjoy immediately!

Tips for the Best Results

  • Don’t crowd the pan. Sear the chicken in batches if needed. Crowding steams the meat instead of giving you those crispy, charred edges.
  • High heat is key. Shawarma gets its signature flavor from intense heat. Get the pan properly hot before the chicken goes in.
  • Warm your flatbreads. Cold, stiff flatbread cracks and tears. A quick warm-up makes them soft, pliable, and so much tastier.
  • Make extra garlic sauce. You’ll want it. Trust me. It also makes an amazing dip for fries and roasted vegetables.
  • Slice against the grain. If using chicken breast, slicing the cooked strips thinly against the grain keeps every bite tender.

FAQs

Can I use chicken thighs instead of breast?

Yes — thighs are fantastic here. They’re juicier and more forgiving. Sear them the same way, just make sure they reach 165°F inside.

What is in shawarma spice?

Traditional shawarma spice blends vary, but cumin, paprika, turmeric, and garlic are the core. Some versions add coriander, cinnamon, cardamom, or cloves — feel free to experiment!

Can I grill the chicken instead?

Absolutely. Grilled shawarma chicken is incredible — the open flame adds even more char and smokiness. Grill over high heat for 4–5 minutes per side.

How do I keep the wraps from falling apart?

Don’t overfill, warm the flatbread first, and wrap tightly — fold in the sides, then roll from the bottom. Wrapping in foil or parchment for a minute helps everything set.

This Homemade Chicken Shawarma Wrap is the kind of dinner that gets requested on repeat. If you want to see the sear, the char, and the all-important wrapping technique, check out my video reel. Make a batch this week — your kitchen is about to smell amazing.
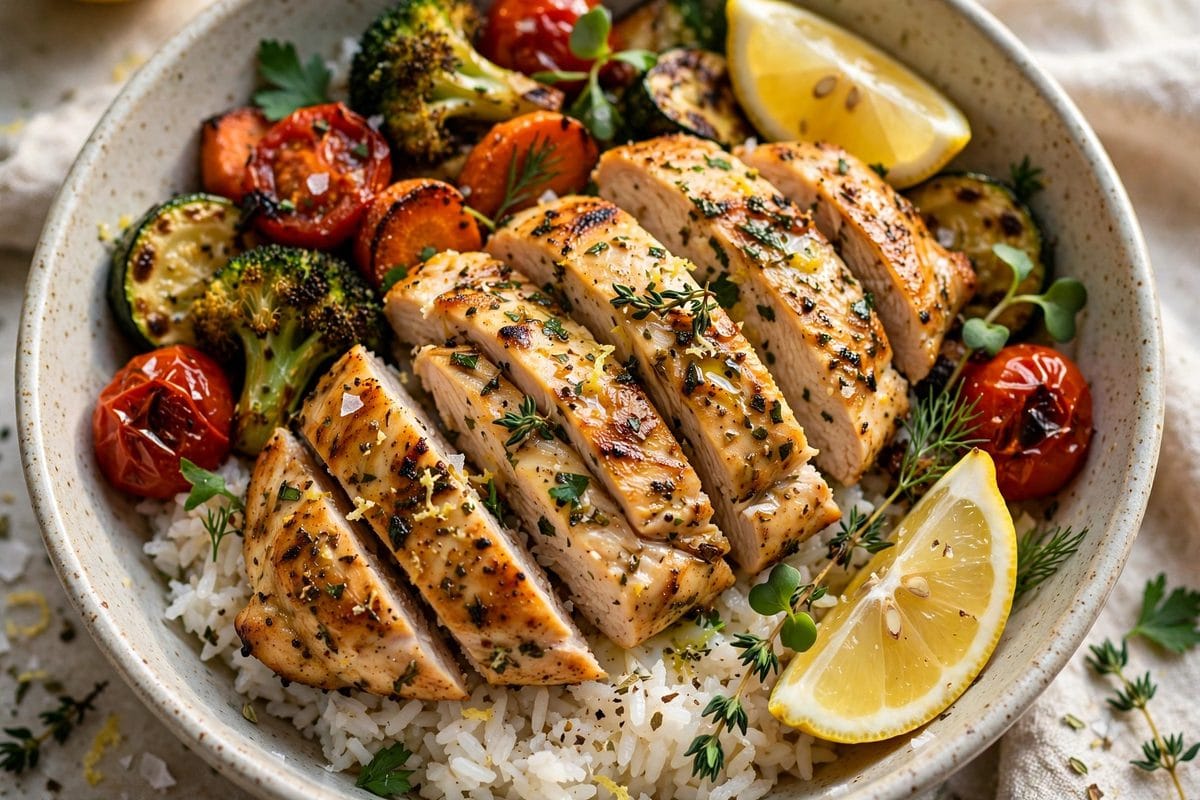
Mediterranean Lemon Chicken Bowl (High-Protein Quinoa Power Bowl)

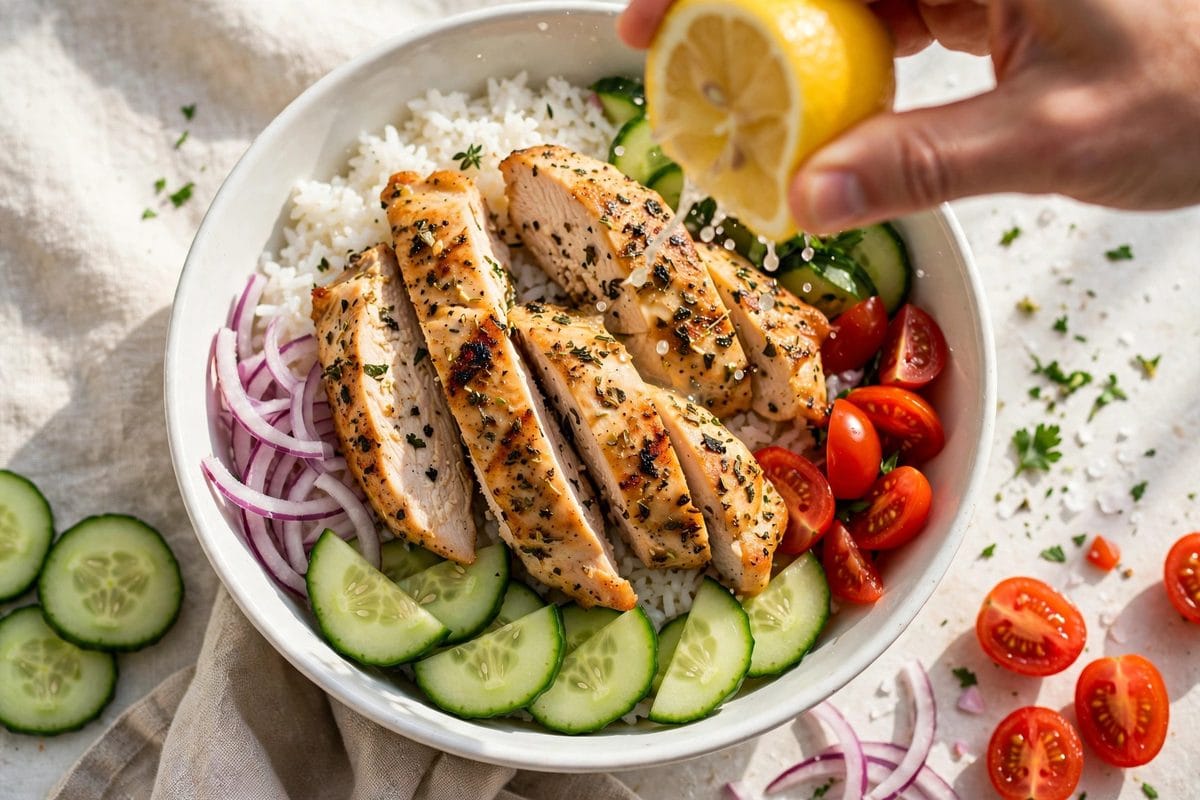
Mediterranean Lemon Chicken Bowl with quinoa, roasted vegetables, hummus and tahini drizzle

If I had to pick one meal that keeps me full, energized, and actually excited about healthy eating, it would be this Mediterranean Lemon Chicken Bowl. Picture this: juicy lemon-herb grilled chicken sliced over a fluffy bed of quinoa, surrounded by sweet roasted zucchini and peppers, with creamy hummus, a nutty tahini drizzle, and fresh parsley on top. It’s a high-protein power bowl that tastes like sunshine and keeps you satisfied for hours.

Mediterranean Lemon Chicken Bowl with quinoa, roasted vegetables, hummus and tahini drizzle

Bowls are my love language when it comes to weeknight dinners. Everything goes into one big, beautiful bowl — no fussy plating, no separate side dishes, just layers of flavor and texture that somehow taste even better together. This one leans fully into Mediterranean flavors: lemon, garlic, oregano, olive oil, plus the creamy one-two punch of hummus and tahini. It’s the kind of meal that makes you feel amazing after eating it.

Why You’ll Love This Recipe

Here’s why this bowl deserves a spot in your weekly rotation:

  • Seriously high in protein. Chicken breast, quinoa, hummus, and tahini team up for a meal that keeps you full for hours — perfect for weight loss or muscle fuel.
  • Meal-prep superstar. Cook the components on Sunday and assemble fresh bowls all week. It reheats beautifully.
  • Bright Mediterranean flavor. Lemon, garlic, and oregano marinate right into the chicken — every bite is zesty and fresh.
  • Completely customizable. Swap quinoa for rice or cauliflower rice, add any roasted veg you love, drizzle generously.
  • One bowl, zero fuss. A complete balanced meal — protein, whole grains, vegetables, healthy fats — in a single bowl.

Ingredients

For the lemon-herb chicken:

  • 2 boneless, skinless chicken breasts
  • Juice of 1 large lemon (about 3 tbsp)
  • 3 tbsp extra virgin olive oil
  • 3 cloves garlic, minced
  • 1 tsp dried oregano
  • Salt and freshly ground black pepper, to taste

For the bowls:

  • 1 cup cooked quinoa (about 1/3 cup dry)
  • 1 zucchini, chopped
  • 1 bell pepper (any color), chopped
  • 1 tbsp olive oil, plus salt and pepper for roasting
  • 3 tbsp hummus
  • Tahini, for drizzling (about 2 tbsp, thinned with a little water and lemon)
  • Fresh parsley, chopped, for garnish

Instructions

  1. Marinate and grill the chicken. Toss the chicken breasts with lemon juice, olive oil, garlic, oregano, salt, and pepper. Let them marinate for at least 15 minutes (30 is even better). Grill over medium-high heat for 6–7 minutes per side, until cooked through (165°F) with beautiful grill marks. Let rest 5 minutes, then slice.
  2. Roast the vegetables. While the chicken grills, toss the zucchini and peppers with olive oil, salt, and pepper. Roast at 425°F (220°C) for 15–18 minutes until tender and caramelized at the edges. (You can also grill them alongside the chicken.)
  3. Build the bowls. Start with a base of fluffy quinoa. Arrange the roasted vegetables and sliced chicken on top. Add a generous dollop of hummus, drizzle with tahini, and shower with fresh parsley. Serve warm and enjoy every single bite.

Tips for the Best Results

  • Don’t skip the rest. Letting the chicken rest for 5 minutes after grilling keeps all the juices inside where they belong.
  • Pound it even. If your chicken breasts are thick on one end, pound them to an even thickness so they cook uniformly.
  • Thin your tahini. Good tahini is thick — whisk it with a spoonful of water and a squeeze of lemon until it’s drizzle-able.
  • Roast extra veg. Make a double batch of roasted zucchini and peppers — they’re fantastic in wraps, salads, and omelets all week.
  • Warm the hummus slightly. A quenelle of room-temperature (not fridge-cold) hummus melts into the warm bowl so much better.

FAQs

Can I use chicken thighs instead of breasts?

Yes! Thighs are juicier and work wonderfully. Grill them 6–8 minutes per side until they reach 165°F inside.

How do I meal prep this bowl?

Cook the quinoa, chicken, and roasted veg, then store in separate containers for up to 4 days. Assemble bowls fresh, adding hummus and tahini after reheating.

Can I make this dairy-free or gluten-free?

It’s naturally both! Just check that your hummus and tahini labels are certified gluten-free if you’re sensitive.

What can I use instead of quinoa?

Brown rice, farro, bulgur, or cauliflower rice all work. Farro and bulgur keep the Mediterranean vibe going strong.

This Mediterranean Lemon Chicken Bowl is proof that healthy food can be the most crave-worthy food on the table. If you want to watch it all come together — the sizzle of the chicken, the building of the bowl — check out my video reel. Your future self will thank you for making this one.

Chicken Kebabs with Tzatziki & Greek Salad (20-Minute High-Protein Dinner)

Chicken Kebabs with Tzatziki and Greek salad, grilled skewers on a platter

Some dinners just make you feel like you’re on vacation, and these 20-Minute Chicken Kebabs with Greek Salad and Tzatziki are exactly that kind of meal. Juicy, charred chicken skewers marinated in yogurt, lemon, and oregano, a pile of crunchy Greek salad, and a big swoosh of cool, garlicky tzatziki — it’s a high-protein Mediterranean dinner that tastes like a Greek island holiday and comes together faster than takeout.

Chicken Kebabs with Tzatziki and Greek salad, grilled skewers on a platter

I started making chicken kebabs at home when I realized how easy they are — and how much better they taste than anything from a restaurant. The secret is the yogurt marinade: it tenderizes the chicken and keeps it incredibly juicy, even if you accidentally overcook it a little (we’ve all been there). Threaded onto skewers and seared until golden with those beautiful charred edges, this is the kind of dinner that makes everyone at the table happy.

Why You’ll Love This Recipe

This plate has everything going for it:

  • High protein, minimal effort. Over 40 grams of protein per serving from the chicken and Greek yogurt, with about 20 minutes of actual cooking.
  • The yogurt marinade is magic. Just 15 minutes in yogurt, lemon, olive oil, and spices gives you the juiciest, most flavorful chicken.
  • Three components, one meal. Kebabs + tzatziki + Greek salad = a complete, balanced dinner with zero side dishes needed.
  • Perfect for meal prep. Grill extra skewers and portion them with salad and tzatziki for grab-and-go lunches all week.
  • Mediterranean diet approved. Lean protein, vegetables, olive oil, and yogurt — it’s a textbook Mediterranean plate.

Ingredients

For the chicken kebabs:

  • 1 lb boneless, skinless chicken breast or thighs, cut into 1-inch cubes
  • 3 tbsp plain Greek yogurt
  • 2 tbsp extra virgin olive oil
  • Juice of 1 lemon
  • 2 tsp dried oregano
  • 1 tsp paprika
  • 2 cloves garlic, minced
  • Salt and freshly ground black pepper, to taste

For the tzatziki:

  • 1 cup plain Greek yogurt
  • 1/2 cucumber, grated and squeezed dry
  • 1 clove garlic, minced
  • 1 tbsp fresh dill, chopped (or 1 tsp dried)
  • Squeeze of lemon juice
  • Salt, to taste

For the Greek salad:

  • 2 tomatoes, chopped
  • 1 cucumber, chopped
  • 1/4 red onion, thinly sliced
  • 1/3 cup kalamata olives
  • 1/3 cup crumbled feta cheese
  • Drizzle of olive oil and a pinch of oregano

Instructions

  1. Marinate the chicken. In a bowl, combine the yogurt, olive oil, lemon juice, oregano, paprika, garlic, salt, and pepper. Add the chicken cubes and toss to coat. Let it marinate for at least 15 minutes (or up to 4 hours in the fridge — the longer, the better).
  2. Thread and cook the kebabs. Thread the marinated chicken onto skewers. Grill over medium-high heat or pan-fry in a hot skillet for 10–12 minutes, turning occasionally, until golden, charred at the edges, and cooked through (165°F internal temperature).
  3. Mix the tzatziki and chop the salad. While the chicken cooks, stir together the yogurt, squeezed-dry cucumber, garlic, dill, lemon, and salt for the tzatziki. Chop the salad ingredients, toss with olives, feta, olive oil, and oregano.
  4. Plate it all up. Arrange the kebabs over or beside the Greek salad, add a generous dollop of tzatziki, and serve with warm pita if you like. High protein, minimal effort — dinner is done!

Tips for the Best Results

  • Don’t skip the yogurt marinade. The lactic acid in yogurt tenderizes the chicken gently without making it mushy — it’s the key to juicy kebabs.
  • Cut chicken evenly. Uniform 1-inch cubes cook at the same rate, so nothing dries out while other pieces catch up.
  • Get the pan or grill hot. High heat gives you that beautiful char and keeps the juices inside. Don’t crowd the skewers.
  • Squeeze the cucumber dry. For tzatziki, wring the grated cucumber in a clean towel — otherwise your sauce turns watery.
  • Soak wooden skewers. If using wooden skewers on the grill, soak them in water for 30 minutes first so they don’t burn.

FAQs

Can I use chicken thighs instead of breast?

Absolutely — thighs are juicier and more forgiving. Use the same marinade and cooking time, just make sure they reach 165°F inside.

How long can I marinate the chicken?

Minimum 15 minutes, but up to 4 hours in the refrigerator gives even better flavor. Don’t go past 24 hours — the yogurt can start to break down the meat’s texture.

Can I make this without skewers?

Yes! Just pan-fry or grill the marinated chicken cubes directly. You’ll miss the fun presentation but keep all the flavor.

How do I store leftovers?

Store kebabs, salad, and tzatziki in separate containers in the fridge for up to 3 days. The kebabs reheat well in a hot skillet or air fryer.

These Chicken Kebabs with Tzatziki and Greek Salad are the kind of dinner that makes healthy eating feel like a treat, not a chore. If you want to see the whole thing come together — the marinade, the sizzle, the plating — check out my video reel. Make it once, and it’ll be in your regular rotation.

Greek Sheet Pan Chicken (Easy One-Pan Mediterranean Dinner)

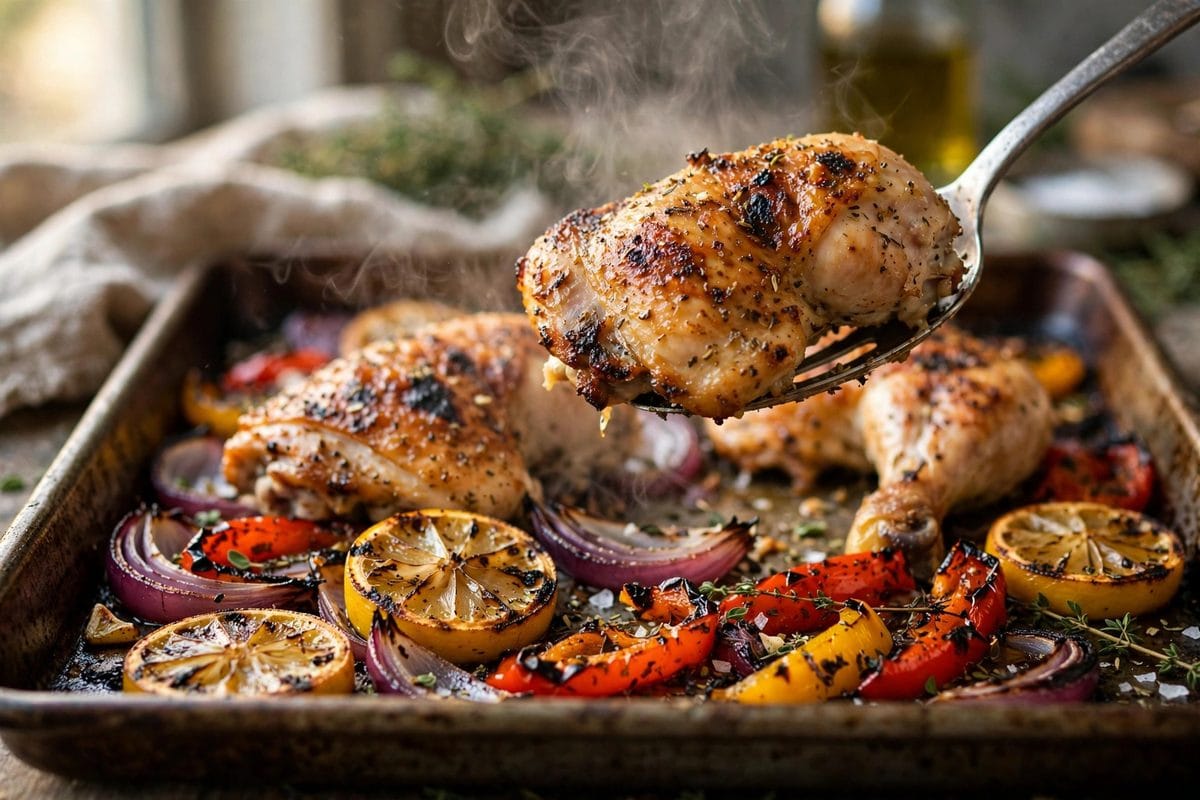
Greek Sheet Pan Chicken with roasted vegetables, lemon wedges and crumbled feta

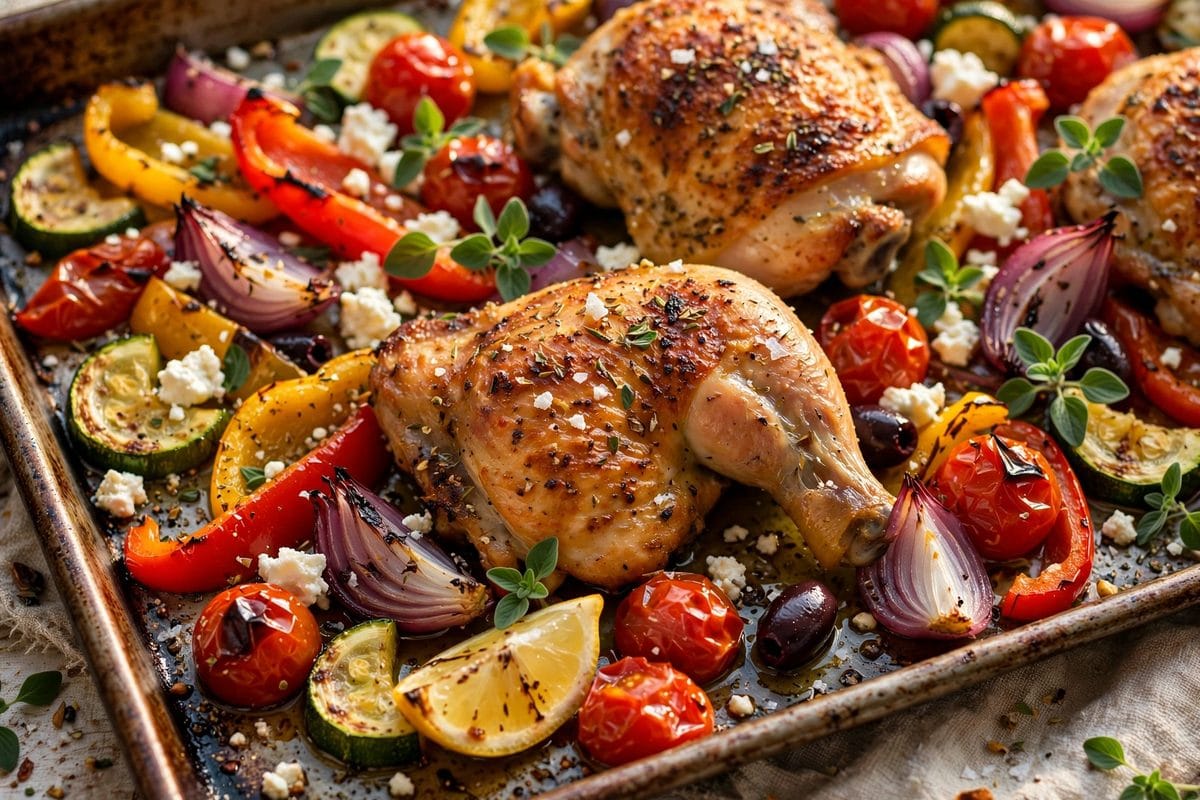
If there’s one dinner I come back to again and again on busy weeknights, it’s this Greek Sheet Pan Chicken. I started making it last year when I wanted all the sunny, bold flavors of the Mediterranean without a pile of dishes to wash afterward, and honestly, it has never let me down. Everything — juicy chicken, sweet roasted peppers, zucchini, blistered cherry tomatoes — cooks together on a single pan, and the kitchen smells like a little Greek taverna while it roasts.

Greek Sheet Pan Chicken with roasted vegetables, lemon wedges and feta

This is the kind of meal that fits the Mediterranean way of eating perfectly: lean protein, loads of vegetables, good olive oil, and bright lemon and oregano. Whether you’re doing the Mediterranean diet or just want a healthy, satisfying dinner with almost no cleanup, this one-pan wonder deserves a permanent spot in your rotation.

Why You’ll Love This Recipe

There are sheet pan dinners, and then there are sheet pan dinners that taste like a vacation. Here’s why this one wins:

  • One pan, zero fuss. Everything roasts together on a single sheet pan. Dinner and cleanup are done in under an hour.
  • Big Mediterranean flavor. Oregano, garlic, lemon, and briny feta turn simple chicken and veggies into something crave-worthy.
  • Healthy and filling. High in protein, packed with vegetables, and naturally gluten-free — right in line with Mediterranean diet principles.
  • Flexible. Use chicken thighs for the juiciest result or breasts if you prefer leaner meat. Swap in whatever vegetables are in your fridge.

Ingredients

You probably have most of this on hand already. Here’s what goes into this Greek sheet pan chicken:

  • 4 chicken thighs (or boneless, skinless chicken breasts)
  • 2 bell peppers, cut into chunks
  • 1 red onion, cut into wedges
  • 1 zucchini, sliced into half-moons
  • 1 cup cherry tomatoes
  • 3 tbsp extra virgin olive oil
  • 2 tsp dried oregano
  • 1 tsp garlic powder
  • Salt and freshly ground black pepper, to taste
  • Lemon wedges, for serving
  • Crumbled feta cheese, for topping
  • Fresh herbs (parsley or dill), optional

Instructions

  1. Toss everything together. Preheat your oven to 400°F (200°C). In a large bowl, toss the chicken and chopped vegetables with the olive oil, oregano, garlic powder, salt, and pepper until everything is evenly coated. I like to really get in there with my hands so every piece gets some of that seasoning.
  2. Spread on the sheet pan and roast. Spread everything out in a single layer on a rimmed sheet pan — give the pieces a little breathing room so they roast instead of steam. Roast at 400°F for 30–35 minutes, until the chicken is cooked through (165°F internal temperature) and the vegetables are tender with caramelized edges. Those blistered cherry tomatoes are little flavor bombs, so don’t be tempted to pull the pan early.
  3. Finish with lemon, feta, and herbs. Squeeze fresh lemon wedges all over the hot pan, then scatter over the crumbled feta and fresh herbs. The feta softens slightly from the heat and mixes with the pan juices into the most incredible sauce. Serve straight from the pan — done!

Tips for the Best Results

  • Don’t crowd the pan. If everything is piled up, the vegetables steam instead of getting those delicious caramelized edges. Use two pans if needed.
  • Cut veggies to similar sizes. Even pieces cook evenly, so you won’t end up with raw peppers and mushy zucchini.
  • Chicken thighs vs. breasts. Thighs stay juicier and are more forgiving if you overcook them slightly; breasts are leaner. Both are delicious here.
  • Add the feta at the end. Feta goes on after roasting so it stays creamy and tangy instead of drying out in the oven.
  • Meal prep friendly. Divide leftovers into containers with some rice or quinoa — they reheat beautifully for lunches.

FAQs

Can I use chicken breasts instead of thighs?

Absolutely! Boneless, skinless chicken breasts work great. Just keep an eye on them — breasts can dry out faster, so start checking for doneness around the 28-minute mark.

What should I serve with Greek sheet pan chicken?

It’s a complete meal on its own, but it’s lovely with warm pita bread, a scoop of rice or quinoa, or a simple Greek salad on the side.

Can I prep this ahead of time?

Yes. Toss the chicken and vegetables with the oil and seasonings in the morning, cover, and refrigerate. When dinner time comes, just spread it on the pan and roast.

Is this recipe good for the Mediterranean diet?

It’s a perfect fit — lean protein, abundant vegetables, extra virgin olive oil, lemon, and herbs are all staples of the Mediterranean diet.

This Greek Sheet Pan Chicken is proof that the simplest dinners are often the best ones. If you want to see it all come together in action, check out my video reel — you can watch the whole one-pan process from toss to roast to that final sprinkle of feta. Make it once and I promise it’ll be in your weekly rotation.

Easy Slow Cooker Garlic Butter Pot Roast Recipe – Tender Beef with Caramelized Onions

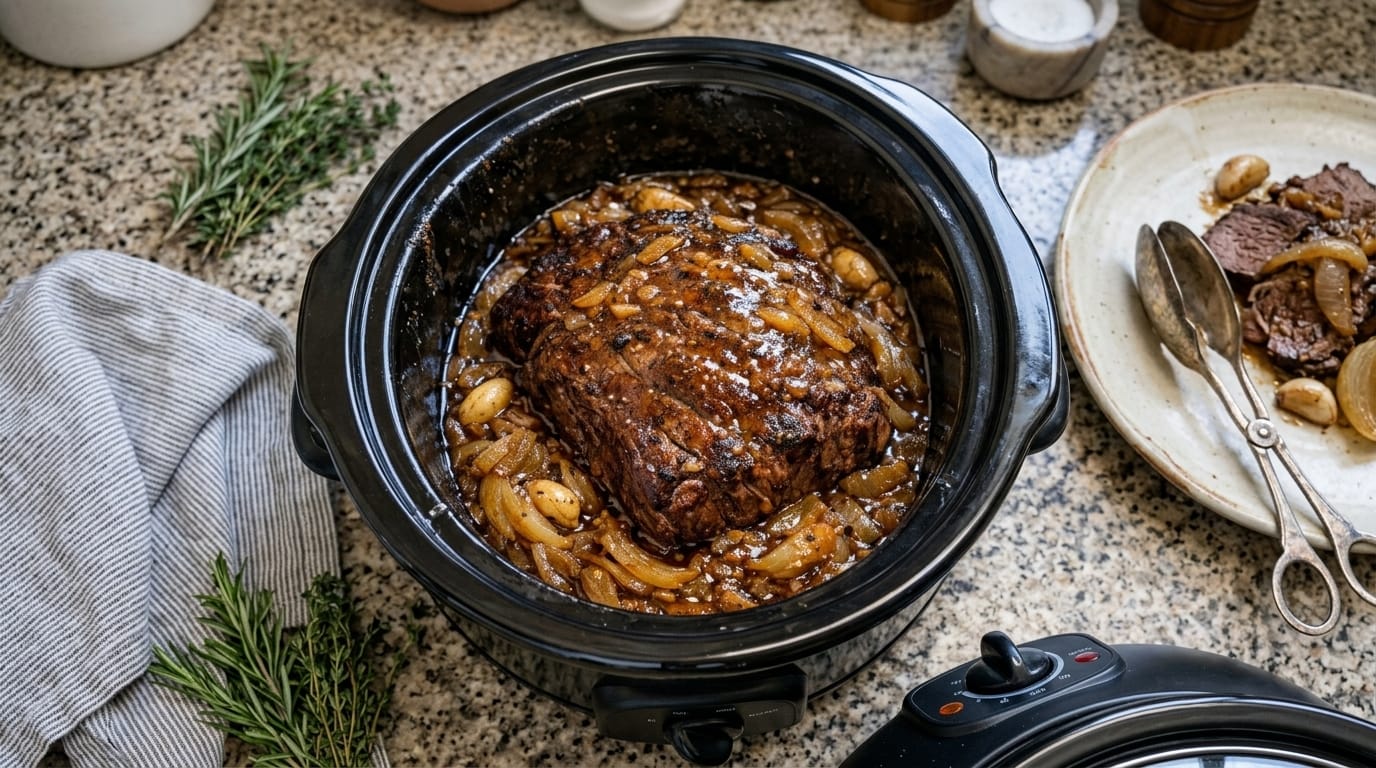
This Slow Cooker Garlic Butter Pot Roast is the ultimate comfort food recipe featuring a juicy, tender beef roast slowly cooked until it practically falls apart. The image shows a beautifully browned beef roast surrounded by caramelized onions and a rich, glossy garlic-infused cooking sauce. The slow cooking process creates incredibly flavorful meat with a deep roasted crust and a savory gravy-like sauce that makes every bite unforgettable.

Perfect for Sunday family dinners, holiday gatherings, or cozy weeknight meals, this recipe transforms a simple cut of beef into a restaurant-quality dish with minimal effort. The combination of garlic, butter, onions, herbs, and slow-cooked beef creates a classic homemade meal that fills your kitchen with an amazing aroma.


Why You’ll Love This Slow Cooker Garlic Butter Pot Roast

There are many reasons this pot roast becomes a family favorite:

  • The beef becomes incredibly tender and juicy
  • The garlic butter sauce adds rich, savory flavor
  • Caramelized onions create natural sweetness
  • The slow cooker does most of the work
  • It pairs perfectly with mashed potatoes and vegetables
  • Leftovers taste even better the next day

The secret to a great pot roast is patience. Cooking the beef slowly allows the tough fibers to break down, creating meat that is tender enough to shred with a fork.


Ingredients

For the Beef Roast

  • 4–5 pounds chuck roast or beef shoulder roast
  • 2 tablespoons olive oil
  • 2 teaspoons kosher salt
  • 1½ teaspoons black pepper
  • 2 teaspoons garlic powder
  • 1 teaspoon onion powder
  • 1 teaspoon smoked paprika
  • 1 teaspoon dried thyme
  • 1 teaspoon dried rosemary

Garlic Butter Sauce

  • 6 tablespoons unsalted butter
  • 8 cloves garlic, minced
  • 2 large yellow onions, sliced
  • 2 cups beef broth
  • 2 tablespoons Worcestershire sauce
  • 1 tablespoon soy sauce
  • 1 tablespoon tomato paste
  • 1 teaspoon Dijon mustard
  • 2 bay leaves
  • 2 sprigs fresh rosemary
  • 3 sprigs fresh thyme

Optional Vegetables

  • 4 large carrots, chopped
  • 1½ pounds baby potatoes
  • 3 celery stalks, sliced
  • Fresh parsley for garnish

How to Make Slow Cooker Garlic Butter Pot Roast

Step 1: Prepare the Roast

Remove the beef roast from the refrigerator about 30 minutes before cooking. Allowing the meat to come closer to room temperature helps it cook more evenly.

Pat the roast completely dry using paper towels.

Season all sides generously with:

  • Salt
  • Black pepper
  • Garlic powder
  • Onion powder
  • Smoked paprika
  • Thyme
  • Rosemary

Make sure the seasoning covers the entire surface because this creates the flavor foundation for the finished roast.


Step 2: Sear the Beef for Maximum Flavor

Heat olive oil in a large skillet over medium-high heat.

Place the seasoned roast into the hot pan.

Sear each side for about:

3–5 minutes per side

until a deep golden-brown crust forms.

This step is extremely important because browning creates rich roasted flavors through caramelization. The slow cooker will make the meat tender, but searing gives it that incredible steakhouse-style taste.

Transfer the browned roast into the slow cooker.


Step 3: Cook the Garlic Butter Onions

Using the same skillet, reduce the heat to medium.

Add butter and allow it to melt.

Add sliced onions and cook for:

5–8 minutes

until they become soft and lightly golden.

Add minced garlic and cook for another:

30 seconds

until fragrant.

The onions absorb the leftover beef flavor from the skillet, creating an incredibly flavorful base for the sauce.


Step 4: Build the Slow Cooker Sauce

Add the onion and garlic butter mixture over the roast.

Pour in:

  • Beef broth
  • Worcestershire sauce
  • Soy sauce
  • Tomato paste
  • Dijon mustard

Add:

  • Bay leaves
  • Fresh rosemary
  • Fresh thyme

The liquid should come about halfway up the roast. The beef will release additional juices as it cooks, creating a rich natural gravy.


Step 5: Slow Cook Until Tender

Cover the slow cooker with the lid.

Cook:

Low Setting:

8–10 hours

or

High Setting:

5–6 hours

The roast is ready when:

  • A fork easily slides into the meat
  • The beef pulls apart easily
  • The sauce becomes rich and flavorful

Avoid opening the slow cooker too often because heat escapes and increases cooking time.


Step 6: Add Vegetables (Optional)

If adding potatoes, carrots, and celery, place them around the roast before cooking.

The vegetables will absorb the garlic butter sauce and become tender and flavorful.

For firmer vegetables, add them halfway through cooking instead.


Step 7: Make the Final Gravy

Once the roast is finished, carefully remove the beef and place it on a serving board.

Let it rest for:

10–15 minutes

before slicing or shredding.

For thicker gravy:

Mix:

  • 2 tablespoons cornstarch
  • 3 tablespoons cold water

Stir into the slow cooker juices.

Cook on high for another:

10–15 minutes

until the sauce thickens.


Serving Suggestions

This garlic butter pot roast is delicious served with classic comfort food sides.

Creamy Mashed Potatoes

The buttery potatoes soak up the rich garlic sauce perfectly.


Roasted Vegetables

Serve with:

  • Green beans
  • Broccoli
  • Carrots
  • Brussels sprouts

for a balanced meal.


Dinner Rolls

Soft bread is perfect for soaking up every drop of the flavorful gravy.


Egg Noodles

The rich sauce turns simple noodles into a delicious complete meal.


Expert Tips for the Best Pot Roast

Choose the Right Cut of Beef

Chuck roast is the best choice because it contains enough marbling and connective tissue to become tender during slow cooking.

Other options:

  • Shoulder roast
  • Bottom round roast
  • Brisket

Always Sear Before Slow Cooking

While you can cook the roast without searing, browning adds a much deeper flavor.

The caramelized crust creates the foundation of the final dish.


Do Not Rush the Cooking Time

Pot roast becomes tender because collagen slowly breaks down during cooking.

If the meat feels tough, it usually needs more time.

Continue cooking until it easily pulls apart.


Let the Meat Rest

Resting allows the juices to redistribute throughout the roast, making every slice more tender and flavorful.


Storage Instructions

Store leftovers in an airtight container with some of the gravy.

Refrigerate for:

3–4 days

The flavor often improves overnight as the beef continues absorbing the sauce.


Freezing Instructions

Allow the roast and gravy to cool completely.

Place in freezer-safe containers.

Freeze for up to:

3 months

Thaw overnight in the refrigerator before reheating.


Reheating Instructions

For best results:

Stovetop:

Heat gently with extra broth or gravy.

Microwave:

Warm in short intervals while covering to prevent drying.


Final Thoughts

This Slow Cooker Garlic Butter Pot Roast is everything a comfort meal should be: tender beef, rich garlic butter flavor, sweet caramelized onions, and a delicious homemade sauce that brings everything together.

With simple ingredients and a slow cooker doing most of the work, this recipe is perfect for busy families who still want a warm, homemade dinner. Whether served for a special occasion or a relaxing weekend meal, this pot roast delivers incredible flavor that everyone will love.

Slow Cooker Creamy Mushroom Steak – Tender Beef with Garlic Mushroom Gravy

There is nothing more comforting than a slow-cooked steak dinner covered in a rich, creamy mushroom gravy. This Slow Cooker Creamy Mushroom Steak transforms simple cuts of beef into a restaurant-style meal with incredibly tender meat, savory mushrooms, caramelized onions, and a silky sauce packed with deep flavor.

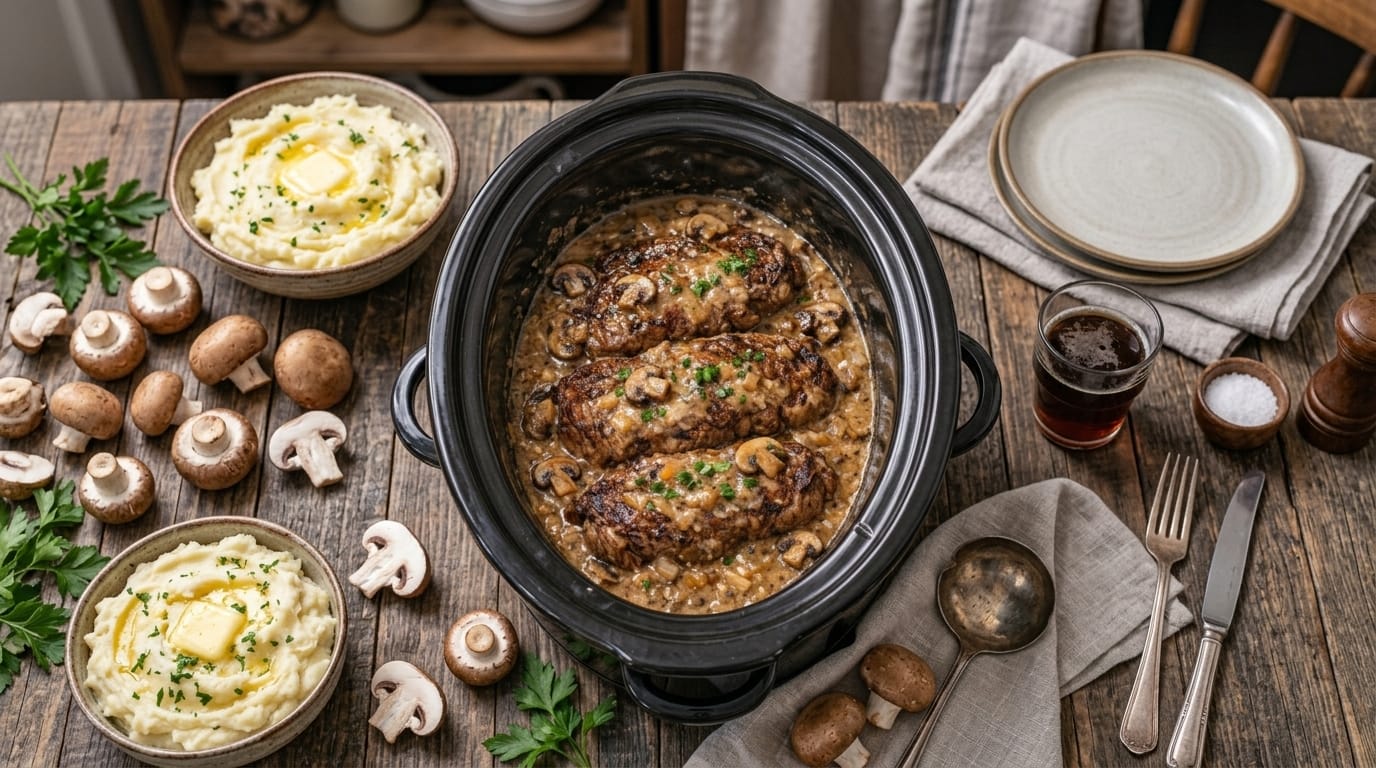
The image shows beautifully browned steak pieces slow-cooked in a creamy mushroom sauce with herbs and onions. The beef has a delicious seared crust while the surrounding gravy is thick, flavorful, and filled with earthy mushrooms. This is the perfect cozy dinner recipe for busy weeknights, Sunday family meals, or any time you want a hearty comfort food dish with minimal effort.

The slow cooker allows the beef to gently simmer for hours, breaking down the fibers and creating tender, juicy bites that practically melt in your mouth.


Why You’ll Love This Slow Cooker Creamy Mushroom Steak

This recipe is a favorite because it combines classic steakhouse flavors with the convenience of slow cooking.

You’ll love this dish because:

  • The beef becomes incredibly tender
  • The mushroom gravy is rich and creamy
  • Simple ingredients create amazing flavor
  • The slow cooker does most of the work
  • It pairs perfectly with potatoes, rice, or noodles
  • It makes excellent leftovers

The combination of garlic, mushrooms, onions, and slow-cooked beef creates a comforting meal that feels homemade and satisfying.


Ingredients

For the Steak

  • 2½–3 pounds beef steak (sirloin, chuck steak, round steak, or stew-style beef)
  • 2 tablespoons olive oil
  • 2 teaspoons salt
  • 1 teaspoon black pepper
  • 2 teaspoons garlic powder
  • 1 teaspoon onion powder
  • 1 teaspoon smoked paprika
  • 2 tablespoons all-purpose flour (for light coating)

For the Creamy Mushroom Gravy

  • 16 ounces fresh mushrooms, sliced
  • 1 large yellow onion, thinly sliced
  • 5 cloves garlic, minced
  • 3 cups beef broth
  • 1 tablespoon Worcestershire sauce
  • 1 tablespoon soy sauce
  • 1 teaspoon Dijon mustard
  • 1 teaspoon dried thyme
  • 1 teaspoon dried parsley
  • ½ teaspoon paprika
  • 1 cup heavy cream
  • 4 ounces cream cheese, softened
  • 2 tablespoons butter

Optional Garnish

  • Fresh parsley
  • Fresh thyme
  • Cracked black pepper

How to Make Slow Cooker Creamy Mushroom Steak

1. Prepare the Beef

Start by preparing the steak pieces.

Pat the beef dry with paper towels. Removing excess moisture helps the meat brown properly and creates better flavor.

Season the beef with:

  • Salt
  • Black pepper
  • Garlic powder
  • Onion powder
  • Smoked paprika

Lightly coat the steak pieces with flour. This helps create a beautiful crust during searing and also helps naturally thicken the gravy later.


2. Sear the Steak for Maximum Flavor

Heat olive oil in a large skillet over medium-high heat.

Add the seasoned steak pieces in a single layer.

Sear for:

2–3 minutes per side

until browned.

You do not need to cook the steak completely at this stage. The goal is only to create a flavorful golden crust.

Searing locks in rich roasted flavors that make the final dish taste much more complex.

Transfer the browned steak into the slow cooker.


3. Cook the Mushrooms and Onions

Using the same skillet, add butter.

Add sliced onions and mushrooms.

Cook for:

5–7 minutes

until the mushrooms soften and the onions begin caramelizing.

Add minced garlic and cook for another:

30 seconds

until fragrant.

Cooking the mushrooms before slow cooking enhances their earthy flavor and prevents them from becoming watery.

Transfer the mushroom mixture into the slow cooker with the beef.


4. Create the Gravy Base

Add the following ingredients:

  • Beef broth
  • Worcestershire sauce
  • Soy sauce
  • Dijon mustard
  • Thyme
  • Parsley
  • Paprika

Stir everything together gently.

The liquid should surround the steak pieces and allow the flavors to slowly blend together.


5. Slow Cook Until Tender

Cover the slow cooker with the lid.

Cook:

Low Heat:

6–8 hours

or

High Heat:

3–4 hours

The steak is ready when it becomes fork tender and easily pulls apart.

Slow cooking allows the beef to absorb all the flavors from the mushroom gravy while becoming incredibly soft.


6. Make the Creamy Mushroom Sauce

About 20–30 minutes before serving, prepare the creamy finish.

Add:

  • Heavy cream
  • Softened cream cheese

Stir gently until the cream cheese melts completely into the gravy.

The sauce will become thick, smooth, and luxurious.

Allow the slow cooker to continue cooking uncovered for about 15–20 minutes if you want a thicker gravy.


7. Serve the Creamy Mushroom Steak

Once finished, garnish with fresh parsley and cracked black pepper.

Serve the tender steak pieces generously covered with creamy mushroom gravy.

Every bite should have:

  • Juicy beef
  • Earthy mushrooms
  • Sweet caramelized onions
  • Creamy garlic sauce

Best Side Dishes for Creamy Mushroom Steak

This dish pairs beautifully with many classic comfort food sides.

Creamy Mashed Potatoes

Mashed potatoes are one of the best choices because they soak up the rich mushroom gravy perfectly.


Buttered Egg Noodles

The creamy sauce coats noodles beautifully, creating a comforting steak stroganoff-style meal.


Steamed Rice

Rice absorbs the flavorful gravy and makes this a simple complete dinner.


Roasted Vegetables

Balance the richness with:

  • Green beans
  • Broccoli
  • Carrots
  • Brussels sprouts

Tips for the Best Slow Cooker Creamy Mushroom Steak

Choose the Right Beef Cut

For the most tender results, use cuts that benefit from slow cooking.

Best options:

  • Chuck steak
  • Round steak
  • Sirloin steak
  • Beef stew meat

These cuts become tender after several hours of gentle cooking.


Do Not Skip Searing

Searing adds a deep savory flavor that cannot be achieved by slow cooking alone.

The browned crust creates extra richness in the final gravy.


Use Fresh Mushrooms

Fresh mushrooms provide better texture and flavor than canned mushrooms.

Good choices include:

  • Baby bella mushrooms
  • Cremini mushrooms
  • White button mushrooms

Avoid Adding Cream Too Early

Dairy products can separate during long cooking times.

Adding cream and cream cheese near the end keeps the sauce smooth and creamy.


Adjust the Gravy Thickness

For thicker gravy:

Mix:

  • 1 tablespoon cornstarch
  • 2 tablespoons water

Add near the end and cook until thickened.

For thinner gravy:

Add a little extra beef broth.


Storage Instructions

Store leftover creamy mushroom steak in an airtight container.

Refrigerate for:

3–4 days

The flavors often become even better the next day.


Freezing Instructions

This recipe freezes well.

Allow it to cool completely, then store in freezer-safe containers.

Freeze for up to:

3 months

Thaw overnight in the refrigerator before reheating.


How to Reheat

For best results:

Stovetop

Warm gently over medium-low heat with a splash of broth or cream.

Microwave

Heat in short intervals, stirring occasionally.

Avoid overheating because creamy sauces can separate.


Final Thoughts

This Slow Cooker Creamy Mushroom Steak is the perfect example of how simple ingredients can create an unforgettable meal. Tender beef, buttery mushrooms, caramelized onions, and creamy garlic gravy come together to create a comforting dish that tastes like it came from a cozy restaurant kitchen.

Whether you serve it for a family dinner, holiday meal, or a relaxing weekend feast, this slow cooker steak recipe delivers incredible flavor with very little effort. It is the kind of recipe everyone remembers and asks you to make again.

Slow Cooker Garlic Onion Pot Roast – Tender, Juicy Beef with Rich Caramelized Onion Gravy

There is nothing more comforting than a classic Slow Cooker Garlic Onion Pot Roast slowly cooking all day until the beef becomes incredibly tender, juicy, and full of deep savory flavor. This recipe creates the perfect fall-apart roast with a rich garlic-infused onion gravy that coats every bite.

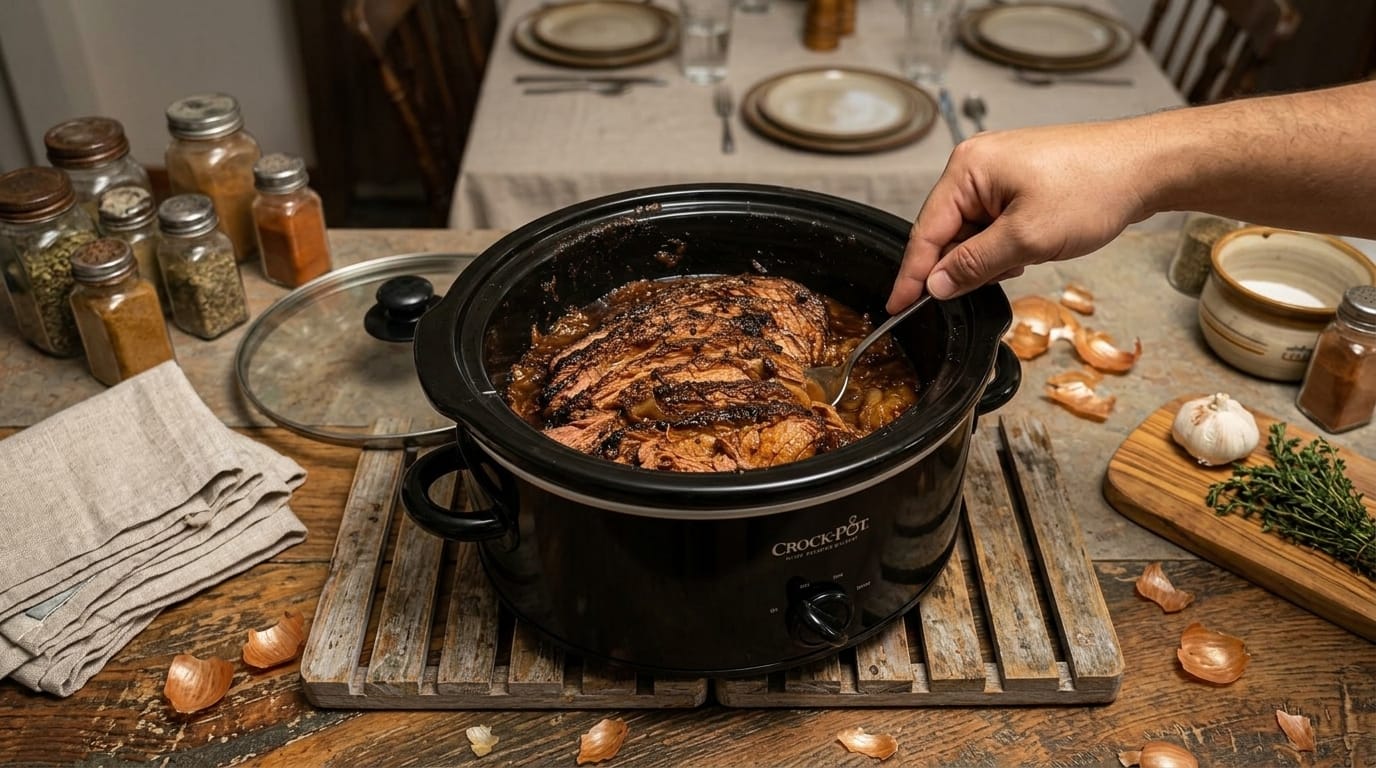
The image shows a beautifully slow-cooked beef roast sitting in a crockpot, surrounded by a dark, flavorful sauce and caramelized onions. The outside has a deep roasted crust while the inside is tender enough to pull apart with a fork. This is the kind of meal that fills your home with an amazing aroma and brings everyone to the dinner table.

Perfect for Sunday dinners, family gatherings, holidays, or an easy weeknight meal, this slow cooker pot roast requires simple ingredients but delivers restaurant-quality comfort food.


Why You’ll Love This Slow Cooker Garlic Onion Pot Roast

This recipe is a true comfort food classic because it combines simple preparation with incredible flavor.

You’ll love this pot roast because:

  • The beef becomes melt-in-your-mouth tender
  • Garlic and onions create a rich savory flavor
  • The slow cooker does all the hard work
  • The gravy is naturally flavorful and delicious
  • It makes amazing leftovers
  • It pairs perfectly with mashed potatoes, vegetables, or crusty bread

The secret to great pot roast is patience. Cooking the beef slowly allows the tough connective tissues to break down, creating a juicy roast with incredible texture.


Ingredients

For the Pot Roast

  • 4–5 pounds beef chuck roast
  • 2 tablespoons olive oil
  • 2 teaspoons kosher salt
  • 1 teaspoon black pepper
  • 2 teaspoons garlic powder
  • 1 teaspoon smoked paprika
  • 1 teaspoon onion powder

For the Garlic Onion Gravy

  • 3 large yellow onions, sliced
  • 8 cloves garlic, minced
  • 2 cups beef broth
  • 1 cup red wine (optional, can replace with extra broth)
  • 3 tablespoons Worcestershire sauce
  • 2 tablespoons tomato paste
  • 2 tablespoons butter
  • 2 tablespoons all-purpose flour (optional for thickening)
  • 3 sprigs fresh rosemary
  • 4 sprigs fresh thyme
  • 2 bay leaves

Optional Vegetables

  • 4 large carrots, chopped
  • 1½ pounds baby potatoes
  • 3 celery stalks, chopped
  • Fresh parsley for garnish

How to Make Slow Cooker Garlic Onion Pot Roast

1. Prepare the Beef Roast

Remove the chuck roast from the refrigerator about 30 minutes before cooking.

Pat the beef dry with paper towels.

Drying the surface helps create a beautiful crust when searing.

Season all sides generously with:

  • Salt
  • Black pepper
  • Garlic powder
  • Onion powder
  • Smoked paprika

Make sure the seasoning covers the entire roast because this creates the foundation of flavor.


2. Sear the Roast for Extra Flavor

Heat olive oil in a large skillet over medium-high heat.

Once hot, place the roast into the pan.

Sear for:

3–5 minutes per side

until a deep golden-brown crust forms.

Do not skip this step.

Searing creates caramelized flavors through the Maillard reaction, which gives the final pot roast a much richer taste.

After browning, transfer the roast to the slow cooker.


3. Cook the Garlic and Onions

Using the same skillet, add butter.

Add sliced onions and cook for:

5–7 minutes

until they begin to soften and turn golden.

Add minced garlic and cook for another:

30 seconds

until fragrant.

The onions slowly release sweetness as they cook, creating the rich flavor base for the gravy.


4. Build the Slow Cooker Base

Place the onion and garlic mixture into the slow cooker around the roast.

Add:

  • Beef broth
  • Red wine
  • Worcestershire sauce
  • Tomato paste
  • Rosemary
  • Thyme
  • Bay leaves

The liquid should come about halfway up the roast.

The beef will release additional juices as it cooks, creating a flavorful natural gravy.


5. Add Vegetables

If using vegetables, arrange them around the roast.

Add:

  • Carrots
  • Potatoes
  • Celery

Keeping the vegetables around the roast allows them to absorb the delicious garlic onion sauce while maintaining their texture.


6. Slow Cook Until Tender

Cover the slow cooker with the lid.

Cook:

Low Setting:

8–10 hours

or

High Setting:

5–6 hours

The roast is ready when it easily pulls apart with a fork.

Avoid cutting into the roast too early because resting helps keep the juices inside the meat.


7. Make the Rich Onion Gravy

Remove the cooked roast carefully and place it on a serving board.

Remove the herb stems and bay leaves from the slow cooker.

For a thicker gravy:

  1. Mix 2 tablespoons flour with 3 tablespoons water.
  2. Stir into the slow cooker juices.
  3. Cook on high for 10–15 minutes until thickened.

Alternatively, blend some of the cooked onions into the liquid for a naturally thick and creamy gravy.


8. Rest and Serve

Allow the roast to rest for:

10–15 minutes

before slicing or shredding.

Spoon the garlic onion gravy generously over the beef.

Garnish with fresh parsley for a bright finishing touch.


What to Serve with Garlic Onion Pot Roast

This hearty roast pairs beautifully with classic comfort sides.

Creamy Mashed Potatoes

The rich gravy soaking into buttery mashed potatoes is a perfect combination.


Roasted Vegetables

Serve with:

  • Green beans
  • Brussels sprouts
  • Roasted carrots
  • Asparagus

for a balanced meal.


Crusty Bread

Fresh bread is perfect for soaking up every drop of the flavorful onion gravy.


Rice or Egg Noodles

The tender beef and gravy also work wonderfully over:

  • White rice
  • Buttered noodles
  • Egg noodles

Tips for the Best Slow Cooker Pot Roast

Choose the Right Cut of Beef

Chuck roast is the best choice because it contains enough fat and connective tissue to become incredibly tender during slow cooking.

Other options:

  • Beef shoulder roast
  • Bottom round roast
  • Brisket

Do Not Skip Searing

Although optional, searing adds deep roasted flavor and creates a better final result.


Cook Low and Slow

The longer cooking time allows collagen to break down, creating a soft texture.

Avoid rushing the cooking process.


Use Fresh Garlic

Fresh garlic creates a stronger, richer flavor compared to garlic powder alone.


Let the Roast Rest

Resting allows the juices to redistribute, keeping the meat moist and flavorful.


Storage Instructions

Store leftover pot roast in an airtight container.

Refrigerate for:

3–4 days

The flavor often becomes even better the next day because the beef continues absorbing the gravy.


Freezing Instructions

Pot roast freezes very well.

Allow it to cool completely, then store:

  • In freezer-safe containers
  • With plenty of gravy

Freeze for up to:

3 months

Thaw overnight in the refrigerator before reheating.


How to Reheat

For best results:

Stovetop:

Heat gently in a saucepan with extra gravy.

Oven:

Cover and warm at:

325°F (160°C) for 20–30 minutes

Microwave:

Heat in short intervals while covered.


Final Thoughts

This Slow Cooker Garlic Onion Pot Roast is the ultimate comfort meal. With tender beef, sweet caramelized onions, fresh herbs, and a rich homemade gravy, every bite delivers deep, slow-cooked flavor.

It is a recipe made for sharing — perfect for cozy family dinners, special occasions, and weekends when you want a meal that feels homemade and satisfying. The slow cooker transforms simple ingredients into a dish that tastes like it has been prepared all day with love.

Cheesy Garlic Mashed Potato Muffins – Crispy Golden Potato Cups with Cheese & Herbs

These Cheesy Garlic Mashed Potato Muffins are the perfect way to turn simple mashed potatoes into a delicious, golden, bite-sized comfort food. Crispy around the edges, creamy and cheesy inside, and packed with garlic, herbs, and melted cheese, these potato muffins are a family favorite for breakfast, brunch, side dishes, or even a fun appetizer.

The image shows beautifully baked potato muffins with a golden crust, crispy cheese topping, and a soft fluffy center. They are made in a muffin tin, giving each portion the perfect shape with lightly browned edges and a rich cheesy finish.

Whether you have leftover mashed potatoes or want to prepare a fresh batch, this recipe creates an irresistible dish that everyone will love.


Why You’ll Love These Cheesy Garlic Mashed Potato Muffins

These potato muffins are the perfect combination of creamy and crispy textures.

You’ll love this recipe because:

  • It transforms everyday mashed potatoes into something special
  • The outside becomes golden and crispy while the inside stays soft
  • It is easy to prepare with simple ingredients
  • It works perfectly for meal prep
  • It is great for holidays and family gatherings
  • Kids and adults both love the cheesy flavor

They are also incredibly versatile. Serve them as a side with roasted meats, enjoy them as a savory breakfast, or serve them as party snacks.


Ingredients

For the Potato Mixture

  • 4 cups mashed potatoes (prepared or leftover)
  • 2 large eggs
  • 1 cup shredded cheddar cheese
  • ½ cup shredded mozzarella cheese
  • ½ cup grated Parmesan cheese
  • 4 tablespoons butter, melted
  • ½ cup sour cream
  • 3 cloves garlic, minced
  • 3 tablespoons fresh chives, chopped
  • 2 tablespoons fresh parsley, chopped
  • ½ teaspoon salt
  • ½ teaspoon black pepper
  • ½ teaspoon garlic powder
  • ¼ teaspoon onion powder

For the Muffin Tin

  • Cooking spray or butter for greasing
  • Extra shredded cheese for topping
  • Fresh herbs for garnish

How to Make Cheesy Garlic Mashed Potato Muffins

1. Prepare the Oven and Muffin Pan

Preheat your oven to:

400°F (200°C)

Grease a standard 12-cup muffin tin generously with cooking spray or butter.

Properly greasing the pan helps the potato muffins develop crispy edges and makes them easier to remove after baking.


2. Prepare the Potato Mixture

Place mashed potatoes into a large mixing bowl.

If using leftover mashed potatoes from the refrigerator, allow them to sit at room temperature for about 15–20 minutes so they are easier to mix.

Add:

  • Eggs
  • Melted butter
  • Sour cream
  • Garlic
  • Cheddar cheese
  • Mozzarella cheese
  • Parmesan cheese

Mix everything together until well combined.

The eggs help bind the muffins together, while the cheese creates a rich, creamy texture.


3. Add Seasonings and Herbs

Add:

  • Salt
  • Black pepper
  • Garlic powder
  • Onion powder
  • Chopped chives
  • Fresh parsley

Mix gently until the herbs and seasonings are evenly distributed.

Fresh herbs add brightness and balance the richness of the cheese and potatoes.


4. Fill the Muffin Tin

Using a spoon or ice cream scoop, divide the potato mixture evenly between the muffin cups.

Fill each cup almost completely.

Press the mixture down gently with the back of a spoon to create a compact muffin shape.

Add extra shredded cheese on top of each potato muffin.

The cheese topping melts during baking and creates the beautiful golden crust.


5. Bake the Potato Muffins

Place the muffin tin into the preheated oven.

Bake for:

25–30 minutes

until:

  • The tops are golden brown
  • The cheese is melted
  • The edges are crispy
  • The muffins hold their shape

For extra crispy tops, turn the oven to broil for the final 1–2 minutes.

Watch carefully to prevent burning.


6. Cool Before Removing

Remove the muffin tin from the oven and allow the potato muffins to cool for:

5–10 minutes

This resting time helps them firm up and makes removal easier.

Run a small knife around the edges if needed before lifting them out.


Serving Suggestions

These cheesy potato muffins are delicious served warm with your favorite meals.

Breakfast or Brunch

Serve alongside:

  • Scrambled eggs
  • Bacon
  • Sausage
  • Fresh fruit
  • Yogurt

They make a great alternative to traditional breakfast potatoes.


Dinner Side Dish

Pair them with:

  • Garlic butter steak
  • Roast chicken
  • Grilled salmon
  • Meatloaf
  • Slow cooker beef recipes

The cheesy potato flavor pairs beautifully with hearty main dishes.


Appetizer or Party Snack

Serve with dipping sauces like:

  • Sour cream and chive sauce
  • Ranch dressing
  • Garlic aioli
  • Spicy mayo

They are perfect for gatherings because they are easy to serve and eat.


Tips for the Best Cheesy Potato Muffins

Use Thick Mashed Potatoes

The best texture comes from mashed potatoes that are creamy but not watery.

If your potatoes are too thin, add a little extra Parmesan cheese or breadcrumbs to help firm the mixture.


Add Crispy Bacon

For extra flavor, mix in:

  • ½ cup cooked crispy bacon
  • Green onions
  • Extra cheddar cheese

This creates a loaded baked potato muffin flavor.


Use Different Cheese

You can customize the recipe with your favorite cheese combinations.

Great options include:

  • Pepper jack for spice
  • Gruyère for richness
  • Monterey Jack for extra meltiness
  • Sharp cheddar for stronger flavor

Do Not Overmix

Mix the ingredients until combined.

Overmixing can make the potato muffins dense instead of light and fluffy.


Easy Recipe Variations

Loaded Cheesy Potato Muffins

Add:

  • Crispy bacon
  • Extra cheddar
  • Green onions
  • Sour cream topping

for a loaded baked potato version.


Garlic Herb Potato Muffins

Increase the herbs by adding:

  • Rosemary
  • Thyme
  • Extra parsley

for a fresh herb flavor.


Spicy Potato Muffins

Add:

  • Jalapeños
  • Chili flakes
  • Pepper jack cheese

for a spicy twist.


Chicken & Potato Muffins

Mix in:

  • Shredded cooked chicken
  • Extra cheese
  • Green onions

for a complete meal-style muffin.


How to Store Leftovers

Allow the potato muffins to cool completely.

Store them in an airtight container in the refrigerator for:

3–4 days

They make a great make-ahead breakfast or side dish.


How to Reheat

For the best texture:

Oven Method:

Heat at:

350°F (175°C) for 10 minutes

This helps restore the crispy edges.

Air Fryer Method:

Heat at:

375°F for 5–7 minutes

for a crispy finish.

Microwave:

Heat for:

30–60 seconds

but the outside will be softer.


Can You Freeze Cheesy Potato Muffins?

Yes, these freeze very well.

Place cooled muffins on a baking sheet and freeze until solid.

Transfer them into freezer-safe bags or containers.

Freeze for up to:

3 months

To reheat, bake directly from frozen at:

350°F (175°C) for 15–20 minutes

until heated through.


Final Thoughts

Cheesy Garlic Mashed Potato Muffins are a delicious way to enjoy classic comfort food in a fun new form. With crispy golden edges, creamy cheesy centers, and amazing garlic herb flavor, these little potato cups are guaranteed to become a favorite.

They are simple enough for everyday meals but impressive enough for holidays, brunches, and special occasions. Whether you make them with leftover mashed potatoes or prepare them fresh, this recipe proves that potatoes can be transformed into something truly unforgettable.

Slow Cooker Braised Beef Shanks with Vegetables – Tender, Rich & Comforting One-Pot Dinner

Slow Cooker Braised Beef Shanks with Vegetables is the ultimate comfort food recipe featuring slow-cooked beef shanks that become incredibly tender while simmering in a rich, savory broth with carrots, celery, potatoes, onions, and aromatic herbs.

This hearty dish is inspired by classic braised beef recipes where simple ingredients are transformed into a deeply flavorful meal through slow cooking. The image shows beautifully browned beef shanks with visible marrow bones surrounded by colorful vegetables and a rich, glossy broth. The meat becomes fall-apart tender while the vegetables absorb all the delicious flavors from the cooking liquid.

Perfect for cold evenings, family dinners, Sunday meals, and special occasions, this recipe delivers restaurant-quality flavor with the convenience of a slow cooker.


Why You’ll Love This Slow Cooker Beef Shanks Recipe

There is something special about slow-braised beef. The long cooking process allows the tough connective tissues in beef shanks to slowly break down, creating incredibly tender meat with a rich, satisfying texture.

The bone marrow inside the shanks adds natural richness to the broth, creating a deep flavor that makes this dish taste like it has been simmering all day.

You’ll love this recipe because it is:

  • Comforting and hearty
  • Full of rich beef flavor
  • Easy to prepare
  • Perfect for meal prep
  • Made with simple ingredients
  • A complete one-pot meal

The vegetables cook alongside the beef, absorbing the savory broth and creating a balanced dinner that requires minimal effort.


Ingredients

For the Beef Shanks

  • 4 large beef shanks (about 4–5 pounds total)
  • 2 tablespoons olive oil
  • 2 teaspoons salt
  • 1 teaspoon black pepper
  • 2 teaspoons garlic powder
  • 1 teaspoon smoked paprika
  • 2 tablespoons all-purpose flour (optional, for better browning)

For the Braising Liquid

  • 3 cups beef broth
  • 1 cup red wine (optional, can replace with more broth)
  • 3 tablespoons Worcestershire sauce
  • 2 tablespoons tomato paste
  • 2 tablespoons soy sauce
  • 1 tablespoon Dijon mustard

For the Vegetables

  • 2 large carrots, chopped
  • 3 celery stalks, chopped
  • 1 large yellow onion, diced
  • 5 cloves garlic, minced
  • 1½ pounds baby potatoes, halved
  • 1 cup mushrooms, sliced (optional)

For the Herbs and Seasoning

  • 3 sprigs fresh rosemary
  • 5 sprigs fresh thyme
  • 2 bay leaves
  • 1 teaspoon Italian seasoning
  • ½ teaspoon red pepper flakes (optional)
  • Fresh parsley for garnish

How to Make Slow Cooker Braised Beef Shanks

1. Prepare the Beef Shanks

Remove the beef shanks from the refrigerator about 30 minutes before cooking.

Pat them dry with paper towels.

This step is important because dry meat develops a much better crust when seared.

Season the beef shanks generously on all sides with:

  • Salt
  • Black pepper
  • Garlic powder
  • Smoked paprika

If using flour, lightly coat the shanks.

The flour helps create a beautiful browned exterior and slightly thickens the final sauce.


2. Sear the Beef Shanks

Heat olive oil in a large skillet over medium-high heat.

Once hot, add the beef shanks.

Sear each side for:

4–5 minutes

until deeply browned.

Do not rush this step.

The golden crust created during searing adds incredible depth and makes the final dish taste much richer.

Once browned, transfer the shanks to the slow cooker.


3. Cook the Aromatic Vegetables

Using the same skillet, add diced onions.

Cook for:

3–4 minutes

until softened.

Add garlic and cook for:

30 seconds

until fragrant.

Add carrots and celery.

Cook for another 2 minutes.

The vegetables will absorb the flavorful browned bits left behind from the beef.


4. Prepare the Braising Sauce

Add tomato paste to the vegetables.

Cook for 1 minute while stirring.

This helps develop a richer, deeper flavor.

Pour in:

  • Beef broth
  • Red wine
  • Worcestershire sauce
  • Soy sauce
  • Dijon mustard

Scrape the bottom of the pan with a wooden spoon to release all the browned pieces.

These flavorful bits are what make the sauce incredibly delicious.


5. Assemble the Slow Cooker

Place the chopped potatoes in the bottom of the slow cooker.

Add the browned beef shanks on top.

Pour the vegetable and broth mixture over the beef.

Add:

  • Rosemary
  • Thyme
  • Bay leaves
  • Italian seasoning

Make sure the beef is partially covered with liquid.

Cover with the lid.


6. Slow Cook Until Tender

Cook on:

LOW:

8–10 hours

or

HIGH:

5–6 hours

The beef shanks are ready when:

  • The meat easily pulls away from the bone
  • A fork slides into the meat easily
  • The vegetables are tender

Slow cooking allows the collagen in the beef shanks to transform into gelatin, creating a rich and silky sauce.


7. Remove Excess Fat

Once cooked, carefully remove the beef shanks from the slow cooker.

Place them on a serving platter.

If desired, skim excess fat from the surface of the broth using a spoon.

For an even richer sauce, you can simmer the cooking liquid on the stovetop for a few minutes to reduce and concentrate the flavors.


8. Serve the Beef Shanks

Place the tender beef shanks on plates or a large serving dish.

Spoon the vegetables and rich braising sauce over the top.

Garnish with fresh parsley and additional herbs.

Serve immediately while warm.


What to Serve With Braised Beef Shanks

This dish is already a complete meal, but it pairs beautifully with classic sides.

Creamy Mashed Potatoes

Mashed potatoes are one of the best choices because they soak up the rich beef sauce perfectly.


Buttered Rice

Serve the beef and gravy over:

  • White rice
  • Brown rice
  • Garlic butter rice

Crusty Bread

A warm loaf of bread is perfect for dipping into the flavorful broth.

Great options:

  • French bread
  • Dinner rolls
  • Garlic bread

Green Vegetables

Balance the richness with:

  • Green beans
  • Roasted broccoli
  • Asparagus
  • Brussels sprouts

Tips for the Best Slow Cooker Beef Shanks

Always Sear the Meat First

Searing creates a deeper flavor and improves the final texture.

Use Bone-In Beef Shanks

The bone adds incredible richness and flavor to the broth.

Cook Low and Slow

Beef shanks need time to become tender.

Avoid rushing the cooking process.

Do Not Cut Away All Fat

Some fat provides flavor and moisture during cooking.

Excess fat can be removed after cooking.

Make It Ahead

This dish often tastes even better the next day because the flavors continue developing.


Easy Recipe Variations

Garlic Butter Beef Shanks

Add extra:

  • Butter
  • Garlic
  • Fresh herbs

for a richer garlic-forward flavor.


Mushroom Beef Shanks

Add:

  • Mushrooms
  • Cream

at the end for a creamy mushroom version.


Spicy Braised Beef Shanks

Add:

  • Chili flakes
  • Cayenne pepper
  • Hot peppers

for extra heat.


Asian-Inspired Beef Shanks

Replace some seasonings with:

  • Ginger
  • Sesame oil
  • Extra soy sauce

for a different flavor profile.


How to Store Leftovers

Allow the beef and vegetables to cool completely.

Store in airtight containers with some of the sauce.

Refrigerate for:

3–4 days

The flavors usually become even better after resting overnight.


How to Reheat

Warm gently in a saucepan over medium-low heat.

Add a splash of beef broth if the sauce becomes too thick.

You can also reheat portions in the microwave.


Can You Freeze Braised Beef Shanks?

Yes, this recipe freezes beautifully.

Place cooled beef, vegetables, and sauce into freezer-safe containers.

Freeze for up to:

3 months

Thaw overnight in the refrigerator before reheating.


Final Thoughts

Slow Cooker Braised Beef Shanks with Vegetables is the perfect example of how slow cooking turns simple ingredients into an unforgettable meal. The tender beef, rich broth, flavorful vegetables, and aromatic herbs create a comforting dish that feels special yet easy to prepare.

Whether you are cooking for your family, hosting a holiday dinner, or simply craving a cozy homemade meal, this recipe delivers incredible flavor with every bite.

Serve it with mashed potatoes, warm bread, or rice and enjoy a classic comfort dinner that everyone will love.

Classic Homemade Meatloaf Recipe – Juicy, Tender & Glazed With Sweet Savory Sauce

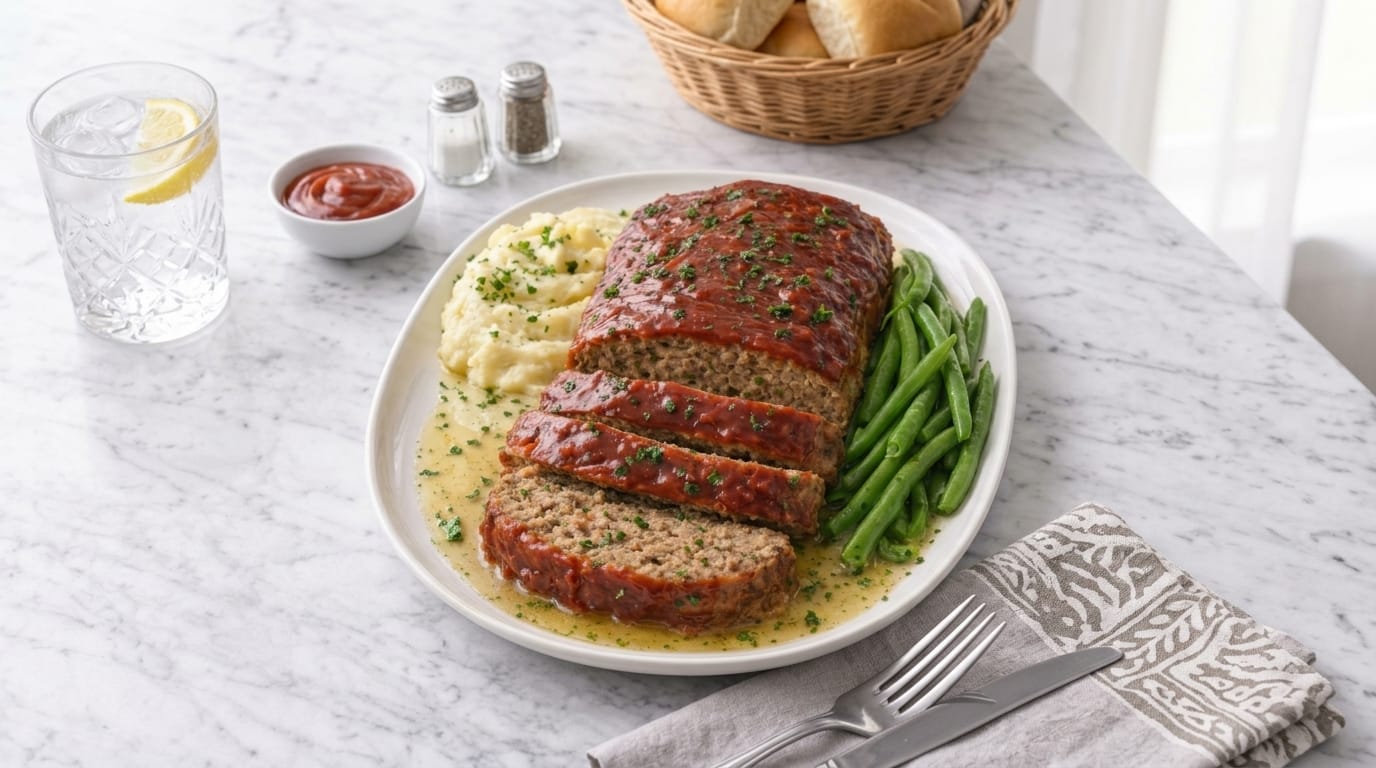
This Classic Homemade Meatloaf is the ultimate comfort food recipe featuring a juicy, flavorful beef mixture topped with a rich tomato glaze and baked until perfectly tender. Served with creamy mashed potatoes and fresh green beans, this traditional dinner brings back the feeling of a warm family meal made from simple ingredients.

The image shows a beautifully baked meatloaf with a glossy red glaze on top, sliced into thick pieces with a moist, tender interior. The meatloaf is paired with creamy mashed potatoes and crisp green beans, creating the perfect balance of hearty, savory, and comforting flavors.

Unlike dry or bland meatloaf recipes, this version stays incredibly moist thanks to a combination of seasoned ground beef, breadcrumbs, milk, eggs, and aromatic vegetables. The homemade glaze caramelizes as it bakes, creating a slightly sweet, tangy coating that makes every slice irresistible.

Perfect for weeknight dinners, meal prep, holidays, or Sunday family gatherings, this classic meatloaf recipe is simple, satisfying, and always a crowd favorite.


Why You’ll Love This Classic Homemade Meatloaf

There is a reason meatloaf has remained a beloved family recipe for generations.

This recipe creates a perfectly tender texture by combining the right amount of moisture and seasoning. The breadcrumbs absorb the juices from the meat while the milk keeps the loaf soft and flavorful.

The homemade glaze adds an amazing finishing touch. The combination of ketchup, brown sugar, and seasonings creates a shiny caramelized topping that complements the savory beef perfectly.

This meatloaf is also incredibly versatile. You can enjoy it fresh from the oven with classic sides or use leftovers for sandwiches, wraps, and easy lunches throughout the week.

You’ll love this recipe because it is:

  • Easy to prepare
  • Budget-friendly
  • Family-approved
  • Perfect for leftovers
  • Full of classic comfort food flavor

Ingredients

For the Meatloaf

  • 2 pounds ground beef (80/20 recommended)
  • 1 cup breadcrumbs
  • ¾ cup whole milk
  • 2 large eggs
  • 1 medium yellow onion, finely diced
  • 3 cloves garlic, minced
  • ¼ cup fresh parsley, chopped
  • 2 tablespoons Worcestershire sauce
  • 2 tablespoons ketchup
  • 1 tablespoon Dijon mustard
  • 2 teaspoons salt
  • 1 teaspoon black pepper
  • 1 teaspoon smoked paprika
  • 1 teaspoon Italian seasoning

For the Meatloaf Glaze

  • ¾ cup ketchup
  • 2 tablespoons brown sugar
  • 1 tablespoon Worcestershire sauce
  • 1 tablespoon apple cider vinegar
  • 1 teaspoon Dijon mustard
  • ½ teaspoon garlic powder
  • ½ teaspoon onion powder

Optional Garnish

  • Fresh parsley
  • Cracked black pepper
  • Chopped green onions

How to Make Classic Homemade Meatloaf

1. Prepare the Oven and Baking Dish

Preheat your oven to:

375°F (190°C)

Line a baking sheet with parchment paper or lightly grease a loaf pan.

Using a baking sheet allows excess fat to drain away and creates a better crust around the edges.


2. Prepare the Breadcrumb Mixture

In a large mixing bowl, combine:

  • Breadcrumbs
  • Milk

Allow the mixture to sit for:

5 minutes

This step creates a soft breadcrumb mixture called a panade.

The breadcrumbs absorb the milk, helping the meatloaf stay juicy instead of becoming dense or dry.


3. Mix the Meatloaf Ingredients

Add the following to the breadcrumb mixture:

  • Ground beef
  • Eggs
  • Onion
  • Garlic
  • Parsley
  • Worcestershire sauce
  • Ketchup
  • Dijon mustard
  • Salt
  • Pepper
  • Smoked paprika
  • Italian seasoning

Using clean hands, gently mix everything together until combined.

Do not overmix.

Overworking the meat mixture can make the final meatloaf tough and dense.

Mix just until all ingredients are evenly distributed.


4. Shape the Meatloaf

Transfer the mixture onto your prepared baking sheet.

Shape it into a loaf approximately:

9 inches long and 5 inches wide

Try to keep the shape even so the meatloaf cooks evenly.

If using a loaf pan, gently press the mixture into the pan without packing it too tightly.


5. Prepare the Meatloaf Glaze

In a small bowl, combine:

  • Ketchup
  • Brown sugar
  • Worcestershire sauce
  • Apple cider vinegar
  • Dijon mustard
  • Garlic powder
  • Onion powder

Whisk until smooth.

This glaze creates the signature sweet and tangy flavor that makes classic meatloaf special.


6. Bake the Meatloaf

Spread half of the glaze over the top of the meatloaf.

Place it in the oven and bake for:

45 minutes

After 45 minutes, remove the meatloaf and spread the remaining glaze over the top.

Return to the oven and continue baking for:

20–30 minutes

until fully cooked.

The internal temperature should reach:

160°F (71°C)


7. Rest Before Slicing

Once cooked, remove the meatloaf from the oven.

Allow it to rest for:

10–15 minutes

before slicing.

Resting allows the juices to redistribute, making every slice moist and tender.

Cut into thick slices and serve warm.


Serving Suggestions

Classic meatloaf is best served with traditional comfort food sides.

Creamy Mashed Potatoes

The creamy potatoes pair perfectly with the savory meatloaf juices and glaze.

For extra flavor, add:

  • Butter
  • Cream
  • Garlic
  • Fresh herbs

Green Beans

Fresh green beans provide a crisp, refreshing contrast to the rich meatloaf.

Try serving them with:

  • Garlic butter
  • Lemon zest
  • Toasted almonds

Roasted Vegetables

Other great options include:

  • Carrots
  • Broccoli
  • Brussels sprouts
  • Corn

Dinner Rolls

Warm bread is perfect for soaking up the flavorful glaze and juices.


Tips for the Best Homemade Meatloaf

Use Ground Beef With Some Fat

An 80/20 ground beef blend provides the best flavor and moisture.

Very lean beef can create a dry meatloaf.


Do Not Overmix

Mix the ingredients gently.

Too much mixing develops the proteins in the meat and creates a tough texture.


Let the Breadcrumbs Soak

The milk and breadcrumbs mixture is one of the secrets to a tender meatloaf.


Add Flavor Layers

Ingredients like:

  • Worcestershire sauce
  • Garlic
  • Onion
  • Dijon mustard

add depth and make the meatloaf taste restaurant-quality.


Check Temperature

Using a meat thermometer ensures the meatloaf is perfectly cooked without drying out.


Easy Meatloaf Variations

Cheesy Stuffed Meatloaf

Add a layer of:

  • Mozzarella cheese
  • Cheddar cheese
  • Parmesan cheese

inside the meat mixture before baking.


Garlic Herb Meatloaf

Add extra:

  • Fresh rosemary
  • Thyme
  • Parsley
  • Garlic

for a more herb-forward flavor.


BBQ Meatloaf

Replace the traditional glaze with your favorite barbecue sauce for a smoky version.


Turkey Meatloaf

Substitute ground beef with ground turkey for a lighter option.

Add extra moisture with:

  • Grated zucchini
  • Mushrooms
  • Extra vegetables

How to Store Leftover Meatloaf

Allow the meatloaf to cool completely.

Store slices in an airtight container.

Refrigerate for:

3–4 days

Leftover meatloaf is perfect for quick lunches and easy dinners.


How to Reheat Meatloaf

Oven Method

Place slices in a baking dish.

Cover with foil and heat at:

325°F for 15–20 minutes

Add a little broth or extra glaze to keep it moist.


Microwave Method

Place a slice on a microwave-safe plate.

Cover lightly and heat in short intervals until warm.


Can You Freeze Meatloaf?

Yes, meatloaf freezes very well.

You can freeze:

  • A whole cooked meatloaf
  • Individual slices

Wrap tightly and freeze for up to:

3 months

Thaw overnight in the refrigerator before reheating.


Final Thoughts

Classic Homemade Meatloaf is the perfect example of a simple recipe creating incredible comfort and flavor. With juicy seasoned beef, a caramelized sweet and tangy glaze, and classic side dishes like mashed potatoes and green beans, this meal delivers everything you want from a traditional family dinner.

Whether you are making it for a busy weeknight, a Sunday gathering, or preparing leftovers for the week, this homemade meatloaf recipe is guaranteed to become a favorite at your table. It is hearty, delicious, and filled with the nostalgic flavors of home cooking.