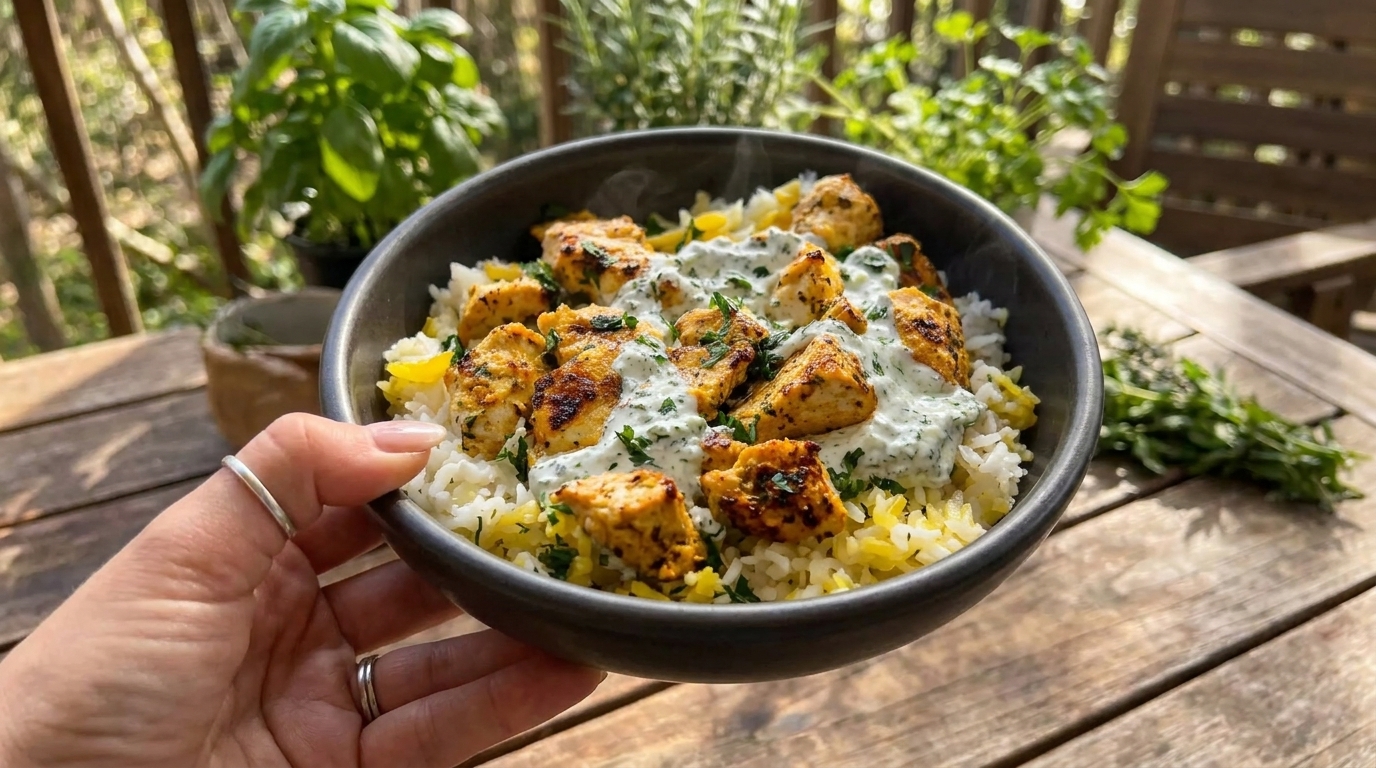
Easy Dump-and-Bake Chicken Tzatziki and Rice Recipe – Creamy, Flavourful, and Perfect for Busy Nights

If you are looking for a simple dinner that feels fresh, comforting, and full of Mediterranean-inspired flavor, this Dump-and-Bake Chicken Tzatziki and Rice Recipe is an easy meal to add to your weekly rotation. Tender chicken, fluffy rice, savory seasonings, and a cool, creamy tzatziki-style finish come together in one baking dish with very little hands-on preparation.

This recipe is especially convenient because there is no need to cook the rice separately or stand over the stove preparing multiple components. Most of the ingredients are added directly to the baking dish, covered, and baked until the chicken is juicy and the rice is tender.

One of the best things about dump-and-bake chicken and rice is how versatile it can be. Serve it with cucumber salad, tomatoes, roasted vegetables, warm pita bread, or extra tzatziki sauce for a complete family-friendly dinner.

Why You’ll Love This Dump-and-Bake Chicken Tzatziki and Rice

This easy chicken and rice recipe is designed for busy evenings when you want something flavorful without creating a sink full of dishes.

The rice cooks directly in seasoned chicken broth while the chicken bakes above it, allowing the grains to absorb plenty of savory flavor. Garlic, lemon, herbs, and Greek-style seasonings give the dish a bright Mediterranean character.

The cool tzatziki topping adds creamy texture and freshness that balances the warm chicken and rice beautifully. You can use store-bought tzatziki for convenience or prepare a quick homemade version if you have extra time.

Ingredients

For the Chicken and Rice

  • 4 boneless, skinless chicken breasts
  • 1½ cups long-grain white rice, uncooked
  • 2¾ cups chicken broth
  • 1 small yellow onion, finely diced
  • 4 garlic cloves, finely minced
  • 2 tablespoons olive oil
  • 2 tablespoons fresh lemon juice
  • 1 teaspoon dried oregano
  • 1 teaspoon garlic powder
  • 1 teaspoon paprika
  • ½ teaspoon onion powder
  • 1 teaspoon salt
  • ½ teaspoon freshly ground black pepper
  • ¼ teaspoon red pepper flakes, optional

For the Tzatziki Topping

  • 1 cup Greek yogurt
  • ½ cup cucumber, finely grated
  • 1 tablespoon fresh lemon juice
  • 1 small garlic clove, finely minced
  • 1 tablespoon olive oil
  • 1 tablespoon fresh dill, finely chopped
  • ¼ teaspoon salt
  • Pinch of black pepper

For Serving

  • ½ cup cherry tomatoes, halved
  • ¼ cup crumbled feta cheese, optional
  • 2 tablespoons freshly chopped parsley or dill
  • Lemon wedges
  • Warm pita bread, optional

How to Make Dump-and-Bake Chicken Tzatziki and Rice

1. Prepare the Baking Dish

Preheat your oven to 375°F (190°C).

Lightly grease a 9×13-inch baking dish with olive oil or nonstick cooking spray.

Add the uncooked rice directly to the bottom of the baking dish and spread it into an even layer.

Sprinkle the diced onion and minced garlic over the rice.

Pour in the chicken broth and fresh lemon juice.

Add half of the oregano, garlic powder, paprika, onion powder, salt, black pepper, and red pepper flakes if using.

Stir everything gently inside the baking dish until the rice is evenly distributed.

Make sure the rice remains mostly submerged in the liquid. This is important because rice that sits above the broth may remain undercooked or dry during baking.

2. Prepare the Chicken

Pat the chicken breasts dry with paper towels.

If the chicken breasts are especially thick, slice them horizontally into thinner cutlets or gently pound them until they are relatively even in thickness.

Evenly sized chicken cooks more consistently and helps prevent thinner portions from drying out before thicker sections are done.

Drizzle the chicken with olive oil.

Season both sides with the remaining oregano, garlic powder, paprika, onion powder, salt, and black pepper.

Rub the seasonings gently over the surface so each piece is evenly coated.

3. Arrange the Chicken Over the Rice

Place the seasoned chicken breasts directly on top of the rice mixture.

Try to leave a little space between the pieces rather than stacking or overlapping them.

Press the chicken very lightly into the liquid, but do not completely bury it.

Cover the baking dish tightly with aluminum foil.

A tight seal is important because the trapped steam helps cook the rice evenly and prevents too much liquid from evaporating.

4. Bake the Chicken and Rice

Place the covered baking dish in the preheated oven.

Bake for approximately 40–45 minutes.

After about 40 minutes, carefully remove the foil and check the rice.

The rice should be tender and should have absorbed most of the broth.

Check the chicken using an instant-read thermometer inserted into the thickest portion. The chicken is safely cooked when it reaches an internal temperature of 165°F (74°C).

If the rice still feels firm but most of the liquid has disappeared, carefully add approximately ¼ cup of hot chicken broth around the edges of the dish.

Cover again and bake for another 5–10 minutes.

Exact cooking time may vary depending on your baking dish, oven, rice variety, and thickness of the chicken.

5. Let the Rice Rest

Once the chicken is cooked and the rice is tender, remove the baking dish from the oven.

Allow everything to rest, covered, for approximately 5–10 minutes.

This resting period allows the remaining steam to finish softening the rice and gives the grains time to absorb any extra liquid.

Transfer the chicken temporarily to a clean plate.

Use a fork to gently fluff the rice, separating the grains without mashing them.

Taste the rice and adjust the seasoning with additional salt, pepper, or lemon juice if needed.

Return the chicken to the baking dish.

6. Prepare the Tzatziki Sauce

While the chicken and rice are baking, prepare the tzatziki.

Place the grated cucumber inside a clean kitchen towel or several layers of paper towels.

Squeeze firmly to remove as much excess moisture as possible.

Removing the cucumber liquid is important because too much moisture can make the tzatziki watery.

Add the Greek yogurt, drained cucumber, lemon juice, minced garlic, olive oil, dill, salt, and black pepper to a bowl.

Stir until evenly combined.

Taste and adjust with additional lemon, dill, or salt if desired.

Cover and refrigerate until ready to serve.

The flavor becomes even better after resting for several minutes because the garlic, cucumber, and herbs have time to blend with the yogurt.

7. Add the Tzatziki and Garnishes

Once the chicken and rice have rested, spoon some of the tzatziki sauce over each chicken breast.

You can also serve the sauce on the side if you prefer everyone to add their own amount.

Scatter cherry tomatoes, crumbled feta, and fresh parsley or dill over the top.

Finish with a squeeze of fresh lemon juice.

Serve immediately while the chicken and rice are warm and the tzatziki remains cool and creamy.

What to Serve With Dump-and-Bake Chicken Tzatziki and Rice

This dish already includes chicken and rice, so it works well as a complete meal on its own.

For a fresh side, serve it with a cucumber and tomato salad, Greek salad, chopped lettuce salad, or simple mixed greens dressed with lemon and olive oil.

Roasted zucchini, asparagus, bell peppers, green beans, or broccoli are also excellent choices.

Warm pita bread or flatbread is especially useful for scooping up the rice and extra tzatziki sauce.

You can also serve olives, hummus, feta, and sliced cucumbers alongside the meal for a larger Mediterranean-inspired spread.

Tips for the Best Dump-and-Bake Chicken Tzatziki and Rice

Use long-grain white rice for the most reliable results. Brown rice requires considerably more cooking time and liquid and should not be substituted without adjusting the recipe.

Make sure your baking dish is tightly covered during the first stage of baking. Escaping steam is one of the most common reasons baked rice turns out dry or undercooked.

Use hot or room-temperature broth rather than ice-cold broth if possible. This helps the rice begin cooking more quickly and consistently.

Try to use chicken breasts that are similar in thickness. Very thick pieces may need longer than the rice, while very thin pieces can become dry.

Do not add the tzatziki before baking. Yogurt-based tzatziki is best served cool or at room temperature after the chicken has finished cooking.

Always squeeze the grated cucumber thoroughly before adding it to the yogurt. This keeps the sauce thick and creamy.

Most importantly, check the chicken with a thermometer rather than relying only on baking time.

Easy Recipe Variations

For Dump-and-Bake Chicken Thighs and Rice, replace the chicken breasts with boneless, skinless chicken thighs. They are naturally juicy and work especially well in baked rice dishes.

For Greek Lemon Chicken and Rice, increase the lemon juice and add 1 teaspoon finely grated lemon zest to the rice mixture.

For Spinach Chicken Tzatziki Rice, stir 2 cups of roughly chopped fresh spinach into the rice immediately after baking. The residual heat will wilt it.

For Feta Chicken and Rice, sprinkle approximately ½ cup crumbled feta over the dish during the final 5 minutes of baking.

For Mediterranean Vegetable Chicken and Rice, add diced bell peppers, zucchini, or chopped sun-dried tomatoes to the rice mixture.

For a spicier version, increase the red pepper flakes or add a pinch of cayenne pepper to the chicken seasoning.

For extra creaminess, stir a few spoonfuls of Greek yogurt or tzatziki into each serving of rice immediately before eating.

How to Store Leftovers

Allow the chicken and rice to cool before transferring leftovers to airtight containers.

For the best texture, store the cooked chicken and rice separately from the tzatziki sauce.

Refrigerate the chicken and rice for up to 3–4 days.

Store homemade tzatziki in a separate airtight container in the refrigerator for approximately 3 days.

To reheat the chicken and rice, place a portion in a microwave-safe dish and add a tablespoon or two of chicken broth or water.

Cover loosely and microwave until heated through.

You can also reheat larger portions in a covered baking dish at 350°F (175°C) until warm.

Add the cold tzatziki only after reheating.

The cooked chicken and rice can also be frozen for up to approximately 2 months, although the tzatziki should not be frozen because yogurt and cucumber can become watery after thawing.

Frequently Asked Questions

Can I use chicken thighs instead of chicken breasts?

Yes. Boneless, skinless chicken thighs work very well and tend to remain especially juicy during baking.

Cooking time may vary slightly depending on their size.

Can I use brown rice?

Brown rice is not a direct substitute because it needs more liquid and a much longer cooking time.

For the most predictable results, use long-grain white rice.

Can I use store-bought tzatziki?

Absolutely.

Store-bought tzatziki is an excellent shortcut and makes this recipe even easier.

Simply spoon it over the chicken after baking.

Why is my rice still crunchy?

The baking dish may not have been sealed tightly enough, there may not have been enough liquid, or your oven temperature may run slightly low.

Add a small amount of hot broth, cover tightly again, and continue baking until the rice becomes tender.

Why is my rice mushy?

Too much liquid or overbaking can make the rice overly soft.

Measure the rice and broth carefully and check the dish near the end of the recommended cooking time.

Can I prepare this recipe ahead of time?

You can prepare the tzatziki sauce ahead of time and refrigerate it.

For best results, assemble the rice mixture shortly before baking rather than allowing uncooked rice to sit in the broth for many hours.

Can I make this recipe without dairy?

Yes.

Prepare the chicken and rice as written and use a dairy-free Greek-style yogurt to make the tzatziki.

You can also omit the feta garnish.

Final Thoughts

This easy Dump-and-Bake Chicken Tzatziki and Rice Recipe is a convenient way to bring fresh Mediterranean-inspired flavors to the dinner table without spending hours cooking or washing multiple pans.

Juicy seasoned chicken, fluffy lemon-herb rice, cool cucumber tzatziki, fresh herbs, and optional feta create a meal that is comforting while still tasting bright and fresh.

Serve it with warm pita bread, a crisp salad, roasted vegetables, or extra tzatziki for a simple family dinner that is easy enough for busy weeknights and flavorful enough to make again and again.
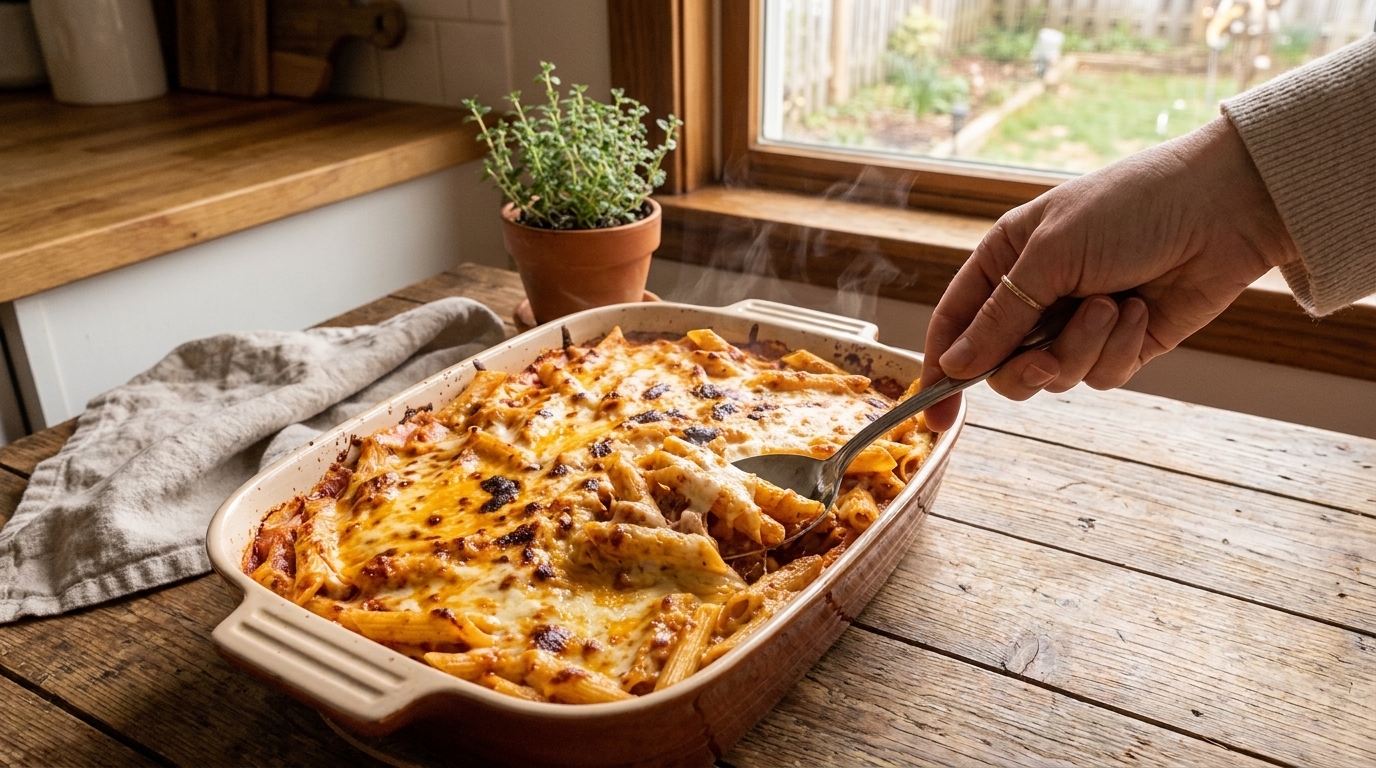
Easy Creamy Cheesy Baked Penne Pasta Recipe – Rich, Comforting, and Perfect for Family Dinner

If you are craving a warm, comforting pasta dinner loaded with creamy sauce and plenty of melted cheese, this Creamy Cheesy Baked Penne Pasta Recipe is exactly what you need. Tender penne pasta is tossed in a rich, velvety tomato cream sauce, layered with mozzarella and Parmesan, then baked until bubbly and beautifully golden on top.

This baked pasta is easy enough for a busy weeknight but satisfying enough to serve for Sunday dinner, family gatherings, potlucks, or casual entertaining. Every forkful delivers soft pasta, creamy sauce, savory herbs, and stretchy melted cheese.

One of the best things about homemade baked penne is how flexible it is. You can keep it completely vegetarian, add ground beef, sausage, chicken, spinach, mushrooms, or extra vegetables, and adjust the cheese depending on what you have available.

Why You’ll Love This Creamy Cheesy Baked Penne Pasta

This creamy baked penne uses simple ingredients that come together to create a rich and comforting meal without requiring complicated cooking techniques.

The pasta is coated in a silky tomato cream sauce before being layered with generous amounts of mozzarella and Parmesan cheese. Baking everything together allows the flavors to blend while creating those irresistible golden, bubbly cheese spots on top.

It is also an excellent make-ahead dinner. You can assemble the entire casserole earlier in the day, refrigerate it, and bake it when you are ready to eat. Leftovers reheat beautifully, making it especially convenient for busy families.

Ingredients

For the Pasta

  • 1 pound penne pasta
  • 1 tablespoon salt, for the pasta water
  • 1 tablespoon olive oil, optional

For the Creamy Tomato Sauce

  • 2 tablespoons unsalted butter
  • 1 tablespoon olive oil
  • 1 small yellow onion, finely diced
  • 4 garlic cloves, finely minced
  • 2 tablespoons tomato paste
  • 1 can (28 ounces) crushed tomatoes
  • 1 teaspoon Italian seasoning
  • ½ teaspoon dried oregano
  • ½ teaspoon paprika
  • ¼ teaspoon red pepper flakes, optional
  • 1 teaspoon salt, or to taste
  • ½ teaspoon freshly ground black pepper
  • ¾ cup heavy cream
  • ½ cup reserved pasta water, as needed

For the Cheese Layer

  • 2 cups shredded mozzarella cheese, divided
  • ¾ cup freshly grated Parmesan cheese, divided
  • 1 cup whole-milk ricotta cheese
  • 2 tablespoons freshly chopped parsley or basil

How to Make Creamy Cheesy Baked Penne Pasta

1. Prepare the Pasta

Bring a large pot of water to a rolling boil.

Season the water generously with salt. Well-seasoned pasta water helps flavor the penne from the inside rather than relying only on the sauce for seasoning.

Add the penne and cook it approximately 2 minutes less than the package instructions recommend. The pasta should be slightly firmer than al dente because it will continue cooking in the oven.

Before draining, reserve approximately ½ cup of the pasta water.

Drain the penne well. You can toss it with a small amount of olive oil if you are not immediately adding it to the sauce, although this is usually unnecessary if the sauce is ready.

2. Prepare the Creamy Tomato Sauce

Preheat your oven to 375°F (190°C).

Place a large skillet or saucepan over medium heat.

Add the butter and olive oil. Once the butter has melted, add the finely diced onion.

Cook the onion for approximately 4–5 minutes, stirring occasionally, until it becomes soft and translucent. Avoid browning it too aggressively because you want a smooth, balanced sauce.

Add the minced garlic and cook for approximately 30–60 seconds, stirring constantly. Garlic can burn quickly, so keep the heat moderate.

Stir in the tomato paste and cook it for approximately 1 minute. Cooking the tomato paste briefly helps deepen its flavor and removes some of its raw acidity.

Pour in the crushed tomatoes.

Add the Italian seasoning, oregano, paprika, red pepper flakes if using, salt, and black pepper.

Stir everything together and allow the sauce to simmer gently for approximately 8–10 minutes.

Reduce the heat to low and slowly stir in the heavy cream.

Allow the sauce to cook for another 2–3 minutes without bringing it to a hard boil. The cream should blend smoothly into the tomatoes and create a rich orange-red sauce.

Taste and adjust the seasoning as needed.

If the sauce appears too thick, add a small amount of the reserved pasta water until it reaches a creamy consistency that will easily coat the penne.

3. Combine the Pasta and Sauce

Add the drained penne directly to the creamy tomato sauce.

Gently stir until every piece of pasta is evenly coated.

The sauce should look slightly looser than you think necessary because the pasta will absorb additional moisture while baking.

Add approximately 1 cup of the shredded mozzarella and ½ cup of the grated Parmesan.

Stir gently until the cheese begins to melt into the warm pasta.

4. Assemble the Baked Penne

Lightly grease a 9×13-inch baking dish.

Spread approximately half of the creamy penne mixture evenly across the bottom.

Drop spoonfuls of ricotta cheese over the pasta, spacing them throughout the dish.

Sprinkle a portion of the remaining mozzarella over the ricotta layer.

Add the rest of the pasta and spread it evenly across the top.

Finish with the remaining mozzarella and Parmesan cheese.

For an especially cheesy top, make sure the mozzarella reaches close to the edges of the baking dish.

5. Bake Until Golden and Bubbling

Place the baking dish uncovered in the preheated oven.

Bake for approximately 20–25 minutes, or until the sauce is bubbling around the edges and the cheese has completely melted.

For a more deeply golden top, switch the oven to broil during the final 1–3 minutes.

Watch the pasta closely while broiling because cheese can go from golden to burnt very quickly.

Remove the baked penne from the oven and allow it to rest for approximately 5–10 minutes before serving.

This short resting period helps the sauce settle slightly and makes the pasta easier to portion.

Finish with freshly chopped parsley or basil before serving.

What to Serve With Creamy Cheesy Baked Penne Pasta

Creamy baked penne is rich and filling, so simple side dishes work especially well.

Serve it with garlic bread, toasted Italian bread, breadsticks, or crusty sourdough for soaking up the creamy tomato sauce.

For something lighter, pair the pasta with a simple green salad, Caesar salad, roasted broccoli, asparagus, green beans, zucchini, or Brussels sprouts.

If you are serving the pasta for a larger family dinner, you can also add grilled chicken, Italian sausage, meatballs, or roasted vegetables on the side.

Tips for the Best Creamy Cheesy Baked Penne Pasta

Do not fully cook the penne before baking. Slightly undercooked pasta holds its shape better and prevents the finished casserole from becoming overly soft.

Use freshly grated cheese whenever possible. Pre-shredded cheese is convenient, but it often contains anti-caking ingredients that can prevent it from melting as smoothly.

Keep the tomato sauce slightly loose before baking. Pasta naturally absorbs liquid as it cooks, so a sauce that looks perfect on the stovetop may become too dry in the oven.

Add the heavy cream over low heat. High heat can cause cream-based sauces to separate.

Allow the baked pasta to rest before cutting into it. Resting helps the cheese and sauce settle so the portions hold together better.

For the best flavor, use good-quality crushed tomatoes and freshly grated Parmesan.

Easy Recipe Variations

For Creamy Chicken Baked Penne, add approximately 2 cups of cooked, shredded, or diced chicken to the sauce before combining it with the pasta.

For Cheesy Beef Baked Penne, brown 1 pound of ground beef with the onions. Drain excess grease before adding the garlic and continuing with the sauce.

For Italian Sausage Baked Penne, cook crumbled Italian sausage in the skillet before preparing the tomato sauce. Mild or spicy sausage both work well.

For Spinach and Ricotta Baked Penne, stir 2–3 cups of fresh spinach into the sauce and cook until wilted before adding the pasta.

For Mushroom Baked Penne, sauté approximately 8 ounces of sliced mushrooms until golden before adding the garlic.

For an Extra Creamy Baked Penne, increase the heavy cream to 1 cup and add an additional ½ cup ricotta to the pasta mixture.

For a spicier version, increase the red pepper flakes or add a small amount of cayenne pepper.

How to Store Leftovers

Allow leftover creamy cheesy baked penne to cool before transferring it to an airtight container.

Store it in the refrigerator for up to 3–4 days.

To reheat larger portions, place the pasta in an oven-safe dish, cover loosely with foil, and warm at 350°F (175°C) until heated through.

For individual portions, the microwave works well. Add a tablespoon or two of milk, cream, or water before reheating to help loosen the sauce.

You can also freeze baked penne for up to approximately 2–3 months.

For the best texture, freeze it in an airtight freezer-safe container. Thaw overnight in the refrigerator before reheating.

Frequently Asked Questions

Can I make baked penne ahead of time?

Yes. Assemble the pasta completely, cover the baking dish tightly, and refrigerate it for up to 24 hours.

When ready to bake, remove it from the refrigerator while the oven preheats. You may need to add approximately 5–10 minutes to the baking time because the pasta will be cold.

Can I use another pasta shape?

Absolutely. Rigatoni, ziti, mostaccioli, rotini, or medium shells all work well.

Choose a sturdy pasta shape that can hold the creamy sauce and remain firm during baking.

Can I make baked penne without ricotta?

Yes. Simply omit the ricotta and add extra mozzarella, Parmesan, or a small amount of cream cheese if desired.

Can I add meat?

Yes. Ground beef, Italian sausage, shredded chicken, ground turkey, or cooked meatballs are all excellent additions.

Make sure raw meat is completely cooked before adding it to the pasta.

Why did my baked pasta turn out dry?

The pasta may have been cooked too long before baking, the sauce may have been too thick, or the casserole may have baked for too long.

For the best result, slightly undercook the penne and make sure the sauce is creamy and relatively loose before assembling the dish.

Can I use marinara sauce instead of crushed tomatoes?

Yes. You can replace the crushed tomatoes with approximately 3 cups of your favorite marinara sauce.

Because prepared marinara is already seasoned, reduce the added salt and herbs until you have tasted the sauce.

Final Thoughts

This easy Creamy Cheesy Baked Penne Pasta Recipe is the kind of comforting meal that works for almost any occasion. Tender pasta, rich tomato cream sauce, creamy ricotta, melted mozzarella, and savory Parmesan come together in one warm, satisfying casserole.

It is simple enough for weeknight cooking, easy to prepare ahead of time, and flexible enough to customize with your favorite meat, vegetables, herbs, or cheeses.

Serve it hot from the oven with garlic bread, salad, or roasted vegetables, and make sure to scoop up plenty of that creamy sauce and golden melted cheese with every serving.

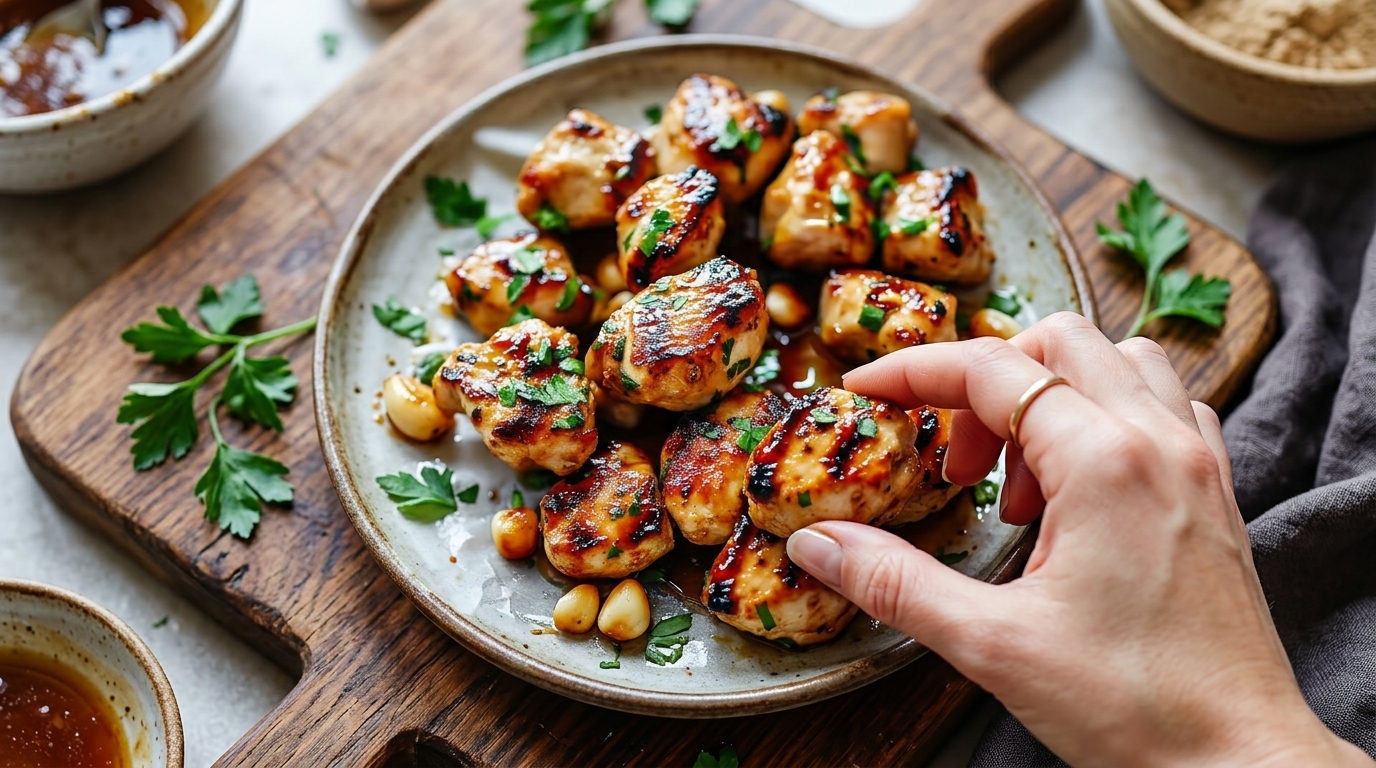
Easy Garlic Chicken Recipe – Juicy, Flavorful, and Ready for Any Night

If you are looking for an easy chicken dinner that delivers big flavor without complicated ingredients, this Garlic Chicken Recipe deserves a place in your weekly rotation. Tender, juicy chicken is pan-seared until beautifully golden, then coated in a rich, buttery garlic sauce that comes together right in the same skillet.

This recipe is simple enough for a busy weeknight but flavorful enough to serve when you want dinner to feel a little more special. The combination of fresh garlic, butter, herbs, chicken broth, and a touch of lemon creates a savory sauce that soaks into every bite.

One of the best things about homemade garlic chicken is how versatile it is. Serve it with mashed potatoes, pasta, rice, roasted vegetables, or crusty bread for soaking up all that delicious sauce.

Why You’ll Love This Garlic Chicken

This easy garlic chicken is made with everyday ingredients and requires very little preparation. Because everything is cooked in one skillet, cleanup is simple too.

The chicken develops a flavorful golden crust while staying juicy inside, and the garlic butter sauce adds richness without overpowering the meat. It is also easy to customize with extra herbs, Parmesan cheese, cream, mushrooms, spinach, or chili flakes.

Whether you are cooking for your family or preparing a cozy dinner for guests, this recipe is reliable, comforting, and packed with flavor.

Ingredients

For the Chicken

  • 4 boneless, skinless chicken breasts
  • 1 teaspoon salt
  • ½ teaspoon freshly ground black pepper
  • 1 teaspoon garlic powder
  • 1 teaspoon paprika
  • ½ teaspoon Italian seasoning
  • 2 tablespoons all-purpose flour
  • 2 tablespoons olive oil

For the Garlic Butter Sauce

  • 3 tablespoons unsalted butter
  • 6–8 garlic cloves, finely minced
  • ¾ cup chicken broth
  • 1 tablespoon fresh lemon juice
  • ½ teaspoon Italian seasoning
  • ¼ teaspoon red pepper flakes, optional
  • 2 tablespoons freshly chopped parsley
  • Salt and black pepper to taste

How to Make Garlic Chicken

1. Prepare the Chicken

Place the chicken breasts on a cutting board and pat them completely dry using paper towels. Removing excess moisture helps the chicken develop a better golden crust.

If your chicken breasts are very thick, slice them horizontally into thinner cutlets or gently pound them until they are approximately even in thickness. This allows them to cook quickly and evenly.

Season both sides of the chicken with salt, black pepper, garlic powder, paprika, and Italian seasoning.

Lightly dust the chicken with flour. You do not need a thick coating—the flour simply helps create a golden exterior and slightly thickens the sauce later.

2. Sear the Chicken

Heat the olive oil in a large skillet over medium-high heat.

Once the oil is hot, carefully place the chicken into the pan. Avoid overcrowding the skillet. If necessary, cook the chicken in two batches.

Allow the chicken to cook without moving it for approximately 4–5 minutes. This gives the surface enough time to develop a deep golden crust.

Flip the chicken and cook the second side for another 4–5 minutes, depending on thickness.

The exact cooking time may vary, so use a meat thermometer whenever possible. Chicken is safely cooked when the thickest portion reaches 165°F (74°C).

Transfer the cooked chicken to a plate and loosely cover it while preparing the sauce.

3. Make the Garlic Butter Sauce

Reduce the heat to medium-low.

Add the butter to the same skillet. Once melted, add the minced garlic.

Cook the garlic for approximately 30–60 seconds, stirring continuously. The goal is to release its aroma without allowing it to burn. Burnt garlic can become bitter very quickly.

Pour in the chicken broth and use a wooden spoon to scrape up the browned bits from the bottom of the skillet. These flavorful pieces are one of the secrets to a delicious pan sauce.

Add the lemon juice, Italian seasoning, and red pepper flakes if using.

Allow the sauce to simmer gently for approximately 3–5 minutes, until it reduces slightly.

Taste and adjust the seasoning with additional salt or black pepper if needed.

4. Return the Chicken to the Skillet

Place the chicken back into the garlic sauce.

Spoon the sauce over the top of each piece and allow everything to simmer together for another 2–3 minutes.

This final step allows the chicken to absorb some of the garlic butter flavor while warming everything evenly.

Finish with freshly chopped parsley and spoon plenty of sauce over the chicken before serving.

What to Serve With Garlic Chicken

Garlic chicken pairs beautifully with many different side dishes.

For a comforting dinner, serve it with creamy mashed potatoes, buttery rice, pasta, or roasted baby potatoes. The starch absorbs the garlic butter sauce and makes the meal especially satisfying.

For something lighter, pair the chicken with steamed broccoli, roasted asparagus, green beans, zucchini, Brussels sprouts, or a simple garden salad.

Crusty bread or homemade garlic bread is another excellent option because you can use it to soak up every last spoonful of sauce.

Tips for the Best Garlic Chicken

Use chicken pieces that are similar in thickness so they finish cooking at approximately the same time.

Do not move the chicken immediately after placing it in the skillet. Leaving it undisturbed helps create that beautiful golden-brown crust.

Fresh garlic produces the strongest and most aromatic flavor. Pre-minced garlic can work in a pinch, but freshly chopped cloves will give you a better sauce.

Keep the heat moderate when cooking the garlic. Garlic burns easily, especially in butter.

Most importantly, avoid overcooking the chicken. Once the internal temperature reaches 165°F, remove it from high heat.

Easy Recipe Variations

For Creamy Garlic Chicken, stir approximately ½ cup heavy cream into the sauce after adding the chicken broth. Simmer until slightly thickened before returning the chicken to the skillet.

For Garlic Parmesan Chicken, add ⅓–½ cup freshly grated Parmesan cheese to the finished sauce.

You can also add sliced mushrooms after cooking the chicken. Sauté them until golden before adding the garlic.

For additional vegetables, stir fresh spinach into the sauce during the final few minutes of cooking.

If you enjoy spicy food, increase the red pepper flakes or add a small amount of cayenne pepper.

How to Store Leftovers

Allow leftover garlic chicken to cool before transferring it to an airtight container.

Store it in the refrigerator for up to 3–4 days.

To reheat, place the chicken and sauce in a skillet over low heat. Add a splash of chicken broth if the sauce has become too thick.

You can also reheat individual portions in the microwave, although gentle stovetop reheating usually keeps the chicken juicier.

Frequently Asked Questions

Can I use chicken thighs?

Yes. Boneless, skinless chicken thighs work wonderfully in this recipe and provide an especially juicy result. Cooking time may vary slightly depending on their size.

Can I make garlic chicken without flour?

Absolutely. The flour helps with browning and thickening the sauce slightly, but it can be omitted.

Can I make it creamy?

Yes. Add heavy cream after the chicken broth has reduced slightly. Keep the heat low to prevent the cream from separating.

How do I know when the chicken is cooked?

The most reliable method is using an instant-read thermometer. Insert it into the thickest part of the chicken. It should register 165°F (74°C).

Final Thoughts

This easy Garlic Chicken Recipe proves that a flavorful homemade dinner does not need to be complicated. With juicy golden chicken, plenty of fresh garlic, melted butter, herbs, and a savory pan sauce, every bite is comforting and satisfying.

It is quick enough for weeknight cooking, flexible enough to pair with almost any side dish, and easy to customize depending on what you have available.

Serve it hot with mashed potatoes, rice, pasta, vegetables, or crusty bread, and do not forget to spoon that delicious garlic butter sauce over everything before serving.

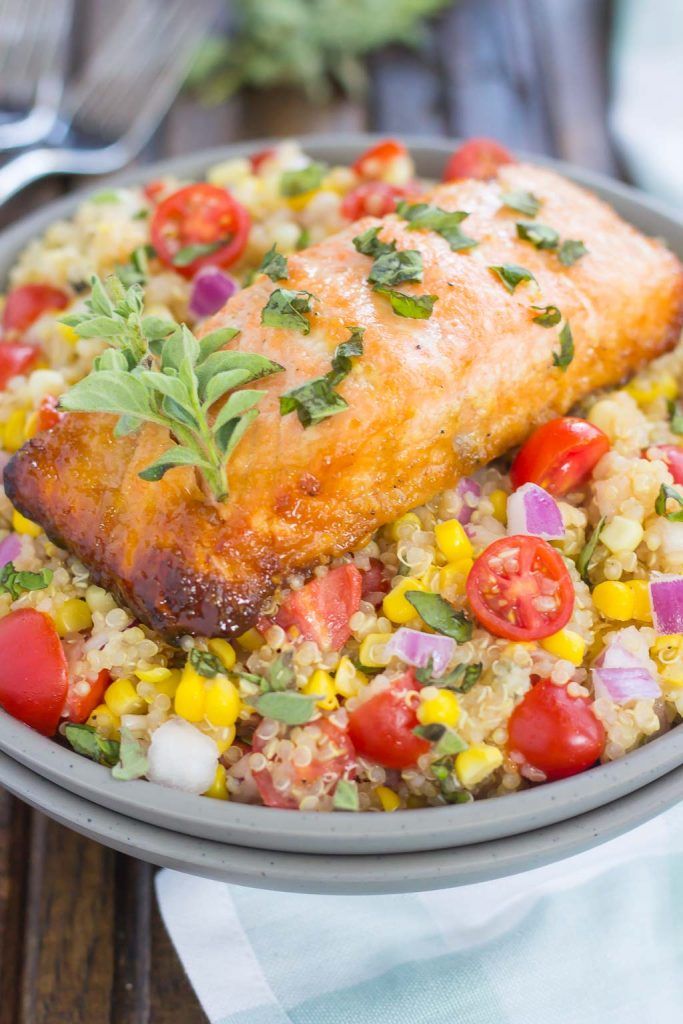
🍯 Honey Garlic Salmon Quinoa Power Bowls

A sweet-savory salmon bowl packed with protein, whole grains and colorful vegetables. Honey-garlic salmon is appearing in current healthy dinner planning, while grain bowls remain an easy way to combine protein, vegetables and fiber-rich carbs.

Servings: 4
Prep: 15 minutes
Cook: 20 minutes

🛒 Ingredients

  • 4 salmon fillets, about 5 oz each
  • 2 cups cooked quinoa
  • 2 cups broccoli florets
  • 1 red bell pepper, sliced
  • 1 cup shelled edamame
  • 1 tbsp olive oil
  • Salt and black pepper

Honey Garlic Sauce

  • 3 tbsp honey
  • 3 tbsp low-sodium soy sauce
  • 3 garlic cloves, minced
  • 1 tbsp fresh lemon juice
  • 1 tsp grated ginger
  • 1 tsp sesame oil

👩‍🍳 Instructions

1. Prepare the sauce.
Whisk honey, soy sauce, garlic, lemon juice, ginger and sesame oil until combined.

2. Roast the vegetables.
Heat oven to 425°F. Toss broccoli and bell pepper with olive oil, salt and pepper. Roast for 15–18 minutes.

3. Cook the salmon.
Pat salmon dry and lightly season. Heat a nonstick skillet over medium-high heat. Cook salmon about 4 minutes on the first side.

4. Glaze it.
Turn salmon over. Pour in the honey-garlic sauce and cook another 3–5 minutes, spooning the thickening sauce over the salmon.

5. Build the bowls.
Divide quinoa among four bowls. Add roasted vegetables, edamame and salmon. Spoon remaining glaze over everything.

✨ Healthy Tip

Use brown rice or farro if you don’t have quinoa. Add shredded cabbage for even more fiber.

Approx. per serving: 500 calories | 38–42g protein