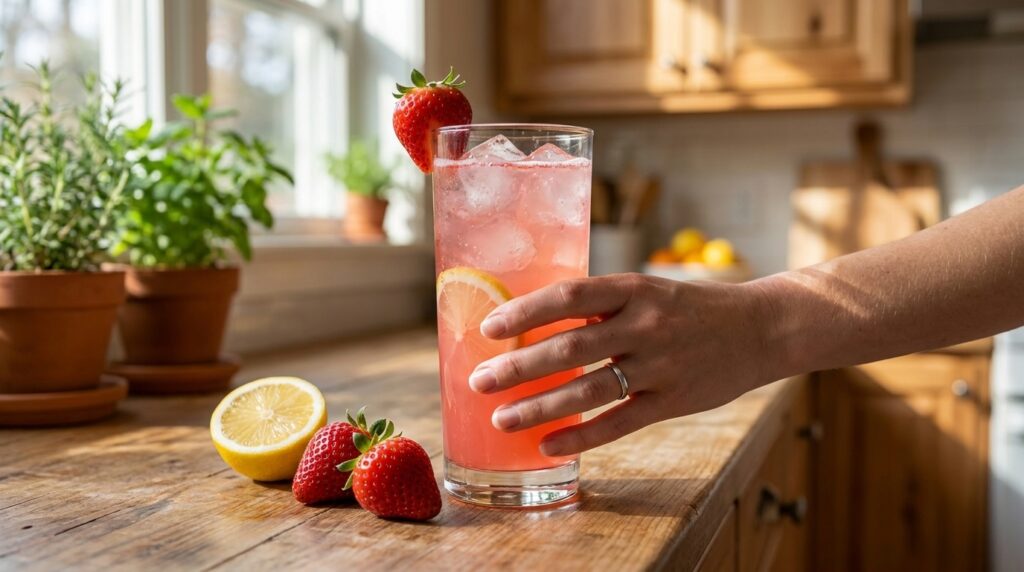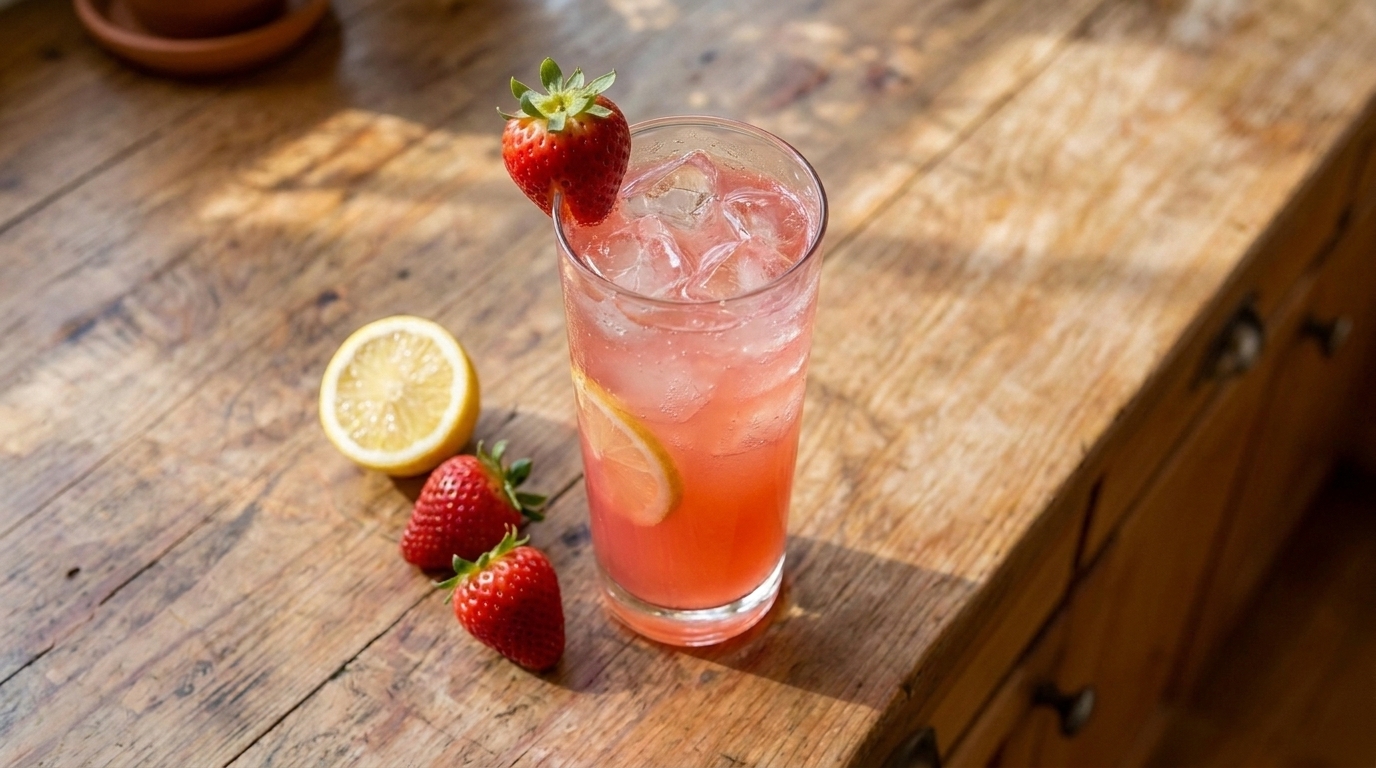
Easy Sparkling Strawberry Lemonade Recipe – Fresh, Fruity, Fizzy, and Perfect for Summer

If you are looking for a refreshing homemade drink that is bright, fruity, and easy to make, this Sparkling Strawberry Lemonade is the perfect recipe. Fresh strawberries are blended with lemon juice and a simple syrup, then topped with sparkling water for a bubbly drink that is sweet, tangy, and incredibly refreshing.

This recipe is perfect for summer parties, barbecues, brunches, baby showers, picnics, family gatherings, or any warm afternoon when you want something more exciting than ordinary lemonade. The strawberries add natural sweetness and beautiful color, while fresh lemon juice keeps the drink bright and citrusy.

One of the best things about homemade sparkling strawberry lemonade is how easy it is to customize. You can make it sweeter or more tart, add mint or basil, use flavored sparkling water, or turn it into a frozen slush-style drink.

Why You’ll Love This Sparkling Strawberry Lemonade

This drink uses simple ingredients but looks colorful and festive enough for entertaining.

Fresh strawberries give the lemonade a naturally fruity flavor that tastes much brighter than bottled strawberry syrup.

The fresh lemon juice balances the sweetness beautifully, while sparkling water adds a crisp, bubbly finish.

It is also easy to make ahead. You can prepare the strawberry-lemon base in advance and add the sparkling water immediately before serving so the drink stays fizzy.

Ingredients

For the Strawberry Lemonade Base

  • 2 cups fresh strawberries, hulled and halved
  • 1 cup freshly squeezed lemon juice
  • ¾ cup granulated sugar
  • ¾ cup water
  • 1 teaspoon finely grated lemon zest, optional

For the Sparkling Lemonade

  • 3 cups chilled sparkling water or club soda
  • 2 cups cold water
  • 2 cups ice cubes

For Garnishing

  • Fresh strawberry slices
  • Lemon slices
  • Fresh mint leaves
  • Extra ice

How to Make Sparkling Strawberry Lemonade

1. Prepare the Strawberries

Wash the strawberries thoroughly.

Remove the green tops and cut the berries in half.

If the strawberries are very large, cut them into quarters.

Use ripe strawberries whenever possible because they provide the best natural sweetness and color.

2. Make the Simple Syrup

Add the granulated sugar and ¾ cup water to a small saucepan.

Place over medium heat.

Stir gently until the sugar completely dissolves.

You do not need to boil the syrup for a long time.

Once the liquid looks clear and the sugar crystals have disappeared, remove the saucepan from the heat.

Allow the syrup to cool.

3. Juice the Lemons

While the syrup cools, squeeze enough fresh lemons to produce approximately 1 cup of lemon juice.

Depending on their size and juiciness, you may need around 5–7 lemons.

Strain the juice if you want to remove seeds and excessive pulp.

Freshly squeezed lemon juice gives the lemonade a cleaner, brighter flavor than bottled juice.

4. Blend the Strawberries

Place the strawberries in a blender.

Add approximately ¼ cup of the lemon juice.

Blend until completely smooth.

If the mixture is too thick to blend easily, add a few tablespoons of cold water.

5. Strain the Strawberry Purée

For a smoother lemonade, pour the strawberry purée through a fine-mesh strainer into a pitcher or bowl.

Use a spoon to gently press the liquid through.

Discard the seeds and thicker pulp.

This step is optional.

If you prefer a more rustic, fruit-forward lemonade, you can leave the strawberry purée unstrained.

6. Combine the Lemonade Base

In a large pitcher, combine the strawberry purée, remaining lemon juice, cooled simple syrup, lemon zest if using, and 2 cups cold water.

Stir thoroughly.

The mixture should have a strong strawberry-lemon flavor because the sparkling water will dilute it slightly later.

7. Taste and Adjust

Taste the lemonade base.

If it is too tart, add a little more simple syrup.

If it is too sweet, add additional lemon juice.

If the strawberry flavor is too strong, add a splash of cold water.

Adjusting the flavor before adding sparkling water gives you better control over the final drink.

8. Chill the Lemonade

Cover the pitcher.

Refrigerate for at least 30–60 minutes.

Serving the lemonade very cold helps preserve the carbonation once the sparkling water is added.

You can prepare this base several hours ahead.

9. Add the Sparkling Water

Immediately before serving, pour the chilled sparkling water or club soda into the pitcher.

Stir very gently.

Avoid stirring aggressively because you do not want to release too much carbonation.

10. Add Ice

Add approximately 2 cups of ice to the pitcher.

Alternatively, place ice directly into individual glasses.

Adding ice to glasses instead of the pitcher helps prevent the entire batch from becoming diluted if it will sit for a while.

11. Add Fresh Fruit

Add several strawberry slices and lemon slices to the pitcher.

They make the drink look beautiful while reinforcing the fresh fruit flavor.

You can also lightly crush a few mint leaves between your fingers and add them for a fresh herbal aroma.

12. Serve Immediately

Pour the sparkling strawberry lemonade into tall glasses.

Garnish each serving with a strawberry slice, lemon wheel, and fresh mint.

Serve immediately while the drink is cold and bubbly.

What to Serve With Sparkling Strawberry Lemonade

This refreshing drink works especially well with summer and picnic-style foods.

Serve it alongside grilled chicken, burgers, sandwiches, wraps, tacos, barbecue, or fresh salads.

For brunch, pair it with croissants, muffins, pancakes, waffles, fruit salad, quiche, or breakfast casseroles.

It is also perfect with desserts such as strawberry shortcake, lemon bars, cheesecake, cookies, pound cake, or cupcakes.

For parties, serve it in a large glass pitcher or beverage dispenser with plenty of floating strawberry and lemon slices.

Tips for the Best Sparkling Strawberry Lemonade

Use ripe, flavorful strawberries.

Always use fresh lemon juice when possible.

Cool the simple syrup before mixing it with the lemonade.

Taste the base before adding sparkling water.

Add the carbonation just before serving.

Keep all ingredients chilled for maximum fizz.

Use ice in individual glasses if the pitcher will sit for a long time.

Strain the strawberry purée for a smoother drink.

Add lemon zest for stronger citrus aroma.

Stir sparkling water gently so it stays bubbly.

Easy Recipe Variations

Strawberry Mint Lemonade

Add ½ cup fresh mint leaves to the pitcher.

Lightly bruise them before adding for more flavor.

Strawberry Basil Lemonade

Add a handful of fresh basil leaves for a more sophisticated herbal flavor.

Raspberry Strawberry Lemonade

Replace 1 cup of strawberries with fresh raspberries.

Sparkling Berry Lemonade

Use a mixture of strawberries, blueberries, raspberries, and blackberries.

Strawberry Limeade

Replace half or all of the lemon juice with fresh lime juice.

Frozen Strawberry Lemonade

Blend the finished lemonade base with plenty of ice until thick and slushy.

Top each glass with a splash of sparkling water.

Honey Strawberry Lemonade

Replace the granulated sugar syrup with honey syrup made from equal parts honey and warm water.

Low-Sugar Strawberry Lemonade

Reduce the sugar and rely on very ripe strawberries for more natural sweetness.

How to Store Leftovers

For the best results, store the strawberry-lemon base separately from the sparkling water.

Transfer the base to an airtight pitcher or container.

Refrigerate for up to 3 days.

When ready to serve, pour in fresh sparkling water.

If sparkling lemonade has already been mixed, refrigerate it in a tightly sealed container.

It will still be drinkable the next day, but it will gradually lose carbonation.

Avoid freezing the finished carbonated drink.

However, you can freeze the strawberry-lemon base in ice cube trays and use the cubes in future lemonade without diluting the flavor.

Frequently Asked Questions

Can I use frozen strawberries?

Yes.

Thaw them first and drain excessive liquid before blending.

Frozen strawberries work especially well when fresh berries are out of season.

Can I make this lemonade ahead?

Yes.

Make the strawberry-lemon base up to a day ahead.

Add the sparkling water shortly before serving.

Can I use bottled lemon juice?

You can, but fresh lemon juice gives the best flavor.

Bottled juice can taste sharper or less fresh.

What sparkling water works best?

Plain sparkling water, club soda, or lemon-flavored sparkling water all work well.

Avoid strongly flavored varieties that may overpower the strawberries.

Can I use Sprite or lemon-lime soda?

Yes.

It will create a sweeter lemonade, so reduce the sugar in the strawberry base.

How can I make the lemonade less sweet?

Reduce the simple syrup or add more fresh lemon juice and sparkling water.

Do I have to strain the strawberry purée?

No.

Straining produces a smoother drink, but leaving it unstrained gives the lemonade more fruit texture.

Can I make this without refined sugar?

Yes.

Honey, maple syrup, agave, or another preferred sweetener can be used.

Adjust the amount according to taste.

Final Thoughts

This Sparkling Strawberry Lemonade combines fresh strawberries, bright lemon juice, homemade simple syrup, and fizzy sparkling water in one colorful and refreshing drink.

It is simple enough for everyday summer sipping but beautiful enough for brunches, parties, showers, picnics, and special gatherings.

Serve it ice-cold with fresh strawberries, lemon slices, and mint, and enjoy a sweet, tangy, bubbly homemade lemonade that tastes especially refreshing on warm days.
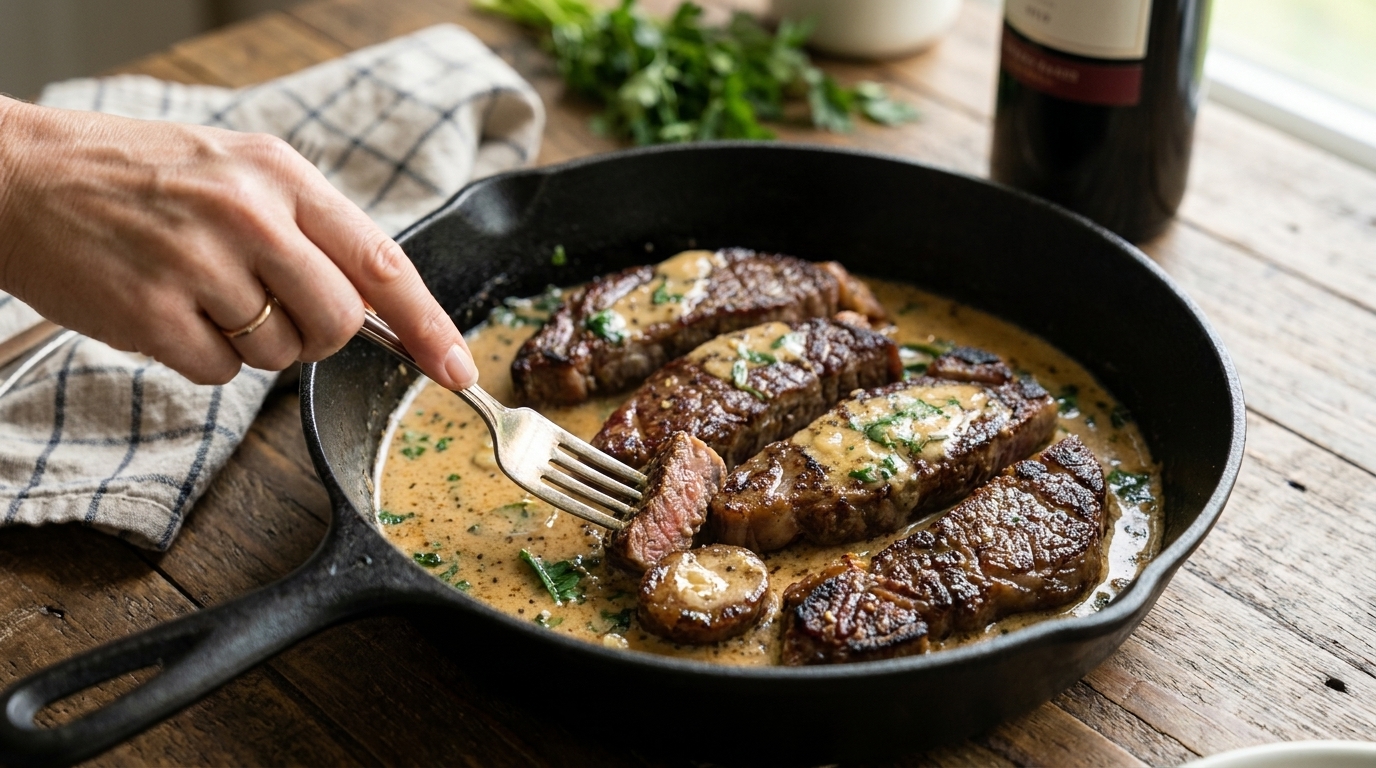
Easy Creamy Garlic Steak Recipe – Tender, Juicy, and Smothered in Rich Garlic Sauce

Creamy Garlic Steak is the perfect recipe when you want something rich, comforting, and restaurant-worthy without spending hours in the kitchen. Tender pieces of steak are seared until beautifully browned, then finished in a silky garlic cream sauce made with butter, Parmesan, herbs, and just enough seasoning to bring everything together.

The combination of juicy beef and creamy garlic sauce makes this dish feel luxurious, yet the recipe is surprisingly simple. Most of the cooking happens in one skillet, which means less cleanup and more time to enjoy dinner.

This Creamy Garlic Steak is perfect for weeknight meals, date nights, family dinners, or special occasions. Serve it over mashed potatoes, pasta, rice, or roasted vegetables so none of that flavorful sauce goes to waste.

Why You’ll Love This Creamy Garlic Steak

This recipe delivers big flavor using simple, familiar ingredients. The steak develops a savory golden crust in a hot skillet, while the creamy garlic sauce adds richness without overpowering the beef.

Another reason this dish works so well is its versatility. You can use sirloin, ribeye, strip steak, or tenderloin depending on your budget and preference. You can also prepare the recipe with steak bites or larger medallions.

The sauce comes together quickly in the same skillet used for the steak, which captures all of the flavorful browned bits left behind after searing. Those bits add incredible depth to the finished sauce.

Ingredients

For the Steak

  • 1½ pounds sirloin, ribeye, strip steak, or beef tenderloin
  • 1 tablespoon olive oil
  • 1 tablespoon unsalted butter
  • 1 teaspoon salt
  • ½ teaspoon black pepper
  • 1 teaspoon garlic powder
  • ½ teaspoon smoked paprika
  • ½ teaspoon onion powder

For the Creamy Garlic Sauce

  • 2 tablespoons unsalted butter
  • 5 garlic cloves, finely minced
  • 1 cup heavy cream
  • ½ cup beef broth
  • ½ cup freshly grated Parmesan cheese
  • 1 teaspoon Dijon mustard
  • ½ teaspoon Italian seasoning
  • ¼ teaspoon red pepper flakes, optional
  • ¼ teaspoon black pepper
  • Salt, to taste
  • 1 tablespoon chopped fresh parsley
  • 1 teaspoon fresh lemon juice, optional

How to Make Creamy Garlic Steak

1. Prepare the Steak

Remove the steak from the refrigerator about 20–30 minutes before cooking.

Pat it thoroughly dry with paper towels. A dry surface is important because excess moisture prevents the steak from developing a proper crust.

If using steak bites, cut the beef into approximately 1½-inch pieces. If using medallions or individual steaks, leave them whole.

Season all sides with salt, black pepper, garlic powder, smoked paprika, and onion powder.

2. Heat the Skillet

Place a large heavy skillet, preferably cast iron, over medium-high heat.

Allow it to heat for 2–3 minutes before adding the oil.

Add the olive oil and butter.

Once the butter is melted and sizzling, the skillet is ready for the steak.

3. Sear the Steak

Add the steak in a single layer.

Do not overcrowd the skillet. If necessary, cook the steak in two batches.

For steak bites, cook for approximately 2 minutes without moving them so a deep brown crust can develop.

Turn and cook for another 1–2 minutes.

For whole steaks, sear for approximately 3–5 minutes per side, depending on thickness and desired doneness.

For medium-rare, aim for an internal temperature of approximately 130–135°F after resting. For medium, aim for around 140–145°F.

Remove the steak from the skillet and place it on a plate. Loosely cover with foil while preparing the sauce.

4. Cook the Garlic

Reduce the heat to medium.

Add 2 tablespoons butter to the same skillet.

Once melted, add the minced garlic.

Cook for approximately 30–45 seconds, stirring constantly.

The garlic should become fragrant but should not turn dark brown because burnt garlic can make the sauce bitter.

5. Deglaze the Skillet

Pour in the beef broth.

Use a wooden spoon or spatula to scrape up the browned bits from the bottom of the skillet.

These caramelized bits contain a lot of flavor and will make the creamy sauce taste much richer.

Allow the broth to simmer for approximately 2 minutes, reducing slightly.

6. Make the Cream Sauce

Lower the heat to medium-low.

Pour in the heavy cream.

Add Dijon mustard, Italian seasoning, red pepper flakes if using, and black pepper.

Stir well and allow the sauce to simmer gently for approximately 3–4 minutes.

Do not let the cream boil rapidly.

7. Add the Parmesan

Reduce the heat to low.

Gradually add the freshly grated Parmesan cheese while stirring constantly.

Continue stirring until the Parmesan melts completely and the sauce becomes smooth and creamy.

Taste and adjust with additional salt and pepper if needed.

If the sauce becomes too thick, add a splash of beef broth or cream.

8. Return the Steak to the Skillet

Place the steak back into the creamy garlic sauce.

Turn the pieces gently so they become coated in the sauce.

Simmer for only 1–2 minutes, just long enough to warm the steak through.

Avoid cooking for too long because the steak can quickly become overdone.

9. Finish and Serve

Remove the skillet from the heat.

Stir in chopped fresh parsley.

For a little brightness, add approximately 1 teaspoon fresh lemon juice. This is optional, but the acidity helps balance the rich cream sauce.

Spoon extra garlic sauce over the steak and serve immediately.

What to Serve With Creamy Garlic Steak

Creamy mashed potatoes are one of the best sides for this recipe because they absorb the garlic Parmesan sauce beautifully.

You can also serve the steak over pasta such as fettuccine, linguine, penne, or egg noodles.

For a hearty meal, try serving it with:

  • Roasted potatoes
  • Garlic butter rice
  • Creamy mashed potatoes
  • Buttered noodles
  • Roasted asparagus
  • Garlic green beans
  • Steamed broccoli
  • Roasted Brussels sprouts
  • Crusty bread

A fresh green salad with a light vinaigrette also pairs well with the rich sauce.

Tips for the Best Creamy Garlic Steak

Use a hot skillet. A properly heated pan gives the steak a flavorful golden-brown crust.

Pat the steak dry. Moisture on the surface causes steaming instead of searing.

Cook in batches when necessary. Overcrowding the skillet lowers the temperature and prevents browning.

Use freshly grated Parmesan. Pre-shredded cheese often contains anti-caking ingredients that can make creamy sauces less smooth.

Do not boil the sauce aggressively. Gentle heat keeps the cream smooth and helps prevent separation.

Let the steak rest. Resting allows the juices to redistribute through the meat.

Do not overcook during the final step. The steak only needs a minute or two in the sauce before serving.

Easy Recipe Variations

Creamy Garlic Mushroom Steak

After searing the steak, cook 8 ounces sliced mushrooms in the same skillet until golden.

Continue with the garlic cream sauce and return the mushrooms to the sauce before serving.

Creamy Garlic Peppercorn Steak

Add 1–2 teaspoons lightly crushed black peppercorns to the sauce for a classic pepper steak flavor.

Creamy Garlic Steak and Shrimp

Cook approximately ½ pound large shrimp separately until pink and opaque.

Add the shrimp to the skillet with the steak during the final minute of cooking.

Creamy Garlic Spinach Steak

Stir 2 cups fresh baby spinach into the sauce before returning the steak.

Cook just until the spinach wilts.

Spicy Creamy Garlic Steak

Increase the red pepper flakes to ½ teaspoon or add a small pinch of cayenne pepper.

Creamy Garlic Blue Cheese Steak

Replace half of the Parmesan with crumbled blue cheese for a stronger steakhouse-style flavor.

How to Choose the Best Steak

Sirloin is a great everyday choice because it is flavorful, relatively lean, and usually more affordable than premium cuts.

Ribeye has more marbling and creates an especially juicy, rich result.

New York strip offers a nice balance between tenderness and beefy flavor.

Beef tenderloin or filet mignon is extremely tender and is an excellent option when preparing this recipe for a special occasion.

Whatever cut you choose, steaks between approximately 1 and 1½ inches thick are generally easier to sear without overcooking.

Storage and Reheating

Allow leftovers to cool before transferring them to an airtight container.

Store in the refrigerator for up to 3 days.

For the best results, reheat the steak gently in a skillet over low heat.

Add a small splash of cream, milk, or beef broth to loosen the sauce if it has thickened in the refrigerator.

Warm only until heated through.

Avoid cooking the steak over high heat during reheating because this can make the meat tough and cause the cream sauce to separate.

Make-Ahead Tips

You can season and cut the steak several hours before cooking. Store it covered in the refrigerator until needed.

The Parmesan can also be grated, garlic minced, and seasonings measured ahead of time.

For the best steak texture, however, cook the beef and prepare the sauce shortly before serving.

Final Thoughts

This Easy Creamy Garlic Steak is the perfect combination of tender beef and a rich, savory garlic Parmesan sauce. The deeply browned steak creates incredible flavor, while the creamy sauce turns a simple skillet dinner into something that feels worthy of a restaurant.

It is quick enough for a weeknight but impressive enough for guests, anniversaries, date nights, or special family dinners.

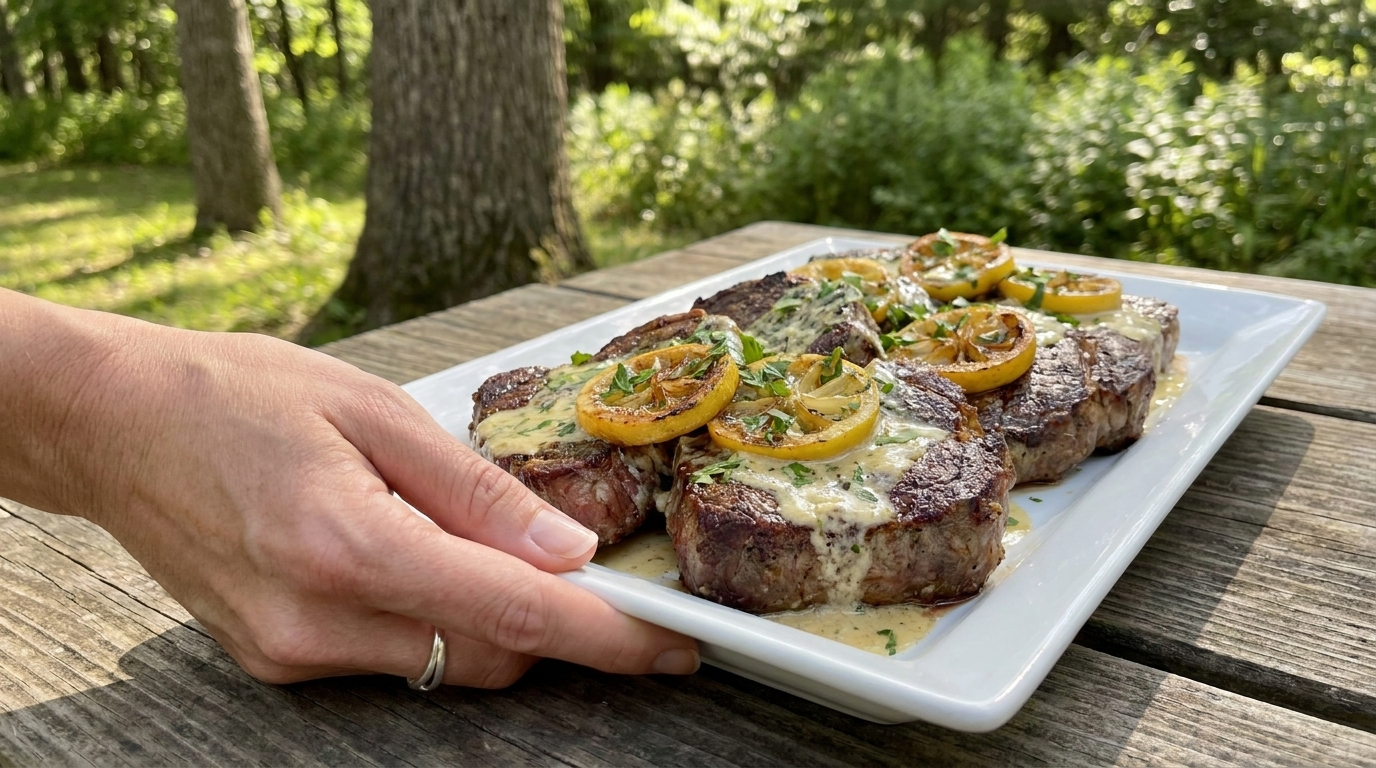
Easy Creamy Lemon Garlic Steak Medallions – Tender, Juicy, and Restaurant-Style

These Creamy Lemon Garlic Steak Medallions are a rich, elegant dinner made with tender pieces of beef seared until beautifully browned, then finished in a silky garlic-Parmesan cream sauce brightened with fresh lemon. The combination of juicy steak, buttery garlic, cream, herbs, and citrus creates a dish that feels luxurious while still being simple enough to prepare at home.

Steak medallions cook quickly, making them perfect for busy evenings when you want something more special than an everyday dinner. The beef develops a caramelized crust in a hot skillet, while the creamy sauce picks up all the flavorful browned bits left behind in the pan. Fresh lemon keeps the sauce from becoming too heavy, and Parmesan adds a savory, slightly nutty finish.

Serve these creamy steak medallions with mashed potatoes, pasta, rice, roasted vegetables, or crusty bread for a complete meal. They are especially good for date night, family dinners, holidays, or entertaining guests.

Why You’ll Love These Creamy Lemon Garlic Steak Medallions

One of the best things about this recipe is how quickly it comes together. Once the steak is cut and seasoned, the entire dish can be ready in around 30 minutes.

The sauce is another highlight. Heavy cream creates a smooth, luxurious texture, while garlic and Parmesan provide rich savory flavor. Fresh lemon juice and zest balance that richness and give the finished sauce a fresh, bright character.

You can also easily customize the recipe. Add mushrooms, spinach, asparagus, sun-dried tomatoes, or extra herbs depending on what you have available.

The steak itself can be made with beef tenderloin, filet mignon, sirloin, or another tender steak cut, so you can adapt the dish to your budget.

Ingredients

For the Steak Medallions

  • 1 1/2 pounds beef tenderloin, filet mignon, or sirloin
  • 1 tablespoon olive oil
  • 1 tablespoon unsalted butter
  • 1 teaspoon garlic powder
  • 1 teaspoon dried Italian seasoning
  • 1/2 teaspoon smoked paprika
  • 1 teaspoon kosher salt
  • 1/2 teaspoon freshly ground black pepper

For the Creamy Lemon Garlic Sauce

  • 2 tablespoons unsalted butter
  • 5 garlic cloves, finely minced
  • 3/4 cup beef broth
  • 1 cup heavy cream
  • 3/4 cup freshly grated Parmesan cheese
  • 2 tablespoons fresh lemon juice
  • 1 teaspoon finely grated lemon zest
  • 1 teaspoon Dijon mustard
  • 1/2 teaspoon dried thyme
  • 1/2 teaspoon dried oregano
  • 1/4 teaspoon crushed red pepper flakes, optional
  • Salt and black pepper to taste

For Garnishing

  • 2 tablespoons chopped fresh parsley
  • Fresh lemon slices
  • Extra Parmesan cheese
  • Freshly cracked black pepper
  • Fresh thyme, optional

How to Make Creamy Lemon Garlic Steak Medallions

1. Prepare the Steak

Pat the steak completely dry with paper towels.

If using beef tenderloin or a larger steak, cut it into medallions approximately 1 1/2 to 2 inches thick.

Allow the steak to sit out for about 15 to 20 minutes before cooking so it is not extremely cold when it reaches the skillet.

Season both sides with garlic powder, Italian seasoning, smoked paprika, salt, and black pepper.

Press the seasoning gently into the surface.

2. Heat the Skillet

Place a large cast-iron or heavy stainless-steel skillet over medium-high heat.

Allow it to become very hot.

Add the olive oil.

Once the oil is shimmering, the skillet is ready for the steak.

A properly heated pan is essential because steak medallions need strong heat to create a flavorful brown crust.

3. Sear the Steak Medallions

Place the medallions in the hot skillet.

Do not overcrowd the pan. If necessary, cook them in batches.

Sear for approximately 2 to 4 minutes on the first side, depending on thickness.

Avoid moving the steak too frequently. Leaving it undisturbed helps form a deep golden crust.

Flip and cook the second side for another 2 to 4 minutes.

Add 1 tablespoon butter during the final minute and spoon some of the melted butter over the steaks.

4. Check the Doneness

Use an instant-read thermometer if you want precise results.

Approximate steak temperatures include:

  • Rare: 120°F to 125°F
  • Medium-rare: 130°F to 135°F
  • Medium: 140°F to 145°F
  • Medium-well: 150°F to 155°F

For food safety, whole cuts of beef are commonly recommended to reach 145°F followed by a 3-minute rest.

Remember that the temperature may continue rising slightly while the steak rests.

Transfer the medallions to a plate and cover loosely with foil.

5. Start the Garlic Sauce

Reduce the skillet heat to medium.

Add 2 tablespoons butter.

Once melted, add the minced garlic.

Cook for approximately 30 to 45 seconds while stirring constantly.

The garlic should become fragrant but should not brown heavily.

Burned garlic can make the sauce taste bitter.

6. Deglaze the Skillet

Pour in the beef broth.

Use a wooden spoon or spatula to scrape up the browned pieces from the bottom of the skillet.

Those caramelized bits contain concentrated steak flavor and will make the sauce much richer.

Allow the broth to simmer for approximately 2 to 3 minutes so it reduces slightly.

7. Add the Cream

Reduce the heat to medium-low.

Pour in the heavy cream.

Add Dijon mustard, thyme, oregano, black pepper, and optional red pepper flakes.

Stir well.

Allow the sauce to gently simmer for approximately 3 minutes.

Avoid boiling aggressively because high heat can cause dairy-based sauces to separate.

8. Add the Parmesan

Gradually stir the freshly grated Parmesan into the cream sauce.

Add it in small amounts while continuously stirring.

Continue cooking until the cheese melts and the sauce becomes smooth and slightly thickened.

If the sauce becomes too thick, add a small splash of beef broth.

9. Add Lemon Zest and Juice

Stir in the fresh lemon zest.

Add the lemon juice gradually while stirring.

The lemon should brighten the sauce without making it overly tart.

Taste before adding more.

Fresh lemon is especially important here because bottled juice will not provide the same clean citrus flavor or aroma.

10. Return the Steak to the Skillet

Place the steak medallions back into the creamy lemon garlic sauce.

Spoon some of the sauce over each piece.

Allow them to warm gently for 30 seconds to 1 minute.

Do not continue simmering the steak for several minutes because it can quickly move beyond your preferred level of doneness.

11. Finish and Serve

Remove the skillet from the heat.

Taste the sauce and adjust with additional salt, black pepper, Parmesan, or lemon if necessary.

Sprinkle chopped parsley and fresh thyme over the top.

Finish with freshly cracked black pepper and a few thin lemon slices for presentation.

Serve immediately with plenty of sauce spooned around each steak medallion.

What to Serve With Creamy Lemon Garlic Steak Medallions

Creamy mashed potatoes are one of the best side dishes for this recipe because they absorb the rich lemon-garlic sauce beautifully.

Pasta is another excellent option. Fettuccine, linguine, tagliatelle, or penne all work well with the Parmesan cream sauce.

Rice, risotto, or creamy polenta can also create a satisfying base for the steak.

For vegetables, try roasted asparagus, broccoli, green beans, Brussels sprouts, mushrooms, or zucchini.

Garlic bread or crusty artisan bread is especially good for soaking up every last bit of the sauce.

Tips for Perfect Steak Medallions

Pat the steak dry. Surface moisture prevents proper browning.

Use a very hot skillet. This creates a deeply caramelized crust without requiring long cooking.

Do not overcrowd the pan. Too much meat causes steaming instead of searing.

Use a thermometer. It is the easiest way to avoid overcooking expensive steak.

Let the steak rest. Resting allows the juices to redistribute.

Use fresh Parmesan. Freshly grated cheese melts more smoothly.

Keep the cream sauce gentle. Avoid boiling after adding cream and Parmesan.

Add lemon slowly. You can always add more, but too much acidity can overpower the steak.

Easy Recipe Variations

Creamy Lemon Garlic Mushroom Steak

Sauté 8 ounces sliced cremini mushrooms after removing the steak.

Cook until golden before adding the garlic and broth.

Creamy Spinach Steak Medallions

Add 2 cups baby spinach to the sauce just before returning the steak.

Cook until the spinach wilts.

Spicy Lemon Garlic Steak

Increase the crushed red pepper flakes or add a small pinch of cayenne pepper.

Extra Garlic Steak Medallions

Increase the garlic to 7 or 8 cloves for a stronger garlic flavor.

Lemon Herb Steak Without Cream

Skip the heavy cream and Parmesan. Finish the pan sauce with butter, lemon juice, garlic, parsley, and thyme for a lighter version.

Storage and Reheating

Store leftover steak and sauce in an airtight container in the refrigerator for up to 3 days.

For best results, reheat gently in a skillet over low heat.

Add a splash of beef broth or cream to loosen the sauce if it has thickened in the refrigerator.

Warm only until heated through.

Avoid boiling or reheating for too long because the steak can become overcooked.

Frequently Asked Questions

What steak is best for medallions?

Beef tenderloin or filet mignon is ideal because it is exceptionally tender. Sirloin can also be used for a more affordable option.

Why did my cream sauce become grainy?

The heat may have been too high, or the Parmesan may have been added too quickly. Keep the sauce over gentle heat and add the cheese gradually.

Can I use half-and-half instead of heavy cream?

Yes, but the sauce will be thinner and more sensitive to high heat.

Can I add mushrooms?

Absolutely. Mushrooms pair beautifully with steak, garlic, cream, and lemon.

Can I make this ahead?

The sauce can be prepared ahead, but the steak tastes best when freshly seared and served immediately.

Final Thoughts

These Creamy Lemon Garlic Steak Medallions combine tender, golden-seared beef with a luxurious sauce made from garlic, cream, Parmesan, herbs, and fresh lemon.

The rich cream sauce makes the dish deeply comforting, while citrus keeps it fresh and balanced. Best of all, the entire meal can be made in one skillet in around half an hour.

Serve the medallions over creamy mashed potatoes, pasta, rice, or polenta with plenty of sauce spooned over the top. Whether you make them for date night, family dinner, or a special occasion, this easy steak recipe brings restaurant-style flavor straight to your kitchen.

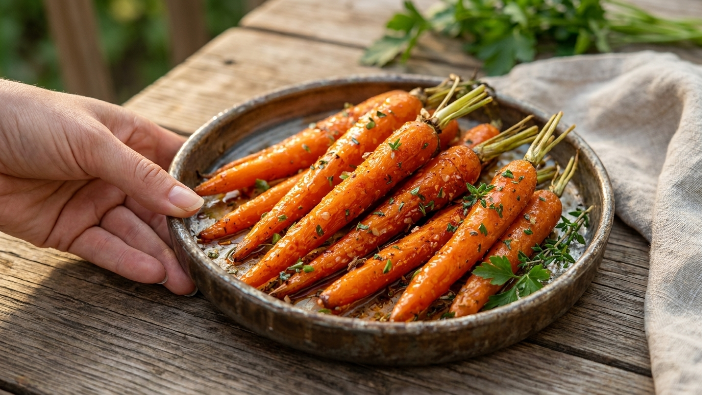
Easy Honey Garlic Glazed Carrots Recipe – Sweet, Buttery, and Perfectly Caramelized 🥕🍯

These Honey Garlic Glazed Carrots are an easy, colorful side dish made with tender carrots coated in a glossy mixture of honey, butter, fresh garlic, and simple seasonings. The carrots become lightly caramelized around the edges while staying tender inside, and the sweet-savory glaze clings beautifully to every piece.

The combination of honey and garlic gives this recipe its irresistible flavor. Honey brings natural sweetness and helps the carrots develop a shiny caramelized coating, while fresh garlic balances that sweetness with a warm, savory bite. Butter adds richness, and a little salt and black pepper keep the flavors perfectly balanced.

These glazed carrots are simple enough for an everyday family dinner but attractive enough for Thanksgiving, Christmas, Easter, Sunday dinner, or any special occasion. They pair beautifully with chicken, steak, pork, roast beef, salmon, or other roasted vegetables.

Why You’ll Love These Honey Garlic Glazed Carrots

One of the biggest reasons to love this recipe is its simplicity. You only need a handful of ingredients, yet the finished carrots look and taste impressive.

Roasting the carrots instead of simply boiling them gives them much more flavor. The natural sugars in the vegetables begin to caramelize in the oven, while the honey-butter mixture creates an even richer golden coating.

The garlic keeps the recipe from becoming overly sweet. As it roasts with the butter and honey, its sharpness softens and becomes mellow and aromatic.

This recipe is also easy to adjust. You can make it sweeter, more garlicky, slightly spicy, or add herbs such as thyme or rosemary.

Ingredients

For the Carrots

  • 2 pounds carrots
  • 2 tablespoons olive oil
  • 1/2 teaspoon salt
  • 1/4 teaspoon freshly ground black pepper

For the Honey Garlic Glaze

  • 3 tablespoons unsalted butter
  • 3 tablespoons honey
  • 4 garlic cloves, finely minced
  • 1 tablespoon brown sugar, optional
  • 1/2 teaspoon smoked paprika, optional
  • 1/4 teaspoon salt
  • 1/4 teaspoon black pepper

For Finishing

  • 1 tablespoon fresh lemon juice, optional
  • 2 tablespoons chopped fresh parsley
  • Fresh thyme leaves, optional
  • Extra honey for drizzling, optional

How to Make Honey Garlic Glazed Carrots

1. Preheat the Oven

Preheat your oven to 425°F.

Line a large baking sheet with parchment paper or lightly grease it with cooking spray.

Using a relatively high oven temperature helps the carrots caramelize instead of simply steaming.

2. Prepare the Carrots

Wash and peel the carrots.

Trim off both ends.

If using large carrots, cut them into approximately 2- to 3-inch pieces.

Slice particularly thick carrots lengthwise so all the pieces are similar in size.

Uniform pieces are important because smaller carrots can become too soft before larger pieces finish cooking.

If using baby carrots, you can leave them whole.

3. Season the Carrots

Place the prepared carrots in a large mixing bowl.

Add olive oil, salt, and black pepper.

Toss thoroughly until every carrot is lightly coated.

Arrange them on the prepared baking sheet in a single layer.

Try not to overcrowd the pan. Leaving a little space between the carrots helps moisture escape and encourages browning.

4. Start Roasting

Place the carrots in the oven.

Roast at 425°F for approximately 15 minutes.

This initial roasting period allows the carrots to begin softening and developing caramelized edges before the honey glaze is added.

Adding honey too early can sometimes cause it to darken excessively before thick carrots become tender.

5. Make the Honey Garlic Glaze

While the carrots roast, melt the butter in a small saucepan over low to medium-low heat.

Add the minced garlic.

Cook for approximately 30 seconds, stirring continuously, until fragrant.

Do not allow the garlic to brown too much.

Add the honey, optional brown sugar, paprika, salt, and black pepper.

Stir until smooth.

Remove the glaze from the heat.

The brown sugar is optional but creates an even richer caramelized finish.

6. Coat the Carrots

After the carrots have roasted for 15 minutes, carefully remove the baking sheet from the oven.

Pour the honey garlic butter mixture over the carrots.

Use a spatula or tongs to toss them until every piece is evenly coated.

Spread the carrots back into a single layer.

7. Continue Roasting

Return the pan to the oven.

Roast for another 15 to 20 minutes, turning the carrots once halfway through.

The exact cooking time depends on the thickness of the carrots.

They are ready when they can easily be pierced with a fork but still hold their shape.

The edges should look golden and lightly caramelized, while the honey glaze should appear glossy and slightly sticky.

8. Caramelize the Edges

For extra caramelization, you can switch the oven to broil during the final 1 to 2 minutes.

Watch the carrots very carefully.

Honey contains sugar and can burn quickly under direct high heat.

You want dark golden edges, not blackened glaze.

9. Add a Fresh Finish

Remove the carrots from the oven.

For a brighter flavor, drizzle approximately 1 tablespoon fresh lemon juice over them.

The acidity helps balance the sweetness of the honey and richness of the butter.

Toss gently.

10. Garnish and Serve

Transfer the Honey Garlic Glazed Carrots to a serving dish.

Sprinkle generously with fresh parsley or thyme.

For a sweeter presentation, drizzle a very small amount of extra honey over the top.

Finish with freshly cracked black pepper and serve warm.

What to Serve With Honey Garlic Glazed Carrots

These carrots are extremely versatile and work with many different main dishes.

They are especially delicious alongside garlic butter steak, roast beef, pot roast, beef tenderloin, or meatloaf.

For chicken dinners, pair them with roasted chicken, creamy garlic chicken, baked chicken breasts, or grilled chicken.

They also complement pork chops, pork tenderloin, ham, turkey, and salmon.

For holiday meals, serve them alongside mashed potatoes, green beans, stuffing, roasted Brussels sprouts, and your favorite roast.

Because the carrots already have a sweet glaze, they pair particularly well with savory main dishes.

Tips for the Best Honey Garlic Glazed Carrots

Cut the carrots evenly. Similar-sized pieces cook at approximately the same speed.

Do not overcrowd the baking sheet. Crowding traps steam and prevents caramelization.

Use real butter. Butter adds richness that works especially well with honey and garlic.

Use fresh garlic. Freshly minced garlic creates stronger, more aromatic flavor.

Add the glaze after partial roasting. This prevents the honey from burning before the carrots become tender.

Use high heat. A hot oven encourages caramelized edges.

Watch carefully near the end. Honey can change from caramelized to burned quickly.

Add lemon for balance. A small squeeze of fresh lemon can keep the finished dish from tasting overly sweet.

Easy Recipe Variations

Honey Garlic Butter Carrots

Increase the butter to 4 tablespoons for an even richer glaze.

Spicy Honey Garlic Carrots

Add 1/4 teaspoon cayenne pepper or 1/2 teaspoon crushed red pepper flakes to the glaze.

The heat contrasts beautifully with the honey.

Maple Garlic Carrots

Replace the honey with pure maple syrup.

This creates a slightly deeper, warmer sweetness.

Herb Honey Carrots

Add fresh thyme or finely chopped rosemary to the glaze.

Fresh herbs work especially well when serving these carrots with roast chicken or beef.

Honey Balsamic Carrots

Add 1 tablespoon balsamic vinegar to the glaze.

The acidity gives the carrots a richer sweet-and-tangy flavor.

Parmesan Honey Garlic Carrots

Sprinkle a small amount of freshly grated Parmesan over the carrots during the final few minutes of roasting.

The salty cheese creates an interesting contrast with the sweet glaze.

Can I Make Honey Garlic Carrots on the Stovetop?

Yes.

Cut the carrots into smaller pieces so they cook evenly.

Place them in a large skillet with approximately 1/3 cup water.

Cover and cook over medium heat for about 6 to 8 minutes until nearly tender.

Drain any remaining water.

Add butter, garlic, honey, salt, and black pepper.

Cook uncovered for another 4 to 6 minutes, stirring frequently, until the carrots become glossy and lightly caramelized.

Can I Use Baby Carrots?

Absolutely.

Baby carrots make this recipe especially convenient because very little preparation is required.

Pat them dry before seasoning so the oil and glaze stick properly.

Because baby carrots vary in thickness, begin checking them for tenderness near the lower end of the cooking time.

Can I Make These Carrots Ahead of Time?

Yes.

You can peel and cut the carrots up to 2 days ahead and store them in an airtight container in the refrigerator.

The honey garlic glaze can also be prepared ahead and refrigerated separately.

For the best caramelized texture, roast the carrots shortly before serving.

You can also cook them completely ahead and gently reheat them if necessary.

Storage and Reheating

Allow leftover carrots to cool before transferring them to an airtight container.

Store them in the refrigerator for up to 3 to 4 days.

For the best reheating results, place them on a baking sheet and warm at 350°F for approximately 8 to 10 minutes.

They can also be reheated in a skillet over medium-low heat with a small amount of butter.

Microwave reheating works for individual portions, although the carrots may lose some of their caramelized texture.

Frequently Asked Questions

Why are my roasted carrots not caramelizing?

The oven may not be hot enough, the carrots may be too crowded, or there may be too much moisture on them.

Use a large baking sheet and arrange them in a single layer.

Can I reduce the honey?

Yes. Use 2 tablespoons instead of 3 for a less-sweet version.

Can I use maple syrup instead?

Absolutely. Pure maple syrup works very well as a substitute.

Do I need to peel carrots?

No. If the carrots are thoroughly scrubbed, peeling is optional. Peeled carrots simply create a smoother presentation.

How do I know when the carrots are done?

They should be tender enough to pierce easily with a fork but should not fall apart. The edges should also have visible caramelization.

Final Thoughts

These Honey Garlic Glazed Carrots turn an everyday vegetable into a sweet, savory, and beautifully caramelized side dish. Tender roasted carrots are coated with buttery honey, fragrant garlic, and simple seasonings, creating plenty of flavor with very little effort.

They are easy enough for a regular weeknight dinner while still looking special enough for Thanksgiving, Christmas, Easter, or a Sunday family meal.

Serve them alongside chicken, steak, pork chops, roast beef, turkey, or salmon, and do not forget to spoon any extra honey garlic glaze from the baking sheet over the top.

With tender centers, caramelized edges, fresh garlic, and a glossy honey-butter finish, these colorful carrots are an easy side dish that can quickly become a family favorite. 🥕🍯

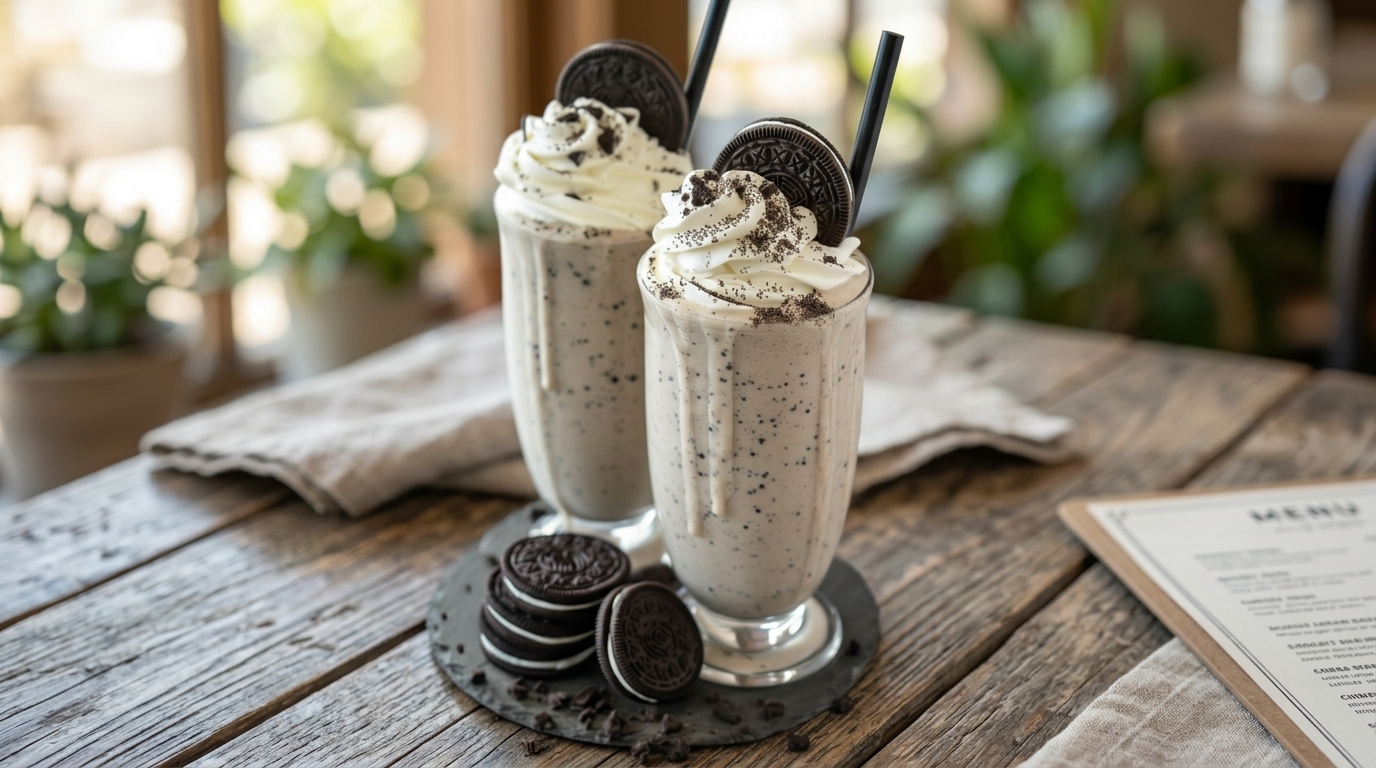
Easy Oreo Milkshake Recipe – Thick, Creamy & Loaded with Cookies

An Oreo Milkshake is one of the easiest desserts you can make when you are craving something cold, creamy, chocolatey, and completely satisfying. Made with vanilla ice cream, milk, and plenty of Oreo cookies, this classic milkshake comes together in just a few minutes and delivers the perfect balance of smooth ice cream and crunchy chocolate cookie pieces.

This easy Oreo milkshake recipe is perfect for hot summer afternoons, movie nights, birthday parties, weekend treats, or anytime you want a quick dessert without turning on the oven. It tastes rich and indulgent, yet requires only a handful of simple ingredients.

You can enjoy it exactly as written or make it extra special with whipped cream, crushed Oreos, chocolate syrup, or even a scoop of cookies-and-cream ice cream. Whether you are making one for yourself or preparing several for family and friends, this homemade Oreo milkshake is always a crowd-pleaser.

Why You’ll Love This Oreo Milkshake

One of the best things about this recipe is how quick and simple it is. You only need a blender and a few basic ingredients, and the entire milkshake can be ready in about 5 minutes.

The texture is another reason this recipe works so well. Vanilla ice cream creates a thick, creamy base, while the Oreo cookies add chocolate flavor and little pieces of cookie throughout every sip.

It is also extremely easy to customize. You can make it thicker, thinner, more chocolatey, extra crunchy, or even turn it into a cookies-and-cream dessert shake with additional toppings.

This recipe is also a great option for parties because it can easily be doubled or tripled depending on the size of your blender.

Ingredients

For the Oreo Milkshake

  • 4 cups vanilla ice cream
  • 1 cup whole milk
  • 10 Oreo cookies
  • 1 teaspoon vanilla extract
  • 2 tablespoons chocolate syrup, optional

For the Topping

  • Whipped cream
  • 2 Oreo cookies, crushed
  • Chocolate syrup, for drizzling
  • 1 whole Oreo cookie, for garnish, optional

How to Make an Oreo Milkshake

1. Chill the Glasses

For an extra-cold milkshake, place your serving glasses in the refrigerator or freezer for about 10 minutes before blending.

This step is optional, but it helps the milkshake stay thick and cold for longer once it is served.

If you want to make the glasses look more decorative, drizzle a little chocolate syrup around the inside before pouring in the milkshake.

2. Prepare the Oreo Cookies

Break the Oreo cookies into halves or quarters before adding them to the blender.

You do not need to remove the cream filling. The filling adds sweetness and contributes to the creamy texture of the shake.

If you prefer noticeable pieces of Oreo in the finished milkshake, reserve 1–2 cookies and add them during the final few seconds of blending.

3. Add the Ice Cream

Add the vanilla ice cream to the blender first.

For the thickest milkshake, use ice cream straight from the freezer rather than allowing it to soften too much at room temperature.

Vanilla ice cream creates the classic Oreo milkshake flavor, but cookies-and-cream ice cream can also be used if you want an even stronger Oreo taste.

4. Add the Milk

Pour in the whole milk.

Start with about ¾ cup if you prefer a very thick milkshake. You can always add more milk after blending.

Using too much milk immediately can make the milkshake thin, so it is better to begin with less and adjust the consistency gradually.

Whole milk provides the richest flavor, but 2% milk can also work.

5. Add the Oreos and Flavoring

Add the Oreo cookies, vanilla extract, and optional chocolate syrup to the blender.

Vanilla extract enhances the flavor of the ice cream, while the chocolate syrup makes the milkshake slightly richer and more chocolatey.

If you want the classic cookies-and-cream flavor without extra chocolate, simply leave the syrup out.

6. Blend the Milkshake

Place the lid securely on the blender.

Blend on medium-high speed for approximately 20–30 seconds.

Stop and check the texture.

The milkshake should be smooth and creamy, but you should still be able to see tiny pieces of Oreo throughout.

Avoid blending for too long because the heat created by the blender can begin melting the ice cream and make the shake thinner.

7. Adjust the Consistency

If the milkshake is too thick to pour, add 1–2 tablespoons of milk at a time and blend briefly.

If it is too thin, add another scoop of vanilla ice cream and blend again.

For a chunkier milkshake, add one or two additional Oreo cookies at the end and pulse the blender just a few times.

This creates larger cookie pieces that give the shake more texture.

8. Pour Into Glasses

Remove your chilled glasses from the refrigerator or freezer.

Pour the Oreo milkshake evenly into the glasses.

Serve immediately after blending for the thickest and creamiest texture.

Milkshakes begin melting quickly, especially in warm kitchens, so they are best enjoyed right away.

9. Add the Toppings

Top each milkshake with a generous swirl of whipped cream.

Sprinkle crushed Oreo cookies over the top.

Drizzle with chocolate syrup and add a whole Oreo cookie to the rim or top of the whipped cream if desired.

For an extra indulgent presentation, you can also coat the rim of the glass with chocolate syrup and crushed Oreo crumbs before serving.

What to Serve With an Oreo Milkshake

Oreo Milkshakes are delicious enough to enjoy on their own as a dessert, but they also pair well with plenty of casual meals and treats.

Serve them alongside burgers, fries, grilled sandwiches, or pizza for a classic diner-style combination.

For dessert, pair your milkshake with brownies, chocolate chip cookies, cupcakes, or a slice of chocolate cake.

You can also serve smaller milkshakes at birthday parties or gatherings alongside cookies, mini desserts, and other sweet treats.

Because the milkshake is rich and creamy, smaller portions can be especially satisfying when serving it with other desserts.

Tips for the Best Oreo Milkshake

Use good-quality vanilla ice cream. Since ice cream is the main ingredient, its flavor and texture make a big difference in the finished shake.

Do not use too much milk at the beginning. Start with less and add more only if necessary.

Blend only until combined. Overblending can melt the ice cream and make the milkshake watery.

For extra Oreo texture, reserve a few cookies and pulse them into the milkshake at the end.

Chill your glasses beforehand if possible. This helps keep the shake cold and thick.

If your blender struggles with thick mixtures, add the milk before the ice cream or allow the ice cream to soften for just 2–3 minutes.

Serve immediately after blending for the best texture.

Easy Recipe Variations

For a Chocolate Oreo Milkshake, use chocolate ice cream instead of vanilla and add 2 tablespoons of chocolate syrup.

For a Cookies and Cream Milkshake, use cookies-and-cream ice cream and add extra crushed Oreos.

For a Peanut Butter Oreo Milkshake, add 2 tablespoons of creamy peanut butter before blending.

For a Mint Oreo Milkshake, add a small amount of peppermint extract and use Mint Oreos if available.

For a Mocha Oreo Milkshake, add 1 teaspoon instant espresso powder or a small shot of cooled espresso.

For an Extra-Thick Oreo Shake, reduce the milk to about ½–¾ cup and add an extra scoop of ice cream.

For a Double Chocolate Oreo Shake, use chocolate ice cream, chocolate syrup, and chocolate-filled Oreo cookies.

How to Store an Oreo Milkshake

Oreo Milkshakes are best served immediately after blending because the texture changes quickly as the ice cream melts.

If you need to store one briefly, pour it into a freezer-safe container and freeze for no more than about 30–60 minutes.

Before serving, stir or blend it again briefly if it has partially frozen.

Long-term storage is not recommended because the milkshake can become icy and lose its smooth texture.

If you want to prepare ahead, measure the Oreo cookies and have the toppings ready, then blend the milkshake immediately before serving.

Frequently Asked Questions

Can I make an Oreo Milkshake without ice cream?

Yes, although the texture will be different. You can blend frozen bananas, milk, Oreos, and ice for a lighter version.

For the traditional thick and creamy result, vanilla ice cream is the best choice.

How do I make my Oreo Milkshake thicker?

Use less milk and more ice cream.

Starting with ¾ cup of milk instead of a full cup is a good way to create a thicker shake.

You can also chill your ingredients and glasses before serving.

Can I use different Oreo flavors?

Absolutely. Golden Oreos, Mint Oreos, chocolate-filled Oreos, peanut butter varieties, or seasonal flavors can all be used to create different milkshakes.

Why is my milkshake too thin?

The most common reasons are using too much milk, letting the ice cream soften too long, or overblending.

Add more ice cream and blend briefly to thicken it again.

Final Thoughts

This Easy Oreo Milkshake recipe combines creamy vanilla ice cream, cold milk, and crunchy chocolate Oreo cookies into a thick, rich dessert that takes only minutes to make.

It is simple enough for an everyday treat but can easily be dressed up with whipped cream, crushed cookies, and chocolate syrup for parties or special occasions.

Whether you keep it classic or try one of the easy variations, this homemade Oreo Milkshake is a quick and satisfying dessert that delivers plenty of cookies-and-cream flavor in every cold, creamy sip.

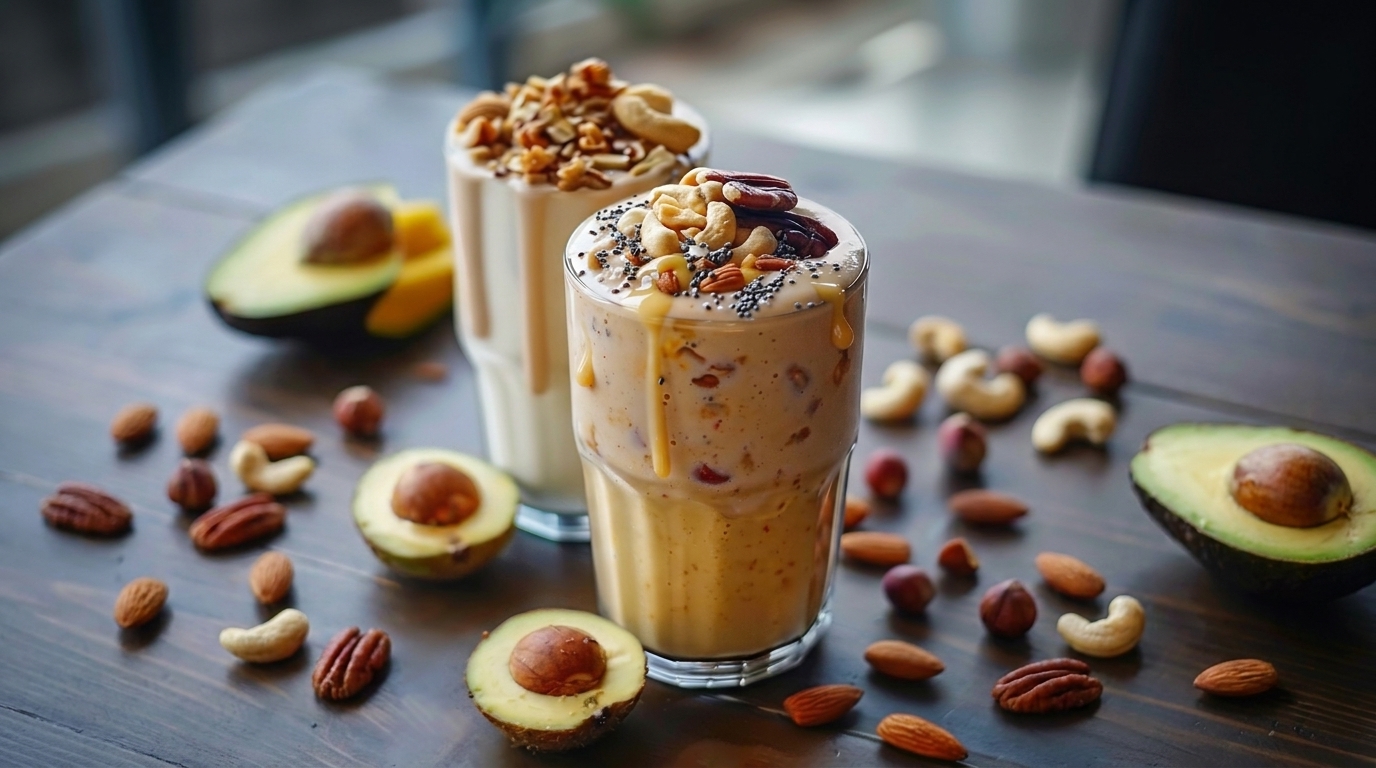
Nutty Smoothie Bliss Recipe – A Creamy, Protein-Packed Breakfast Delight

If you love quick breakfasts that are creamy, satisfying, and full of nourishing ingredients, this Nutty Smoothie Bliss is the kind of recipe you will want to make again and again. It blends banana, Greek yogurt, nut butter, milk, oats, chia seeds, and warm cinnamon into a thick, naturally sweet smoothie that tastes almost like dessert while still being practical enough for breakfast or a post-workout snack.

The nut butter gives this smoothie its rich, roasted flavor and helps make every sip feel extra creamy. Banana adds natural sweetness and body, Greek yogurt brings a smooth texture and extra protein, and oats help make the drink more filling. A spoonful of chia seeds adds additional fiber and creates an even thicker consistency after blending.

This smoothie is especially useful on busy mornings because everything comes together in just a few minutes. You can enjoy it immediately, pour it into a travel cup, or prepare smoothie packs ahead of time so breakfast is almost effortless.

Why You’ll Love This Nutty Smoothie Bliss

One of the best things about this smoothie is how satisfying it is. Instead of feeling like a thin fruit drink, it has a thick, milkshake-like texture that can actually help keep you full through the morning.

It is also easy to customize. Peanut butter gives you a classic nutty flavor, almond butter creates a milder roasted taste, and cashew butter makes the smoothie especially creamy. You can change the milk, add cocoa powder, blend in berries, or include a scoop of protein powder depending on your needs.

The ingredients are simple and widely available, which makes this recipe ideal for everyday use. There is no complicated preparation, cooking, or equipment beyond a blender.

Ingredients

For the Smoothie

  • 1 large ripe banana, preferably frozen
  • 1 cup unsweetened milk of choice
  • ¾ cup plain Greek yogurt
  • 2 tablespoons peanut butter, almond butter, or cashew butter
  • ¼ cup old-fashioned rolled oats
  • 1 tablespoon chia seeds
  • ½ teaspoon ground cinnamon
  • ½ teaspoon pure vanilla extract
  • 1 to 2 teaspoons honey or maple syrup, optional
  • ½ cup ice cubes, optional
  • Pinch of salt

Optional Protein Boost

  • 1 scoop vanilla or unflavored protein powder
  • 1 to 2 tablespoons hemp seeds
  • 2 tablespoons powdered peanut butter

Optional Toppings

  • Chopped almonds or peanuts
  • Banana slices
  • Chia seeds
  • Rolled oats
  • Cinnamon
  • Drizzle of nut butter

How to Make Nutty Smoothie Bliss

1. Prepare the Banana

For the thickest and creamiest smoothie, use a frozen banana.

Peel a ripe banana, slice it into chunks, and freeze it in a sealed container or freezer bag for at least 2 to 3 hours.

Very ripe bananas work particularly well because they are naturally sweeter. Bananas with plenty of brown speckles are ideal for smoothies.

If you do not have frozen banana, fresh banana works perfectly. Simply add a little extra ice to achieve a colder, thicker texture.

2. Choose Your Nut Butter

Peanut butter creates a bold, familiar flavor and pairs beautifully with banana.

Almond butter has a slightly more delicate toasted taste, while cashew butter is especially smooth and creamy.

For the cleanest flavor, choose a nut butter that contains mostly nuts and perhaps a little salt. However, regular commercial nut butter also works well.

Stir the nut butter before measuring if the natural oils have separated.

3. Add the Liquid First

Pour the milk into the blender first.

Adding liquid before thicker ingredients helps the blender blades move more freely and makes it easier to create a smooth consistency.

You can use dairy milk, almond milk, oat milk, soy milk, cashew milk, or another milk you enjoy.

For a higher-protein version, dairy milk or soy milk can be especially useful.

4. Add the Creamy Ingredients

Add the Greek yogurt, nut butter, and vanilla extract.

Greek yogurt gives the smoothie a thick, creamy texture while adding protein and a slight tang that balances the sweetness of the banana.

If you prefer a dairy-free smoothie, use a thick plant-based yogurt.

5. Add the Banana, Oats, and Seeds

Add the frozen banana chunks, rolled oats, chia seeds, cinnamon, and a small pinch of salt.

The oats make the smoothie more substantial and help create a breakfast-style drink rather than a simple fruit smoothie.

Chia seeds absorb liquid and become slightly gel-like, helping thicken the drink.

A tiny pinch of salt may seem unusual in a smoothie, but it helps bring out the roasted nut butter flavor and balances the sweetness.

6. Add Optional Sweetener and Protein

Taste preferences vary depending on how ripe your banana is and whether your yogurt is sweetened.

If you like a sweeter smoothie, add 1 to 2 teaspoons of honey or maple syrup.

For additional protein, add one scoop of your favorite vanilla or unflavored protein powder.

Keep in mind that some protein powders naturally thicken smoothies, so you may need to add a little extra milk later.

7. Blend Until Smooth

Secure the blender lid and begin blending on low speed.

Gradually increase to high.

Blend for approximately 45 to 60 seconds, or until the smoothie looks completely creamy and no visible pieces of oats or banana remain.

Stop the blender and scrape down the sides if necessary.

If your blender struggles with frozen banana, add another 2 to 4 tablespoons milk.

8. Adjust the Consistency

Check the texture before serving.

For a thicker smoothie, add several ice cubes or a few extra pieces of frozen banana and blend again.

For a thinner smoothie, add milk a few tablespoons at a time.

Remember that chia seeds and oats continue absorbing liquid after blending, so the smoothie may become slightly thicker if it sits for several minutes.

9. Serve Immediately

Pour the smoothie into a tall glass or travel cup.

For a pretty presentation, top it with a small drizzle of nut butter, a few banana slices, chopped nuts, chia seeds, or a light sprinkle of cinnamon.

Serve immediately while cold and creamy.

What Makes This Smoothie Protein-Packed?

Several ingredients contribute protein to this recipe.

Greek yogurt is one of the main sources and also provides the creamy base. Nut butter contributes additional protein along with healthy fats, while milk can add even more depending on the variety you choose.

If you include protein powder, the smoothie becomes even more substantial and can work particularly well after exercise or as a quick meal when you are short on time.

The exact protein content will depend on the brands and ingredients you use, so check individual nutrition labels if you are tracking protein closely.

Tips for the Best Nutty Smoothie Bliss

Use frozen banana. It makes the smoothie naturally thick and cold without requiring a large amount of ice.

Add liquids first. This helps the blender process thicker ingredients more efficiently.

Use rolled oats. They blend easily while adding body and making the smoothie more filling.

Start with less liquid. You can always add more, but it is difficult to make a smoothie thick again after adding too much.

Blend thoroughly. Give the oats and chia seeds enough time to break down for the smoothest texture.

Adjust sweetness at the end. Ripe banana may provide all the sweetness you need.

Use a high-powered blender when possible. It makes breaking down oats, seeds, and frozen fruit much easier.

Easy Recipe Variations

Chocolate Nutty Smoothie

Add 1 tablespoon unsweetened cocoa powder and use peanut or almond butter.

For an even richer chocolate flavor, add a few cacao nibs.

Berry Nut Smoothie

Add ½ to 1 cup frozen strawberries, blueberries, or raspberries.

You may need an extra splash of milk because frozen berries will make the smoothie thicker.

Peanut Butter Banana Smoothie

Keep things simple by using peanut butter as your nut butter and increasing it to 3 tablespoons for extra peanut flavor.

Coffee Nutty Smoothie

Replace ¼ cup of the milk with chilled coffee or cold brew.

This variation works especially well for breakfast.

Green Nutty Smoothie

Add 1 cup baby spinach.

The banana and nut butter help balance the flavor, making this an easy way to include greens without dramatically changing the taste.

Apple Cinnamon Nut Smoothie

Replace half of the banana with ½ cup chopped apple and increase the cinnamon slightly.

Almond butter works especially well in this version.

Make-Ahead Smoothie Packs

For faster mornings, create individual freezer smoothie packs.

Place sliced banana, oats, chia seeds, and any frozen fruit you want to use into freezer-safe bags or containers.

Freeze the packs until needed.

In the morning, empty one pack into your blender and add the yogurt, nut butter, milk, vanilla, and any protein powder.

Blend until creamy.

Avoid freezing the milk directly in the same pack unless you intentionally want milk ice cubes, as using liquid milk usually makes blending easier.

Storage

Smoothies have the best flavor and texture immediately after blending.

If necessary, store leftovers in a tightly covered jar or bottle in the refrigerator for up to 24 hours.

The smoothie will likely thicken because the oats and chia seeds continue absorbing liquid.

Shake or stir well before drinking and add a splash of milk if it has become too thick.

For longer storage, freeze the smoothie in an airtight container or ice cube tray. Blend the frozen smoothie cubes with a little fresh milk when ready to enjoy.

What to Serve With a Nutty Smoothie

This smoothie is filling enough to enjoy by itself, especially when prepared with Greek yogurt, oats, nut butter, and protein powder.

For a larger breakfast, pair it with whole-grain toast, hard-boiled eggs, fresh fruit, or a small bowl of yogurt.

It also makes a great afternoon snack alongside sliced apples, homemade energy bites, or a handful of nuts.

Final Thoughts

This Nutty Smoothie Bliss is an easy way to turn simple breakfast ingredients into a creamy, satisfying drink that takes only minutes to prepare.

The combination of banana, Greek yogurt, nut butter, oats, chia seeds, cinnamon, and milk creates a smoothie that tastes rich and indulgent while still being practical for a busy morning.

Whether you make the classic version, add chocolate, blend in berries, or give it an extra boost with protein powder, this recipe is easy to adapt to your taste.

Keep a few frozen bananas ready in your freezer, and you will always be just a few minutes away from a thick, creamy, nutty smoothie that works for breakfast, post-workout fuel, or an easy anytime snack.