
Easy Garlic Parmesan Chicken Meatloaves Recipe – Juicy, Cheesy & Family-Friendly

These Garlic Parmesan Chicken Meatloaves are a delicious twist on classic meatloaf, made with ground chicken, plenty of garlic, Parmesan cheese, herbs, and a flavorful cheesy topping. They are tender, juicy, savory, and much lighter than traditional beef meatloaf while still delivering all the comfort-food satisfaction you want from a cozy homemade dinner.

Making the meatloaves in individual portions helps them cook faster and more evenly than one large loaf. It also gives every serving more golden edges and makes portioning easy. These mini chicken meatloaves are perfect for busy weeknights, meal prep, family dinners, or even casual entertaining.

Serve them with creamy mashed potatoes, roasted vegetables, buttery green beans, pasta, or a simple salad. The garlic-Parmesan flavor works with almost any side dish, making this an easy recipe to keep in your regular dinner rotation.

Why You’ll Love These Garlic Parmesan Chicken Meatloaves

One of the best things about this recipe is how flavorful ground chicken becomes when combined with Parmesan, garlic, breadcrumbs, milk, herbs, and seasonings. Ground chicken can sometimes dry out when baked, but the right combination of moisture and fat keeps these meatloaves tender and juicy.

The individual size is another major advantage. Mini meatloaves need less cooking time than a traditional full-size meatloaf, and everyone gets their own perfectly portioned serving with plenty of browned exterior.

You will also love how flexible the recipe is. You can add mozzarella for extra cheesiness, use Italian-style breadcrumbs for additional seasoning, add red pepper flakes for heat, or finish the tops with garlic butter for even more richness.

Ingredients

For the Chicken Meatloaves

  • 2 pounds ground chicken
  • 1 cup Italian-style breadcrumbs
  • ¾ cup freshly grated Parmesan cheese
  • 2 large eggs
  • ½ cup whole milk
  • 4 cloves garlic, finely minced
  • ½ small yellow onion, very finely diced
  • 2 tablespoons chopped fresh parsley
  • 1 teaspoon Italian seasoning
  • 1 teaspoon garlic powder
  • 1 teaspoon onion powder
  • 1 teaspoon salt
  • ½ teaspoon freshly ground black pepper
  • ¼ teaspoon red pepper flakes, optional

For the Parmesan Topping

  • ½ cup shredded mozzarella cheese
  • ¼ cup freshly grated Parmesan cheese
  • 2 tablespoons melted butter
  • 1 clove garlic, finely minced
  • 1 tablespoon chopped fresh parsley

How to Make Garlic Parmesan Chicken Meatloaves

1. Preheat the Oven

Preheat your oven to 375°F (190°C).

Line a large baking sheet with parchment paper or lightly grease a baking dish with nonstick spray.

A rimmed baking sheet works especially well because it allows hot air to circulate around the individual meatloaves, helping the sides brown rather than steam.

2. Prepare the Garlic and Onion

Heat a small skillet over medium-low heat with a teaspoon of olive oil or butter.

Add the finely diced onion and cook for approximately 3 to 4 minutes, stirring occasionally, until softened and translucent.

Add the minced garlic and cook for another 30 seconds until fragrant.

Remove from the heat and allow the mixture to cool for a few minutes.

This step is optional, but lightly cooking the onion and garlic before mixing them into the chicken gives the meatloaves a sweeter, smoother flavor and prevents crunchy pieces of onion in the finished dish.

3. Make the Breadcrumb Mixture

In a large mixing bowl, combine the breadcrumbs and milk.

Stir gently and allow the mixture to sit for about 2 to 3 minutes.

The breadcrumbs will absorb the milk and form a soft mixture called a panade. This is one of the most useful techniques for keeping meatloaf moist because the hydrated breadcrumbs help hold moisture inside the meat as it cooks.

Add the eggs, Parmesan cheese, parsley, Italian seasoning, garlic powder, onion powder, salt, black pepper, and optional red pepper flakes.

Add the cooled onion and garlic mixture.

Stir until everything is evenly combined.

4. Add the Ground Chicken

Add the ground chicken to the bowl.

Using clean hands or a large fork, gently mix the chicken with the breadcrumb mixture.

Be careful not to overmix.

Overworking ground meat can make the finished meatloaf dense and slightly rubbery. Mix only until the ingredients are evenly distributed and you no longer see large pockets of breadcrumbs or seasoning.

The mixture will be softer than traditional beef meatloaf, which is completely normal.

5. Shape the Mini Meatloaves

Divide the mixture into approximately 6 equal portions.

Gently shape each portion into a small loaf approximately 4 to 5 inches long.

Place them several inches apart on the prepared baking sheet.

Try not to compress the chicken mixture too firmly while shaping. Keeping the meatloaves slightly loose helps maintain a tender texture.

If the mixture feels sticky, lightly dampen your hands with water before shaping.

6. Prepare the Garlic Parmesan Butter

In a small bowl, combine the melted butter, minced garlic, and chopped parsley.

Brush a little of the garlic butter over the top of each chicken meatloaf.

Reserve some for the final few minutes of baking.

The butter adds richness and helps the surface turn golden while the fresh garlic gives the meatloaves an additional layer of flavor.

7. Bake the Chicken Meatloaves

Place the baking sheet in the preheated oven.

Bake for approximately 25 minutes.

Because ground chicken is lean, avoid baking much longer than necessary.

After 25 minutes, check the internal temperature by inserting an instant-read thermometer into the thickest part of one meatloaf.

Ground chicken needs to reach an internal temperature of 165°F (74°C) for safe serving.

If they are not yet done, continue baking and check every few minutes.

8. Add the Cheese Topping

When the meatloaves are almost fully cooked, remove the pan from the oven.

Brush the tops with the remaining garlic butter.

Sprinkle each meatloaf generously with shredded mozzarella and grated Parmesan.

Return the pan to the oven and bake for another 5 to 7 minutes, or until the cheese has melted and the meatloaves reach 165°F internally.

For a more golden topping, switch the oven to broil for the final 1 to 2 minutes.

Watch carefully because Parmesan and mozzarella can brown quickly under the broiler.

9. Rest Before Serving

Remove the meatloaves from the oven and allow them to rest for approximately 5 minutes.

Resting allows the juices inside the chicken to redistribute rather than immediately escaping when you cut into the meat.

Sprinkle with additional fresh parsley and Parmesan before serving.

What to Serve With Garlic Parmesan Chicken Meatloaves

These chicken meatloaves pair beautifully with classic comfort-food sides.

For a hearty dinner, serve them with creamy mashed potatoes, roasted garlic potatoes, mac and cheese, buttered noodles, or Parmesan rice.

Vegetables balance the richness nicely. Try roasted broccoli, asparagus, Brussels sprouts, green beans, zucchini, carrots, or sautéed spinach.

For a lighter meal, pair each meatloaf with a simple green salad dressed with lemon vinaigrette.

Garlic bread or warm dinner rolls are another excellent choice, especially if you want something to soak up any buttery juices from the meatloaves.

Tips for the Best Garlic Parmesan Chicken Meatloaves

Do not use extremely lean chicken if possible. Ground chicken containing both white and dark meat tends to produce a juicier meatloaf.

Do not skip the milk and breadcrumbs. The panade provides important moisture and keeps the chicken tender.

Use freshly grated Parmesan. It melts more naturally into the meat mixture and delivers stronger flavor than shelf-stable grated cheese.

Do not overmix. Mix just until combined to avoid dense meatloaves.

Use a meat thermometer. Ground chicken can dry out quickly, so checking for exactly 165°F is much more reliable than guessing based on appearance.

Let them rest. A short resting period helps preserve moisture.

Easy Recipe Variations

Mozzarella-Stuffed Chicken Meatloaves

Place a small cube of mozzarella cheese inside the center of each meatloaf before baking. Seal the chicken mixture completely around the cheese so it stays inside as it melts.

Spinach Parmesan Chicken Meatloaves

Add 1 cup finely chopped cooked spinach to the mixture. Be sure to squeeze out as much water as possible before adding it.

Spicy Garlic Parmesan Meatloaves

Add ½ teaspoon crushed red pepper flakes and a small amount of cayenne pepper for extra heat.

Italian Chicken Meatloaves

Top each loaf with 2 tablespoons marinara sauce before adding mozzarella and Parmesan for a chicken-Parmesan-inspired variation.

Herb Garlic Chicken Meatloaves

Add fresh basil, oregano, thyme, or rosemary to give the meatloaves an even more aromatic herb flavor.

Storage and Reheating

Allow leftover meatloaves to cool before transferring them to an airtight container.

Store in the refrigerator for up to 3 to 4 days.

For best results, reheat them in a covered baking dish at 325°F until warmed through. Adding a teaspoon of water, broth, or butter to the dish can help prevent the chicken from drying out.

Individual meatloaves can also be microwaved in short intervals until hot.

For longer storage, wrap the cooled meatloaves individually and place them in a freezer-safe container. Freeze for up to approximately 2 to 3 months.

Thaw overnight in the refrigerator before reheating.

Final Thoughts

These Easy Garlic Parmesan Chicken Meatloaves are a flavorful, comforting alternative to traditional meatloaf. The combination of juicy ground chicken, fresh garlic, Parmesan cheese, Italian herbs, and a bubbling mozzarella topping creates a dinner that feels familiar yet a little more special.

They are easy enough for a weeknight, attractive enough to serve to guests, and convenient enough for meal prep. Best of all, the individual portions cook quickly and give everyone plenty of those delicious golden, cheesy edges.

Serve them hot with mashed potatoes and roasted vegetables for the ultimate comfort-food dinner, or pair them with salad and steamed vegetables for something lighter. Either way, these tender garlic Parmesan chicken meatloaves are sure to become a recipe worth making again.
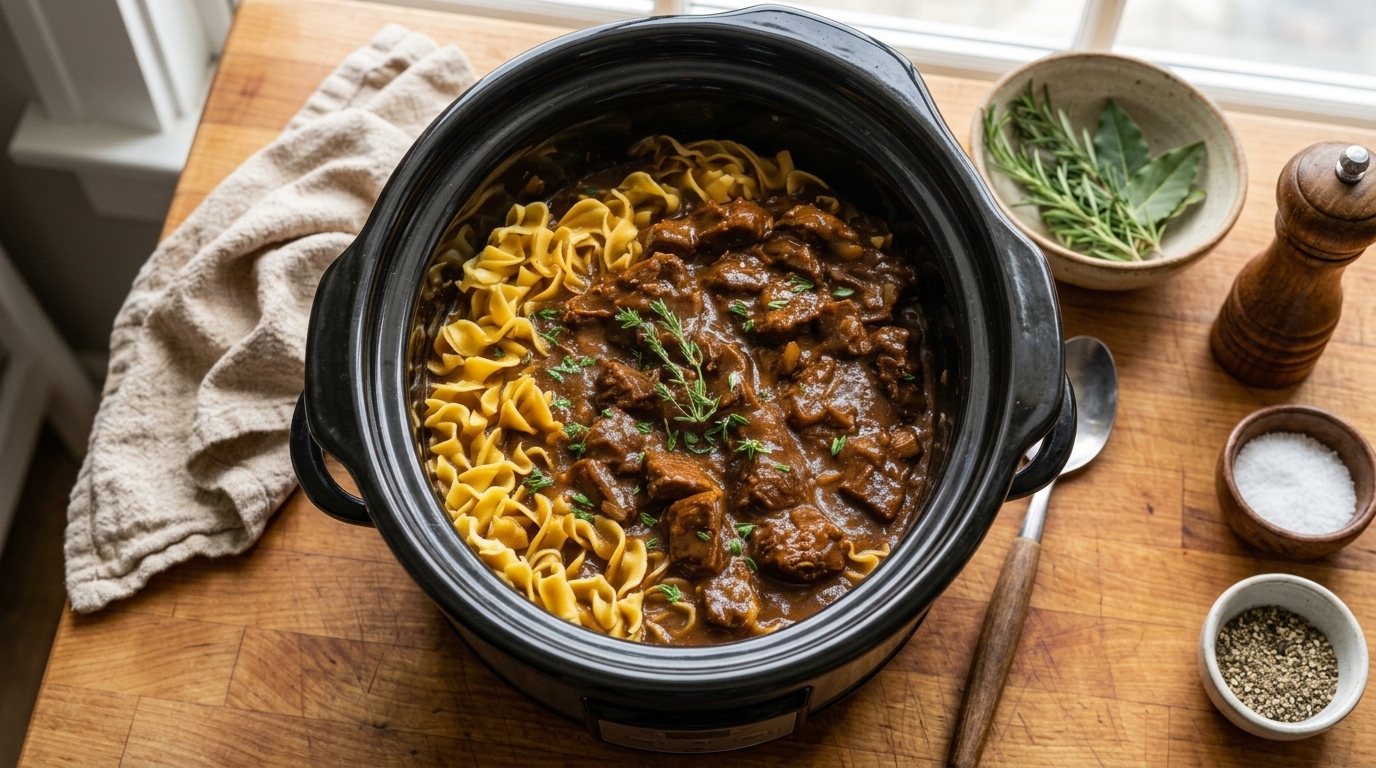
Easy Slow Cooker Beef Noodles Recipe – Tender, Savory & Perfect for Cozy Dinners

Slow Cooker Beef Noodles are the ultimate comfort food for busy days when you want a hearty homemade dinner without spending hours standing over the stove. Tender chunks of beef cook low and slow in a rich, savory broth until they practically fall apart, then egg noodles are added near the end to soak up all that deep beefy flavor.

This easy slow cooker beef noodles recipe is warm, filling, and incredibly satisfying. The long cooking time allows the beef to become beautifully tender while onions, garlic, Worcestershire sauce, herbs, and beef broth create a flavorful base that tastes like it has been simmering all day.

It is the perfect meal for cool evenings, family dinners, meal prep, or those days when you want something comforting waiting for you at dinnertime. Serve it in deep bowls with crusty bread, roasted vegetables, or a simple salad for a complete meal everyone can enjoy.

Why You’ll Love These Slow Cooker Beef Noodles

One of the biggest reasons to love this recipe is how simple it is to prepare. Once the beef and seasonings are added to the slow cooker, most of the work is done for you. The slow cooker gently breaks down the beef over several hours, creating tender meat and a deeply flavored broth.

The noodles make the dish especially comforting. Instead of cooking them separately, they can be added toward the end so they absorb the savory cooking liquid. This gives every bite rich beef flavor and creates a cozy, almost stew-like consistency.

This recipe is also very flexible. You can keep it simple with beef and noodles or add mushrooms, peas, carrots, or a splash of cream depending on the style of meal you want.

Ingredients

For the Beef

  • 2 pounds beef chuck roast or beef stew meat, cut into 1½-inch pieces
  • 1 teaspoon salt
  • ½ teaspoon black pepper
  • 1 teaspoon garlic powder
  • ½ teaspoon onion powder
  • 2 tablespoons all-purpose flour
  • 1 tablespoon olive oil, optional for searing

For the Slow Cooker Broth

  • 1 medium yellow onion, finely chopped
  • 4 garlic cloves, minced
  • 4 cups low-sodium beef broth
  • 1 tablespoon Worcestershire sauce
  • 1 tablespoon soy sauce
  • 1 teaspoon dried thyme
  • ½ teaspoon dried rosemary
  • ½ teaspoon paprika
  • 1 bay leaf
  • 1 tablespoon tomato paste
  • 1 tablespoon butter

For the Noodles

  • 12 ounces wide egg noodles
  • ½ to 1 cup additional beef broth, if needed
  • 2 tablespoons chopped fresh parsley
  • Salt and black pepper, to taste

How to Make Slow Cooker Beef Noodles

1. Prepare the Beef

Place the beef pieces on a cutting board and pat them dry with paper towels. Removing excess moisture helps the seasoning stick better and also improves browning if you decide to sear the meat first.

Season the beef with salt, black pepper, garlic powder, and onion powder.

Sprinkle the flour over the beef and toss until each piece is lightly coated. The flour helps the beef develop a flavorful crust during searing and also contributes a little body to the cooking liquid.

If you want the easiest possible version, you can skip the searing step and place the seasoned beef directly into the slow cooker. However, searing adds an extra layer of deep, roasted flavor.

2. Sear the Beef

Heat the olive oil in a large skillet over medium-high heat.

Once the skillet is hot, add the beef in a single layer. Avoid overcrowding the pan because too much meat at once will release moisture and cause the beef to steam instead of brown.

Sear the beef for about 2–3 minutes per side until a deep golden-brown crust forms.

You do not need to cook the beef completely. The goal is simply to brown the outside.

Transfer the seared beef to the slow cooker.

If necessary, work in batches until all of the beef is browned.

3. Add the Aromatics

Add the chopped onion and minced garlic to the slow cooker.

You can also briefly cook the onion and garlic in the same skillet used for the beef if you want even more flavor. If you do, cook the onion for about 2 minutes and add the garlic during the final 30 seconds.

Transfer everything to the slow cooker.

4. Add the Broth and Seasonings

Pour the beef broth over the meat.

Add Worcestershire sauce, soy sauce, dried thyme, rosemary, paprika, tomato paste, butter, and the bay leaf.

Stir gently so the tomato paste and seasonings begin to distribute throughout the broth.

The Worcestershire sauce and soy sauce add savory depth without making the finished dish taste strongly of either ingredient. Tomato paste adds richness and helps give the broth a fuller flavor.

5. Slow Cook the Beef

Cover the slow cooker with the lid.

Cook on LOW for approximately 7–8 hours or on HIGH for about 4–5 hours.

The beef is ready when it is very tender and can easily be pulled apart with a fork.

Chuck roast works especially well because its connective tissue slowly breaks down during cooking, resulting in juicy, tender pieces of beef.

Avoid repeatedly opening the slow cooker lid because each time you remove it, heat escapes and the cooking time can increase.

6. Check the Broth

Once the beef is tender, remove and discard the bay leaf.

Taste the broth and adjust with additional salt and black pepper if needed.

At this stage, check how much liquid remains in the slow cooker. The noodles need enough broth to cook properly.

If the liquid level seems low, add an additional ½ to 1 cup of warm beef broth.

7. Add the Egg Noodles

Turn the slow cooker to HIGH if it is not already on that setting.

Add the uncooked egg noodles directly to the slow cooker and stir gently to submerge them in the broth.

Cover and cook for approximately 20–30 minutes.

Stir once or twice during cooking so the noodles cook evenly and do not stick together.

Cooking time can vary depending on the thickness and brand of egg noodles, so begin checking them after about 18–20 minutes.

The noodles should be tender but still have a little structure. Avoid overcooking them because they will continue absorbing liquid as they sit.

8. Finish the Beef Noodles

Once the noodles are tender, gently stir the beef and noodles together.

If the mixture becomes thicker than you prefer, add a splash of warm beef broth.

For a thicker, more gravy-like consistency, leave the slow cooker uncovered for about 10 minutes before serving.

Stir in the chopped fresh parsley.

Taste one final time and adjust the salt and pepper if necessary.

Serve hot in bowls with plenty of tender beef and savory noodles in every portion.

What to Serve With Slow Cooker Beef Noodles

These beef noodles are filling enough to serve as a complete meal, but simple sides can make dinner even better.

Crusty bread, homemade dinner rolls, or garlic bread are excellent choices because they can be used to soak up the flavorful broth.

For vegetables, serve the noodles with roasted green beans, broccoli, carrots, Brussels sprouts, or asparagus.

A crisp green salad with a light vinaigrette is another good option because its freshness balances the rich beef and noodles.

If you want a traditional comfort-food dinner, serve the beef noodles alongside buttered peas or roasted carrots.

Tips for the Best Slow Cooker Beef Noodles

Use beef chuck roast whenever possible. It contains enough fat and connective tissue to remain tender during long slow cooking.

Cut the beef into similar-sized pieces so everything cooks at approximately the same rate.

Searing is optional, but it adds noticeably more flavor. Browning creates caramelized edges that deepen the final taste of the broth.

Do not add the noodles at the beginning of cooking. They would become extremely soft and mushy after several hours.

Add noodles only during the final 20–30 minutes.

Keep some additional beef broth nearby. Egg noodles absorb liquid quickly, especially as the dish sits.

If you are planning leftovers, consider cooking the noodles separately and adding them to individual servings. This prevents them from continuing to absorb all the broth overnight.

Easy Recipe Variations

For Creamy Beef Noodles, stir in ½ cup heavy cream or 4 ounces softened cream cheese after the noodles are cooked.

For Beef and Mushroom Noodles, add 8 ounces of sliced mushrooms during the final 1–2 hours of slow cooking.

For Beef and Vegetable Noodles, add sliced carrots at the beginning of cooking and frozen peas during the final 10 minutes.

For a richer gravy-style version, mix 1 tablespoon cornstarch with 2 tablespoons cold water and stir it into the broth before adding the noodles.

For extra garlic flavor, increase the fresh garlic to 6 cloves.

How to Store and Reheat Slow Cooker Beef Noodles

Allow leftovers to cool before transferring them to airtight containers.

Store in the refrigerator for up to 3–4 days.

Keep in mind that the noodles will continue absorbing broth as they sit. When reheating, add a splash of beef broth or water to loosen the mixture.

Reheat gently in a saucepan over medium-low heat until hot, stirring occasionally.

Individual servings can also be reheated in the microwave in short intervals.

For freezing, the beef and broth freeze better than the cooked noodles. If you know you plan to freeze the meal, freeze the beef mixture separately and add freshly cooked noodles when reheating.

Frequently Asked Questions

Can I put uncooked noodles in the slow cooker?

Yes, but only toward the end of cooking. Wide egg noodles generally need about 20–30 minutes on HIGH.

What type of beef is best for slow cooker beef noodles?

Beef chuck roast is one of the best choices because it becomes tender and flavorful during long, slow cooking. Stew meat can also work well.

Why did my noodles become mushy?

The noodles were likely cooked too long or left sitting in the hot slow cooker after becoming tender. Begin checking them early and switch the slow cooker to WARM or OFF once they are done.

Can I make slow cooker beef noodles ahead of time?

Yes. For the best texture, prepare the beef and broth ahead of time and refrigerate them. Reheat in the slow cooker and add the noodles shortly before serving.

Final Thoughts

This Easy Slow Cooker Beef Noodles recipe is everything you want from classic comfort food: tender beef, savory broth, soft egg noodles, and rich slow-cooked flavor.

It is simple enough for busy weeknights yet hearty enough for Sunday dinner or feeding the whole family. The slow cooker does most of the work, while the noodles added at the end turn the flavorful beef broth into a satisfying one-pot meal.

Serve it hot with crusty bread, vegetables, or a fresh salad, and enjoy a cozy homemade dinner that tastes like it has been cooking with care all day.

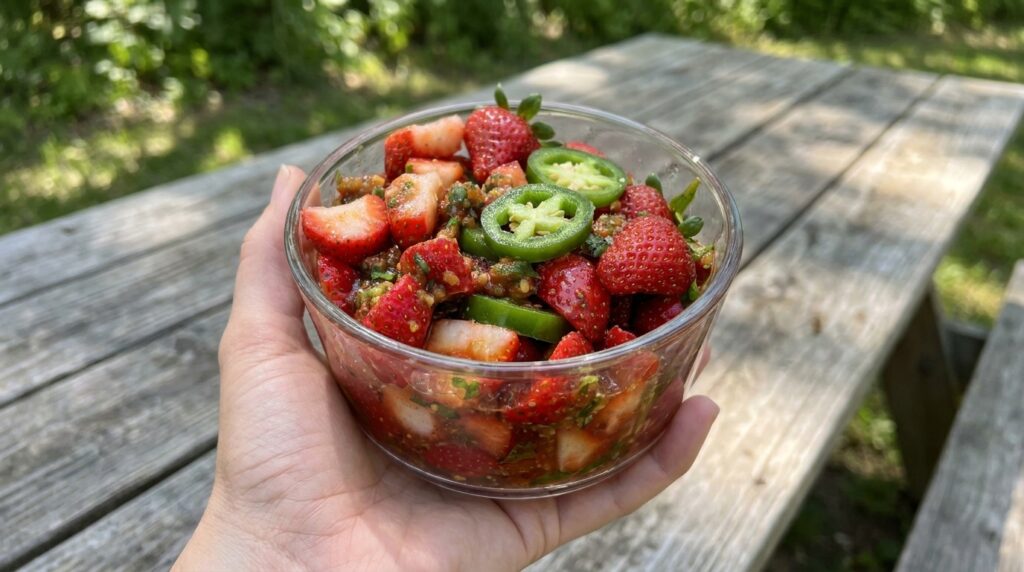
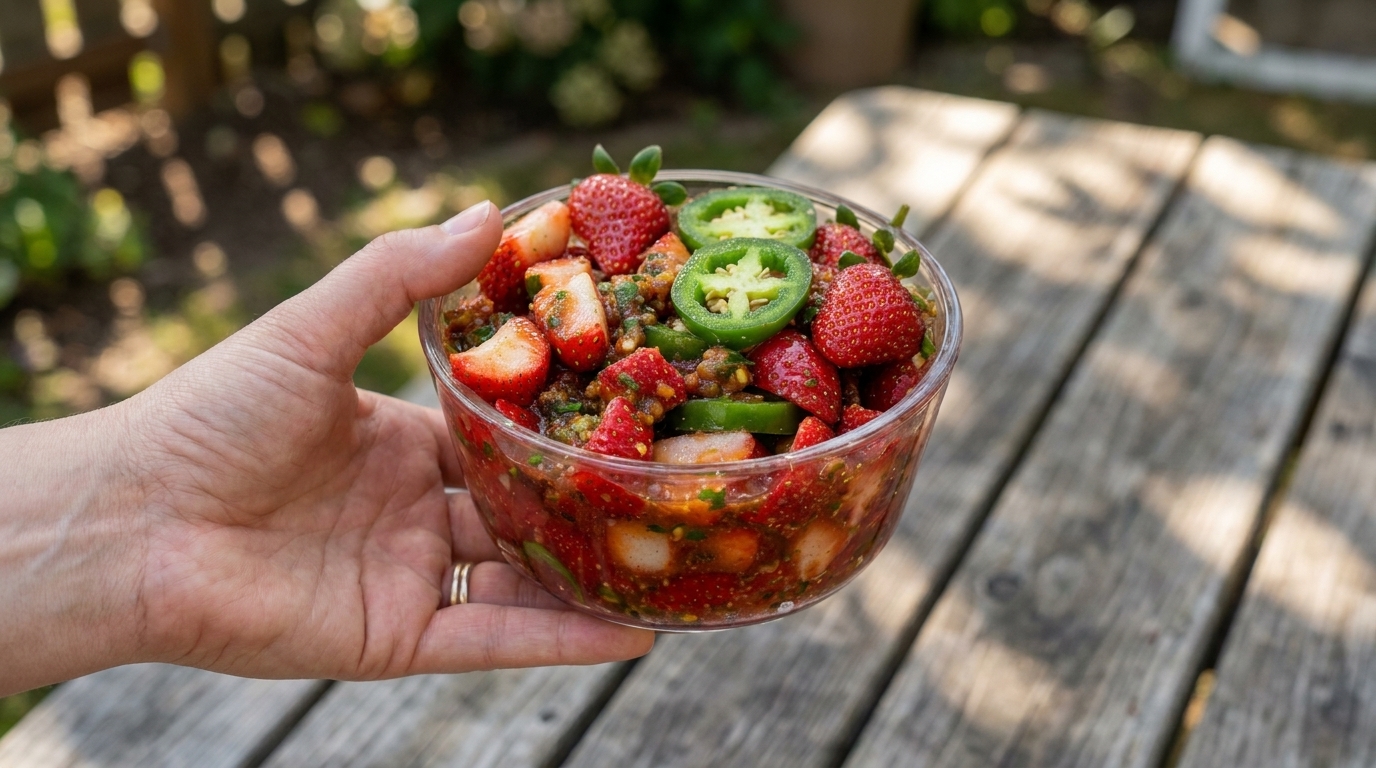
Easy Spicy Strawberry Jalapeno Salad Recipe – Fresh, Sweet, Tangy, and Full of Flavour

If you are looking for a fresh summer salad that delivers a perfect balance of sweet, spicy, tangy, and refreshing flavors, this Spicy Strawberry Jalapeño Salad Recipe is a vibrant dish you will want to make again and again. Juicy strawberries are combined with crisp greens, thinly sliced jalapeños, creamy cheese, fresh herbs, and a bright homemade dressing that brings everything together beautifully.

This salad is light enough for warm-weather lunches but flavourful enough to serve alongside grilled chicken, steak, shrimp, fish, or your favourite barbecue dishes. The natural sweetness of the strawberries balances the gentle heat from the jalapenos, while lime, honey, and olive oil create a refreshing dressing with just the right amount of acidity.

One of the best things about homemade strawberry jalapeño salad is how easy it is to customise. You can make it mild or extra spicy, add avocado, cucumber, nuts, grilled protein, feta, goat cheese, or even fresh mango depending on what you have available.

Why You’ll Love This Spicy Strawberry Jalapeño Salad

This easy strawberry salad is packed with contrasting flavors and textures that make every bite interesting.

Fresh strawberries provide juicy sweetness, jalapeños add a bright kick of heat, and crisp greens keep the salad fresh and light. Creamy feta or goat cheese adds richness, while toasted nuts bring crunch and depth.

The homemade honey-lime dressing is simple but flavorful. It enhances the strawberries without overpowering them and helps balance the heat from the peppers.

It is also quick to prepare, making it perfect for busy lunches, summer gatherings, cookouts, picnics, or an easy side dish when you want something colorful and refreshing.

Ingredients

For the Salad

  • 6 cups mixed salad greens, spinach, or arugula
  • 2 cups fresh strawberries, hulled and sliced
  • 1 fresh jalapeño, very thinly sliced
  • ½ small red onion, thinly sliced
  • 1 small cucumber, thinly sliced
  • ½ cup crumbled feta cheese or goat cheese
  • ⅓ cup toasted pecans, almonds, or walnuts
  • ¼ cup fresh cilantro or mint leaves
  • 1 small avocado, sliced, optional
  • Freshly ground black pepper, to taste

For the Honey-Lime Dressing

  • 3 tablespoons extra-virgin olive oil
  • 2 tablespoons fresh lime juice
  • 1 tablespoon honey
  • 1 teaspoon Dijon mustard
  • ½ teaspoon lime zest
  • ¼ teaspoon salt
  • ¼ teaspoon freshly ground black pepper
  • 1 small garlic clove, finely grated or minced
  • Pinch of red pepper flakes, optional

How to Make Spicy Strawberry Jalapeño Salad

1. Prepare the Strawberries

Begin by rinsing the strawberries gently under cool running water.

Pat them completely dry with paper towels or a clean kitchen towel.

Removing excess moisture is important because wet berries can dilute the dressing and make the salad watery.

Remove the green tops and slice the strawberries into halves or thin slices depending on their size.

If your strawberries are very large, quartering them can make the salad easier to eat.

Set the prepared strawberries aside while you prepare the remaining ingredients.

2. Prepare the Jalapeño

Rinse and dry the jalapeño.

Slice it into very thin rounds using a sharp knife.

For a milder salad, remove the seeds and white membranes before slicing. Much of the heat in a jalapeño is concentrated around the inner membrane.

For a spicier salad, leave some or all of the seeds and membranes intact.

Start with a smaller amount if you are unsure about the heat level. You can always add more jalapeño later.

Wash your hands thoroughly after handling fresh peppers and avoid touching your eyes.

3. Prepare the Remaining Vegetables

Thinly slice the red onion.

If you prefer a milder onion flavor, place the sliced onion in a bowl of cold water for approximately 10 minutes.

Drain and pat dry before adding it to the salad. This simple step softens the sharp bite of raw onion.

Slice the cucumber into thin rounds or half-moons.

If using avocado, slice it shortly before assembling the salad to prevent excessive browning.

Wash and thoroughly dry your salad greens.

Dry greens are important because dressing adheres much better when there is no excess water on the leaves.

4. Prepare the Honey-Lime Dressing

In a small bowl or jar, combine the olive oil, fresh lime juice, honey, Dijon mustard, lime zest, salt, black pepper, and garlic.

Add a pinch of red pepper flakes if you want extra heat.

Whisk vigorously until the mixture becomes smooth and slightly emulsified.

If using a jar, close the lid tightly and shake for approximately 20–30 seconds.

Taste the dressing.

If it is too tart, add a little more honey.

If it tastes too sweet, add another squeeze of lime juice.

If you want more heat, add additional jalapeño or red pepper flakes rather than making the dressing overly spicy immediately.

5. Assemble the Salad

Place the mixed greens in a large serving bowl.

Add the sliced strawberries, cucumber, red onion, and jalapeño.

Scatter the crumbled feta or goat cheese over the top.

Add the toasted pecans, almonds, or walnuts.

Sprinkle with fresh cilantro or mint.

If using avocado, arrange the slices gently around the salad.

At this stage, the salad should look colorful, fresh, and evenly distributed rather than heavily mixed.

6. Add the Dressing

Just before serving, drizzle approximately half of the honey-lime dressing over the salad.

Using salad tongs or clean hands, toss everything gently until the greens are lightly coated.

Add more dressing as needed.

Avoid pouring all of the dressing onto the salad immediately because too much can weigh down the greens and overpower the strawberries.

Taste and adjust with additional salt, black pepper, lime juice, or jalapeño if desired.

7. Finish and Serve

Top the finished salad with a few extra strawberries, jalapeño slices, crumbled cheese, and toasted nuts for an attractive presentation.

Finish with freshly ground black pepper and a small squeeze of lime juice.

Serve immediately while the greens are crisp and the berries are fresh.

For a complete meal, add grilled chicken, shrimp, salmon, or steak just before serving.

What to Serve With Spicy Strawberry Jalapeño Salad

This fresh salad pairs especially well with grilled meats and seafood.

Serve it alongside grilled chicken breasts, barbecue chicken, steak, pork tenderloin, salmon, shrimp skewers, or grilled fish.

It is also a great side dish for burgers, sandwiches, wraps, tacos, or summer cookouts.

For a lighter meal, serve the salad with crusty bread, avocado toast, quinoa, couscous, or a simple soup.

The sweet and spicy flavors also work beautifully alongside Mexican-inspired dishes such as chicken tacos, grilled corn, quesadillas, or rice bowls.

Tips for the Best Spicy Strawberry Jalapeño Salad

Choose ripe but firm strawberries. Overly soft berries can break apart when tossed and make the salad watery.

Slice the jalapeño very thinly so the heat is evenly distributed rather than concentrated in large bites.

Taste your jalapeño before adding too much. Pepper heat can vary significantly from one jalapeño to another.

Toast the nuts before adding them to the salad. Toasting brings out their natural oils and creates a deeper flavor and crunch.

Add the dressing immediately before serving. Once dressed, salad greens gradually soften.

Keep the avocado until the final stage of assembly so it remains fresh-looking.

Balance is especially important in this recipe. If the salad tastes too spicy, add additional strawberries, cheese, avocado, or honey dressing.

If it tastes too sweet, add more lime juice or a pinch of salt.

Easy Recipe Variations

For Strawberry Jalapeño Chicken Salad, add sliced grilled or pan-seared chicken breast for extra protein.

For Strawberry Jalapeño Shrimp Salad, top the salad with grilled or sautéed shrimp seasoned with lime, garlic, and paprika.

For Strawberry Mango Jalapeño Salad, add 1 cup diced fresh mango for an even sweeter tropical flavor.

For Strawberry Avocado Jalapeño Salad, increase the avocado to 2 small avocados for extra creaminess.

For Strawberry Jalapeño Goat Cheese Salad, replace feta with soft crumbled goat cheese for a tangier and creamier result.

For Strawberry Jalapeño Spinach Salad, use baby spinach as the entire salad base.

For Extra Spicy Strawberry Salad, use 2 jalapeños or add a finely sliced serrano pepper.

For a milder version, remove all of the jalapeño seeds and membranes or use only half a pepper.

How to Store Leftovers

This salad is best enjoyed immediately after assembling and dressing.

If you expect leftovers, store the salad ingredients and dressing separately whenever possible.

Keep the undressed salad in an airtight container in the refrigerator for up to 1–2 days.

Store the honey-lime dressing separately in a sealed jar or airtight container for up to 5 days.

The dressing may separate while refrigerated, which is completely normal. Shake or whisk it again before serving.

If the salad already contains dressing, the greens will soften more quickly and are best eaten within approximately 24 hours.

For best results, store avocado separately and add it just before serving.

Freezing is not recommended because fresh strawberries, cucumbers, greens, and cheese lose their texture after thawing.

Frequently Asked Questions

Is strawberry jalapeño salad very spicy?

It can be as mild or spicy as you like.

Removing the jalapeño seeds and white membranes significantly reduces the heat.

You can also start with half a jalapeño and add more after tasting.

What cheese works best in strawberry salad?

Feta and goat cheese are excellent choices because their salty, tangy flavor balances the sweetness of the strawberries.

Fresh mozzarella can also work if you prefer a milder cheese.

Can I make this salad ahead of time?

You can prepare most of the ingredients several hours ahead.

Keep the greens, berries, dressing, nuts, and avocado separate until shortly before serving.

Assemble and dress the salad at the last minute for the freshest texture.

Can I use frozen strawberries?

Fresh strawberries are strongly recommended.

Frozen strawberries become very soft and release a significant amount of liquid after thawing, which can make the salad watery.

What can I use instead of jalapeño?

For less heat, use thinly sliced sweet bell pepper.

For more heat, use serrano pepper.

You can also add a small pinch of crushed red pepper to the dressing.

Can I add protein to this salad?

Absolutely.

Grilled chicken, shrimp, salmon, steak, chickpeas, quinoa, or even crispy tofu can turn this salad into a more complete meal.

Can I make the dressing without honey?

Yes.

Maple syrup or agave can be used instead.

You can also reduce or omit the sweetener if your strawberries are especially ripe and sweet.

Final Thoughts

This easy Spicy Strawberry Jalapeño Salad Recipe is a fresh and colorful way to combine sweet fruit with a little heat. Juicy strawberries, crisp greens, spicy jalapeños, creamy cheese, crunchy nuts, and bright honey-lime dressing create a salad that is refreshing, flavorful, and anything but boring.

It is simple enough for a quick lunch yet beautiful enough for summer parties, cookouts, brunches, and family gatherings. You can also customize it with grilled chicken, shrimp, avocado, mango, or your favorite cheese.

Serve it fresh with grilled meats, seafood, tacos, sandwiches, or crusty bread, and enjoy the perfect balance of sweetness, spice, acidity, creaminess, and crunch in every bite.

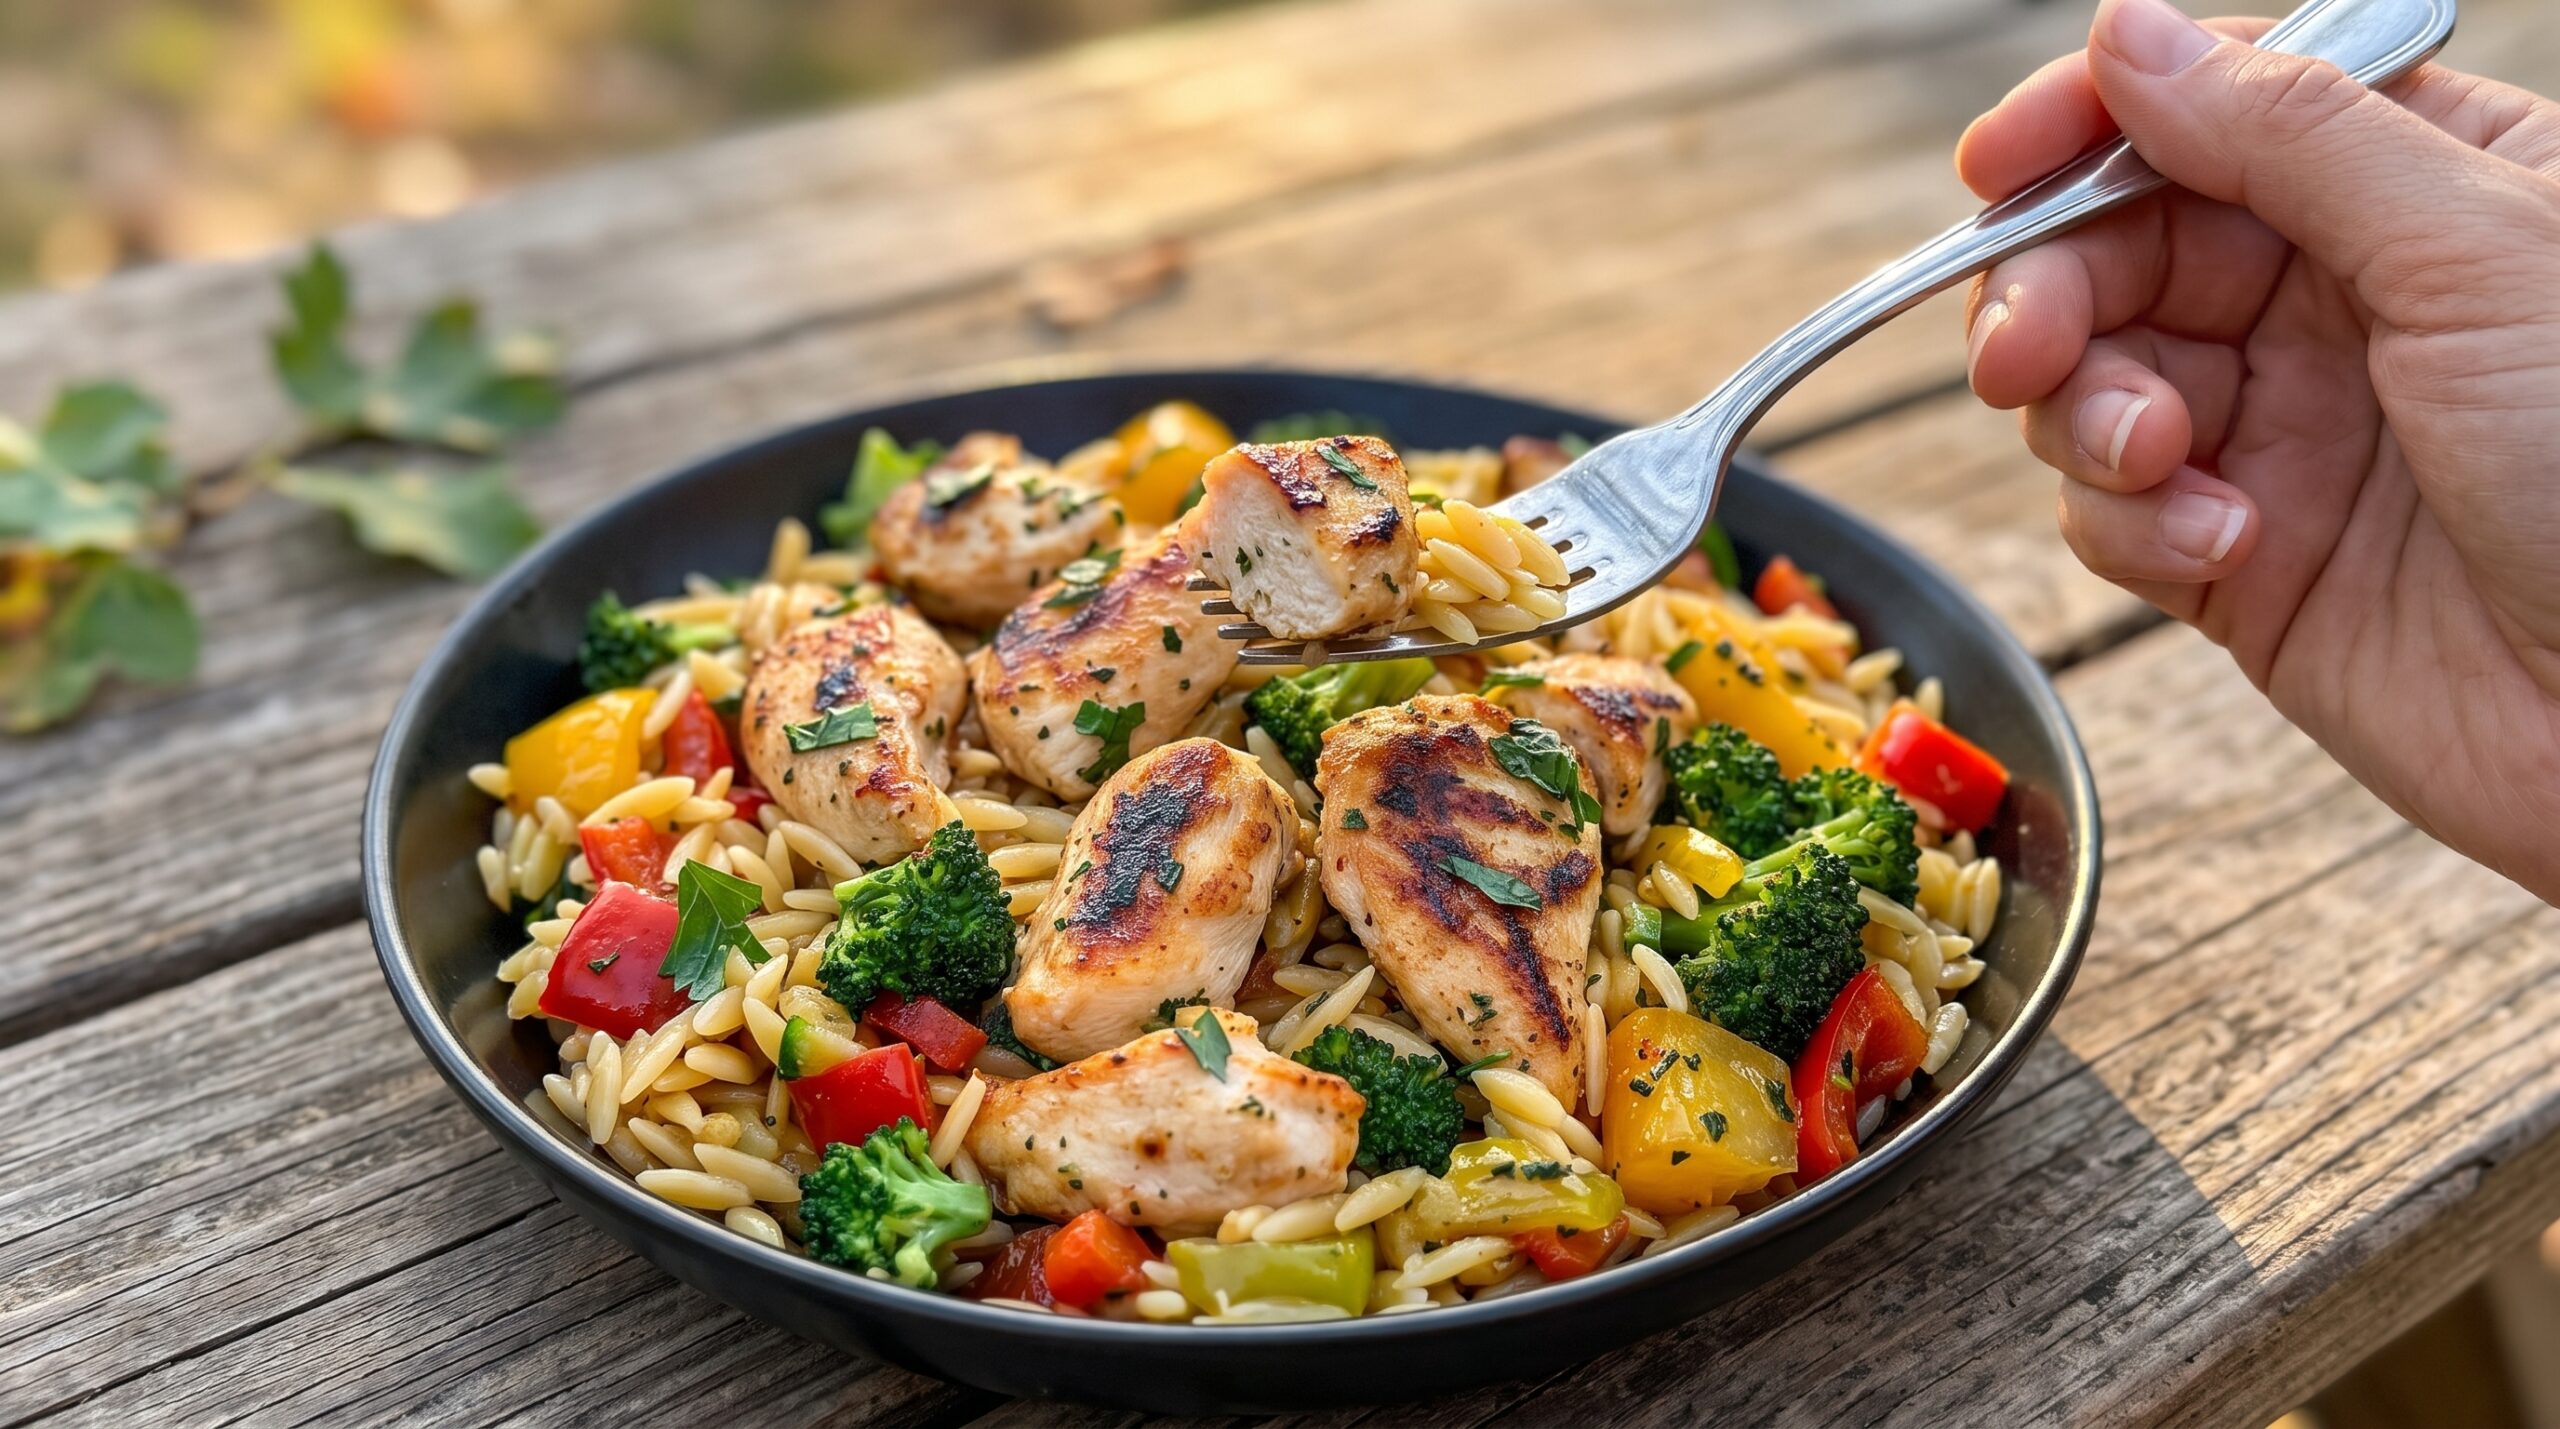
Healthy Lemon Herb Chicken & Veggie Orzo Bowl 🍋🍗

If you are looking for a fresh, wholesome, and satisfying dinner that still feels full of flavor, this Healthy Lemon Herb Chicken & Veggie Orzo Bowl is a perfect choice. Tender pieces of herb-seasoned chicken are paired with fluffy orzo, colorful vegetables, fresh lemon, garlic, and herbs to create a balanced meal that is bright, comforting, and incredibly easy to enjoy.

This recipe is ideal for busy weeknights because everything comes together without complicated ingredients or difficult cooking techniques. The juicy chicken provides plenty of protein, while the vegetables add color, texture, and nutrients. Orzo makes the bowl filling and comforting without feeling overly heavy, and the fresh lemon gives the entire dish a light, refreshing finish.

It is also an excellent meal-prep recipe. You can prepare several portions ahead of time and enjoy a flavorful lunch or dinner throughout the week.

Why You’ll Love This Lemon Herb Chicken Orzo Bowl

There are so many reasons to add this recipe to your regular dinner rotation.

First, it is incredibly versatile. You can use zucchini, bell peppers, spinach, broccoli, cherry tomatoes, asparagus, or whatever vegetables you already have in the refrigerator.

It is also naturally packed with satisfying ingredients. Chicken breast provides lean protein, vegetables contribute fiber and nutrients, and orzo gives the bowl enough carbohydrates to make it a complete meal.

The lemon herb flavor keeps the recipe fresh and vibrant. Instead of relying on a heavy cream sauce, this dish gets most of its flavor from garlic, olive oil, herbs, lemon zest, and fresh lemon juice.

Best of all, the entire meal can be ready in around 35 minutes.

Ingredients

For the Lemon Herb Chicken

  • 1 1/2 pounds boneless, skinless chicken breasts
  • 1 1/2 tablespoons olive oil
  • 1 teaspoon dried oregano
  • 1 teaspoon Italian seasoning
  • 1 teaspoon garlic powder
  • 1/2 teaspoon paprika
  • 1/2 teaspoon salt
  • 1/4 teaspoon black pepper
  • Zest of 1 lemon
  • 1 tablespoon fresh lemon juice

For the Orzo and Vegetables

  • 1 1/2 cups dry orzo pasta
  • 1 tablespoon olive oil
  • 3 cloves garlic, finely minced
  • 1 medium zucchini, diced
  • 1 red bell pepper, diced
  • 1 cup cherry tomatoes, halved
  • 2 cups baby spinach
  • 2 1/2 cups low-sodium chicken broth
  • 1/2 teaspoon dried oregano
  • 1/4 teaspoon black pepper
  • 2 tablespoons fresh lemon juice
  • 2 tablespoons chopped fresh parsley

Optional Garnishes

  • Crumbled feta cheese
  • Fresh parsley
  • Lemon wedges
  • Fresh dill
  • Red pepper flakes
  • Sliced cucumber
  • Extra lemon zest

How to Make Healthy Lemon Herb Chicken & Veggie Orzo Bowls

1. Prepare the Chicken

Begin by patting the chicken breasts dry with paper towels.

If your chicken breasts are very thick, slice them horizontally into thinner cutlets or gently pound them until they are an even thickness. This helps the chicken cook more evenly and prevents the outside from becoming dry before the center is fully cooked.

Place the chicken in a bowl or on a large plate.

Drizzle with olive oil and season with oregano, Italian seasoning, garlic powder, paprika, salt, black pepper, and fresh lemon zest.

Add the lemon juice and rub the seasoning mixture evenly over both sides of the chicken.

If you have additional time, allow the chicken to marinate for 15 to 30 minutes. This is optional, but it gives the herbs and lemon more time to flavor the meat.

2. Cook the Lemon Herb Chicken

Heat a large skillet over medium-high heat.

Once the skillet is hot, add the seasoned chicken.

Cook for approximately 5 to 7 minutes on the first side without moving it too much. Allowing the chicken to stay in contact with the hot skillet helps develop a lightly golden exterior.

Flip the chicken and cook for another 5 to 7 minutes, depending on thickness.

Chicken should reach an internal temperature of 165°F or 74°C at the thickest part.

Once cooked, transfer the chicken to a clean plate and allow it to rest for about 5 minutes.

Resting is important because it allows the juices to redistribute through the meat instead of running out immediately when you slice it.

After resting, cut the chicken into strips or bite-size pieces.

3. Sauté the Vegetables

Using the same skillet allows you to keep all of the flavorful browned bits left behind from the chicken.

Reduce the heat to medium and add another tablespoon of olive oil if necessary.

Add the diced zucchini and bell pepper.

Cook for approximately 3 to 4 minutes, stirring occasionally, until the vegetables begin to soften while still retaining a little texture.

Add the minced garlic and cook for another 30 seconds.

Avoid cooking the garlic for too long because it can burn quickly and develop a bitter taste.

4. Toast the Orzo

Add the dry orzo directly into the skillet with the vegetables.

Stir continuously for about 1 minute.

Lightly toasting the orzo before adding the liquid gives it a subtle nutty flavor and helps create a more flavorful final dish.

Add the dried oregano and black pepper.

5. Cook the Orzo

Pour the chicken broth into the skillet and stir everything together.

Bring the mixture to a gentle boil.

Once bubbling, reduce the heat to medium-low and allow the orzo to simmer.

Cook for approximately 9 to 11 minutes, stirring occasionally so the pasta does not stick to the bottom of the skillet.

The exact cooking time can vary depending on the brand of orzo you are using, so check the package instructions as well.

As the orzo cooks, it will absorb most of the broth and become tender.

If the liquid disappears before the orzo is completely cooked, add a small splash of additional broth or water.

6. Add Tomatoes and Spinach

When the orzo is almost tender, stir in the halved cherry tomatoes.

Cook for approximately 2 minutes.

Add the baby spinach and gently fold it into the warm orzo.

The spinach should wilt within about 1 minute.

You want the vegetables to remain colorful and fresh rather than becoming overcooked.

7. Add the Fresh Lemon Flavor

Remove the skillet from the heat.

Add the fresh lemon juice and chopped parsley.

Stir everything together and taste the orzo.

Adjust the salt, pepper, or lemon juice if necessary.

Fresh lemon juice is especially important at the end because it provides brightness and balances the savory chicken broth and herbs.

8. Assemble the Bowls

Divide the lemon veggie orzo between serving bowls.

Arrange sliced lemon herb chicken over the top.

Finish each bowl with fresh parsley, a squeeze of lemon, and any additional garnishes you enjoy.

For a Mediterranean-inspired finish, sprinkle a small amount of crumbled feta cheese over the top.

Serve while warm.

Tips for the Best Lemon Herb Chicken

One of the most important secrets to juicy chicken is avoiding overcooking.

Use a meat thermometer whenever possible. Once the thickest part reaches 165°F, remove the chicken from the heat.

Try to keep the chicken pieces approximately the same thickness so they cook at an even rate.

Fresh lemon zest gives much stronger lemon flavor than juice alone. Zest the lemon before squeezing it for the recipe.

Also, allow the cooked chicken to rest before slicing. Five minutes makes a noticeable difference in how juicy the chicken remains.

How to Keep the Orzo From Becoming Mushy

Orzo looks like rice, but it is actually a small type of pasta.

Because it absorbs liquid quickly, avoid overcooking it.

Stir occasionally while it cooks and begin checking for doneness after about 8 minutes.

The orzo should be tender but still have a slight bite.

Remember that it will continue absorbing a little moisture after you remove the pan from the heat.

Healthy Recipe Variations

This recipe is extremely flexible.

Mediterranean Orzo Bowl

Add cucumber, Kalamata olives, feta cheese, fresh dill, and extra tomatoes for a Mediterranean-style bowl.

High-Protein Version

Increase the amount of chicken or stir chickpeas into the vegetable orzo for additional protein.

Extra Veggie Version

Add broccoli, asparagus, mushrooms, carrots, or peas.

Spicy Lemon Chicken Bowl

Add crushed red pepper flakes or a pinch of cayenne pepper to the chicken seasoning.

Shrimp Orzo Bowl

Replace the chicken with seasoned shrimp. Because shrimp cook much faster, sauté them for approximately 1 to 2 minutes per side.

What to Serve With Lemon Herb Chicken Orzo

This recipe is already a complete meal, but you can easily serve it alongside additional vegetables or salads.

Good options include:

  • Greek salad
  • Roasted broccoli
  • Garlic green beans
  • Roasted asparagus
  • Cucumber tomato salad
  • Grilled vegetables
  • Homemade tzatziki
  • Hummus and pita

A simple lemon vinaigrette salad works especially well because it complements the fresh flavors of the chicken.

Meal Prep Tips

This Healthy Lemon Herb Chicken & Veggie Orzo Bowl works very well for meal prep.

Divide the finished orzo and sliced chicken between airtight meal-prep containers.

Store in the refrigerator for up to 3 to 4 days.

If possible, keep fresh garnishes such as parsley, cucumber, feta, and lemon wedges separate until serving.

When reheating, add a tablespoon or two of water or broth to the orzo. This helps restore some moisture because pasta naturally absorbs liquid while sitting in the refrigerator.

How to Store Leftovers

Allow leftovers to cool before placing them into airtight containers.

Refrigerate for up to 4 days.

Reheat individual servings in the microwave until hot or gently warm the mixture in a skillet over medium-low heat.

Add a splash of chicken broth if the orzo feels dry.

For the freshest flavor, squeeze a little fresh lemon juice over the dish after reheating.

Frequently Asked Questions

Can I use chicken thighs instead of chicken breasts?

Yes. Boneless, skinless chicken thighs work beautifully and tend to stay especially juicy. Cooking time may vary slightly depending on thickness.

Can I use whole-wheat orzo?

Absolutely. Whole-wheat orzo is a great way to add extra fiber. Follow the cooking time listed on the package because it may take slightly longer than traditional orzo.

Can I make this vegetarian?

Yes. Replace the chicken broth with vegetable broth and omit the chicken. Chickpeas, white beans, or grilled tofu can be added for protein.

Can I prepare the chicken ahead of time?

Yes. The lemon herb chicken can be seasoned several hours ahead and stored covered in the refrigerator until you are ready to cook.

Is orzo rice?

No. Although orzo resembles large grains of rice, it is actually pasta traditionally made from wheat.

Final Thoughts

Healthy Lemon Herb Chicken & Veggie Orzo Bowls are proof that nutritious meals do not have to be boring or complicated.

Juicy herb-seasoned chicken, tender orzo, colorful vegetables, garlic, fresh herbs, and bright lemon come together in one satisfying bowl that works equally well for a family dinner or weekly meal prep.

The recipe is easy to customize with whatever vegetables you have available, and the fresh lemon herb flavor makes every bite light, savory, and refreshing.

Whether you are trying to prepare healthier weeknight dinners, add more protein to your meals, or simply need a flavorful one-pan recipe that everyone can enjoy, this Lemon Herb Chicken & Veggie Orzo Bowl is a delicious recipe worth adding to your regular rotation.