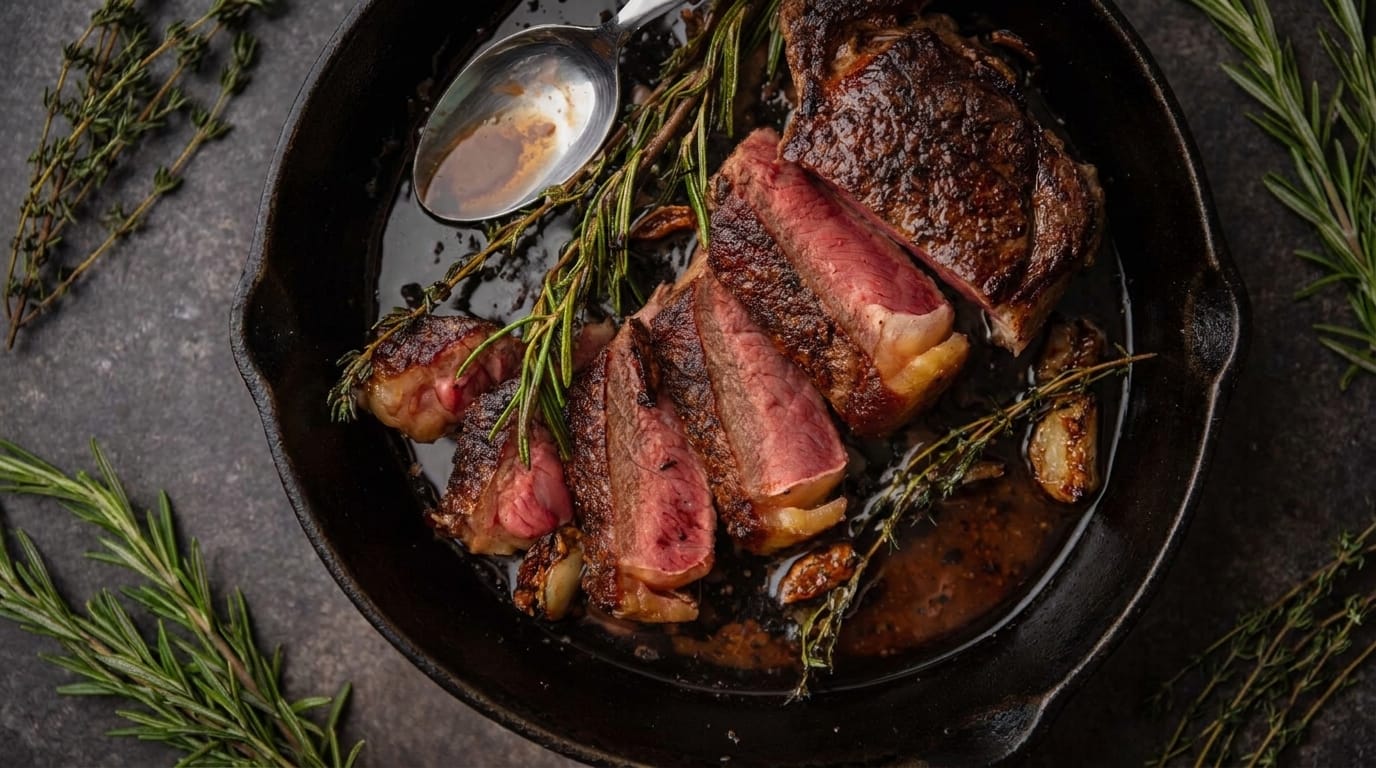
The Definitive Masterclass on Mastering Cast-Iron Herb Butter Seared Steak at Home

Cast-Iron Herb Butter Seared Steak represents the undisputed pinnacle of culinary indulgence, blending the primal satisfaction of a deep, caramelized crust with the melt-in-your-mouth tenderness of perfectly cooked beef. Whether you are celebrating a momentous occasion or elevating an ordinary weeknight dinner into an unforgettable feast, this culinary masterpiece delivers rich, complex flavors that rival the finest steakhouses in the world. Achieving this level of perfection requires more than simply tossing a cut of meat into a pan; it demands an understanding of heat dynamics, seasoning science, and the art of basting with aromatic fats. By meticulously breaking down every single phase—from choosing the ideal cut and managing skillet temperatures to mastering the continuous cascade of melted herb butter—this comprehensive guide transforms your home kitchen into a professional culinary sanctuary.

Understanding the Anatomy of Steak Searing and Flavor Chemistry

To consistently produce a steak with a magnificent mahogany crust and a juicy, succulent interior, one must master the underlying physics and chemistry of cooking meat.

The Maillard Reaction: The Science Behind the Crust

The incredible, savory crust that forms on a properly seared steak is the direct result of the Maillard reaction—a complex chemical reaction between amino acids and reducing sugars that occurs when proteins are subjected to high heat.

  • The role of moisture: Surface moisture is the primary enemy of the Maillard reaction. Water must evaporate before the temperature of the meat surface can rise high enough to trigger browning, which can lead to overcooked gray interiors. Patting the steak completely dry with paper towels is an essential, non-negotiable prerequisite.
  • Pan thermodynamics: A heavy cast-iron skillet acts as a thermal reservoir, absorbing and holding immense amounts of heat. When the dry, seasoned steak hits the scorching iron surface, the pan transfers heat rapidly, initiating instant browning without losing its temperature.

The Power of Aromatic Fat Basting (Arrosé)

Basting a steak with foaming butter infused with garlic and fresh herbs—a French technique known as arrosé—revolutionizes its flavor and texture.

  • Thermal transfer: Spooning hot, melted butter over the top of the steak cooks the upper layers more evenly while counterbalancing the intense, direct heat coming from the bottom of the skillet.
  • Infusion of aromatics: As butter foams and melts, it draws out the fat-soluble flavor compounds from smashed garlic cloves, woody rosemary sprigs, and fragrant thyme, coating every inch of the meat in a rich, aromatic glaze.

Comprehensive Ingredient Blueprint

Creating a transcendent cast-iron steak relies on keeping the ingredient list focused, high-quality, and intentional. Here is the exact blueprint designed to yield a perfectly balanced, deeply savory portion:

  • Beef Steak: 1 beef steak (ideally a thick-cut ribeye or strip steak, providing rich marbling and deep flavor)
  • Butter: 2 tbsp (adds luxurious richness, promotes browning, and creates the foundational basting medium)
  • Garlic: 2 cloves, smashed (delivers pungent, savory aromatic depth as it infuses the hot butter)
  • Fresh Rosemary and Thyme: 2 sprigs of each (offers earthy, piney, and floral herbaceous notes that cut through the richness of the beef and butter)
  • Salt and Black Pepper: To taste (draws out natural moisture, builds a seasoned crust, and enhances the savory character of the beef)

Step-by-Step Culinary Masterclass

Executing a flawless cast-iron steak requires precise timing, unwavering attention, and absolute control over your heat sources. Follow these detailed steps to achieve professional results every single time.

Step 1: Preparation and Temperature Management

  1. Remove the 1 beef steak from the refrigerator approximately 30 to 45 minutes before cooking to allow it to lose its chill. Cooking a cold steak directly from the fridge results in uneven cooking, where the exterior overcooks before the center reaches your desired temperature.
  2. Pat the steak thoroughly dry on all sides using paper towels, ensuring zero surface moisture remains.
  3. Season the steak generously with salt and black pepper to taste, pressing the seasoning gently into the meat so it adheres securely.

Step 2: Achieving the Initial Sear in Cast Iron

  1. Place a heavy cast-iron skillet over high heat and let it heat up dry until it is piping hot and beginning to shimmer or lightly smoke.
  2. Add a tiny amount of high-smoke-point oil if necessary, though a well-seasoned cast-iron skillet combined with the natural fat of the steak is often sufficient.
  3. Carefully lay the seasoned 1 beef steak into the center of the screaming hot skillet away from you to prevent any oil splatter.
  4. Sear the steak undisturbed for 2 to 3 minutes to build a deep, rich crust before flipping.

Step 3: Butter Basting and Herb Infusion

  1. Once the initial crust has formed and you have flipped the steak, reduce the heat to medium-low to prevent the pan from burning.
  2. Add the 2 tbsp of butter, 2 cloves smashed garlic, and 2 sprigs fresh rosemary and thyme directly into the foaming butter.
  3. Tilt the skillet slightly toward you and use a large spoon to scoop up the melted, herb-infused butter, continuously spooning (arrosé) it in a steady cascade over the top of the searing steak.
  4. Continue cooking and basting until the steak reaches your desired internal temperature (such as 130°F to 135°F for medium-rare).

Step 4: Resting the Meat

  1. Transfer the cooked steak immediately to a warm cutting board or a resting plate.
  2. Allow the steak to rest undisturbed for 5 to 8 minutes. Resting is vital because it allows the muscle fibers to relax and the savory juices to redistribute evenly throughout the cut rather than spilling out onto the board when sliced.

Plating, Presentation, and Finishing Touches

Elevating a classic steak from a simple meal to a fine-dining experience depends heavily on how it is presented on the plate.

  • The Slice: Use a sharp carving knife to slice the steak against the grain into thick, even strips, revealing the vibrant pink interior and glossy marbling.
  • The Arrangement: Fan the sliced steak elegantly in the cast-iron skillet or on a warm platter, letting the pieces lean against one another to showcase the magnificent crust.
  • The Pan Juices: Spoon the remaining garlic- and herb-infused pan drippings generously over the sliced meat to ensure maximum moisture and flavor.
  • The Garnish: Leave the charred garlic cloves and crisp rosemary and thyme sprigs resting naturally alongside the steak for an authentic, rustic, and visually striking presentation.

Frequently Asked Questions

What is the best cut of beef to use for a cast-iron skillet steak?

Thick-cut ribeye, New York strip, and filet mignon are the absolute gold standard for cast-iron searing. Ribeye offers incredible marbling that renders down during cooking for maximum juiciness, while strip steaks provide a fantastic balance of robust beef flavor and firm texture.

How do I know when my steak has reached the correct internal temperature?

Using an instant-read digital meat thermometer inserted into the thickest part of the steak is the only foolproof method. Pull the steak at 120°F to 125°F for rare, 130°F to 135°F for medium-rare, 140°F for medium, and 150°F or above for well-done, keeping in mind that carryover cooking will raise the temperature another 5 degrees while resting.

Why is resting the steak so important?

When a steak cooks, the intense heat drives the natural juices toward the center of the meat. Cutting into a steak immediately upon removing it from the heat forces those juices to escape onto the plate, resulting in dry meat; resting gives the proteins time to reabsorb the moisture.

Conclusion and Call to Action

Mastering the art of the cast-iron herb butter seared steak transforms your approach to home cooking, giving you the confidence to prepare a restaurant-quality meal anytime you desire. The harmonious combination of a deeply caramelized crust, tender interior, and aromatic herb-infused butter creates an extraordinary sensory experience that never fails to satisfy.

Would you prefer this perfectly seared steak served with garlic butter or a rich mushroom sauce?

Save this recipe for your next steak night and drop a comment below!

#CastIronSteak #SteakLover #ComfortFood #EasyDinner #HeartyMeals
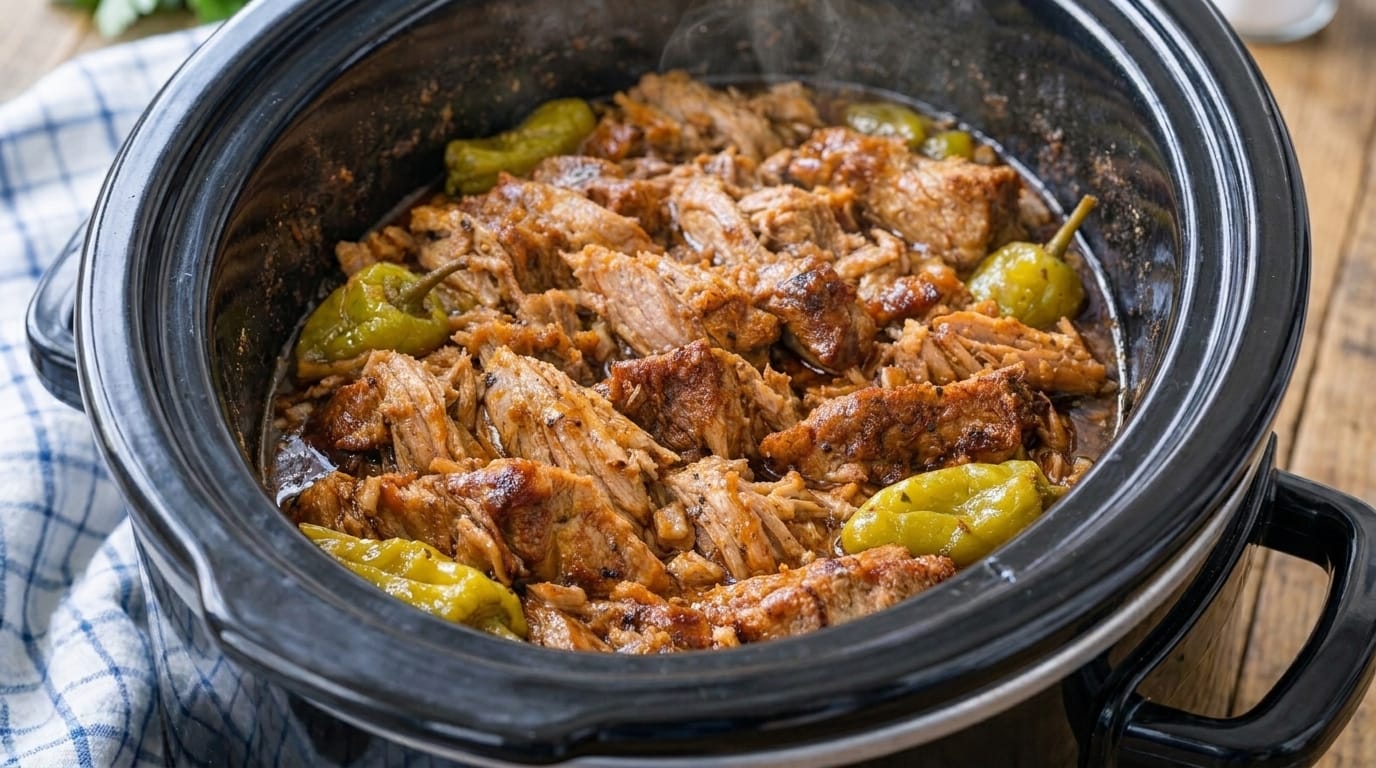
Slow Cooker Mississippi Pot Roast

There’s something truly comforting about a slow-cooked roast that becomes so tender it practically melts apart with a fork. This Slow Cooker Mississippi Pot Roast is a beloved comfort food classic featuring juicy beef chuck roast, rich buttery flavor, tangy pepperoncini peppers, and a savory seasoning blend that creates an unforgettable meal.

Unlike traditional pot roast recipes, Mississippi pot roast gets its signature flavor from a simple combination of ranch seasoning, au jus seasoning, butter, and pepperoncini peppers. As the roast slowly cooks, these ingredients blend together to create a rich, flavorful sauce that coats every bite of tender beef.

Perfect for busy weeknight dinners, Sunday family meals, holidays, or cozy gatherings, this Slow Cooker Mississippi Pot Roast is an easy recipe that delivers incredible flavor with minimal preparation.

Why You’ll Love This Slow Cooker Mississippi Pot Roast

Melt-In-Your-Mouth Tender Beef

The slow cooker transforms a simple chuck roast into incredibly tender beef that easily shreds apart.

Rich and Savory Flavor

Butter, seasonings, and pepperoncini peppers create a unique combination of creamy, tangy, and savory flavors.

Minimal Preparation

With only a few simple ingredients, this recipe is easy to prepare before letting the slow cooker do all the work.

Perfect Comfort Food

This roast is hearty, satisfying, and perfect for feeding the whole family.

Great for Leftovers

The shredded beef tastes even better the next day and can be used in sandwiches, wraps, and bowls.

Ingredients You’ll Need

For the Pot Roast

  • 4–5 pounds chuck roast
  • 2 tablespoons olive oil
  • 2 teaspoons kosher salt
  • 1 teaspoon black pepper
  • 1 teaspoon garlic powder
  • 1 teaspoon onion powder

For the Mississippi Roast Flavor

  • 1 packet ranch seasoning mix
  • 1 packet au jus gravy mix
  • ½ cup unsalted butter (1 stick)
  • 8–10 whole pepperoncini peppers
  • ¼ cup pepperoncini juice
  • 6 garlic cloves, minced
  • 1 large yellow onion, sliced

Optional Additions

  • 1 pound baby potatoes
  • 4 large carrots, chopped
  • 2 celery stalks, sliced
  • 1 teaspoon dried thyme
  • 1 teaspoon fresh rosemary

For Serving

  • Fresh parsley
  • Mashed potatoes
  • Dinner rolls
  • Rice
  • Egg noodles

How to Make Slow Cooker Mississippi Pot Roast

Step 1: Prepare the Chuck Roast

Remove the chuck roast from the refrigerator about 30 minutes before cooking.

Pat the roast dry with paper towels.

Season both sides with:

  • Salt
  • Black pepper
  • Garlic powder
  • Onion powder

Rub the seasoning into the beef to create a flavorful coating.


Step 2: Sear the Roast

Heat olive oil in a large skillet over medium-high heat.

Add the chuck roast and sear for:

3–5 minutes per side

until a deep golden-brown crust forms.

Transfer the roast to the slow cooker.

While searing is optional, it adds a deeper roasted flavor and creates a more flavorful finished dish.


Step 3: Build the Mississippi Flavor Base

Place sliced onions and minced garlic at the bottom of the slow cooker.

Set the seared roast on top.

Sprinkle evenly with:

  • Ranch seasoning mix
  • Au jus gravy mix

Do not stir the seasoning into the liquid yet. It will naturally blend as the roast cooks.


Step 4: Add Butter and Pepperoncini

Place the butter slices directly on top of the roast.

Add:

  • Pepperoncini peppers
  • Pepperoncini juice

The butter slowly melts into the beef while the pepperoncini adds a delicious tangy flavor.


Step 5: Slow Cook the Roast

Cover the slow cooker with the lid.

Cook on:

Low: 8–10 hours

or

High: 5–6 hours

The roast is ready when it is extremely tender and easily pulls apart with a fork.

Avoid opening the lid frequently to maintain consistent heat.


Step 6: Shred the Beef

Carefully remove the roast from the slow cooker.

Place it on a cutting board.

Using two forks, shred the beef into large tender pieces.

Remove any excess fat.


Step 7: Combine With the Sauce

Return the shredded beef to the slow cooker.

Mix it with the flavorful juices.

Allow it to sit on the warm setting for:

15–20 minutes

so the beef absorbs even more flavor.

Taste and adjust seasoning if needed.


Step 8: Serve the Mississippi Pot Roast

Serve the tender shredded beef with plenty of the flavorful sauce.

Garnish with fresh parsley.

Enjoy over:

  • Mashed potatoes
  • Rice
  • Egg noodles
  • Toasted rolls

Tips for the Best Slow Cooker Mississippi Pot Roast

Use Chuck Roast

Chuck roast is the best choice because the marbling creates tender, juicy beef.

Don’t Add Extra Liquid

The roast releases its own juices while cooking, creating a rich sauce.

Choose Quality Pepperoncini

The peppers add the signature tangy flavor that makes this recipe unique.

Let the Roast Cook Fully

If the beef is tough, it usually needs more cooking time.

Shred While Warm

Warm beef separates easily and absorbs the flavorful juices.

Save the Sauce

The leftover cooking liquid is full of flavor and perfect for reheating leftovers.

What to Serve With Mississippi Pot Roast

Creamy Mashed Potatoes

The classic pairing for soaking up the rich sauce.

Buttered Egg Noodles

A comforting side that works beautifully with shredded beef.

Roasted Vegetables

Serve with:

  • Green beans
  • Carrots
  • Brussels sprouts
  • Broccoli

Dinner Rolls

Perfect for making delicious roast beef sandwiches.

Rice

A simple option that absorbs all the flavorful juices.

Side Salad

Adds freshness to balance the rich roast.

How to Store Leftover Mississippi Pot Roast

Allow leftovers to cool completely.

Store shredded beef with the sauce in an airtight container.

Refrigerate for up to:

4 days

To reheat:

  • Warm gently in a saucepan.
  • Add a little beef broth if needed.
  • Stir until heated through.

For freezing:

Place beef and sauce into freezer-safe containers.

Freeze for up to:

3 months

Thaw overnight in the refrigerator before reheating.

Delicious Ways to Customize This Recipe

Cheesy Mississippi Roast

Top the shredded beef with melted provolone or mozzarella cheese.

Spicy Mississippi Roast

Add extra pepperoncini peppers, jalapeños, or red pepper flakes.

Garlic Herb Mississippi Roast

Add fresh rosemary, thyme, and extra garlic for a stronger herb flavor.

Mississippi Roast Sandwiches

Serve shredded beef on toasted buns with melted cheese and pickles.

Creamy Mississippi Roast

Stir cream cheese into the sauce for a rich, creamy variation.

Vegetable Mississippi Roast

Add potatoes, carrots, and mushrooms for a complete one-pot meal.

Frequently Asked Questions

What makes Mississippi pot roast different from regular pot roast?

Mississippi pot roast uses ranch seasoning, au jus mix, butter, and pepperoncini peppers, creating a unique tangy and savory flavor.

Can I make this without pepperoncini peppers?

Yes, but the peppers provide the signature flavor. You can substitute mild banana peppers if needed.

Can I use another cut of beef?

Yes. Beef shoulder or brisket can work, but chuck roast gives the best texture.

Can I prepare this ahead?

Yes. This roast reheats beautifully and is perfect for meal prep.

Why is my roast not tender?

It likely needs more cooking time. Continue cooking until it easily falls apart.

Can I make Mississippi pot roast in the oven?

Yes. Braise covered in a Dutch oven at 325°F (165°C) for about 3–4 hours until tender.

Final Thoughts

This Slow Cooker Mississippi Pot Roast is the ultimate comfort food recipe, combining tender beef, buttery richness, tangy pepperoncini, and savory seasonings into one unforgettable meal.

With just a few simple ingredients and the magic of slow cooking, this recipe creates a hearty dinner that tastes like it has been cooking all day. Serve it over creamy mashed potatoes, with warm rolls, or alongside your favorite vegetables for a comforting meal everyone will love.

Crispy Air Fryer Smashed Potatoes

There’s something irresistible about perfectly crispy Air Fryer Smashed Potatoes with golden edges, a fluffy tender center, and a delicious garlic herb coating. This easy side dish transforms simple baby potatoes into a restaurant-style favorite with incredible texture and flavor.

The potatoes are boiled until tender, gently smashed to create crispy edges, coated with seasoned garlic butter, and cooked in the air fryer until beautifully golden. The result is a perfect combination of crunchy outside and soft, creamy inside that makes every bite satisfying.

Perfect for family dinners, holiday meals, BBQs, brunches, or a quick snack, these Crispy Air Fryer Smashed Potatoes are easy to prepare and pair wonderfully with almost any main dish.

Why You’ll Love These Crispy Air Fryer Smashed Potatoes

Extra Crispy Texture

The air fryer creates beautifully golden edges without needing excessive oil.

Soft and Fluffy Inside

Boiling the potatoes first creates a creamy interior that contrasts perfectly with the crispy exterior.

Loaded With Garlic Herb Flavor

A simple seasoning mixture adds incredible savory taste.

Quick and Easy Side Dish

With simple ingredients and minimal preparation, this recipe is perfect for busy days.

Versatile and Customizable

Serve them with:

  • Steak
  • Chicken
  • Burgers
  • Seafood
  • Breakfast dishes
  • Dipping sauces

Ingredients You’ll Need

For the Potatoes

  • 2 pounds baby Yukon Gold potatoes or baby red potatoes
  • 2 teaspoons kosher salt (for boiling water)
  • 2 tablespoons olive oil

For the Garlic Herb Seasoning

  • 3 tablespoons melted butter
  • 2 tablespoons olive oil
  • 5 garlic cloves, minced
  • 2 teaspoons fresh rosemary, chopped
  • 2 teaspoons fresh parsley, chopped
  • 1 teaspoon fresh thyme leaves
  • 1 teaspoon garlic powder
  • 1 teaspoon smoked paprika
  • ½ teaspoon black pepper
  • ½ teaspoon salt

For Topping

  • ½ cup grated Parmesan cheese
  • Fresh parsley
  • Extra cracked black pepper
  • Red pepper flakes (optional)

How to Make Crispy Air Fryer Smashed Potatoes

Step 1: Cook the Potatoes

Wash the baby potatoes thoroughly.

Place them in a large pot and cover with cold water.

Add salt to the water.

Bring to a boil and cook for:

15–20 minutes

until the potatoes are fork-tender but not falling apart.

Drain the potatoes well and allow them to cool slightly.


Step 2: Prepare the Garlic Herb Butter

While the potatoes are cooking, prepare the seasoning mixture.

In a small bowl, combine:

  • Melted butter
  • Olive oil
  • Minced garlic
  • Rosemary
  • Parsley
  • Thyme
  • Garlic powder
  • Smoked paprika
  • Black pepper
  • Salt

Mix well until combined.

This garlic herb mixture will create the crispy, flavorful coating.


Step 3: Smash the Potatoes

Place the cooked potatoes on a flat surface lined with parchment paper.

Using the bottom of a glass, measuring cup, or potato masher, gently press each potato until it flattens.

Aim for about:

½-inch thickness

Avoid smashing too aggressively because the potatoes can break apart.

The more surface area created, the crispier the potatoes will become.


Step 4: Season the Potatoes

Brush both sides of the smashed potatoes generously with the garlic herb mixture.

Sprinkle with Parmesan cheese.

Make sure the seasoning reaches the edges because those areas become the crispiest part.


Step 5: Air Fry the Potatoes

Preheat the air fryer to:

400°F (200°C)

Arrange potatoes in a single layer.

Cook for:

15–20 minutes

until:

  • Edges are golden brown
  • Surface is crispy
  • Cheese is melted

Flip halfway through cooking for even crispiness.

Depending on the size of your air fryer, you may need to cook in batches.


Step 6: Finish and Serve

Remove the potatoes from the air fryer.

Sprinkle with:

  • Fresh parsley
  • Extra Parmesan
  • Cracked black pepper

Serve immediately with your favorite dipping sauce.

Tips for the Best Crispy Air Fryer Smashed Potatoes

Use Small Potatoes

Baby potatoes work best because they cook evenly and have the perfect creamy texture.

Don’t Skip Boiling

Boiling creates the soft interior that makes smashed potatoes so delicious.

Dry the Potatoes Well

Excess moisture prevents the potatoes from becoming crispy.

Smash Them Evenly

A consistent thickness helps all potatoes cook at the same rate.

Avoid Overcrowding the Air Fryer

Air circulation is important for achieving crispy edges.

Add Cheese Near the End

Parmesan can brown quickly, so monitor the potatoes while cooking.

What to Serve With Crispy Air Fryer Smashed Potatoes

Grilled Steak

These potatoes make the perfect steakhouse-style side.

Garlic Butter Chicken

The flavors pair beautifully with juicy chicken dishes.

Roasted Salmon

A crispy potato side complements tender seafood.

Burgers

Use them as a delicious alternative to fries.

BBQ Meats

Serve alongside:

  • Pulled pork
  • Ribs
  • Grilled chicken

Breakfast Dishes

Enjoy them with:

  • Eggs
  • Bacon
  • Sausage
  • Avocado

How to Store Leftover Smashed Potatoes

Allow leftover potatoes to cool completely.

Store them in an airtight container in the refrigerator for up to:

4 days

To reheat and restore crispiness:

  • Air fry at 375°F (190°C) for 5–8 minutes.
  • Bake in the oven until heated through.

Avoid microwaving because the potatoes will lose their crispy texture.

For freezing:

Freeze cooked smashed potatoes in a single layer, then transfer them to freezer bags.

Store for up to:

2 months

Reheat directly from frozen in the air fryer.

Delicious Ways to Customize This Recipe

Loaded Cheesy Smashed Potatoes

Add:

  • Cheddar cheese
  • Crispy bacon
  • Sour cream
  • Green onions

for a loaded potato version.

Spicy Smashed Potatoes

Add:

  • Cayenne pepper
  • Chili flakes
  • Hot sauce

for extra heat.

Ranch Smashed Potatoes

Add ranch seasoning and serve with ranch dipping sauce.

Mediterranean Smashed Potatoes

Add:

  • Feta cheese
  • Oregano
  • Lemon zest
  • Fresh herbs

for a Mediterranean twist.

Truffle Parmesan Smashed Potatoes

Finish with truffle oil and extra Parmesan for a luxurious flavor.

Garlic Butter Steakhouse Potatoes

Increase the garlic butter and serve alongside grilled meats.

Frequently Asked Questions

Can I use regular potatoes?

Yes. Cut larger potatoes into smaller pieces before boiling so they cook evenly.

Can I make smashed potatoes without an air fryer?

Yes. Bake them at 425°F (220°C) for about 25–35 minutes until crispy.

Why are my smashed potatoes not crispy?

They may have too much moisture, not enough oil, or the air fryer may be overcrowded.

Can I prepare these ahead of time?

Yes. Boil and smash the potatoes ahead, then season and air fry before serving.

What potatoes work best?

Yukon Gold and baby red potatoes are ideal because they become creamy inside while crisping well outside.

Can I make them dairy-free?

Yes. Replace butter with extra olive oil and skip the Parmesan.

Final Thoughts

These Crispy Air Fryer Smashed Potatoes are proof that simple ingredients can create an unforgettable side dish. With golden crispy edges, a fluffy center, and bold garlic herb flavor, they’re the perfect upgrade from traditional roasted potatoes.

Whether served with steak, chicken, seafood, or enjoyed as a snack with your favorite dip, these smashed potatoes deliver incredible texture and flavor every time. Easy, crispy, and completely satisfying, this recipe is sure to become a regular favorite in your kitchen.

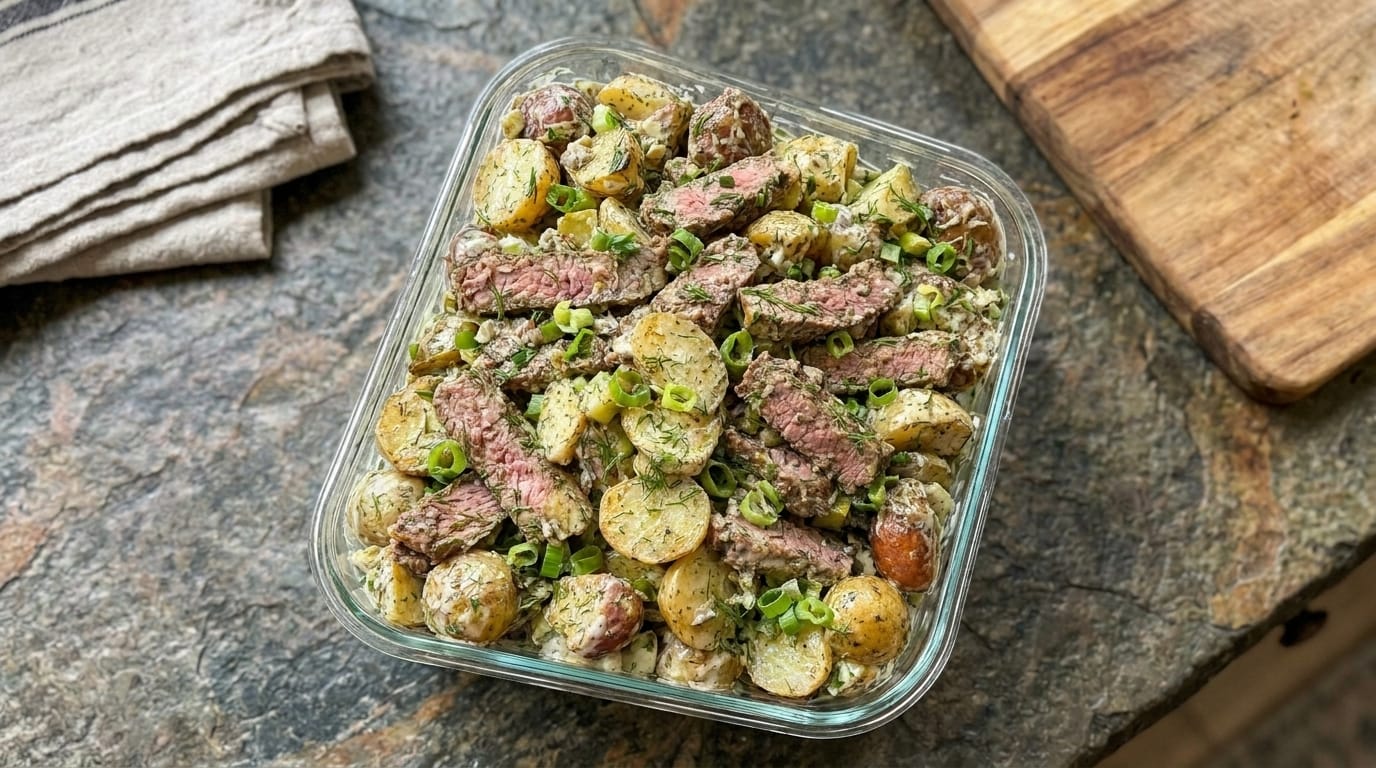
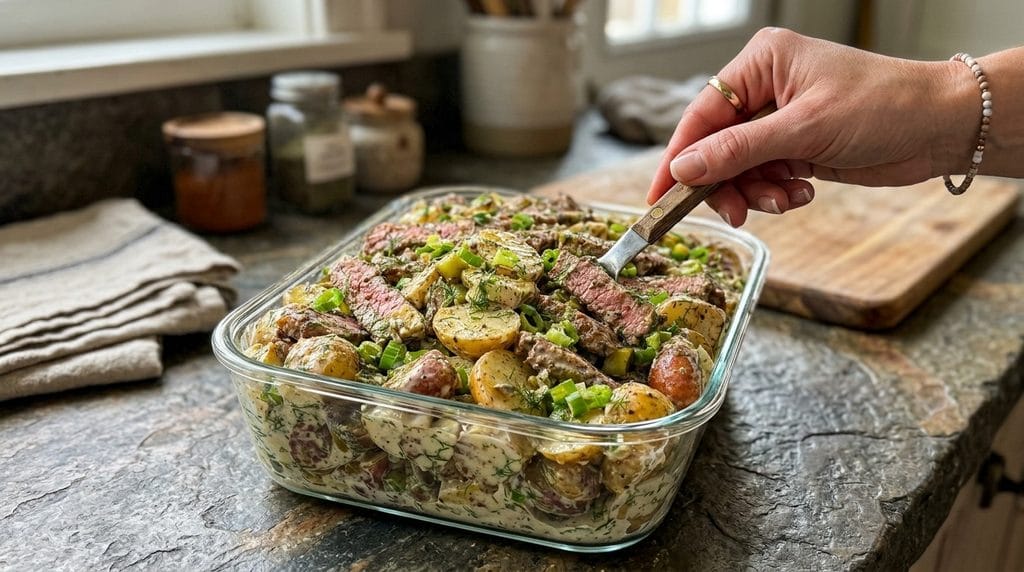
Easy Creamy Pickle Ranch Steak & Potato Salad Recipe – Loaded, Flavorful, and Perfectly Comforting

If you love hearty salads with bold flavors, this Creamy Pickle Ranch Steak & Potato Salad is the ultimate combination of tender steak, creamy ranch dressing, crispy potatoes, and tangy pickles. This recipe takes classic potato salad to the next level by adding juicy slices of seasoned steak and a rich pickle ranch sauce that brings every ingredient together.

The combination of golden potatoes, savory steak, fresh herbs, crunchy pickles, and creamy ranch dressing creates a satisfying dish that works as a full meal, side dish, or party favorite.

Perfect for summer gatherings, BBQs, family dinners, meal prep, or a filling lunch, this steak and potato salad is packed with flavor and texture in every bite.

Why You’ll Love This Creamy Pickle Ranch Steak & Potato Salad

It combines tender steak and creamy potato salad into one hearty dish.

The pickle ranch dressing adds tangy, creamy, and savory flavor.

Golden potatoes provide the perfect soft texture with crispy edges.

The steak makes this salad filling enough to serve as a complete meal.

It is great served warm, chilled, or at room temperature.

Perfect for potlucks, cookouts, and family gatherings.

It is easy to customize with your favorite toppings and mix-ins.

Ingredients

For the Steak

  • 1½ pounds sirloin steak, ribeye, or New York strip
  • 2 tablespoons olive oil
  • 1½ teaspoons kosher salt
  • 1 teaspoon black pepper
  • 1 teaspoon garlic powder
  • 1 teaspoon smoked paprika
  • 1 teaspoon onion powder
  • 1 teaspoon Italian seasoning
  • 1 tablespoon Worcestershire sauce
  • 2 tablespoons butter

For the Potatoes

  • 2½ pounds baby potatoes, halved
  • 2 tablespoons olive oil
  • 1 teaspoon garlic powder
  • 1 teaspoon onion powder
  • 1 teaspoon smoked paprika
  • 1 teaspoon salt
  • ½ teaspoon black pepper
  • 1 tablespoon fresh parsley, chopped

For the Creamy Pickle Ranch Dressing

  • 1 cup mayonnaise
  • ½ cup sour cream
  • ¼ cup ranch dressing
  • ½ cup dill pickles, finely chopped
  • 3 tablespoons pickle juice
  • 3 garlic cloves, minced
  • 1 tablespoon fresh dill, chopped
  • 2 tablespoons fresh parsley, chopped
  • 1 teaspoon onion powder
  • ½ teaspoon black pepper
  • Salt to taste

For Mixing the Salad

  • ½ cup green onions, sliced
  • ½ cup shredded cheddar cheese
  • ¼ cup crispy bacon bits (optional)
  • ¼ cup fresh parsley
  • Extra chopped pickles
  • Fresh cracked black pepper

How to Make Creamy Pickle Ranch Steak & Potato Salad

1. Prepare the Potatoes

Wash and halve the baby potatoes.

Place them in a large bowl.

Add:

  • Olive oil
  • Garlic powder
  • Onion powder
  • Smoked paprika
  • Salt
  • Black pepper

Toss until evenly coated.

2. Roast the Potatoes

Spread potatoes on a baking sheet in a single layer.

Roast at:

425°F (220°C) for approximately 25–30 minutes

until golden outside and tender inside.

Flip halfway through cooking for even browning.

3. Prepare the Steak

Pat the steak dry with paper towels.

Season both sides with:

  • Salt
  • Black pepper
  • Garlic powder
  • Smoked paprika
  • Onion powder
  • Italian seasoning

Allow the steak to sit for a few minutes before cooking.

4. Sear the Steak

Heat olive oil in a cast iron skillet over high heat.

Add the steak.

Sear for approximately:

  • 3–5 minutes per side for medium-rare
  • 5–6 minutes per side for medium

Add butter during the final minute and baste the steak.

5. Rest the Steak

Remove the steak from the skillet.

Allow it to rest for 5–10 minutes.

This keeps the juices inside.

6. Slice the Steak

Cut the steak into thin strips or bite-sized pieces.

Set aside.

7. Prepare the Pickle Ranch Dressing

In a large bowl combine:

  • Mayonnaise
  • Sour cream
  • Ranch dressing
  • Pickle juice
  • Chopped pickles
  • Garlic
  • Dill
  • Parsley
  • Onion powder
  • Black pepper

Mix until smooth and creamy.

8. Combine the Potatoes and Dressing

Allow the roasted potatoes to cool slightly.

Add them to the bowl with the pickle ranch dressing.

Gently toss until coated.

9. Add the Steak

Add sliced steak pieces.

Fold gently to combine without breaking the potatoes.

10. Add Extra Flavor

Mix in:

  • Green onions
  • Cheddar cheese
  • Bacon bits
  • Extra pickles
  • Fresh herbs

11. Chill or Serve Warm

Serve immediately while slightly warm, or refrigerate for 1–2 hours for a chilled potato salad texture.

12. Garnish Before Serving

Top with:

  • Fresh dill
  • Parsley
  • Cracked black pepper
  • Extra ranch drizzle
  • Pickle slices

What to Serve With Creamy Pickle Ranch Steak & Potato Salad

This salad works beautifully as a complete meal or side dish.

Serve with:

  • Grilled chicken
  • BBQ ribs
  • Burgers
  • Grilled vegetables
  • Corn on the cob
  • Garlic bread

For summer gatherings, pair it with:

  • Coleslaw
  • Baked beans
  • Fresh fruit salad
  • Lemonade or iced tea

For a steakhouse-style dinner, serve alongside:

  • Roasted asparagus
  • Green beans
  • Dinner rolls

Tips for the Best Creamy Pickle Ranch Steak & Potato Salad

Choose the Right Potatoes

Baby potatoes or Yukon Gold potatoes work best because they stay creamy inside while roasting beautifully.

Let the Steak Rest

Resting prevents the juices from escaping and keeps the steak tender.

Don’t Overdress the Salad

Add dressing gradually so the potatoes stay coated but not soggy.

Use Fresh Pickles

Dill pickles provide the perfect tangy flavor.

Roast Instead of Boil

Roasting potatoes creates better flavor and texture.

Slice Steak Against the Grain

This makes every bite more tender.

Chill Before Serving

A short rest in the refrigerator allows the flavors to blend together.

Easy Recipe Variations

Bacon Ranch Steak Potato Salad

Add extra crispy bacon and cheddar cheese for a loaded version.

Spicy Pickle Ranch Steak Salad

Add:

  • Jalapeños
  • Hot sauce
  • Crushed red pepper flakes

Garlic Butter Steak Salad

Add extra garlic butter sauce over the steak before mixing.

BBQ Steak Potato Salad

Add barbecue sauce to the dressing for smoky flavor.

Southwest Steak Potato Salad

Add:

  • Corn
  • Black beans
  • Avocado
  • Cilantro

Cheeseburger Potato Salad

Add:

  • Ground beef instead of steak
  • Pickles
  • Cheddar cheese
  • Burger sauce

Herb Garden Steak Salad

Add extra:

  • Dill
  • Basil
  • Chives
  • Parsley

Make-Ahead Instructions

The potatoes can be roasted up to 2 days ahead.

The dressing can be prepared up to 3 days ahead.

The steak can be cooked and sliced one day before serving.

For the best texture, combine everything a few hours before serving.

How to Store Leftovers

Store leftover steak potato salad in an airtight container.

Refrigerate for up to 3 days.

Stir gently before serving.

If the dressing thickens, add a small splash of pickle juice or ranch dressing to loosen it.

Freezing Instructions

This salad is not recommended for freezing because creamy dressings and potatoes can change texture after thawing.

For best results, prepare fresh.

Frequently Asked Questions

Can I use leftover steak?

Yes. Leftover grilled steak works perfectly.

Can I use boiled potatoes instead of roasted?

Yes. Boiled potatoes create a softer classic potato salad texture.

What steak is best for this recipe?

Sirloin, ribeye, and New York strip are excellent choices.

Can I make this without mayonnaise?

Yes. Replace mayonnaise with Greek yogurt or extra sour cream.

Can I add eggs?

Absolutely. Chopped boiled eggs make a great addition.

How long does this salad last?

It stays fresh in the refrigerator for up to 3 days.

Can I serve it warm?

Yes. It is delicious warm with freshly cooked steak and potatoes.

What pickles work best?

Dill pickles provide the classic tangy ranch flavor.

Final Thoughts

This Creamy Pickle Ranch Steak & Potato Salad is a delicious twist on classic potato salad, combining juicy steak, golden roasted potatoes, creamy ranch dressing, and tangy pickles into one unforgettable dish.

The secret is balancing textures—the tender steak, crispy potatoes, creamy dressing, and crunchy pickles create the perfect bite every time.

Whether served at a backyard BBQ, family dinner, or as a hearty meal prep option, this loaded steak potato salad is guaranteed to become a favorite.

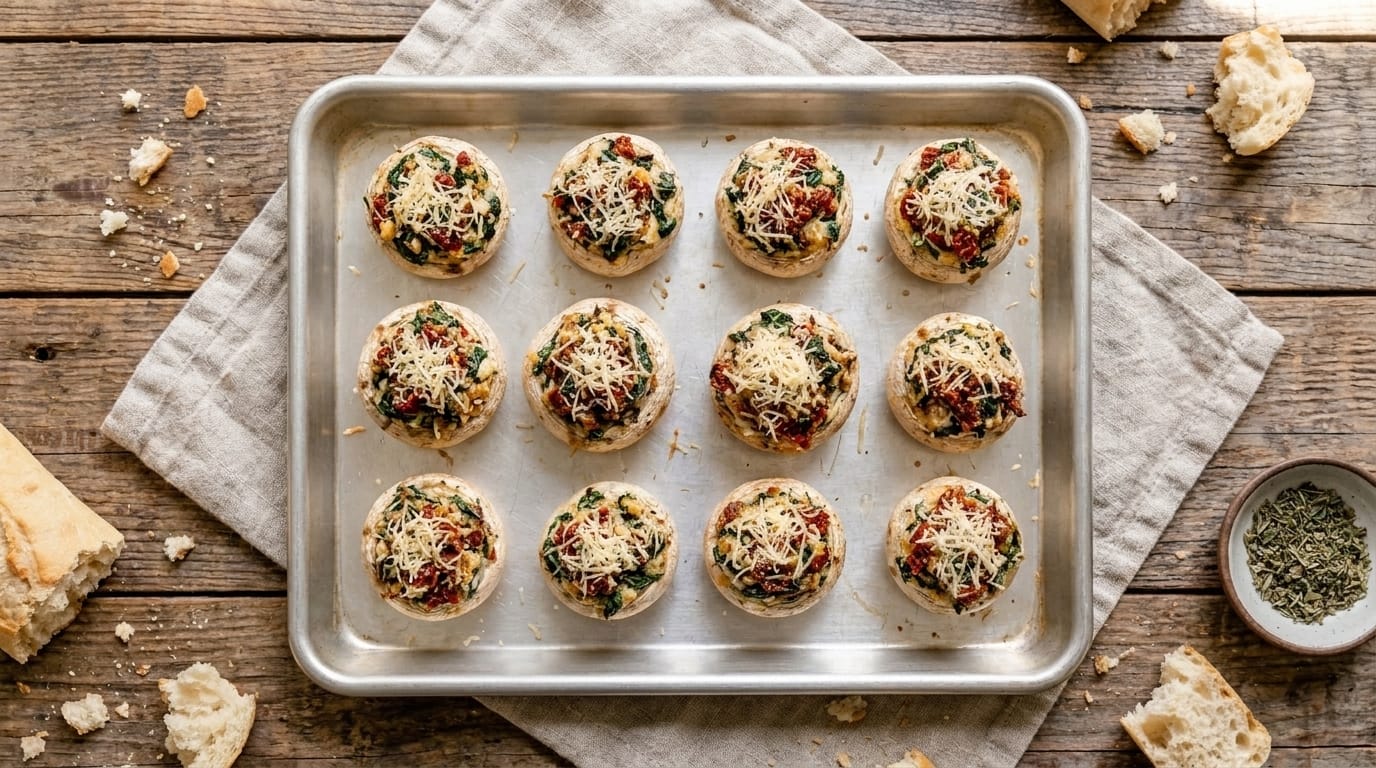
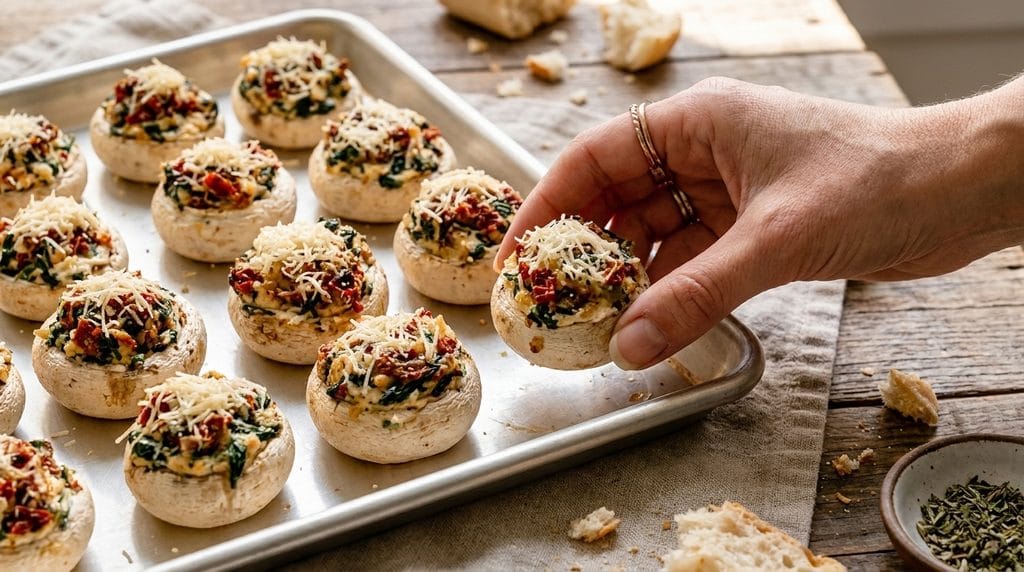
Easy Keto Stuffed Mushrooms Recipe – Low-Carb, Cheesy, and Flavor-Packed

If you are looking for a delicious low-carb appetizer that does not sacrifice flavor, these Keto Stuffed Mushrooms are the perfect recipe to make. Tender mushroom caps are filled with a creamy mixture of garlic, cream cheese, Parmesan, herbs, and savory seasonings, then baked until golden, bubbly, and incredibly flavorful.

These stuffed mushrooms are naturally keto-friendly, gluten-free, and perfect for parties, holidays, game days, or a simple snack. The combination of earthy mushrooms, rich cheese filling, and fresh herbs creates a restaurant-quality appetizer that is surprisingly easy to prepare.

Whether you are following a keto lifestyle or simply looking for a delicious low-carb dish, these stuffed mushrooms are guaranteed to be a crowd favorite.

Why You’ll Love These Keto Stuffed Mushrooms

They are naturally low-carb and keto-friendly.

The creamy cheese filling is rich and satisfying.

They are easy to prepare with simple ingredients.

They make an elegant appetizer for gatherings.

They can be customized with bacon, spinach, sausage, or seafood.

They are perfect for meal prep and reheating.

They are packed with flavor without needing breadcrumbs.

Ingredients

For the Mushrooms

  • 24 large white button mushrooms or cremini mushrooms
  • 2 tablespoons olive oil
  • ½ teaspoon kosher salt
  • ½ teaspoon freshly ground black pepper

For the Creamy Filling

  • 8 ounces cream cheese, softened
  • 1 cup freshly grated Parmesan cheese
  • 1 cup shredded mozzarella cheese
  • 4 garlic cloves, finely minced
  • 3 tablespoons fresh parsley, chopped
  • 2 tablespoons fresh chives, chopped
  • 1 teaspoon Italian seasoning
  • ½ teaspoon garlic powder
  • ½ teaspoon onion powder
  • ¼ teaspoon red pepper flakes, optional
  • ½ teaspoon black pepper
  • Salt to taste

Optional Add-Ins

  • ½ cup cooked crispy bacon, crumbled
  • ½ cup cooked Italian sausage
  • 1 cup chopped spinach, cooked and drained
  • ½ cup chopped crab meat
  • ½ cup chopped shrimp
  • ¼ cup sun-dried tomatoes

For Topping

  • ¼ cup Parmesan cheese
  • Fresh parsley
  • Extra mozzarella
  • Cracked black pepper

How to Make Keto Stuffed Mushrooms

1. Preheat the Oven

Preheat your oven to 375°F (190°C).

Line a baking sheet with parchment paper.

2. Clean the Mushrooms

Gently wipe mushrooms with a damp paper towel.

Avoid soaking them in water because mushrooms absorb moisture easily.

3. Remove the Stems

Carefully twist or cut out the mushroom stems.

Set the mushroom caps aside.

4. Prepare the Mushroom Caps

Brush the mushroom caps lightly with olive oil.

Season with:

  • Salt
  • Black pepper

Place them hollow-side up on the baking sheet.

5. Prepare the Filling

Finely chop the mushroom stems.

In a mixing bowl, combine:

  • Cream cheese
  • Parmesan cheese
  • Mozzarella cheese
  • Garlic
  • Parsley
  • Chives
  • Italian seasoning
  • Garlic powder
  • Onion powder
  • Black pepper
  • Red pepper flakes

Mix until smooth.

6. Add Optional Ingredients

Fold in your preferred add-ins:

  • Bacon
  • Sausage
  • Spinach
  • Crab
  • Shrimp

Mix until evenly distributed.

7. Fill the Mushroom Caps

Spoon the cheese mixture into each mushroom cap.

Fill generously, creating a small mound on top.

8. Add Cheese Topping

Sprinkle extra Parmesan or mozzarella over each mushroom.

9. Bake the Stuffed Mushrooms

Place in the oven.

Bake for 20–25 minutes until:

  • Mushrooms are tender
  • Filling is hot and bubbly
  • Cheese is golden

10. Broil for Extra Color

For a golden topping, broil for 1–2 minutes.

Watch carefully to prevent burning.

11. Rest Briefly

Allow mushrooms to cool for 5 minutes.

This helps the filling set.

12. Garnish and Serve

Top with:

  • Fresh parsley
  • Chives
  • Black pepper

Serve warm.

What to Serve With Keto Stuffed Mushrooms

These stuffed mushrooms work beautifully as an appetizer or side dish.

Main Dishes

Serve alongside:

  • Garlic butter steak
  • Grilled chicken
  • Roasted salmon
  • Pork chops
  • Ribeye steak

Keto-Friendly Sides

  • Cauliflower mash
  • Roasted asparagus
  • Green beans
  • Zucchini noodles
  • Broccoli casserole

Party Foods

Pair with:

  • Cheese boards
  • Deviled eggs
  • Chicken wings
  • Meatballs
  • Low-carb dips

Tips for the Best Keto Stuffed Mushrooms

Choose Large Mushrooms

Bigger mushroom caps hold more filling.

Do Not Wash Mushrooms Excessively

Too much water can make them soggy.

Use Softened Cream Cheese

Room-temperature cream cheese creates a smoother filling.

Drain Wet Ingredients

Spinach and seafood should be drained well before adding.

Avoid Overfilling

A generous filling is good, but too much can spill during baking.

Bake Until Golden

The cheese should be melted and lightly browned.

Serve Warm

The filling is best when creamy and melted.

Easy Recipe Variations

Keto Bacon Cheeseburger Stuffed Mushrooms

Add:

  • Crispy bacon
  • Ground beef
  • Cheddar cheese

for a cheeseburger-inspired version.

Spinach Artichoke Stuffed Mushrooms

Add:

  • Chopped artichoke hearts
  • Spinach
  • Extra Parmesan

for a classic dip-inspired filling.

Garlic Butter Shrimp Stuffed Mushrooms

Add:

  • Chopped cooked shrimp
  • Extra garlic
  • Lemon zest

for a seafood variation.

Sausage Stuffed Mushrooms

Add:

  • Cooked Italian sausage
  • Mozzarella
  • Fresh herbs

for a hearty appetizer.

Jalapeño Popper Stuffed Mushrooms

Add:

  • Chopped jalapeños
  • Cream cheese
  • Bacon
  • Pepper Jack cheese

for a spicy version.

Crab Stuffed Mushrooms

Add:

  • Lump crab meat
  • Old Bay seasoning
  • Lemon juice

for an elegant seafood appetizer.

Chicken Parmesan Stuffed Mushrooms

Add:

  • Shredded chicken
  • Parmesan
  • Mozzarella
  • Italian herbs

for a protein-packed option.

Air Fryer Method

Preheat the air fryer to 375°F (190°C).

Place stuffed mushrooms in a single layer.

Cook for 8–12 minutes until mushrooms are tender and cheese is melted.

Air frying creates a slightly crispier top.

Make-Ahead Instructions

The filling can be prepared up to 3 days ahead.

Store in an airtight container in the refrigerator.

The mushrooms can be cleaned and stuffed up to 24 hours ahead.

Keep covered and refrigerated.

Bake just before serving for the best texture.

How to Store Leftovers

Allow mushrooms to cool completely.

Transfer to an airtight container.

Refrigerate for up to 3–4 days.

Reheating in the Oven

Bake at 350°F (175°C) for 10 minutes until warmed through.

Reheating in the Air Fryer

Air fry at 350°F for 3–5 minutes.

Microwave

Heat briefly, though the mushrooms may become softer.

Freezing Instructions

Stuffed mushrooms can be frozen, but the texture may soften slightly.

Freeze before baking for best results.

Place stuffed mushrooms on a tray and freeze until firm.

Transfer to freezer-safe containers.

Freeze for up to 2 months.

Bake from frozen, adding extra cooking time as needed.

Frequently Asked Questions

Are stuffed mushrooms keto-friendly?
Yes. Mushrooms are naturally low in carbohydrates, and this recipe uses a cheese-based filling without breadcrumbs.

Can I use portobello mushrooms?
Yes. Large portobello caps work well for a meal-sized version.

Can I add breadcrumbs?
Traditional breadcrumbs are not keto-friendly, but crushed pork rinds can be used as a low-carb alternative.

Why are my mushrooms watery?
They may have been washed excessively or overcooked.

Can I make these dairy-free?
Yes. Use dairy-free cream cheese and cheese alternatives.

Can I use frozen spinach?
Yes. Thaw and squeeze out all excess moisture before adding.

How many carbs are in stuffed mushrooms?
The exact amount depends on ingredients and portion size, but this cheese-filled version is generally very low in carbohydrates.

Final Thoughts

These Keto Stuffed Mushrooms are proof that low-carb recipes can still be rich, satisfying, and full of flavor.

With tender mushroom caps, creamy garlic cheese filling, Parmesan, mozzarella, and fresh herbs, they make the perfect appetizer, snack, or side dish.

The key is choosing fresh mushrooms, keeping the filling flavorful, and baking until the cheese is golden and bubbly. Whether you are following keto or simply love delicious food, these stuffed mushrooms are a recipe everyone will enjoy.

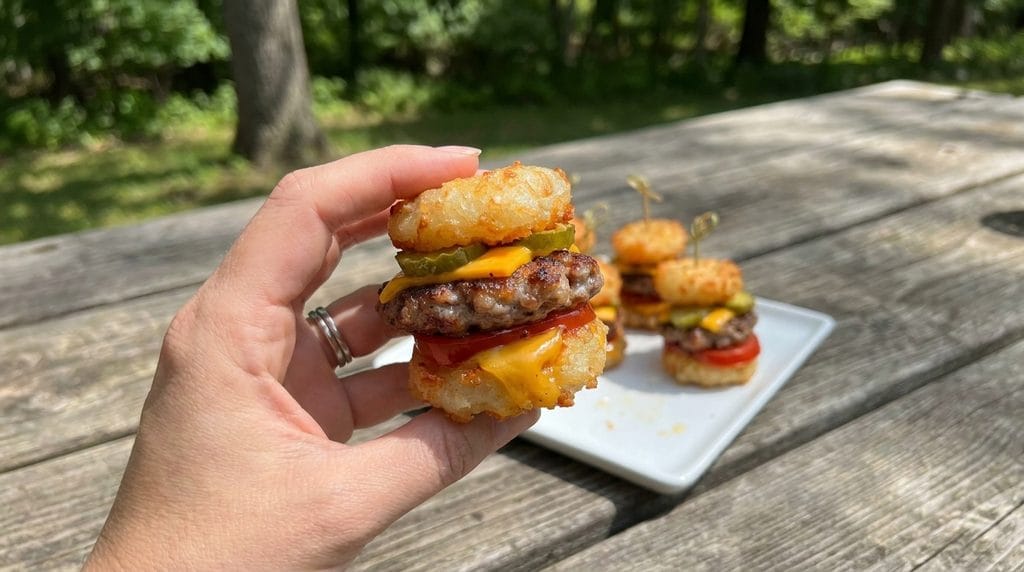
Easy Mini Tater Tot Cheeseburgers Recipe – Crispy, Cheesy, and Fun Bite-Sized Sliders

If you love classic cheeseburgers and crispy tater tots, these Mini Tater Tot Cheeseburgers are the perfect combination of two comfort food favorites. Juicy seasoned beef patties are layered with melted cheese, pickles, and burger toppings, then paired with golden crispy tater tots to create a fun handheld appetizer or family-friendly meal.

These mini cheeseburgers deliver everything people love about a traditional burger — savory beef, melted cheese, tangy pickles, and creamy sauce — but in a bite-sized format that is perfect for parties, game days, kids’ meals, or casual dinners.

Easy to customize and simple to prepare, these little burger bites are guaranteed to be a crowd favorite.

Why You’ll Love These Mini Tater Tot Cheeseburgers

They combine crispy potatoes and juicy cheeseburgers in one bite.

They are perfect for parties, appetizers, and gatherings.

Kids love the fun mini size.

They are easy to customize with different toppings.

The patties can be prepared ahead of time.

They are crispy, cheesy, and packed with classic burger flavor.

They are perfect for game days and family movie nights.

Ingredients

For the Mini Burger Patties

  • 1 pound ground beef (80/20 recommended)
  • 1 teaspoon kosher salt
  • ½ teaspoon freshly ground black pepper
  • 1 teaspoon garlic powder
  • 1 teaspoon onion powder
  • ½ teaspoon smoked paprika
  • 1 tablespoon Worcestershire sauce
  • 1 tablespoon yellow mustard

For the Tater Tots

  • 1½ pounds frozen tater tots
  • 1 tablespoon olive oil spray or cooking spray
  • ½ teaspoon garlic powder
  • ½ teaspoon smoked paprika
  • Pinch of salt

For the Cheeseburger Layers

  • 12 slices cheddar cheese, cut into small squares
  • ½ cup dill pickles, sliced
  • ½ cup shredded lettuce, optional
  • ½ cup diced tomatoes, optional
  • ½ cup diced onions, optional

For the Burger Sauce

  • ½ cup mayonnaise
  • 2 tablespoons ketchup
  • 1 tablespoon yellow mustard
  • 1 tablespoon pickle relish
  • ½ teaspoon garlic powder
  • ¼ teaspoon smoked paprika
  • Pinch of black pepper

For Garnishing

  • Sesame seeds
  • Fresh parsley
  • Extra burger sauce
  • Pickle slices

How to Make Mini Tater Tot Cheeseburgers

1. Preheat the Oven

Preheat your oven according to the tater tot package instructions, usually around 425°F (220°C).

Line a baking sheet with parchment paper.

2. Bake the Tater Tots

Spread frozen tater tots in a single layer.

Bake for approximately 25–30 minutes until golden and crispy.

Flip halfway through cooking for even browning.

3. Prepare the Burger Mixture

In a large bowl, combine:

  • Ground beef
  • Salt
  • Black pepper
  • Garlic powder
  • Onion powder
  • Smoked paprika
  • Worcestershire sauce
  • Mustard

Mix gently until combined.

Avoid overmixing because it can make the patties tough.

4. Shape Mini Patties

Divide the beef mixture into small portions.

Shape into patties slightly larger than the tater tots.

Make them thin because they will shrink slightly during cooking.

5. Cook the Burger Patties

Heat a large skillet or griddle over medium-high heat.

Cook patties for approximately 2–3 minutes per side.

The beef should develop a browned crust.

6. Add Cheese

Place a small square of cheddar cheese on each patty.

Cover the skillet for approximately 30 seconds until melted.

7. Prepare the Burger Sauce

In a small bowl, combine:

  • Mayonnaise
  • Ketchup
  • Mustard
  • Pickle relish
  • Garlic powder
  • Smoked paprika
  • Black pepper

Mix until smooth.

8. Assemble the Tater Tot Base

Place one crispy tater tot on a serving plate or tray.

Add a small amount of burger sauce.

9. Add the Burger Patty

Place the cheesy mini burger patty on top of the tater tot.

10. Add Toppings

Add:

  • Pickle slice
  • Lettuce
  • Tomato
  • Onion

if using.

11. Add the Top Tater Tot

Place another crispy tater tot on top.

Secure with a toothpick if needed.

12. Garnish

Sprinkle with:

  • Sesame seeds
  • Fresh parsley

13. Serve Immediately

Serve warm with extra burger sauce.

What to Serve With Mini Tater Tot Cheeseburgers

These mini burgers are perfect for party spreads.

Serve with:

Dipping Sauces

  • Burger sauce
  • Ranch dressing
  • Garlic aioli
  • Chipotle mayo
  • BBQ sauce

Party Sides

  • Chicken wings
  • Mozzarella sticks
  • Onion rings
  • Loaded fries
  • Nachos

Fresh Sides

  • Coleslaw
  • Garden salad
  • Fruit salad
  • Pickle salad

Drinks

  • Lemonade
  • Iced tea
  • Milkshakes
  • Soda

Tips for the Best Mini Tater Tot Cheeseburgers

Cook Tater Tots Until Extra Crispy

Crispy tots hold the burger layers better.

Use 80/20 Ground Beef

The extra fat creates juicier mini patties.

Make Thin Patties

Thin patties cook quickly and fit perfectly between the tots.

Do Not Overmix Beef

Gentle mixing creates softer burgers.

Add Cheese While Hot

Cheese melts best immediately after cooking.

Assemble Right Before Serving

This keeps the tater tots crispy.

Use Toothpicks for Parties

They make serving easier and prevent slipping.

Easy Recipe Variations

Bacon Cheeseburger Tater Tot Bites

Add:

  • Crispy bacon pieces
  • Extra cheddar

for a loaded burger flavor.

BBQ Mini Tater Tot Cheeseburgers

Replace burger sauce with BBQ sauce.

Add crispy onions.

Spicy Jalapeño Cheeseburger Tots

Add:

  • Pickled jalapeños
  • Pepper Jack cheese
  • Spicy mayo

Big Mac Style Tater Tot Cheeseburgers

Add:

  • Special sauce
  • Shredded lettuce
  • Pickles
  • Finely diced onions

Mushroom Swiss Tater Tot Burgers

Top patties with:

  • Sautéed mushrooms
  • Swiss cheese

Chicken Tater Tot Cheeseburgers

Replace beef patties with seasoned ground chicken patties.

Breakfast Tater Tot Cheeseburgers

Add:

  • Fried egg
  • Bacon
  • Breakfast sausage

for a brunch version.

Air Fryer Method

Preheat air fryer to 400°F (200°C).

Cook tater tots for approximately 15–20 minutes, shaking halfway.

Cook mini patties separately for approximately 6–8 minutes, flipping halfway.

Assemble after cooking.

Make-Ahead Instructions

The burger patties can be shaped up to 1 day ahead.

Store covered in the refrigerator.

The burger sauce can be prepared up to 3 days ahead.

Bake tater tots fresh before assembling for the best texture.

How to Store Leftovers

Store components separately when possible.

Burger Patties

Refrigerate for up to 3–4 days.

Burger Sauce

Refrigerate for up to 5 days.

Tater Tots

Store refrigerated for up to 2 days, though they will lose crispiness.

Reheating

Reheat patties and tater tots in the oven or air fryer.

Air fryer:

375°F (190°C) for 5–8 minutes

This restores the crisp texture best.

Freezing Instructions

Cooked mini burger patties can be frozen.

Freeze in an airtight container for up to 2 months.

Reheat before assembling.

Do not freeze fully assembled tater tot cheeseburgers because the tots will become soft.

Frequently Asked Questions

Can I use frozen mini burger patties?
Yes. Cook according to package instructions and assemble with crispy tater tots.

Can I make these ahead for a party?
Yes, prepare the patties and sauce ahead, then assemble just before serving.

How do I keep tater tots crispy?
Bake them until deeply golden and avoid adding wet toppings too early.

Can I use sweet potato tots?
Yes. They create a slightly sweeter version.

Can I use ground turkey?
Yes. Season well and avoid overcooking.

What cheese works best?
Cheddar, American, Swiss, and pepper Jack all work well.

Can I make these spicy?
Yes. Add jalapeños, hot sauce, or spicy mayo.

Final Thoughts

These Mini Tater Tot Cheeseburgers combine crispy golden potatoes, juicy mini beef patties, melted cheddar cheese, and classic burger toppings into one fun bite-sized recipe.

The key is making crispy tater tots, keeping the patties thin and juicy, and assembling everything right before serving.

Perfect for parties, game days, family dinners, or snack nights, these mini cheeseburgers are a delicious twist on two classic comfort foods everyone loves.

Slow Cooker Sticky Honey Garlic Beef – Tender, Caramelized & Fall-Apart Delicious

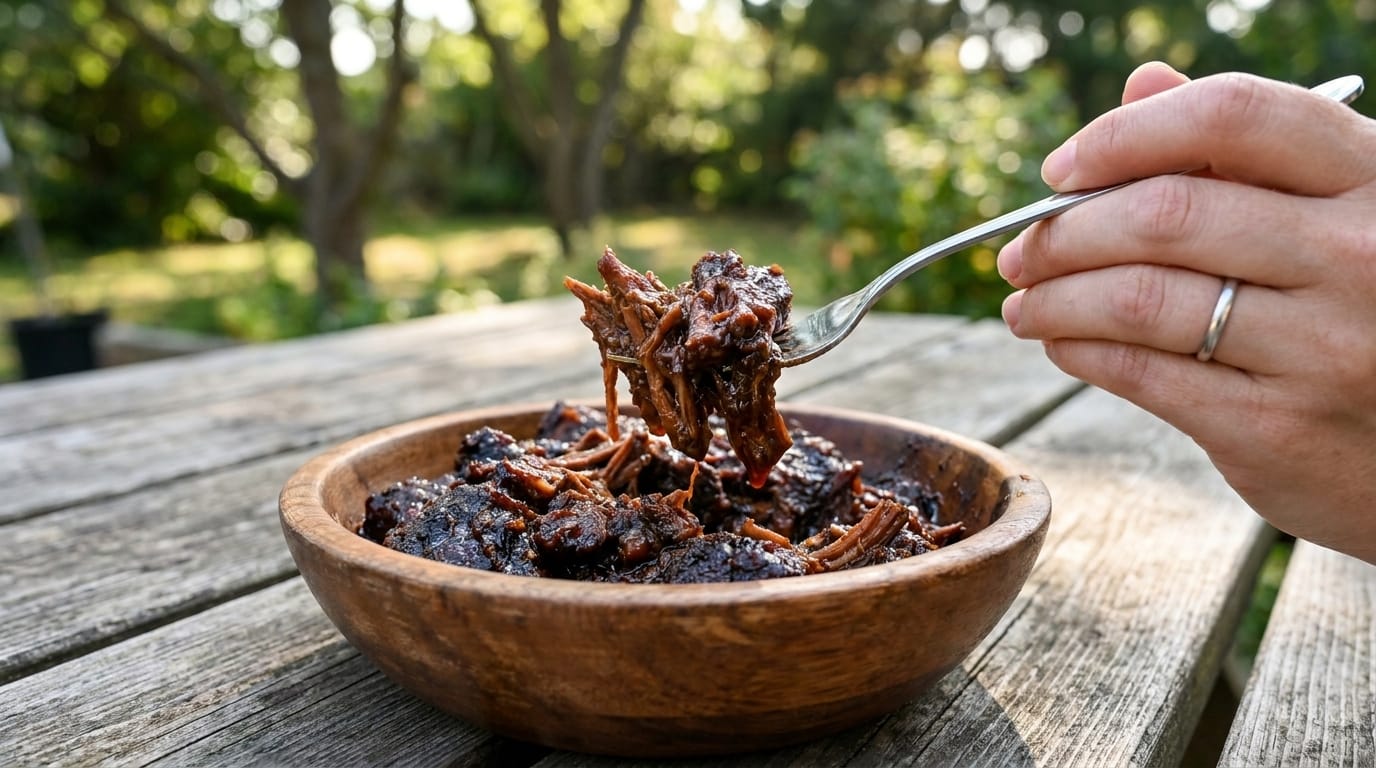
Slow Cooker Sticky Honey Garlic Beef is the ultimate comfort food for anyone who loves rich, tender meat coated in a sweet and savory sauce. This slow-cooked beef recipe creates incredibly soft, pull-apart pieces of beef covered in a glossy honey garlic glaze with deep caramelized flavors.

The dish in the image shows beautifully shredded beef with a dark, sticky coating and a rich sauce that has developed after hours of slow cooking. The secret behind this incredible texture is cooking the beef low and slow, allowing the connective tissues to break down while the honey, garlic, soy sauce, and spices slowly transform into a bold, flavorful glaze.

This recipe is perfect for busy weeknights, weekend dinners, meal prep, or family gatherings. The slow cooker does most of the work, making it easy to achieve restaurant-quality beef without spending hours in the kitchen. Serve it over fluffy rice, mashed potatoes, noodles, or alongside roasted vegetables for a complete meal.


Why You’ll Love This Slow Cooker Sticky Honey Garlic Beef

This recipe combines everything people love about a great slow-cooked meal: tender beef, incredible flavor, minimal effort, and plenty of leftovers.

The beef becomes so tender that it easily pulls apart with a fork. Slow cooking allows the meat to absorb the sweet, garlicky sauce while creating a rich texture that cannot be achieved with quick cooking methods.

The sauce is the highlight of this dish. Honey adds sweetness and helps create a sticky glaze, while garlic, soy sauce, Worcestershire sauce, and spices add layers of savory flavor.

It is also extremely versatile. You can serve it as a rice bowl, make sandwiches, add it to tacos, or use leftovers for meal prep throughout the week.


Ingredients

For the Beef

  • 3 to 4 pounds beef chuck roast
  • 2 tablespoons olive oil
  • 2 teaspoons salt
  • 1 teaspoon black pepper
  • 1 teaspoon smoked paprika
  • 1 teaspoon garlic powder
  • 1 teaspoon onion powder

For the Sticky Honey Garlic Sauce

  • 6 cloves garlic, minced
  • 1 large onion, sliced
  • ¾ cup honey
  • ½ cup low-sodium soy sauce
  • ¼ cup beef broth
  • 3 tablespoons Worcestershire sauce
  • 2 tablespoons tomato paste
  • 2 tablespoons apple cider vinegar
  • 1 tablespoon Dijon mustard
  • 1 teaspoon fresh ginger, grated
  • 1 teaspoon smoked paprika
  • ½ teaspoon crushed red pepper flakes (optional)
  • 1 teaspoon black pepper

For Thickening the Sauce

  • 3 tablespoons cornstarch
  • 3 tablespoons cold water

For Garnishing

  • Fresh parsley or green onions
  • Sesame seeds, optional
  • Extra cracked black pepper

How to Make Slow Cooker Sticky Honey Garlic Beef

1. Prepare the Beef

Remove the chuck roast from the refrigerator and pat it dry using paper towels.

Drying the surface helps create a better sear and improves the overall flavor of the finished dish.

Season all sides of the beef with salt, black pepper, garlic powder, onion powder, and smoked paprika.

Make sure the seasoning is evenly distributed across the entire roast.


2. Sear the Beef for Maximum Flavor

Heat olive oil in a large skillet over medium-high heat.

Once the skillet is hot, place the seasoned beef into the pan.

Sear the roast for approximately 3 to 5 minutes per side until a deep brown crust forms.

This step is optional, but highly recommended.

The browned exterior creates additional savory flavors that make the final slow cooker sauce taste richer and more complex.

Transfer the browned beef to the slow cooker.


3. Prepare the Honey Garlic Sauce

In a bowl, combine:

  • Honey
  • Soy sauce
  • Beef broth
  • Worcestershire sauce
  • Tomato paste
  • Apple cider vinegar
  • Dijon mustard
  • Ginger
  • Smoked paprika
  • Black pepper
  • Red pepper flakes if using

Whisk everything together until smooth.

The combination of sweet honey, salty soy sauce, tangy vinegar, and aromatic garlic creates the signature sticky glaze.


4. Add Garlic and Onion

Place the sliced onions at the bottom of the slow cooker.

Add the minced garlic over the onions.

The onions create a flavorful base while also helping prevent the beef from sitting directly against the bottom of the cooker.

Place the seared beef on top.


5. Add the Sauce

Pour the honey garlic sauce evenly over the beef.

Make sure the roast is coated as much as possible.

The beef does not need to be completely submerged because the slow cooker will create additional liquid as the meat cooks.

Cover with the lid.


Slow Cook the Beef

6. Cook Until Tender

Cook the beef on:

LOW: 8 to 10 hours
HIGH: 5 to 6 hours

Low cooking produces the most tender results because the meat has more time to slowly break down.

The beef is ready when it easily pulls apart with a fork.

If the meat feels firm, continue cooking. Tough beef usually needs more time rather than less.


7. Shred the Beef

Carefully remove the cooked beef from the slow cooker.

Place it on a large cutting board or plate.

Using two forks, shred the beef into large pieces.

Avoid shredding it too finely because larger chunks hold more moisture and create a better texture.

Remove any large pieces of fat if desired.

Return the shredded beef to the slow cooker sauce.


Make the Sticky Glaze

8. Thicken the Sauce

Mix cornstarch and cold water in a small bowl until smooth.

Pour the mixture into the slow cooker.

Stir gently with the shredded beef.

Cover and cook on HIGH for approximately 15 to 20 minutes.

The sauce will gradually thicken and coat the beef with a glossy sticky glaze.


9. Caramelize for Extra Flavor

For an even richer finish similar to the image, transfer some shredded beef and sauce to a baking dish.

Spread into an even layer.

Broil for 2 to 4 minutes until the edges become darker and caramelized.

Watch carefully because the honey in the sauce can burn quickly.

This extra step creates those deep, sticky caramelized pieces that make the dish especially delicious.


How to Serve Sticky Honey Garlic Beef

This beef is incredibly versatile and works with many different sides.

Over Rice

Serve the sticky beef over steamed jasmine rice or white rice.

The rice absorbs the sweet garlic sauce perfectly.

With Mashed Potatoes

Creamy mashed potatoes create an amazing combination with the rich beef gravy-style sauce.

With Noodles

Toss the beef with noodles for an easy Asian-inspired dinner.

In Sandwiches

Pile the shredded beef onto toasted rolls with cheese and extra sauce.

As Tacos

Add the beef to tortillas with cabbage, onions, and a drizzle of sauce.


What to Serve With Honey Garlic Beef

For vegetables, try:

  • Roasted broccoli
  • Green beans
  • Carrots
  • Brussels sprouts
  • Asparagus
  • Stir-fried vegetables

For a complete comfort meal, serve with:

  • Garlic bread
  • Dinner rolls
  • Creamy mashed potatoes
  • Buttered noodles

Tips for the Best Sticky Honey Garlic Beef

Use Chuck Roast

Chuck roast is ideal because it contains enough fat and connective tissue to become tender during slow cooking.

Do Not Skip Searing

Although optional, searing creates deeper flavor and a richer final sauce.

Use Fresh Garlic

Fresh minced garlic provides a much stronger flavor than garlic powder alone.

Avoid Opening the Lid Frequently

Every time the slow cooker lid is removed, heat escapes and cooking time increases.

Adjust the Sweetness

If you prefer a less sweet sauce, reduce the honey slightly and increase the beef broth.

Make It Spicy

Add extra crushed red pepper flakes, chili garlic sauce, or sriracha for heat.


Easy Recipe Variations

Honey Garlic Steak Bites

Use cubed sirloin or stew beef instead of chuck roast and reduce cooking time.

BBQ Honey Garlic Beef

Add ½ cup barbecue sauce to the honey garlic mixture for a smoky version.

Mushroom Honey Garlic Beef

Add sliced mushrooms during the last few hours of cooking.

Korean-Inspired Honey Garlic Beef

Add sesame oil, extra ginger, and garnish with sesame seeds and green onions.

Creamy Honey Garlic Beef

Stir in a small amount of heavy cream at the end for a richer sauce.


How to Store Leftovers

Allow the beef to cool completely.

Store in an airtight container with the sauce.

Refrigerate for up to 4 days.

Keeping the beef in the sauce helps maintain moisture and flavor.


How to Reheat

Reheat the beef gently in a saucepan over medium-low heat.

Add a splash of beef broth if the sauce has become too thick.

You can also microwave individual portions in short intervals, stirring occasionally.


Can You Freeze Honey Garlic Beef?

Yes, this recipe freezes beautifully.

Place cooled beef and sauce into freezer-safe containers.

Freeze for up to 3 months.

Thaw overnight in the refrigerator before reheating.

The flavor often becomes even better after resting because the beef continues absorbing the sauce.


Final Thoughts

Slow Cooker Sticky Honey Garlic Beef is the perfect example of how simple ingredients can create an unforgettable meal. Tender chuck roast slowly cooks until it becomes melt-in-your-mouth beef, while honey, garlic, soy sauce, and spices transform into a rich sticky glaze.

The combination of sweet, savory, and deeply caramelized flavors makes this recipe ideal for family dinners, meal prep, or special occasions. Whether served over rice, mashed potatoes, noodles, or tucked into sandwiches, this slow cooker beef delivers incredible flavor with very little effort.

A comforting, hearty recipe like this is exactly the kind of meal that brings everyone back to the table.

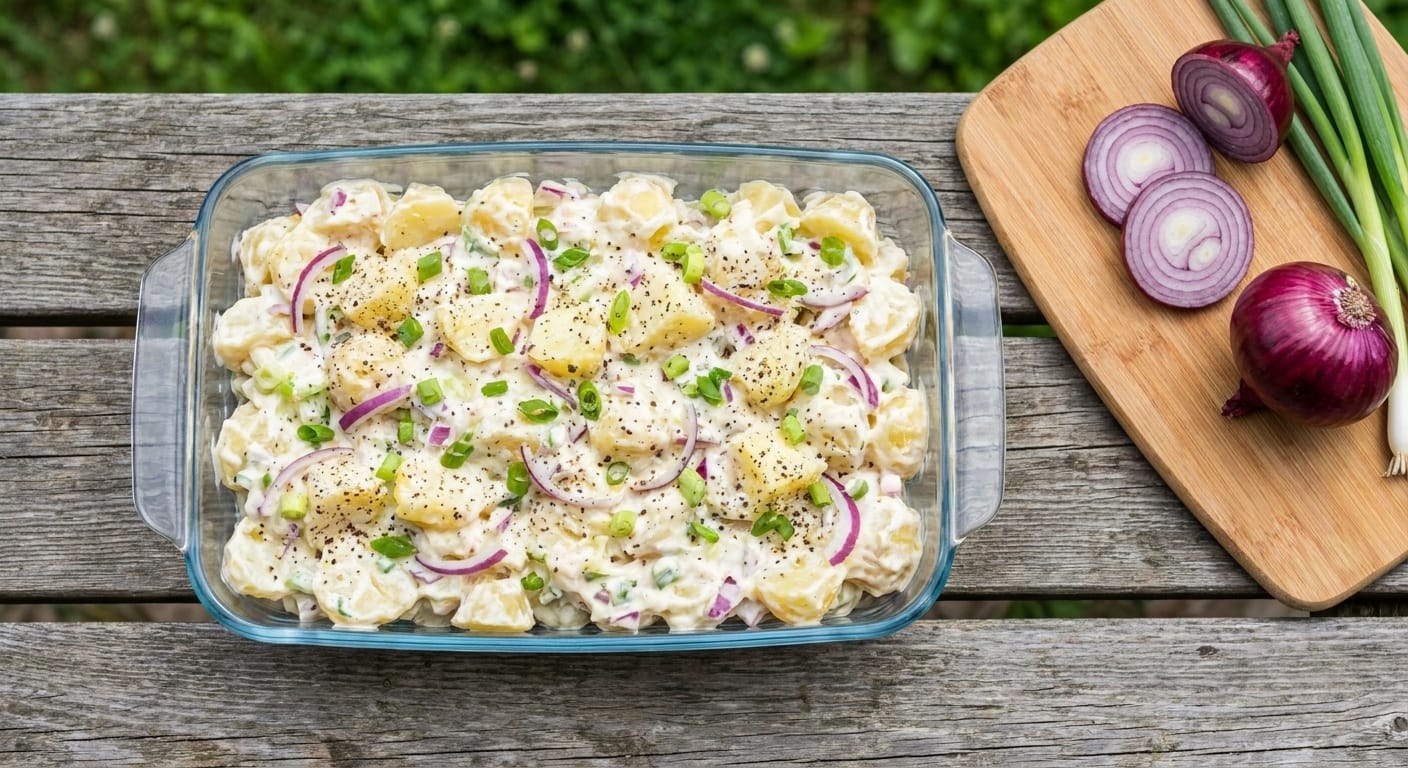
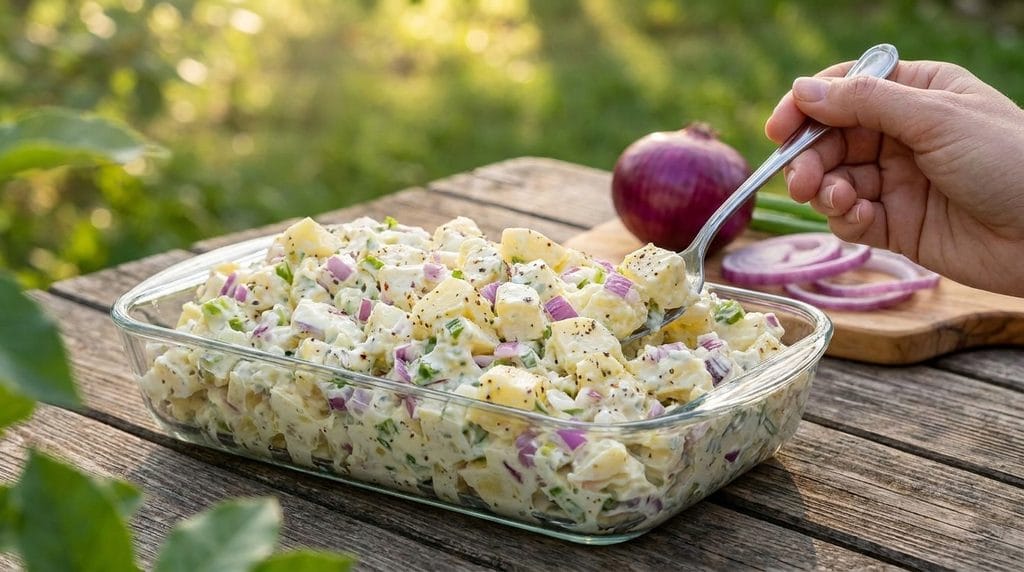
Easy Creamy Classic Potato Salad Recipe – Rich, Tangy, and Perfect for Gatherings

If you are looking for a timeless side dish that belongs at every barbecue, picnic, holiday table, and family gathering, this Creamy Classic Potato Salad is the perfect recipe. Tender potatoes are combined with crunchy celery, sweet pickles, fresh onions, and a creamy dressing made with mayonnaise, mustard, and simple seasonings for a comforting dish everyone loves.

This traditional potato salad has the perfect balance of creamy, tangy, and slightly sweet flavors. The potatoes stay tender without becoming mushy, while the crunchy vegetables add freshness and texture to every bite.

Whether you are serving grilled meats, sandwiches, burgers, or a holiday feast, this classic potato salad is an easy make-ahead side dish that always disappears quickly.

Why You’ll Love This Creamy Classic Potato Salad

It is a timeless recipe loved by everyone.

The creamy dressing is rich, tangy, and flavorful.

The potatoes stay tender while holding their shape.

It can be made ahead for easy entertaining.

The recipe uses simple ingredients found in most kitchens.

It pairs perfectly with grilled meats and summer dishes.

It is easy to customize with eggs, bacon, herbs, or extra vegetables.

Ingredients

For the Potato Salad

  • 3 pounds Yukon Gold potatoes or red potatoes
  • 1 tablespoon salt for boiling water
  • 4 large hard-boiled eggs, chopped
  • ¾ cup celery, finely diced
  • ½ cup sweet pickles or dill pickles, finely chopped
  • ½ cup yellow onion, finely diced
  • ¼ cup fresh parsley, chopped

For the Creamy Dressing

  • 1½ cups mayonnaise
  • 2 tablespoons yellow mustard
  • 2 tablespoons sour cream or Greek yogurt
  • 2 tablespoons pickle juice
  • 1 tablespoon apple cider vinegar
  • 1 teaspoon sugar, optional
  • 1 teaspoon garlic powder
  • ½ teaspoon onion powder
  • 1 teaspoon kosher salt, or to taste
  • ½ teaspoon freshly ground black pepper
  • ½ teaspoon paprika

For Garnishing

  • Paprika
  • Fresh parsley
  • Sliced boiled eggs
  • Fresh dill
  • Cracked black pepper

How to Make Creamy Classic Potato Salad

1. Prepare the Potatoes

Wash the potatoes thoroughly.

Peel them if desired.

Cut the potatoes into evenly sized 1-inch pieces.

Keeping the pieces similar in size helps them cook evenly.

2. Boil the Potatoes

Place potatoes in a large pot.

Cover with cold water.

Add salt.

Bring to a boil over medium-high heat.

3. Cook Until Tender

Boil for approximately 10–15 minutes.

The potatoes should be tender when pierced with a fork but should not fall apart.

4. Drain the Potatoes

Drain the potatoes well.

Allow them to cool for approximately 15–20 minutes.

Warm potatoes absorb flavor better, but very hot potatoes can make the dressing too thin.

5. Prepare the Eggs

While potatoes cook, prepare hard-boiled eggs.

Chop them into small pieces.

Reserve a few slices for garnish if desired.

6. Prepare the Vegetables

Dice:

  • Celery
  • Pickles
  • Onion

Chop fresh parsley.

7. Make the Dressing

In a medium bowl, combine:

  • Mayonnaise
  • Mustard
  • Sour cream
  • Pickle juice
  • Apple cider vinegar
  • Sugar
  • Garlic powder
  • Onion powder
  • Salt
  • Pepper
  • Paprika

Whisk until smooth and creamy.

8. Taste the Dressing

Adjust flavors if needed.

Add more:

  • Pickle juice for tanginess
  • Mustard for sharpness
  • Mayonnaise for creaminess
  • Salt and pepper for balance

9. Combine the Potatoes and Vegetables

Place cooled potatoes in a large mixing bowl.

Add:

  • Chopped eggs
  • Celery
  • Pickles
  • Onion
  • Parsley

10. Add the Dressing

Pour the creamy dressing over the potato mixture.

11. Mix Gently

Fold everything together carefully.

Avoid stirring too aggressively because the potatoes can break apart.

12. Chill the Potato Salad

Cover and refrigerate for at least 2 hours.

This allows the flavors to blend.

For the best flavor, chill overnight.

13. Adjust Before Serving

After chilling, stir gently.

If the salad seems dry, add a little extra mayonnaise.

14. Garnish

Top with:

  • Paprika
  • Fresh parsley
  • Egg slices
  • Fresh dill

15. Serve

Serve chilled.

What to Serve With Creamy Classic Potato Salad

This potato salad pairs perfectly with grilled and barbecue dishes.

Grilled Meats

  • BBQ chicken
  • Grilled steak
  • Burgers
  • Hot dogs
  • Grilled sausages

Seafood

  • Grilled salmon
  • Fried fish
  • Shrimp skewers
  • Crab cakes

Sandwiches

  • Pulled pork sandwiches
  • Chicken sandwiches
  • Turkey sandwiches
  • Club sandwiches

Picnic Favorites

  • Coleslaw
  • Pasta salad
  • Baked beans
  • Corn on the cob

Tips for the Best Creamy Classic Potato Salad

Choose the Right Potatoes

Yukon Gold and red potatoes hold their shape while staying creamy.

Do Not Overcook Potatoes

Overcooked potatoes become watery and mushy.

Salt the Cooking Water

Seasoning the potatoes from the inside makes a big difference.

Cool Potatoes Before Adding Dressing

This prevents the dressing from becoming oily.

Chop Ingredients Small

Small pieces create better texture in every bite.

Make It Ahead

Potato salad tastes even better after resting in the refrigerator.

Mix Gently

Fold instead of stirring aggressively.

Easy Recipe Variations

Bacon Potato Salad

Add:

  • 1 cup crispy cooked bacon
  • Extra black pepper

for a smoky version.

Loaded Baked Potato Salad

Add:

  • Cheddar cheese
  • Bacon
  • Green onions
  • Sour cream

for a loaded potato flavor.

Southern Potato Salad

Add:

  • More mustard
  • Sweet pickle relish
  • Extra boiled eggs

for a classic Southern-style version.

Dill Pickle Potato Salad

Increase:

  • Dill pickles
  • Fresh dill
  • Pickle juice

for a tangy pickle-forward flavor.

Herb Potato Salad

Add:

  • Fresh chives
  • Dill
  • Parsley
  • Basil

for a fresh version.

Spicy Potato Salad

Add:

  • Jalapeños
  • Hot sauce
  • Cayenne pepper

for extra heat.

Healthy Potato Salad

Replace part of the mayonnaise with:

  • Greek yogurt
  • Sour cream

for a lighter dressing.

Make-Ahead Instructions

This potato salad is perfect for preparing ahead.

Prepare it up to 2 days before serving.

Store covered in the refrigerator.

The flavors become even better as they sit.

Before serving, stir gently and adjust seasoning if needed.

How to Store Leftovers

Store leftover potato salad in an airtight container.

Refrigerate for up to 3–4 days.

Do not leave potato salad at room temperature for more than 2 hours.

Always keep it chilled when serving outdoors.

Freezing Instructions

Freezing is not recommended.

The mayonnaise-based dressing can separate and become watery after thawing.

For the best texture, prepare fresh.

Frequently Asked Questions

What potatoes are best for potato salad?
Yukon Gold and red potatoes are ideal because they hold their shape while remaining creamy.

Can I make potato salad the day before?
Yes. In fact, overnight chilling improves the flavor.

Why is my potato salad watery?
The potatoes may have been overcooked or not drained properly.

Can I use Miracle Whip instead of mayonnaise?
Yes, but the flavor will be sweeter and slightly different.

Can I add bacon?
Absolutely. Crispy bacon adds great smoky flavor.

How long does homemade potato salad last?
It lasts about 3–4 days when stored properly in the refrigerator.

Can I use red potatoes with the skin on?
Yes. The skin adds color and texture.

Final Thoughts

This Creamy Classic Potato Salad is a simple, delicious side dish made with tender potatoes, crunchy vegetables, boiled eggs, and a rich creamy dressing.

The key is choosing the right potatoes, cooking them until just tender, seasoning the dressing well, and allowing the salad time to chill before serving.

Perfect for picnics, barbecues, holidays, and family dinners, this classic potato salad is a comforting recipe that brings everyone back for seconds.

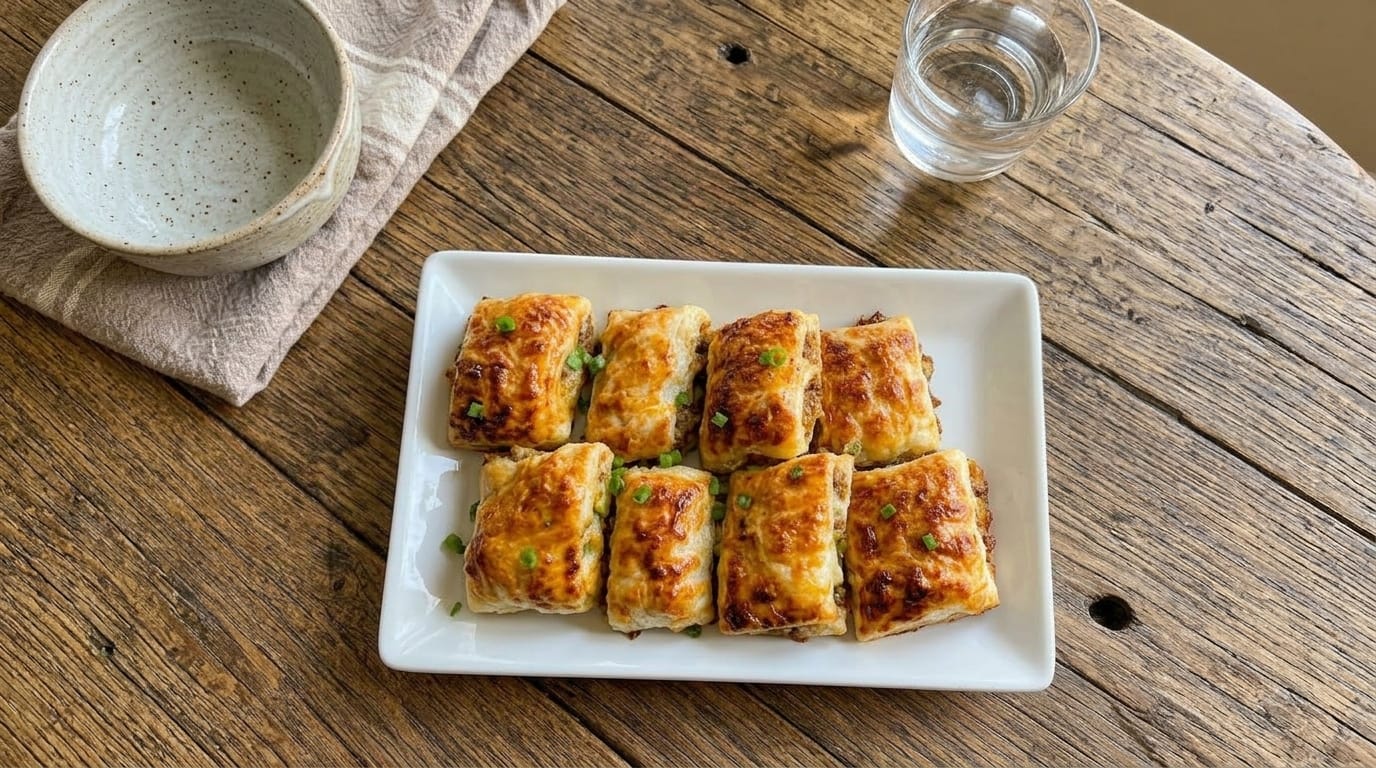
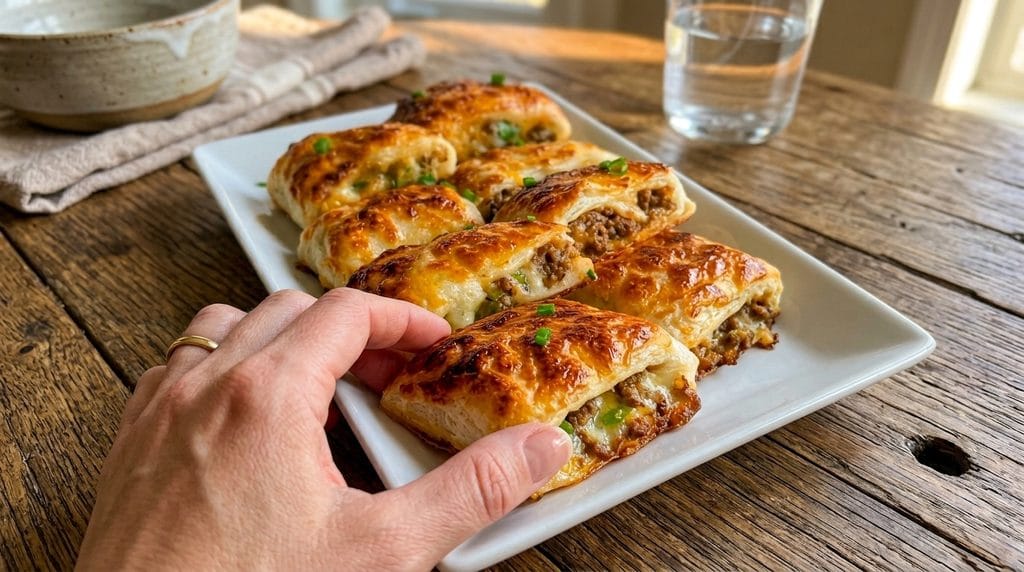
Easy Cheeseburger Crescent Rolls Recipe – Flaky, Cheesy, and Loaded with Savory Beef Flavor

If you love classic cheeseburgers and warm, buttery baked pastries, these Cheeseburger Crescent Rolls are the perfect comfort food combination. Flaky crescent dough is filled with seasoned ground beef, creamy melted cheese, and classic burger flavors, then baked until golden brown and irresistibly delicious.

Each bite delivers a crispy, buttery exterior with a juicy cheeseburger-inspired filling inside. The combination of savory beef, melted cheese, garlic, and seasonings makes these rolls taste like a handheld cheeseburger wrapped in a warm golden crust.

Perfect for busy weeknight dinners, party appetizers, game-day snacks, lunch boxes, or family gatherings, these easy crescent rolls come together quickly and are loved by both kids and adults.

Why You’ll Love These Cheeseburger Crescent Rolls

They combine the flavors of a cheeseburger with the convenience of a baked roll.

The crescent dough becomes golden, flaky, and buttery.

The beef filling is rich, savory, and packed with burger flavor.

Melted cheese creates a gooey texture in every bite.

They are easy to prepare with simple ingredients.

Perfect for meal prep, parties, and quick dinners.

They can be customized with your favorite burger toppings.

Ingredients

For the Cheeseburger Filling

  • 1½ pounds ground beef (80–85% lean)
  • 1 tablespoon olive oil
  • 1 medium yellow onion, finely diced
  • 3 garlic cloves, minced
  • 1 teaspoon kosher salt
  • 1 teaspoon black pepper
  • 1 teaspoon garlic powder
  • 1 teaspoon onion powder
  • 1 teaspoon smoked paprika
  • 1 tablespoon Worcestershire sauce
  • 2 tablespoons ketchup
  • 1 tablespoon yellow mustard
  • 1 tablespoon chopped fresh parsley

For the Crescent Rolls

  • 2 cans refrigerated crescent roll dough (8 ounces each)
  • 8 slices cheddar cheese
  • 1 cup shredded mozzarella cheese
  • ½ cup shredded Monterey Jack cheese
  • 1 large egg, beaten (for egg wash)

Optional Burger Add-Ins

  • Dill pickle slices
  • Cooked bacon pieces
  • Sautéed mushrooms
  • Jalapeños
  • Caramelized onions
  • Extra cheddar cheese
  • Burger sauce

For the Garlic Butter Topping

  • 3 tablespoons melted butter
  • 2 garlic cloves, minced
  • 1 tablespoon fresh parsley, chopped
  • ½ teaspoon Italian seasoning
  • ¼ teaspoon black pepper

How to Make Cheeseburger Crescent Rolls

1. Preheat the Oven

Preheat your oven to 375°F (190°C).

Line a large baking sheet with parchment paper.

2. Prepare the Beef Filling

Heat olive oil in a large skillet over medium-high heat.

Add the ground beef.

Cook for approximately 5–7 minutes, breaking it apart with a spoon until browned.

3. Drain Excess Grease

Remove excess fat from the skillet.

Leave a small amount for flavor.

4. Add Onion and Garlic

Add diced onion.

Cook for approximately 3–4 minutes until softened.

Add minced garlic.

Cook for another 30 seconds until fragrant.

5. Season the Beef

Add:

  • Salt
  • Black pepper
  • Garlic powder
  • Onion powder
  • Smoked paprika

Stir well to coat the beef.

6. Add Burger Flavor

Mix in:

  • Worcestershire sauce
  • Ketchup
  • Mustard

Cook for another 2 minutes.

7. Cool the Filling

Remove the beef mixture from heat.

Allow it to cool slightly before assembling the rolls.

This prevents the dough from becoming soft.

8. Prepare the Crescent Dough

Unroll the crescent dough.

Separate into individual triangles.

Place each triangle on your work surface.

9. Add Cheese

Place a small piece of cheddar cheese on the wide end of each dough triangle.

Add a spoonful of the beef mixture.

Sprinkle with mozzarella and Monterey Jack cheese.

10. Add Optional Toppings

Add small amounts of:

  • Pickles
  • Bacon
  • Jalapeños
  • Mushrooms

if desired.

11. Roll the Crescent Rolls

Starting from the wide end, roll each triangle tightly toward the pointed end.

Place seam-side down on the baking sheet.

12. Apply Egg Wash

Brush each crescent roll with beaten egg.

This creates a shiny golden crust.

13. Bake the Rolls

Bake for approximately 15–18 minutes.

The crescent rolls should be puffed, golden brown, and fully cooked.

14. Prepare Garlic Butter

While the rolls bake, combine:

  • Melted butter
  • Garlic
  • Parsley
  • Italian seasoning
  • Black pepper

Mix well.

15. Add Garlic Butter Finish

Remove the rolls from the oven.

Brush the tops with garlic butter while warm.

16. Rest Briefly

Allow the rolls to cool for 3–5 minutes.

This helps the cheese set slightly.

17. Serve Warm

Serve immediately with your favorite dipping sauces.

What to Serve With Cheeseburger Crescent Rolls

These rolls pair perfectly with classic comfort sides.

Serve with:

  • French fries
  • Sweet potato fries
  • Onion rings
  • Potato wedges
  • Coleslaw
  • Pickle chips

For a complete meal, pair them with:

  • Tomato soup
  • Garden salad
  • Caesar salad
  • Roasted vegetables
  • Mac and cheese

They also make a great party platter with:

  • Buffalo chicken dip
  • Cheese dip
  • Vegetable trays
  • Wings

Tips for the Best Cheeseburger Crescent Rolls

Cool the Beef Before Filling

Warm filling can make crescent dough difficult to roll and may cause leaking.

Do Not Overfill

Too much filling can cause the rolls to open while baking.

Use Fresh Crescent Dough

Fresh dough creates the best flaky texture.

Shred Your Own Cheese

Freshly shredded cheese melts smoother than pre-shredded varieties.

Seal the Edges Well

Press the dough gently around the filling to keep the cheese inside.

Bake Until Golden

Undercooked crescent dough will remain soft and doughy.

Add Burger Sauce After Baking

A drizzle of special sauce adds extra cheeseburger flavor.

Serve Warm

These rolls are best when the cheese is melted and the crust is fresh.

Easy Recipe Variations

Bacon Cheeseburger Crescent Rolls

Add cooked crispy bacon pieces with the beef filling.

Mushroom Swiss Crescent Rolls

Replace cheddar with Swiss cheese and add sautéed mushrooms.

BBQ Cheeseburger Rolls

Mix barbecue sauce into the beef filling and top with cheddar.

Jalapeño Popper Cheeseburger Rolls

Add:

  • Jalapeños
  • Cream cheese
  • Pepper jack cheese

for a spicy creamy version.

Pizza Cheeseburger Rolls

Add:

  • Pepperoni
  • Mozzarella
  • Italian seasoning

Garlic Parmesan Beef Rolls

Add Parmesan cheese and extra garlic butter topping.

Chicken Cheeseburger Rolls

Replace beef with seasoned shredded chicken.

Breakfast Cheeseburger Rolls

Add scrambled eggs and bacon for a breakfast version.

Make-Ahead Instructions

The beef filling can be prepared up to 3 days ahead.

Store in an airtight container in the refrigerator.

When ready:

  • Prepare crescent rolls
  • Add filling
  • Bake fresh

You can also assemble the rolls several hours ahead and refrigerate before baking.

Brush with egg wash just before placing them in the oven.

How to Store Leftovers

Allow leftover crescent rolls to cool completely.

Store in an airtight container.

Refrigerate for up to 3 days.

Reheating in the Oven

Bake at 350°F (175°C) for approximately 8–10 minutes.

This helps restore crispiness.

Reheating in an Air Fryer

Air fry at 350°F (175°C) for approximately 4–5 minutes.

Microwave

Heat in short intervals until warm.

The dough may become softer.

Freezing

These cheeseburger crescent rolls freeze well.

Freeze baked rolls in a freezer-safe container for up to 2 months.

To reheat:

  • Thaw overnight
  • Warm in the oven or air fryer

You can also freeze the cooked beef filling separately.

Frequently Asked Questions

Can I use puff pastry instead of crescent dough?

Yes. Puff pastry creates an even flakier and more buttery texture.

Can I make these with ground turkey?

Yes. Ground turkey works well with the same seasonings.

How do I prevent the filling from leaking out?

Avoid overfilling and make sure the dough is rolled tightly.

Can I add pickles inside?

Yes. Pickles add the classic cheeseburger flavor.

What cheese works best?

Cheddar, American, mozzarella, Monterey Jack, and pepper jack all melt beautifully.

Can I make these ahead of time?

Yes. Assemble ahead and bake when ready.

Can I use leftover cooked beef?

Absolutely. Leftover taco meat or burger meat works well.

How do I make them extra crispy?

Brush with egg wash and bake until deeply golden.

Final Thoughts

These Cheeseburger Crescent Rolls bring together everything you love about a classic cheeseburger and a buttery baked pastry. With seasoned beef, melted cheese, and flaky golden dough, every bite is packed with comforting flavor.

The secret is creating a flavorful beef filling, using plenty of melted cheese, and baking until the crescent crust is perfectly golden.

Whether served as a quick dinner, party appetizer, or family snack, these cheesy beef-filled rolls are guaranteed to disappear fast.

Easy Crispy Garlic Chicken Potato Patties Recipe – Golden, Cheesy, and Comforting

If you are looking for an easy recipe that combines tender chicken, creamy potatoes, garlic, herbs, and a crispy golden crust, these Crispy Garlic Chicken Potato Patties are the perfect choice. Mashed potatoes are mixed with seasoned chicken, garlic, Parmesan, herbs, and cheese, then shaped into patties and pan-fried until beautifully crisp on the outside while staying soft and flavorful inside.

These patties are a delicious way to use leftover chicken or mashed potatoes while creating a completely new meal. They are budget-friendly, freezer-friendly, and perfect for breakfast, lunch, dinner, snacks, or party appetizers.

Serve them with garlic aioli, sour cream, ranch, salad, or roasted vegetables for a comforting homemade dish that everyone will enjoy.

Why You’ll Love These Crispy Garlic Chicken Potato Patties

They are crispy on the outside and tender inside.

They are a great way to use leftover chicken and potatoes.

Garlic and herbs add incredible flavor.

The recipe is easy to customize with different cheeses and vegetables.

They can be pan-fried, baked, or air-fried.

They are perfect for meal prep and freezing.

Kids and adults love this simple comfort food.

Ingredients

For the Chicken Potato Mixture

  • 3 cups mashed potatoes, cooled
  • 2 cups cooked chicken, shredded or finely chopped
  • 4 garlic cloves, finely minced
  • ½ cup freshly grated Parmesan cheese
  • 1 cup shredded mozzarella cheese
  • 2 large eggs
  • ½ cup breadcrumbs
  • 2 tablespoons fresh parsley, chopped
  • 1 tablespoon fresh chives, chopped
  • 1 teaspoon Italian seasoning
  • ½ teaspoon garlic powder
  • ½ teaspoon onion powder
  • ½ teaspoon smoked paprika
  • 1 teaspoon kosher salt
  • ½ teaspoon freshly ground black pepper
  • ¼ teaspoon red pepper flakes, optional

For Coating

  • 1 cup breadcrumbs or panko breadcrumbs
  • ¼ cup Parmesan cheese
  • ½ teaspoon garlic powder

For Cooking

  • 3 tablespoons olive oil
  • 2 tablespoons unsalted butter

For Serving

  • Garlic aioli
  • Ranch dressing
  • Sour cream
  • Fresh parsley
  • Lemon wedges

How to Make Crispy Garlic Chicken Potato Patties

1. Prepare the Chicken

If using leftover chicken, shred or finely chop it into small pieces.

The chicken should be evenly distributed throughout the patties.

2. Prepare the Potato Base

Place cooled mashed potatoes in a large mixing bowl.

Cold mashed potatoes work best because they are firmer and easier to shape.

3. Add Chicken

Add shredded chicken to the potatoes.

Mix gently to combine.

4. Add Garlic and Cheese

Add:

  • Minced garlic
  • Parmesan cheese
  • Mozzarella cheese

Stir until evenly combined.

5. Add Eggs

Add the eggs.

Mix well.

The eggs help bind the patties together.

6. Add Breadcrumbs

Add breadcrumbs.

Mix until the mixture becomes firm enough to shape.

If the mixture feels too soft, add another tablespoon of breadcrumbs.

7. Add Seasonings

Add:

  • Parsley
  • Chives
  • Italian seasoning
  • Garlic powder
  • Onion powder
  • Smoked paprika
  • Salt
  • Black pepper
  • Red pepper flakes

Mix until everything is evenly incorporated.

8. Chill the Mixture

Cover the bowl.

Refrigerate for 20–30 minutes.

This helps the patties hold their shape while cooking.

Shaping the Patties

9. Prepare the Coating

In a shallow bowl, combine:

  • Breadcrumbs
  • Parmesan cheese
  • Garlic powder

10. Shape the Patties

Scoop approximately ⅓ cup of mixture.

Shape into round patties about ½-inch thick.

11. Coat the Patties

Press each patty lightly into the breadcrumb mixture.

Coat both sides evenly.

12. Rest Before Cooking

Place coated patties on a tray.

Let them rest for 10 minutes.

This helps the coating stick.

Cooking the Chicken Potato Patties

13. Heat the Skillet

Place a large skillet over medium heat.

Add:

  • Olive oil
  • Butter

Allow the butter to melt.

14. Add the Patties

Place patties in the skillet.

Do not overcrowd the pan.

Cook in batches if needed.

15. Cook the First Side

Cook for approximately 3–5 minutes.

The bottom should become golden and crispy.

16. Flip Carefully

Use a wide spatula.

Turn each patty gently.

17. Cook the Second Side

Cook for another 3–5 minutes until golden brown.

18. Check the Center

The patties should be heated throughout and the cheese should be melted.

19. Transfer to a Rack

Place cooked patties on a wire rack.

This keeps the crust crispy.

20. Garnish

Finish with:

  • Fresh parsley
  • Parmesan
  • Black pepper

21. Serve

Serve warm with your favorite dipping sauce.

What to Serve With Crispy Garlic Chicken Potato Patties

These patties are versatile and work well as a complete meal.

Dipping Sauces

  • Garlic aioli
  • Ranch dressing
  • Sour cream
  • Chipotle mayo
  • Honey mustard

Fresh Sides

  • Garden salad
  • Caesar salad
  • Cucumber salad
  • Coleslaw

Vegetable Sides

  • Roasted broccoli
  • Green beans
  • Garlic asparagus
  • Sautéed spinach

Breakfast Serving Ideas

Serve with:

  • Fried eggs
  • Scrambled eggs
  • Bacon
  • Fresh fruit

Tips for the Best Crispy Garlic Chicken Potato Patties

Use Cold Mashed Potatoes

Cold potatoes create a firmer mixture that is easier to shape.

Do Not Add Too Much Breadcrumb

Too much breadcrumb can make the patties dry.

Keep the Patties Even

Similar thickness helps them cook evenly.

Chill Before Cooking

This prevents the patties from breaking apart.

Use Panko for Extra Crispiness

Panko creates a lighter, crunchier crust.

Cook Over Medium Heat

High heat can burn the outside before the inside warms.

Do Not Overcrowd the Pan

Crowding lowers the heat and prevents crisping.

Easy Recipe Variations

Cheesy Bacon Chicken Potato Patties

Add:

  • ½ cup crispy bacon
  • Extra cheddar cheese

for a richer version.

Spinach Garlic Chicken Patties

Add:

  • 1 cup chopped spinach
  • Extra Parmesan

for a vegetable-packed option.

Spicy Chicken Potato Patties

Add:

  • Jalapeños
  • Cayenne pepper
  • Chili flakes

for heat.

Buffalo Chicken Potato Patties

Mix cooked chicken with buffalo sauce before combining with potatoes.

Serve with ranch.

Mushroom Chicken Potato Patties

Add finely chopped sautéed mushrooms.

Broccoli Cheddar Chicken Patties

Add:

  • Chopped broccoli
  • Sharp cheddar cheese

for a comforting variation.

Herb Butter Chicken Patties

Increase fresh herbs:

  • Parsley
  • Thyme
  • Chives
  • Rosemary

Air Fryer Method

Preheat the air fryer to 375°F (190°C).

Lightly spray patties with oil.

Place them in a single layer.

Air fry for 10–14 minutes, flipping halfway through.

Cook until golden and crisp.

Oven-Baked Method

Preheat oven to 425°F (220°C).

Place patties on a parchment-lined baking sheet.

Brush lightly with oil.

Bake for 20–25 minutes, flipping halfway through.

Bake until golden and crispy.

Make-Ahead Instructions

The chicken potato mixture can be prepared up to 2 days ahead.

Store covered in the refrigerator.

You can also shape the patties ahead of time.

Keep them refrigerated until ready to cook.

How to Store Leftovers

Allow patties to cool completely.

Store in an airtight container.

Refrigerate for up to 3–4 days.

Reheating in the Oven

Bake at 375°F (190°C) for 10–15 minutes.

Reheating in the Air Fryer

Air fry at 350°F for 5–7 minutes.

This restores the crisp texture best.

Reheating on the Stovetop

Warm in a lightly oiled skillet over medium heat.

Freezing Instructions

These patties freeze very well.

Freezing Before Cooking

Shape and coat the patties.

Place on a tray and freeze until firm.

Transfer to freezer bags.

Freeze for up to 2 months.

Cook from thawed or partially frozen.

Freezing After Cooking

Cool completely.

Freeze in airtight containers.

Reheat in the oven or air fryer.

Frequently Asked Questions

Can I use leftover mashed potatoes?
Yes. This recipe is perfect for leftover mashed potatoes.

Can I use rotisserie chicken?
Absolutely. Rotisserie chicken works beautifully.

Why are my patties falling apart?
The mixture may be too warm, too wet, or may need more breadcrumbs.

Can I bake these instead of frying?
Yes. Baking and air frying both work well.

What cheese works best?
Mozzarella, cheddar, Parmesan, and Monterey Jack all work well.

Can I make these vegetarian?
Yes. Replace chicken with extra vegetables, mushrooms, or beans.

Can I use sweet potatoes?
Yes. Sweet potatoes create a slightly sweeter version.

Final Thoughts

These Crispy Garlic Chicken Potato Patties combine creamy potatoes, tender chicken, garlic, herbs, Parmesan, and cheese into a golden crispy comfort food everyone will love.

The key is using chilled potatoes, keeping the mixture balanced, coating the patties well, and cooking them over medium heat until perfectly crisp.

Serve them as a snack, appetizer, lunch, or dinner with your favorite sauce for a simple homemade recipe that is crispy, cheesy, flavorful, and satisfying.