
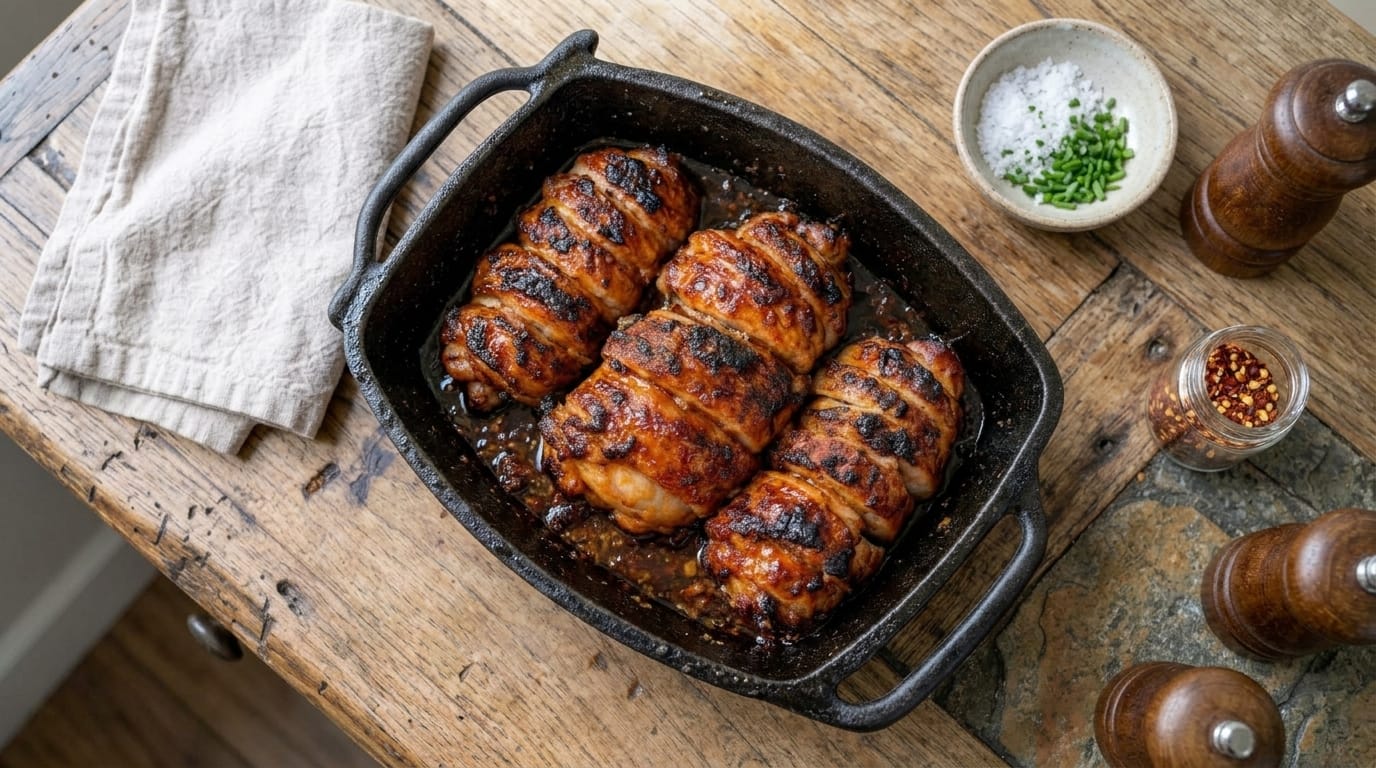
If you are looking for a chicken dinner with deeply caramelized edges, juicy meat, and an irresistible glossy glaze, these Sticky Honey Garlic Chicken Thighs are an excellent choice. Tender chicken thighs are seasoned, seared until beautifully browned, then coated in a buttery honey garlic sauce that becomes thick, sticky, and intensely flavorful as it cooks.
The combination of honey, garlic, soy sauce, butter, and savory seasonings creates the perfect balance of sweetness, saltiness, and rich umami flavor. As the chicken finishes cooking, the glaze reduces around the thighs and caramelizes into the dark, glossy coating that makes this dish so tempting.
These sticky honey garlic chicken thighs are perfect for weeknight dinners, family meals, meal prep, or serving to guests. Pair them with rice, mashed potatoes, noodles, or vegetables and spoon plenty of the extra sticky pan sauce over everything.
Why You’ll Love These Sticky Honey Garlic Chicken Thighs
Chicken thighs stay naturally juicy and tender while developing beautifully caramelized edges.
The honey garlic glaze is sweet, savory, buttery, and packed with flavor.
Everything can be prepared in one skillet or baking dish.
The sauce thickens naturally as it cooks and coats the chicken beautifully.
The recipe uses simple pantry ingredients and requires very little complicated preparation.
You can make it mild, spicy, extra garlicky, or even add ginger for an Asian-inspired variation.
Leftovers reheat well, making this recipe excellent for meal preparation.
Ingredients
For the Chicken Thighs
- 8 boneless, skinless chicken thighs, approximately 2½ pounds
- 1 teaspoon kosher salt
- ¾ teaspoon freshly ground black pepper
- 1 teaspoon garlic powder
- 1 teaspoon onion powder
- 1 teaspoon smoked paprika
- ½ teaspoon dried thyme
- 2 tablespoons olive oil
- 1 tablespoon unsalted butter
For the Sticky Honey Garlic Sauce
- ⅓ cup honey
- ¼ cup low-sodium soy sauce
- 4 tablespoons unsalted butter
- 6 garlic cloves, finely minced
- 2 tablespoons brown sugar
- 1 tablespoon apple cider vinegar or rice vinegar
- 1 tablespoon fresh lemon juice
- 1 teaspoon Dijon mustard
- 1 teaspoon Worcestershire sauce
- ½ teaspoon smoked paprika
- ¼ teaspoon freshly ground black pepper
- ¼ teaspoon crushed red pepper flakes, optional
For Thickening the Sauce
- 1 tablespoon cornstarch
- 1 tablespoon cold water
Optional Finishing Ingredients
- Chopped fresh parsley
- Thinly sliced green onions
- Sesame seeds
- Extra crushed red pepper flakes
- Freshly cracked black pepper
- Lemon wedges
- Extra honey drizzle
How to Make Sticky Honey Garlic Chicken Thighs
1. Preheat the Oven
Preheat your oven to 400°F (200°C).
If you are using an oven-safe skillet, you can sear and bake the chicken in the same pan.
Otherwise, lightly grease a baking dish and set it aside.
2. Prepare the Chicken
Remove the chicken thighs from their packaging.
Trim away any large pieces of excess fat.
Pat the chicken thoroughly dry with paper towels.
Dry chicken develops a much better caramelized crust.
3. Season the Chicken
Season both sides with:
- Salt
- Black pepper
- Garlic powder
- Onion powder
- Smoked paprika
- Dried thyme
Rub the seasonings evenly over the chicken.
4. Heat the Skillet
Place a large oven-safe skillet over medium-high heat.
Add:
- Olive oil
- 1 tablespoon butter
Allow the butter to melt and the skillet to become hot.
5. Add the Chicken
Arrange the thighs in the skillet without overcrowding.
If necessary, sear them in two batches.
6. Sear the First Side
Cook without moving for approximately 4–5 minutes.
The underside should develop a deep golden-brown crust.
7. Flip the Chicken
Turn the thighs over.
Cook for another 3–4 minutes.
The chicken does not need to be completely cooked at this stage.
8. Remove the Chicken
Transfer the seared chicken to a clean plate.
Leave the flavorful browned bits in the skillet.
9. Reduce the Heat
Lower the skillet heat to medium-low.
Allow the pan to cool slightly so the garlic does not burn.
10. Add the Butter
Add the remaining butter.
Allow it to melt into the chicken drippings.
11. Add the Garlic
Add the minced garlic.
Cook for approximately 30–45 seconds, stirring constantly.
The garlic should become fragrant without turning dark brown.
12. Add the Honey
Pour in the honey.
Stir it into the melted garlic butter.
13. Add the Brown Sugar
Add the brown sugar.
Stir until it begins dissolving into the sauce.
14. Add the Soy Sauce
Slowly pour in the soy sauce.
Stir continuously until evenly combined.
15. Add the Vinegar
Add the apple cider vinegar or rice vinegar.
The acidity balances the sweetness of the honey and brown sugar.
16. Add the Lemon Juice
Stir in the fresh lemon juice.
This gives the glaze additional brightness.
17. Add the Remaining Flavorings
Stir in:
- Dijon mustard
- Worcestershire sauce
- Smoked paprika
- Black pepper
- Optional crushed red pepper flakes
Mix thoroughly.
18. Simmer the Sauce
Bring the sauce to a gentle simmer.
Cook for approximately 2–3 minutes.
It should begin to look glossy and slightly syrupy.
19. Prepare the Cornstarch Slurry
In a small bowl, whisk together:
- Cornstarch
- Cold water
Mix until completely smooth.
20. Add the Slurry
Slowly whisk the cornstarch mixture into the simmering sauce.
Cook for approximately 1 minute.
The glaze should begin thickening noticeably.
21. Return the Chicken
Place the seared chicken thighs back into the skillet.
Turn each piece through the sauce so it becomes completely coated.
22. Spoon Glaze Over the Chicken
Generously spoon the honey garlic glaze over the tops of the thighs.
Make sure the garlic pieces are distributed evenly.
23. Transfer to the Oven
Place the skillet into the preheated oven.
Bake at 400°F (200°C) for approximately 15–20 minutes.
24. Baste During Baking
After approximately 10 minutes, carefully remove the skillet.
Spoon more glaze over each chicken thigh.
Return it to the oven.
25. Check for Doneness
Chicken thighs are safely cooked when the thickest portion reaches at least 165°F (74°C).
For especially tender dark meat, they can be cooked closer to approximately 175–185°F (79–85°C).
26. Remove From the Oven
Carefully remove the skillet.
The sauce should be thick, bubbling, and glossy.
27. Baste Again
Spoon the sticky pan sauce generously over the chicken.
Coat each thigh several times.
28. Increase the Heat for Caramelization
For deeper browning, increase the oven temperature to 425°F (220°C).
Cook for another 3–5 minutes.
29. Optional Broil
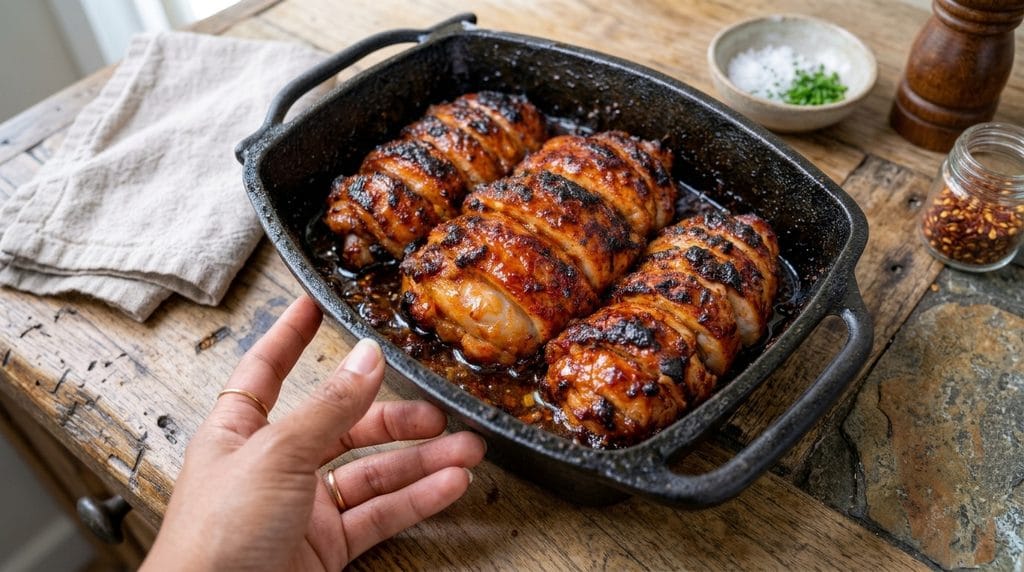
For the dark caramelized edges shown in the finished dish, switch the oven to broil.
Broil for approximately 1–3 minutes.
Watch constantly because honey can burn very quickly.
30. Remove From the Oven
Once the chicken is dark golden and glossy, remove it immediately.
31. Rest the Chicken
Allow the chicken thighs to rest in the pan for approximately 5 minutes.
The sauce will continue thickening slightly as it cools.
32. Spoon Over the Sauce
Before serving, turn each chicken thigh once more through the sticky honey garlic glaze.
33. Garnish
Finish with:
- Chopped parsley
- Green onions
- Sesame seeds
- Freshly cracked black pepper
34. Serve
Serve hot with plenty of extra honey garlic sauce spooned over the chicken.
What to Serve With Sticky Honey Garlic Chicken Thighs
These glazed chicken thighs are especially delicious with rice because it absorbs the sweet and savory sauce.
Serve them with:
- Steamed white rice
- Jasmine rice
- Garlic butter rice
- Brown rice
- Fried rice
- Coconut rice
- Mashed potatoes
- Garlic mashed potatoes
- Buttered noodles
For vegetables, pair them with:
- Roasted broccoli
- Garlic green beans
- Roasted carrots
- Brussels sprouts
- Asparagus
- Stir-fried vegetables
- Sautéed zucchini
- Bok choy
You can also slice the chicken and serve it over grain bowls with rice, vegetables, avocado, cucumbers, or shredded cabbage.
Tips for the Best Sticky Honey Garlic Chicken Thighs
Use Chicken Thighs
Chicken thighs contain more fat than breasts, which helps them stay tender and juicy while the glaze caramelizes.
Pat the Chicken Dry
Dry chicken develops a much stronger crust during searing.
Don’t Overcrowd the Skillet
Crowding traps steam and prevents proper browning.
Cook in batches if necessary.
Use Low-Sodium Soy Sauce
Regular soy sauce can make the glaze excessively salty once it reduces.
Add Garlic Over Lower Heat
Garlic burns easily.
Reduce the heat before adding it to the skillet.
Keep the Sauce at a Gentle Simmer
Honey and sugar can scorch if cooked too aggressively.
Baste More Than Once
Repeatedly spooning the sauce over the chicken builds a thicker, more flavorful glaze.
Watch Carefully When Broiling
Honey can move from caramelized to burned within seconds.
Check Temperature Rather Than Time Alone
Chicken thickness varies, so internal temperature gives the most reliable result.
Let the Sauce Rest
The glaze will become noticeably thicker and stickier after sitting for a few minutes.
Easy Recipe Variations
Spicy Honey Garlic Chicken
Add:
- 1 teaspoon crushed red pepper flakes
- 1 tablespoon sriracha or chili sauce
to the glaze.
Honey Garlic Ginger Chicken
Add 1 tablespoon freshly grated ginger along with the garlic.
Sticky Teriyaki Chicken Thighs
Add:
- 1 tablespoon mirin
- 1 teaspoon sesame oil
- 1 teaspoon grated ginger
Finish with sesame seeds and green onions.
Honey Garlic Butter Chicken
Increase the butter by 2 tablespoons for an even richer sauce.
Lemon Honey Garlic Chicken
Increase the lemon juice to 3 tablespoons and add 1 teaspoon lemon zest.
Orange Honey Garlic Chicken
Replace the lemon juice with ¼ cup fresh orange juice.
Add 1 teaspoon orange zest.
Honey Garlic Sesame Chicken
Add 1 teaspoon toasted sesame oil to the finished sauce.
Sprinkle generously with sesame seeds.
Extra Garlic Chicken Thighs
Increase the garlic to 8–10 cloves.
Honey BBQ Chicken Thighs
Add ¼ cup barbecue sauce to the honey garlic mixture.
Sticky Pineapple Chicken
Add ½ cup pineapple chunks during the final 10 minutes of baking.
Air Fryer Method
These honey garlic chicken thighs can also be prepared in an air fryer.
Preheat the air fryer to 380°F (193°C).
Season the chicken as directed.
Lightly brush with oil.
Arrange the chicken thighs in a single layer.
Air fry for approximately 10 minutes.
Flip and continue cooking for another 6–10 minutes.
Meanwhile, prepare the honey garlic sauce in a small saucepan.
During the final 3–4 minutes, brush the chicken generously with the glaze.
Return it to the air fryer.
Continue cooking until caramelized and the internal temperature reaches at least 165°F (74°C).
Brush with additional warm sauce immediately before serving.
Because air fryers vary considerably, begin checking the chicken early.
Make-Ahead Instructions
The honey garlic sauce can be prepared up to 3 days ahead.
Allow it to cool and refrigerate in an airtight container.
The chicken thighs can be seasoned up to 24 hours ahead.
Store them covered in the refrigerator.
You can also combine the honey, soy sauce, vinegar, mustard, Worcestershire sauce, and seasonings ahead of time.
For the best texture, sear and cook the chicken shortly before serving.
How to Store Leftovers
Allow leftover chicken and sauce to cool completely.
Transfer them to an airtight container.
Refrigerate for up to 3–4 days.
Store the chicken with plenty of the honey garlic sauce to help keep it juicy.
Reheating in the Oven
Preheat the oven to 325°F (165°C).
Place the chicken in a baking dish.
Spoon additional glaze over the top.
Cover loosely with foil.
Heat for approximately 12–15 minutes.
Remove the foil during the final few minutes.
Reheating on the Stovetop
Place the chicken and sauce in a skillet.
Add approximately 1–2 tablespoons water or chicken broth.
Cover and warm over low heat until heated through.
Microwave
Place one chicken thigh with sauce on a microwave-safe plate.
Cover loosely.
Microwave at medium power in short intervals until hot.
Avoid overheating because the glaze can become excessively thick.
Freezing
These honey garlic chicken thighs freeze very well.
Allow the cooked chicken and sauce to cool completely.
Place individual portions into freezer-safe containers.
Spoon plenty of glaze around the chicken.
Freeze for up to approximately 2–3 months.
Thaw overnight in the refrigerator.
Reheat slowly in the oven or skillet.
If the sauce becomes extremely thick after freezing, stir in a tablespoon or two of water or chicken broth while reheating.
Frequently Asked Questions
Can I use bone-in chicken thighs?
Yes. Bone-in thighs work beautifully but will require additional cooking time. Check the internal temperature before serving.
Can I use chicken breasts?
Yes. Thick chicken breasts can be used, although they are leaner and should be monitored carefully to prevent drying.
Why isn’t my honey garlic sauce sticky?
The sauce may need additional reduction. Allow it to simmer gently or add the cornstarch slurry to help thicken it.
Why did my glaze burn?
Honey and brown sugar caramelize quickly at high temperatures. Keep the sauce at moderate heat and watch closely during broiling.
Can I make this without soy sauce?
Yes. Coconut aminos can be used as an alternative, although the flavor and salt level will differ slightly.
Can I make this spicy?
Absolutely. Add chili flakes, cayenne pepper, sriracha, or your favorite hot sauce.
Can I skip the cornstarch?
Yes. Simply simmer the sauce longer until naturally reduced and syrupy.
Can I prepare this recipe ahead of time?
Yes. Prepare the sauce and season the chicken ahead, then cook shortly before serving.
How do I know when chicken thighs are finished?
They should reach at least 165°F (74°C) internally. Dark meat becomes especially tender at somewhat higher temperatures.
Can I double the sauce?
Absolutely. If serving the chicken with rice or noodles, doubling the sauce is a great idea.
Final Thoughts
These Sticky Honey Garlic Chicken Thighs combine juicy chicken, golden garlic, honey, butter, soy sauce, and savory seasonings in a beautifully glossy glaze with deeply caramelized edges.
The key is thoroughly drying and searing the chicken before adding the sauce, allowing the honey garlic glaze to reduce until thick, basting the thighs several times, and finishing them briefly under high heat for that dark, sticky exterior.
Serve them with rice, mashed potatoes, noodles, or vegetables and spoon the extra glaze over everything for an easy family dinner that is juicy inside, caramelized outside, and packed with sweet, savory garlic flavor.