
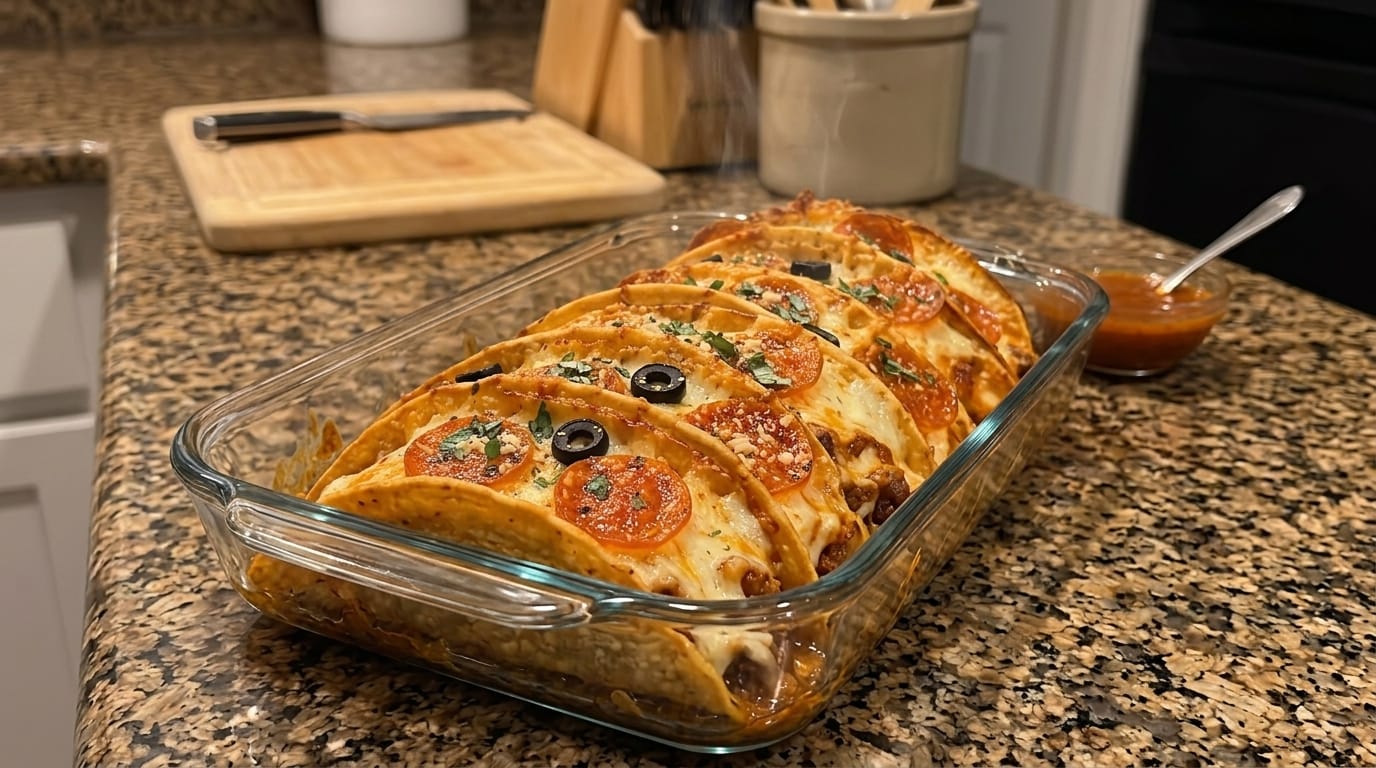
If you are craving a fun, family-friendly dinner that is crispy, cheesy, and packed with savory flavor, these Cheesy Baked Tacos are the perfect recipe. Warm tortillas are filled with seasoned ground beef, melty cheddar and Monterey Jack, then baked until the shells are lightly crisp and the cheese is bubbling. Finish them with lettuce, tomatoes, sour cream, salsa, avocado, or your favorite taco toppings for an easy meal that everyone can customize.
Baked tacos are especially convenient because you can assemble several at once and cook them together instead of standing over the stove preparing each taco individually. The filling is simple but flavorful, made with ground beef, onion, garlic, tomato paste, chili powder, cumin, paprika, and a splash of broth. Once everything is tucked into the tortillas and covered with cheese, the oven does the rest.
These tacos are perfect for weeknight dinners, game nights, casual parties, or meal prep. Serve them with Mexican-style rice, black beans, corn salad, tortilla chips, guacamole, or a fresh salad for a complete meal.
Why You’ll Love These Cheesy Baked Tacos
These tacos combine the best parts of crispy tacos and cheesy beef quesadillas in one easy baked recipe.
The ground beef filling is hearty and well seasoned, while the cheese melts into the meat and helps hold everything together. Baking gives the tortillas lightly crisp edges without requiring deep frying.
Another reason this recipe works so well is that it is easy to customize. You can use ground turkey or chicken, add beans or corn, make the tacos spicier, or switch up the cheese.
They are also excellent for feeding a group because you can arrange a whole batch in one baking dish and serve them directly from the oven.
Ingredients
For the Beef Filling
- 1 pound lean ground beef
- 1 tablespoon olive oil
- 1 small yellow onion, finely diced
- 3 garlic cloves, finely minced
- 2 tablespoons tomato paste
- 1 teaspoon chili powder
- 1 teaspoon ground cumin
- 1 teaspoon paprika
- ½ teaspoon smoked paprika
- ½ teaspoon garlic powder
- ½ teaspoon onion powder
- ½ teaspoon dried oregano
- ¾ teaspoon kosher salt
- ½ teaspoon freshly ground black pepper
- ¼ teaspoon crushed red pepper flakes, optional
- ½ cup beef broth
- 1 tablespoon Worcestershire sauce
For the Tacos
- 10–12 small flour or corn tortillas
- 2 cups shredded sharp cheddar cheese
- 1½ cups shredded Monterey Jack or mozzarella cheese
- 1 tablespoon olive oil or melted butter for brushing
For Topping
- Shredded lettuce
- Diced tomatoes
- Sliced green onions
- Chopped cilantro
- Sour cream
- Salsa
- Guacamole
- Sliced jalapeños
- Lime wedges
How to Make Cheesy Baked Tacos
1. Preheat the Oven
Preheat your oven to 400°F (205°C).
Lightly grease a large baking dish or line a sheet pan with parchment paper.
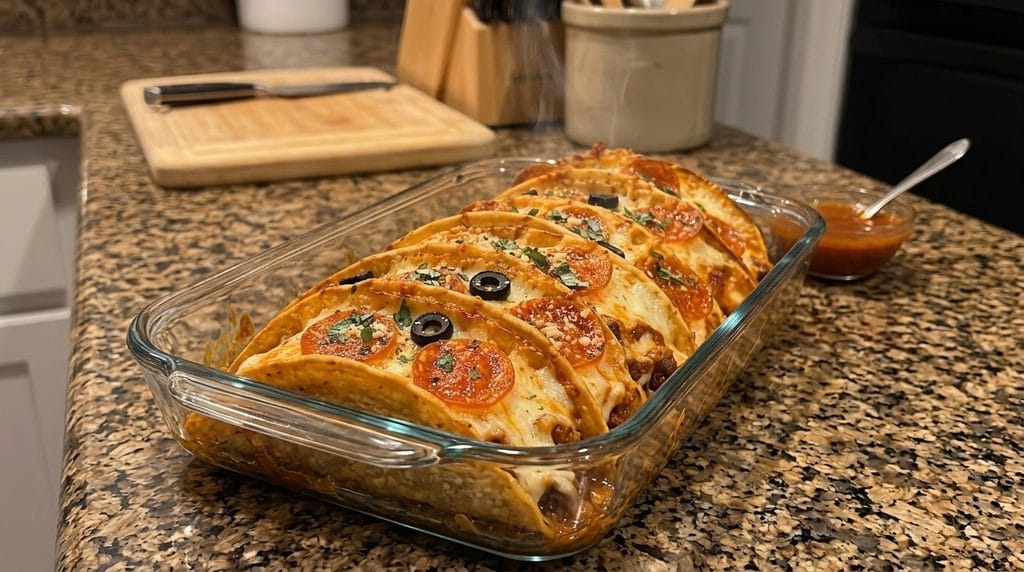
If you want the tacos to stand upright while baking, arrange them snugly in a rectangular baking dish.
2. Heat the Skillet
Place a large skillet over medium-high heat.
Add the olive oil and allow it to warm.
Once hot, add the ground beef.
3. Brown the Beef
Cook the ground beef for approximately 5–7 minutes, breaking it into small crumbles with a wooden spoon.
Continue cooking until no pink remains and the beef reaches an internal temperature of 160°F (71°C).
If there is a lot of excess grease in the skillet, carefully drain most of it before continuing.
4. Add the Onion
Add the diced onion to the beef.
Cook for approximately 3–4 minutes, stirring occasionally.
The onion should become soft and slightly translucent.
5. Add the Garlic
Stir in the minced garlic.
Cook for approximately 30 seconds.
Avoid cooking the garlic too long because it can become bitter if it burns.
6. Cook the Tomato Paste
Add the tomato paste.
Stir it into the beef and cook for approximately 1–2 minutes.
Cooking the tomato paste briefly gives the filling a deeper, richer flavor.
7. Add the Seasonings
Stir in chili powder, cumin, paprika, smoked paprika, garlic powder, onion powder, oregano, salt, black pepper, and optional crushed red pepper flakes.
Cook for another 30–60 seconds.
The spices should become fragrant and thoroughly coat the beef.
8. Add the Broth
Pour in the beef broth and Worcestershire sauce.
Stir well and scrape the bottom of the skillet to release any flavorful browned pieces.
Allow the filling to simmer for approximately 3–5 minutes, or until most of the liquid has reduced.
The finished filling should be moist but not watery.
A very wet filling can make the taco shells soggy.
9. Warm the Tortillas
Warm the tortillas briefly before assembling.
You can microwave them wrapped in a slightly damp paper towel for about 20–30 seconds.
This makes them more flexible and reduces the chance of cracking when folded.
10. Add the First Cheese Layer
Sprinkle a small amount of cheddar and Monterey Jack inside each tortilla.
Adding a little cheese underneath the beef creates another cheesy layer and helps form a barrier between the tortilla and filling.
11. Add the Beef Filling
Spoon approximately 2–3 tablespoons of seasoned beef into each tortilla.
Avoid overfilling.
Too much filling can cause the tacos to open or become difficult to eat.
12. Add More Cheese
Top the beef generously with more shredded cheddar and Monterey Jack.
The cheese should cover much of the meat so it melts throughout the taco as it bakes.
13. Arrange the Tacos
Fold each tortilla gently and arrange the tacos in the baking dish.
Keep them fairly close together so they support each other while baking.
If using a sheet pan, place them seam-side down when possible.
14. Brush with Oil
Lightly brush the outside of the tortillas with olive oil or melted butter.
You do not need much.
This small amount helps the shells become golden and crisp around the edges.
15. Bake the Tacos
Bake at 400°F (205°C) for approximately 10–15 minutes.
The cheese should be completely melted and the tortillas lightly crisp.
If you prefer extra-crispy edges, bake for another few minutes while watching closely.
16. Broil for Extra Cheese Browning
For a more golden cheese topping, switch the oven to broil for approximately 1 minute.
Stay near the oven.
The cheese and tortilla edges can brown very quickly.
17. Let the Tacos Rest
Remove the baking dish from the oven.
Let the tacos rest for approximately 3–5 minutes.
This gives the melted cheese time to set slightly and makes the tacos easier to handle.
18. Add Fresh Toppings
Top the baked tacos with shredded lettuce, tomatoes, green onions, cilantro, jalapeños, or avocado.
Fresh toppings should be added after baking so they stay crisp and colorful.
19. Add Sauces
Serve with sour cream, salsa, guacamole, or taco sauce.
A squeeze of fresh lime juice over the top adds a bright finishing flavor.
What to Serve With Cheesy Baked Tacos
Mexican-style rice is an excellent side and makes the meal more filling.
Black beans, refried beans, or seasoned pinto beans also pair beautifully with the beef and cheese.
For vegetables, serve grilled corn, corn salad, roasted peppers, or a simple avocado salad.
Tortilla chips with salsa, queso, or guacamole make an easy appetizer.
For a lighter option, pair the tacos with a crisp lettuce salad topped with tomatoes, corn, beans, and lime dressing.
Tips for the Best Cheesy Baked Tacos
Keep the beef filling fairly dry. Too much liquid can make the tortillas soggy.
Warm the tortillas first. Soft tortillas are much easier to fold without tearing.
Do not overfill. Smaller amounts of filling create neater tacos and crispier shells.
Use freshly shredded cheese. It generally melts more smoothly.
Layer the cheese. Cheese underneath and over the beef gives you more flavor in every bite.
Brush the tortillas lightly with oil. This encourages crispness without making them greasy.
Add fresh toppings after baking. Lettuce, tomatoes, avocado, and sour cream are best added once the tacos come out of the oven.
Easy Recipe Variations
Spicy Cheesy Baked Tacos
Add chopped jalapeños to the beef filling and use Pepper Jack cheese.
You can also increase the crushed red pepper flakes.
Chicken Baked Tacos
Replace the ground beef with cooked shredded chicken.
Season the chicken with taco seasoning and a little salsa before assembling.
Beef and Bean Tacos
Add 1 cup drained black beans or pinto beans to the cooked beef mixture.
This makes the filling even heartier.
Cheesy Corn Beef Tacos
Stir ¾ cup corn kernels into the filling before assembling.
Loaded Baked Tacos
After baking, add lettuce, tomato, avocado, sour cream, jalapeños, cilantro, and crushed tortilla chips.
BBQ Beef Tacos
Replace some of the tomato and taco seasoning flavors with barbecue sauce and use cheddar cheese.
Storage and Reheating
Store leftover baked tacos in an airtight container in the refrigerator for up to 3 days.
For best results, remove fresh toppings before storing whenever possible.
Reheat the tacos in a 375°F (190°C) oven for approximately 8–10 minutes.
An air fryer also works well at around 350°F (175°C) for 4–6 minutes.
Avoid microwaving if you want to preserve the crispy texture, although it works when convenience is more important.
Add fresh lettuce, tomatoes, sour cream, and avocado after reheating.
Make-Ahead Instructions
The beef filling can be prepared up to 2 days ahead and stored in the refrigerator.
You can also shred the cheese, chop the vegetables, and prepare the toppings in advance.
For the best texture, assemble the tacos shortly before baking.
If you need to assemble them a few hours ahead, keep them covered in the refrigerator and wait to brush the outside with oil until just before baking.
Final Thoughts
These Cheesy Baked Tacos combine savory seasoned beef, warm tortillas, cheddar, Monterey Jack, and fresh taco toppings into one easy and satisfying dinner.
The key to the best results is keeping the beef filling flavorful but not watery, warming the tortillas before folding, layering the cheese generously, and baking until the edges become lightly crisp.
Serve them for taco night, game day, casual gatherings, or an easy family dinner. Keep them simple with beef and cheese, load them with beans and vegetables, or make them spicy with jalapeños and Pepper Jack. Crispy, cheesy, beefy, and easy to customize, these baked tacos are a crowd-friendly recipe worth making again and again.