Easy Mediterranean Beef and Bell Pepper Stir-Fry with Onions – Juicy, Colorful, and Flavor-Packed

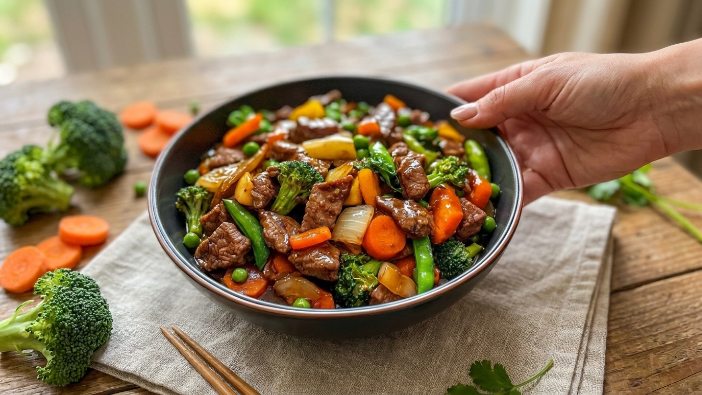
Mediterranean Beef and Bell Pepper Stir-Fry with Onions is a quick, colorful dinner made with tender slices of beef, sweet bell peppers, caramelized onions, garlic, olive oil, herbs, and a bright lemony sauce. It combines the convenience of a classic stir-fry with fresh Mediterranean-inspired flavors for a meal that feels hearty without being overly heavy.

The beef is quickly seared over high heat so it develops a beautifully browned exterior while staying juicy inside. Bell peppers add natural sweetness and a crisp-tender texture, while sliced onions become soft and lightly caramelized as they cook. Garlic, oregano, paprika, lemon juice, and a touch of balsamic vinegar bring everything together with bold, savory flavor.

This recipe is ideal for busy weeknights because it can be prepared in around 30 minutes. Serve it over rice, couscous, quinoa, bulgur, or alongside warm pita bread for a complete meal. It also works wonderfully for meal prep and can easily be customized with extra vegetables.

Why You’ll Love This Mediterranean Beef and Bell Pepper Stir-Fry

One of the best things about this recipe is how much flavor you can build in a single skillet. Searing the beef first creates caramelized browned bits in the pan, and those flavorful bits become part of the sauce when the vegetables and broth are added.

The combination of red, yellow, and green bell peppers gives the dish beautiful color while adding slightly different levels of sweetness. The onions soften and caramelize around the edges, creating a delicious contrast with the tender beef.

Unlike many stir-fries that rely heavily on soy sauce, this Mediterranean-inspired version uses olive oil, lemon, herbs, garlic, paprika, and balsamic vinegar. The result is fresh, savory, and bright.

It is also extremely versatile. You can use sirloin, flank steak, or strip steak, adjust the vegetables based on what you have available, and serve it with almost any grain or flatbread.

Ingredients

For the Beef

  • 1 1/2 pounds flank steak, sirloin steak, or strip steak
  • 1 tablespoon olive oil
  • 1 teaspoon dried oregano
  • 1 teaspoon smoked paprika
  • 1/2 teaspoon garlic powder
  • 3/4 teaspoon salt
  • 1/2 teaspoon black pepper

For the Vegetables

  • 1 red bell pepper, sliced
  • 1 yellow bell pepper, sliced
  • 1 green bell pepper, sliced
  • 1 large yellow or red onion, thinly sliced
  • 1 tablespoon olive oil

For the Mediterranean Sauce

  • 3 tablespoons extra-virgin olive oil
  • 4 garlic cloves, finely minced
  • 2 tablespoons fresh lemon juice
  • 1 tablespoon balsamic vinegar
  • 1/3 cup beef broth
  • 1 teaspoon dried oregano
  • 1/2 teaspoon smoked paprika
  • 1/4 teaspoon red pepper flakes, optional
  • 1/2 teaspoon salt
  • 1/4 teaspoon black pepper

For Garnishing

  • 2 tablespoons chopped fresh parsley
  • Crumbled feta cheese, optional
  • Fresh lemon wedges
  • Extra freshly cracked black pepper

How to Make Mediterranean Beef and Bell Pepper Stir-Fry

1. Slice the Beef

Pat the steak dry thoroughly with paper towels.

Slice it thinly against the grain into strips about 1/4-inch thick.

Cutting against the grain is important because it shortens the muscle fibers and helps keep the beef tender.

If the steak is difficult to slice thinly, place it in the freezer for about 15 to 20 minutes first. Slightly firm beef is much easier to cut evenly.

2. Season the Beef

Place the sliced beef in a large bowl.

Add olive oil, oregano, smoked paprika, garlic powder, salt, and black pepper.

Toss until the beef is evenly coated.

Allow it to sit while you prepare the vegetables and sauce.

3. Prepare the Bell Peppers and Onion

Remove the stems and seeds from the bell peppers.

Slice them into strips of similar thickness.

Peel the onion, cut it in half, and slice it into thin strips.

Keeping the vegetables relatively uniform in size helps them cook evenly.

4. Mix the Mediterranean Sauce

In a small bowl, combine extra-virgin olive oil, minced garlic, lemon juice, balsamic vinegar, beef broth, oregano, paprika, red pepper flakes, salt, and black pepper.

Whisk until everything is well combined.

Set the sauce aside.

Because stir-frying happens quickly, it is best to have all ingredients prepared before the pan gets hot.

5. Heat the Skillet

Place a large cast-iron skillet, wok, or heavy frying pan over medium-high to high heat.

Allow it to become very hot.

A properly heated skillet is essential for creating a good sear on the beef instead of steaming it.

6. Sear the Beef

Add half of the seasoned beef to the skillet in a single layer.

Avoid crowding the pan.

Cook for about 1 to 2 minutes without moving the beef too much.

Flip or stir and continue cooking for another 1 to 2 minutes.

The exterior should become deeply browned while the center remains juicy.

Transfer the beef to a clean plate and repeat with the remaining batch.

Do not worry if the beef is not completely cooked at this stage because it will return to the skillet later.

7. Cook the Onion

Reduce the heat slightly to medium-high.

Add 1 tablespoon olive oil to the skillet if needed.

Add the sliced onion and cook for about 2 to 3 minutes, stirring occasionally.

The onion should begin to soften and become lightly golden around the edges.

8. Add the Bell Peppers

Add the red, yellow, and green bell peppers to the skillet.

Cook for another 3 to 5 minutes.

Stir occasionally, but do not overcook them.

The peppers should become slightly tender while still retaining some crispness.

This crisp-tender texture gives the finished stir-fry much more freshness and visual appeal.

9. Add the Mediterranean Sauce

Pour the prepared sauce over the peppers and onions.

Stir continuously for about 1 minute.

The garlic will become fragrant while the broth, lemon juice, balsamic vinegar, and olive oil form a light coating around the vegetables.

Be careful not to cook the garlic for too long because it can become bitter if burned.

10. Return the Beef to the Skillet

Add the browned beef and any accumulated juices back into the pan.

Toss everything together until the beef, peppers, and onions are evenly coated.

Cook for another 1 to 2 minutes or until the beef reaches your desired level of doneness.

Thinly sliced beef cooks very quickly, so avoid leaving it over high heat for too long.

For food safety, whole cuts of beef are commonly cooked to at least 145°F followed by a 3-minute rest.

11. Finish the Dish

Turn off the heat.

Add the chopped fresh parsley and toss gently.

Taste and adjust with additional salt, black pepper, or lemon juice if needed.

For extra Mediterranean character, sprinkle crumbled feta cheese over the top just before serving.

Serve immediately while the beef is juicy and the peppers still have a little bite.

What to Serve With Mediterranean Beef and Bell Pepper Stir-Fry

Steamed white rice is one of the simplest options because it absorbs the savory sauce beautifully.

Brown rice also works well and adds a slightly nutty flavor.

For a more Mediterranean-style meal, serve the beef with couscous, quinoa, bulgur wheat, or seasoned rice pilaf.

Warm pita bread is another delicious choice. You can even tuck the beef, peppers, and onions into pita pockets and add a little tzatziki or hummus.

For a lighter meal, serve the stir-fry over mixed greens or alongside a cucumber and tomato salad.

Roasted potatoes, grilled zucchini, or a simple Greek-style salad also pair beautifully with the dish.

Tips for the Best Mediterranean Beef Stir-Fry

Slice the steak against the grain. This is one of the most important steps for tender beef.

Use high heat. A hot pan helps create a browned crust instead of gray, steamed meat.

Cook the beef in batches. Crowding the pan causes excess moisture to build up.

Do not overcook the vegetables. Bell peppers taste best when they stay slightly crisp.

Prepare everything in advance. Stir-fries cook quickly, so you will not have much time to chop or measure once cooking begins.

Use fresh lemon juice. It gives the dish a cleaner and brighter flavor than bottled juice.

Add feta at the end. This keeps its flavor distinct and prevents it from melting completely into the sauce.

Easy Recipe Variations

Spicy Mediterranean Beef Stir-Fry

Add extra red pepper flakes, sliced fresh chilies, or a pinch of cayenne pepper.

Beef and Mushroom Stir-Fry

Add 8 ounces sliced cremini or button mushrooms.

Cook them after the onions and before adding the bell peppers.

Beef and Zucchini Version

Add one sliced zucchini along with the peppers.

Because zucchini cooks quickly, add it during the final few minutes so it does not become too soft.

Tomato and Beef Stir-Fry

Add 1 cup halved cherry tomatoes during the last 2 minutes of cooking.

Their juices create an even brighter and slightly sweeter sauce.

Feta Beef Stir-Fry

Finish the dish with 1/2 cup crumbled feta cheese.

The salty, tangy cheese contrasts beautifully with the sweet peppers and rich beef.

Chicken Version

Replace the steak with thinly sliced chicken breast or chicken thighs.

Cook chicken completely to an internal temperature of 165°F before serving.

What Cut of Beef Is Best?

Flank steak is excellent for stir-fries because it has strong beef flavor and becomes tender when thinly sliced against the grain.

Sirloin steak is another great option. It is naturally tender and relatively lean.

New York strip can also be used if you want a slightly richer version.

Regardless of the cut, avoid slicing the beef too thickly. Thin strips cook quickly and stay much more tender.

Can I Make This Stir-Fry Ahead of Time?

Yes.

You can slice and season the beef up to 24 hours ahead and refrigerate it in an airtight container.

The bell peppers and onions can also be sliced in advance and stored separately.

For the best texture, however, cook the dish shortly before serving.

Stir-fried vegetables are at their best when fresh because they retain more color and crunch.

Storage and Reheating

Allow leftovers to cool before placing them in an airtight container.

Store in the refrigerator for up to 3 to 4 days.

For the best results, reheat the stir-fry in a skillet over medium heat for a few minutes.

Add a small splash of beef broth or water if the mixture seems dry.

Individual portions can also be reheated in the microwave in short intervals.

Avoid excessive reheating because the beef may become tough and the bell peppers can lose their crisp texture.

Meal Prep Tips

This Mediterranean Beef and Bell Pepper Stir-Fry works very well for meal prep.

Divide cooked rice, quinoa, or couscous among meal-prep containers.

Top each portion with the beef, peppers, and onions.

Keep optional feta or fresh parsley in a separate container and add it after reheating.

This helps preserve the fresh flavor and texture.

Frequently Asked Questions

Why is my beef tough?

The most common reasons are slicing it with the grain, cutting the pieces too thick, or overcooking them.

Thinly sliced beef needs only a few minutes in a hot skillet.

Can I use frozen bell peppers?

Yes, but fresh peppers provide better texture.

Frozen peppers release more moisture and may become softer during cooking.

Can I skip the balsamic vinegar?

Yes.

Replace it with a little extra lemon juice or red wine vinegar.

Can I add soy sauce?

You can, although it will shift the flavor away from the Mediterranean style.

If you want deeper savory flavor, add only about 1 teaspoon.

Is this recipe good for meal prep?

Absolutely. The beef and vegetables store and reheat well, especially when paired with rice, quinoa, or couscous.

Final Thoughts

This Mediterranean Beef and Bell Pepper Stir-Fry with Onions is a simple way to turn everyday ingredients into a colorful, flavorful dinner. Tender strips of seasoned beef, sweet bell peppers, caramelized onions, garlic, olive oil, herbs, lemon, and balsamic vinegar create a dish that is savory, fresh, and incredibly satisfying.

It is quick enough for weeknight cooking while still looking impressive enough to serve to guests. You can enjoy it over rice, couscous, quinoa, or simply with warm pita bread and a fresh salad.

With its juicy beef, vibrant vegetables, and bright Mediterranean flavors, this easy stir-fry is a recipe you can return to whenever you need a fast, delicious, and family-friendly dinner.
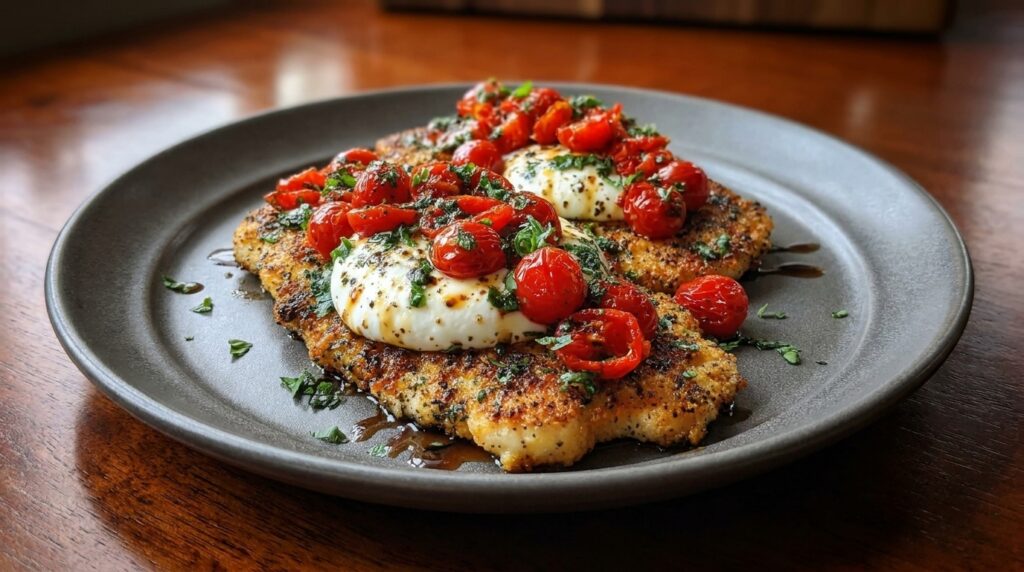
Easy Caprese Chicken Recipe – Juicy, Cheesy, and Bursting with Fresh Tomato Basil Flavor

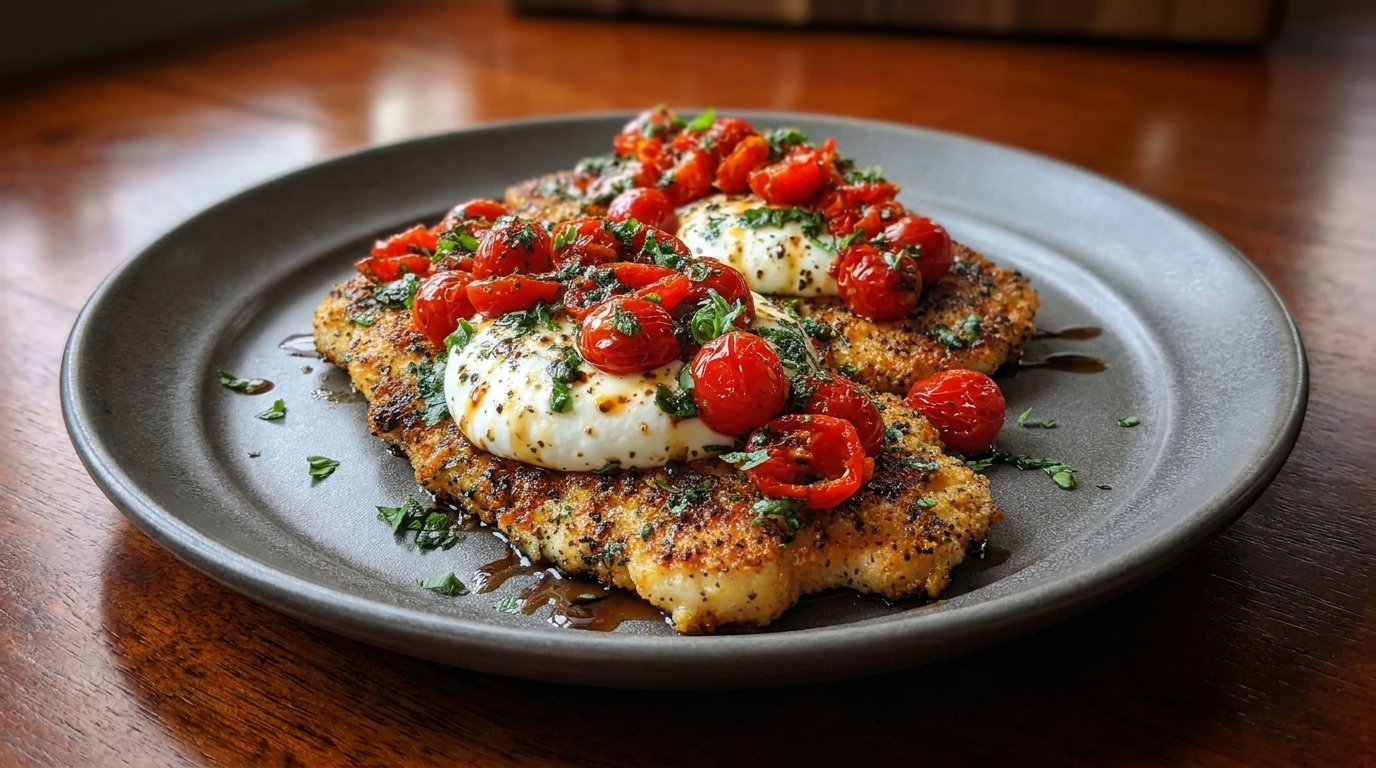
If you love the fresh flavors of a classic Caprese salad, this Caprese Chicken turns that combination into a satisfying, restaurant-style dinner. Juicy chicken breasts are seasoned and pan-seared until golden, then topped with ripe tomatoes, creamy mozzarella, fresh basil, and a glossy balsamic glaze.

The beauty of this recipe is its balance. The chicken provides a hearty, savory base, while tomatoes add freshness and acidity. Melted mozzarella brings richness, basil adds a fragrant herbal finish, and balsamic glaze ties everything together with a slightly sweet tang.

Caprese Chicken is also surprisingly easy to make. The entire dish can be ready in about 30 minutes, making it suitable for busy weeknights while still looking elegant enough for date nights or entertaining. Serve it with pasta, roasted potatoes, vegetables, or a fresh salad for a complete meal.

Why You’ll Love This Caprese Chicken

Caprese Chicken delivers big flavor without requiring a long ingredient list. Most of the ingredients are simple and familiar, but when combined they create a colorful and flavorful dinner.

Another great thing about this recipe is that it feels lighter than many creamy or heavily sauced chicken dishes. Fresh tomatoes and basil keep everything bright, while mozzarella provides just enough richness.

It is also versatile. You can cook the chicken entirely on the stovetop, finish it under the broiler for beautifully melted cheese, or bake the whole dish in the oven. You can even add pesto, spinach, or sun-dried tomatoes for different variations.

Ingredients

For the Chicken

  • 4 small boneless, skinless chicken breasts
  • 1 teaspoon salt
  • ½ teaspoon freshly ground black pepper
  • 1 teaspoon garlic powder
  • ½ teaspoon onion powder
  • 1 teaspoon Italian seasoning
  • ½ teaspoon paprika
  • 1 tablespoon olive oil
  • 1 tablespoon unsalted butter

For the Caprese Topping

  • 2 medium ripe tomatoes, sliced
  • 8 ounces fresh mozzarella, sliced
  • ¼ cup fresh basil leaves
  • 1 tablespoon extra-virgin olive oil
  • Salt and black pepper, to taste

For the Balsamic Glaze

  • ½ cup balsamic vinegar
  • 1 tablespoon honey or brown sugar, optional

Optional Garnishes

  • Extra fresh basil
  • Freshly cracked black pepper
  • Grated Parmesan
  • Cherry tomatoes
  • Extra balsamic glaze

How to Make Caprese Chicken

1. Prepare the Chicken

If your chicken breasts are especially thick, slice them horizontally into thinner cutlets or gently pound them to an even thickness of approximately ½ to ¾ inch.

Evenly sized chicken cooks much more consistently and reduces the risk of dry edges with an undercooked center.

Pat the chicken dry using paper towels.

Season both sides with salt, black pepper, garlic powder, onion powder, Italian seasoning, and paprika.

Allow the seasoned chicken to sit for about 10 minutes while you prepare the tomatoes, mozzarella, and basil.

2. Make the Balsamic Glaze

Pour the balsamic vinegar into a small saucepan.

Add honey or brown sugar if you prefer a slightly sweeter glaze.

Bring the mixture to a gentle simmer over medium-low heat.

Cook for approximately 8–12 minutes, stirring occasionally, until the vinegar has reduced by roughly half and becomes syrupy enough to coat the back of a spoon.

Remember that balsamic glaze thickens more as it cools, so avoid reducing it too aggressively.

Remove from the heat and set aside.

3. Heat the Skillet

Place a large oven-safe skillet over medium-high heat.

Add the olive oil and butter.

Once the butter melts and begins to foam, add the chicken breasts.

Make sure the chicken pieces have enough room between them. If your skillet is small, cook in batches rather than overcrowding the pan.

4. Sear the Chicken

Cook the chicken for approximately 4–5 minutes on the first side without moving it unnecessarily.

Once the underside develops a golden crust, flip the chicken.

Cook for another 3–4 minutes.

The chicken does not necessarily need to reach its final temperature yet because it will cook slightly longer after the toppings are added.

5. Add the Tomatoes

Reduce the heat to medium-low.

Place one or two tomato slices over each chicken breast.

Season the tomatoes lightly with salt and black pepper.

Fresh, ripe tomatoes work best because they provide sweetness and acidity that complement the mozzarella.

6. Add the Mozzarella

Place slices of fresh mozzarella over the tomatoes.

Cover the skillet and cook over low heat for approximately 2–4 minutes, until the cheese becomes soft and begins to melt.

Alternatively, place the oven-safe skillet under the broiler for 1–2 minutes to create a more melted, lightly golden cheese topping.

Keep a close eye on the mozzarella because it can melt quickly.

7. Check the Chicken

Use an instant-read thermometer to check the thickest part of each chicken breast.

The chicken is safely cooked when it reaches 165°F (74°C) internally.

If it has not reached temperature, cover the skillet and continue cooking over low heat for another minute or two.

Avoid overcooking because chicken breast can become dry quickly.

8. Add the Fresh Basil

Remove the skillet from the heat.

Scatter fresh basil leaves over the mozzarella and tomatoes.

Adding the basil after cooking preserves its bright color and fresh flavor.

For larger basil leaves, you can stack them, roll them gently, and slice them into thin ribbons.

9. Finish with Balsamic Glaze

Drizzle the homemade balsamic glaze over each chicken breast.

Finish with a small drizzle of extra-virgin olive oil and freshly cracked black pepper.

Serve immediately while the mozzarella is warm and soft.

What to Serve With Caprese Chicken

Caprese Chicken pairs beautifully with pasta. Try serving it over angel hair, spaghetti, linguine, or buttered noodles. A simple garlic olive oil pasta works especially well because it does not compete with the fresh Caprese flavors.

Roasted potatoes are another excellent option. Baby potatoes seasoned with garlic and herbs create a hearty but simple side dish.

For a lighter meal, pair the chicken with roasted asparagus, zucchini, broccoli, green beans, or a large garden salad.

You can also serve Caprese Chicken with garlic bread or warm crusty bread. The bread is perfect for soaking up the tomato juices, olive oil, and balsamic glaze left on the plate.

Rice, quinoa, or couscous can also turn the dish into an easy grain bowl.

Tips for the Best Caprese Chicken

Use evenly sized chicken breasts. Thin, evenly sized pieces cook faster and remain juicier.

Choose ripe tomatoes. Since tomatoes are one of the main flavors, use the best tomatoes you can find.

Use fresh mozzarella. Fresh mozzarella gives Caprese Chicken its signature creamy texture.

Do not add basil too early. Basil can darken and lose freshness when cooked for too long.

Use an instant-read thermometer. Checking for 165°F prevents both undercooking and unnecessary overcooking.

Reduce balsamic gently. High heat can cause the vinegar to burn or become overly thick.

Do not overcrowd the pan. Give the chicken room to develop a proper golden crust.

Easy Recipe Variations

Pesto Caprese Chicken

Spread approximately 1 tablespoon of basil pesto over each chicken breast before adding the tomato and mozzarella.

Baked Caprese Chicken

Arrange seasoned chicken breasts in a baking dish and bake at 400°F for approximately 18–22 minutes. Add tomatoes and mozzarella during the final 5 minutes and bake until the chicken reaches 165°F.

Caprese Chicken with Spinach

Add 2 cups of baby spinach to the skillet after searing the chicken. Cook until just wilted before adding the chicken back and topping with tomato and mozzarella.

Sun-Dried Tomato Caprese Chicken

Replace or supplement the fresh tomatoes with chopped sun-dried tomatoes for a stronger, sweeter tomato flavor.

Parmesan Caprese Chicken

Sprinkle grated Parmesan over the mozzarella before broiling for an extra cheesy finish.

Storage and Reheating

Allow leftover Caprese Chicken to cool before transferring it to an airtight container.

Store in the refrigerator for up to 3 days.

For best results, reheat gently in a covered skillet over low heat until warmed through. You can add a tablespoon of chicken broth or water to prevent the chicken from drying out.

The chicken can also be reheated in a 325°F oven until hot.

Microwaving works for individual portions, but use short intervals to avoid making the chicken tough.

Fresh basil is best added after reheating rather than before storage.

Freezing is not ideal because fresh tomatoes and mozzarella can release excess water after thawing.

Final Thoughts

This Caprese Chicken recipe brings together juicy golden chicken, ripe tomatoes, creamy mozzarella, fragrant basil, and sweet-tangy balsamic glaze for a dinner that looks impressive but requires very little complicated preparation.

It is fresh enough for summer yet satisfying enough to enjoy throughout the year. Serve it with pasta for a restaurant-inspired meal, roasted vegetables for something lighter, or potatoes and bread for classic comfort.

With its bright colors and familiar Italian-inspired flavors, Caprese Chicken is an easy recipe to keep in your regular dinner rotation whenever you want something simple, fresh, cheesy, and full of flavor.

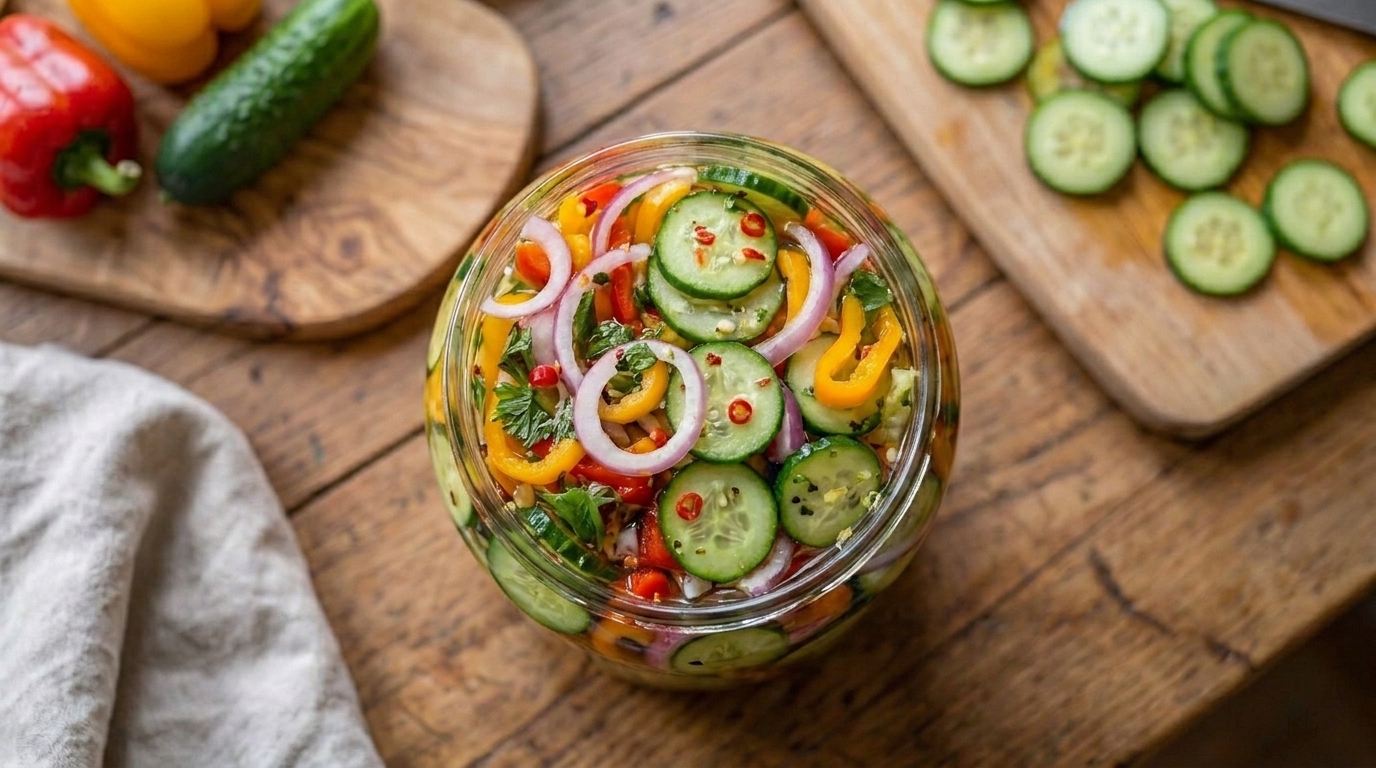
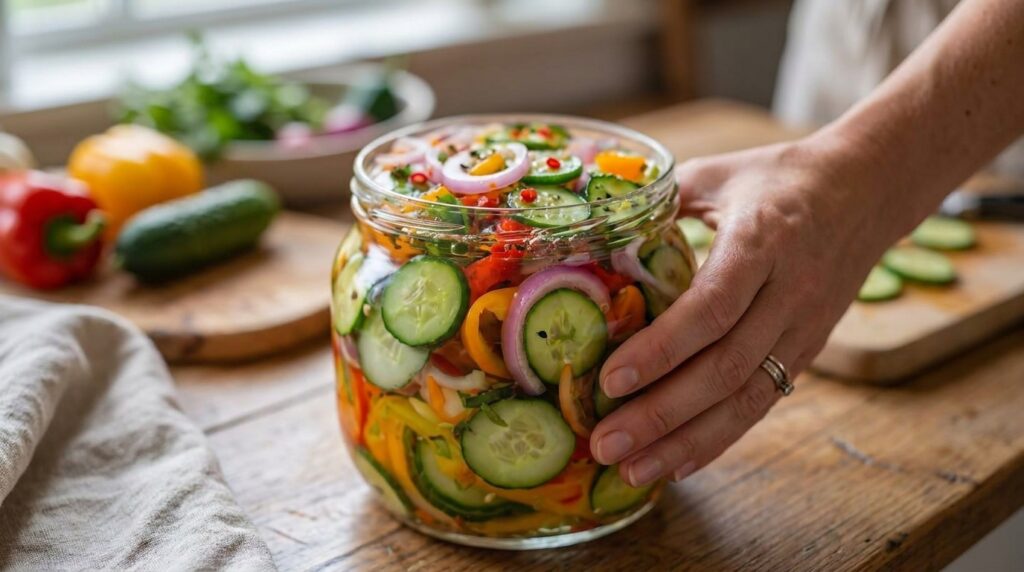
Easy Spicy Pickled Cucumber, Onion & Pepper Salad Recipe – Crisp, Tangy, Fresh, and Full of Flavor

If you are looking for a fresh side dish that is crisp, tangy, slightly sweet, and packed with a little heat, this Spicy Pickled Cucumber, Onion & Pepper Salad is an easy recipe you will want to keep in your refrigerator all summer long. Thinly sliced cucumbers, onions, and peppers are soaked in a bright vinegar dressing flavored with garlic, herbs, red pepper flakes, and a touch of sweetness.

This salad is light, refreshing, and incredibly versatile. It works beautifully with grilled chicken, steak, burgers, sandwiches, barbecue, tacos, rice bowls, or simple weeknight dinners. The cucumbers stay crunchy, the onions become pleasantly tangy, and the peppers add both colour and a fresh spicy bite.

One of the best things about homemade pickled cucumber salad is that the flavor improves as it rests. You can serve it after a short chill for a fresh, crisp texture or refrigerate it longer for a stronger pickled flavor.

Why You’ll Love This Spicy Pickled Cucumber, Onion & Pepper Salad

This easy cucumber salad uses simple ingredients but delivers plenty of bold flavor.

Fresh cucumbers provide refreshing crunch, onions add sharpness, and sliced peppers bring color and heat. A vinegar-based dressing creates the classic pickled flavor while a small amount of sugar balances the acidity.

It is also an excellent make-ahead side dish because there is no cooking required. Once everything is sliced and mixed, the refrigerator does most of the work.

You can easily adjust the spice level, sweetness, acidity, and vegetables depending on your preferences.

Ingredients

For the Salad

  • 2 large English cucumbers, thinly sliced
  • 1 medium red onion, thinly sliced
  • 1 red bell pepper, thinly sliced
  • 1 green bell pepper, thinly sliced
  • 1 jalapeño pepper, thinly sliced
  • 2 tablespoons freshly chopped dill or parsley
  • 2 garlic cloves, thinly sliced or finely minced

For the Pickling Dressing

  • ¾ cup white vinegar or apple cider vinegar
  • ¼ cup water
  • 2 tablespoons granulated sugar
  • 1 teaspoon salt
  • ½ teaspoon freshly ground black pepper
  • ½ teaspoon red pepper flakes
  • ½ teaspoon mustard seeds, optional
  • ¼ teaspoon celery seeds, optional
  • 1 tablespoon extra-virgin olive oil
  • 1 tablespoon fresh lemon juice, optional

How to Make Spicy Pickled Cucumber, Onion & Pepper Salad

1. Prepare the Cucumbers

Wash and dry the cucumbers thoroughly.

Slice them into thin, even rounds using a sharp knife or mandoline slicer.

English cucumbers work especially well because they have thin skins and relatively few seeds, so peeling is usually unnecessary.

If using regular garden cucumbers with thick skins, you can peel them completely or remove alternating strips of skin for a decorative appearance.

Place the sliced cucumbers in a large mixing bowl.

2. Prepare the Onion

Peel the red onion and slice it as thinly as possible.

Thin slices soften more quickly in the vinegar mixture and develop a pleasant pickled texture.

Separate the onion pieces gently with your fingers and add them to the bowl with the cucumbers.

If you prefer a milder onion flavor, soak the slices in cold water for approximately 10 minutes before draining and adding them to the salad.

3. Slice the Peppers

Remove the stems and seeds from the red and green bell peppers.

Slice them into thin strips.

Add them to the bowl.

For the jalapeño, decide how spicy you want the salad before slicing.

For a milder version, remove the seeds and white inner membranes.

For more heat, leave some or all of them intact.

Slice the jalapeño very thinly and add it to the vegetables.

Wash your hands thoroughly after handling hot peppers.

4. Add the Garlic and Herbs

Add the sliced or minced garlic to the cucumber mixture.

Sprinkle in the fresh dill or parsley.

Dill gives the salad a more traditional pickle-inspired flavor, while parsley keeps it lighter and fresher.

You can also use a combination of both herbs.

Toss the vegetables gently so the onions, peppers, herbs, and cucumbers are evenly distributed.

5. Prepare the Pickling Dressing

In a small saucepan or mixing bowl, combine the vinegar, water, sugar, salt, black pepper, red pepper flakes, mustard seeds, and celery seeds if using.

For a quick cold dressing, whisk everything vigorously until most of the sugar and salt dissolve.

For a stronger pickling mixture, warm the vinegar, water, sugar, and salt in a small saucepan over medium-low heat for approximately 2–3 minutes.

Stir just until the sugar and salt dissolve.

Do not boil aggressively.

Remove from the heat and allow the mixture to cool for several minutes before pouring it over the vegetables.

6. Pour the Dressing Over the Vegetables

Pour the prepared vinegar mixture evenly over the cucumber, onion, and peppers.

Add the olive oil and lemon juice if using.

Toss gently until all of the vegetables are coated.

At first, the liquid may not completely cover everything.

As the vegetables rest, they will release some natural moisture and soften slightly, creating more pickling liquid.

7. Chill the Salad

Cover the bowl tightly or transfer the salad to a large airtight container or glass jar.

Refrigerate for at least 30–60 minutes before serving.

For a stronger pickled flavor, refrigerate for approximately 2–4 hours.

You can also leave the salad overnight for an even more developed flavor.

Stir or shake the container occasionally so the vegetables remain evenly coated in the dressing.

8. Taste and Adjust

Before serving, taste the salad.

If you want more acidity, add another splash of vinegar or lemon juice.

For a sweeter flavor, add a small amount of sugar or honey.

For more heat, add additional jalapeño slices, red pepper flakes, or a few thin slices of serrano pepper.

If the salad tastes too sharp, add a tablespoon or two of water.

Adjust the salt and black pepper as needed.

9. Serve Chilled

Use a slotted spoon or tongs to transfer the salad to a serving bowl.

You can serve it with some of the pickling liquid or drain it more thoroughly depending on your preference.

Garnish with fresh dill, parsley, additional jalapeño slices, or black pepper.

Serve chilled for the crispest and most refreshing texture.

What to Serve With Spicy Pickled Cucumber, Onion & Pepper Salad

This salad is especially delicious with grilled foods.

Serve it alongside grilled chicken, steak, pork chops, burgers, sausages, shrimp, salmon, or grilled fish.

It also pairs beautifully with barbecue dishes because the bright acidity helps balance rich, smoky meats and sauces.

For sandwiches, serve it next to pulled chicken sandwiches, deli sandwiches, cheesesteaks, wraps, or sliders.

The salad also works well with tacos, burrito bowls, rice bowls, falafel, gyros, and Mediterranean-inspired meals.

For a simple summer dinner, pair it with grilled protein, corn on the cob, and crusty bread.

Tips for the Best Spicy Pickled Cucumber, Onion & Pepper Salad

Slice the vegetables thinly and evenly so they pickle at approximately the same rate.

English or Persian cucumbers work especially well because they stay crisp and have fewer seeds.

If using watery cucumbers, lightly salt them and let them sit for approximately 15 minutes, then pat dry before preparing the salad.

Adjust the jalapeño carefully. Pepper heat varies, so taste a small piece before adding too much.

Allow the salad to chill before serving. Even 30 minutes makes a noticeable difference in flavor.

Use clean glass jars or airtight containers if storing the salad for several days.

Do not reduce the vinegar too much if you want a stronger pickled flavor.

For maximum crunch, avoid letting the cucumbers sit at room temperature for long periods.

Easy Recipe Variations

For Sweet and Spicy Pickled Cucumber Salad, increase the sugar to approximately 3–4 tablespoons.

For Extra Spicy Cucumber Pepper Salad, add serrano peppers, additional jalapeño, or more red pepper flakes.

For Garlic Dill Pickled Cucumber Salad, increase the fresh dill and add 1–2 extra garlic cloves.

For Asian-Inspired Pickled Cucumber Salad, replace part of the white vinegar with rice vinegar and add sesame oil, sesame seeds, and a small splash of soy sauce.

For Mediterranean Pickled Cucumber Salad, add cherry tomatoes, fresh parsley, oregano, and a little extra olive oil.

For Pickled Cucumber and Radish Salad, add 1 cup thinly sliced radishes.

For No-Sugar Pickled Cucumber Salad, omit the sugar or replace it with your preferred sugar substitute.

For a milder version, leave out the jalapeño and red pepper flakes.

How to Store Leftovers

Transfer leftover pickled cucumber salad to an airtight container or glass jar.

Store it in the refrigerator for up to 4–5 days.

The vegetables will gradually become softer and more strongly flavored the longer they remain in the dressing.

For the crispest texture, enjoy the salad within the first 2–3 days.

Always keep the salad refrigerated.

Freezing is not recommended because cucumbers contain a large amount of water and become very soft after thawing.

If the pickling liquid becomes diluted after several days, you can refresh the flavor with a small splash of vinegar and a pinch of salt.

Frequently Asked Questions

How long should cucumber salad pickle before eating?

You can eat it after approximately 30 minutes, but 2–4 hours produces a more developed pickled flavor.

For an even stronger flavor, refrigerate it overnight.

What cucumbers are best for this salad?

English cucumbers and Persian cucumbers are excellent because they have thin skins, small seeds, and a naturally crisp texture.

Regular cucumbers can also be used.

Can I make this salad ahead of time?

Yes.

In fact, this salad benefits from resting in the refrigerator.

Prepare it several hours or up to one day before serving.

How can I make it less spicy?

Remove the seeds and membranes from the jalapeño or use only half of the pepper.

You can also completely omit the red pepper flakes.

How can I make it spicier?

Leave the jalapeño seeds intact, add another jalapeño, or use sliced serrano peppers.

Extra red pepper flakes can also increase the heat.

Can I use apple cider vinegar?

Yes.

Apple cider vinegar creates a slightly fruitier and softer acidity than white vinegar.

White vinegar gives a sharper, more traditional pickle flavor.

Can I add tomatoes?

Yes.

Cherry tomatoes can be added, although they release extra juice and become softer as they sit.

For the best texture, add tomatoes shortly before serving.

Is this the same as canned pickles?

No.

This is a quick refrigerator-pickled salad and is not designed for shelf-stable canning.

It should remain refrigerated and be eaten within several days.

Final Thoughts

This easy Spicy Pickled Cucumber, Onion & Pepper Salad is a refreshing side dish packed with crisp vegetables, bright vinegar flavor, fresh herbs, and just the right amount of heat.

It takes only a few minutes of preparation and becomes even more flavorful as it chills, making it ideal for barbecues, picnics, family dinners, sandwiches, tacos, and grilled meals.

Serve it cold alongside your favorite meats or summer dishes and enjoy the perfect combination of crunchy cucumbers, tangy onions, colorful peppers, and spicy pickling dressing in every bite.

Easy Sticky BBQ Ribs Recipe – Tender, Juicy and Caramelized

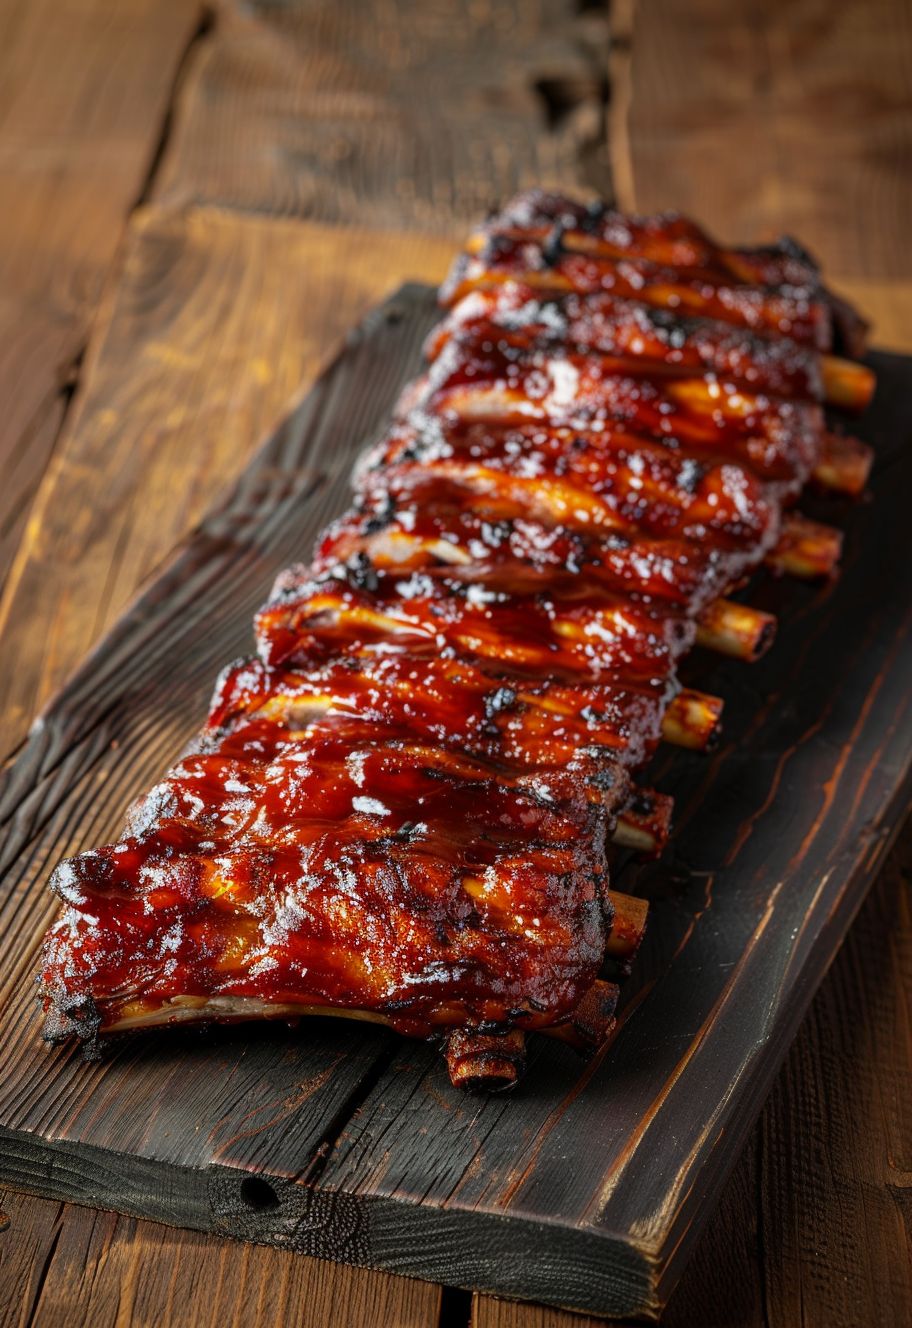
These Sticky BBQ Ribs are everything a great rack of ribs should be: tender and juicy on the inside, deeply seasoned, and coated in a thick, glossy barbecue glaze with beautifully caramelized edges. Inspired by the ribs in the image, this recipe uses a low-and-slow oven method to create tender meat before finishing the ribs at high heat so the barbecue sauce becomes sticky, dark, and irresistible.

You don’t need a smoker or complicated equipment to make excellent ribs at home. The secret is seasoning them generously, cooking them slowly while covered, and adding the barbecue sauce toward the end. This keeps the sugars in the sauce from burning before the meat has had time to become tender.

These ribs are perfect for summer cookouts, game-day dinners, weekend gatherings, holidays, or any night when you want serious comfort food. Pair them with creamy coleslaw, baked beans, corn, potato salad, or crispy fries for a complete barbecue-style meal.

Why You’ll Love These Sticky BBQ Ribs

The combination of smoky dry seasoning and sweet, tangy barbecue glaze gives these ribs layers of flavor. The spice rub seasons the meat itself, while repeated coats of barbecue sauce create the shiny lacquered exterior seen in the image.

Another advantage is that most of the cooking is hands-off. After about 15 minutes of preparation, the oven does almost all the work.

Slow baking also makes this method more forgiving than cooking ribs entirely over direct grill heat. You can get juicy, tender ribs without constantly turning or monitoring them.

The final broiling or grilling stage is what transforms them from simple baked ribs into sticky restaurant-style barbecue ribs with dark caramelized spots around the edges.

Ingredients

For the Ribs

  • 2 racks baby back ribs, about 2½–3 pounds each
  • 2 tablespoons yellow mustard or olive oil
  • 2 teaspoons kosher salt
  • 1 teaspoon freshly ground black pepper

For the BBQ Dry Rub

  • 2 tablespoons brown sugar
  • 2 teaspoons smoked paprika
  • 1 teaspoon regular paprika
  • 1½ teaspoons garlic powder
  • 1½ teaspoons onion powder
  • 1 teaspoon chili powder
  • ½ teaspoon ground cumin
  • ½ teaspoon cayenne pepper, optional
  • ½ teaspoon mustard powder

For the Sticky BBQ Glaze

  • 1½ cups barbecue sauce
  • ¼ cup brown sugar
  • 2 tablespoons honey
  • 1 tablespoon apple cider vinegar
  • 1 tablespoon Worcestershire sauce
  • 1 teaspoon smoked paprika
  • ½ teaspoon garlic powder

How to Make Sticky BBQ Ribs

1. Prepare the Ribs

Preheat your oven to 300°F (150°C).

Place the ribs meat-side down on a large cutting board.

You may notice a thin, shiny membrane covering the bones on the back of the rack. Removing this membrane helps the seasoning penetrate better and makes the finished ribs easier to eat.

Slide a butter knife underneath one edge of the membrane to loosen it. Grab the loosened section using a paper towel and pull it away from the rack.

Pat both sides of the ribs dry with paper towels.

2. Season the Ribs

Combine brown sugar, smoked paprika, regular paprika, garlic powder, onion powder, chili powder, cumin, cayenne, and mustard powder in a small bowl.

Lightly coat the ribs with mustard or olive oil. You won’t taste much mustard after cooking—it mainly helps the seasoning adhere.

Season the ribs with salt and black pepper before generously rubbing the spice mixture over both sides.

Massage the seasoning into the meat, making sure the entire surface is coated.

For stronger flavor, season the ribs several hours in advance and refrigerate them covered. Let them sit at room temperature for about 20 minutes before baking.

3. Wrap and Slow-Bake

Place each rack on a large sheet of heavy-duty aluminum foil with the meat side facing upward.

Wrap tightly so steam cannot easily escape.

Place the wrapped ribs on a rimmed baking sheet.

Bake at 300°F for approximately 2½–3 hours for baby back ribs. Larger spare ribs may require closer to 3–3½ hours.

Low-temperature cooking gradually softens the connective tissue inside the ribs while keeping the meat juicy.

The ribs are ready for glazing when the meat is tender and has pulled back slightly from the ends of the bones.

Avoid cooking until the ribs completely fall apart. Proper barbecue ribs should be tender but still hold together when lifted.

4. Make the Sticky BBQ Sauce

While the ribs finish cooking, prepare the glaze.

Add barbecue sauce, brown sugar, honey, apple cider vinegar, Worcestershire sauce, smoked paprika, and garlic powder to a small saucepan.

Place over medium-low heat and stir until combined.

Allow the sauce to simmer gently for 5–7 minutes, stirring frequently.

The glaze should become slightly thicker, glossy, and easy to brush over the ribs.

The honey and brown sugar help create the sticky caramelized finish while the vinegar balances the sweetness.

5. Glaze the Ribs

Carefully remove the baking sheet from the oven.

Open the foil cautiously because hot steam will escape.

Transfer the ribs to a foil-lined baking sheet or leave them on the opened foil.

Generously brush the top of each rack with barbecue glaze.

Increase the oven temperature to 425°F (220°C).

Return the uncovered ribs to the oven for about 8 minutes.

Remove them and brush on another layer of sauce.

Bake for another 5–8 minutes.

Layering the sauce rather than applying one extremely thick coating helps produce the glossy, lacquered surface visible in the image.

6. Caramelize the BBQ Glaze

For those beautiful dark, sticky edges, switch the oven to broil.

Brush the ribs with one final thin layer of barbecue sauce.

Broil for approximately 2–4 minutes, watching continuously.

The sauce should bubble, caramelize, and develop a few dark spots without burning.

Barbecue sauce contains plenty of sugar and can go from beautifully caramelized to burned quickly, so don’t walk away during this stage.

If you have an outdoor grill, you can instead place the cooked ribs over medium-high heat for a few minutes while brushing them with additional sauce.

7. Rest and Slice

Transfer the finished ribs to a cutting board and allow them to rest for 10 minutes.

Resting gives the juices time to redistribute and allows the sticky glaze to settle slightly.

Turn the rack so you can see the bones clearly, then slice between each bone using a sharp knife.

Brush with a little additional warm barbecue sauce before serving if desired.

What to Serve With Sticky BBQ Ribs

Classic barbecue side dishes are perfect with these ribs.

Serve them with creamy coleslaw, baked beans, mac and cheese, potato salad, cornbread, grilled corn, or crispy potato wedges.

For a fresher contrast, add a cucumber salad, green salad, vinegar-based slaw, or grilled vegetables.

If you’re feeding a crowd, arrange the sliced ribs on a large platter surrounded by corn, pickles, potato wedges, and small bowls of extra barbecue sauce.

Tips for the Best BBQ Ribs

Remove the membrane. This improves tenderness and lets the seasoning reach the meat more effectively.

Cook low and slow. Trying to rush ribs at high heat can produce tough meat before the connective tissue has softened.

Wrap them tightly. The trapped steam helps keep the ribs moist during the long baking period.

Don’t add BBQ sauce too early. Most sauces contain sugar, which can burn during several hours of cooking.

Glaze in layers. Two or three thinner coats create a better sticky finish than one extremely heavy coating.

Watch carefully while broiling. The final caramelization happens quickly.

Rest before cutting. Cutting straight from the oven can cause more juices to escape.

Easy Recipe Variations

For spicy BBQ ribs, add additional cayenne pepper to the dry rub and hot sauce to the glaze.

For honey garlic ribs, increase the honey to ⅓ cup and add two finely minced garlic cloves to the sauce.

For a deeper smoky flavor, add a small amount of liquid smoke to your barbecue sauce or finish the ribs on an outdoor charcoal grill.

You can also substitute spare ribs or St. Louis-style ribs for baby backs. Just remember that larger racks generally require a little more cooking time.

For extra-sweet ribs, replace some of the brown sugar in the glaze with maple syrup.

Storage and Reheating

Store leftover ribs in an airtight container in the refrigerator for up to 3–4 days.

For the best reheated texture, place them in a baking dish, add a tablespoon or two of water or apple juice, cover tightly with foil, and warm at 300°F for approximately 15–20 minutes.

Once hot, brush with barbecue sauce and broil briefly to restore the sticky exterior.

Ribs can also be frozen for up to about 2–3 months. Wrap them tightly before placing them inside a freezer-safe container or bag.

Final Thoughts

These Sticky BBQ Ribs deliver the tender meat, smoky seasoning, shiny barbecue glaze, and beautifully caramelized edges that make classic ribs so satisfying. The slow oven method makes them approachable even if you’ve never cooked ribs before, while the final layers of sauce create that irresistible barbecue-style finish.

The key is patience: season generously, cook the ribs slowly until tender, then glaze them several times before giving them a short blast of high heat. Serve them warm with extra BBQ sauce and your favorite classic sides, and you’ll have a crowd-pleasing rib dinner worthy of any backyard barbecue or weekend feast.

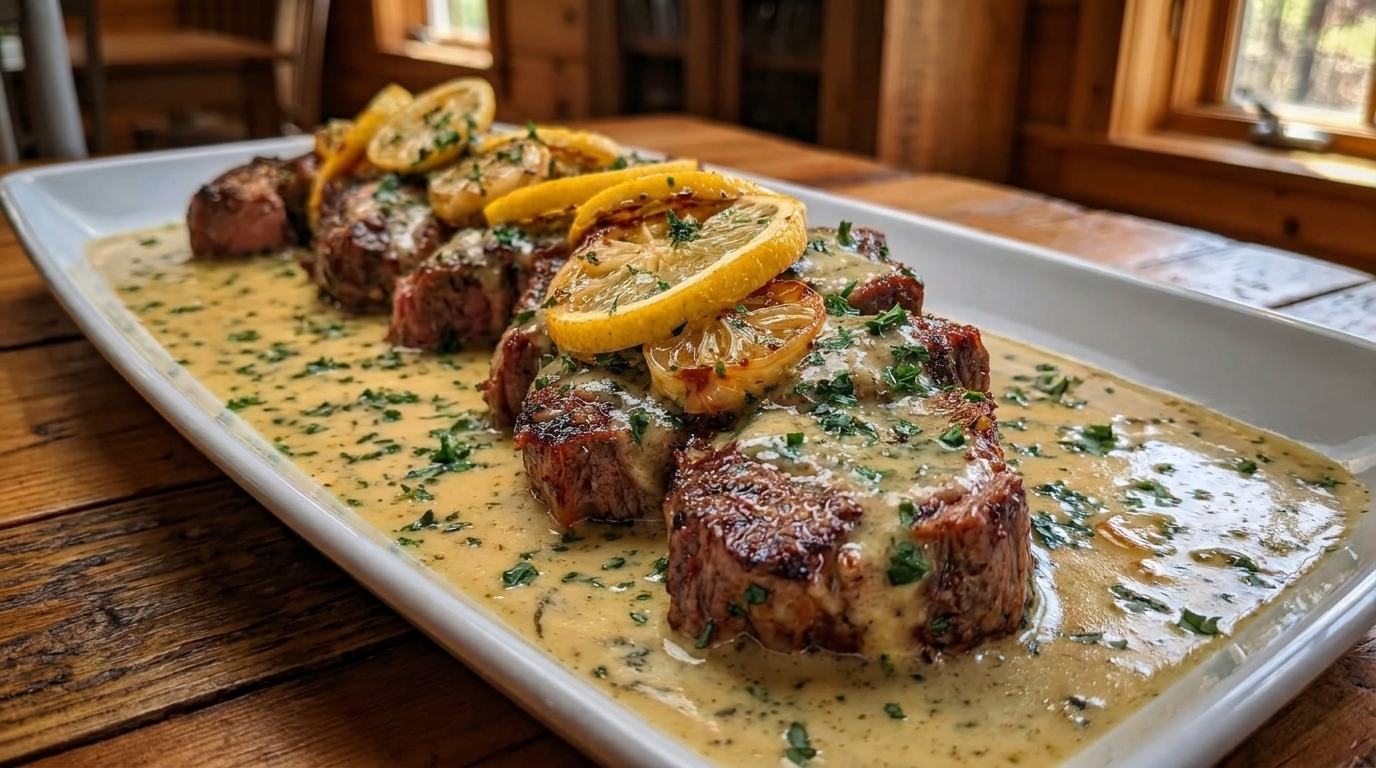
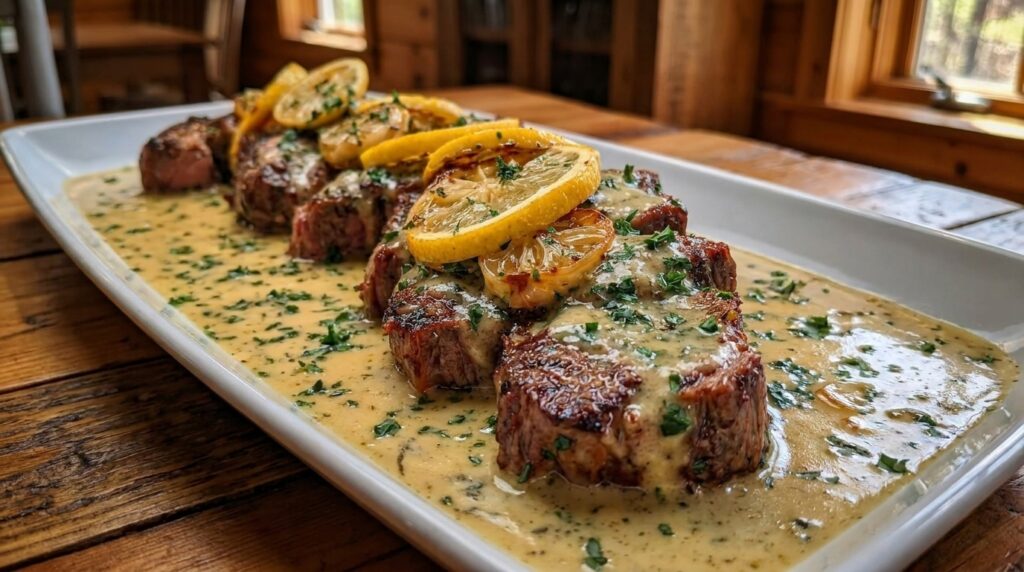
Easy Creamy Lemon Garlic Steak Recipe – Tender, Juicy, and Rich with a Bright Cream Sauce

If you love steak dinners that feel restaurant-worthy but are still easy enough to make at home, this Creamy Lemon Garlic Steak deserves a place in your recipe collection. Tender steak is seared until beautifully browned, then finished in a silky garlic cream sauce brightened with fresh lemon juice and Parmesan cheese. The combination is rich, savory, slightly tangy, and incredibly satisfying.

What makes this dish special is the balance of flavors. The butter and cream create a luxurious sauce, while lemon keeps it fresh and prevents it from feeling too heavy. Fresh garlic brings warmth and depth, and Parmesan adds a savory, slightly nutty finish that pairs perfectly with juicy beef.

This creamy steak recipe is ideal for date nights, family dinners, special occasions, or simply when you want to turn an ordinary evening into something a little more memorable. Serve it with mashed potatoes, pasta, roasted vegetables, or crusty bread to soak up every drop of the lemon garlic cream sauce.

Why You’ll Love This Creamy Lemon Garlic Steak

One of the best things about this recipe is how quickly it comes together. Depending on the thickness of your steaks, you can have the entire meal ready in around 30 minutes.

The steak is cooked separately from the sauce, which makes it easier to control doneness. Once the meat has developed a deep golden crust, it rests while you prepare the sauce in the same skillet. All of the flavorful browned bits left behind become part of the creamy base.

You can also customize this dish easily. Add mushrooms, spinach, sun-dried tomatoes, extra Parmesan, or red pepper flakes. The basic lemon garlic sauce works beautifully with several variations.

Ingredients

For the Steak

  • 4 small sirloin steaks, about 5–6 ounces each
  • 1 tablespoon olive oil
  • 1 teaspoon kosher salt
  • ½ teaspoon freshly ground black pepper
  • ½ teaspoon garlic powder
  • ½ teaspoon smoked paprika
  • 1 tablespoon unsalted butter

For the Creamy Lemon Garlic Sauce

  • 2 tablespoons unsalted butter
  • 5 garlic cloves, finely minced
  • ¾ cup beef broth
  • 1 cup heavy cream
  • ½ cup freshly grated Parmesan cheese
  • 2 tablespoons fresh lemon juice
  • 1 teaspoon finely grated lemon zest
  • ½ teaspoon Italian seasoning
  • ¼ teaspoon dried thyme
  • ¼ teaspoon red pepper flakes, optional
  • 2 tablespoons chopped fresh parsley
  • Salt and black pepper, to taste

Optional Garnishes

  • Fresh parsley
  • Extra Parmesan cheese
  • Lemon slices
  • Freshly cracked black pepper

How to Make Creamy Lemon Garlic Steak

1. Prepare the Steak

Remove the steaks from the refrigerator about 20–30 minutes before cooking. Allowing the meat to lose some of its refrigerator chill helps it cook more evenly.

Pat each steak thoroughly dry with paper towels. A dry surface is important for developing a deeply browned crust.

Season both sides with salt, black pepper, garlic powder, and smoked paprika.

2. Heat the Skillet

Place a large cast-iron or heavy-bottomed skillet over medium-high heat.

Add the olive oil and 1 tablespoon of butter.

Allow the skillet to become very hot. The butter should foam and the oil should look shimmering before you add the steak.

3. Sear the Steak

Place the steaks in the skillet, leaving enough room between them so they sear rather than steam.

Cook without moving them for approximately 3–4 minutes on the first side.

Flip and cook for another 2–4 minutes, depending on thickness and preferred doneness.

For medium-rare, aim for an internal temperature of approximately 130–135°F before resting. For medium, aim for 140–145°F.

Transfer the steaks to a plate and loosely cover with foil. Let them rest while you prepare the sauce.

4. Sauté the Garlic

Reduce the skillet heat to medium-low.

Add 2 tablespoons of butter.

Once melted, add the minced garlic and optional red pepper flakes.

Cook for about 30–45 seconds, stirring constantly.

The garlic should become fragrant but should not turn dark brown. Burned garlic can make the entire cream sauce bitter.

5. Deglaze the Skillet

Pour the beef broth into the pan.

Use a wooden spoon or spatula to scrape up all the caramelized browned bits from the bottom.

Allow the broth to simmer for approximately 2–3 minutes, until it reduces slightly.

These browned bits are packed with concentrated beef flavor and help make the sauce taste much richer.

6. Make the Cream Sauce

Reduce the heat to low.

Pour in the heavy cream and stir in the Italian seasoning and thyme.

Bring the mixture to a gentle simmer, not a rolling boil.

Gradually add the freshly grated Parmesan while stirring constantly.

Continue cooking for approximately 2–4 minutes, until the cheese melts and the sauce becomes smooth and slightly thickened.

7. Add the Lemon

Turn the heat to low and stir in the fresh lemon juice and lemon zest.

Adding the lemon toward the end helps maintain its bright flavor.

Taste the sauce and adjust with salt and black pepper if necessary.

If the sauce is too thick, add a small splash of beef broth. If it is too thin, gently simmer it for another minute.

8. Return the Steak to the Skillet

Place the rested steaks back into the creamy lemon garlic sauce.

Spoon sauce over each steak and let everything warm together for approximately 1–2 minutes.

Avoid simmering the steak for too long because it may continue cooking beyond your preferred doneness.

9. Finish and Serve

Remove the skillet from the heat.

Sprinkle with fresh parsley and extra Parmesan if desired.

Spoon plenty of the creamy lemon garlic sauce over each steak before serving.

For an attractive presentation, add thin lemon slices and freshly cracked black pepper.

What to Serve With Creamy Lemon Garlic Steak

Creamy mashed potatoes are one of the best sides for this dish. Their smooth texture absorbs the rich cream sauce beautifully, making every bite even more comforting.

You can also serve the steak with roasted baby potatoes, crispy potato wedges, or baked potatoes.

For a pasta dinner, try fettuccine, linguine, penne, or tagliatelle. Toss the pasta with a little of the cream sauce before placing sliced steak on top.

If you prefer something lighter, roasted asparagus, broccoli, green beans, zucchini, or Brussels sprouts work extremely well.

A fresh arugula or garden salad dressed with lemon vinaigrette can also provide a refreshing contrast to the rich steak.

And do not forget crusty bread. It is perfect for soaking up the remaining sauce.

Tips for the Best Creamy Lemon Garlic Steak

Pat the steak dry before cooking. Moisture prevents proper browning.

Use a very hot skillet. This creates a flavorful crust without requiring the steak to cook for too long.

Do not overcrowd the pan. Cook the steaks in batches if necessary.

Use freshly grated Parmesan. Pre-shredded cheeses often contain anti-caking ingredients that can make creamy sauces grainy.

Keep the sauce on gentle heat. Heavy cream can separate if boiled aggressively.

Add lemon near the end. This preserves its fresh flavor and reduces the chance of the dairy sauce separating.

Let the steak rest. Resting for at least 5 minutes allows the juices to redistribute throughout the meat.

Easy Recipe Variations

Creamy Lemon Garlic Steak with Mushrooms

After removing the steak, add 8 ounces sliced mushrooms to the skillet. Cook until deeply browned before adding the garlic and continuing with the sauce.

Creamy Spinach Steak

Stir 2 cups baby spinach into the finished sauce and cook until just wilted.

Spicy Lemon Garlic Steak

Increase the red pepper flakes or add a pinch of cayenne pepper.

Extra Parmesan Steak

Increase the Parmesan to ¾ cup for a thicker, richer sauce.

Creamy Lemon Garlic Steak Bites

Instead of whole steaks, cut sirloin into 1-inch cubes and sear quickly over high heat. Toss the finished steak bites directly in the cream sauce.

Storage and Reheating

Store leftover steak and sauce in an airtight container in the refrigerator for up to 3 days.

For best results, reheat gently in a skillet over low heat. Add a splash of beef broth or cream to loosen the sauce.

Try not to boil the steak during reheating because this can make it tough and cause the sauce to separate.

You can also microwave individual portions in short intervals, but lower power is preferable for maintaining the steak’s texture.

Cream sauces do not always freeze perfectly because dairy can separate after thawing, so this recipe is best enjoyed fresh or refrigerated.

Final Thoughts

This Creamy Lemon Garlic Steak combines everything that makes a great restaurant-style dinner irresistible: juicy beef, a golden seared crust, plenty of garlic, rich cream, Parmesan, and the fresh brightness of lemon.

The sauce feels luxurious without being overwhelmingly heavy, while the steak remains the star of the dish. Better yet, the entire recipe can be made in one skillet in about half an hour.

Serve it over mashed potatoes for classic comfort food, pair it with pasta for a richer dinner, or add roasted vegetables for a balanced meal. However you serve it, this creamy lemon garlic steak is an easy way to turn a simple steak dinner into something truly special.

Easy Creamy Garlic Shrimp – Stuffed Salmon – Rich, Juicy & Restaurant-Style

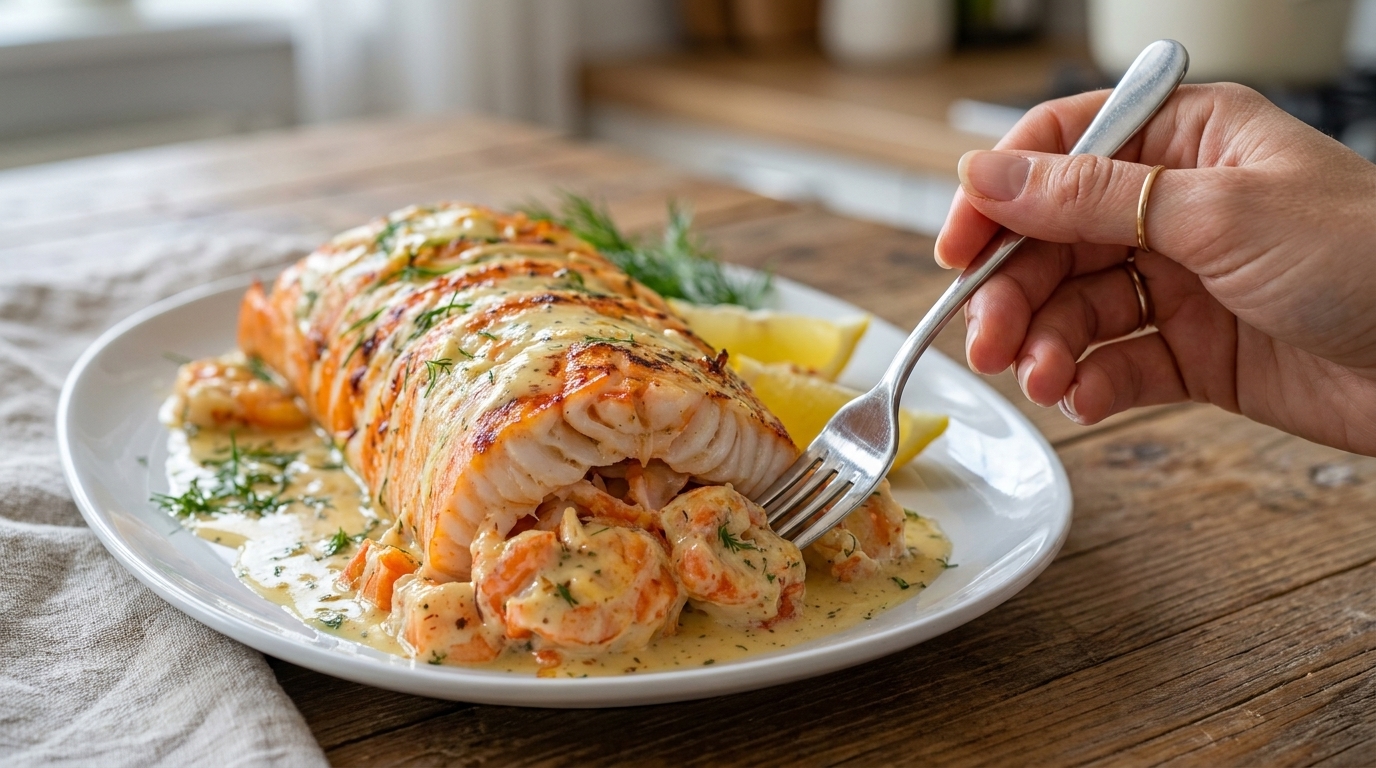
This Creamy Garlic Shrimp Stuffed Salmon is an impressive seafood dinner that combines a thick, juicy salmon fillet with tender shrimp and a silky garlic-herb cream sauce. Inspired by the dish in the image, the salmon is roasted until beautifully golden while succulent shrimp are tucked alongside and spooned over the fish with plenty of rich, buttery sauce.

The combination works beautifully because salmon has enough richness to stand up to a creamy sauce, while shrimp adds a naturally sweet seafood flavor and tender texture. Garlic, lemon, fresh dill, and Parmesan balance the cream and keep the finished dish from feeling overly heavy.

Despite its elegant appearance, this recipe doesn’t require complicated techniques. Most of the cooking happens in one skillet and the oven, making it suitable for date nights, celebrations, holiday dinners, or simply an upgraded family meal.

Why You’ll Love This Creamy Shrimp Stuffed Salmon

This recipe delivers a true restaurant-style presentation using ingredients that are easy to find. The salmon stays moist and flaky inside while developing lightly caramelized edges on top.

The creamy shrimp filling is another highlight. Plump shrimp are quickly sautéed in butter and garlic before being combined with a smooth cream sauce flavored with Parmesan, lemon, and fresh herbs.

It is also highly versatile. Serve it with mashed potatoes for an indulgent dinner, rice for something simple, or roasted vegetables and salad for a lighter meal.

Ingredients

For the Salmon

  • 1 large salmon fillet, about 2 pounds
  • 1 tablespoon olive oil
  • 1 teaspoon salt
  • ½ teaspoon freshly ground black pepper
  • 1 teaspoon garlic powder
  • ½ teaspoon paprika
  • ½ teaspoon onion powder
  • 1 tablespoon fresh lemon juice

For the Shrimp

  • 1 pound large shrimp, peeled and deveined
  • 1 tablespoon olive oil
  • 1 tablespoon butter
  • ½ teaspoon salt
  • ¼ teaspoon black pepper
  • ½ teaspoon paprika
  • ½ teaspoon garlic powder

For the Creamy Garlic Sauce

  • 2 tablespoons butter
  • 4 cloves garlic, finely minced
  • 1 cup heavy cream
  • ½ cup chicken or seafood broth
  • ½ cup freshly grated Parmesan cheese
  • 1 tablespoon fresh lemon juice
  • 1 teaspoon lemon zest
  • 1 tablespoon chopped fresh dill
  • 1 tablespoon chopped fresh parsley
  • ¼ teaspoon red pepper flakes, optional
  • Salt and black pepper to taste

For Serving

  • Fresh dill
  • Fresh parsley
  • Lemon wedges
  • Extra Parmesan, optional

How to Make Creamy Garlic Shrimp Stuffed Salmon

1. Prepare the Salmon

Preheat your oven to 400°F (205°C).

Pat the salmon completely dry with paper towels. Removing surface moisture allows the seasoning to adhere better and encourages attractive browning.

Place the salmon on a lightly greased baking sheet or in a large oven-safe baking dish.

If using one thick salmon fillet, make several deep pockets across the top without cutting all the way through the fish. These openings provide spaces where some of the shrimp and cream sauce can be tucked for the stuffed appearance shown in the image.

Brush the salmon with olive oil and lemon juice.

Combine salt, black pepper, garlic powder, paprika, and onion powder, then season the fish evenly.

Set aside while preparing the shrimp.

2. Season the Shrimp

Pat the shrimp dry.

Season with salt, black pepper, paprika, and garlic powder.

Try to use medium-large or large shrimp because they remain juicy and create a more dramatic presentation.

If your shrimp are especially large, you can roughly chop half of them for stuffing while leaving the remaining shrimp whole for serving around the salmon.

3. Quickly Sear the Shrimp

Heat one tablespoon each of olive oil and butter in a large skillet over medium-high heat.

Once hot, arrange the shrimp in a single layer.

Cook for only about 1 minute per side.

The goal isn’t to cook them completely at this stage. They should just begin turning pink and developing a little golden color.

Because the shrimp will continue cooking in the sauce and oven, removing them early prevents them from becoming rubbery.

Transfer the shrimp to a plate.

4. Make the Creamy Garlic Sauce

Reduce the skillet heat to medium-low.

Add two tablespoons of butter.

Once melted, stir in the minced garlic and cook for approximately 30 seconds, just until fragrant.

Pour in the broth and scrape the bottom of the skillet to loosen any flavorful browned bits left from the shrimp.

Allow the broth to simmer for approximately 2 minutes.

Pour in the heavy cream and stir gently.

Add Parmesan, lemon juice, lemon zest, dill, parsley, and optional red pepper flakes.

Let the sauce simmer gently for 3–4 minutes, stirring frequently.

Avoid boiling the cream aggressively. Gentle heat produces a smoother sauce and reduces the chance of separation.

The sauce should lightly coat the back of a spoon while remaining loose enough to spoon over the salmon.

Taste and adjust the salt and pepper.

5. Stuff the Salmon

Reserve several whole shrimp for decorating the finished dish.

Place some of the remaining shrimp into the pockets you created in the salmon. Spoon a small amount of creamy garlic sauce over and around them.

Don’t overfill the openings. The salmon expands slightly while cooking, and too much filling may spill out.

Spoon another light layer of sauce over the surface of the fish.

6. Bake Until Tender

Transfer the salmon to the oven.

Bake at 400°F for approximately 15–20 minutes, depending on the thickness of the fillet.

For especially thick salmon, cooking may take a few minutes longer.

During the final 5 minutes, arrange the partially cooked shrimp around and over the salmon.

Spoon additional cream sauce over everything before returning the pan to the oven.

The salmon is ready when it flakes easily at the thickest section and reaches 145°F (63°C) internally for fully cooked salmon.

Avoid unnecessarily extending the cooking time because salmon becomes dry when overcooked.

7. Finish With the Cream Sauce

Warm any remaining sauce over low heat if necessary.

Once the salmon comes out of the oven, spoon the creamy garlic sauce generously over the fish and shrimp.

The sauce should settle around the seafood, creating the glossy restaurant-style presentation shown in the image.

Finish with fresh dill, chopped parsley, cracked black pepper, and lemon wedges.

Serve immediately.

What to Serve With Creamy Shrimp Stuffed Salmon

Creamy mashed potatoes are one of the best pairings because they absorb the extra garlic sauce beautifully.

For pasta lovers, serve the salmon with linguine, fettuccine, or angel hair pasta tossed with a little of the cream sauce.

Rice is another easy choice. Garlic rice, lemon herb rice, or wild rice all complement seafood nicely.

For vegetables, try asparagus, roasted broccoli, green beans, zucchini, or sautéed spinach.

If you’re preparing this for a special occasion, a simple green salad with lemon vinaigrette makes an excellent starter because its acidity contrasts nicely with the rich seafood.

Pro Tips for the Best Salmon and Shrimp

Don’t overcook the shrimp. Shrimp cooks extremely quickly, so only partially cook it in the skillet before adding it to the salmon.

Use thick salmon. A thicker fillet is easier to stuff and remains juicier during baking.

Pat seafood dry first. Excess moisture prevents attractive browning.

Use freshly grated Parmesan. It melts more smoothly into cream sauce than many pre-shredded cheeses.

Keep cream over moderate heat. Boiling the sauce too vigorously can make it grainy or oily.

Add fresh lemon. Salmon, shrimp, butter, and cream are all rich ingredients. Lemon gives the dish essential brightness.

Check doneness at the thickest section. Salmon thickness can vary dramatically, making an instant-read thermometer more dependable than cooking time alone.

Easy Recipe Variations

For a Cajun shrimp stuffed salmon, season both proteins with Cajun seasoning and add a pinch to the cream sauce.

To make spinach shrimp stuffed salmon, sauté about 2 cups of baby spinach with the garlic and fold it into the cream sauce.

For extra richness, add a few tablespoons of softened cream cheese to the sauce.

Crab meat can also be mixed with the shrimp for a luxurious seafood-stuffed salmon variation.

If you’d prefer something less rich, skip the heavy cream and make a simple garlic-lemon butter sauce instead.

Storage and Reheating

Store leftovers in an airtight container in the refrigerator for up to 2–3 days.

Because both salmon and shrimp can become dry when reheated aggressively, warm leftovers gently.

Place the seafood in a covered baking dish with a spoonful of sauce and reheat at 300°F (150°C) until just warmed through.

You can also use a skillet over low heat.

If the sauce becomes too thick after refrigeration, stir in a splash of cream, milk, or broth while reheating.

Final Thoughts

This Creamy Garlic Shrimp Stuffed Salmon combines several restaurant favorites into one impressive seafood dinner. Juicy baked salmon, tender garlic shrimp, buttery Parmesan cream sauce, fresh herbs, and lemon create a dish that feels indulgent while remaining surprisingly approachable for home cooks.

The most important part is controlling the cooking time. Partially cook the shrimp, bake the salmon only until tender and flaky, and keep the cream sauce over gentle heat. Finish everything with fresh dill and lemon, and you’ll have a beautiful centerpiece that’s perfect for date night, family celebrations, holidays, or any evening when you want dinner to feel extra special.

Easy Slow Cooker Beef Bourguignon Recipe – Rich, Tender, and Comforting

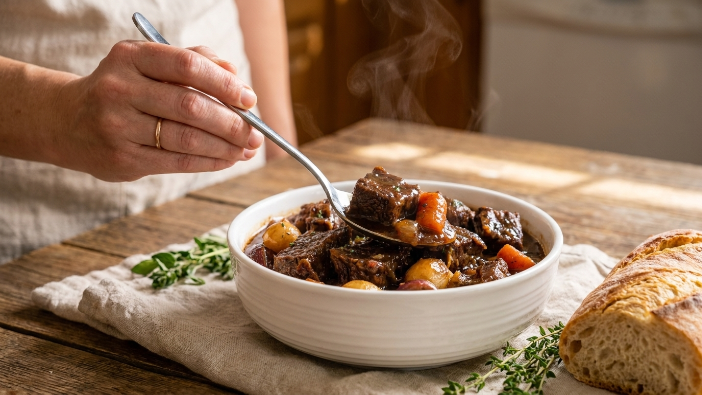
Slow Cooker Beef Bourguignon is the ultimate cozy comfort food, combining tender chunks of beef with mushrooms, carrots, onions, herbs, and a rich red wine sauce. Inspired by the classic French dish, this slow cooker version keeps all the deep, savory flavor while making the cooking process much easier for busy home cooks.

The beef cooks slowly for hours until it becomes incredibly tender, while the vegetables absorb the rich broth and wine-based sauce. Bacon adds smoky depth, garlic and herbs build aroma, and tomato paste gives the sauce extra body and richness. The result is a hearty, restaurant-style stew that feels perfect for cold evenings, family dinners, holidays, or special occasions.

One of the best things about this recipe is that most of the work is done at the beginning. Once the beef is browned and the ingredients are added to the slow cooker, the dish gently cooks until everything becomes tender and flavorful. Serve it over creamy mashed potatoes, buttered noodles, or alongside crusty bread for a truly satisfying meal.

Why You’ll Love This Slow Cooker Beef Bourguignon

This recipe delivers deep, slow-cooked flavor without requiring you to stand over the stove for hours. The slow cooker gives the beef plenty of time to become fork-tender while allowing the wine, herbs, vegetables, and broth to blend into a rich sauce.

Browning the beef before slow cooking adds an important layer of flavor. Those caramelized edges give the finished bourguignon a deeper, more savory taste than simply placing raw beef directly into the slow cooker.

It is also an excellent make-ahead meal. Beef Bourguignon often tastes even better the next day because the flavors continue developing as it rests in the refrigerator.

Ingredients

For the Beef

  • 3 pounds beef chuck roast, cut into 1 1/2-inch cubes
  • 1 1/2 teaspoons kosher salt
  • 1 teaspoon black pepper
  • 1/3 cup all-purpose flour
  • 2 tablespoons olive oil

For the Bacon and Vegetables

  • 6 ounces bacon, chopped
  • 1 large yellow onion, diced
  • 4 medium carrots, cut into thick slices
  • 4 garlic cloves, minced
  • 8 ounces cremini or button mushrooms, halved or quartered
  • 1 cup pearl onions, peeled, optional

For the Sauce

  • 2 tablespoons tomato paste
  • 2 cups dry red wine
  • 2 cups beef broth
  • 1 tablespoon Worcestershire sauce
  • 1 teaspoon dried thyme
  • 2 bay leaves
  • 1 teaspoon salt, or to taste
  • 1/2 teaspoon black pepper

For Finishing

  • 2 tablespoons unsalted butter
  • 2 tablespoons chopped fresh parsley
  • Additional salt and pepper, as needed

How to Make Slow Cooker Beef Bourguignon

1. Prepare the Beef

Pat the beef cubes dry thoroughly with paper towels.

Season them with salt and black pepper, then place them in a large bowl.

Sprinkle the flour over the beef and toss until each piece is lightly coated.

The flour helps the beef brown more effectively and also assists in thickening the sauce as the dish cooks.

2. Cook the Bacon

Heat a large skillet over medium heat.

Add the chopped bacon and cook for approximately 5 to 7 minutes, stirring occasionally, until the bacon is browned and slightly crisp.

Use a slotted spoon to transfer the bacon to the slow cooker, leaving the rendered fat in the skillet.

The bacon fat adds tremendous flavor to the beef and vegetables.

3. Brown the Beef

Increase the heat to medium-high.

Add a little olive oil if there is not enough bacon fat in the pan.

Working in batches, add the beef cubes in a single layer.

Do not overcrowd the skillet, or the beef will release too much moisture and steam instead of browning.

Sear the beef for approximately 2 to 3 minutes per side until a deep brown crust forms.

Transfer each batch to the slow cooker.

4. Sauté the Onion and Carrots

Reduce the heat to medium.

Add the diced onion and carrots to the same skillet.

Cook for approximately 4 to 5 minutes, stirring occasionally, until the onion begins to soften.

Add the minced garlic and cook for another 30 seconds until fragrant.

Transfer the vegetables to the slow cooker.

5. Add the Tomato Paste

Add the tomato paste to the skillet.

Cook it for about 1 minute, stirring constantly.

Cooking tomato paste briefly helps caramelize it and gives the finished sauce a deeper, richer flavor.

6. Deglaze With Red Wine

Pour the red wine into the skillet.

Use a wooden spoon to scrape all the browned bits from the bottom of the pan.

These browned bits are packed with concentrated beef, bacon, and vegetable flavor.

Allow the wine to simmer for approximately 3 to 5 minutes.

This reduces it slightly and concentrates the flavor.

7. Add the Sauce to the Slow Cooker

Pour the wine mixture into the slow cooker.

Add the beef broth, Worcestershire sauce, thyme, bay leaves, salt, and black pepper.

Stir gently to combine everything.

The liquid does not need to completely cover the beef. As the meat and vegetables cook, they will release additional moisture.

8. Slow Cook the Beef Bourguignon

Cover the slow cooker.

Cook on LOW for 7 to 8 hours or on HIGH for approximately 4 to 5 hours.

For the most tender beef and deepest flavor, the LOW setting is generally recommended.

The beef should be fork-tender when finished and should pull apart easily when pressed with a fork.

9. Cook the Mushrooms

About 30 minutes before serving, melt the butter in a skillet over medium-high heat.

Add the mushrooms and spread them into a single layer.

Allow them to cook undisturbed for 2 to 3 minutes before stirring.

Continue sautéing for approximately 5 to 7 minutes until browned.

If using pearl onions, add them to the skillet during the final few minutes.

Transfer the mushrooms and onions to the slow cooker.

Cooking the mushrooms separately helps them develop a better texture and deeper flavor instead of becoming overly soft.

10. Finish the Sauce

Remove the bay leaves.

Taste the sauce and adjust the seasoning with additional salt and black pepper if needed.

If the sauce is thinner than you prefer, leave the slow cooker uncovered on HIGH for 15 to 20 minutes.

For an even thicker sauce, mix 1 tablespoon cornstarch with 1 tablespoon cold water and stir the slurry into the slow cooker. Cook for another 10 to 15 minutes until thickened.

11. Garnish and Serve

Sprinkle chopped fresh parsley over the finished Beef Bourguignon.

Serve hot with your favorite side dish and spoon plenty of the rich sauce over each portion.

What to Serve With Slow Cooker Beef Bourguignon

Creamy mashed potatoes are one of the best sides because they soak up the rich wine sauce beautifully.

Buttered egg noodles are another classic option. Spoon the tender beef, vegetables, mushrooms, and sauce directly over the noodles for a hearty meal.

You can also serve Beef Bourguignon with crusty French bread or sourdough. The bread is perfect for dipping into the flavorful sauce.

For a lighter side, serve it with roasted green beans, asparagus, Brussels sprouts, or a fresh green salad.

Creamy polenta also pairs wonderfully with the rich beef and wine sauce.

Tips for the Best Slow Cooker Beef Bourguignon

Use beef chuck. Chuck roast contains enough fat and connective tissue to become tender and flavorful during long cooking.

Do not skip browning the beef. It takes a little extra time but creates significantly more flavor.

Cook in batches. Overcrowding the skillet prevents proper browning.

Use a wine you enjoy drinking. The wine flavor becomes concentrated during cooking, so choose a dry red wine with good flavor.

Do not use cooking wine. It often contains extra salt and does not provide the same depth of flavor as regular red wine.

Cook mushrooms separately. This helps them brown and keeps their texture more appealing.

Use LOW heat when possible. Slow cooking the beef for 7 to 8 hours generally produces the most tender result.

Taste before serving. Long-cooked sauces often need a final adjustment of salt and black pepper.

What Red Wine Is Best for Beef Bourguignon?

Traditional Beef Bourguignon is associated with Burgundy wine, but you do not need an expensive bottle.

Pinot Noir is an excellent choice because it has moderate acidity and complements beef without overpowering it.

Merlot, Cabernet Sauvignon, or another dry red wine can also work well.

Avoid very sweet red wines because they can make the finished sauce taste unbalanced.

Easy Recipe Variations

Alcohol-Free Beef Bourguignon

If you prefer not to cook with wine, replace the wine with additional beef broth.

Add 1 to 2 tablespoons balsamic vinegar to provide some of the acidity and complexity normally contributed by red wine.

Extra Mushroom Beef Bourguignon

Increase the mushrooms to 16 ounces for an earthier, more savory dish.

A mixture of cremini and shiitake mushrooms works especially well.

Potato Beef Bourguignon

Add 1 pound small baby potatoes to the slow cooker along with the carrots.

Cut larger potatoes in half so they cook evenly.

Herb Variation

Add a small sprig of fresh rosemary along with the thyme and bay leaves.

Remove the rosemary before serving.

Spicy Beef Bourguignon

For a subtle warming heat, add 1/4 teaspoon crushed red pepper flakes.

This is not traditional, but it can be delicious if you enjoy a little spice.

Can I Make Beef Bourguignon Ahead of Time?

Absolutely.

In fact, this is one of the best dishes to prepare ahead.

Cook the Beef Bourguignon completely, allow it to cool, and refrigerate it overnight.

The next day, remove any excess hardened fat from the surface if desired and gently reheat the stew.

The sauce often tastes even richer after resting overnight.

Storage and Reheating

Allow leftovers to cool before transferring them to airtight containers.

Store Beef Bourguignon in the refrigerator for up to 3 to 4 days.

To reheat on the stovetop, transfer the desired amount to a saucepan and warm gently over medium-low heat until hot.

Add a splash of beef broth if the sauce has become too thick.

You can also reheat individual servings in the microwave in short intervals, stirring occasionally.

Avoid excessively high heat because it may cause the beef to dry out.

Can You Freeze Slow Cooker Beef Bourguignon?

Yes.

Beef Bourguignon freezes very well.

Allow the dish to cool completely, then transfer it to freezer-safe containers.

Freeze for up to 2 to 3 months.

Thaw overnight in the refrigerator before reheating.

If possible, freeze the bourguignon without potatoes because potatoes can become slightly grainy after freezing and thawing.

Frequently Asked Questions

Can I put raw beef directly into the slow cooker?

Yes, but browning it first is highly recommended.

Searing creates a caramelized crust that adds significantly more flavor to the finished dish.

Why is my beef still tough?

If the beef is tough, it usually needs more cooking time.

Chuck roast contains connective tissue that becomes tender only after enough time at a gentle temperature.

Continue cooking until the beef can easily be pierced with a fork.

Why is my sauce too thin?

Slow cookers trap moisture, so sauces do not reduce as quickly as they do on the stovetop.

Remove the lid and cook on HIGH for 15 to 20 minutes or use a small cornstarch slurry to thicken the sauce.

Can I prepare everything the night before?

Yes.

You can brown the beef, cook the bacon and vegetables, prepare the sauce, and refrigerate everything overnight.

Place the ingredients in the slow cooker the next morning and begin cooking.

Final Thoughts

This Slow Cooker Beef Bourguignon transforms simple ingredients into a deeply flavorful and comforting meal. Tender beef, smoky bacon, carrots, mushrooms, onions, garlic, herbs, and a rich red wine sauce slowly cook together until every bite is savory and satisfying.

The slow cooker makes this classic-inspired dish approachable enough for everyday home cooking while still creating the elegant flavor you would expect from a special dinner.

Serve it over creamy mashed potatoes, egg noodles, or polenta with plenty of the rich sauce spooned over the top. Add crusty bread on the side, and you have a warm, hearty meal that is perfect for family dinners, entertaining guests, or cozy weekends at home.

Easy Garlic Butter Shrimp and Scallops – Restaurant-Style Seafood Dinner

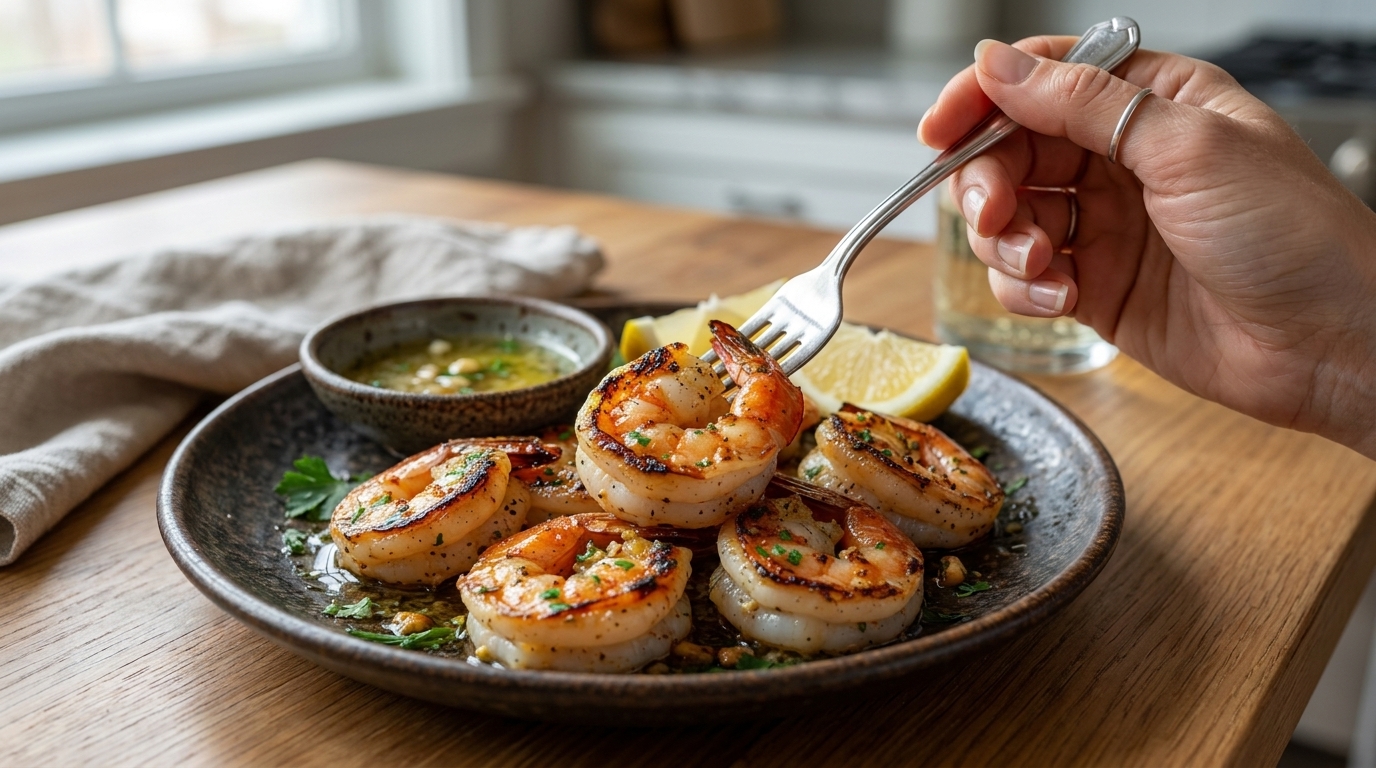
Garlic Butter Shrimp and Scallops is an elegant seafood dinner featuring juicy golden shrimp, tender seared scallops, fresh garlic, melted butter, herbs, and bright lemon. Inspired by the dish in the image, this recipe keeps the seafood simple so the naturally sweet flavor of the shrimp and scallops remains the star.

The secret to making this dish taste restaurant-quality is getting a beautiful golden sear without overcooking the seafood. Scallops should have caramelized edges with tender centers, while shrimp should stay plump and juicy. Once both are cooked, a quick garlic-lemon butter sauce is prepared right in the same skillet, capturing all the flavorful browned bits left behind.

Despite its impressive appearance, this meal comes together in about 30 minutes, making it suitable for both special occasions and weeknight dinners. Serve it with crusty bread, pasta, rice, mashed potatoes, or vegetables for an easy seafood meal that looks much more complicated than it really is.

Why You’ll Love This Garlic Butter Shrimp and Scallops Recipe

Shrimp and scallops are a perfect combination because both have a naturally sweet, delicate flavor but slightly different textures. The shrimp are juicy and lightly firm, while large sea scallops become incredibly tender when properly seared.

The garlic butter sauce brings everything together without overwhelming the seafood. Fresh lemon balances the richness of the butter, while parsley gives the finished plate freshness and color.

This recipe is also wonderfully versatile. Serve it as an appetizer with lemon wedges and garlic butter for dipping, or transform it into a complete dinner by adding pasta, rice, potatoes, or vegetables.

Ingredients

For the Shrimp

  • 1 pound large or jumbo shrimp, peeled and deveined
  • 1 tablespoon olive oil
  • ½ teaspoon salt
  • ½ teaspoon freshly ground black pepper
  • ½ teaspoon garlic powder
  • ¼ teaspoon paprika

For the Scallops

  • 1 pound large sea scallops
  • 1 tablespoon olive oil
  • ½ teaspoon salt
  • ¼ teaspoon black pepper
  • ¼ teaspoon garlic powder

For the Garlic Butter Sauce

  • 5 tablespoons unsalted butter
  • 4 cloves garlic, finely minced
  • 2 tablespoons fresh lemon juice
  • 1 teaspoon lemon zest
  • ¼ teaspoon red pepper flakes, optional
  • 2 tablespoons chopped fresh parsley
  • Salt and black pepper to taste

For Serving

  • Lemon wedges
  • Fresh parsley
  • Crusty bread, optional

How to Make Garlic Butter Shrimp and Scallops

1. Prepare the Seafood

Proper preparation is extremely important when cooking shrimp and scallops.

Pat the shrimp thoroughly dry with paper towels and place them in a bowl. Season with salt, black pepper, garlic powder, and paprika.

Next, prepare the scallops. If each scallop has a small, firm side muscle attached, gently pull it away and discard it.

Use several clean paper towels to pat the scallops extremely dry.

This step makes a major difference. Moist scallops release water into the pan and steam rather than developing the beautiful caramelized surface visible in the image.

Season the scallops with salt, black pepper, and garlic powder immediately before cooking.

2. Heat the Skillet

Place a large stainless-steel or cast-iron skillet over medium-high heat.

Allow it to become properly hot before adding the oil.

A hot skillet allows the seafood to make immediate contact with intense heat, encouraging browning rather than steaming.

Add about one tablespoon of olive oil and swirl it around the pan.

3. Sear the Scallops

Carefully arrange the scallops in the skillet, leaving plenty of room between them.

Do not overcrowd the pan. If necessary, cook them in two batches.

Once the scallops are in the pan, do not move them for approximately 1½–2 minutes.

Allowing them to remain untouched gives the underside enough time to develop a deep golden crust.

Use tongs to flip each scallop.

Cook the second side for approximately another 1–2 minutes.

The center should be opaque and tender rather than firm and rubbery.

Transfer the scallops to a clean plate immediately.

4. Sear the Shrimp

Add another tablespoon of olive oil to the same skillet if necessary.

Arrange the seasoned shrimp in one layer.

Cook for approximately 1–2 minutes on the first side, until you see golden edges developing.

Flip the shrimp and cook another 1–2 minutes.

Perfectly cooked shrimp should be pink and opaque with a gentle “C” shape.

If shrimp curl tightly into an “O,” they are usually becoming overcooked.

Transfer the shrimp to the plate with the scallops.

5. Make the Garlic Butter Sauce

Reduce the heat to medium-low.

Add the butter to the same skillet.

Once it melts, add the minced garlic and red pepper flakes if using.

Cook for approximately 30–45 seconds, stirring constantly.

The garlic should smell fragrant but shouldn’t become dark brown.

Add the lemon juice and lemon zest.

As you stir, gently scrape the bottom of the skillet to release the flavorful caramelized bits left behind from searing the seafood.

Allow the sauce to bubble gently for about one minute.

Stir in chopped parsley and season with a little additional salt and black pepper if needed.

6. Finish the Shrimp and Scallops

Return the scallops and shrimp to the skillet.

Gently toss or spoon the garlic butter over the seafood.

Cook for only 30–60 seconds, just long enough to coat and warm everything.

Avoid leaving the seafood in the sauce for several minutes because it has already been cooked. Additional cooking can quickly make scallops and shrimp tough.

Remove the skillet from the heat.

7. Serve Immediately

Arrange the shrimp and scallops on a serving plate.

Spoon plenty of warm garlic butter over the top and around the seafood, just like the glossy presentation shown in the image.

Sprinkle with additional chopped parsley and freshly ground black pepper.

Serve with lemon wedges so everyone can add an extra squeeze of fresh lemon.

For dipping, place additional garlic butter in a small bowl alongside the seafood.

What to Serve With Shrimp and Scallops

One of the easiest ways to serve this dish is with warm crusty bread. The bread absorbs the garlic and lemon butter left on the plate and makes sure none of the flavorful sauce goes to waste.

For a complete seafood dinner, toss the shrimp and scallops with linguine, spaghetti, or angel hair pasta.

Creamy mashed potatoes are another delicious pairing, especially if you spoon some of the garlic butter over the potatoes.

Rice works equally well. Try steamed white rice, lemon rice, wild rice, or Parmesan risotto.

For a lighter meal, add roasted asparagus, green beans, broccoli, zucchini, or a crisp garden salad.

Tips for Perfect Shrimp and Scallops

Dry the scallops extremely well. Excess moisture is the biggest reason scallops fail to develop a golden crust.

Use large sea scallops. They are much easier to sear than small bay scallops and create a more impressive presentation.

Don’t overcrowd your skillet. Overcrowding traps steam and prevents proper browning.

Use high heat for searing. The pan should be properly hot before the seafood is added.

Cook the seafood separately. Shrimp and scallops don’t always finish cooking at exactly the same speed.

Don’t overcook either one. Both seafood varieties become rubbery when cooked too long.

Add garlic over lower heat. Garlic burns easily and can become bitter.

Use fresh lemon juice. The acidity balances the butter and enhances the naturally sweet seafood.

Easy Recipe Variations

For Cajun shrimp and scallops, replace the paprika and garlic powder with about 1½ teaspoons Cajun seasoning.

For a creamy version, add ½ cup heavy cream and ¼ cup Parmesan to the garlic butter and simmer gently until thickened.

If you enjoy spicy seafood, increase the red pepper flakes or add a small pinch of cayenne pepper.

You can also add mushrooms, asparagus, spinach, or cherry tomatoes to turn the dish into a more substantial skillet meal.

For an impressive surf-and-turf dinner, serve these garlic butter shrimp and scallops alongside grilled ribeye, filet mignon, or sirloin steak.

Storage and Reheating

Shrimp and scallops are best eaten immediately after cooking because their tender texture can change when reheated.

Store leftovers in an airtight container in the refrigerator for up to 2 days.

For the best results, reheat the seafood gently in a skillet over low heat with a teaspoon of butter. Heat only until warmed through.

Avoid repeatedly reheating the seafood because each additional cooking cycle increases the chance that the shrimp and scallops will become tough.

Final Thoughts

This Garlic Butter Shrimp and Scallops recipe delivers a beautiful restaurant-style seafood dinner using surprisingly simple ingredients. Golden seared scallops, juicy shrimp, fresh garlic, melted butter, lemon, and parsley create a combination that is rich and flavorful without covering up the delicate sweetness of the seafood.

The most important techniques are simple: dry the seafood thoroughly, use a hot skillet, avoid overcrowding, and remove the shrimp and scallops as soon as they’re cooked. Finish them with plenty of warm garlic butter and fresh lemon, and you’ll have an elegant seafood dinner that’s perfect for date nights, holidays, celebrations, or whenever you’re craving something special.

Easy Creamy Chicken Corn Chowder with Bacon – Rich, Hearty & Comforting

Creamy Chicken Corn Chowder with Bacon is the kind of cozy, satisfying soup that feels like a complete meal in one bowl. It combines tender chicken, sweet corn, smoky bacon, soft potatoes, aromatic vegetables, and a rich creamy broth that comes together into something deeply comforting without being overly complicated.

What makes this chowder so delicious is the balance of textures and flavors. The potatoes become tender and help give the soup body, the corn adds natural sweetness, the bacon brings smoky richness, and the chicken makes the chowder hearty enough for dinner. A creamy base ties everything together while garlic, onion, herbs, and a little paprika add warmth and depth.

This recipe is perfect for cool evenings, family dinners, meal prep, or whenever you want a comforting homemade soup that tastes like it has been simmering all day. It also reheats beautifully, which makes it an excellent option for leftovers.

Why You’ll Love This Creamy Chicken Corn Chowder with Bacon

This chowder is rich and creamy, but it is still easy enough to make on a weeknight. Most of the cooking happens in one pot, which means fewer dishes and plenty of flavor built into every step.

The bacon is cooked first, leaving behind flavorful drippings that are used to sauté the vegetables. Those drippings add a smoky base to the soup before the chicken, potatoes, corn, broth, and cream are even added.

It is also an adaptable recipe. You can use fresh, frozen, or canned corn, and both chicken breast and chicken thighs work well. You can even add extra vegetables such as carrots, celery, spinach, or bell peppers.

Ingredients

For the Bacon and Chicken

  • 6 slices bacon, chopped
  • 1 pound boneless, skinless chicken breast or thighs, cut into bite-sized pieces
  • ½ teaspoon salt
  • ¼ teaspoon black pepper
  • ½ teaspoon garlic powder
  • ½ teaspoon smoked paprika

For the Chowder

  • 1 tablespoon butter
  • 1 medium yellow onion, finely diced
  • 2 celery stalks, diced
  • 1 medium carrot, diced
  • 3 cloves garlic, minced
  • 3 tablespoons all-purpose flour
  • 4 cups low-sodium chicken broth
  • 3 medium Yukon Gold or russet potatoes, peeled and diced
  • 3 cups corn kernels
  • 1 teaspoon dried thyme
  • ½ teaspoon dried parsley
  • ½ teaspoon smoked paprika
  • ½ teaspoon salt, or to taste
  • ¼ teaspoon black pepper

For the Creamy Finish

  • 1 cup heavy cream
  • ½ cup whole milk
  • ½ cup shredded cheddar cheese, optional
  • 2 tablespoons chopped fresh parsley
  • 2 green onions, sliced
  • Reserved crispy bacon, for topping

How to Make Creamy Chicken Corn Chowder with Bacon

1. Cook the Bacon

Place a large Dutch oven or heavy soup pot over medium heat.

Add the chopped bacon and cook for approximately 6 to 8 minutes, stirring occasionally, until the bacon becomes crisp and golden.

Use a slotted spoon to transfer the bacon to a paper towel-lined plate.

Leave approximately 2 tablespoons of bacon drippings in the pot. If there is significantly more, carefully remove the excess.

Do not discard the reserved crispy bacon because it will be added back to the chowder later and used as a topping.

2. Season and Cook the Chicken

Season the chicken pieces with salt, black pepper, garlic powder, and smoked paprika.

Add the chicken to the hot bacon drippings.

Cook over medium-high heat for approximately 4 to 6 minutes, stirring occasionally, until the chicken is lightly browned on the outside.

It does not need to be fully cooked at this point because it will finish cooking in the broth later.

Transfer the chicken to a clean plate and set aside.

3. Sauté the Vegetables

Reduce the heat to medium.

Add the butter to the same pot.

Once melted, add the diced onion, celery, and carrot.

Cook for approximately 5 minutes, stirring occasionally, until the vegetables begin to soften.

Add the minced garlic and cook for another 30 to 60 seconds.

The garlic should become fragrant but should not brown too much.

4. Add the Flour

Sprinkle the flour evenly over the vegetables.

Stir constantly for approximately 1 to 2 minutes.

This step creates a simple roux that will help thicken the chowder. Cooking the flour briefly also removes the raw flour taste.

The vegetables may look slightly coated and pasty at this stage, which is completely normal.

5. Add the Chicken Broth

Slowly pour in the chicken broth while stirring or whisking continuously.

Adding the broth gradually helps prevent lumps from forming.

Use a wooden spoon to scrape any browned bits from the bottom of the pot. Those bits contain concentrated flavor from the bacon and chicken and make the finished chowder even better.

Bring the mixture to a gentle simmer.

6. Add the Potatoes and Seasonings

Add the diced potatoes, thyme, dried parsley, smoked paprika, salt, and black pepper.

Stir everything together.

Bring the soup to a light boil, then immediately reduce the heat to medium-low.

Cover partially and simmer for approximately 12 to 15 minutes, or until the potatoes are nearly tender when pierced with a fork.

Try to cut the potatoes into evenly sized pieces so they cook at the same rate.

7. Add the Chicken and Corn

Return the partially cooked chicken to the pot along with any juices that collected on the plate.

Add the corn.

Stir thoroughly and continue simmering for approximately 5 to 7 minutes, or until the chicken is fully cooked and the potatoes are completely tender.

The chicken should reach an internal temperature of 165°F.

At this point, the broth should already have started thickening slightly.

8. Make the Chowder Creamy

Reduce the heat to low.

Pour in the heavy cream and whole milk.

Stir gently until everything is well combined.

Allow the chowder to warm for approximately 3 to 5 minutes over low heat.

Do not allow the soup to boil aggressively after adding the dairy because high heat can sometimes cause creamy soups to separate.

9. Add the Cheese

If you want an extra-rich and slightly cheesy chowder, stir in the shredded cheddar.

Add the cheese gradually while stirring continuously.

Continue stirring until completely melted.

This step is optional, but cheddar pairs especially well with bacon, chicken, potatoes, and corn.

Taste the chowder and adjust the salt and black pepper as needed.

10. Add the Bacon

Stir approximately half of the crispy bacon into the chowder.

Save the remaining bacon for serving.

Mix in the fresh parsley.

If the chowder seems too thick, add a small splash of chicken broth or milk.

If it seems thinner than you prefer, allow it to simmer gently for a few additional minutes.

11. Serve the Chowder

Ladle the hot chowder into bowls.

Top each serving with crispy bacon, sliced green onions, fresh parsley, and a little shredded cheddar if desired.

Finish with freshly ground black pepper.

Serve immediately while warm and creamy.

What to Serve With Chicken Corn Chowder

This chowder is hearty enough to serve on its own, but bread is an especially good companion.

Serve it with crusty sourdough, garlic bread, dinner rolls, biscuits, cornbread, or toasted baguette slices. Bread is perfect for soaking up the creamy broth.

A simple green salad is another excellent option if you want a lighter side. Lettuce, cucumber, tomato, and a tangy vinaigrette help balance the richness of the soup.

You can also serve smaller bowls alongside sandwiches or wraps for an easy lunch.

Tips for the Best Creamy Chicken Corn Chowder

Cook the bacon until crisp. Soft bacon can disappear into the soup, while crispy bacon adds both texture and smoky flavor.

Use the bacon drippings. They provide an excellent flavor base for the chicken and vegetables.

Cut the potatoes evenly. Similar-sized pieces cook at the same rate and prevent some potatoes from becoming mushy while others remain firm.

Do not overcook the chicken. Browning it first and finishing it in the broth helps keep the pieces tender.

Add the dairy over low heat. Gentle heat keeps the creamy broth smooth.

Use low-sodium broth. Bacon, cheese, and seasoned chicken all contribute salt, so low-sodium broth gives you better control over the final seasoning.

Taste before adding extra salt. This is especially important if you use both bacon and cheddar.

Easy Recipe Variations

Spicy Chicken Corn Chowder

Add diced jalapeño, a pinch of cayenne pepper, or extra crushed red pepper flakes for a little heat.

Cheesy Bacon Corn Chowder

Increase the cheddar to 1 cup and sprinkle additional cheese over each bowl before serving.

Southwest Chicken Corn Chowder

Add black beans, green chiles, cumin, and a little chili powder. Garnish with avocado, cilantro, and lime.

Vegetable-Loaded Chowder

Add diced bell peppers, spinach, zucchini, or extra carrots and celery.

Rotisserie Chicken Version

Skip cooking raw chicken and use approximately 3 cups shredded cooked rotisserie chicken. Add it during the final 5 to 7 minutes of simmering.

How to Store and Reheat

Allow leftover chowder to cool before transferring it to an airtight container.

Refrigerate for up to 3 to 4 days.

Reheat gently in a saucepan over low to medium-low heat, stirring frequently.

The chowder will usually thicken after refrigeration, so add a small splash of chicken broth or milk until it reaches your preferred consistency.

Avoid boiling the chowder aggressively while reheating because that can affect the texture of the cream.

Freezing creamy potato-based chowders is generally not ideal because potatoes and dairy can develop a grainy or separated texture after thawing.

Final Thoughts

Creamy Chicken Corn Chowder with Bacon brings together tender chicken, sweet corn, soft potatoes, smoky bacon, vegetables, herbs, and a rich creamy broth in one warm and satisfying bowl.

The recipe is simple enough for an everyday family dinner yet flavorful enough to feel special. Cooking the vegetables in bacon drippings, building the broth from the browned ingredients, and finishing everything gently with cream creates layers of flavor without requiring complicated techniques.

Whether you serve it with crusty bread on a chilly evening, prepare it for weekend meal prep, or make a large pot for the whole family, this creamy chicken corn chowder is comforting, filling, and full of classic flavors that are easy to love.

Easy Garlic Butter Steak with Herbs Recipe – Juicy, Tender, and Restaurant-Style

Garlic Butter Steak with Herbs is a rich, flavorful dinner made with beautifully seared steak, melted butter, fresh garlic, and aromatic herbs. It is one of those recipes that looks and tastes like a restaurant meal but is surprisingly easy to prepare at home with only a handful of simple ingredients.

The secret to a great steak is a hot skillet, proper seasoning, and careful cooking. Once the steak develops a deep golden crust, it is basted with foamy garlic-herb butter that melts into every surface and adds incredible richness. Fresh rosemary and thyme bring an earthy aroma that pairs perfectly with the savory beef.

This recipe works beautifully for date night, weekend dinners, holidays, or whenever you want an impressive meal without spending hours in the kitchen. Serve it with mashed potatoes, roasted vegetables, crispy potatoes, or a fresh salad for a complete steakhouse-style dinner.

Why You’ll Love This Garlic Butter Steak with Herbs

This recipe is simple but delivers big flavor. Salt and pepper allow the natural taste of the beef to shine, while butter, garlic, rosemary, and thyme create a rich finishing sauce.

Cooking the steak in a cast-iron or heavy skillet helps create the dark caramelized crust that makes restaurant steaks so appealing. Basting the steak with hot herb butter near the end keeps the surface flavorful and adds extra richness without requiring a complicated sauce.

Another advantage is versatility. You can use ribeye, New York strip, sirloin, or filet mignon depending on your preference and budget.

The entire recipe can be ready in about 25 to 30 minutes, making it an excellent option when you want an elegant dinner without a long preparation time.

Ingredients

For the Steak

  • 2 steaks, about 10 to 12 ounces each
  • 1 to 1 1/2 inches thick
  • 1 tablespoon olive oil
  • 1 teaspoon kosher salt
  • 1 teaspoon freshly ground black pepper
  • 1/2 teaspoon garlic powder, optional

For the Garlic Herb Butter

  • 4 tablespoons unsalted butter
  • 5 garlic cloves, lightly crushed
  • 3 sprigs fresh rosemary
  • 4 sprigs fresh thyme
  • 1 tablespoon chopped fresh parsley
  • 1 teaspoon fresh lemon juice, optional

For Serving

  • Flaky sea salt
  • Freshly cracked black pepper
  • Additional chopped parsley
  • Lemon wedges, optional

How to Make Garlic Butter Steak with Herbs

1. Bring the Steak Toward Room Temperature

Remove the steaks from the refrigerator about 20 to 30 minutes before cooking.

Pat them completely dry with paper towels.

A dry surface is extremely important because moisture prevents proper browning. The drier the steak, the easier it is to develop a flavorful crust.

Season both sides generously with salt, black pepper, and optional garlic powder.

2. Heat the Skillet

Place a cast-iron skillet or heavy stainless-steel pan over medium-high to high heat.

Allow the pan to become very hot before adding the steak.

Add the olive oil and swirl it around the skillet.

The oil should shimmer but should not be smoking excessively.

3. Sear the First Side

Carefully place the steaks into the hot skillet.

You should immediately hear a strong sizzling sound.

Do not move the steaks for approximately 2 to 4 minutes, depending on thickness.

Leaving the steak undisturbed allows the surface to develop a deep brown crust.

4. Flip the Steak

Turn the steaks using tongs.

Cook the second side for another 2 to 3 minutes.

If your steaks have a thick fat edge, hold each steak upright with tongs for about 30 to 60 seconds to render and brown the fat.

5. Add the Garlic Butter and Herbs

Reduce the heat to medium.

Add the butter, crushed garlic cloves, rosemary, and thyme to the skillet.

As the butter melts, it will begin to foam and absorb the flavors of the herbs and garlic.

Tilt the skillet slightly so the melted butter collects on one side.

6. Baste the Steak

Using a large spoon, repeatedly scoop the hot garlic-herb butter and pour it over the steaks.

Continue basting for about 1 to 2 minutes.

Flip the steaks once more if necessary and continue spooning the butter over them.

This technique coats the steak with rich flavor while helping it cook evenly.

7. Check the Internal Temperature

Use an instant-read thermometer to check the thickest part of each steak.

Approximate temperatures before resting are:

  • Rare: 120°F to 125°F
  • Medium-rare: 130°F to 135°F
  • Medium: 140°F to 145°F
  • Medium-well: 150°F to 155°F
  • Well done: 160°F or higher

The USDA recommends cooking whole cuts of beef to at least 145°F followed by a 3-minute rest for food safety.

Remember that the internal temperature can rise several degrees while the steak rests.

8. Rest the Steak

Transfer the steaks to a cutting board or warm plate.

Spoon some of the garlic-herb butter from the skillet over the top.

Let the steaks rest for approximately 5 to 10 minutes.

Do not cut into the steak immediately. Resting allows the juices to redistribute throughout the meat instead of spilling onto the cutting board.

9. Slice and Finish

If serving sliced steak, cut against the grain into thin strips.

Drizzle with additional garlic butter from the skillet.

Sprinkle with chopped parsley, flaky sea salt, and freshly cracked black pepper.

A small squeeze of fresh lemon juice can be added if you want a brighter finish.

Serve immediately.

What to Serve With Garlic Butter Steak with Herbs

Creamy mashed potatoes are one of the most classic sides for this steak because they absorb the rich garlic butter beautifully.

Roasted or crispy potatoes are another excellent option. Season them with rosemary, garlic, salt, and pepper to complement the flavors of the steak.

For vegetables, try roasted asparagus, broccoli, Brussels sprouts, green beans, mushrooms, or zucchini.

You can also serve Garlic Butter Steak with Herbs alongside a fresh Caesar salad, Mediterranean salad, or simple arugula salad with lemon vinaigrette.

For an extra restaurant-style dinner, add sautéed mushrooms and caramelized onions.

Tips for the Best Garlic Butter Steak

Choose a thick steak. Steaks around 1 to 1 1/2 inches thick are easier to sear while keeping the inside juicy.

Pat the steak dry. Excess moisture is one of the biggest reasons steaks fail to develop a good crust.

Preheat the skillet properly. The skillet needs to be hot before the steak goes in.

Do not overcrowd the pan. If your skillet is small, cook the steaks individually.

Use fresh herbs when possible. Rosemary and thyme release wonderful flavor into the hot butter.

Add butter after searing. Butter can burn at very high temperatures, so add it after the initial crust has developed.

Use a thermometer. This is the easiest way to avoid overcooking expensive steak.

Always rest the meat. Resting helps preserve juiciness.

Easy Recipe Variations

Garlic Parmesan Steak

Sprinkle freshly grated Parmesan over the sliced steak just before serving.

The heat from the steak will soften the cheese slightly and add a salty, savory finish.

Spicy Garlic Butter Steak

Add 1/2 teaspoon crushed red pepper flakes or a pinch of cayenne to the butter.

Mushroom Garlic Butter Steak

After removing the steaks, sauté 8 ounces sliced mushrooms in the remaining garlic-herb butter until browned.

Serve them over the steak.

Creamy Garlic Steak

After removing the steak, discard excess fat and add about 1 cup heavy cream and 1/3 cup Parmesan to the skillet.

Simmer gently until thickened, then spoon the creamy garlic sauce over the steak.

Herb Variation

Fresh sage, oregano, or parsley can be added along with rosemary and thyme.

Which Steak Cut Is Best?

Ribeye is one of the most flavorful choices because it contains plenty of marbling. As the fat melts during cooking, it keeps the meat juicy and rich.

New York strip is slightly leaner but still offers excellent tenderness and beefy flavor.

Filet mignon is extremely tender and works beautifully with garlic butter, although it has less fat than ribeye.

Sirloin is a more affordable choice and still produces excellent results when cooked carefully.

Storage and Reheating

Store leftover steak in an airtight container in the refrigerator for up to 3 to 4 days.

For the best texture, reheat steak gently.

Place it in a skillet over low heat with a small amount of butter and warm just until heated through.

You can also place it in a covered baking dish and reheat at about 275°F to 300°F until warm.

Avoid high heat during reheating because it can quickly turn a medium-rare steak into an overcooked one.

Leftover steak is also delicious served cold or at room temperature in salads, sandwiches, wraps, or steak bowls.

Frequently Asked Questions

Can I use dried herbs?

Yes. Fresh herbs give the best aroma, but dried herbs can work.

Use about 1/2 teaspoon each of dried rosemary and dried thyme in place of fresh sprigs.

Can I cook steak without cast iron?

Absolutely.

A heavy stainless-steel skillet works very well. The most important thing is using a pan that can handle high heat and maintain a consistent temperature.

Why did my steak turn gray instead of brown?

This usually happens when the steak is wet, the pan is not hot enough, or the skillet is overcrowded.

Patting the meat dry and preheating the skillet thoroughly should solve the problem.

Should I add garlic at the beginning?

It is better to add fresh garlic after the initial sear.

Garlic burns quickly over high heat and can become bitter if added too soon.

Final Thoughts

This Garlic Butter Steak with Herbs recipe proves that you do not need complicated ingredients to create an impressive steakhouse-style meal at home.

A properly seared steak combined with melted butter, fresh garlic, rosemary, thyme, and parsley creates incredible flavor in every bite. The outside develops a beautiful crust while the inside stays tender and juicy.

Whether you serve it with creamy mashed potatoes, roasted vegetables, crispy potatoes, or a fresh salad, this easy garlic butter steak is perfect for family dinners, romantic evenings, celebrations, or any night when you want something special.

Once you master the simple techniques of drying, searing, butter-basting, temperature checking, and resting, you can make consistently delicious steak right in your own kitchen.