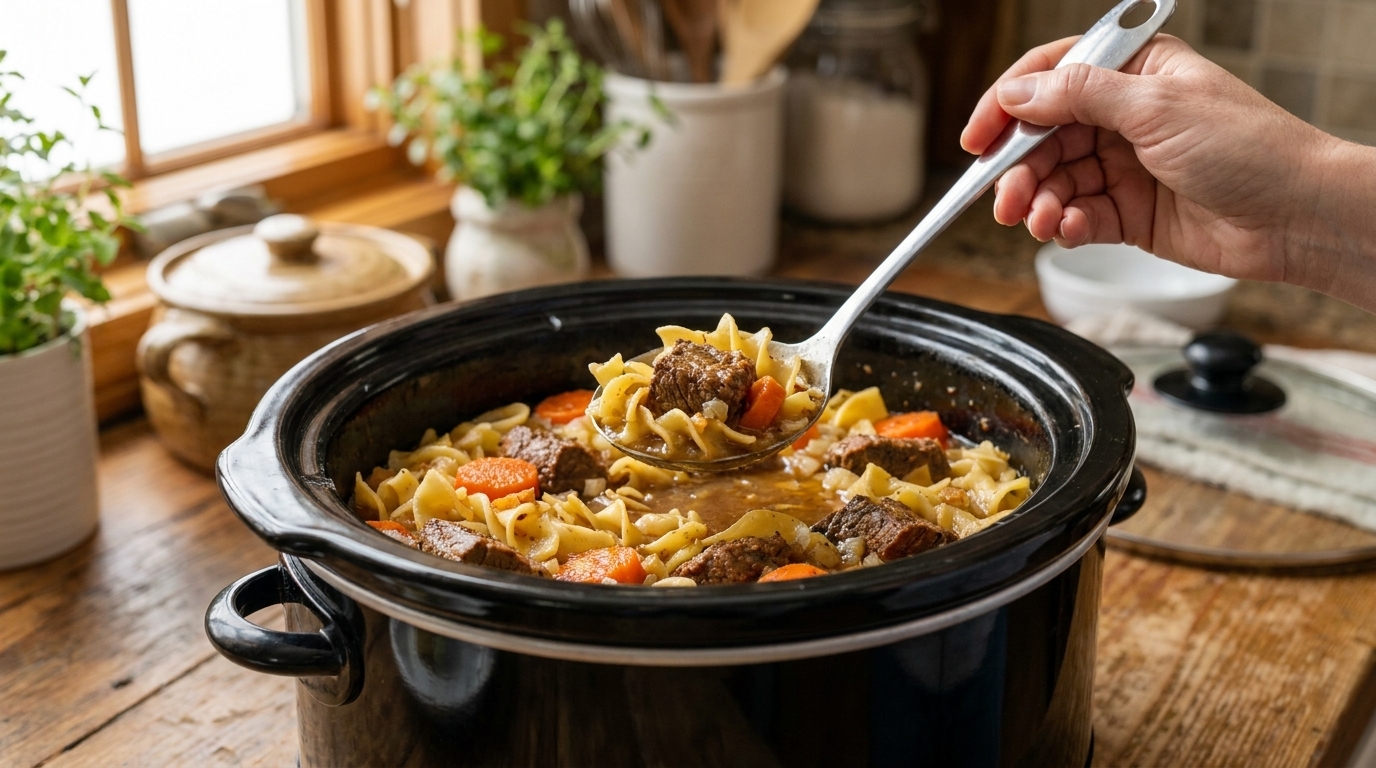
Easy Slow Cooker Beef Tips with Egg Noodles and Carrots – Tender, Savory, and Comforting 🥩🥕🍜

This Slow Cooker Beef Tips with Egg Noodles and Carrots is a hearty comfort-food dinner made with tender chunks of beef, sweet carrots, onions, garlic, herbs, and a rich savory gravy served over buttery egg noodles. The beef cooks low and slow until fork-tender, while the vegetables absorb all of the flavorful juices from the broth and seasonings.

Beef tips are ideal for slow cooking because the long, gentle cooking time helps tougher cuts become soft and juicy. A quick sear before slow cooking adds extra depth, while Worcestershire sauce, beef broth, tomato paste, garlic, and herbs create a deeply savory gravy.

The egg noodles are cooked separately near the end so they stay tender instead of becoming mushy in the slow cooker. Spoon the beef, carrots, and plenty of gravy over the noodles for an easy family dinner that is perfect for busy weekdays, Sunday meals, or chilly evenings.

Why You’ll Love These Slow Cooker Beef Tips

One of the best things about this recipe is how little hands-on work it requires. Once the beef has been browned and everything is added to the slow cooker, most of the cooking happens automatically.

The combination of beef, carrots, and egg noodles makes the meal especially satisfying. The carrots add natural sweetness, while the buttery noodles provide the perfect base for the rich beef gravy.

This recipe is also easy to customize. You can add mushrooms, peas, celery, extra onions, or a creamy finish depending on your preferences.

It is also excellent for meal prep because the beef and gravy reheat beautifully.

Ingredients

For the Beef Tips

  • 3 pounds beef chuck roast or stew meat, cut into 1 1/2-inch pieces
  • 2 tablespoons olive oil
  • 1 1/2 teaspoons kosher salt
  • 1 teaspoon freshly ground black pepper
  • 1 teaspoon garlic powder
  • 1 teaspoon onion powder
  • 1 teaspoon smoked paprika
  • 1/2 teaspoon dried thyme

For the Vegetables

  • 4 medium carrots, peeled and cut into thick pieces
  • 1 large yellow onion, diced
  • 4 garlic cloves, minced

For the Savory Gravy

  • 2 cups low-sodium beef broth
  • 2 tablespoons Worcestershire sauce
  • 2 tablespoons tomato paste
  • 1 teaspoon Dijon mustard
  • 1 teaspoon dried thyme
  • 1/2 teaspoon dried rosemary
  • 1/2 teaspoon black pepper

For Thickening

  • 2 tablespoons cornstarch
  • 2 tablespoons cold water

For the Egg Noodles

  • 12 ounces wide egg noodles
  • 2 tablespoons unsalted butter
  • Salt for the cooking water

For Garnishing

  • 2 tablespoons chopped fresh parsley
  • Freshly cracked black pepper

How to Make Slow Cooker Beef Tips with Egg Noodles and Carrots

1. Prepare the Beef

Pat the beef pieces dry thoroughly with paper towels.

If using chuck roast, cut it into approximately 1 1/2-inch cubes.

Try to keep the pieces similar in size so they cook evenly.

Season the beef with salt, black pepper, garlic powder, onion powder, smoked paprika, and thyme.

Toss until every piece is evenly coated.

2. Sear the Beef

Heat the olive oil in a large skillet over medium-high heat.

Working in batches, add the beef in a single layer.

Cook for approximately 2 to 3 minutes per side, or until deeply browned.

Do not overcrowd the skillet. Too much beef at once will release moisture and steam instead of developing a good crust.

Transfer the browned beef to the slow cooker.

3. Cook the Onion

Reduce the skillet heat to medium.

Add the diced onion and cook for approximately 3 to 4 minutes.

Stir occasionally until the onion begins to soften.

Add the minced garlic and cook for another 30 seconds.

The garlic should become fragrant without turning dark brown.

4. Add the Tomato Paste

Stir the tomato paste into the onions and garlic.

Cook for about 1 minute.

This helps caramelize the tomato paste and gives the finished gravy deeper flavor.

5. Deglaze the Skillet

Pour approximately 1/2 cup of the beef broth into the skillet.

Use a wooden spoon to scrape up the browned pieces from the bottom.

Those caramelized bits contain concentrated beef flavor and are an important part of the gravy.

Stir in the Worcestershire sauce, Dijon mustard, thyme, rosemary, and black pepper.

6. Assemble the Slow Cooker

Add the carrots to the slow cooker with the browned beef.

Pour the onion and broth mixture over everything.

Add the remaining beef broth.

Gently stir to distribute the ingredients.

The beef does not need to be completely covered with liquid because it will release additional juices while cooking.

7. Slow Cook Until Tender

Cover the slow cooker.

Cook on LOW for 7 to 8 hours or on HIGH for approximately 4 to 5 hours.

LOW is usually the better option for chuck roast because it gives the connective tissue more time to soften gradually.

The beef should be fork-tender when finished.

If the meat still feels chewy, continue cooking until a fork slides easily into the pieces.

8. Check the Carrots

The carrots should be tender but still able to hold their shape.

If you prefer firmer carrots, add them about halfway through the cooking time instead of at the beginning.

For very soft, stew-style carrots, cook them with the beef from the start.

9. Thicken the Gravy

About 20 minutes before serving, mix the cornstarch and cold water in a small bowl.

Whisk until completely smooth.

Stir the slurry into the slow cooker.

Cover and cook on HIGH for another 10 to 15 minutes, or until the gravy thickens.

Taste and adjust with additional salt or black pepper if necessary.

10. Cook the Egg Noodles

While the gravy thickens, bring a large pot of salted water to a boil.

Add the egg noodles.

Cook according to the package directions until al dente, usually around 6 to 8 minutes.

Drain thoroughly.

Return the noodles to the warm pot and toss with butter.

Keeping the noodles separate prevents them from absorbing too much gravy and becoming overly soft.

11. Assemble the Dish

Divide the buttery egg noodles among serving bowls or plates.

Spoon the tender beef tips and carrots generously over the noodles.

Add plenty of the rich gravy.

Finish with fresh parsley and cracked black pepper.

Serve hot.

What to Serve With Beef Tips and Egg Noodles

This dish already contains beef, vegetables, and noodles, so it works well as a complete meal.

For extra vegetables, serve it with steamed green beans, broccoli, asparagus, peas, or roasted Brussels sprouts.

A fresh green salad with a light vinaigrette can add brightness and balance to the rich gravy.

Warm dinner rolls, garlic bread, or crusty sourdough are also excellent for soaking up any sauce remaining on the plate.

Tips for the Best Slow Cooker Beef Tips

Use chuck roast when possible. It becomes especially tender during long cooking.

Sear the beef first. Browning adds much deeper flavor than placing raw meat directly into the slow cooker.

Cut the beef evenly. Similar-sized pieces cook more consistently.

Do not overcrowd the skillet. Work in batches for better browning.

Cook on LOW when possible. Gentle cooking usually produces the most tender beef.

Keep noodles separate. Cooking egg noodles directly in the slow cooker for several hours can make them mushy.

Thicken the gravy near the end. This gives you better control over the final consistency.

Easy Recipe Variations

Beef Tips with Mushrooms

Add 8 to 12 ounces sliced cremini mushrooms.

For deeper flavor, sauté them separately and add them during the final hour.

Creamy Beef Tips

After thickening the gravy, stir in 1/2 cup heavy cream.

Cook for another 10 minutes for a richer sauce.

Garlic Butter Beef Tips

Add 2 tablespoons butter and two additional minced garlic cloves during the final 15 minutes.

Beef Tips with Peas

Stir in 1 cup frozen peas during the final 10 minutes.

They add sweetness and extra color without becoming overcooked.

Beef Tips with Potatoes

Replace the egg noodles with baby potatoes added directly to the slow cooker.

Cut larger potatoes into halves or quarters.

Can I Use Stew Meat?

Yes.

Pre-cut stew meat is convenient, but it may contain several different cuts of beef that cook at slightly different rates.

For more consistent tenderness, buying a chuck roast and cutting it yourself is usually the best option.

Can I Make This Recipe Ahead?

Absolutely.

The beef tips and gravy can be completely cooked a day ahead and refrigerated.

In fact, the flavor can become even richer overnight.

Cook the egg noodles shortly before serving for the best texture.

When reheating the beef, add a small splash of broth if the gravy has become too thick.

Storage and Reheating

Store leftover beef tips and carrots with the gravy in an airtight container in the refrigerator for up to 3 to 4 days.

Store the egg noodles separately whenever possible.

To reheat the beef, place it in a saucepan or skillet over medium-low heat and warm gently.

Add a little beef broth if needed.

Reheat the noodles with a small amount of butter or broth.

Individual portions can also be reheated in the microwave using short intervals.

Can You Freeze Slow Cooker Beef Tips?

Yes.

The beef, carrots, and gravy freeze well for up to 2 to 3 months.

For the best texture, freeze them without the egg noodles.

Cook fresh noodles after thawing and reheating the beef.

Thaw the frozen beef mixture overnight in the refrigerator before reheating.

Frequently Asked Questions

Why are my beef tips still tough?

They probably need more cooking time. Chuck roast becomes tender only after its connective tissue has had enough time to break down.

Can I add the noodles directly to the slow cooker?

You can add cooked noodles briefly at the end, but cooking them for hours is not recommended because they may become very soft.

Can I use frozen carrots?

Yes, but add them later because frozen carrots usually cook more quickly than fresh ones.

What can I use instead of egg noodles?

Mashed potatoes, rice, polenta, or pasta all work beautifully.

How can I make the gravy creamier?

Stir in heavy cream, sour cream, or a small amount of cream cheese near the end of cooking.

Final Thoughts

This Slow Cooker Beef Tips with Egg Noodles and Carrots is a classic comfort-food dinner built around tender beef, sweet carrots, buttery noodles, and a rich savory gravy.

A quick sear gives the beef deeper flavor before several hours of slow cooking transform it into tender, juicy bites. Cooking the noodles separately keeps their texture just right, while the thick beef gravy ties everything together.

Serve this dish with extra parsley and plenty of gravy over the egg noodles for a warm, satisfying family meal. Whether you make it for a busy weeknight, Sunday dinner, or meal prep, these slow cooker beef tips are an easy recipe worth adding to your regular dinner rotation. 🥩🥕🍜
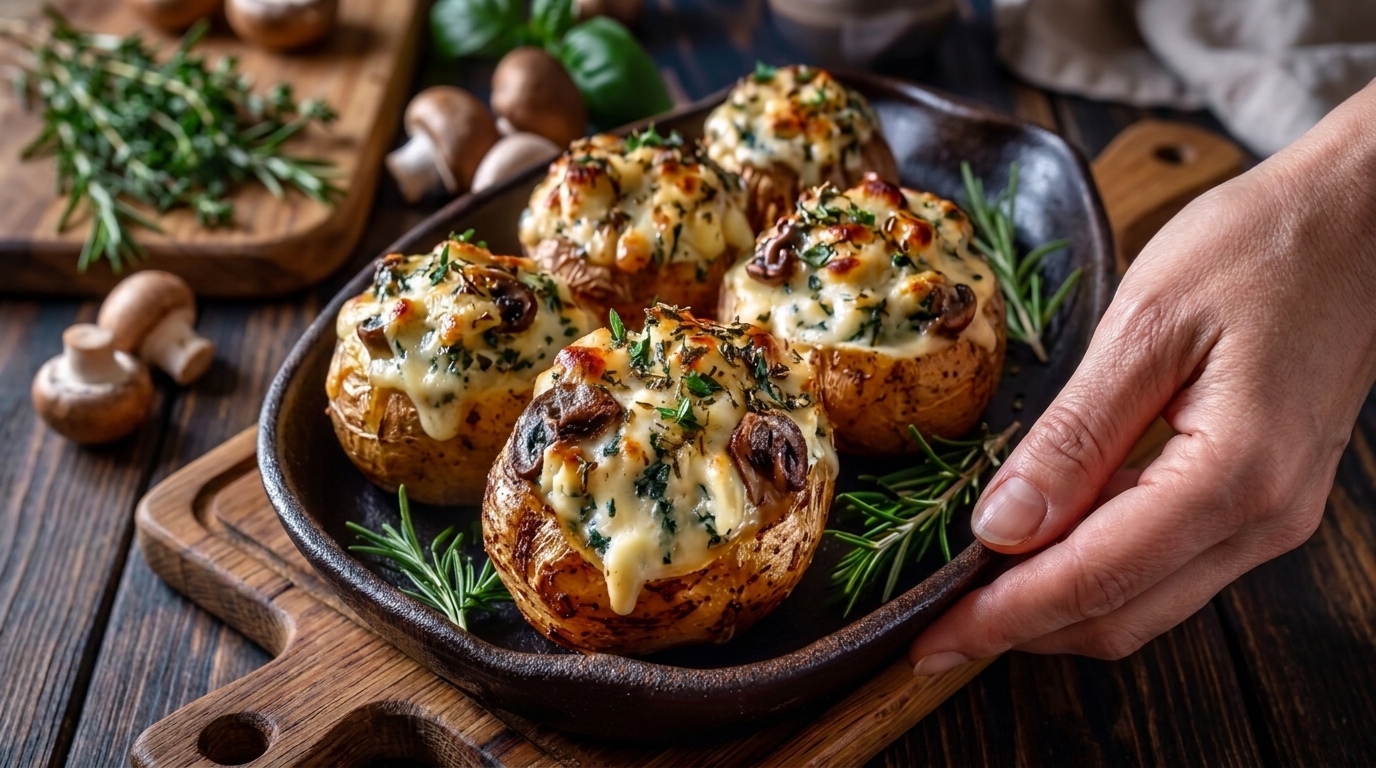
Easy Creamy Garlic Mushroom Stuffed Baked Potatoes – Rich, Cheesy, and Comforting 🥔🍄🧄

These Creamy Garlic Mushroom Stuffed Baked Potatoes are the ultimate comfort-food dinner, combining fluffy oven-baked potatoes with buttery mushrooms, fresh garlic, herbs, cream, and plenty of melted cheese. The crispy potato skins hold a rich, savory filling that is creamy on the inside and beautifully golden on top.

The mushrooms are sautéed until deeply browned before being mixed with garlic, cream, Parmesan, and the soft potato centers. This gives the filling an earthy, restaurant-style flavor while still using simple ingredients you can find at almost any grocery store.

These stuffed baked potatoes work beautifully as a vegetarian main dish, hearty side, cozy lunch, or party appetizer. Serve them with a fresh salad, roasted vegetables, steak, chicken, or simply enjoy them on their own for an easy and satisfying meal.

Why You’ll Love These Creamy Garlic Mushroom Stuffed Baked Potatoes

One of the best things about this recipe is the combination of textures. The potato skins become lightly crisp in the oven while the inside stays soft and fluffy. The creamy mushroom filling adds richness, and a layer of melted cheese on top creates an irresistible golden finish.

Mushrooms and garlic are naturally delicious together. Browning the mushrooms intensifies their savory flavor, while butter and cream make the filling smooth and luxurious.

This recipe is also easy to customize. You can add spinach, bacon, chicken, broccoli, caramelized onions, different cheeses, or fresh herbs depending on what you have available.

The potatoes can even be partially prepared ahead of time, making them useful for entertaining or busy family dinners.

Ingredients
For the Baked Potatoes
4 large russet potatoes
1 tablespoon olive oil
1 teaspoon kosher salt
For the Garlic Mushroom Filling
2 tablespoons unsalted butter
1 tablespoon olive oil
12 ounces cremini or button mushrooms, sliced
5 garlic cloves, finely minced
1 teaspoon dried thyme
1/2 teaspoon Italian seasoning
1/2 teaspoon salt
1/4 teaspoon freshly ground black pepper
1/2 cup heavy cream
1/3 cup sour cream
1/2 cup freshly grated Parmesan cheese
1 cup shredded mozzarella cheese, divided
2 tablespoons chopped fresh parsley
Optional Extras
1/2 cup baby spinach
1/4 teaspoon crushed red pepper flakes
1/4 cup chopped green onions
Extra Parmesan for topping
How to Make Creamy Garlic Mushroom Stuffed Baked Potatoes

  1. Preheat the Oven

Preheat your oven to 425°F.

Line a baking sheet with parchment paper or foil for easier cleanup.

A hot oven helps create crispy potato skins while keeping the inside fluffy.

  1. Prepare the Potatoes

Scrub the potatoes thoroughly under running water.

Dry them completely with a kitchen towel.

Pierce each potato several times with a fork. This allows steam to escape during baking.

Rub the potatoes with olive oil and sprinkle the skins with kosher salt.

The oil helps the skins become crisp, while the salt adds extra flavor.

  1. Bake the Potatoes

Place the potatoes directly on the prepared baking sheet.

Bake for approximately 50 to 65 minutes, depending on size.

The potatoes are ready when a knife or skewer slides easily through the center.

Their skins should feel dry and slightly crisp.

Remove them from the oven and allow them to cool for about 10 minutes, just until they are comfortable enough to handle.

  1. Brown the Mushrooms

While the potatoes bake, prepare the mushroom filling.

Heat the butter and olive oil in a large skillet over medium-high heat.

Add the sliced mushrooms in a fairly even layer.

Allow them to cook for about 2 to 3 minutes without stirring. This gives them time to develop golden-brown color.

Stir and continue cooking for another 4 to 5 minutes until the mushrooms are tender and most of their moisture has evaporated.

Avoid overcrowding the skillet because mushrooms release water and can steam instead of brown.

  1. Add the Garlic and Herbs

Reduce the heat to medium.

Add the minced garlic, thyme, Italian seasoning, salt, black pepper, and optional red pepper flakes.

Cook for approximately 30 to 45 seconds, stirring constantly.

The garlic should become fragrant but should not burn.

  1. Make the Creamy Mushroom Sauce

Pour the heavy cream into the skillet.

Reduce the heat to medium-low and allow it to simmer gently for about 2 to 3 minutes.

Stir in the Parmesan cheese.

Continue stirring until the cheese melts and the sauce thickens slightly.

Remove the skillet from the heat.

If using spinach, stir it in now and let the residual heat wilt the leaves.

  1. Cut the Potatoes

Once the baked potatoes are cool enough to handle, slice each one lengthwise.

You can either cut them completely in half or simply split the tops open.

For a more traditional stuffed-potato presentation, cut them in half lengthwise.

  1. Scoop Out the Potato Centers

Using a spoon, carefully scoop out most of the fluffy potato flesh.

Leave approximately 1/4 inch of potato inside the skins so they remain sturdy enough to hold the filling.

Transfer the scooped potato to a large mixing bowl.

Be careful not to tear the skins.

  1. Make the Creamy Potato Filling

Mash the potato centers gently with a fork or potato masher.

Add the sour cream, half of the mozzarella, and approximately three-quarters of the creamy mushroom mixture.

Stir gently until combined.

Do not overmix, as potatoes can become gluey when worked too aggressively.

Taste and adjust with additional salt and black pepper if needed.

  1. Fill the Potato Skins

Place the empty potato shells back onto the baking sheet.

Spoon the creamy mushroom and potato mixture generously into each shell.

Mound the filling slightly above the tops.

Spoon some of the remaining mushrooms over each potato so the mushroom pieces remain visible.

  1. Add the Cheese Topping

Sprinkle the remaining mozzarella cheese over the stuffed potatoes.

Add extra Parmesan if desired.

The cheese will melt and create a rich, lightly golden surface.

  1. Bake Again

Reduce the oven temperature to 400°F.

Return the stuffed potatoes to the oven.

Bake for approximately 12 to 15 minutes, or until the filling is hot and the cheese is completely melted.

For a more golden top, switch the oven to broil for the final 1 to 2 minutes.

Watch carefully because cheese can brown quickly.

  1. Garnish and Serve

Remove the potatoes from the oven and allow them to rest for about 3 minutes.

Sprinkle with chopped parsley, green onions, cracked black pepper, and extra Parmesan if desired.

Serve immediately while the filling is creamy and the skins remain crisp.

What to Serve With Creamy Garlic Mushroom Stuffed Potatoes

These stuffed potatoes are filling enough to serve as a vegetarian main dish.

Pair them with a fresh green salad dressed with lemon vinaigrette for a balanced meal.

They also work beautifully alongside roasted broccoli, asparagus, green beans, Brussels sprouts, or glazed carrots.

If you are serving them as a side dish, pair them with garlic herb chicken, roast beef, steak, pork chops, or baked salmon.

For an especially comforting dinner, serve them with a rich beef or mushroom gravy.

Tips for the Best Stuffed Baked Potatoes

Use russet potatoes. Their high starch content creates a light, fluffy interior and crispy skin.

Do not wrap potatoes in foil. Foil traps steam and softens the skins.

Brown mushrooms properly. Give them enough space and avoid stirring constantly.

Remove excess mushroom moisture. Watery mushrooms can make the filling loose.

Do not overmix the potatoes. Gentle mixing keeps the filling fluffy.

Use freshly grated Parmesan. It melts more smoothly and provides better flavor.

Broil briefly for color. A short broil gives the cheese a beautiful golden finish.

Easy Recipe Variations
Creamy Garlic Spinach Mushroom Potatoes

Add 2 cups fresh baby spinach to the mushroom mixture.

Let it wilt before adding the cream sauce to the potatoes.

Cheesy Mushroom Stuffed Potatoes

Add shredded cheddar, Gruyère, or Monterey Jack along with the mozzarella.

Bacon Mushroom Stuffed Potatoes

Add 6 slices of cooked, crumbled bacon to the filling for extra smoky flavor.

Chicken and Mushroom Stuffed Potatoes

Add 1 to 1 1/2 cups diced cooked chicken.

This turns the potatoes into an even heartier dinner.

Caramelized Onion Mushroom Potatoes

Cook one sliced onion slowly until golden and sweet, then mix it with the mushrooms.

Spicy Garlic Mushroom Potatoes

Increase the crushed red pepper flakes or add a little cayenne pepper.

Can I Make These Ahead of Time?

Yes.

Bake the potatoes, prepare the mushroom filling, and stuff the skins.

Cover and refrigerate for up to 24 hours before the final bake.

When ready to serve, place them in a 375°F to 400°F oven until thoroughly heated and the cheese is melted.

You may need to add about 5 extra minutes when baking directly from the refrigerator.

Storage and Reheating

Store leftover stuffed potatoes in an airtight container in the refrigerator for up to 3 to 4 days.

For the best texture, reheat them in the oven at 350°F for approximately 15 to 20 minutes.

An air fryer also works well and can help restore the crisp potato skin.

Microwave reheating is faster, but the skin will become softer.

Frequently Asked Questions
What mushrooms work best?

Cremini mushrooms provide excellent savory flavor, but white button mushrooms, baby bellas, shiitakes, or a combination also work well.

Can I use milk instead of heavy cream?

Yes, but the sauce will be thinner. Half-and-half is a better lighter substitute.

Why is my filling watery?

The mushrooms may not have cooked long enough to release their moisture, or too much cream may have been added.

Can I use another potato?

Yukon Gold potatoes can work, but russets give the fluffiest interior and crispiest skin.

Can these be made without cheese?

Yes. Leave out the Parmesan and mozzarella and add extra sour cream, herbs, or a dairy-free alternative if preferred.

Final Thoughts

These Creamy Garlic Mushroom Stuffed Baked Potatoes combine crispy potato skins with fluffy potato, buttery mushrooms, fresh garlic, herbs, cream, Parmesan, and melted mozzarella for a deeply comforting meal.

The mushrooms provide rich savory flavor while the creamy potato filling keeps every bite soft and satisfying. Baking the potatoes a second time gives the cheese a beautiful melted finish while helping the skins stay sturdy and delicious.

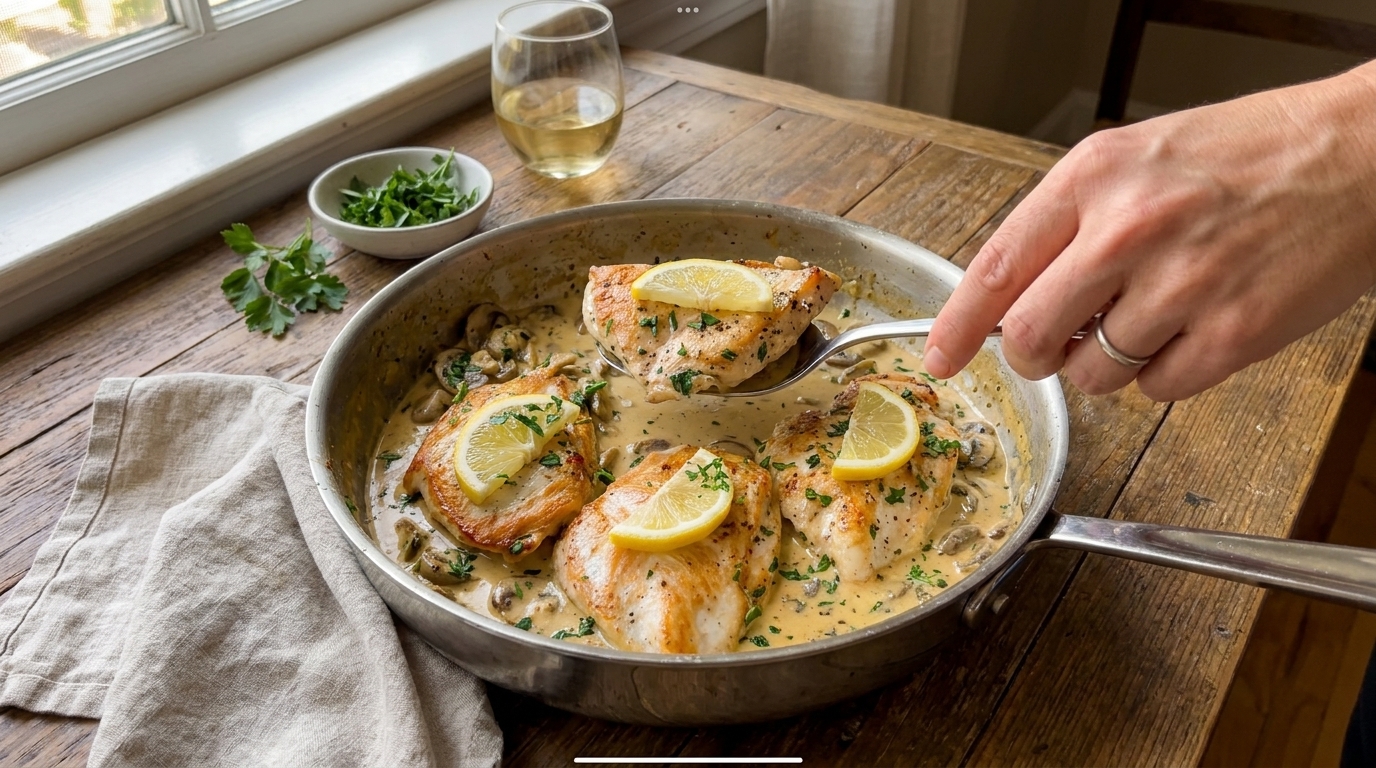
Easy Creamy Lemon Chicken Recipe – Juicy, Rich, and Bright with Fresh Lemon

Creamy Lemon Chicken is a comforting skillet dinner made with juicy chicken breasts simmered in a silky garlic, Parmesan, and lemon cream sauce. It has the richness of a classic creamy chicken dish, but fresh lemon juice and zest give the sauce a bright, fresh flavor that keeps every bite balanced.

This recipe is especially useful when you want something that feels restaurant-worthy without complicated ingredients or a long cooking process. The chicken is seasoned and seared until golden, then the same skillet is used to build the sauce so all of those flavorful browned bits become part of the finished dish.

Serve this creamy lemon chicken over pasta, mashed potatoes, rice, or alongside roasted vegetables. It works beautifully for weeknight dinners, date nights, family meals, or whenever you are craving something warm, creamy, and satisfying.

Why You’ll Love This Creamy Lemon Chicken

The combination of cream, garlic, Parmesan, and lemon gives this recipe a rich but balanced flavor. The cream makes the sauce smooth and luxurious, while the lemon adds enough acidity to keep it from tasting too heavy.

Another advantage is that everything comes together in one skillet. The chicken is browned first, then removed while the sauce cooks. When the chicken returns to the pan, it gently finishes cooking while absorbing the flavors of the lemon garlic sauce.

This recipe is also very easy to customize. Spinach, mushrooms, sun-dried tomatoes, asparagus, or extra herbs can all be added depending on what you have available.

Ingredients

For the Chicken

  • 4 boneless, skinless chicken breasts
  • 1 tablespoon olive oil
  • 1 tablespoon unsalted butter
  • 1 teaspoon salt
  • ½ teaspoon black pepper
  • 1 teaspoon garlic powder
  • ½ teaspoon onion powder
  • ½ teaspoon smoked paprika
  • ½ teaspoon Italian seasoning

For the Creamy Lemon Garlic Sauce

  • 2 tablespoons unsalted butter
  • 5 garlic cloves, finely minced
  • ½ cup chicken broth
  • 1 cup heavy cream
  • ½ cup freshly grated Parmesan cheese
  • 1 teaspoon Dijon mustard
  • 1 teaspoon Italian seasoning
  • Zest of 1 lemon
  • 2 tablespoons fresh lemon juice
  • ¼ teaspoon red pepper flakes, optional
  • Salt and black pepper, to taste
  • 2 tablespoons chopped fresh parsley
  • Lemon slices, for serving

How to Make Creamy Lemon Chicken

1. Prepare the Chicken

Pat the chicken breasts dry thoroughly with paper towels.

If the chicken breasts are very thick, slice them horizontally into thinner cutlets or gently pound them to an even thickness of about ¾ inch.

This helps the chicken cook evenly and prevents the outside from becoming dry before the center is done.

Season both sides with salt, black pepper, garlic powder, onion powder, smoked paprika, and Italian seasoning.

2. Heat the Skillet

Place a large skillet over medium-high heat.

Add the olive oil and 1 tablespoon butter.

Allow the skillet to heat until the butter is melted and lightly sizzling.

A properly heated skillet helps the chicken develop a beautiful golden crust.

3. Sear the Chicken

Add the chicken breasts in a single layer.

Cook for approximately 4–5 minutes on the first side without moving them.

Flip and cook for another 3–5 minutes, depending on thickness.

The chicken does not need to be completely cooked at this stage because it will finish cooking in the sauce.

Transfer the chicken to a clean plate and set aside.

4. Cook the Garlic

Reduce the skillet heat to medium.

Add 2 tablespoons butter.

Once melted, stir in the minced garlic.

Cook for approximately 30 seconds, stirring constantly.

The garlic should become fragrant but should not brown deeply.

5. Deglaze the Skillet

Pour in the chicken broth.

Use a wooden spoon to scrape up the browned bits from the bottom of the skillet.

Let the broth simmer for about 2 minutes, reducing slightly.

Those browned bits contain concentrated chicken and seasoning flavors and help make the sauce much richer.

6. Make the Creamy Sauce

Reduce the heat to medium-low.

Pour in the heavy cream.

Add Dijon mustard, Italian seasoning, lemon zest, and red pepper flakes if using.

Stir until everything is well combined.

Allow the sauce to simmer gently for approximately 3–4 minutes.

Do not allow the cream to boil rapidly.

7. Add the Parmesan

Reduce the heat to low.

Gradually add the freshly grated Parmesan while stirring continuously.

Continue stirring until the cheese has completely melted and the sauce becomes smooth and slightly thickened.

If the sauce becomes too thick, add a small splash of chicken broth.

If it seems too thin, allow it to simmer gently for another minute or two.

8. Add the Lemon Juice

Stir in the fresh lemon juice.

Taste the sauce and adjust the salt and black pepper.

For an even stronger lemon flavor, add additional zest instead of adding too much lemon juice. Extra zest increases the citrus flavor without making the sauce overly acidic.

9. Return the Chicken to the Skillet

Place the browned chicken breasts back into the sauce.

Spoon some of the creamy lemon sauce over the top.

Reduce the heat to low and simmer gently for approximately 5–8 minutes, depending on the thickness of the chicken.

The chicken is fully cooked when the thickest part reaches an internal temperature of 165°F (74°C).

Avoid overcooking because chicken breast can dry out quickly.

10. Garnish and Serve

Remove the skillet from the heat.

Sprinkle with chopped fresh parsley.

Add several thin lemon slices for extra color and fresh citrus aroma.

Spoon plenty of creamy lemon garlic sauce over each chicken breast and serve immediately.

What to Serve With Creamy Lemon Chicken

Pasta is one of the best pairings for creamy lemon chicken because the noodles absorb the sauce beautifully.

Try serving it with:

  • Fettuccine
  • Linguine
  • Spaghetti
  • Penne
  • Buttered egg noodles

Creamy mashed potatoes are another excellent option. Spoon the chicken directly over the potatoes and add plenty of sauce.

For a lighter meal, serve it with:

  • Roasted asparagus
  • Steamed broccoli
  • Garlic green beans
  • Roasted zucchini
  • Sautéed spinach
  • Fresh garden salad
  • Cauliflower rice

Garlic bread or crusty artisan bread is also perfect for soaking up any sauce left on the plate.

Tips for the Best Creamy Lemon Chicken

Use evenly sized chicken pieces. Chicken of similar thickness cooks more consistently.

Pat the chicken dry. This helps create a proper golden sear.

Do not overcrowd the skillet. If necessary, cook the chicken in batches.

Use freshly grated Parmesan. It melts more smoothly into creamy sauces than most pre-shredded cheese.

Keep the cream at a gentle simmer. Rapid boiling can cause the sauce to separate.

Use fresh lemon juice and zest. Fresh citrus provides much better flavor than bottled lemon juice.

Do not overcook the chicken. Use a meat thermometer whenever possible.

Easy Recipe Variations

Creamy Lemon Chicken with Spinach

Add 2–3 cups fresh baby spinach to the sauce before returning the chicken.

Cook for 1–2 minutes until wilted.

Creamy Lemon Mushroom Chicken

Cook 8 ounces sliced mushrooms after removing the chicken from the skillet.

Let the mushrooms brown before adding the garlic and continuing with the sauce.

Creamy Lemon Chicken Pasta

Slice the cooked chicken and toss it with the lemon cream sauce and 8–10 ounces cooked pasta.

Add a splash of pasta water if needed to loosen the sauce.

Creamy Lemon Garlic Chicken

Increase the garlic to 6–7 cloves for a stronger garlic flavor.

Spicy Creamy Lemon Chicken

Add ½ teaspoon red pepper flakes or a small pinch of cayenne pepper.

Creamy Lemon Chicken with Asparagus

Cut 1 bunch asparagus into bite-sized pieces.

Sauté it for several minutes after browning the chicken, then continue with the sauce.

How to Keep Chicken Breast Juicy

Chicken breast is naturally lean, so timing is important.

Using thinner, evenly sized pieces helps the chicken cook quickly without drying out.

Searing creates flavor on the outside, while finishing the chicken gently in the sauce helps retain moisture.

For the most reliable results, check the thickest part with an instant-read thermometer and remove the skillet from the heat once the chicken reaches 165°F.

Storage and Reheating

Allow leftovers to cool before transferring them to an airtight container.

Store in the refrigerator for up to 3–4 days.

For the best results, reheat gently in a skillet over low heat.

Add a small splash of chicken broth, milk, or cream if the sauce has thickened in the refrigerator.

Cover and warm until the chicken is heated through.

Avoid boiling the sauce or reheating over high heat because this can dry out the chicken and cause the cream sauce to separate.

Make-Ahead Tips

You can prepare several parts of the recipe ahead of time.

Season the chicken, mince the garlic, grate the Parmesan, zest the lemon, and measure the remaining ingredients earlier in the day.

Keep the chicken refrigerated until cooking.

For the best texture, prepare the sauce and cook the chicken shortly before serving.

Final Thoughts

This Easy Creamy Lemon Chicken combines juicy golden chicken with a smooth garlic Parmesan cream sauce and the fresh brightness of lemon.

It is rich enough to feel indulgent but balanced enough for an everyday dinner. Best of all, it comes together in one skillet with ingredients that are easy to find.

Serve it over pasta, mashed potatoes, or rice, add a simple vegetable on the side, and spoon plenty of creamy lemon garlic sauce over the chicken for a comforting dinner that is full of fresh, savory flavor.

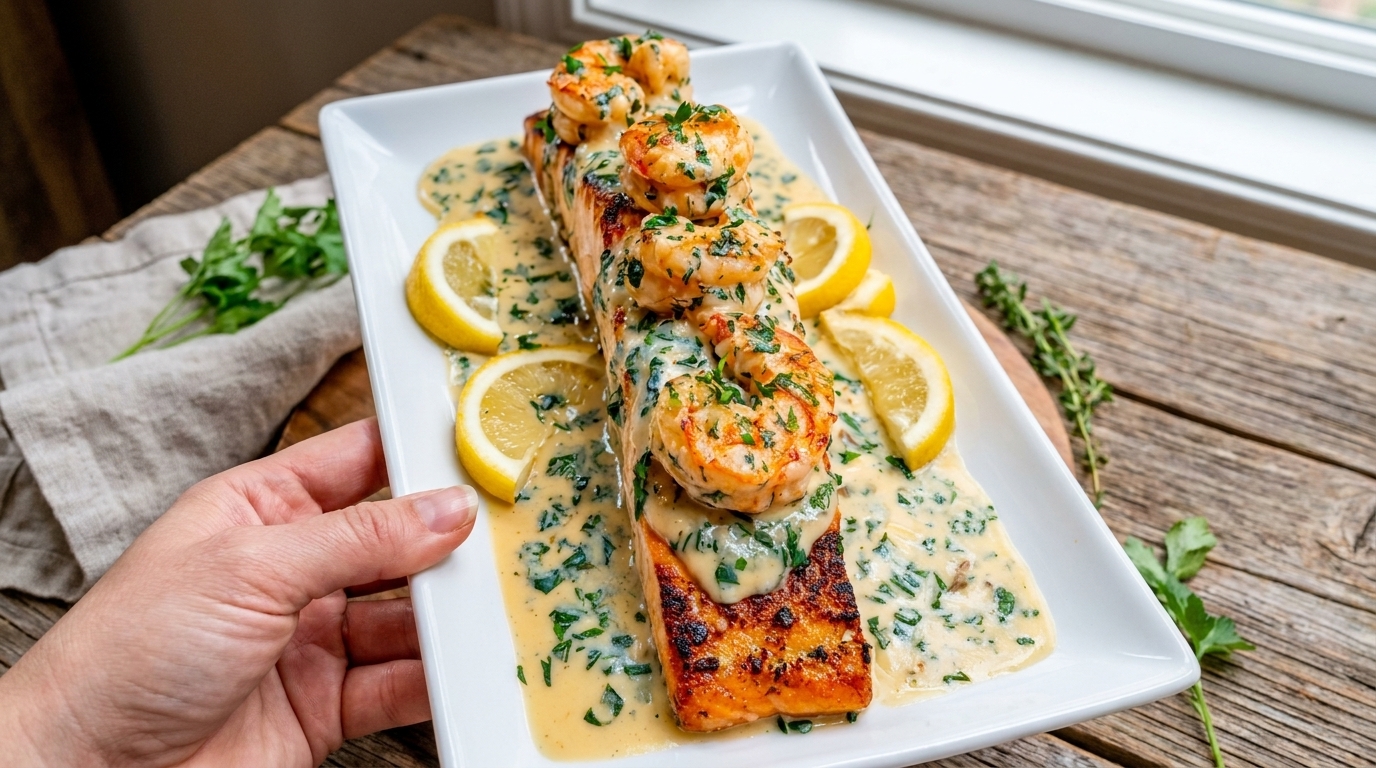
Easy Creamy Lemon Garlic Salmon & Shrimp Recipe – Rich, Zesty, and Restaurant-Worthy

Creamy Lemon Garlic Salmon & Shrimp is a rich and elegant seafood dinner that brings together tender salmon, juicy shrimp, fresh lemon, and a silky garlic cream sauce. The combination feels luxurious, but the recipe is simple enough for a weeknight meal and impressive enough for date night, holidays, or special family dinners.

The salmon is seared until golden on the outside while staying moist and flaky inside. The shrimp cook quickly in the same skillet, picking up all of the buttery garlic flavor before everything is finished in a creamy lemon-Parmesan sauce.

What makes this dish especially satisfying is the balance of flavors. Heavy cream and Parmesan create richness, garlic adds savory depth, and fresh lemon keeps the sauce bright and prevents it from feeling too heavy. Serve it with pasta, rice, mashed potatoes, or roasted vegetables to make the most of every spoonful of sauce.

Why You’ll Love This Creamy Lemon Garlic Salmon & Shrimp

This recipe gives you two favorite seafood proteins in one dish. Salmon provides a buttery, flaky texture while shrimp add a juicy, tender bite, making the meal feel extra special without requiring complicated cooking techniques.

The entire dish is prepared in one large skillet. The salmon and shrimp are cooked first, then the sauce is built directly in the same pan so all of the flavorful browned bits become part of the finished sauce.

It is also easy to customize. You can add spinach, mushrooms, sun-dried tomatoes, asparagus, or extra herbs depending on what you have available.

Ingredients

For the Salmon

  • 4 salmon fillets, about 5–6 ounces each
  • 1 tablespoon olive oil
  • 1 tablespoon unsalted butter
  • ¾ teaspoon salt
  • ½ teaspoon black pepper
  • ½ teaspoon garlic powder
  • ½ teaspoon smoked paprika

For the Shrimp

  • 1 pound large shrimp, peeled and deveined
  • ½ teaspoon salt
  • ¼ teaspoon black pepper
  • ½ teaspoon garlic powder
  • ½ teaspoon smoked paprika
  • 1 tablespoon olive oil

For the Creamy Lemon Garlic Sauce

  • 2 tablespoons unsalted butter
  • 5 garlic cloves, finely minced
  • ½ cup chicken or seafood broth
  • 1 cup heavy cream
  • ½ cup freshly grated Parmesan cheese
  • 1 teaspoon Dijon mustard
  • 1 teaspoon Italian seasoning
  • Zest of 1 lemon
  • 2 tablespoons fresh lemon juice
  • ¼ teaspoon red pepper flakes, optional
  • Salt and black pepper, to taste
  • 2 tablespoons chopped fresh parsley
  • 1 tablespoon chopped fresh dill, optional

How to Make Creamy Lemon Garlic Salmon & Shrimp

1. Prepare the Salmon

Remove the salmon from the refrigerator about 15–20 minutes before cooking.

Pat each fillet dry thoroughly with paper towels. Removing excess moisture is important because it helps the salmon develop a beautiful golden crust instead of steaming.

Season both sides with salt, black pepper, garlic powder, and smoked paprika.

If your salmon has skin, leave it attached during cooking. It helps protect the fish and can become deliciously crisp.

2. Season the Shrimp

Pat the shrimp dry with paper towels.

Place them in a bowl and season with salt, black pepper, garlic powder, and smoked paprika.

Toss gently until evenly coated.

Keep the shrimp refrigerated until shortly before cooking.

3. Sear the Salmon

Heat a large skillet over medium-high heat.

Add the olive oil and butter.

Once the butter has melted and the skillet is hot, place the salmon in the pan.

If using skin-on salmon, place it skin-side down first.

Cook for approximately 4–5 minutes without moving the fillets.

Flip carefully and cook for another 2–4 minutes, depending on thickness.

The salmon should be golden outside and should flake easily when gently pressed with a fork.

For food safety, salmon can be cooked to an internal temperature of 145°F (63°C) at its thickest point.

Transfer the salmon to a plate and loosely cover while you prepare the rest of the dish.

4. Cook the Shrimp

Add 1 tablespoon olive oil to the same skillet if needed.

Place the seasoned shrimp in a single layer.

Cook for approximately 1–2 minutes per side.

The shrimp are ready when they turn pink and opaque and curl into a loose C-shape.

Avoid overcooking them because they will be warmed again in the sauce.

Transfer the shrimp to the plate with the salmon.

5. Sauté the Garlic

Reduce the heat to medium.

Add 2 tablespoons butter to the skillet.

Once melted, stir in the minced garlic.

Cook for approximately 30 seconds, stirring continuously.

The garlic should become fragrant but should not brown deeply.

6. Deglaze the Skillet

Pour in the chicken or seafood broth.

Use a wooden spoon to scrape up the browned bits from the bottom of the skillet.

Allow the broth to simmer for approximately 2 minutes, reducing slightly.

Those browned bits contain concentrated salmon, shrimp, butter, and seasoning flavors that add depth to the sauce.

7. Make the Creamy Lemon Sauce

Reduce the heat to medium-low.

Pour in the heavy cream.

Add Dijon mustard, Italian seasoning, lemon zest, and red pepper flakes if using.

Stir until combined.

Allow the sauce to simmer gently for 3–4 minutes.

Do not let the cream boil aggressively, as high heat can cause the sauce to separate.

8. Add the Parmesan

Turn the heat to low.

Gradually stir in the freshly grated Parmesan.

Continue stirring until the cheese completely melts and the sauce becomes smooth and slightly thickened.

If the sauce seems too thick, add a splash of broth.

If it seems too thin, continue simmering gently for another minute or two.

9. Add the Lemon Juice

Remove the skillet briefly from direct high heat and stir in the fresh lemon juice.

Adding the lemon after the sauce has thickened helps preserve its bright flavor.

Taste and adjust the salt and black pepper.

For a stronger lemon flavor, add a little extra zest rather than too much juice, which could make the sauce overly acidic.

10. Return the Salmon and Shrimp

Place the salmon fillets back into the skillet.

Arrange the shrimp around the salmon.

Spoon the creamy lemon garlic sauce over everything.

Simmer very gently for approximately 1–2 minutes, just until the seafood is warmed through.

Avoid prolonged cooking because both salmon and shrimp can become dry if overheated.

11. Garnish and Serve

Remove the skillet from the heat.

Sprinkle generously with chopped parsley and dill if using.

Add thin lemon slices or wedges around the skillet for serving.

Spoon extra creamy sauce over the salmon and shrimp and serve immediately.

What to Serve With Creamy Lemon Garlic Salmon & Shrimp

Pasta is one of the best pairings for this dish because the noodles absorb the creamy lemon garlic sauce beautifully. Fettuccine, linguine, spaghetti, or angel hair all work well.

Creamy mashed potatoes are another excellent choice. Spoon the salmon, shrimp, and plenty of sauce directly over the potatoes for an especially comforting dinner.

You can also serve this seafood skillet with:

  • Garlic butter rice
  • Parmesan risotto
  • Roasted potatoes
  • Steamed asparagus
  • Roasted broccoli
  • Garlic green beans
  • Sautéed spinach
  • Crusty artisan bread
  • Fresh garden salad

For a lighter meal, serve the seafood with roasted vegetables and a simple salad dressed with lemon vinaigrette.

Tips for the Best Creamy Lemon Garlic Salmon & Shrimp

Pat the seafood dry. Excess moisture prevents proper browning.

Do not overcrowd the skillet. Cook the seafood in batches if your pan is not large enough.

Use freshly grated Parmesan. It melts more smoothly into the sauce than most pre-shredded cheese.

Cook the shrimp briefly. Shrimp need only a few minutes and become rubbery when overcooked.

Do not boil the cream sauce aggressively. Keep it at a gentle simmer for the smoothest texture.

Use fresh lemon. Bottled lemon juice does not provide the same bright flavor as freshly squeezed juice and zest.

Add lemon juice near the end. This keeps the flavor fresh while reducing the chance of the cream separating.

Easy Recipe Variations

Creamy Lemon Garlic Salmon & Shrimp with Spinach

Add 2–3 cups baby spinach to the sauce before returning the seafood.

Cook for about 1 minute until wilted.

Creamy Tuscan Salmon & Shrimp

Add:

  • ½ cup chopped sun-dried tomatoes
  • 2 cups baby spinach
  • ½ teaspoon extra Italian seasoning

This creates a rich Tuscan-style version.

Creamy Garlic Mushroom Salmon & Shrimp

Cook 8 ounces sliced mushrooms after removing the seafood from the skillet.

Allow them to brown before adding the garlic and continuing with the sauce.

Spicy Creamy Salmon & Shrimp

Increase the red pepper flakes to ½ teaspoon or add a pinch of cayenne pepper.

Extra Lemon Version

Add the zest of a second lemon for a stronger citrus flavor without making the cream sauce too acidic.

Creamy Cajun Salmon & Shrimp

Replace the smoked paprika and Italian seasoning with approximately 1½ teaspoons Cajun seasoning.

Reduce the added salt if your Cajun seasoning already contains salt.

How to Know When Salmon Is Done

Perfectly cooked salmon should be moist and easily flake when pressed gently with a fork.

The center should no longer look raw or translucent.

Using an instant-read thermometer is the most reliable method. For food safety, cook fish to 145°F (63°C) at the thickest portion.

Remember that salmon continues cooking slightly from residual heat after it leaves the skillet, so avoid leaving it over high heat longer than necessary.

How to Avoid Rubbery Shrimp

Shrimp cook much faster than salmon.

Large shrimp generally need only 1–2 minutes per side in a hot skillet.

Look for shrimp that are pink, opaque, and curved into a relaxed C shape. Shrimp that curl very tightly into an O shape are often overcooked.

Removing the shrimp before preparing the sauce helps prevent them from cooking continuously.

Storage and Reheating

Store leftover salmon, shrimp, and sauce in an airtight container in the refrigerator for up to 2–3 days.

Seafood is best reheated gently.

Place leftovers in a skillet over low heat and add a tablespoon or two of cream, milk, or broth to loosen the sauce.

Cover and warm gently until heated through.

Avoid boiling the sauce or cooking over high heat because this can dry out the seafood and cause the cream sauce to separate.

Make-Ahead Tips

You can prepare several components ahead of time.

Clean and season the shrimp, season the salmon, mince the garlic, grate the Parmesan, and measure all of the sauce ingredients earlier in the day.

Keep the seafood refrigerated until cooking.

For the best texture, cook the salmon and shrimp immediately before serving rather than preparing the complete dish far in advance.

Final Thoughts

This Easy Creamy Lemon Garlic Salmon & Shrimp brings together flaky salmon, juicy shrimp, buttery garlic, fresh lemon, Parmesan, and a luxurious cream sauce in one impressive skillet dinner.

The rich sauce makes the dish feel indulgent, while the fresh citrus keeps every bite balanced and flavorful. Best of all, the whole recipe comes together quickly enough for a weeknight while still looking elegant enough for a special dinner.

Serve it over pasta, mashed potatoes, or rice with roasted vegetables and plenty of creamy lemon garlic sauce spooned over the top. 🍋🐟🍤

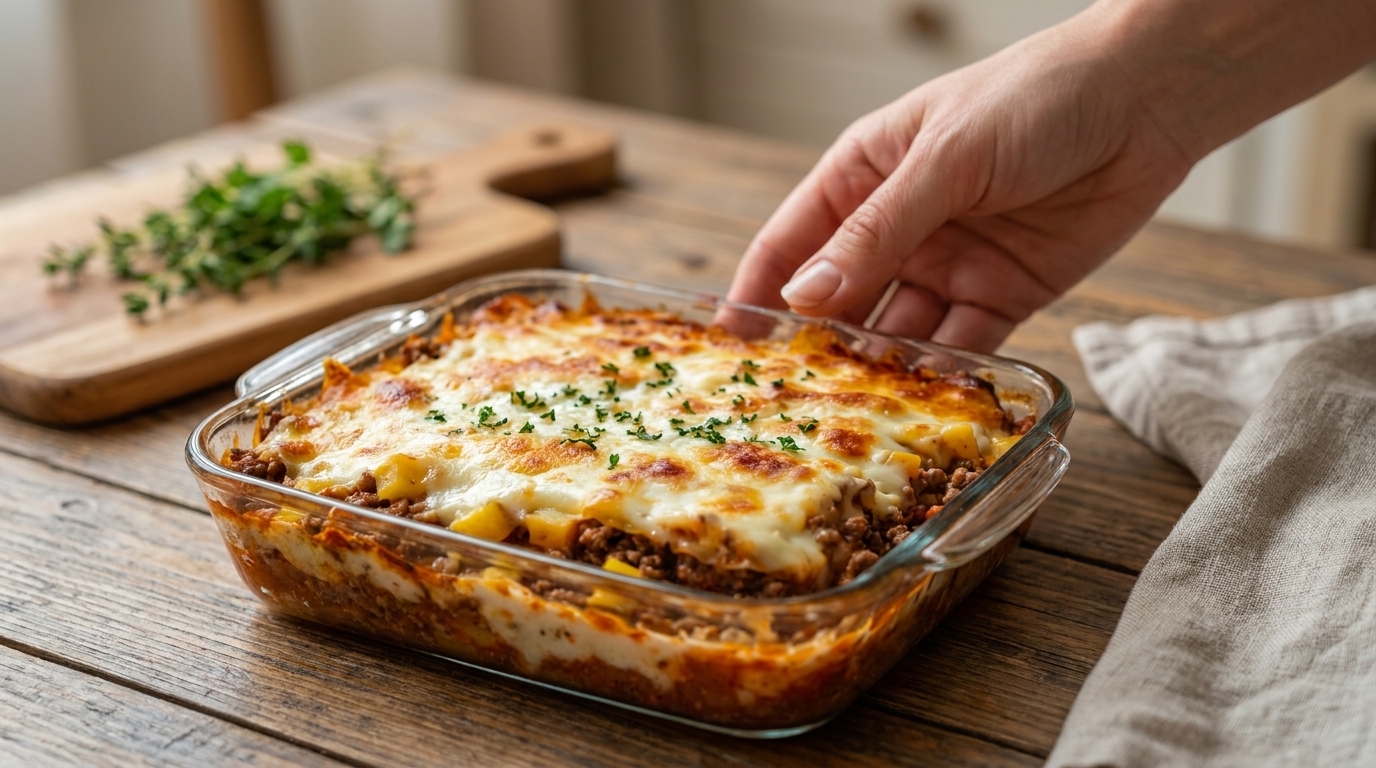
Easy Cheesy Beef & Tomato Casserole Recipe – Hearty, Saucy, and Loaded with Melted Cheese

Cheesy Beef & Tomato Casserole is the kind of comforting family dinner that combines simple ingredients with big, satisfying flavor. Savory ground beef is cooked with onions, garlic, tomatoes, and Italian-style seasonings, then layered with tender pasta and plenty of melted cheese for a bubbling, golden casserole that feels perfect for busy weeknights.

The rich tomato sauce keeps the casserole moist and flavorful, while the beef adds heartiness and the cheese brings everything together. Every serving has a delicious mix of meaty sauce, tender pasta, and gooey mozzarella with a lightly browned cheesy top.

This is also a practical make-ahead meal. You can assemble the casserole earlier in the day, refrigerate it, and bake it when dinner time arrives. Leftovers reheat beautifully, making it an excellent option for meal prep or feeding a hungry family.

Why You’ll Love This Cheesy Beef & Tomato Casserole

One of the best things about this recipe is how easy it is to customize. You can use whatever short pasta you have on hand, adjust the amount of cheese, add vegetables, or make the tomato sauce spicier depending on your family’s preferences.

The casserole also uses affordable everyday ingredients such as ground beef, canned tomatoes, pasta, and cheese. Despite its simplicity, it comes out of the oven looking and tasting like a hearty baked pasta dish you might order at a casual Italian restaurant.

It is filling enough to serve on its own, but adding garlic bread and a simple salad turns it into a complete dinner.

Ingredients

For the Beef and Tomato Sauce

  • 1½ pounds ground beef
  • 1 tablespoon olive oil
  • 1 medium yellow onion, diced
  • 4 garlic cloves, minced
  • 1 tablespoon tomato paste
  • 1 can (28 ounces) crushed tomatoes
  • 1 can (14.5 ounces) diced tomatoes, drained
  • 1 teaspoon Worcestershire sauce
  • 1½ teaspoons Italian seasoning
  • 1 teaspoon dried oregano
  • ½ teaspoon smoked paprika
  • ½ teaspoon onion powder
  • ½ teaspoon salt
  • ½ teaspoon black pepper
  • ¼ teaspoon red pepper flakes, optional
  • 1 teaspoon sugar, optional, if the tomatoes taste acidic

For the Casserole

  • 12 ounces penne, rigatoni, rotini, or elbow pasta
  • 1½ cups shredded mozzarella cheese
  • 1 cup shredded cheddar cheese
  • ½ cup freshly grated Parmesan cheese
  • ½ cup sour cream or ricotta cheese, optional for extra creaminess
  • 2 tablespoons chopped fresh parsley or basil

How to Make Cheesy Beef & Tomato Casserole

1. Preheat the Oven

Preheat your oven to 375°F (190°C).

Lightly grease a 9×13-inch baking dish with cooking spray or a thin layer of olive oil.

Set it aside while you prepare the filling.

2. Cook the Pasta

Bring a large pot of salted water to a boil.

Add the pasta and cook it approximately 2 minutes less than the package instructions recommend.

The pasta should be slightly firmer than al dente because it will continue cooking in the oven.

Drain thoroughly and set aside.

Avoid overcooking the pasta at this stage, or it may become too soft once the casserole is baked.

3. Brown the Ground Beef

Heat the olive oil in a large skillet over medium-high heat.

Add the ground beef and break it apart with a wooden spoon or spatula.

Cook for approximately 5–7 minutes, stirring occasionally, until the beef is browned and no pink remains.

If there is a large amount of excess grease in the skillet, carefully drain most of it while leaving a small amount behind for flavor.

4. Add the Onion and Garlic

Add the diced onion to the browned beef.

Cook for 3–4 minutes until softened.

Stir in the minced garlic and cook for approximately 30 seconds, just until fragrant.

Avoid cooking the garlic for too long because burnt garlic can make the sauce bitter.

5. Build the Tomato Sauce

Add the tomato paste and stir it into the beef mixture.

Cook for about 1 minute. Briefly cooking the tomato paste helps deepen its flavor.

Pour in the crushed tomatoes and diced tomatoes.

Add Worcestershire sauce, Italian seasoning, oregano, smoked paprika, onion powder, salt, black pepper, and red pepper flakes if using.

Stir everything together.

Bring the mixture to a gentle simmer.

6. Simmer the Beef Sauce

Reduce the heat to medium-low and simmer the sauce uncovered for approximately 10–15 minutes.

Stir occasionally.

The sauce should thicken slightly while still remaining loose enough to coat the pasta.

Taste the sauce before assembling the casserole. If the tomatoes are particularly acidic, stir in about 1 teaspoon sugar.

Adjust the salt and pepper as needed.

7. Combine the Pasta and Sauce

Add the cooked pasta directly to the skillet with the beef and tomato mixture.

Stir until every piece of pasta is evenly coated.

For an extra creamy casserole, stir in the sour cream or ricotta cheese.

Add approximately ½ cup mozzarella and ½ cup cheddar to the mixture and stir gently.

The cheese will begin melting into the warm sauce.

8. Assemble the Casserole

Transfer half of the beef and pasta mixture into the prepared baking dish.

Sprinkle with a small amount of mozzarella, cheddar, and Parmesan.

Add the remaining beef mixture.

Spread it evenly across the baking dish.

Top generously with the remaining mozzarella, cheddar, and Parmesan.

Make sure the cheese reaches close to the edges so every serving gets plenty of melted topping.

9. Bake Until Golden and Bubbling

Cover loosely with aluminum foil.

Bake at 375°F for 20 minutes.

Remove the foil and continue baking for another 10–15 minutes, or until the sauce is bubbling around the edges and the cheese is completely melted.

For a more deeply golden cheese topping, broil the casserole for approximately 1–2 minutes at the end.

Watch it carefully because cheese can brown very quickly under the broiler.

10. Rest Before Serving

Remove the casserole from the oven and allow it to rest for approximately 5–10 minutes.

This short resting period helps the sauce settle and makes the casserole easier to portion.

Finish with chopped parsley or fresh basil.

Serve while hot and cheesy.

What to Serve With Cheesy Beef & Tomato Casserole

Garlic bread is one of the best sides for this casserole. The crispy bread is perfect for soaking up any tomato sauce left on the plate.

A simple green salad also provides a fresh contrast to the rich beef and cheese.

Other delicious serving options include:

  • Garlic knots
  • Caesar salad
  • Roasted broccoli
  • Steamed green beans
  • Roasted asparagus
  • Sautéed zucchini
  • Italian chopped salad
  • Roasted Brussels sprouts

For a casual family dinner, serve generous portions of the casserole with garlic bread and a fresh salad.

Tips for the Best Cheesy Beef & Tomato Casserole

Undercook the pasta slightly. Pasta continues cooking in the oven, so boiling it until completely soft beforehand can produce a mushy casserole.

Brown the beef properly. Allow the beef to develop some caramelized edges instead of constantly stirring it.

Do not make the sauce too dry. The pasta absorbs additional moisture while baking.

Use freshly shredded cheese. Freshly grated mozzarella and cheddar generally melt more smoothly than bagged pre-shredded cheese.

Let the tomato paste cook. Cooking tomato paste for a minute before adding liquid gives the sauce a deeper flavor.

Rest before serving. Cutting into the casserole immediately can cause it to fall apart.

Easy Recipe Variations & Substitutions

Creamy Beef & Tomato Casserole

Add 4 ounces softened cream cheese or ½ cup heavy cream to the tomato sauce before combining it with the pasta.

This creates a richer, creamier filling.

Spicy Beef Casserole

Add ½ teaspoon crushed red pepper flakes or diced jalapeños.

You can also use pepper Jack cheese in place of some of the cheddar.

Beef and Mushroom Casserole

Cook 8 ounces sliced mushrooms with the onions before adding the garlic.

The mushrooms add extra savory flavor and make the casserole even heartier.

Beef and Spinach Casserole

Stir 2 cups fresh baby spinach into the hot tomato sauce.

Allow it to wilt before adding the pasta.

Vegetable Beef Casserole

Add diced bell peppers, zucchini, mushrooms, or spinach to increase the vegetable content.

Ground Turkey Version

Ground turkey can replace the beef.

Because turkey is leaner, adding an extra tablespoon of olive oil can help keep the filling moist.

Make-Ahead Instructions

This casserole is excellent for preparing ahead.

Complete the recipe through the assembly stage but do not bake it.

Cover the baking dish tightly with foil and refrigerate for up to 24 hours.

When ready to bake, remove it from the refrigerator while the oven preheats.

Bake covered for approximately 25–30 minutes, then uncover and continue baking until the cheese is golden and the casserole is hot throughout.

A refrigerated casserole may require an additional 5–10 minutes compared with one baked immediately.

Storage and Reheating

Allow leftover casserole to cool completely.

Transfer it to an airtight container or cover the baking dish tightly.

Refrigerate for up to 3–4 days.

For individual portions, microwave until hot.

For larger portions, cover the casserole with foil and reheat at 350°F for approximately 15–20 minutes.

Adding a tablespoon or two of tomato sauce before reheating can help prevent the pasta from drying out.

Can You Freeze Cheesy Beef & Tomato Casserole?

Yes.

Assemble the casserole in a freezer-safe dish and allow all ingredients to cool completely.

Wrap tightly with plastic wrap followed by aluminum foil.

Freeze for up to 2–3 months.

For best results, thaw overnight in the refrigerator before baking.

You can also freeze individual cooked portions for easy future lunches or dinners.

Final Thoughts

This Easy Cheesy Beef & Tomato Casserole is everything a comforting baked dinner should be: hearty ground beef, rich tomato sauce, tender pasta, and layers of gooey melted cheese.

It uses straightforward ingredients, feeds a family easily, and can be customized with whatever vegetables or cheeses you already have available.

Whether you’re preparing it for a busy weeknight, Sunday family dinner, potluck, or make-ahead meal, this cheesy beef casserole is a dependable recipe that delivers warm, satisfying comfort in every bite.

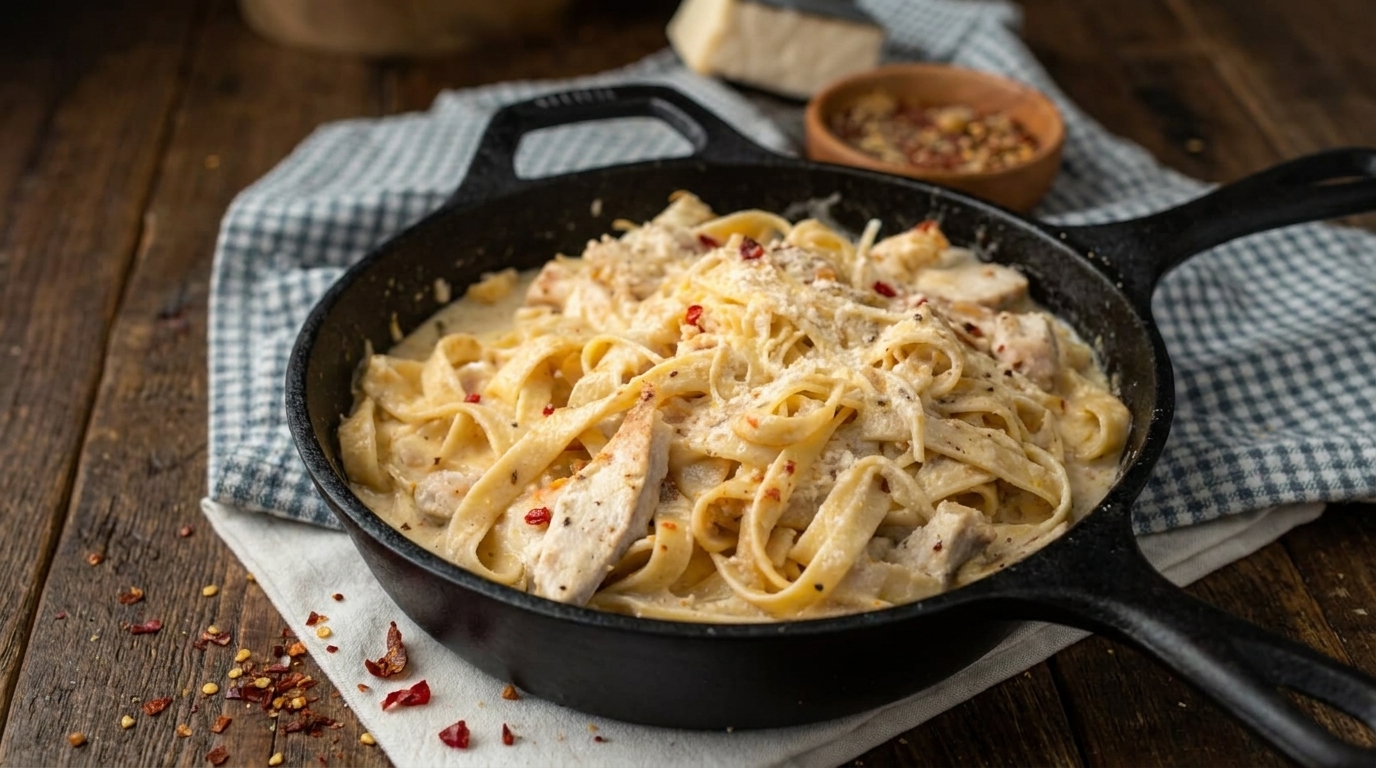
The Ultimate Creamy Garlic Beef Fettuccine Alfredo: A Luxurious Comfort Food Masterpiece

There are few dishes in the culinary world that command attention quite like a steaming plate of Fettuccine Alfredo. It is the epitome of comfort food—rich, velvety, and deeply satisfying. But what happens when you take this classic Italian-American favorite and elevate it with tender, pan-seared slices of seasoned beef and an extra punch of aromatic garlic?

Welcome to the definitive guide for The Ultimate Creamy Garlic Beef Fettuccine Alfredo. This recipe combines the luxurious silkiness of a homemade Alfredo sauce with the savory, hearty depth of perfectly cooked beef. Whether you are planning a romantic date night at home, treating your family to a weekend feast, or publishing your next viral food blog post, this step-by-step walkthrough will ensure your pasta turns out flawlessly every single time.

Why This Recipe is a Total Show-Stopper

  • The Ultimate Fusion: Combining tender, juicy beef slices with a rich, garlic-infused cream sauce creates a satisfying surf-and-turf style experience without any of the fuss.
  • No-Packet Creaminess: We build the Alfredo sauce completely from scratch using real butter, garlic, heavy cream, and freshly grated parmesan cheese, resulting in a smooth, velvety texture that jarred sauces simply cannot match.
  • Restaurant-Quality at Home: With just a few simple ingredients and a hot cast-iron skillet, you can achieve results that rival your favorite high-end Italian bistro.

Ingredients You Will Need

To pull off this magnificent pasta dish, gather a combination of pantry staples, dairy favorites, and fresh protein.

For the Pasta & Beef:

  • 12 oz Fettuccine Noodles: Traditional long strands work best for holding onto that thick cream sauce.
  • 1 lb Flank Steak, Sirloin, or Beef Tenderloin: Sliced into thin, bite-sized strips.
  • 2 tbsp Olive Oil or Avocado Oil: For searing the beef.
  • 1 tsp Garlic Powder & 1 tsp Onion Powder: To season the meat.
  • Salt and Freshly Cracked Black Pepper: To taste.

For the Creamy Garlic Alfredo Sauce:

  • 1/4 cup Unsalted Butter: The rich foundation of the sauce.
  • 5–6 cloves Fresh Garlic: Minced finely (don’t skimp on the garlic!).
  • 1.5 cups Heavy Cream: Essential for that thick, velvety texture.
  • 1.5 cups Freshly Grated Parmesan Cheese: Always grate your own from a block; pre-bagged cheese contains anti-caking agents that prevent a smooth melt.
  • 1/4 tsp Ground Nutmeg: A traditional secret ingredient that adds warmth and depth to cream sauces.

For the Garnish:

  • Fresh Parsley: Chopped, for a bright pop of green.
  • A Pinch of Red Pepper Flakes: For a subtle, contrasting kick of heat.

Step-by-Step Cooking Instructions

Step 1: Cook the Fettuccine

  1. Bring a large pot of generously salted water to a rolling boil.
  2. Add your fettuccine noodles and cook according to the package instructions until al dente (usually about 8 to 10 minutes).
  3. Pro-Tip: Before draining, scoop out about 1/2 cup of the starchy pasta cooking water. This liquid gold is the secret weapon for adjusting your sauce later. Drain the pasta and set aside.

Step 2: Sear the Seasoned Beef

  1. Pat your sliced beef completely dry with paper towels and season with salt, pepper, garlic powder, and onion powder.
  2. Heat the olive oil in a large skillet or cast-iron pan over medium-high heat.
  3. Add the beef strips in a single layer. Sear undisturbed for 2 to 3 minutes until a gorgeous brown crust forms, then flip and cook for 1 more minute. Remove the beef from the skillet and set it aside on a clean plate.

Step 3: Build the Creamy Garlic Alfredo Sauce

  1. In the same skillet used for the beef (leaving those incredible flavor remnants behind), melt the unsalted butter over medium-low heat.
  2. Add the minced garlic and sauté for about 30 to 45 seconds until intensely aromatic. Be careful not to let the garlic burn!
  3. Pour in the heavy cream and bring the mixture to a gentle simmer. Let it bubble softly for 2 to 3 minutes to thicken slightly.

Step 4: Melt the Parmesan

  1. Reduce the heat to low. Gradually whisk in your freshly grated parmesan cheese, a little bit at a time, allowing it to melt completely into the cream before adding more.
  2. Stir in the ground nutmeg, along with salt and freshly cracked black pepper to taste. Watch as the sauce transforms into a rich, glossy, velvety blanket.

Step 5: Toss and Combine

  1. Add your cooked fettuccine directly into the simmering skillet with the garlic alfredo sauce.
  2. Toss the noodles continuously using tongs so every single strand is coated in the luxurious cream sauce. If the sauce is too thick, splash in a tablespoon or two of your reserved starchy pasta water to achieve a silky consistency.
  3. Gently fold the seared beef slices (along with any resting juices) back into the pasta, letting them warm through for 1 minute.

Step 6: Garnish and Serve

  1. Remove the skillet from the heat.
  2. Garnish the dish generously with freshly chopped parsley and a dusting of red pepper flakes for color and contrast.
  3. Serve piping hot straight from the pan or plated in wide pasta bowls, and enjoy the ultimate comfort food experience!

Pro-Tips for Culinary Success

  • Grating Your Own Cheese: Pre-shredded parmesan will clump up and ruin the velvety texture of a homemade Alfredo sauce. Always buy a block of real Parmigiano-Reggiano and grate it yourself.
  • Control the Heat: When adding the parmesan cheese, keep the heat on low. Too much heat can cause the dairy to break, separating the cheese solids from the fats.
  • Content Creation Angle: If you are filming this recipe for social media or your blog, capture a close-up shot of the thick, glossy Alfredo sauce coating the fettuccine strands, or a slow-motion pan of the sliced beef nestling into the cheesy noodles.

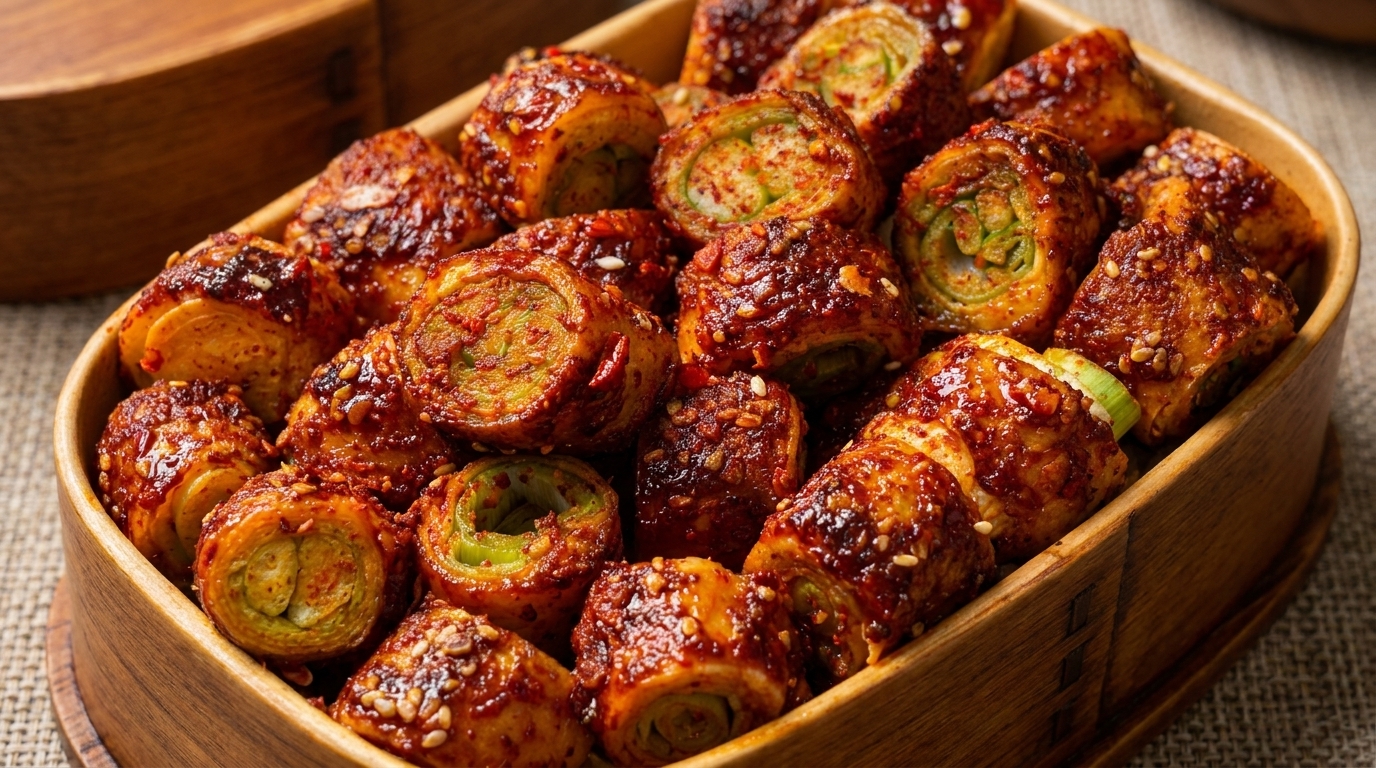
The Ultimate Spicy Stuffed Scallion Rolls: A Flavor-Packed Culinary Masterpiece

There are moments in the kitchen when a recipe comes along that completely redefines what comfort food can be. It bridges the gap between creative visual artistry and deep, soul-warming flavor. If you are looking to surprise your family, impress your dinner guests, or create a viral sensation on your food blog, you have found the right recipe.

Welcome to the definitive guide for The Ultimate Spicy Stuffed Scallion Rolls. This dish takes tender beef, wraps it tightly around crisp, fresh scallions, pan-frys it to golden perfection, and coats it in a bold, fiery chili glaze. Every single bite delivers an explosion of textures—from the tender, savory bite of the beef to the crisp freshness of the scallion and the rich, spicy punch of the chili sauce.

Whether you are building your digital cookbook or simply craving a deeply satisfying, restaurant-quality meal at home, this step-by-step guide will walk you through mastering this incredible dish.

Why This Recipe is a Total Game-Changer

  • Stunning Visual Presentation: Sliced into neat, bite-sized rounds that reveal vibrant green centers wrapped in rich, glossy red chili glaze, this dish is an absolute show-stopper on the plate.
  • The Ultimate Flavor Contrast: The fiery heat of the chili glaze and the savory depth of the seasoned beef balance harmoniously with the sharp, fresh crunch of green onions.
  • Approachable Ingredients: Despite looking like it came straight out of a high-end fusion restaurant, it relies on simple, accessible ingredients that come together quickly.

Ingredients You Will Need

To create these magnificent spicy rolls, gather a combination of fresh produce, quality protein, and bold pantry spices.

For the Scallion Rolls:

  • 1 lb Thinly Sliced Beef: Flank steak, ribeye, or thinly sliced hotpot beef work exceptionally well. The meat needs to be thin enough to wrap easily around the scallions.
  • 2 bunches Fresh Scallions (Green Onions): Washed, trimmed, and sorted so you use the sturdy white and light green parts.
  • 1 tbsp Soy Sauce: To season the beef base.
  • 1 tbsp Cornstarch: Helps bind the meat together so it holds its shape during cooking.
  • 1 tbsp Vegetable or Avocado Oil: For pan-frying.

For the Bold Spicy Chili Glaze:

  • 2 tbsp Chili Oil (with flakes): Adds that signature vibrant color and deep heat.
  • 1 tbsp Gochugaru (Korean Chili Flakes) or regular red pepper flakes: For texture and extra kick.
  • 2 cloves Garlic: Minced finely.
  • 1 tsp Fresh Ginger: Grated.
  • 1 tbsp Soy Sauce: For umami depth.
  • 1 tbsp Oyster Sauce: Adds thickness and a hint of sweetness to balance the heat.
  • 1 tsp Brown Sugar: To help create that glossy, caramelized finish.
  • 1 tsp Sesame Oil: For a nutty aroma.

For the Garnish:

  • Toasted Sesame Seeds: For a delightful crunch.
  • Extra Chopped Scallions: For a pop of fresh green color.

Step-by-Step Cooking Instructions

Step 1: Prep the Scallions and Beef

  1. Wash and dry your scallions thoroughly. Trim the root ends and dark green leafy tops, keeping the straight, crisp center sections (roughly 4 to 5 inches long).
  2. If using a larger cut of beef like flank steak, slice it as thinly as possible against the grain. Lay the slices out on a clean cutting board.
  3. Season the beef lightly with 1 tablespoon of soy sauce and dust with cornstarch. This light coating acts as an adhesive, ensuring the meat hugs the scallions tightly as it cooks.

Step 2: Roll the Scallions

  1. Take 2 to 3 stalks of trimmed scallions and bundle them together.
  2. Wrap a slice of thinly cut beef snugly around the middle section of the scallion bundle, overlapping the edges slightly.
  3. Repeat this process until you have used all your beef and scallions. You should have several neat, tightly wrapped meat-and-scallion cylinders.

Step 3: Slice Into Bite-Sized Pieces

  1. Using a sharp knife, carefully slice each wrapped cylinder crosswise into bite-sized round pieces (about 1 to 1.5 inches thick).
  2. As you slice, you will reveal the gorgeous green concentric circles of the scallions framed by the seasoned beef.

Step 4: Pan-Fry to Tender Perfection

  1. Heat vegetable oil in a large skillet or wok over medium-high heat.
  2. Place the rolls cut-side down in the hot skillet. Let them sear undisturbed for 2 to 3 minutes until the beef develops a deep, golden-brown crust.
  3. Gently flip them and cook for another 2 minutes until the beef is fully cooked through and the scallions have softened slightly while maintaining their fresh crunch. Remove them from the pan and set aside on a clean plate.

Step 5: Craft the Bold Spicy Chili Glaze

  1. In the same skillet (leaving any flavorful residual oils behind), lower the heat to medium-low.
  2. Add the minced garlic, grated ginger, and chili flakes, sautéing for about 30 seconds until intensely aromatic.
  3. Pour in the chili oil, soy sauce, oyster sauce, brown sugar, and sesame oil.
  4. Stir continuously as the mixture comes to a gentle simmer, bubbling into a thick, glossy, fiery glaze within 1 to 2 minutes.

Step 6: Toss and Coat

  1. Return your cooked scallion rolls back into the skillet with the simmering chili glaze.
  2. Toss gently using a spatula or tongs for 1 minute, ensuring every single piece is completely coated in that rich, glossy, spicy goodness.

Step 7: Plate and Serve

  1. Transfer your Ultimate Spicy Stuffed Scallion Rolls to a serving dish or paper boat style container.
  2. Generously scatter toasted sesame seeds and fresh chopped green onions over the top for the ultimate finishing touch.
  3. Serve piping hot and watch them disappear instantly!

Pro-Tips for Culinary Success

  • Cutting the Beef: If you are having trouble slicing your beef thin enough, pop the meat into the freezer for 20 to 30 minutes before cutting. Partially frozen beef is much easier to slice into uniform, paper-thin sheets.
  • Control the Heat: The chili glaze packs a punch. If you prefer a milder flavor, reduce the amount of chili flakes or opt for a sweet chili sauce base instead.
  • Content Creation Angle: If you are filming this recipe for social media, capture a close-up overhead shot of the knife slicing through the rolls to reveal the green centers, or a slow-motion pan of the glossy chili glaze pouring over the crispy bites.

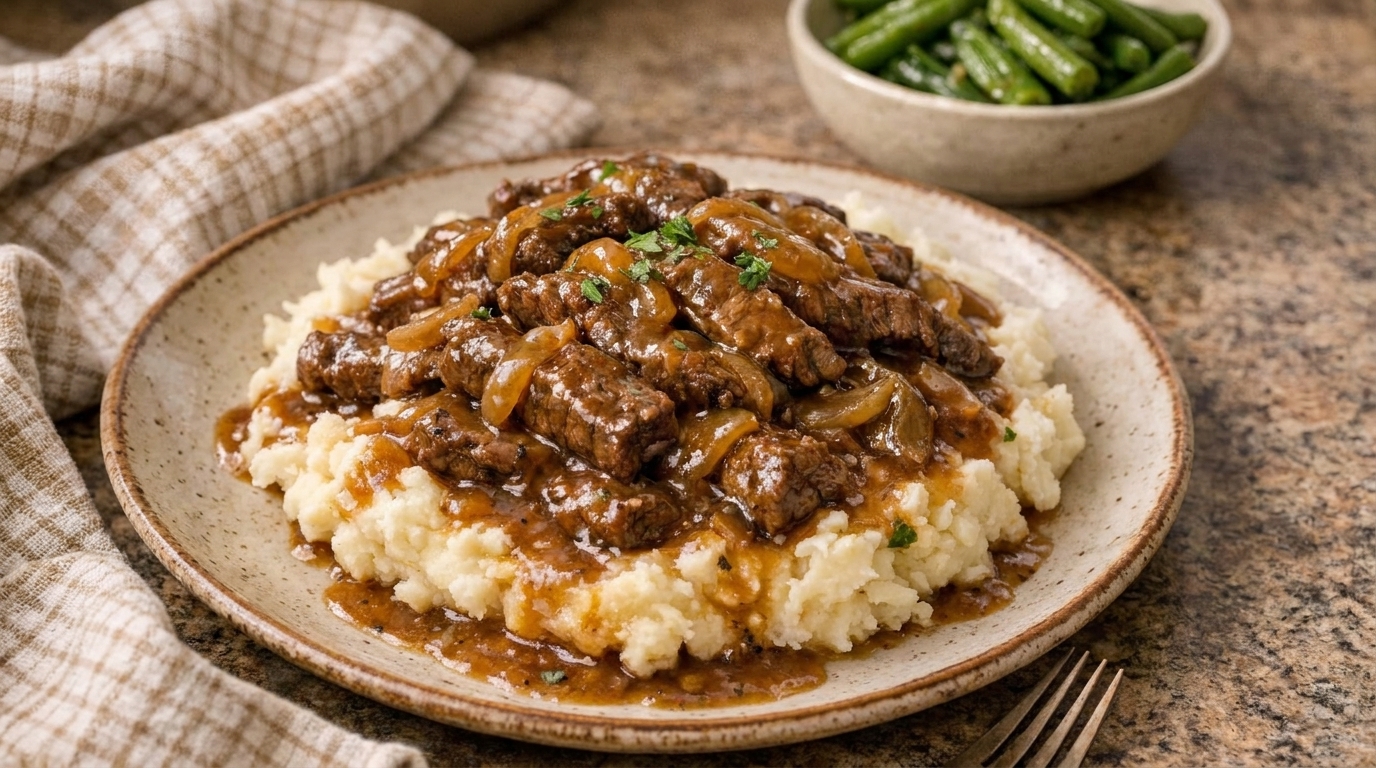
The Ultimate Beef Tips and Gravy: Fork-Tender Comfort Food at Its Finest

There is a universal kind of comfort that comes from a plate of rich, slow-simmered beef smothered in a glossy, savory gravy, resting proudly atop a mountain of buttery, whipped mashed potatoes. It is the kind of meal that instantly slows down time, making any ordinary weeknight feel like a cozy Sunday supper at home.

Welcome to the definitive guide for The Ultimate Beef Tips and Gravy. This recipe takes humble, budget-friendly cuts of beef and transforms them through the magic of a slow simmer into meat so tender it melts on your tongue. Whether you are plating this for your family or crafting a mouthwatering post for your food blog, this step-by-step walkthrough will give you everything you need to master this classic comfort dish.

Why This Recipe is a True Crowd-Pleaser

  • Melt-in-Your-Mouth Tenderness: By searing the beef first to lock in juices and then simmering it low and slow with caramelized onions, the meat breaks down into absolute buttery perfection.
  • The Ultimate Gravy: No packet mixes here! We build a deep, complex, velvety brown gravy from scratch using pan drippings, garlic, broth, and a touch of Worcestershire sauce.
  • The Perfect Pairing: Piled high over creamy mashed potatoes, every drop of that savory gravy is put to work.

Ingredients You Will Need

To create a deeply flavorful dish, gather these essential pantry staples and fresh ingredients.

For the Beef Tips & Marinade:

  • 2 lbs Sirloin Tips, Chuck Roast, or Stew Beef: Cut into bite-sized 1.5-inch cubes.
  • 1 tbsp Olive Oil or Avocado Oil: For searing.
  • 1 tsp Garlic Powder & 1 tsp Onion Powder: To build the initial seasoning layer.
  • Salt and Freshly Cracked Black Pepper: To taste.
  • 2 tbsp All-Purpose Flour: For a light dusting to help thicken the gravy later.

For the Rich Onion Gravy:

  • 2 tbsp Unsalted Butter: For richness.
  • 1 large Yellow Onion: Sliced thinly into half-moons.
  • 3 cloves Garlic: Minced.
  • 2.5 cups Beef Broth or Stock: Low-sodium is best so you can control the salt level.
  • 1 tbsp Worcestershire Sauce: Essential for that deep umami profile.
  • 1 tsp Dried Thyme: Adds an earthy undertone.
  • 2 tbsp Cornstarch mixed with 2 tbsp cold water: (A slurry) to achieve that glossy, spoon-coating thickness.

For Serving:

  • 4 cups Creamy Mashed Potatoes: Homemade or your favorite style.
  • Fresh Parsley: Chopped, for a pop of color.

Step-by-Step Cooking Instructions

Step 1: Prep and Season the Beef

  1. Pat your beef cubes completely dry with paper towels. Removing surface moisture is the secret to getting a phenomenal golden-brown sear.
  2. In a large bowl, toss the beef with salt, black pepper, garlic powder, onion powder, and the 2 tablespoons of flour until every piece is lightly coated.

Step 2: Sear to Perfection

  1. Heat your olive oil in a large, heavy-bottomed skillet or Dutch oven over medium-high heat until shimmering.
  2. Add the beef cubes in a single layer, making sure not to overcrowd the pan (cook in two batches if necessary).
  3. Let the beef sear undisturbed for 2 to 3 minutes to develop a rich, caramelized crust, then flip and brown the other sides. Remove the beef and set it aside on a clean plate. Do not wipe out the pan—those browned bits at the bottom are pure flavor gold!

Step 3: Caramelize the Onions and Garlic

  1. In the same skillet, lower the heat to medium and melt your butter.
  2. Add the sliced yellow onions and cook slowly, stirring occasionally, for about 6 to 8 minutes until they are soft, translucent, and beautifully golden brown.
  3. Stir in the minced garlic and dried thyme, cooking for about 30 to 60 seconds until fragrant.

Step 4: Build the Gravy Base

  1. Pour in the beef broth and Worcestershire sauce, using a wooden spoon to scrape up all the delicious browned bits stuck to the bottom of the pan.
  2. Bring the liquid to a gentle simmer.

Step 5: Simmer the Beef Low and Slow

  1. Return the seared beef tips (and any resting juices from the plate) back into the skillet, nestling them right into the simmering broth and onions.
  2. Reduce the heat to low, cover the skillet with a lid, and let it simmer gently for 35 to 45 minutes. This slow simmer allows the beef to become incredibly tender and lets the flavors marry completely.

Step 6: Thicken and Shine

  1. Remove the lid. Stir in your cornstarch slurry (cornstarch mixed with cold water) a little bit at a time.
  2. Let the gravy simmer uncovered for 3 to 5 minutes, stirring frequently, until the sauce transforms into a rich, glossy, velvety masterpiece that coats the back of a spoon. Taste and adjust seasoning with extra salt and pepper if needed.

Step 7: Plate and Serve

  1. Mound a generous serving of hot, creamy mashed potatoes in the center of a wide, shallow bowl or plate, creating a slight well in the center.
  2. Spoon the piping hot beef tips and sweet caramelized onions right over the top, letting that glorious savory gravy cascade down the sides of the potatoes.
  3. Garnish with a sprinkle of freshly chopped parsley and serve immediately!

Pro-Tips for Success

  • Choosing the Right Cut: While sirloin tips cook faster and stay tender, a well-marbled chuck roast cut into cubes will yield an even richer, melt-in-your-mouth texture if you let it simmer a bit longer.
  • Deglazing is Key: Never skip scraping the bottom of the pan when you add the broth. Those caramelized remnants from searing the beef are what give homemade gravy its authentic, restaurant-quality depth.
  • Content Creation Angle: If you are filming this for social media or your blog, capture a close-up shot of the thick gravy pouring slowly over the steaming mound of mashed potatoes—it is an instant engagement magnet!

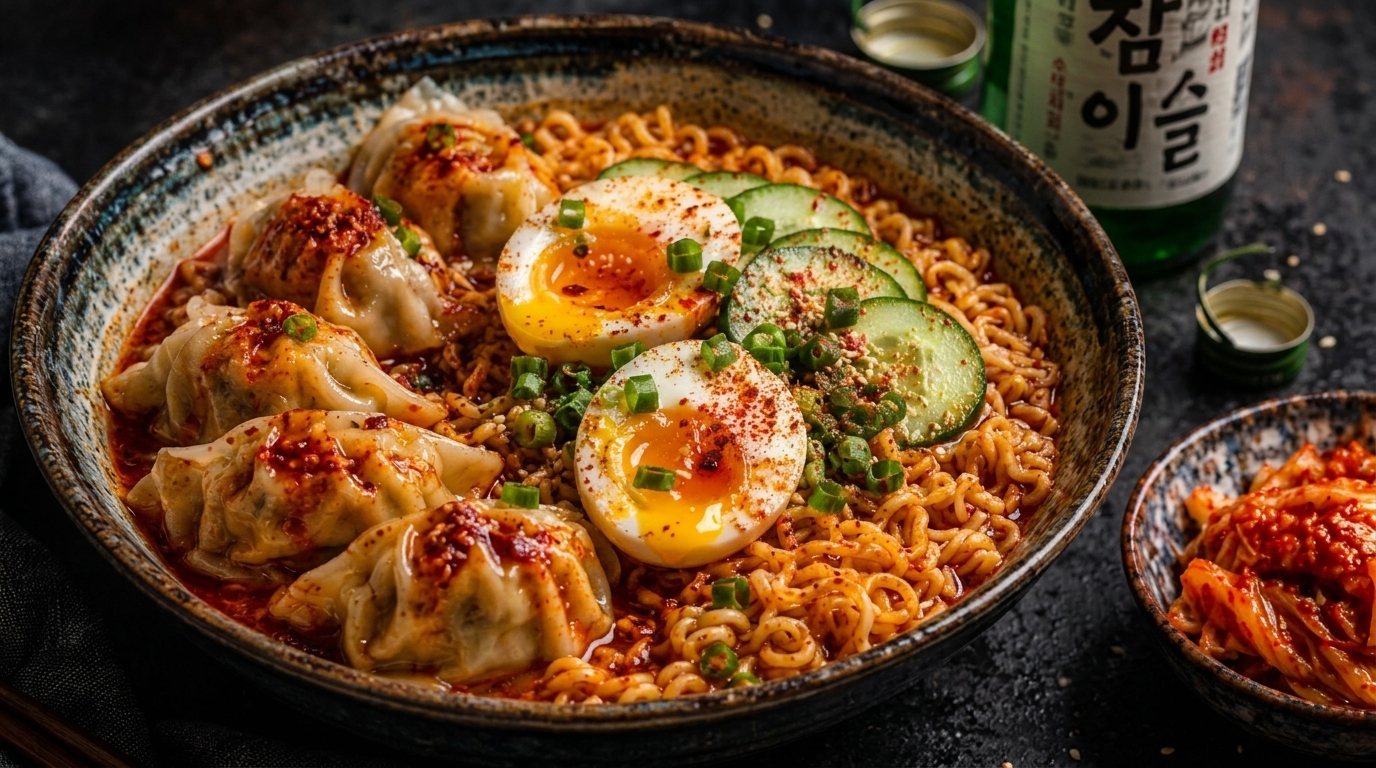
The Ultimate Spicy Dumpling Ramen: A Bowl of Comfort, Heat, and Soul

There are few meals as deeply comforting, visually striking, and soul-warming as a steaming bowl of homemade ramen. But when you take rich, savory broth, springy noodles, and top them with plump, chili-oil-glazed dumplings, everything changes.

Welcome to the definitive guide for The Ultimate Spicy Dumpling Ramen. This recipe brings together the absolute best of Asian-inspired comfort food: fiery, aromatic broth, chewy ramen noodles, and juicy dumplings that soak up every drop of flavor. Whether you are looking to elevate your weeknight dinner routine or create mouthwatering content for your food blog, this step-by-step guide will walk you through making a restaurant-quality bowl right at home.

Why This Recipe is an Absolute Must-Try

  • The Ultimate Fusion of Textures: You get the slurp-able goodness of ramen noodles combined with the tender, juicy bite of dumplings—all in one bowl.
  • Customizable Heat: The fiery chili oil broth can be scaled up or down depending on your personal tolerance for spice.
  • Effortless Elegance: While it looks like an intricate masterpiece worthy of a high-end noodle bar, it comes together in under 30 minutes using simple pantry staples and frozen or fresh dumplings.

Ingredients You Will Need

To pull off this magnificent bowl, you will need a mix of freezer-friendly shortcuts and fresh aromatic ingredients.

For the Ramen Base & Broth:

  • 2 packs Instant Ramen Noodles: (Discard the seasoning packets, or save them for another use) or 8 oz fresh ramen noodles.
  • 3 cups Chicken or Vegetable Broth: The flavorful foundation of your soup.
  • 2 tbsp Chili Garlic Sauce or Chili Crisp: For that signature kick and vibrant red hue.
  • 1 tbsp Soy Sauce or Tamari: For deep umami flavor.
  • 1 tbsp Sesame Oil: Adds a rich, nutty finish.
  • 2 cloves Garlic: Minced.
  • 1 tsp Fresh Ginger: Grated.

For the Dumpling & Toppings:

  • 8–10 Dumplings: Pork, chicken, or vegetable potstickers/dumplings (frozen or fresh).
  • 2 Soft-Boiled Eggs: Cooked for exactly 6.5 minutes for that gooey, jammy yolk.
  • 1/2 Fresh Cucumber: Sliced into delicate half-moons for a crisp, refreshing crunch.
  • 3 stalks Green Onions: Chopped thin.
  • 1 tsp Chili Flakes & Toasted Sesame Seeds: For garnish.

Step-by-Step Cooking Instructions

Step 1: Prep the Soft-Boiled Eggs

  1. Bring a medium pot of water to a rolling boil.
  2. Gently lower your cold eggs into the boiling water using a spoon. Cook for exactly 6 minutes and 30 seconds.
  3. Transfer the eggs immediately to an ice bath to stop the cooking process. Once cooled, peel them gently and slice them in half lengthwise. Set aside.

Step 2: Cook the Dumplings

  1. You can pan-fry, steam, or boil your dumplings beforehand. For this recipe, boiling or steaming them until tender ensures they absorb the broth beautifully.
  2. If boiling, drop them into a pot of boiling water for about 4 to 5 minutes until they float and are cooked through. Remove and set aside.

Step 3: Build the Spicy Broth

  1. In a large saucepan or pot, heat the sesame oil over medium heat.
  2. Add the minced garlic and grated ginger, sautéing for about 30 seconds until fragrant and aromatic.
  3. Pour in the chicken or vegetable broth, soy sauce, and your chili garlic sauce (or chili crisp).
  4. Bring the mixture to a gentle boil, then reduce the heat and let it simmer for 5 minutes so all the flavors meld together into a rich, spicy elixir.

Step 4: Cook the Noodles

  1. Drop your ramen noodles directly into the simmering spicy broth (or cook them separately in boiling water if you prefer a cleaner broth).
  2. Cook for 2 to 3 minutes until the noodles are tender and springy.

Step 5: Assemble Your Masterpiece

  1. Ladle your hot, spicy noodles and rich broth generously into a wide, deep serving bowl.
  2. Arrange your cooked dumplings in a neat row along one side of the bowl, drizzling a little extra chili oil right over them.
  3. Place your jammy soft-boiled egg halves and crisp cucumber slices opposite the dumplings to create a stunning visual contrast of colors and textures.
  4. Garnish the entire bowl with a generous scattering of chopped green onions, toasted sesame seeds, and a pinch of chili flakes.

Step 6: Serve and Enjoy

Serve immediately while piping hot with chopsticks and a soup spoon. Break open the egg yolk, let it melt into the spicy broth, and dive into the ultimate comfort food experience!

Pro-Tips for Culinary Success

  • The Egg Timing is Everything: Getting that signature jammy ramen egg requires precision. Stick strictly to 6.5 minutes in boiling water followed by an immediate ice bath.
  • Crisp Contrast: The addition of fresh cucumber slices might seem unconventional, but the cool, refreshing crunch cuts through the rich, spicy broth brilliantly.
  • Content Creation Angle: If you are filming this for social media, capture a slow-motion shot of the soft-boiled egg being sliced open to reveal the runny yolk, or a close-up of chopsticks lifting a chili-glazed dumpling out of the broth.

The Ultimate Sweet & Savory Beef Lo Mein: Restaurant-Quality Stir-Fry at Home

There is a distinct kind of magic that happens when a hot pan meets sizzling beef, crisp-tender vegetables, and glossy, slurp-able noodles coated in a rich, savory glaze. If you have ever ordered takeout on a busy weeknight and wished you could recreate that exact, mouthwatering depth of flavor right in your own kitchen, your search ends here.

Welcome to the definitive guide for The Ultimate Sweet & Savory Beef Lo Mein. This dish delivers everything you love about your favorite Asian-inspired comfort food: perfectly tender strips of beef, vibrant bell peppers, sweet carrots, and thick, satisfying noodles enveloped in a perfectly balanced sauce. Whether you are cooking to impress your family or building engaging content for your food blog, this comprehensive walkthrough will ensure your lo mein turns out phenomenal every single time.

Why This Recipe is a Game-Changer

  • The Perfect Sauce Balance: The secret to incredible lo mein lies in the sauce. This recipe strikes the ultimate harmony between sweet brown sugar, savory soy sauce, aromatic garlic, and ginger.
  • Speed Meets Quality: While it tastes like it took hours to develop, stir-frying is all about high heat and fast movement, meaning you can go from prep to plate in under 30 minutes.
  • Customizable Freshness: You can easily adapt the vegetables based on what is lingering in your refrigerator, making it a fantastic vehicle for clearing out produce while keeping the meal deeply satisfying.

Ingredients You Will Need

To create this masterpiece, gather a combination of pantry staples, fresh produce, and quality protein.

For the Noodles & Beef:

  • 8 oz Lo Mein Noodles: Fresh or dried Chinese egg noodles work best, but yakisoba or even thick spaghetti can substitute in a pinch.
  • 1 lb Flank Steak or Sirloin: Cut thinly against the grain for maximum tenderness.
  • 1 tbsp Cornstarch: Used to velvet the beef, locking in moisture and helping it brown.
  • 2 tbsp Vegetable Oil or Avocado Oil: High-smoke-point oils ideal for stir-frying.

For the Vegetables:

  • 1 medium Red Bell Pepper: Sliced into thin, vibrant strips.
  • 2 medium Carrots: Julienned into matchsticks for a touch of natural sweetness.
  • 3 cloves Garlic: Minced finely.
  • 1 tbsp Fresh Ginger: Grated.
  • 3 stalks Green Onions: Chopped, keeping the white and green parts separate.

For the Sweet & Savory Lo Mein Sauce:

  • 1/3 cup Soy Sauce or Tamari: Provides the deep, savory umami base.
  • 2 tbsp Oyster Sauce: Adds a rich, glossy thickness and subtle sweetness.
  • 1 tbsp Brown Sugar: Brings out that classic sweet undertone.
  • 1 tsp Sesame Oil: For that distinct, nutty finishing aroma.
  • 1/4 cup Beef Broth or Water: To loosen the sauce so it coats every noodle evenly.
  • 1 tsp Red Pepper Flakes: Optional, if you want a subtle kick of heat.

For the Garnish:

  • Toasted Sesame Seeds: For a nutty crunch.
  • Extra Green Onion Tops: For a fresh, sharp bite.

Step-by-Step Cooking Instructions

Step 1: Whisk the Sauce

In a small mixing bowl, combine the soy sauce, oyster sauce, brown sugar, sesame oil, beef broth, and red pepper flakes. Whisk vigorously until the sugar is completely dissolved. Set this liquid gold aside; it will tie the entire dish together.

Step 2: Prepare and Velvet the Beef

  1. Slice your flank steak thinly against the grain. Cutting against the grain shortens the muscle fibers, ensuring your beef melts in your mouth.
  2. Toss the sliced beef with 1 tablespoon of cornstarch until every piece is lightly coated. This traditional technique (velveting) protects the meat from drying out under high heat and helps create a wonderful crust.

Step 3: Boil the Noodles

Bring a large pot of water to a boil. Cook your lo mein noodles according to the package instructions, usually about 3 to 4 minutes for fresh noodles, until al dente. Drain immediately and rinse briefly with cool water to stop the cooking process. Toss with a tiny splash of oil to prevent sticking.

Step 4: Sear the Beef

  1. Heat 1 tablespoon of oil in a large wok or skillet over medium-high heat until shimmering.
  2. Add the beef slices in a single layer, ensuring you don’t overcrowd the pan (cook in two batches if necessary).
  3. Let it sear undisturbed for 2 minutes to develop a gorgeous golden-brown crust, then stir-fry for another minute until just cooked through. Remove the beef from the pan and set it aside on a clean plate.

Step 5: Stir-Fry the Aromatics and Vegetables

  1. Add the remaining oil to the same hot pan. Toss in the sliced red bell peppers, matchstick carrots, and the white parts of the green onions.
  2. Stir-fry briskly for 2 to 3 minutes until the vegetables become bright and slightly tender-crisp.
  3. Stir in the minced garlic and grated ginger, cooking for about 30 seconds until intensely aromatic. Be careful not to burn the garlic!

Step 6: Bring It All Together

  1. Reduce the heat to medium. Add your cooked noodles and the seared beef back into the wok with the vegetables.
  2. Pour your prepared sweet and savory sauce all over the contents of the pan.
  3. Toss everything together continuously using tongs or a spatula for 1 to 2 minutes. Watch as the sauce bubbles, thickens rapidly, and coats every single noodle, pepper strip, and beef piece in a glossy finish.

Step 7: Garnish and Serve

Remove the wok from the heat. Scatter the remaining green onion tops and a generous dusting of toasted sesame seeds over the top. Serve piping hot straight from your favorite bowl and enjoy the ultimate comfort food experience!

Pro-Tips for Culinary Success

  • Prep Everything First (Mise en Place): Stir-frying moves at lightning speed. Once the pan is hot, you won’t have time to chop vegetables or mix sauces. Have all your ingredients measured, chopped, and sitting next to the stove before you turn on the heat.
  • Control the Heat: Do not be afraid of high heat when searing the beef and cooking the vegetables. It creates that authentic wok-hei (breath of the wok) char that elevates home cooking to restaurant quality.
  • Storage and Reheating: Leftovers store beautifully in an airtight container in the refrigerator for up to 3 days. Reheat gently in a skillet with a splash of water to bring the glossy sauce back to life.