Creamy Lasagna Soup with Ground Beef and Ricotta: A Cozy Italian-Inspired Comfort Food Recipe

Introduction

Creamy Lasagna Soup is the perfect combination of everything people love about traditional lasagna transformed into a warm, comforting bowl of soup. This delicious recipe brings together rich tomato sauce, seasoned ground beef, tender pasta pieces, Italian herbs, and creamy cheese toppings to create a meal that feels like classic homemade lasagna but with an easier preparation.

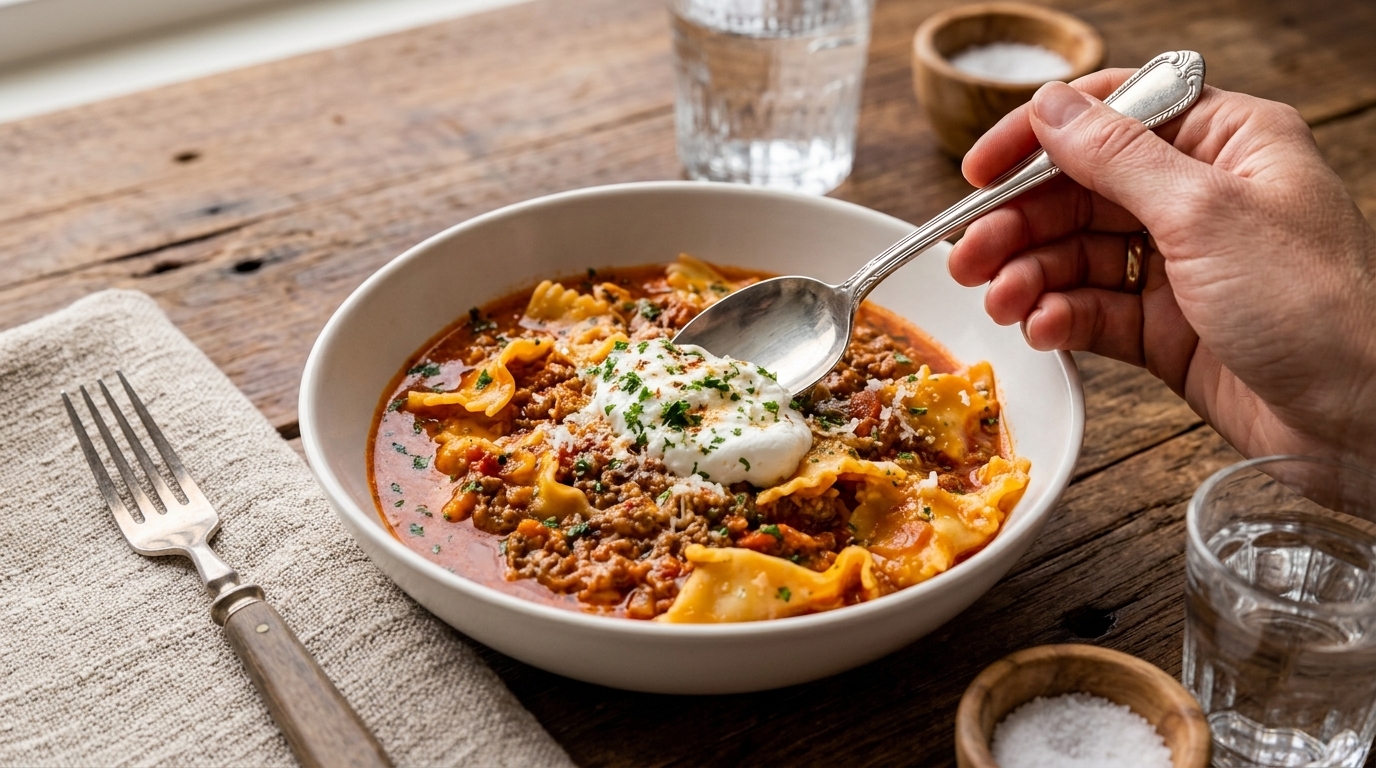
The image shows a beautiful bowl of lasagna soup filled with curly pasta pieces, a rich red tomato-based broth, seasoned ground meat, and a generous spoonful of creamy ricotta cheese in the center. Fresh herbs and grated Parmesan add a finishing touch, creating a dish that looks both rustic and restaurant-worthy. The soup has a thick, hearty texture with layers of Italian flavors in every spoonful.

Unlike traditional layered lasagna that requires careful assembly and long preparation, lasagna soup delivers the same comforting flavors in a simpler one-pot recipe. The pasta absorbs the rich tomato broth while the cheese melts into the warm soup, creating a creamy and satisfying experience.

This recipe is perfect for cold evenings, family dinners, meal preparation, or whenever you crave the flavors of classic Italian comfort food without spending hours in the kitchen.


Why You’ll Love This Recipe

There are many reasons why creamy lasagna soup has become such a popular comfort meal.

The first reason is the incredible flavor. The combination of ground beef, tomatoes, garlic, onions, herbs, and cheese creates the same rich taste found in traditional lasagna.

The second reason is the texture. Every spoonful includes tender pasta, savory meat sauce, creamy cheese, and flavorful broth. The ricotta topping slowly melts into the soup, creating a delicious creamy finish.

This recipe is also incredibly convenient. Everything cooks together in one pot, meaning fewer dishes and easier cleanup.

Perfect for:

  • Family dinners
  • Cozy winter meals
  • Weekend cooking
  • Meal preparation
  • Italian food lovers
  • Comfort food cravings

This soup is hearty enough to be a complete meal while still feeling warm and satisfying.


Ingredients Overview

For the Lasagna Soup Base

  • 2 tablespoons olive oil
  • 1 pound ground beef
  • 1 medium onion, diced
  • 4 cloves garlic, minced
  • 2 tablespoons tomato paste
  • 1 can crushed tomatoes (28 ounces)
  • 4 cups beef broth
  • 1 teaspoon dried basil
  • 1 teaspoon dried oregano
  • ½ teaspoon Italian seasoning
  • ½ teaspoon red pepper flakes (optional)
  • Salt and black pepper to taste
  • 8 ounces lasagna noodles, broken into pieces

The soup base creates the rich flavor foundation. Ground beef provides a savory depth, while tomato paste intensifies the sauce and herbs create the classic Italian taste.


For the Creamy Cheese Topping

  • 1 cup ricotta cheese
  • 1 cup shredded mozzarella cheese
  • ½ cup grated Parmesan cheese
  • 2 tablespoons fresh parsley or basil
  • ¼ teaspoon black pepper

The cheese mixture is what makes this soup taste like real lasagna. Ricotta adds creaminess, mozzarella provides a stretchy texture, and Parmesan adds a salty, nutty flavor.


Step-by-Step Instructions

1. Cook the Ground Beef

Heat olive oil in a large soup pot over medium heat.

Add diced onion and cook until softened and slightly golden.

Add ground beef and cook until browned, breaking it apart with a wooden spoon.

Remove any excess grease if necessary.

The browned meat creates a rich base and adds deep flavor to the soup.


2. Add Garlic and Seasonings

Add minced garlic and cook for about 30 seconds until fragrant.

Stir in tomato paste and cook for another minute. This step helps develop a deeper tomato flavor.

Add dried basil, oregano, Italian seasoning, salt, black pepper, and red pepper flakes if using.

Mix well so the spices coat the meat evenly.


3. Create the Soup Base

Pour in crushed tomatoes and beef broth.

Stir everything together and bring the soup to a gentle boil.

Reduce the heat and allow it to simmer for 15–20 minutes so the flavors can combine.

The longer simmer creates a richer and more flavorful broth.


4. Cook the Lasagna Noodles

Break lasagna noodles into smaller pieces and add them directly into the soup.

Cook until the pasta becomes tender, usually around 10–12 minutes depending on the noodle type.

Stir occasionally to prevent pasta from sticking together.

The noodles absorb the tomato broth and create the signature lasagna texture.


5. Prepare the Cheese Mixture

While the soup cooks, combine ricotta cheese, mozzarella, Parmesan, parsley, and black pepper in a bowl.

Mix until creamy and well combined.

This mixture will create the delicious creamy topping that melts into the hot soup.


6. Serve the Lasagna Soup

Ladle the hot soup into bowls.

Add a generous spoonful of the ricotta cheese mixture on top.

Sprinkle with extra Parmesan and fresh herbs.

Allow the cheese to slowly melt into the soup before enjoying.

The result is a warm, cheesy, and flavorful bowl of Italian comfort food.


Expert Cooking Tips

  • Break lasagna noodles into different sizes for a more authentic homemade texture.
  • Do not overcook the pasta because it continues absorbing liquid as it sits.
  • Use freshly grated Parmesan for the best flavor.
  • Let the soup rest for a few minutes before serving so the flavors settle.
  • Add extra broth when reheating because pasta continues soaking up liquid.

Substitutions and Variations

This recipe can easily be customized.

For a lighter version, replace ground beef with:

  • Ground turkey
  • Ground chicken

For a vegetarian version, add:

  • Mushrooms
  • Spinach
  • Zucchini
  • Extra vegetables

For extra creaminess, stir a little heavy cream into the soup before serving.

You can also make it spicy by adding:

  • Italian sausage
  • Extra chili flakes
  • Hot peppers

If lasagna noodles are unavailable, use other pasta shapes such as:

  • Bowtie pasta
  • Penne
  • Rotini

Serving Suggestions

Creamy lasagna soup is delicious on its own, but it pairs perfectly with simple sides.

Serve with:

  • Garlic bread
  • Toasted Italian bread
  • Fresh green salad
  • Roasted vegetables
  • Caesar salad

The garlic bread is especially perfect for dipping into the rich tomato broth.

For a beautiful presentation, finish each bowl with fresh basil, Parmesan cheese, and a drizzle of olive oil.


Storage and Reheating Instructions

Store leftover lasagna soup in an airtight container in the refrigerator for up to 4 days.

Because the pasta continues absorbing liquid, the soup may become thicker after storing. Add extra broth while reheating to restore the original texture.

Reheat gently on the stovetop over medium heat or in the microwave until warm.

For freezing, prepare the soup without the pasta if possible. Add freshly cooked pasta when reheating for the best texture.


Frequently Asked Questions

Can I make lasagna soup ahead of time?
Yes. The flavors become even better after resting overnight.

Can I use jarred pasta sauce instead of tomatoes?
Yes. A high-quality marinara sauce works well and saves time.

Why did my soup become too thick?
The pasta absorbs liquid as it sits. Simply add more broth when reheating.

Can I freeze lasagna soup?
Yes, but freezing without pasta gives the best texture.

What cheese works best for the topping?
A combination of ricotta, mozzarella, and Parmesan creates the most authentic lasagna flavor.


Final Thoughts

Creamy Lasagna Soup is the perfect recipe for anyone who loves the comforting flavors of traditional lasagna but wants a simpler, cozier meal. With rich tomato broth, seasoned beef, tender pasta, and creamy cheese, every spoonful delivers the taste of homemade Italian comfort food.

Whether you are cooking for your family, preparing a cozy weekend dinner, or looking for a meal that warms you from the inside out, this lasagna soup is guaranteed to become a favorite. It is easy, flavorful, and filled with the classic flavors that make Italian cuisine so loved around the world.
Garlic Butter Shrimp Spaghetti: A Creamy Seafood Pasta Recipe Full of FlavorIntroduction

Garlic Butter Shrimp Spaghetti is a classic seafood pasta dish that combines tender, juicy shrimp with perfectly cooked spaghetti coated in a rich garlic-infused sauce. This elegant yet simple recipe brings together the comforting flavors of homemade pasta with the freshness of seafood, creating a meal that feels like it came straight from an Italian restaurant.

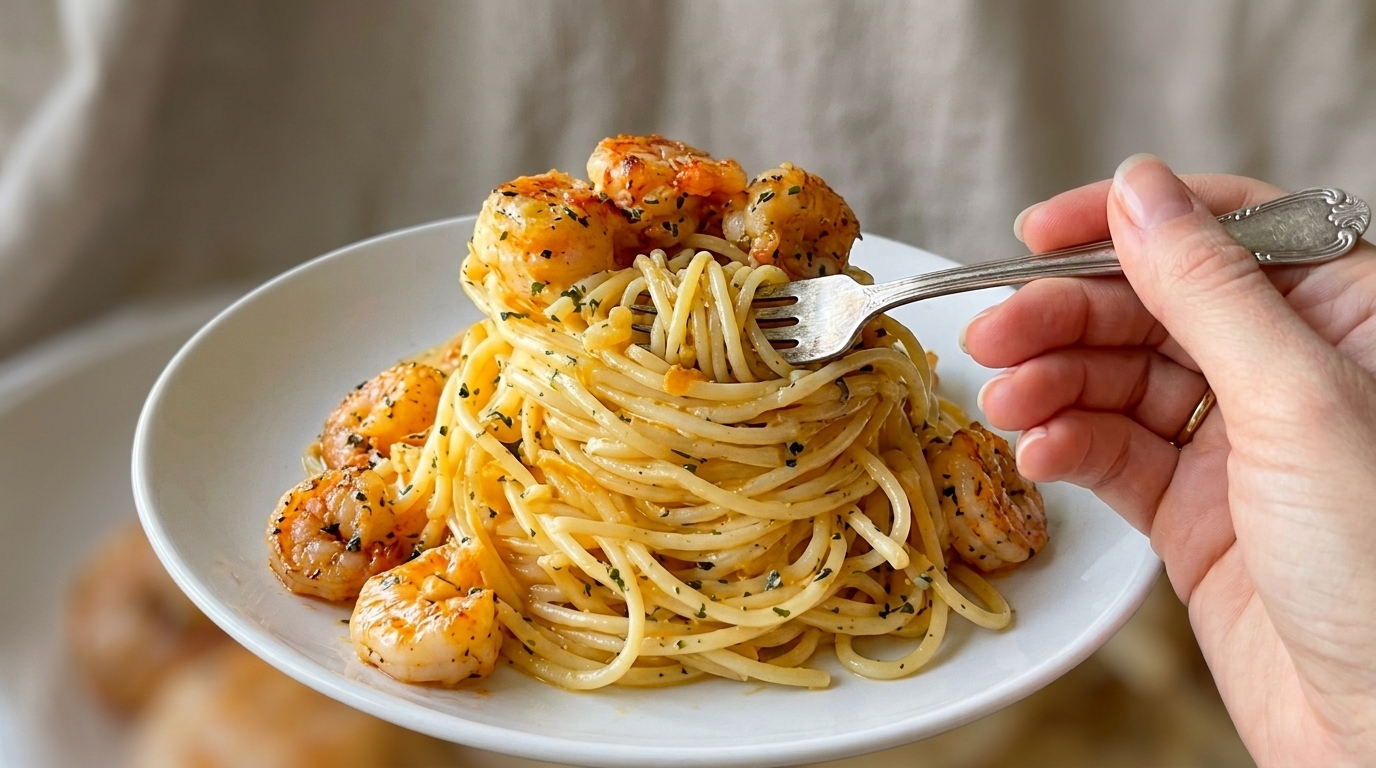
The image shows a beautiful serving of spaghetti twisted into a tall, elegant portion and topped with golden sautéed shrimp. The pasta is lightly coated in a flavorful garlic butter sauce with herbs sprinkled throughout, while the shrimp have a perfectly cooked golden exterior that adds a delicious contrast to the soft noodles.

This dish is perfect for anyone who loves quick meals with impressive flavor. The combination of buttery garlic, herbs, tender shrimp, and silky pasta creates a satisfying dinner that works beautifully for family meals, date nights, celebrations, or a cozy weekend dinner at home.

The best part about this recipe is that it does not require complicated techniques or expensive ingredients. With a few simple steps, you can create a restaurant-quality seafood pasta that is fresh, flavorful, and incredibly comforting.

Why You’ll Love This Recipe

There are countless reasons why garlic butter shrimp spaghetti is loved by seafood and pasta lovers everywhere.

The first reason is the incredible flavor combination. Garlic and butter create a rich base that enhances the natural sweetness of shrimp, while herbs add freshness and aroma. The pasta absorbs the sauce beautifully, making every bite full of flavor.

The second reason is how quick and easy it is to prepare. Shrimp cook in just minutes, and the entire dish can come together in less than 30 minutes, making it perfect for busy weeknights.

This recipe is also versatile. You can adjust the spice level, add vegetables, change the pasta type, or make it creamy depending on your preference.

Perfect for:

Quick weeknight dinners
Seafood lovers
Romantic dinners
Family meals
Special occasions
Restaurant-style meals at home

This pasta is proof that simple ingredients can create something truly delicious.

Ingredients Overview
For the Garlic Butter Shrimp Spaghetti
12 ounces spaghetti pasta
1 pound large shrimp, peeled and deveined
4 tablespoons butter
2 tablespoons olive oil
5 cloves garlic, minced
1 teaspoon paprika
1 teaspoon Italian seasoning
½ teaspoon black pepper
Salt to taste
¼ teaspoon red pepper flakes (optional)
2 tablespoons fresh parsley, chopped
2 tablespoons lemon juice
½ cup pasta water
Optional Creamy Addition
½ cup heavy cream
½ cup Parmesan cheese

The shrimp provides a juicy seafood flavor, while the garlic butter sauce creates the rich coating that brings the entire dish together. Pasta water helps the sauce stick to the spaghetti and creates a smooth texture.

Fresh herbs and lemon juice brighten the dish and balance the richness of the butter.

Step-by-Step Instructions

  1. Cook the Spaghetti

Bring a large pot of salted water to a boil.

Add spaghetti and cook according to package instructions until al dente. The pasta should be tender but still have a slight bite.

Before draining, reserve about half a cup of pasta water. This starchy water will help create a silky sauce later.

Drain the pasta and set it aside.

  1. Season the Shrimp

Pat the shrimp dry using paper towels. This helps them develop a beautiful golden color while cooking.

Season shrimp with paprika, Italian seasoning, salt, and black pepper.

Allow the shrimp to sit for a few minutes so the flavors can absorb.

  1. Cook the Shrimp

Heat olive oil and butter in a large skillet over medium-high heat.

Add minced garlic and cook for about 30 seconds until fragrant.

Place shrimp in the skillet and cook for approximately 2–3 minutes per side until they turn pink and golden.

Avoid overcooking shrimp because they can become tough. Properly cooked shrimp should be tender, juicy, and slightly firm.

Remove shrimp from the skillet and set aside.

  1. Create the Garlic Butter Sauce

Using the same skillet, add a little more butter if needed.

Add lemon juice, red pepper flakes, and pasta water. Stir everything together to create a smooth, flavorful sauce.

If making a creamy version, add heavy cream and Parmesan cheese. Stir until the sauce becomes rich and creamy.

  1. Combine Pasta and Sauce

Add cooked spaghetti directly into the skillet.

Toss the pasta gently until every strand is coated with the garlic butter sauce.

The pasta water helps the sauce cling to the noodles, creating a smooth and flavorful finish.

Return the shrimp to the skillet and gently combine everything together.

  1. Finish and Serve

Sprinkle fresh parsley over the pasta before serving.

Serve immediately while the spaghetti is warm and the shrimp are juicy.

Add extra Parmesan cheese, lemon slices, or herbs for a beautiful final presentation.

Expert Cooking Tips
Always cook shrimp quickly over medium-high heat to keep them tender.
Use fresh garlic for the best flavor instead of garlic powder.
Do not rinse cooked pasta because the starch helps the sauce stick.
Reserve pasta water every time you make pasta sauces.
Freshly grated Parmesan melts better and adds more flavor.
Add lemon juice at the end for a fresh seafood-style finish.
Substitutions and Variations

This garlic butter shrimp spaghetti can easily be customized.

For a creamy version, add heavy cream and Parmesan cheese to create a rich Alfredo-style sauce.

For a healthier option, replace regular spaghetti with whole wheat pasta or zucchini noodles.

Add vegetables such as:

Spinach
Cherry tomatoes
Mushrooms
Bell peppers
Asparagus

For extra spice, increase chili flakes or add fresh chopped chili peppers.

You can also replace shrimp with scallops, chicken, or salmon for different variations.

Serving Suggestions

Garlic butter shrimp spaghetti pairs beautifully with simple sides that complete the meal.

Serve with:

Garlic bread
Fresh garden salad
Roasted vegetables
Caesar salad
Steamed asparagus
Crispy bread rolls

A sprinkle of fresh parsley and a squeeze of lemon make the dish look fresh and restaurant-quality.

For a special dinner, serve it with sparkling water, lemonade, or your favorite wine pairing.

Storage and Reheating Instructions

Store leftover shrimp spaghetti in an airtight container in the refrigerator for up to 3 days.

When reheating, add a small splash of water, milk, or broth to refresh the sauce.

Warm gently in a skillet over medium heat for the best texture.

Avoid overheating because shrimp can become chewy when cooked too long.

This recipe is best enjoyed fresh, but proper storage keeps it delicious for future meals.

Frequently Asked Questions

Can I use frozen shrimp?
Yes. Thaw frozen shrimp completely and pat dry before cooking.

What pasta works best for this recipe?
Spaghetti is classic, but linguine, fettuccine, or angel hair pasta also work well.

How do I prevent shrimp from becoming rubbery?
Cook shrimp only until they turn pink and opaque. Overcooking is the main cause of tough shrimp.

Can I make this recipe dairy-free?
Yes. Replace butter with olive oil or dairy-free butter alternatives.

Can I prepare this ahead of time?
The sauce and pasta can be prepared ahead, but shrimp are best cooked fresh before serving.

Final Thoughts

Garlic Butter Shrimp Spaghetti is a perfect example of how simple ingredients can create an unforgettable meal. With juicy golden shrimp, silky pasta, fragrant garlic butter sauce, and fresh herbs, this recipe delivers restaurant-quality flavor from the comfort of your own kitchen.

Whether you are preparing a quick dinner after a busy day or making something special for loved ones, this seafood pasta is guaranteed to impress. Every forkful brings together the perfect balance of buttery richness, fresh flavors, and comforting homemade goodness.

Garlic Parmesan Chicken Roll-Ups: A Creamy, Cheesy Chicken Dinner Recipe

Introduction

Garlic Parmesan Chicken Roll-Ups are a delicious and elegant dinner recipe that transforms simple chicken breasts into a flavorful, restaurant-style meal. This dish features tender chicken wrapped around a creamy, cheesy filling, then baked until golden and beautifully caramelized. Finished with a rich garlic butter sauce and fresh herbs, these chicken roll-ups are packed with flavor in every bite.

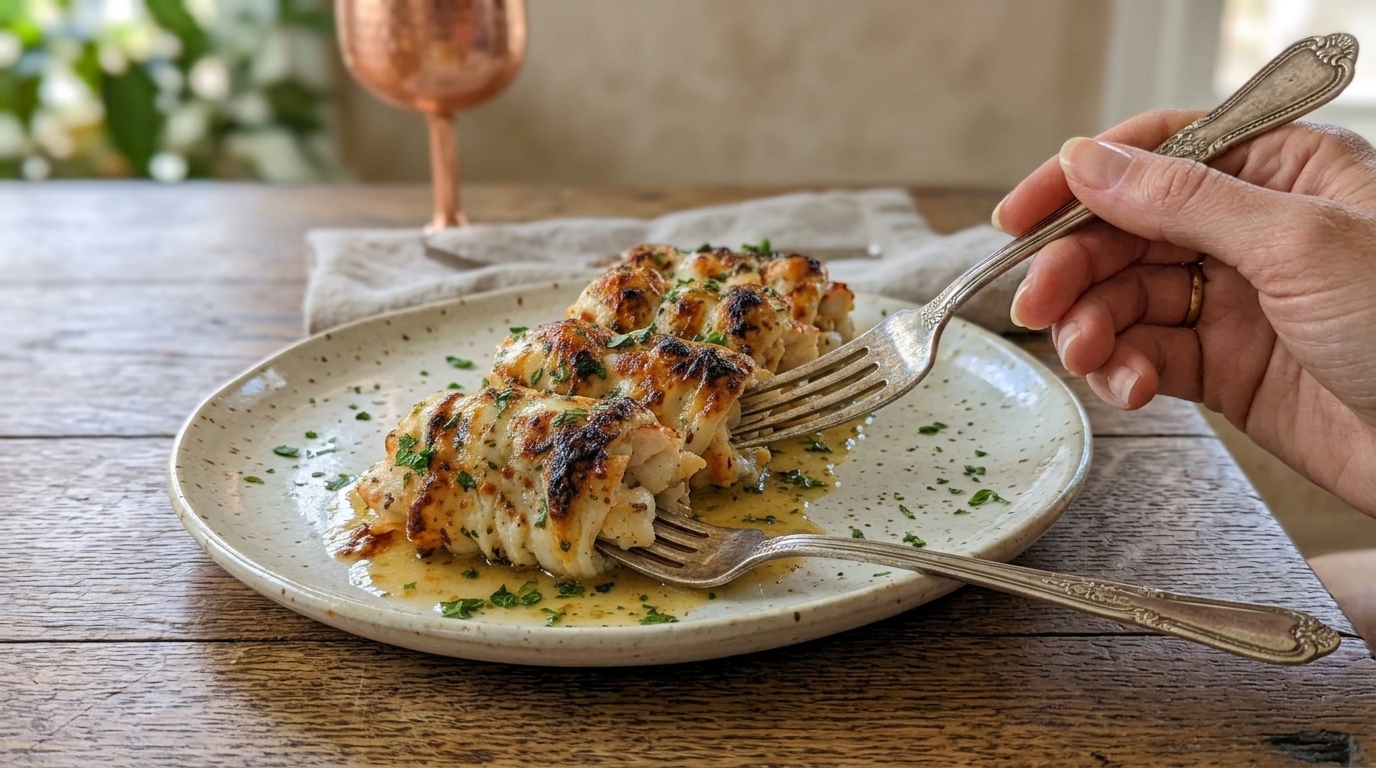
The image shows perfectly baked chicken pieces arranged on a plate, covered with a golden-brown cheesy crust and sprinkled with fresh herbs. The chicken has a juicy interior with a creamy filling, while the surrounding garlic butter sauce adds moisture and incredible flavor. The lightly roasted cheese topping creates a delicious contrast between the crispy outside and tender inside.

This recipe is perfect for family dinners, date nights, special occasions, or anyone looking for a meal that feels impressive without requiring complicated cooking techniques. With simple ingredients and easy preparation, Garlic Parmesan Chicken Roll-Ups deliver a comforting and satisfying dish that everyone will love.

Why You’ll Love This Recipe

There are many reasons why these chicken roll-ups are a favorite among home cooks.

The first reason is the flavor. The combination of garlic, Parmesan cheese, herbs, and creamy filling creates a rich savory taste that makes ordinary chicken feel special. Each bite offers tender chicken, melted cheese, and buttery garlic goodness.

The second reason is the texture. The outside becomes golden and slightly crispy during baking, while the inside stays moist, creamy, and flavorful.

This recipe is also versatile and easy to customize. You can prepare it ahead of time, adjust the filling ingredients, or serve it with your favorite side dishes.

Perfect for:

  • Family dinners
  • Holiday meals
  • Romantic dinners
  • Meal prep
  • Low-carb diets
  • Dinner parties

It is a simple recipe that looks elegant enough for guests but is easy enough for everyday cooking.

Ingredients Overview

For the Chicken Roll-Ups

  • 4 large boneless, skinless chicken breasts
  • 1 teaspoon salt
  • 1 teaspoon black pepper
  • 1 teaspoon paprika
  • 1 teaspoon garlic powder
  • 1 teaspoon Italian seasoning
  • 2 tablespoons olive oil

The chicken is seasoned with simple spices that enhance the natural flavor while creating a beautiful golden crust during baking.

For the Creamy Garlic Parmesan Filling

  • 8 ounces cream cheese, softened
  • 1 cup shredded mozzarella cheese
  • ½ cup grated Parmesan cheese
  • 3 cloves garlic, minced
  • 2 tablespoons chopped fresh parsley
  • 1 teaspoon Italian seasoning
  • ½ teaspoon black pepper
  • ½ cup cooked spinach (optional)

The creamy filling is the heart of this recipe. Cream cheese provides richness, mozzarella creates a delicious cheese pull, and Parmesan adds a salty, nutty flavor.

For the Garlic Butter Sauce

  • 3 tablespoons butter
  • 2 cloves garlic, minced
  • 2 tablespoons fresh parsley
  • 1 tablespoon lemon juice
  • ¼ teaspoon black pepper

This sauce keeps the chicken juicy and adds a bright, buttery finish.

Step-by-Step Instructions

1. Prepare the Chicken

Begin by placing the chicken breasts on a cutting board. Using a sharp knife, carefully slice each chicken breast horizontally to create thin pieces.

Place the chicken between sheets of plastic wrap and gently pound it with a meat mallet until evenly thin.

Thin chicken pieces are easier to roll and cook more evenly.

Season both sides with salt, pepper, paprika, garlic powder, and Italian seasoning.

2. Prepare the Cheese Filling

In a bowl, combine softened cream cheese, mozzarella, Parmesan cheese, minced garlic, parsley, Italian seasoning, and black pepper.

Mix until smooth and creamy.

If using spinach, squeeze out excess moisture and mix it into the filling for extra flavor and nutrition.

The filling should be thick enough to stay inside the chicken while baking.

3. Fill and Roll the Chicken

Spread a layer of the cheese mixture over each chicken piece.

Carefully roll the chicken tightly from one end to the other.

Secure each roll with toothpicks if needed to prevent the filling from escaping during cooking.

The tighter the roll, the better the final presentation will be.

4. Sear the Chicken

Heat olive oil in a large oven-safe skillet over medium-high heat.

Place the chicken rolls seam-side down and cook for 2–3 minutes on each side until lightly golden.

Searing creates extra flavor and helps develop the beautiful browned exterior.

5. Bake Until Perfect

Preheat the oven to 375°F (190°C).

Transfer the skillet to the oven and bake for 20–25 minutes until the chicken reaches an internal temperature of 165°F (74°C).

During baking, the cheese filling melts and combines with the chicken juices to create a delicious sauce.

6. Make the Garlic Butter Finish

While the chicken cooks, melt butter in a small saucepan.

Add minced garlic and cook until fragrant. Stir in parsley, lemon juice, and black pepper.

Drizzle the garlic butter sauce over the cooked chicken before serving.

Expert Cooking Tips

  • Pound the chicken evenly so every roll cooks at the same speed.
  • Do not overfill the chicken because the cheese mixture may leak out.
  • Use freshly grated Parmesan for the best flavor.
  • Let the chicken rest for a few minutes after baking so the juices stay inside.
  • Use a meat thermometer to avoid overcooking.

Substitutions and Variations

This recipe can easily be adapted to your taste.

For extra flavor, add crispy bacon pieces to the filling.

For a spicy version, mix chopped jalapeños or red pepper flakes into the cheese mixture.

You can replace spinach with mushrooms, roasted peppers, or sun-dried tomatoes.

For a lighter option, use Greek yogurt mixed with Parmesan instead of some of the cream cheese.

You can also use chicken thighs instead of breasts for a richer flavor.

Serving Suggestions

Garlic Parmesan Chicken Roll-Ups pair beautifully with many side dishes.

Serve with:

  • Mashed potatoes
  • Roasted vegetables
  • Garlic bread
  • Pasta
  • Steamed broccoli
  • Fresh garden salad
  • Rice pilaf

For a complete restaurant-style dinner, serve the chicken with creamy mashed potatoes and drizzle extra garlic butter sauce on top.

Fresh herbs like parsley or basil add color and freshness to the final presentation.

Storage and Reheating Instructions

Store leftover chicken roll-ups in an airtight container in the refrigerator for up to 3 days.

To reheat, place them in a covered baking dish and warm in the oven at 325°F until heated through.

Avoid overheating because the chicken can become dry.

These roll-ups can also be prepared ahead of time. Assemble them, cover, and refrigerate until ready to bake.

For freezing, wrap individual portions tightly and freeze for up to 2 months.

Frequently Asked Questions

Can I prepare chicken roll-ups ahead of time?
Yes. Assemble them several hours before cooking and keep them refrigerated until ready to bake.

How do I keep the filling from leaking out?
Avoid overfilling and roll the chicken tightly. Toothpicks can help hold everything together.

Can I cook this recipe without cream cheese?
Yes. You can replace cream cheese with ricotta, Greek yogurt, or a mixture of mozzarella and Parmesan.

What chicken cut works best?
Boneless chicken breasts are ideal because they are easy to flatten and roll.

Can I make this recipe in an air fryer?
Yes. Cook at 375°F until the chicken reaches 165°F internally.

Final Thoughts

Garlic Parmesan Chicken Roll-Ups are the perfect combination of elegance, comfort, and incredible flavor. With juicy seasoned chicken, creamy cheese filling, golden roasted edges, and a delicious garlic butter finish, this recipe turns everyday ingredients into a memorable meal.

Whether you are cooking for your family or preparing a special dinner for guests, these chicken roll-ups are guaranteed to impress. They are easy to make, packed with flavor, and the kind of recipe everyone will ask you to make again.

Sticky Glazed Chicken

If you are craving a chicken dinner that is sweet, savory, garlicky, and beautifully caramelized, this Sticky Glazed Chicken is the kind of recipe that quickly becomes a family favorite. Tender pieces of chicken are seasoned and seared until golden, then coated in a glossy homemade glaze made with honey, brown sugar, soy sauce, garlic, ginger, and a touch of vinegar.

What makes this recipe especially delicious is the glaze. As it cooks, the sauce reduces and clings to the chicken, creating a shiny, sticky coating packed with flavor. The sweetness from honey and brown sugar is balanced by salty soy sauce, fresh garlic, ginger, and tangy vinegar, so the finished dish tastes rich without becoming overly sweet.

Sticky Glazed Chicken is perfect for busy weeknight dinners, meal prep, family meals, or casual entertaining. Serve it over steamed rice, fried rice, noodles, or mashed potatoes, and add broccoli, green beans, carrots, or stir-fried vegetables on the side for a complete dinner.

Why You’ll Love This Sticky Glazed Chicken

This recipe delivers restaurant-style flavor using simple pantry ingredients.

The chicken cooks quickly, especially if you cut it into bite-sized pieces, which makes this a great option when you need dinner on the table fast.

The homemade glaze is also easy to customize. You can make it spicier with chili sauce, more citrusy with orange juice, or add sesame oil for an Asian-inspired finish.

Another advantage is that the sauce is made directly in the skillet after the chicken is browned. That means all the flavorful caramelized bits left behind from the chicken become part of the glaze.

Ingredients

For the Chicken

  • 1½ pounds boneless, skinless chicken breasts or thighs
  • 1 tablespoon olive oil
  • 1 teaspoon garlic powder
  • ½ teaspoon onion powder
  • ½ teaspoon paprika
  • ¾ teaspoon kosher salt
  • ½ teaspoon freshly ground black pepper
  • 2 tablespoons cornstarch

For the Sticky Glaze

  • ⅓ cup honey
  • ¼ cup packed brown sugar
  • ⅓ cup low-sodium soy sauce
  • 2 tablespoons rice vinegar or apple cider vinegar
  • 1 tablespoon ketchup
  • 1 tablespoon hoisin sauce, optional
  • 4 garlic cloves, finely minced
  • 1 teaspoon freshly grated ginger
  • 1 teaspoon sesame oil, optional
  • ¼ teaspoon crushed red pepper flakes, optional
  • ½ cup chicken broth or water

For Thickening the Sauce

  • 1 tablespoon cornstarch
  • 2 tablespoons cold water

For Garnishing

  • 2 tablespoons sliced green onions
  • 1 tablespoon sesame seeds
  • Freshly cracked black pepper, optional

How to Make Sticky Glazed Chicken

1. Prepare the Chicken

Pat the chicken dry with paper towels.

Cut it into approximately 1 to 1½-inch pieces.

Try to keep the pieces similar in size so they cook evenly.

Place the chicken in a bowl and season with garlic powder, onion powder, paprika, salt, and black pepper.

Sprinkle the cornstarch over the chicken and toss until every piece is lightly coated.

The cornstarch helps the chicken develop a golden exterior and also helps the sticky glaze cling to the surface.

2. Heat the Skillet

Place a large skillet over medium-high heat.

Add the olive oil.

Allow the skillet to become hot before adding the chicken.

The chicken should begin sizzling immediately when it touches the pan.

3. Sear the Chicken

Arrange the chicken in a single layer.

Avoid overcrowding the skillet. If necessary, cook it in two batches.

Cook for approximately 3–4 minutes on the first side without moving the pieces too often.

Turn and cook for another 3–4 minutes.

The chicken should develop golden edges and be nearly cooked through.

Chicken is safely cooked when the internal temperature reaches 165°F (74°C).

Transfer the chicken to a clean plate while you prepare the glaze.

4. Make the Sticky Glaze

In a medium bowl, whisk together honey, brown sugar, soy sauce, vinegar, ketchup, optional hoisin sauce, garlic, ginger, sesame oil, red pepper flakes, and chicken broth.

Mix until the brown sugar begins to dissolve.

The glaze may look thin at this point, but it will reduce and thicken once heated.

5. Add the Glaze to the Skillet

Reduce the skillet heat to medium.

Pour the glaze mixture into the same pan used for the chicken.

Use a wooden spoon to scrape up any browned pieces from the bottom.

Those caramelized bits add extra flavor to the finished sauce.

Bring the glaze to a gentle simmer.

6. Reduce the Sauce

Let the glaze simmer for approximately 3–5 minutes, stirring occasionally.

The sauce should begin reducing and becoming slightly more concentrated.

Keep the heat moderate because honey and brown sugar can burn if cooked too aggressively.

7. Make the Cornstarch Slurry

In a small bowl, mix 1 tablespoon cornstarch with 2 tablespoons cold water.

Stir until completely smooth.

Pour the slurry slowly into the simmering glaze while stirring.

Continue cooking for approximately 1–2 minutes.

The sauce should quickly become glossy and thick enough to coat the back of a spoon.

8. Return the Chicken

Add the seared chicken back to the skillet.

Toss gently until every piece is coated in the sticky glaze.

Cook for another 1–2 minutes over medium-low heat.

The sauce should cling tightly to the chicken and become shiny.

Avoid cooking for too long after returning the chicken, or the meat can become dry.

9. Taste and Adjust

Taste a small amount of the glaze.

If you want more sweetness, add a teaspoon of honey.

For extra tang, add a splash of vinegar.

For more heat, add red pepper flakes or chili sauce.

If the sauce becomes too thick, loosen it with a tablespoon or two of chicken broth.

10. Garnish and Serve

Remove the skillet from the heat.

Sprinkle the chicken with sliced green onions and sesame seeds.

Serve immediately while the glaze is warm and glossy.

What to Serve With Sticky Glazed Chicken

Steamed white rice is one of the best sides for this recipe. The rice absorbs the extra glaze and balances the strong sweet-savory flavors.

Jasmine rice or basmati rice also work beautifully.

For a more restaurant-style meal, serve the chicken with vegetable fried rice or egg fried rice.

Noodles are another excellent option. Lo mein, ramen noodles, or simple garlic noodles pair especially well with the sticky sauce.

For vegetables, try steamed broccoli, green beans, carrots, snap peas, bell peppers, bok choy, or roasted Brussels sprouts.

You can also serve the chicken in lettuce cups or over cauliflower rice for a lighter variation.

Tips for the Best Sticky Glazed Chicken

Cut the chicken evenly. Similar-sized pieces cook at the same rate.

Pat the chicken dry. Removing moisture helps create a better golden crust.

Use cornstarch on the chicken. It gives the surface better texture and helps the glaze adhere.

Do not overcrowd the skillet. Crowded chicken releases moisture and begins steaming.

Use low-sodium soy sauce. The glaze reduces significantly, which can concentrate saltiness.

Keep the glaze at a gentle simmer. High heat can burn the sugar.

Add the chicken back near the end. This prevents it from becoming overcooked.

Easy Recipe Variations

Spicy Sticky Chicken

Add 1–2 tablespoons sriracha or chili garlic sauce to the glaze.

You can also add cayenne or extra crushed red pepper flakes.

Sticky Orange Chicken

Replace ¼ cup of the chicken broth with fresh orange juice and add 1 teaspoon orange zest.

Sticky Garlic Chicken

Increase the fresh garlic to 6 cloves for a stronger garlic flavor.

Sticky Sesame Chicken

Increase the sesame oil slightly and add extra toasted sesame seeds before serving.

Sticky Pineapple Chicken

Add 1 cup pineapple chunks during the final few minutes.

A small splash of pineapple juice can also be added to the glaze.

Sticky Chicken and Vegetables

Sauté bell peppers, broccoli, snap peas, or carrots separately and add them back with the chicken.

Storage and Reheating

Allow leftover chicken to cool before transferring it to an airtight container.

Refrigerate for up to 3–4 days.

The glaze will become thicker after chilling.

To reheat, place the chicken in a skillet over low heat.

Add a tablespoon or two of water or chicken broth and stir gently until the glaze loosens and the chicken is heated through.

Individual portions can also be microwaved in short intervals.

Avoid overheating because chicken can become dry and the sugary glaze can become overly thick.

Make-Ahead Instructions

The sticky glaze can be mixed up to 2 days ahead and stored in an airtight container in the refrigerator.

The chicken can be cut and seasoned several hours before cooking.

For the best texture, wait until shortly before cooking to toss the chicken with cornstarch.

You can also chop the green onions and prepare the garnishes ahead, making the final cooking process especially quick.

Final Thoughts

This Sticky Glazed Chicken combines juicy golden chicken with honey, brown sugar, soy sauce, garlic, ginger, and a glossy caramelized sauce for an easy dinner packed with sweet and savory flavor.

The secret is to brown the chicken first, build the glaze in the same skillet, and let the sauce reduce gently before returning the chicken. Cornstarch gives the glaze that thick, shiny texture that clings beautifully to every bite.

Serve it over steamed rice for an easy weeknight dinner, pair it with noodles and vegetables for a takeout-inspired meal, or customize it with orange, pineapple, sesame, or extra chili for a different version every time.

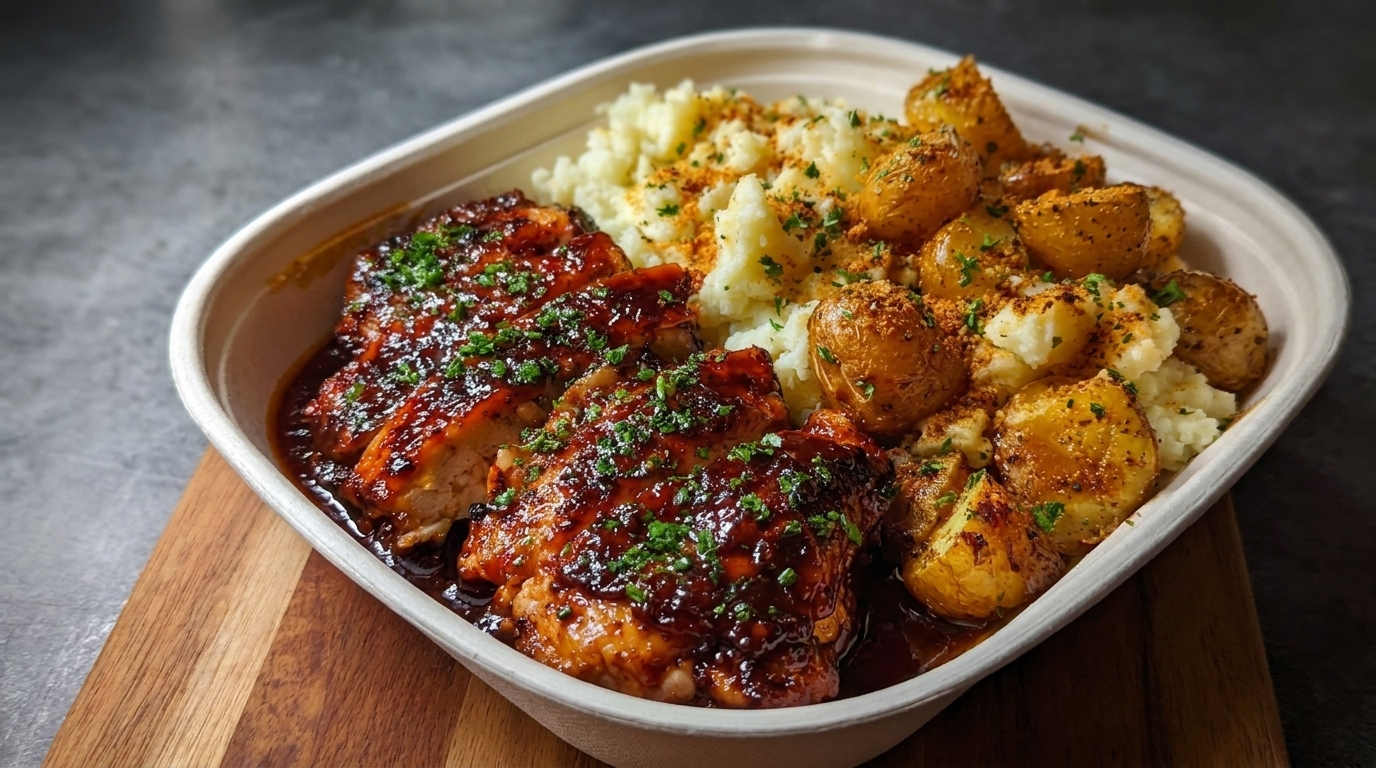
Easy Juicy Chicken with Golden Potatoes and Roasted Vegetables – Flavor-Packed One-Pan Dinner

If you are looking for a comforting dinner that combines juicy chicken, golden roasted potatoes, and colorful roasted vegetables, this easy one-pan recipe is perfect for busy weeknights, Sunday dinners, or relaxed family meals. Everything cooks together with garlic, olive oil, herbs, paprika, and lemon, giving the entire dish a savory, roasted flavor with minimal cleanup.

The chicken stays tender and flavorful while the potatoes develop crisp, golden edges and soft centers. Bell peppers, carrots, onions, and zucchini add sweetness, color, and extra texture. As everything roasts, the chicken juices mingle with the garlic-herb seasoning and coat the vegetables, creating a simple pan sauce that makes the entire meal taste even better.

One of the biggest advantages of this recipe is its flexibility. You can use chicken breasts or thighs, swap in whatever vegetables you have available, add Parmesan for extra richness, or use red pepper flakes for a spicy variation. Serve it straight from the roasting pan or pair it with a fresh salad and warm bread.

Why You’ll Love This Chicken, Potatoes, and Roasted Vegetables

This recipe gives you protein, potatoes, and vegetables in one pan, making it an excellent complete dinner.

The chicken is seasoned with garlic, herbs, paprika, and lemon, so it develops plenty of flavor without needing a complicated marinade.

The potatoes roast in the same pan and absorb some of the chicken juices while becoming golden and crispy around the edges.

Another reason to love this dish is how easy it is to customize. Broccoli, Brussels sprouts, mushrooms, green beans, sweet potatoes, and cauliflower can all be used depending on what you have in your kitchen.

Ingredients

For the Chicken

  • 4 boneless, skinless chicken breasts or 6 boneless chicken thighs
  • 2 tablespoons olive oil
  • 1 teaspoon kosher salt
  • ½ teaspoon freshly ground black pepper
  • 1 teaspoon garlic powder
  • 1 teaspoon paprika
  • ½ teaspoon onion powder
  • 1 teaspoon dried oregano
  • ½ teaspoon dried thyme
  • ½ teaspoon dried rosemary
  • 1 tablespoon fresh lemon juice

For the Golden Potatoes

  • 1½ pounds baby Yukon Gold potatoes
  • 2 tablespoons olive oil
  • 1 teaspoon garlic powder
  • ½ teaspoon paprika
  • ½ teaspoon dried oregano
  • ¾ teaspoon salt
  • ¼ teaspoon black pepper

For the Roasted Vegetables

  • 2 large carrots, cut into thick slices
  • 1 red bell pepper, cut into chunks
  • 1 yellow bell pepper, cut into chunks
  • 1 small zucchini, cut into thick pieces
  • 1 medium red onion, cut into wedges
  • 1 tablespoon olive oil
  • ½ teaspoon Italian seasoning
  • ¼ teaspoon salt
  • ¼ teaspoon black pepper

For the Garlic Herb Butter

  • 3 tablespoons unsalted butter, melted
  • 4 garlic cloves, finely minced
  • 1 tablespoon chopped fresh parsley
  • 1 teaspoon fresh lemon juice

For Garnishing

  • Fresh parsley
  • Lemon wedges
  • Freshly cracked black pepper
  • Freshly grated Parmesan, optional

How to Make Juicy Chicken with Golden Potatoes and Roasted Vegetables

1. Preheat the Oven

Preheat your oven to 425°F (220°C).

Lightly grease a large rimmed baking sheet or roasting pan.

Use a pan large enough to spread the ingredients out. Crowding everything too tightly traps steam and prevents the potatoes and vegetables from becoming properly roasted.

2. Prepare the Potatoes

Wash and dry the baby potatoes.

Cut larger potatoes in half and leave very small ones whole.

Place them in a large bowl.

Add olive oil, garlic powder, paprika, oregano, salt, and black pepper.

Toss thoroughly until every potato is coated.

Arrange the potatoes cut-side down on one side of the baking sheet.

3. Give the Potatoes a Head Start

Place the potatoes in the oven and roast for approximately 15 minutes.

Potatoes require more cooking time than chicken and softer vegetables, so this short head start helps everything finish at roughly the same time.

While they roast, prepare the chicken and vegetables.

4. Season the Chicken

Pat the chicken dry using paper towels.

If using very thick chicken breasts, gently pound them to an even thickness of about ¾ inch.

Place the chicken in a bowl.

Add olive oil, salt, black pepper, garlic powder, paprika, onion powder, oregano, thyme, rosemary, and lemon juice.

Rub the seasonings over both sides.

Allow the chicken to sit for approximately 10 minutes while you prepare the vegetables.

5. Prepare the Vegetables

Add the carrots, bell peppers, zucchini, and red onion to a bowl.

Drizzle with olive oil.

Season with Italian seasoning, salt, and black pepper.

Toss until evenly coated.

Keep the vegetable pieces relatively large because they will shrink slightly as they roast.

6. Add Everything to the Pan

After the potatoes have roasted for 15 minutes, carefully remove the pan from the oven.

Turn the potatoes.

Arrange the chicken in the center of the baking sheet.

Place the vegetables around the chicken and potatoes.

Try to keep everything in a single layer.

7. Roast the Chicken and Vegetables

Return the pan to the oven.

Roast for approximately 20–25 minutes.

Cooking time depends on the thickness of the chicken pieces.

The potatoes should become golden brown, the vegetables should be tender with lightly caramelized edges, and the chicken should be cooked through.

8. Check the Chicken Temperature

Insert an instant-read thermometer into the thickest part of the chicken.

Chicken is safely cooked when it reaches an internal temperature of 165°F (74°C).

Remove thinner chicken pieces earlier if necessary while allowing the potatoes to finish roasting.

Avoid overcooking the chicken, as this can make breast meat dry.

9. Make the Garlic Herb Butter

While the chicken finishes cooking, combine melted butter, minced garlic, parsley, and lemon juice in a small bowl.

Stir thoroughly.

The garlic butter gives the finished dish an extra layer of richness without requiring a separate sauce.

10. Brush with Garlic Butter

Remove the roasting pan from the oven.

Brush the warm chicken generously with garlic herb butter.

Drizzle a small amount over the potatoes as well.

Toss the vegetables gently in any flavorful juices remaining in the pan.

11. Broil for Extra Golden Color

If you want more caramelization, place the baking sheet under the broiler for approximately 1–2 minutes.

Watch carefully.

The potatoes and vegetables should become slightly deeper in color without burning.

12. Rest the Chicken

Let the chicken rest for approximately 5 minutes before slicing.

This allows the juices inside the meat to redistribute and helps keep each bite moist.

13. Garnish and Serve

Sprinkle everything with fresh parsley.

Add freshly cracked black pepper and optional Parmesan over the potatoes.

Serve with fresh lemon wedges.

Spoon some of the buttery pan juices over the chicken just before serving.

What to Serve With This Chicken and Potato Dinner

This recipe already provides a complete meal, but a few simple additions can make it even better.

A crisp garden salad with lettuce, cucumber, tomato, and lemon vinaigrette provides a refreshing contrast to the roasted flavors.

Garlic bread or warm dinner rolls are great for soaking up the pan juices.

You can also serve the meal with tzatziki, garlic yogurt sauce, honey mustard, or creamy herb dressing.

If you are feeding a larger group, add rice, couscous, or quinoa to stretch the meal further.

Tips for the Best Juicy Chicken and Golden Potatoes

Give the potatoes a head start. This is one of the most important steps because potatoes need longer than chicken.

Use similarly sized potato pieces. Uniform pieces cook more evenly.

Pat the chicken dry. This helps the seasoning adhere and encourages better browning.

Do not overcrowd the pan. Space allows roasting instead of steaming.

Use a thermometer. Remove chicken at 165°F to keep it juicy.

Add softer vegetables later. Zucchini and peppers do not need as much cooking time as potatoes.

Finish with garlic butter. Adding it after roasting keeps the garlic flavor fresh and aromatic.

Easy Recipe Variations

Garlic Parmesan Chicken and Potatoes

Sprinkle the chicken and potatoes with ½ cup freshly grated Parmesan during the final 5 minutes of roasting.

Mediterranean Chicken and Potatoes

Add cherry tomatoes, Kalamata olives, oregano, and crumbled feta after cooking.

Spicy Chicken and Potatoes

Add cayenne pepper, chili flakes, or Cajun seasoning to the chicken and potatoes.

Honey Garlic Chicken

Mix 1 tablespoon honey into the garlic butter before brushing it over the chicken.

Chicken with Broccoli and Potatoes

Replace the zucchini with broccoli florets and add them during the final 15–20 minutes of roasting.

Storage and Reheating

Store leftover chicken, potatoes, and vegetables in an airtight container in the refrigerator for up to 3–4 days.

For the best texture, reheat everything in a 375°F (190°C) oven for about 10–15 minutes.

An air fryer also works especially well for restoring crispy edges to the potatoes.

Chicken can also be reheated gently in a covered skillet with a splash of chicken broth to help maintain moisture.

Make-Ahead Instructions

The potatoes can be washed and cut several hours ahead.

Keep them submerged in cold water in the refrigerator, then drain and dry thoroughly before seasoning.

The chicken can be seasoned and refrigerated for several hours.

Vegetables can also be chopped earlier in the day and stored in airtight containers.

When dinner time arrives, simply roast the potatoes first, add the remaining ingredients, and finish everything with garlic herb butter.

Final Thoughts

This Juicy Chicken with Golden Potatoes and Roasted Vegetables is an easy one-pan meal packed with comforting flavors and colorful ingredients. Tender herb-seasoned chicken, crispy potatoes, sweet roasted vegetables, garlic, butter, lemon, and fresh herbs come together in a dinner that requires very little complicated preparation.

The secret is timing each ingredient correctly: give the potatoes a head start, add the chicken and vegetables afterward, and remove the chicken as soon as it reaches 165°F. Finish everything with fresh garlic herb butter for a simple touch that makes the entire dish taste special.

Serve it straight from the roasting pan for an easy weeknight meal, add Parmesan for extra richness, or customize the vegetables based on what you already have at home.

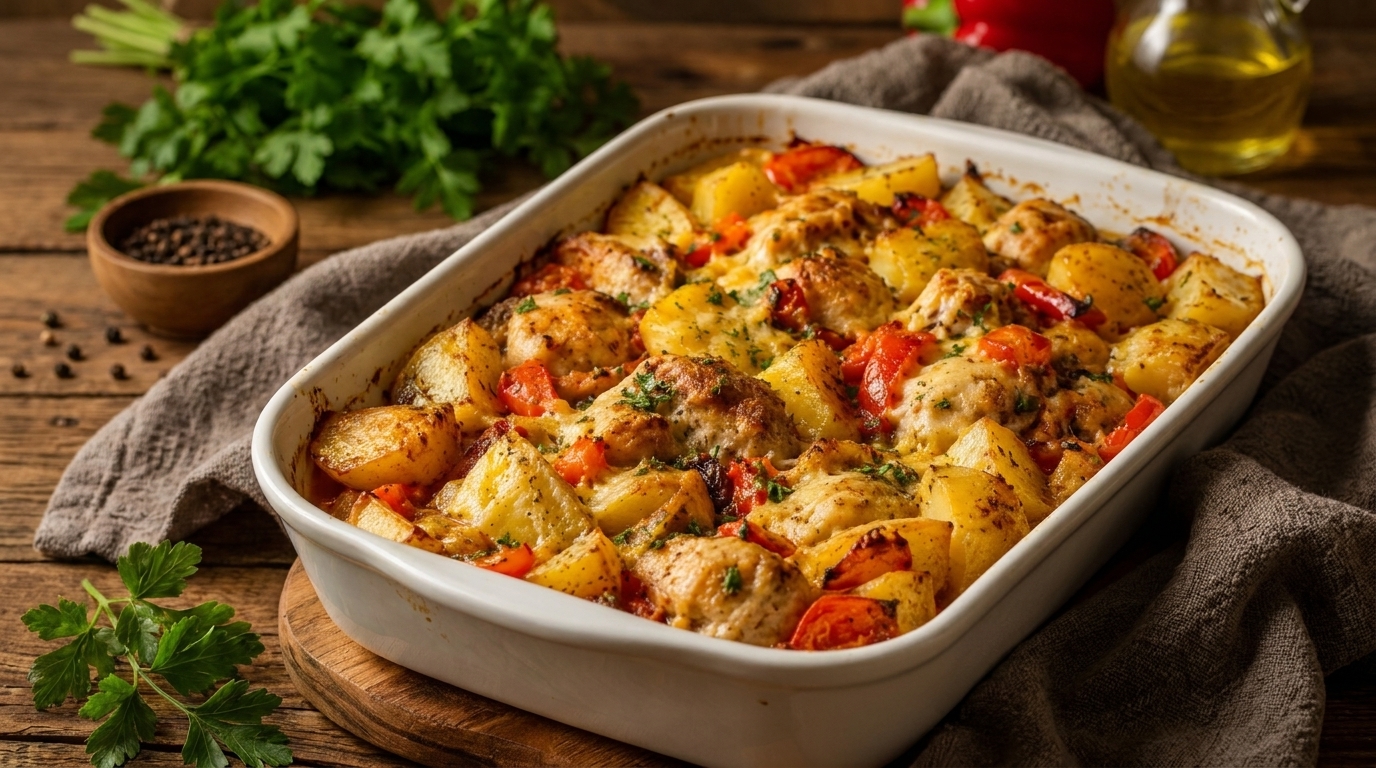
Baked Spaghetti Casserole with Rich Meat Sauce and Cheesy Topping

Introduction

Baked spaghetti casserole is the ultimate comfort food that combines everything people love about a classic Italian-inspired dinner into one warm, cheesy, and satisfying dish. This recipe transforms simple spaghetti into a beautiful oven-baked meal layered with flavorful meat sauce, tender pasta, creamy cheese, and a golden melted topping.

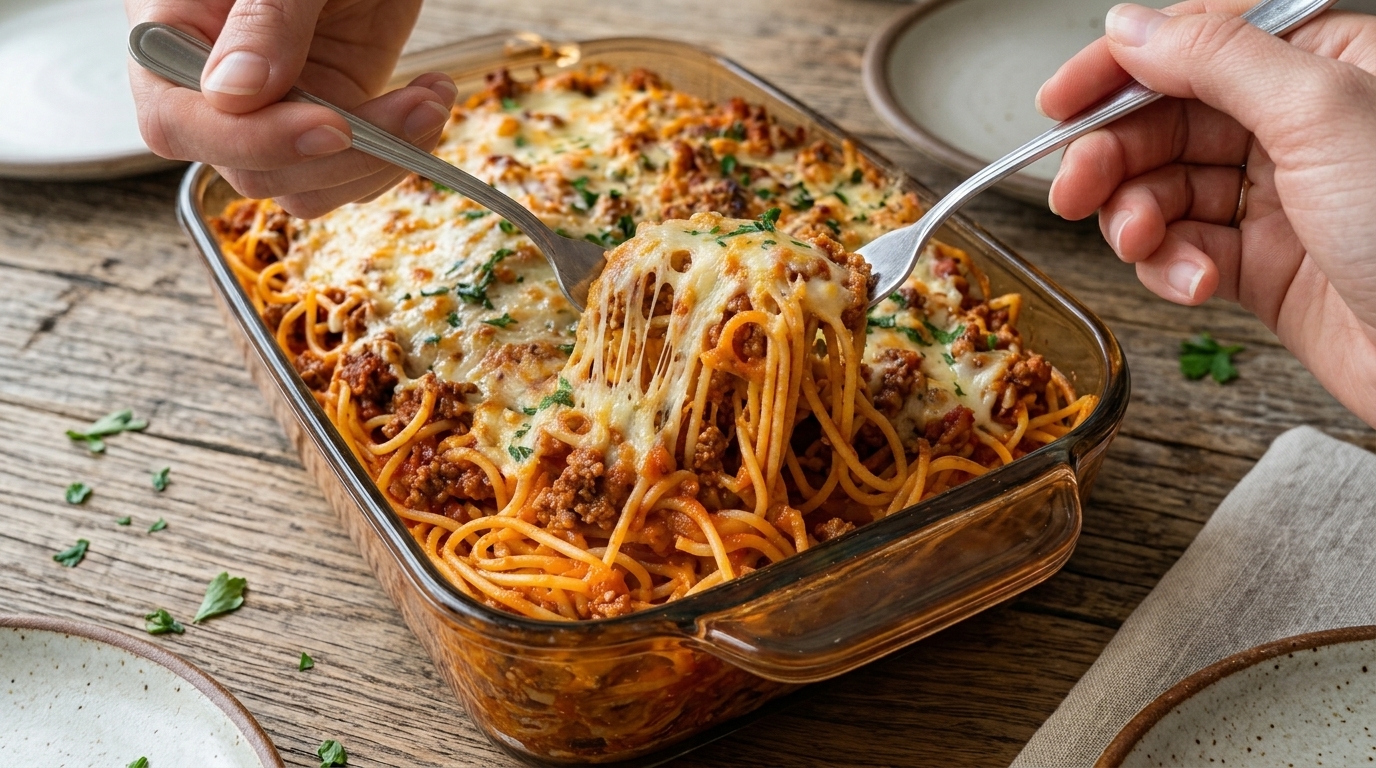
The dish shown features perfectly cooked spaghetti coated in a rich tomato-based meat sauce, layered inside a glass baking dish, and finished with a generous blanket of melted cheese. The top has a beautifully baked golden crust with fresh herbs sprinkled over it, while the inside remains saucy, creamy, and full of comforting flavors.

Unlike traditional spaghetti served on a plate, baked spaghetti casserole brings all the ingredients together so every bite contains pasta, savory sauce, and delicious melted cheese. It is a perfect family dinner recipe because it can feed a crowd, can be prepared ahead of time, and tastes even better the next day.

Whether you are cooking for a busy weeknight, a weekend gathering, or a cozy family meal, this cheesy baked spaghetti is guaranteed to become a favorite.

Why You’ll Love This Recipe

There are many reasons why baked spaghetti casserole has become a beloved comfort food in kitchens around the world.

First, it is incredibly flavorful. The combination of seasoned ground beef, aromatic vegetables, tomato sauce, and Italian herbs creates a rich and satisfying sauce that coats every strand of spaghetti.

Second, the cheese layer makes this dish extra special. As the casserole bakes, the cheese melts into the pasta and creates a creamy texture throughout, while the top becomes golden, bubbly, and slightly crispy.

This recipe is also practical and convenient. You can prepare it ahead of time, store it in the refrigerator, and bake it whenever you are ready to serve. It is perfect for:

  • Family dinners
  • Meal prep
  • Potluck gatherings
  • Holiday meals
  • Busy weeknight cooking
  • Comfort food cravings

It is a budget-friendly recipe that turns everyday ingredients into something that feels special and homemade.

Ingredients Overview

For the Spaghetti and Meat Sauce

  • 1 pound spaghetti noodles
  • 2 tablespoons olive oil
  • 1 pound ground beef
  • 1 medium onion, finely chopped
  • 3 cloves garlic, minced
  • 1 can crushed tomatoes (28 ounces)
  • 2 tablespoons tomato paste
  • 1 teaspoon dried oregano
  • 1 teaspoon dried basil
  • ½ teaspoon red pepper flakes (optional)
  • Salt and black pepper to taste
  • ½ cup chopped fresh parsley

The meat sauce is the heart of this casserole. Ground beef adds richness, while garlic, onions, and herbs build layers of flavor. Tomato paste helps deepen the sauce and gives it a restaurant-quality taste.

For the Cheese Layer

  • 2 cups shredded mozzarella cheese
  • 1 cup shredded cheddar cheese
  • ½ cup grated Parmesan cheese
  • 4 ounces cream cheese (optional for extra creaminess)
  • ½ cup ricotta cheese (optional)

Using a mixture of cheeses creates the perfect balance of flavor and texture. Mozzarella provides stretch and creaminess, Parmesan adds a salty savory finish, and cheddar gives extra richness.

Step-by-Step Instructions

1. Prepare the Pasta

Begin by bringing a large pot of salted water to a boil. Cook the spaghetti according to package instructions until slightly firm, also known as al dente.

Avoid overcooking the pasta because it will continue cooking while baking in the oven. Once cooked, drain the spaghetti and set it aside.

Adding a small amount of olive oil can help prevent the noodles from sticking together while you prepare the sauce.

2. Make the Homemade Meat Sauce

Heat olive oil in a large skillet over medium heat. Add chopped onions and cook until they become soft and slightly golden.

Add minced garlic and cook for about 30 seconds until fragrant. Then add the ground beef and cook until browned, breaking it apart with a spoon as it cooks.

Drain excess fat if needed, then add crushed tomatoes, tomato paste, oregano, basil, salt, pepper, and red pepper flakes.

Allow the sauce to simmer for 15–20 minutes. This step allows the flavors to blend together and creates a rich, delicious sauce.

3. Combine Pasta and Sauce

Add the cooked spaghetti into the meat sauce and gently toss until every strand is coated.

This ensures that the pasta absorbs the flavors before baking. The sauce should evenly cover the noodles without making them too dry.

4. Layer the Casserole

Preheat your oven to 375°F (190°C).

Grease a large baking dish and add half of the spaghetti mixture. Spread a layer of cheese over the pasta, then add the remaining spaghetti.

Top the casserole with mozzarella, cheddar, and Parmesan cheese. The cheese layer will melt and create the beautiful golden topping seen in the dish.

5. Bake Until Golden and Bubbly

Cover the baking dish with foil and bake for about 20 minutes.

Remove the foil and continue baking for another 10–15 minutes until the cheese becomes golden brown and bubbly.

For an extra crispy top, you can place it under the broiler for 1–2 minutes while watching carefully.

Allow the casserole to rest for a few minutes before serving. This helps the layers set and makes slicing easier.

Expert Cooking Tips

  • Cook the spaghetti slightly less than recommended because it will continue cooking in the oven.
  • Use freshly shredded cheese for the smoothest melt and best flavor.
  • Let the meat sauce simmer longer if you have time because slow cooking develops deeper flavors.
  • Add vegetables like mushrooms, spinach, or bell peppers for extra nutrition.
  • Prepare the casserole one day ahead for an easy dinner option.

Substitutions and Variations

This baked spaghetti recipe can easily be customized based on your preferences.

For a lighter version, use ground turkey or chicken instead of beef.

For a vegetarian option, replace the meat with mushrooms, zucchini, spinach, or roasted vegetables.

You can also make it extra creamy by adding ricotta cheese or a layer of Alfredo sauce.

For spice lovers, add extra chili flakes or spicy Italian sausage for a stronger flavor.

Serving Suggestions

Serve this cheesy baked spaghetti casserole with simple sides to complete the meal.

Great pairings include:

  • Garlic bread
  • Caesar salad
  • Roasted vegetables
  • Steamed broccoli
  • Fresh garden salad

A sprinkle of fresh parsley or basil on top adds color and freshness while balancing the richness of the cheese and sauce.

This dish pairs beautifully with a refreshing drink or a glass of wine for an Italian-inspired dinner experience.

Storage and Reheating Instructions

Store leftover baked spaghetti in an airtight container or cover the baking dish tightly with foil.

It can be kept in the refrigerator for up to 4 days.

To reheat, place individual portions in the microwave or warm larger portions in the oven at 350°F until heated through.

For freezing, assemble the casserole without baking, cover tightly, and freeze for up to 3 months. Thaw overnight in the refrigerator before baking.

Frequently Asked Questions

Can I make baked spaghetti ahead of time?
Yes. Assemble the casserole, cover it, and refrigerate it until you are ready to bake.

What pasta works best for this recipe?
Spaghetti is traditional, but you can also use penne, rigatoni, or other pasta shapes.

How do I prevent baked spaghetti from drying out?
Make sure there is enough sauce and avoid overbaking. Covering it during the first part of baking helps retain moisture.

Can I use jarred pasta sauce?
Yes. A high-quality store-bought sauce can save time while still creating a delicious casserole.

Final Thoughts

Baked spaghetti casserole is a classic comfort meal that brings together the best parts of pasta, meat sauce, and melted cheese in one irresistible dish. With its rich flavors, creamy texture, and golden cheesy topping, it is the kind of recipe that makes everyone gather around the table.

Easy enough for a weekday dinner but impressive enough for guests, this cheesy baked spaghetti is a recipe you will want to make again and again. Every forkful delivers the perfect combination of savory sauce, tender pasta, and comforting homemade flavor.

Slow Cooker Beef with Mushrooms and Onions

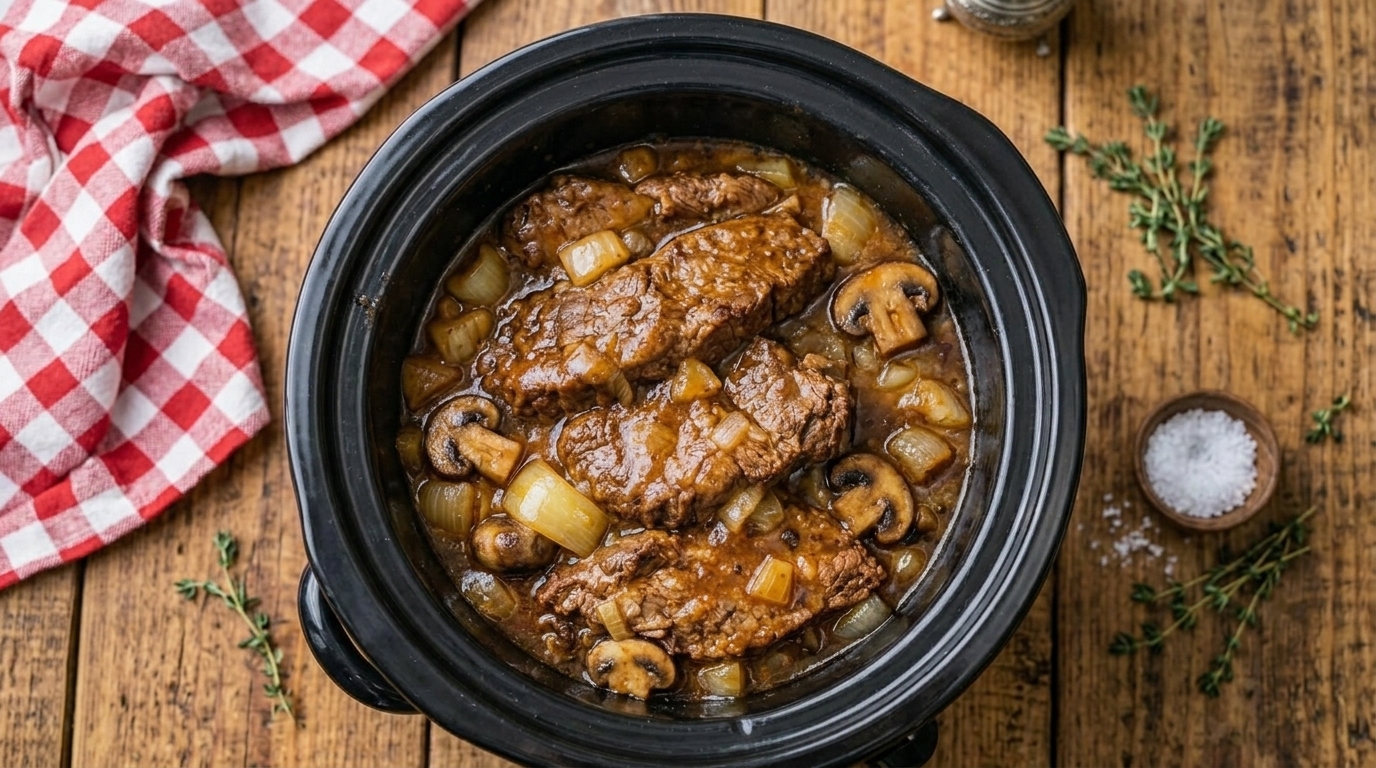
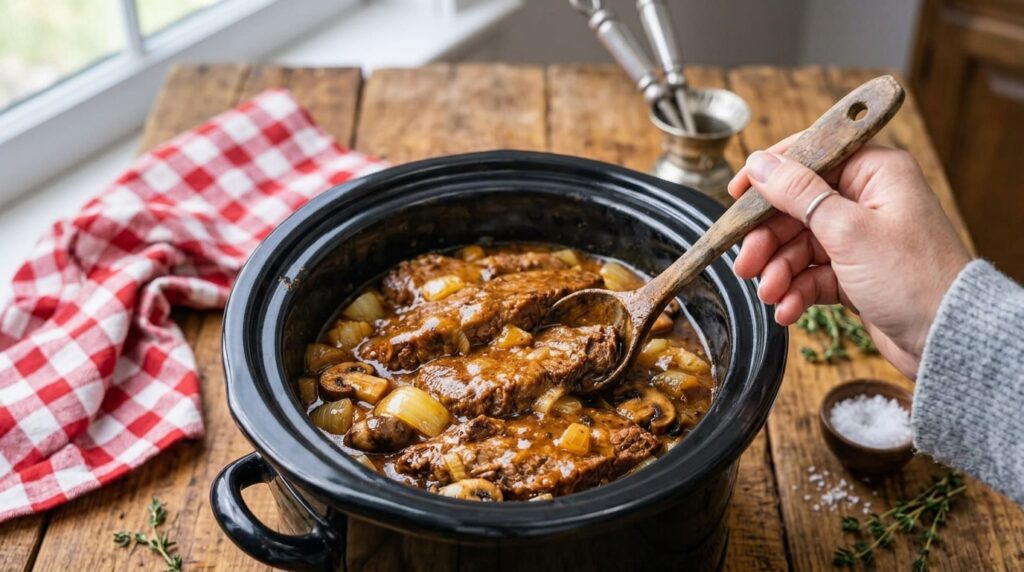
This Slow Cooker Beef with Mushrooms and Onions is a hearty comfort-food dinner featuring tender beef slowly cooked in a rich savory gravy with caramelized onions, mushrooms, garlic, and herbs. The low-and-slow cooking method makes the beef fork-tender while the mushrooms and onions soak up all the flavorful juices, creating an easy family meal that is perfect with mashed potatoes, rice, or buttered noodles.

Why You’ll Love It

  • Tender slow-cooked beef with rich, savory gravy
  • Mushrooms and onions add deep, comforting flavor
  • Easy slow-cooker preparation with minimal hands-on work
  • Perfect for family dinners, Sunday meals, or meal prep

Ingredients Overview

Beef

  • 3 lbs beef chuck roast or thick-cut chuck steaks
  • 1 tbsp olive oil
  • 1½ tsp salt
  • 1 tsp black pepper
  • 1 tsp garlic powder
  • 1 tsp onion powder
  • 1 tsp smoked paprika

Mushrooms & Onions

  • 12 oz mushrooms, sliced
  • 2 large yellow onions, chopped
  • 4 garlic cloves, minced
  • 2 tbsp butter

Savory Gravy

  • 2 cups beef broth
  • 2 tbsp Worcestershire sauce
  • 1 tbsp soy sauce
  • 1 tbsp tomato paste
  • 1 tsp Dijon mustard
  • 1 tsp dried thyme
  • ½ tsp dried rosemary
  • ½ tsp black pepper
  • 2 tbsp cornstarch
  • 2 tbsp cold water

Garnish

  • 2 tbsp fresh parsley, chopped
  • Freshly cracked black pepper

Step-by-Step Instructions

1. Season the Beef

Pat the beef dry thoroughly with paper towels.

Season both sides with salt, black pepper, garlic powder, onion powder, and smoked paprika.

Let the beef rest for about 10 minutes while you heat the skillet.

2. Sear the Beef

Heat olive oil in a large skillet over medium-high heat.

Add the beef and sear for 3–4 minutes per side, until deeply browned.

Work in batches if necessary so the pan is not overcrowded.

Transfer the browned beef to the slow cooker.

3. Cook the Mushrooms and Onions

Reduce the skillet heat to medium and add butter.

Add the onions and mushrooms.

Cook for 5–6 minutes, stirring occasionally, until softened and lightly browned.

Add the garlic and cook for another 30 seconds until fragrant.

Transfer everything to the slow cooker.

4. Prepare the Gravy

In a bowl, whisk together beef broth, Worcestershire sauce, soy sauce, tomato paste, Dijon mustard, thyme, rosemary, and black pepper.

Pour the mixture over the beef, mushrooms, and onions.

Spoon some of the vegetables and liquid over the top of the meat.

5. Slow Cook

Cover and cook on LOW for 7–8 hours or on HIGH for 4–5 hours, until the beef is very tender.

For the best texture, LOW heat is recommended.

During the final 20 minutes, mix the cornstarch and cold water until smooth.

Stir the slurry into the cooking liquid and continue cooking until the gravy thickens.

6. Serve

Carefully transfer the beef to a serving platter.

Spoon plenty of mushrooms, onions, and rich gravy over the top.

Finish with fresh parsley and freshly cracked black pepper.

Serve immediately while hot and tender.

Cooking Tips

  • Searing the beef before slow cooking adds deeper flavor and better color.
  • Chuck roast works especially well because it becomes very tender during long cooking.
  • Avoid lifting the slow cooker lid frequently, as this releases heat.
  • Let the mushrooms brown briefly before adding them to the slow cooker for richer flavor.
  • Add the cornstarch slurry near the end so the gravy becomes smooth and glossy.

Serving Suggestions

Serve this slow cooker beef with mushrooms and onions with:

  • Creamy mashed potatoes
  • Buttered egg noodles
  • Steamed white rice
  • Roasted green beans
  • Crusty dinner rolls

Storage

Store leftover beef, mushrooms, onions, and gravy in an airtight container in the refrigerator for up to 4 days.

Reheat gently on the stovetop, in the microwave, or in a 325°F (165°C) oven. Add a splash of beef broth if the gravy becomes too thick.

Leftover Ideas

  • Shred leftover beef and serve it over mashed potatoes with extra gravy.
  • Toss the beef and mushrooms with egg noodles for an easy next-day dinner.
  • Use sliced leftover beef in toasted sandwiches with melted provolone cheese.

FAQs

Can I use stew meat instead of chuck roast?
Yes. Beef stew meat works well and may cook slightly faster because the pieces are smaller.

Can I add potatoes to the slow cooker?
Yes. Baby potatoes or chopped Yukon Gold potatoes can be added around the beef at the beginning.

Can I make this without mushrooms?
Yes. Leave them out and increase the onions for a rich onion gravy version.

How do I know when the beef is done?
The beef should be fork-tender and easy to pull apart. Toughness usually means it needs additional slow-cooking time.

Final Thoughts

Slow Cooker Beef with Mushrooms and Onions combines tender beef, caramelized vegetables, and rich savory gravy in one comforting meal that requires very little effort. Hearty, flavorful, and perfect for serving over potatoes, rice, or noodles, this easy slow-cooker dinner is ideal for busy weekdays, Sunday meals, or cozy family gatherings.

#SlowCookerBeef #BeefAndMushrooms #ComfortFood #SlowCookerRecipes #FamilyDinner

Easy Garlic Parmesan Shrimp Puff Pastry Cups Recipe – Flaky, Creamy, and Elegant

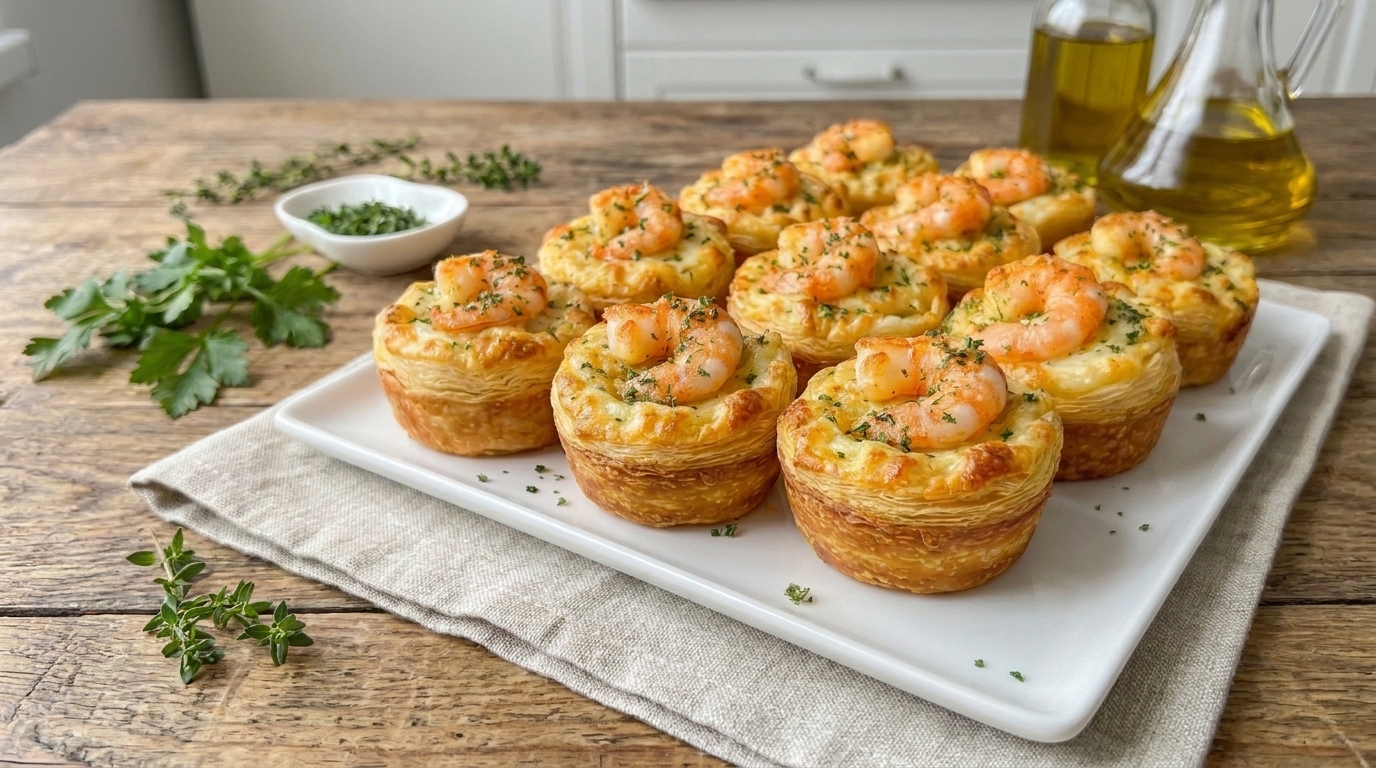
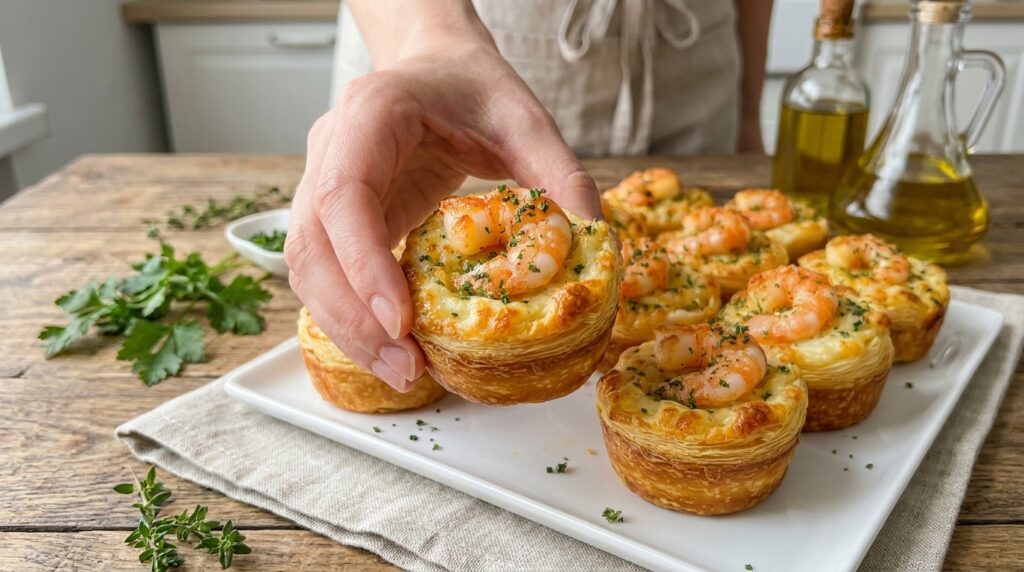
If you are looking for an easy appetizer that feels elegant enough for holidays, parties, or special occasions, these Garlic Parmesan Shrimp Puff Pastry Cups are an excellent recipe to make. Buttery puff pastry is baked until crisp and golden, then filled with juicy garlic shrimp in a creamy Parmesan sauce.

The contrast of flaky pastry, tender shrimp, fresh garlic, Parmesan, lemon, and herbs makes every bite rich without feeling overly heavy. Because the shrimp cook quickly and store-bought puff pastry does most of the work, these little cups look far more complicated than they actually are.

Serve them warm as an appetizer, brunch dish, party bite, or light seafood starter with fresh parsley and lemon.

Why You’ll Love These Garlic Parmesan Shrimp Puff Pastry Cups

The puff pastry becomes crisp, buttery, and beautifully golden in the oven.

Shrimp cook in just a few minutes, so the filling comes together quickly.

Garlic, Parmesan, cream, and lemon create a rich sauce that pairs perfectly with seafood.

The cups can be prepared in stages, making them convenient for entertaining.

They are also easy to customize with spinach, mushrooms, Cajun seasoning, sun-dried tomatoes, or extra cheese.

Ingredients

For the Puff Pastry Cups

  • 1 sheet frozen puff pastry, thawed according to package directions
  • 1 large egg
  • 1 tablespoon water
  • 2 tablespoons freshly grated Parmesan cheese
  • ½ teaspoon garlic powder
  • Nonstick cooking spray or softened butter, for the muffin pan

For the Shrimp

  • 1 pound large raw shrimp, peeled and deveined
  • 1 tablespoon olive oil
  • 1 tablespoon unsalted butter
  • ½ teaspoon kosher salt
  • ¼ teaspoon freshly ground black pepper
  • ½ teaspoon smoked paprika
  • ½ teaspoon garlic powder

For the Garlic Parmesan Sauce

  • 2 tablespoons unsalted butter
  • 4 garlic cloves, finely minced
  • ¾ cup heavy cream
  • ¼ cup low-sodium chicken or seafood broth
  • 1 teaspoon Dijon mustard
  • ½ teaspoon Italian seasoning
  • ¼ teaspoon red pepper flakes, optional
  • ¾ cup freshly grated Parmesan cheese
  • 1 tablespoon fresh lemon juice
  • 1 teaspoon lemon zest
  • 2 tablespoons chopped fresh parsley

Optional Add-Ins

  • 1 cup chopped spinach
  • ½ cup finely chopped mushrooms
  • ¼ cup sun-dried tomatoes
  • ½ cup shredded mozzarella
  • Chopped green onions

For Garnishing

  • Fresh parsley
  • Extra Parmesan
  • Freshly cracked black pepper
  • Red pepper flakes
  • Lemon wedges

How to Make Garlic Parmesan Shrimp Puff Pastry Cups

1. Preheat the Oven

Preheat your oven to 400°F (200°C).

Lightly grease a standard 12-cup muffin pan.

2. Prepare the Puff Pastry

Place the thawed puff pastry on a lightly floured surface.

Gently roll it just enough to smooth the seams and create an even rectangle.

Avoid rolling it too thinly.

3. Cut the Pastry

Cut the pastry into 12 equal squares.

Each piece should be large enough to come partway up the sides of a muffin cup.

4. Shape the Cups

Press one pastry square gently into each muffin well.

Allow the corners to extend slightly above the edges.

Do not press too aggressively or compress the pastry layers.

5. Prepare the Egg Wash

Whisk the egg with 1 tablespoon water.

Brush the exposed pastry lightly with egg wash.

6. Add Parmesan

Combine the Parmesan and garlic powder.

Sprinkle a small amount over each pastry cup.

7. Dock the Centers

Use a fork to prick the center of each pastry cup once or twice.

This helps limit excessive puffing in the middle while allowing the edges to rise.

8. Bake the Puff Pastry Cups

Bake for approximately 12–16 minutes.

The pastry should become puffed and deeply golden.

9. Shape the Centers

Remove the pan from the oven.

If the centers have puffed considerably, gently press them down with the back of a spoon while still warm.

This creates space for the shrimp filling.

Set the cups aside.

10. Prepare the Shrimp

Pat the shrimp thoroughly dry.

Cut larger shrimp into bite-sized pieces, leaving a few whole if you want an elegant garnish.

11. Season the Shrimp

Season with salt, black pepper, smoked paprika, and garlic powder.

12. Heat the Skillet

Place a large skillet over medium-high heat.

Add olive oil and 1 tablespoon butter.

13. Cook the Shrimp

Add the shrimp in a single layer.

Cook for approximately 1–2 minutes on the first side.

Flip and cook another 30–60 seconds.

The shrimp should be nearly cooked but not overly firm.

14. Remove the Shrimp

Transfer the shrimp to a plate.

They will be added back to the hot sauce, so slightly undercooking them at this stage helps prevent a rubbery texture.

15. Melt the Butter

Reduce the skillet heat to medium-low.

Add the remaining 2 tablespoons butter.

16. Add the Garlic

Stir in the minced garlic.

Cook for approximately 30–60 seconds, just until fragrant.

Do not allow the garlic to brown heavily.

17. Add the Broth

Pour in the chicken or seafood broth.

Scrape up any flavorful browned bits from the skillet.

Simmer for approximately 1–2 minutes.

18. Add the Cream

Pour in the heavy cream.

Stir in Dijon mustard, Italian seasoning, and red pepper flakes if using.

19. Simmer Gently

Cook over low to medium-low heat for approximately 3–4 minutes, stirring frequently.

The sauce should begin to thicken slightly.

20. Add Parmesan

Reduce the heat to low.

Add the Parmesan gradually while stirring.

Keep the sauce at a gentle temperature rather than boiling it aggressively.

21. Add Lemon

Stir in the lemon juice and zest.

This brightens the richness of the cream and Parmesan.

22. Return the Shrimp

Add the shrimp and any juices from the plate back to the skillet.

Cook gently for approximately 1 minute, just until heated through.

Shrimp should reach 145°F (63°C).

23. Add Parsley

Stir in the chopped parsley.

Taste and adjust the seasoning.

24. Thicken if Necessary

The filling should be creamy but fairly thick.

If it looks too thin for the pastry cups, let it simmer gently for another minute or two.

Avoid making the filling watery because excess sauce can soften the pastry.

25. Fill the Pastry Cups

Spoon the warm shrimp mixture into each puff pastry cup.

Use approximately 1–2 tablespoons filling per cup, depending on size.

26. Add Extra Cheese

If desired, sprinkle a little additional Parmesan or mozzarella over each cup.

27. Return to the Oven

Bake the filled cups for approximately 3–5 minutes, just until everything is hot and the cheese melts.

28. Garnish

Finish with fresh parsley, extra Parmesan, cracked black pepper, and red pepper flakes if desired.

29. Add Lemon

Serve with lemon wedges for squeezing over the top.

30. Serve

Serve warm while the puff pastry is crisp and flaky.

What to Serve With Garlic Parmesan Shrimp Puff Pastry Cups

These cups work especially well as appetizers or party food.

Serve them alongside:

  • Caesar salad
  • Arugula salad
  • Cucumber tomato salad
  • Roasted asparagus
  • Garlic green beans
  • Fresh fruit
  • Antipasto platters
  • Other small appetizers

For brunch, serve them with scrambled eggs, roasted potatoes, fruit, and a fresh salad.

Tips for the Best Shrimp Puff Pastry Cups

Keep the puff pastry cold until you are ready to work with it.

Do not roll the pastry too thin.

Bake the pastry cups before adding the creamy filling.

Pat the shrimp completely dry.

Do not overcook the shrimp.

Keep the Parmesan sauce over gentle heat.

Use freshly grated Parmesan.

Make sure the filling is thick enough to sit inside the pastry.

Fill the cups shortly before serving.

Serve warm for the crispiest texture.

Easy Recipe Variations

Cajun Shrimp Puff Pastry Cups

Season the shrimp with Cajun seasoning and add a pinch to the cream sauce.

Spinach Garlic Shrimp Cups

Stir 1 cup chopped spinach into the sauce until wilted.

Tuscan Shrimp Cups

Add chopped sun-dried tomatoes and spinach.

Mushroom Parmesan Shrimp Cups

Sauté finely chopped mushrooms before making the cream sauce.

Cook until their moisture evaporates.

Spicy Garlic Shrimp Cups

Add cayenne, extra red pepper flakes, or hot sauce.

Cheesy Shrimp Cups

Top each pastry with mozzarella or Monterey Jack before the final bake.

Crab and Shrimp Puff Pastry Cups

Replace half of the shrimp with lump crab meat.

Fold the crab gently into the sauce near the end.

Lemon Dill Shrimp Cups

Replace parsley with fresh dill and increase the lemon zest.

How to Store Leftovers

These puff pastry cups have their best texture when eaten fresh.

If you have leftovers, transfer them to an airtight container and refrigerate for up to 2–3 days.

For the best results, reheat in a 350°F (175°C) oven for approximately 6–10 minutes.

An air fryer can also help restore some crispness.

Microwaving is not ideal because it makes the puff pastry soft.

For make-ahead preparation, store the baked pastry cups and shrimp filling separately.

Reheat the filling gently, then assemble shortly before serving.

Freezing fully assembled cups is not recommended because the creamy filling can soften the pastry after thawing.

Frequently Asked Questions

Can I use frozen shrimp?

Yes.

Thaw completely in the refrigerator and pat thoroughly dry before cooking.

Can I use cooked shrimp?

Yes.

Skip the initial sautéing and add the cooked shrimp to the finished sauce only long enough to heat through.

Can I make the pastry cups ahead?

Yes.

Bake them several hours ahead and store at room temperature once completely cool.

Fill them shortly before serving.

Why are my pastry cups soggy?

The filling may have been too thin or the cups may have been filled too far in advance.

Keep the sauce thick and assemble close to serving time.

Can I use phyllo dough instead?

Yes, although the texture and method will be different. Layer several buttered sheets of phyllo in muffin cups and bake until crisp.

Can I add crab?

Absolutely.

Lump crab works beautifully with shrimp, garlic, Parmesan, and lemon.

Can I make mini appetizer cups?

Yes.

Use a mini muffin pan and cut the pastry into smaller squares. Reduce the baking time and use smaller shrimp pieces.

How do I know the shrimp are cooked?

Shrimp should become opaque, curl gently, and reach 145°F (63°C).

Final Thoughts

These Garlic Parmesan Shrimp Puff Pastry Cups combine flaky golden pastry with juicy shrimp, garlic, cream, Parmesan, lemon, and fresh herbs for an elegant appetizer that is surprisingly easy to prepare.

The key is baking the puff pastry before filling, keeping the garlic Parmesan sauce thick, and cooking the shrimp only until tender.

Serve them warm with lemon wedges and extra Parmesan for a crisp, creamy seafood appetizer that works beautifully for holidays, brunches, parties, or special dinners.

Easy Cheesy Ground Beef Stuffed Potato Skins Recipe – Crispy, Loaded, and Flavor-Packed

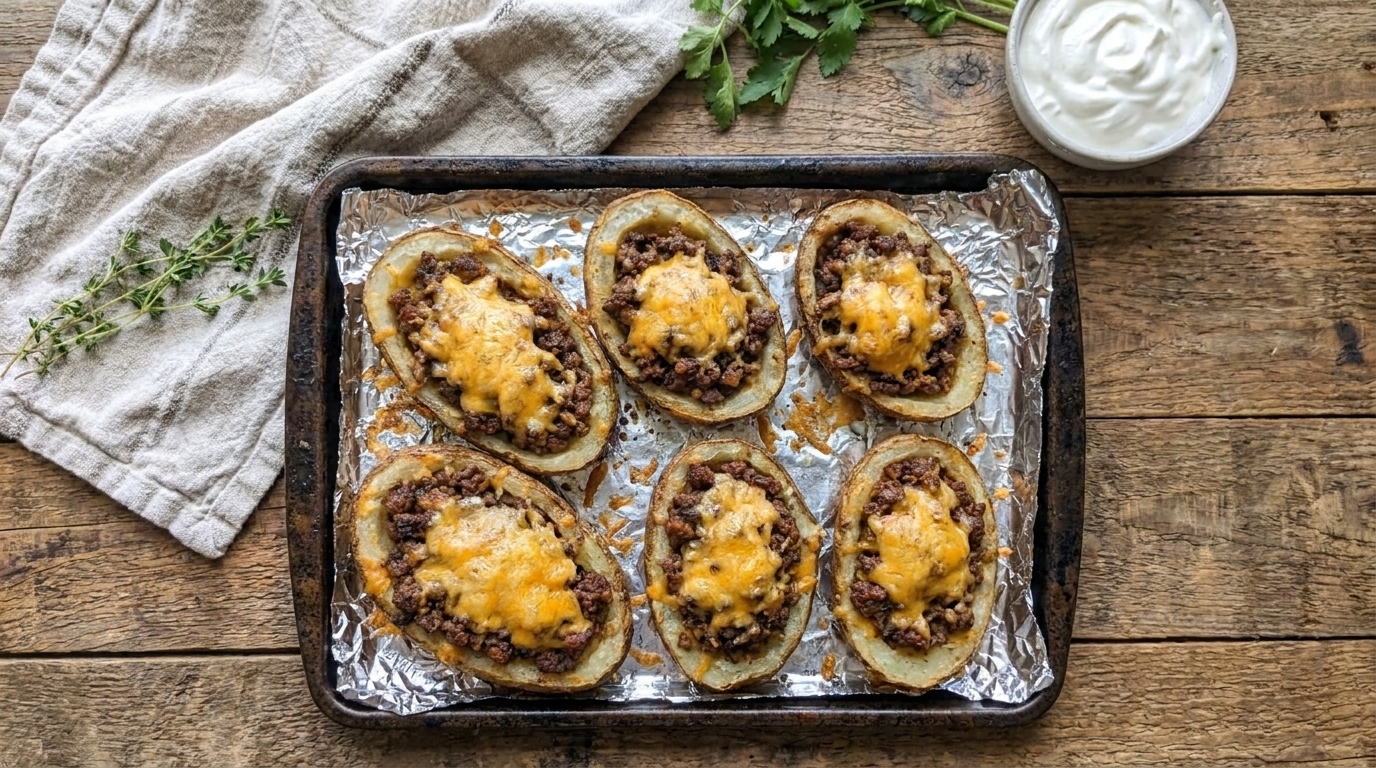
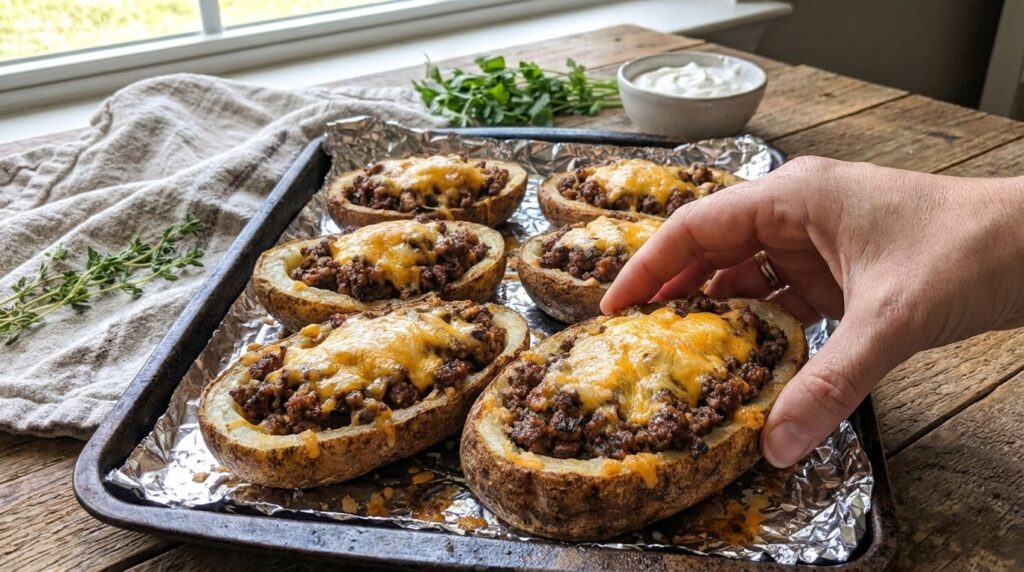
If you are looking for a hearty appetizer or easy dinner packed with crispy potatoes, seasoned ground beef, melted cheese, and savory toppings, these Cheesy Ground Beef Stuffed Potato Skins are an excellent recipe to make. Russet potatoes are baked until tender, hollowed out, brushed with garlic butter, crisped in the oven, then filled with flavorful ground beef and plenty of cheddar and mozzarella.

This recipe is perfect for game day, parties, family dinners, movie nights, or whenever you want a loaded comfort-food dish that is easy to serve and customize. The potato shells become crisp around the edges while the beef filling stays juicy and the cheese melts into a bubbly golden topping.

Serve them with sour cream, green onions, salsa, ranch, or your favorite dipping sauce.

Why You’ll Love These Cheesy Ground Beef Stuffed Potato Skins

The potato skins become crisp and sturdy enough to hold a generous amount of filling.

Seasoned ground beef turns them into something hearty enough for a main meal rather than just an appetizer.

Using cheddar and mozzarella together gives you bold cheese flavor along with plenty of melt.

The filling can be prepared ahead, making final assembly quick and convenient.

You can also customize the skins with bacon, jalapeños, mushrooms, taco seasoning, barbecue sauce, or different cheeses.

Ingredients

For the Potatoes

  • 4 large russet potatoes
  • 2 tablespoons olive oil
  • 1 teaspoon kosher salt

For the Garlic Butter

  • 3 tablespoons unsalted butter, melted
  • 2 garlic cloves, finely minced
  • ½ teaspoon garlic powder
  • ½ teaspoon Italian seasoning
  • ¼ teaspoon black pepper

For the Ground Beef Filling

  • 1 pound ground beef
  • 1 tablespoon olive oil, if needed
  • 1 small yellow onion, finely diced
  • 3 garlic cloves, finely minced
  • 1 tablespoon tomato paste
  • 1 tablespoon Worcestershire sauce
  • 1 teaspoon smoked paprika
  • 1 teaspoon garlic powder
  • ½ teaspoon onion powder
  • ½ teaspoon Italian seasoning
  • ½ teaspoon kosher salt
  • ¼ teaspoon freshly ground black pepper
  • ¼ teaspoon red pepper flakes, optional
  • ¼ cup low-sodium beef broth

For the Cheese

  • 1½ cups shredded sharp cheddar cheese
  • 1 cup shredded mozzarella or Monterey Jack cheese
  • ¼ cup freshly grated Parmesan cheese

Optional Toppings

  • Crispy chopped bacon
  • Sliced jalapeños
  • Chopped tomatoes
  • Sliced black olives
  • Pickled jalapeños
  • Diced avocado

For Serving

  • Sour cream
  • Sliced green onions
  • Fresh parsley or cilantro
  • Salsa
  • Ranch dressing
  • Extra shredded cheese

How to Make Cheesy Ground Beef Stuffed Potato Skins

1. Preheat the Oven

Preheat your oven to 425°F (220°C).

Line a large baking sheet with parchment paper or foil.

2. Prepare the Potatoes

Scrub the russet potatoes thoroughly and dry them.

Pierce each potato several times with a fork.

3. Season the Potatoes

Rub the potatoes lightly with olive oil.

Sprinkle with kosher salt.

4. Bake

Place the potatoes directly on the baking sheet.

Bake for approximately 45–60 minutes, depending on size.

They should be completely tender when pierced with a knife.

5. Cool Slightly

Remove the potatoes from the oven.

Let them cool for approximately 10–15 minutes, just until they can be handled safely.

Keep the oven at 425°F.

6. Prepare the Ground Beef

While the potatoes bake, place a large skillet over medium-high heat.

Add olive oil if your beef is particularly lean.

7. Brown the Beef

Add the ground beef.

Break it into small crumbles.

Cook for approximately 6–8 minutes, until browned and cooked through.

Ground beef should reach 160°F (71°C).

8. Add the Onion

Add the diced onion.

Cook for approximately 3–4 minutes, until softened.

9. Add the Garlic

Stir in the minced garlic.

Cook for approximately 30–60 seconds, until fragrant.

10. Drain Excess Grease

If necessary, drain excessive fat from the skillet.

Leaving too much grease can make the potato skins soggy.

11. Add Tomato Paste

Stir in the tomato paste.

Cook for approximately 1 minute.

12. Season the Beef

Add Worcestershire sauce, smoked paprika, garlic powder, onion powder, Italian seasoning, salt, black pepper, and red pepper flakes if using.

Mix thoroughly.

13. Add Beef Broth

Pour in the beef broth.

Simmer for approximately 3–5 minutes, until most of the liquid has evaporated.

The filling should be moist but not watery.

Remove from the heat.

14. Cut the Potatoes

Slice each baked potato lengthwise in half.

You should have 8 potato halves.

15. Scoop Out the Centers

Using a spoon, carefully scoop out most of the potato flesh.

Leave approximately ¼ inch of potato attached to the skin.

Do not scrape too aggressively or the shells may tear.

Save the removed potato for mashed potatoes or another recipe.

16. Make the Garlic Butter

Combine melted butter, minced garlic, garlic powder, Italian seasoning, and black pepper.

17. Brush the Inside

Brush the inside of each potato shell generously with garlic butter.

18. Crisp the First Side

Place the potato skins cut-side down on the baking sheet.

Bake for approximately 8–10 minutes.

19. Flip

Carefully turn them cut-side up.

Brush with a little more garlic butter.

20. Crisp Again

Bake for another 5–7 minutes.

The edges should be golden and slightly crisp.

21. Add a Cheese Base

Sprinkle a small amount of cheddar into the bottom of each potato skin.

This creates an extra cheesy layer beneath the beef.

22. Add the Ground Beef

Divide the seasoned beef mixture evenly among the potato shells.

Press it in gently without packing too tightly.

23. Add Optional Toppings

Add bacon, jalapeños, olives, or other baked toppings if desired.

24. Add Cheddar

Sprinkle cheddar generously over each filled potato skin.

25. Add Mozzarella

Top with mozzarella or Monterey Jack.

26. Add Parmesan

Finish with a light sprinkle of Parmesan.

27. Bake Again

Return the stuffed potato skins to the oven.

Bake for approximately 7–10 minutes, until the cheese is completely melted.

28. Broil for Extra Browning

For golden cheese, broil for approximately 1–2 minutes.

Watch carefully.

29. Rest Briefly

Remove from the oven.

Let the potato skins rest for approximately 2–3 minutes.

30. Add Fresh Toppings

Top with sour cream, green onions, tomatoes, cilantro, avocado, or additional jalapeños.

31. Serve

Serve immediately while the shells are crisp and the cheese is hot and melted.

What to Serve With Cheesy Ground Beef Potato Skins

These loaded potato skins work beautifully as either an appetizer or casual main dish.

Serve them with:

  • Sour cream
  • Salsa
  • Guacamole
  • Ranch dressing
  • Queso
  • Garden salad
  • Caesar salad
  • Coleslaw
  • Chicken wings
  • Roasted vegetables

For game day, arrange them on a large platter with several dipping sauces.

Tips for the Best Stuffed Potato Skins

Use russet potatoes because their sturdy skins crisp especially well.

Bake rather than boil the potatoes.

Leave some potato attached to the skins.

Brush both sides with garlic butter.

Crisp the empty shells before filling them.

Drain excess grease from the ground beef.

Keep the beef filling thick rather than watery.

Use freshly shredded cheese when possible.

Do not add wet toppings until after baking.

Serve immediately for maximum crispiness.

Easy Recipe Variations

Taco Ground Beef Potato Skins

Season the beef with taco seasoning.

Top with cheddar, jalapeños, salsa, sour cream, and avocado.

Bacon Cheeseburger Potato Skins

Add crispy bacon and cheddar.

Finish with diced pickles and burger sauce.

Philly Cheesesteak Potato Skins

Add sautéed onions, peppers, and mushrooms to the beef.

Top with provolone.

BBQ Beef Potato Skins

Mix barbecue sauce into the ground beef and use cheddar and Monterey Jack.

Jalapeño Popper Beef Skins

Add cream cheese, jalapeños, bacon, and cheddar.

Pizza Potato Skins

Add marinara, ground beef, pepperoni, mozzarella, and Parmesan.

Mushroom Swiss Potato Skins

Mix sautéed mushrooms into the beef and top with Swiss cheese.

Spicy Beef Potato Skins

Add cayenne, hot sauce, jalapeños, and pepper Jack cheese.

How to Store Leftovers

Allow leftover stuffed potato skins to cool before transferring them to an airtight container.

Refrigerate for up to 3–4 days.

For the best texture, reheat them in a 375°F (190°C) oven for approximately 10–15 minutes.

An air fryer also works very well at around 375°F for several minutes.

Microwaving is convenient, but the potato skins will become softer.

For freezing, arrange fully cooled potato skins on a tray and freeze until firm.

Transfer them to a freezer-safe container and freeze for up to approximately 2 months.

Reheat from frozen or thaw overnight in the refrigerator.

Frequently Asked Questions

What potatoes are best for potato skins?

Russet potatoes work best because they have thick, sturdy skins and fluffy interiors.

Can I make the ground beef ahead?

Yes.

Prepare the beef mixture up to several days ahead and refrigerate until ready to assemble.

How do I make the potato skins extra crispy?

Brush them with garlic butter and bake the empty shells on both sides before adding the filling.

Can I use leftover baked potatoes?

Absolutely.

They are excellent for this recipe as long as the skins are still intact.

Can I use ground turkey?

Yes.

Cook ground turkey to 165°F (74°C) and season generously.

Can I make these ahead?

Yes.

Prepare the potato shells and beef filling ahead, then assemble and bake shortly before serving.

What cheese works best?

Cheddar, mozzarella, Monterey Jack, pepper Jack, provolone, and Parmesan all work well.

What can I do with the potato filling I scoop out?

Use it for mashed potatoes, potato cakes, shepherd’s pie topping, soup, or cheesy potato casserole.

Final Thoughts

These Cheesy Ground Beef Stuffed Potato Skins combine crispy garlic-butter potato shells, savory seasoned ground beef, cheddar, mozzarella, Parmesan, and customizable toppings in one satisfying comfort-food recipe.

The key is baking the potato shells twice—once before and once after filling—so they stay crisp underneath the hearty beef and melted cheese.

Serve them with sour cream, salsa, green onions, or ranch for an easy family dinner, game-day appetizer, or party platter loaded with cheesy, savory flavor.

Cheesy Meat Stromboli

This Cheesy Meat Stromboli is a delicious baked meal featuring soft golden dough wrapped around a savory filling of seasoned ground beef, melted mozzarella, and colorful peppers. Baked until beautifully browned and bubbly, these individual stromboli rolls are perfect for family dinners, game nights, snacks, or party food when you want something hearty, cheesy, and satisfying.

Why You’ll Love It

  • Golden baked dough with a gooey cheesy meat filling
  • Easy to make with simple ingredients and big flavor
  • Perfect for dinner, lunch, parties, or freezer-friendly snacks
  • Great served with marinara sauce for dipping

Ingredients Overview

Dough

  • 1 tube refrigerated pizza dough or crescent sheet dough
  • 1 tbsp olive oil
  • 1 egg, beaten for egg wash

Meat Filling

  • 1 lb ground beef
  • 1 tbsp olive oil
  • ½ small onion, finely chopped
  • 2 garlic cloves, minced
  • ½ red bell pepper, finely diced
  • 1 tsp Italian seasoning
  • ½ tsp paprika
  • ½ tsp garlic powder
  • ¾ tsp salt
  • ½ tsp black pepper

Cheese Filling

  • 1½ cups shredded mozzarella cheese
  • ½ cup shredded provolone cheese
  • ¼ cup grated Parmesan cheese

Topping

  • 1 tbsp melted butter
  • ½ tsp garlic powder
  • ½ tsp dried parsley
  • 2 tbsp grated Parmesan cheese

Step-by-Step Instructions

1. Prepare the Filling

Heat olive oil in a skillet over medium heat.

Add the chopped onion and diced bell pepper and cook for 3–4 minutes until softened.

Add the ground beef and cook for 6–8 minutes, breaking it into crumbles until browned and fully cooked.

Drain excess grease if needed.

Stir in the garlic, Italian seasoning, paprika, garlic powder, salt, and black pepper.

Cook for another 30 seconds until fragrant, then remove from the heat and let the mixture cool slightly.

2. Prepare the Dough

Preheat the oven to 375°F (190°C).

Line a baking sheet with parchment paper.

Roll out the pizza dough or crescent sheet on a lightly floured surface into a rectangle.

Cut the dough into 6–8 equal rectangles, depending on how large you want each stromboli.

3. Fill the Stromboli

Place a spoonful of the meat mixture onto the center of each dough piece.

Top with mozzarella, provolone, and a little Parmesan.

Be careful not to overfill so the dough can seal properly while baking.

4. Roll and Seal

Fold or roll the dough around the filling, tucking in the ends as needed.

Pinch the seams closed tightly so the cheese stays inside.

Place each stromboli seam-side down on the prepared baking sheet.

5. Add the Topping

Brush the tops with beaten egg for a glossy golden finish.

In a small bowl, mix the melted butter with garlic powder and dried parsley.

Brush a little of this mixture over each stromboli.

Sprinkle with grated Parmesan.

6. Bake

Bake for 18–22 minutes, or until the stromboli are puffed, deeply golden, and cooked through.

If desired, brush lightly with a little more garlic butter as soon as they come out of the oven.

7. Serve

Let the stromboli cool for about 5 minutes before serving.

Serve warm with marinara sauce, ranch, or garlic butter for dipping if desired.

Cooking Tips

  • Let the meat filling cool slightly before adding it to the dough.
  • Do not overfill the stromboli or the cheese may leak out while baking.
  • Seal the edges well to keep the filling tucked inside.
  • Use mozzarella for meltiness and provolone for extra flavor.
  • Brush with egg wash for the best golden crust.

Serving Suggestions

Serve this cheesy meat stromboli with:

  • Marinara sauce
  • Caesar salad
  • Roasted vegetables
  • French fries
  • Garlic dipping sauce

Storage

Store leftover stromboli in an airtight container in the refrigerator for up to 3 days.

Reheat in the oven or air fryer at 350°F (175°C) until warmed through and crisp again.

Leftover Ideas

  • Slice leftovers and pack them for lunch.
  • Reheat and serve with scrambled eggs for a savory breakfast.
  • Cut into smaller pieces for a party appetizer platter.

FAQs

Can I use sausage instead of ground beef?
Yes. Ground Italian sausage, turkey, or chicken all work well.

Can I make stromboli ahead of time?
Yes. Assemble them a few hours ahead, refrigerate, and bake when ready.

Can I freeze them?
Yes. Bake and cool completely, then freeze for up to 2 months. Reheat in the oven until hot.

What other fillings can I add?
You can add mushrooms, spinach, jalapeños, pepperoni, or cooked onions for extra flavor.

Final Thoughts

Cheesy Meat Stromboli is a fun and comforting recipe that combines flaky golden dough, savory beef filling, and gooey melted cheese in every bite. Easy to make and perfect for dipping, these baked rolls are a family-friendly favorite for weeknight meals, gatherings, or anytime you want something cheesy and satisfying.

#CheesyStromboli #MeatStromboli #EasyDinner #PartyFood #ComfortFood