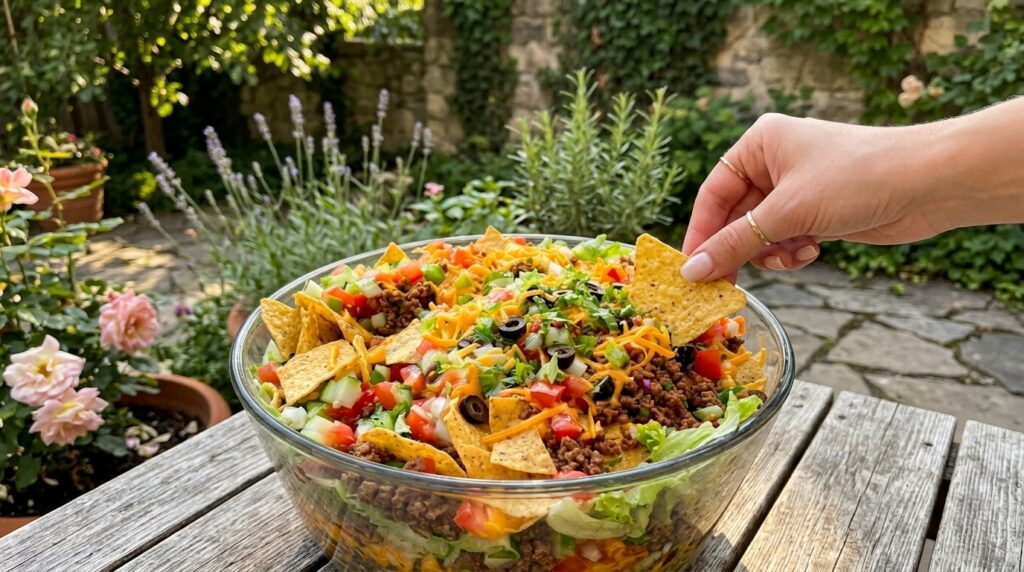
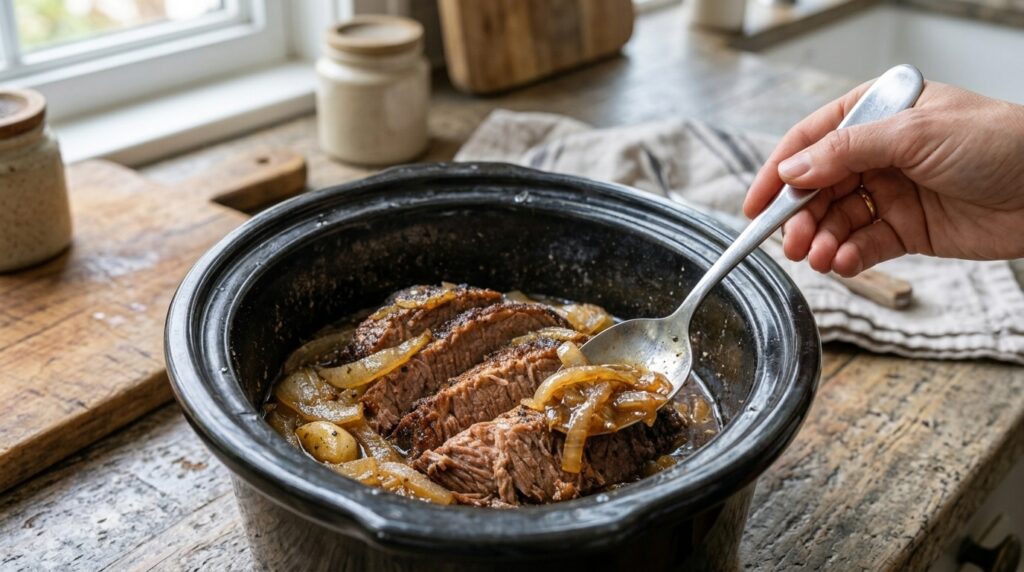
Loaded Beef Taco Salad

This Loaded Beef Taco Salad is packed with seasoned ground beef, crisp lettuce, juicy tomatoes, crunchy tortilla chips, shredded cheddar, fresh onions, black olives, and plenty of classic taco flavor. It is colorful, hearty, and easy to assemble, making it perfect for family dinners, summer gatherings, potlucks, or a fun taco-night meal served in one big bowl.

Why You’ll Love It

  • Loaded with seasoned beef, fresh vegetables, cheese, and crunchy tortilla chips
  • Easy to customize with your favorite taco toppings
  • Perfect for feeding a crowd at parties, cookouts, or family dinners
  • Quick to prepare with simple everyday ingredients

Ingredients Overview

Seasoned Beef

  • 1½ lbs ground beef
  • 1 tbsp olive oil
  • 1 small onion, finely chopped
  • 2 garlic cloves, minced
  • 2 tsp chili powder
  • 1 tsp ground cumin
  • 1 tsp smoked paprika
  • ½ tsp garlic powder
  • ½ tsp salt
  • ¼ tsp black pepper
  • ¼ cup tomato sauce
  • 2 tbsp water

Salad Base

  • 1 large head romaine or iceberg lettuce, chopped
  • 2 cups cherry or Roma tomatoes, diced
  • 1 cup cucumber, diced
  • ½ cup red or white onion, diced
  • 1 cup shredded cheddar cheese
  • ½ cup sliced black olives
  • 3 cups tortilla chips, roughly broken

Toppings

  • ¼ cup sliced green onions
  • ¼ cup fresh cilantro, chopped
  • ½ cup salsa
  • ½ cup sour cream
  • 1 avocado, diced, optional

Step-by-Step Instructions

1. Prepare the Ground Beef

Heat olive oil in a large skillet over medium heat.

Add the chopped onion and cook for 3–4 minutes until softened.

Add the ground beef and cook for 6–8 minutes, breaking it into small crumbles until browned and fully cooked.

Drain excess grease if necessary.

2. Season the Beef

Add the garlic, chili powder, cumin, smoked paprika, garlic powder, salt, and black pepper.

Cook for about 30 seconds until fragrant.

Stir in the tomato sauce and water.

Simmer for 2–3 minutes until the beef is well coated and the liquid has mostly reduced.

Remove from the heat and allow it to cool slightly.

3. Prepare the Vegetables

Wash and thoroughly dry the lettuce.

Chop it into bite-sized pieces and place it in a large serving bowl.

Add the diced tomatoes, cucumber, onion, green onions, and black olives.

4. Assemble the Taco Salad

Spoon the seasoned beef over the lettuce and vegetables.

Sprinkle generously with shredded cheddar cheese.

Add the tortilla chips throughout the salad, reserving a few for the top.

5. Add the Toppings

Top with fresh cilantro and diced avocado if using.

Add spoonfuls of salsa and sour cream, or serve them on the side so everyone can customize their portion.

6. Serve

Gently toss the salad just before serving, or leave it layered for a colorful presentation.

Serve immediately while the vegetables are crisp and the tortilla chips are crunchy.

Cooking Tips

  • Let the cooked beef cool slightly before adding it to the lettuce so the greens do not wilt.
  • Add tortilla chips just before serving to keep them crunchy.
  • Drain excess grease from the ground beef to prevent the salad from becoming oily.
  • Dry the lettuce thoroughly after washing so the salad stays crisp.
  • Keep salsa and sour cream on the side when serving a crowd so guests can add their preferred amount.

Serving Suggestions

Serve this loaded beef taco salad with:

  • Mexican rice
  • Guacamole
  • Refried or black beans
  • Fresh lime wedges
  • Corn salsa

Storage

Store the seasoned beef, vegetables, cheese, and tortilla chips separately whenever possible.

The cooked beef will keep in an airtight container in the refrigerator for up to 3 days, while the prepared vegetables are best used within 1–2 days.

Add tortilla chips and dressing only when ready to serve.

Leftover Ideas

  • Turn leftover ingredients into soft beef tacos or burritos.
  • Use the seasoned beef and vegetables to make loaded nachos.
  • Serve leftovers over rice for an easy taco bowl.

FAQs

Can I use ground turkey instead of beef?
Yes. Ground turkey or chicken works well and creates a slightly lighter taco salad.

Can I make this salad ahead of time?
Yes. Prepare all the components separately and assemble just before serving so the lettuce and chips remain crisp.

What dressing works best with taco salad?
Salsa, ranch, avocado-lime dressing, cilantro-lime dressing, or a mixture of salsa and sour cream all work beautifully.

Can I add beans or corn?
Yes. Black beans, pinto beans, corn, or roasted corn are excellent additions.

Final Thoughts

Loaded Beef Taco Salad combines savory seasoned beef, crisp fresh vegetables, melted-style cheddar flavor, crunchy tortilla chips, and classic taco toppings in one colorful and satisfying bowl. It is easy to customize, simple to serve for a crowd, and perfect for family dinners, outdoor gatherings, potlucks, or anytime you want all the flavors of taco night in a fresh and crunchy salad.

#TacoSalad #BeefRecipes #TacoNight #EasyDinner #MexicanRecipes

Crispy Cheesy Beef Tacos

These Crispy Cheesy Beef Tacos are filled with savory seasoned ground beef, melty cheese, and creamy toppings, all tucked inside crunchy golden taco shells. They are quick, satisfying, and packed with classic taco flavor, making them perfect for family dinners, game-day snacks, parties, or an easy weeknight meal.

Why You’ll Love It

  • Crispy golden taco shells filled with juicy seasoned beef
  • Easy to customize with cheese, sour cream, and fresh toppings
  • Quick enough for busy weeknights
  • Perfect for family dinners, parties, or casual entertaining

Ingredients Overview

Beef Filling

  • 1 lb ground beef
  • 1 tbsp olive oil
  • ½ small onion, finely chopped
  • 2 garlic cloves, minced
  • 1 tsp chili powder
  • 1 tsp ground cumin
  • ½ tsp smoked paprika
  • ½ tsp garlic powder
  • ½ tsp salt
  • ¼ tsp black pepper
  • ¼ cup tomato sauce
  • 2 tbsp water

Taco Shells & Cheese

  • 8 crispy taco shells
  • 1½ cups shredded cheddar or Mexican-blend cheese
  • ½ cup crumbled cotija or queso fresco, optional

Toppings

  • ½ cup sour cream
  • ¼ cup sliced green onions
  • ¼ cup chopped cilantro
  • Salsa, optional
  • Lime wedges, optional

Step-by-Step Instructions

1. Prepare the Beef

Heat olive oil in a large skillet over medium heat.

Add the chopped onion and cook for 3–4 minutes until softened.

Add the ground beef and cook for 6–8 minutes, breaking it apart with a spoon until browned and fully cooked.

Drain excess grease if necessary.

2. Season the Filling

Add the garlic, chili powder, cumin, smoked paprika, garlic powder, salt, and black pepper.

Cook for about 30 seconds until fragrant.

Stir in the tomato sauce and water.

Simmer for 2–3 minutes until the beef mixture is moist but not watery.

3. Warm the Taco Shells

Preheat the oven to 375°F (190°C).

Arrange the taco shells upright in a baking dish or on a taco rack.

Bake for 4–5 minutes until warm and extra crisp.

4. Fill the Tacos

Spoon the seasoned beef evenly into each taco shell.

Sprinkle shredded cheese over the warm beef so it begins to melt.

Return the tacos to the oven for another 3–5 minutes if you prefer the cheese fully melted.

5. Add the Toppings

Remove the tacos from the oven.

Top each one with sour cream, green onions, cilantro, and crumbled cotija or queso fresco if using.

Add salsa or a squeeze of fresh lime for extra flavor.

6. Serve

Arrange the tacos on a serving platter.

Serve immediately while the shells are crisp, the beef is hot, and the cheese is melted.

Cooking Tips

  • Drain excess grease from the beef so the taco shells stay crispy.
  • Keep the beef filling thick rather than watery to prevent soggy shells.
  • Warm the shells before filling for the best crunch.
  • Add cheese while the beef is hot so it melts easily.
  • Serve immediately after assembling to preserve the crispy texture.

Serving Suggestions

Serve these crispy cheesy beef tacos with:

  • Mexican rice
  • Refried or black beans
  • Fresh guacamole
  • Corn and tomato salad
  • Salsa and tortilla chips

Storage

Store leftover beef filling separately in an airtight container in the refrigerator for up to 3 days.

Keep unused taco shells at room temperature in a tightly sealed container. Reheat the beef in a skillet or microwave, then assemble fresh tacos just before serving.

Leftover Ideas

  • Use leftover beef to make nachos with melted cheese and jalapeños.
  • Add the beef to quesadillas or burritos.
  • Serve it over rice with avocado and salsa for an easy taco bowl.

FAQs

Can I use ground turkey instead of beef?
Yes. Ground turkey or chicken can be used for a lighter version.

Can I use soft tortillas instead of crispy shells?
Yes. Flour or corn tortillas work well and can be warmed in a skillet before filling.

Can I make the beef filling ahead of time?
Yes. Prepare it up to 2–3 days ahead, refrigerate, and reheat before assembling the tacos.

What other toppings can I add?
Shredded lettuce, diced tomatoes, avocado, jalapeños, pickled onions, corn, and extra cheese all work beautifully.

Final Thoughts

Crispy Cheesy Beef Tacos combine crunchy shells, savory seasoned beef, melted cheese, and cool creamy toppings for an easy dinner that everyone can customize and enjoy. Fast, flavorful, and perfect for casual meals or entertaining, these tacos are a dependable favorite whenever you want something crispy, hearty, and satisfying.

#BeefTacos #CrispyTacos #TacoNight #EasyDinner #MexicanRecipes

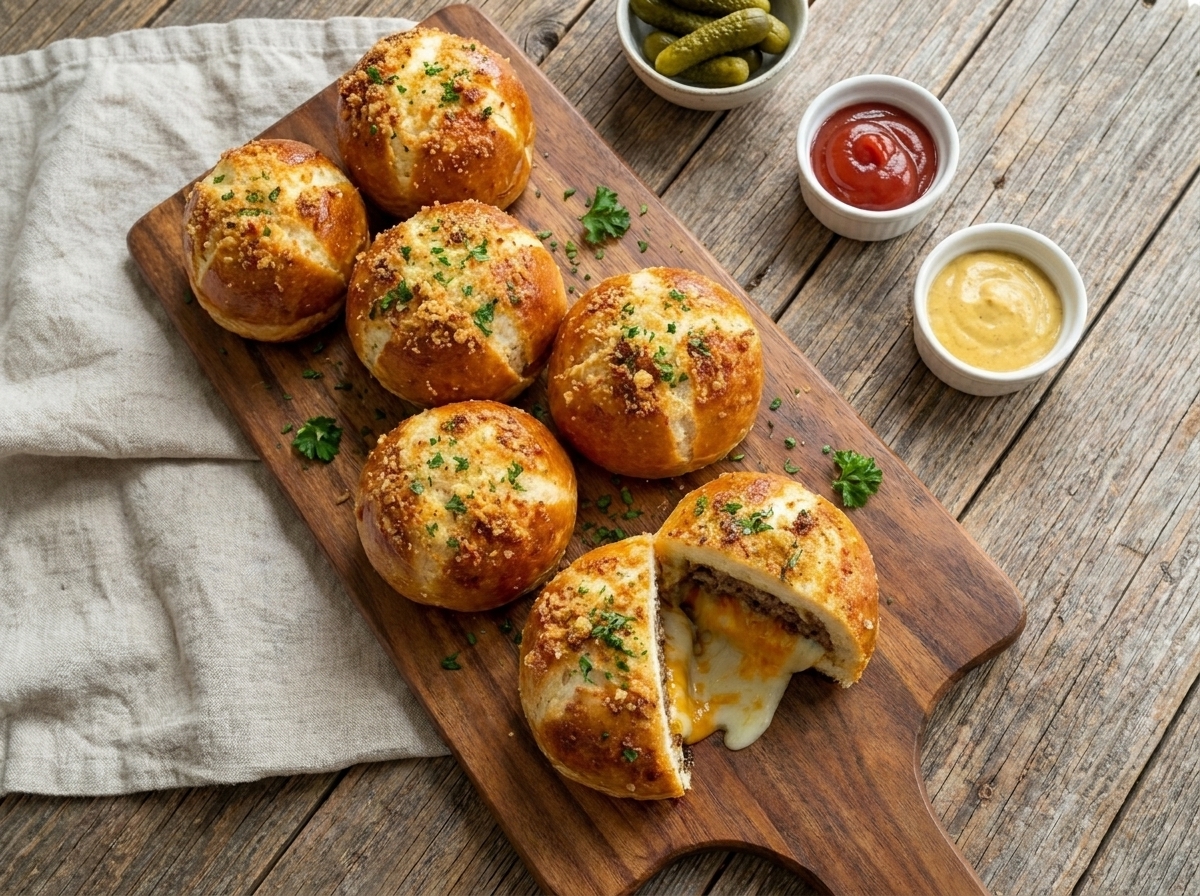
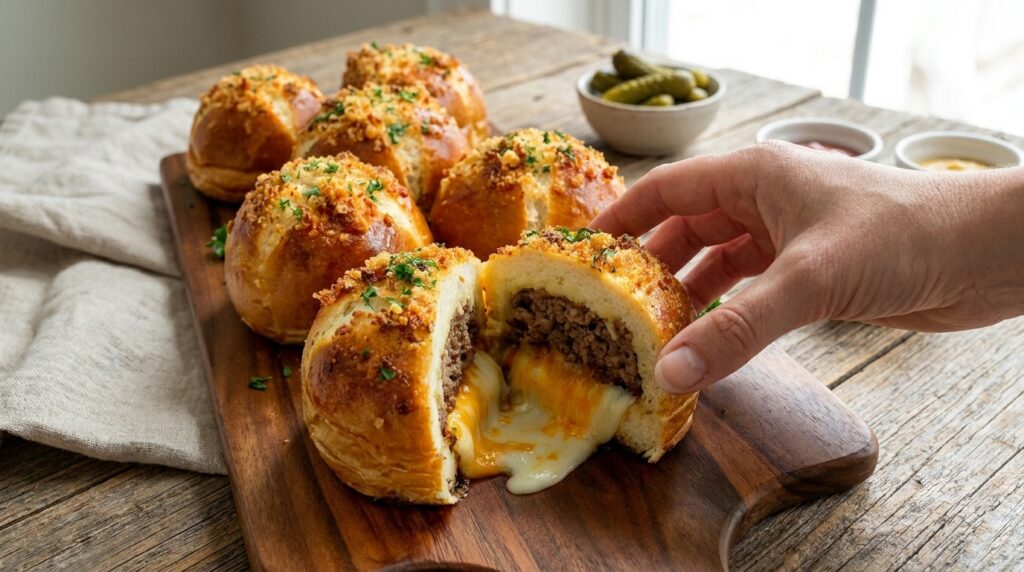
Easy Cheesy Stuffed Meatball Sliders Recipe – Juicy, Saucy, and Loaded with Melted Cheese

If you are looking for a fun, crowd-pleasing dinner or party recipe, these Cheesy Stuffed Meatball Sliders are an excellent choice. Soft slider rolls are filled with juicy homemade meatballs stuffed with gooey mozzarella, spooned with rich marinara sauce, topped with even more cheese, and brushed with buttery garlic Parmesan before baking.

These sliders are perfect for game day, family dinners, parties, potlucks, or casual weekend meals. The meatballs stay tender and flavorful, while the cheese hidden inside gives every bite a melty center. Marinara adds saucy Italian flavor, and the garlic butter topping turns the rolls golden and aromatic.

One of the best things about this recipe is that you can prepare several parts ahead of time. The meatballs can be shaped in advance, the sauce can be ready to go, and the sliders only need a short bake before serving.

Why You’ll Love These Cheesy Stuffed Meatball Sliders

These sliders combine meatballs, mozzarella, marinara, garlic bread, and cheesy sandwiches into one easy recipe.

Stuffing the meatballs with mozzarella creates a gooey surprise in the center while keeping each slider especially satisfying.

The rolls soak up just enough marinara to become flavorful without losing their soft, buttery texture.

A garlic Parmesan butter brushed over the tops adds even more flavor and helps the sliders bake to a beautiful golden finish.

They are also easy to portion, making them especially convenient for feeding a group.

Ingredients

For the Cheese-Stuffed Meatballs

  • 1½ pounds ground beef
  • ½ cup Italian-style breadcrumbs
  • ¼ cup freshly grated Parmesan cheese
  • 1 large egg
  • ¼ cup milk
  • 3 garlic cloves, finely minced
  • 2 tablespoons finely chopped parsley
  • 1 teaspoon Italian seasoning
  • 1 teaspoon onion powder
  • 1 teaspoon kosher salt
  • ½ teaspoon freshly ground black pepper
  • ¼ teaspoon red pepper flakes, optional
  • 4 ounces low-moisture mozzarella, cut into 12 cubes

For the Sliders

  • 12 slider rolls or Hawaiian-style rolls
  • 1½ cups marinara sauce
  • 1½ cups shredded mozzarella cheese
  • ½ cup shredded provolone cheese, optional
  • ¼ cup freshly grated Parmesan cheese

For the Garlic Butter Topping

  • 4 tablespoons unsalted butter, melted
  • 2 garlic cloves, finely minced
  • 1 tablespoon chopped fresh parsley
  • ½ teaspoon Italian seasoning
  • 2 tablespoons freshly grated Parmesan cheese

For Garnishing

  • Fresh parsley
  • Fresh basil, optional
  • Extra Parmesan
  • Additional warm marinara sauce for dipping

How to Make Cheesy Stuffed Meatball Sliders

1. Preheat the Oven

Preheat your oven to 400°F (200°C).

Line a rimmed baking sheet with parchment paper.

Lightly grease a 9×13-inch baking dish for assembling the sliders later.

2. Prepare the Mozzarella

Cut the mozzarella into 12 small cubes.

Keep the cubes relatively small so they fit comfortably inside the meatballs without breaking through the surface.

3. Make the Meatball Mixture

In a large bowl, combine the ground beef, breadcrumbs, Parmesan, egg, milk, garlic, parsley, Italian seasoning, onion powder, salt, black pepper, and red pepper flakes if using.

Mix gently with clean hands or a fork.

Avoid overworking the beef because overly compact meatballs can become dense.

4. Divide the Meat

Divide the mixture into 12 equal portions.

Roll each portion loosely into a ball.

5. Stuff with Mozzarella

Flatten one meat portion slightly in your palm.

Place one mozzarella cube in the center.

Bring the meat around the cheese and pinch the edges together.

Roll gently until completely sealed.

Make sure no cheese is visible.

Repeat with the remaining meatballs.

6. Arrange the Meatballs

Place the stuffed meatballs on the prepared baking sheet.

Leave a little space between them.

7. Bake the Meatballs

Bake for approximately 18–22 minutes.

Ground beef should reach an internal temperature of 160°F (71°C).

Some cheese may escape slightly during baking, but properly sealing the meatballs helps minimize this.

8. Warm the Marinara

While the meatballs bake, warm the marinara sauce in a small saucepan over medium-low heat.

Keep it gently warm until assembly.

9. Prepare the Rolls

Without separating the individual rolls, slice the entire slab horizontally through the middle.

Place the bottom half in the prepared baking dish.

10. Add a Layer of Marinara

Spread approximately ½ cup marinara sauce over the bottom rolls.

Do not completely soak the bread.

11. Add the Meatballs

Place one cooked stuffed meatball over each slider section.

Arrange them evenly so each finished slider contains one meatball.

12. Add More Marinara

Spoon the remaining marinara sauce over the meatballs.

Use enough to coat them generously without flooding the baking dish.

13. Add the Cheese

Sprinkle shredded mozzarella and provolone over the meatballs.

Finish with Parmesan.

14. Add the Top Rolls

Place the top half of the slider rolls over the cheese.

Press down very gently.

15. Make the Garlic Butter

Combine melted butter, minced garlic, parsley, Italian seasoning, and Parmesan in a small bowl.

Stir thoroughly.

16. Brush the Rolls

Brush the garlic butter generously over the tops of the sliders.

Make sure some of the butter reaches the edges and spaces between the rolls.

17. Cover and Bake

Cover the baking dish loosely with foil.

Bake at 375°F (190°C) for approximately 10–12 minutes.

This gives the cheese time to melt without over-browning the bread.

18. Finish Uncovered

Remove the foil.

Bake for another 5–8 minutes, or until the tops are golden and the cheese is bubbling.

19. Broil if Desired

For a deeper golden top, broil for approximately 30–60 seconds.

Watch carefully because the rolls can brown very quickly.

20. Rest Before Cutting

Remove the sliders from the oven.

Let them rest for approximately 5 minutes.

This makes them easier to separate and helps the melted cheese settle slightly.

21. Garnish

Sprinkle with fresh parsley, basil, and extra Parmesan.

22. Cut and Serve

Slice between the rolls to separate the individual sliders.

Serve warm with extra marinara sauce for dipping.

What to Serve With Cheesy Stuffed Meatball Sliders

These sliders are filling enough to serve as a main dish, especially with a simple salad.

Try them with Caesar salad, garden salad, cucumber tomato salad, or Italian chopped salad.

For something heartier, serve with French fries, potato wedges, roasted potatoes, or onion rings.

Roasted broccoli, green beans, zucchini, or asparagus are good vegetable options.

For parties, serve the sliders alongside mozzarella sticks, garlic bread, wings, or antipasto-style vegetables.

Tips for the Best Cheesy Stuffed Meatball Sliders

Use low-moisture mozzarella inside the meatballs.

Seal each meatball completely around the cheese.

Do not overmix the ground beef.

Keep meatballs similar in size.

Bake the meatballs before assembling the sliders.

Do not add too much marinara to the bottom rolls.

Use freshly shredded cheese for better melting.

Cover the sliders during the first stage of baking.

Brush garlic butter generously over the tops.

Let the sliders rest briefly before cutting.

Serve warm for the best cheese pull.

Easy Recipe Variations

Pepperoni Meatball Sliders

Add chopped pepperoni to the meatball mixture or layer slices over the marinara.

Spicy Meatball Sliders

Add extra red pepper flakes, hot Italian seasoning, or sliced jalapeños.

Three-Cheese Meatball Sliders

Use mozzarella, provolone, and Parmesan throughout the sliders.

Garlic Parmesan Meatball Sliders

Increase the garlic and Parmesan and serve with garlic butter dipping sauce.

BBQ Meatball Sliders

Replace marinara with barbecue sauce and use cheddar cheese.

Bacon Cheeseburger Meatball Sliders

Add crispy bacon and cheddar instead of marinara and mozzarella.

Turkey Meatball Sliders

Replace the beef with ground turkey and cook the meatballs to 165°F (74°C).

Mushroom Mozzarella Sliders

Add sautéed mushrooms between the meatballs before topping with cheese.

How to Store Leftovers

Allow leftover sliders to cool before transferring them to an airtight container.

Refrigerate for up to 3–4 days.

For the best texture, reheat in a 350°F (175°C) oven for approximately 10–12 minutes, loosely covered with foil.

Remove the foil during the final few minutes to help the tops become crisp again.

An air fryer also works well for individual sliders.

Microwaving is convenient but will make the rolls softer.

The cooked stuffed meatballs can also be frozen separately for up to approximately 2–3 months. Thaw overnight in the refrigerator before assembling fresh sliders.

Frequently Asked Questions

What cheese is best for stuffing the meatballs?

Low-moisture mozzarella is ideal because it melts well without releasing too much liquid.

Can I use frozen meatballs?

Yes.

You can use cooked frozen meatballs for a shortcut, although you will lose the cheese-stuffed center unless you purchase stuffed meatballs.

Can I make the meatballs ahead?

Absolutely.

Shape them up to a day ahead, cover, and refrigerate until ready to bake.

Why did the cheese leak out of my meatballs?

The meat may not have completely sealed around the mozzarella.

Keep the cheese cube small and check for cracks before baking.

Can I use ground turkey?

Yes.

Ground turkey works well, but it should reach 165°F (74°C).

Can I use regular dinner rolls?

Yes.

Any soft connected dinner rolls work well.

How do I keep the sliders from getting soggy?

Use a thick marinara sauce, avoid adding too much directly to the bread, and bake the meatballs separately before assembling.

Can I prepare the whole dish ahead?

Yes.

You can assemble the sliders several hours ahead, cover, refrigerate, and bake when ready. You may need to add a few extra minutes if they are cold from the refrigerator.

Final Thoughts

These Cheesy Stuffed Meatball Sliders combine juicy seasoned beef meatballs, gooey mozzarella centers, rich marinara, melted cheese, soft rolls, and garlic Parmesan butter in one satisfying shareable meal.

The key is sealing the mozzarella completely inside each meatball, baking the meatballs before assembly, and using just enough marinara to keep the sliders saucy without making the bread soggy.

Serve them hot with extra marinara for dipping for an easy game-day appetizer, party favorite, or family dinner packed with cheesy Italian-inspired flavor.

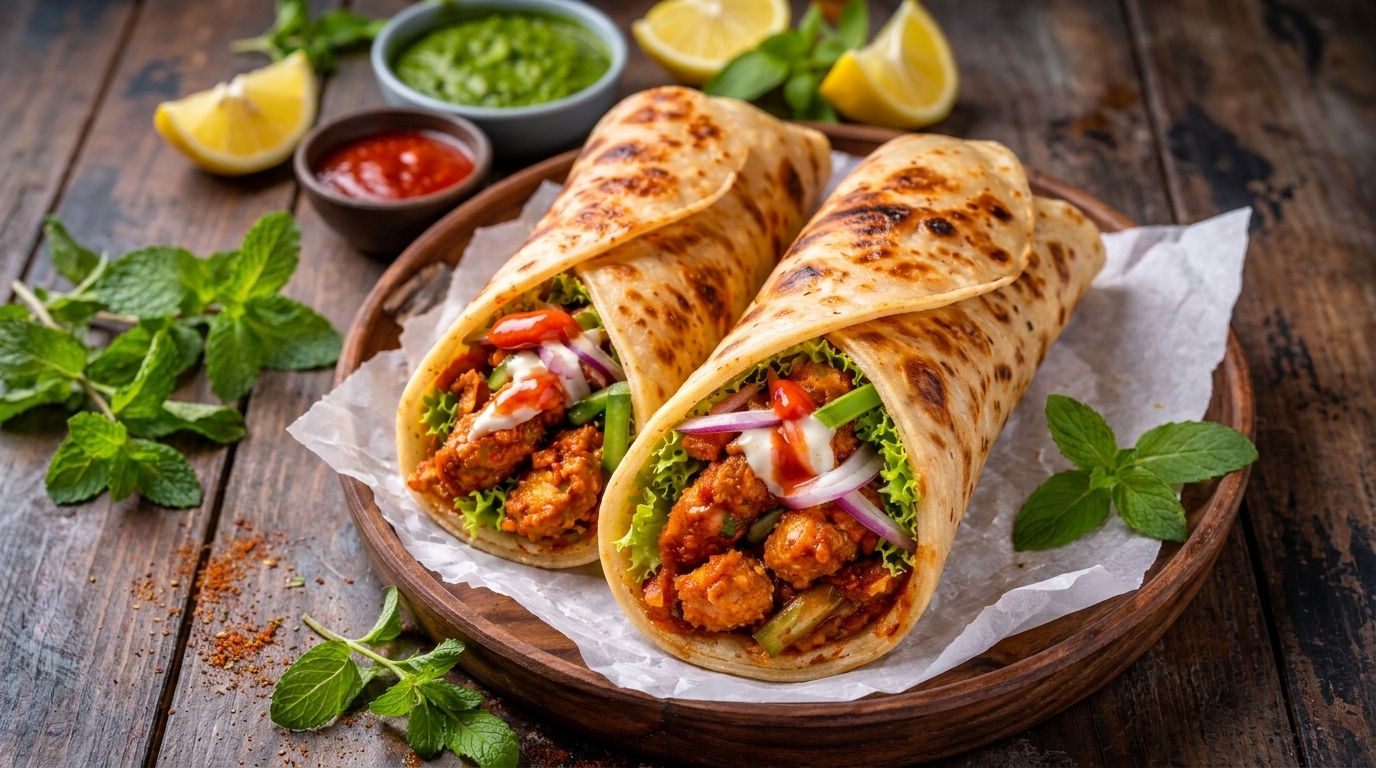
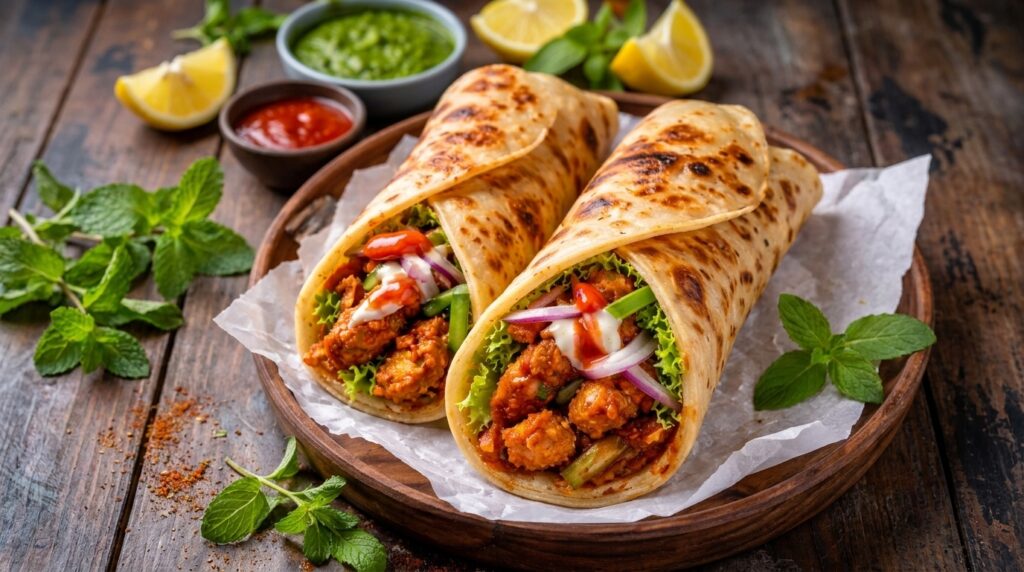
Crispy Chicken Wraps

If you are looking for an easy dinner that combines crunchy golden chicken, fresh vegetables, creamy sauce, and soft tortillas, these Crispy Chicken Wraps are the perfect recipe to add to your weekly rotation. Tender chicken strips are seasoned, coated in a crispy Parmesan-panko breading, and cooked until golden on the outside and juicy in the center. They are then wrapped in warm flour tortillas with lettuce, tomatoes, cheese, and a simple homemade creamy garlic sauce.

These wraps are ideal for busy weeknights, family dinners, lunches, game days, or casual gatherings. They are filling without being complicated, and almost every part of the recipe can be prepared ahead of time.

One of the best things about homemade crispy chicken wraps is how customizable they are. Add avocado, bacon, pickles, jalapeños, onions, coleslaw, or your favorite cheese. You can also change the sauce from creamy garlic to ranch, honey mustard, spicy mayo, or barbecue sauce.

Why You’ll Love These Crispy Chicken Wraps

The chicken is the star of these wraps. Panko breadcrumbs provide a light, crunchy coating, while Parmesan adds extra savory flavor. Seasoning the chicken itself as well as the breading ensures that every bite tastes delicious.

The contrast of warm crispy chicken with cool lettuce and tomatoes gives the wraps plenty of texture. The creamy sauce ties everything together without overpowering the chicken.

They are also incredibly versatile. You can serve them whole for dinner, cut them into smaller pieces for parties, or pack the components separately for lunch.

Another advantage is that the chicken can be cooked in a skillet, air fryer, or oven depending on your preference.

Ingredients

For the Crispy Chicken

  • 1½ pounds boneless, skinless chicken breasts
  • 1 teaspoon kosher salt
  • ½ teaspoon freshly ground black pepper
  • 1 teaspoon garlic powder
  • ½ teaspoon onion powder
  • 1 teaspoon paprika
  • ½ teaspoon dried oregano

For the Crispy Coating

  • ½ cup all-purpose flour
  • 2 large eggs
  • 2 tablespoons milk
  • 1¼ cups panko breadcrumbs
  • ½ cup freshly grated Parmesan cheese
  • ½ teaspoon garlic powder
  • ½ teaspoon paprika
  • ½ teaspoon dried Italian seasoning
  • ¼ teaspoon black pepper
  • 3–4 tablespoons vegetable or olive oil, for cooking

For the Creamy Garlic Sauce

  • ½ cup mayonnaise
  • ¼ cup sour cream or plain Greek yogurt
  • 1 tablespoon fresh lemon juice
  • 1 garlic clove, finely grated
  • ½ teaspoon garlic powder
  • ½ teaspoon dried dill
  • ¼ teaspoon salt
  • ¼ teaspoon freshly ground black pepper

For the Wraps

  • 6 large flour tortillas
  • 2 cups shredded romaine lettuce
  • 1 cup diced tomatoes
  • 1 cup shredded cheddar or Monterey Jack cheese
  • ½ small red onion, thinly sliced, optional
  • 1 avocado, sliced, optional
  • Pickles or jalapeños, optional

How to Make Crispy Chicken Wraps

1. Prepare the Chicken

Pat the chicken breasts dry with paper towels.

Slice them lengthwise into strips approximately 1 inch wide.

Try to make the pieces similar in size so they cook evenly.

Place the chicken in a bowl and season with salt, black pepper, garlic powder, onion powder, paprika, and oregano.

Toss until every piece is evenly coated.

2. Prepare the Breading Station

Set out three shallow bowls.

Add the flour to the first bowl.

In the second bowl, whisk together the eggs and milk.

In the third bowl, combine panko breadcrumbs, Parmesan, garlic powder, paprika, Italian seasoning, and black pepper.

This three-step coating creates a crisp exterior that stays attached during cooking.

3. Bread the Chicken

Take one chicken strip and coat it lightly in flour.

Shake off any excess.

Dip it into the egg mixture, allowing extra egg to drip away.

Finally, press it into the Parmesan-panko mixture.

Make sure the breadcrumbs cover all sides.

Place the breaded chicken on a clean plate and repeat with the remaining strips.

4. Heat the Skillet

Add about 3 tablespoons oil to a large skillet.

Heat over medium heat.

The oil is ready when a breadcrumb dropped into the skillet begins sizzling immediately.

Avoid using extremely high heat because the breading may burn before the chicken cooks through.

5. Cook the Crispy Chicken

Place the chicken strips in the skillet in a single layer.

Do not overcrowd the pan. Cook in batches if necessary.

Cook for approximately 3–4 minutes on the first side.

Flip carefully and cook for another 3–4 minutes.

The exterior should become deep golden and crispy.

The chicken is safely cooked when the thickest pieces reach an internal temperature of 165°F (74°C).

Transfer the cooked chicken to a wire rack or paper-towel-lined plate.

A wire rack works especially well because it allows air to circulate underneath, helping the chicken stay crisp.

6. Make the Creamy Garlic Sauce

While the chicken rests, prepare the sauce.

In a small bowl, combine mayonnaise, sour cream, lemon juice, grated garlic, garlic powder, dill, salt, and black pepper.

Stir until smooth.

Taste and adjust the seasoning.

For a thinner sauce, add a teaspoon of water or milk.

For extra brightness, add another small squeeze of lemon.

7. Warm the Tortillas

Warm the tortillas before assembling the wraps.

You can heat them individually in a dry skillet for about 15–20 seconds per side, or microwave them under a slightly damp paper towel for approximately 20–30 seconds.

Warm tortillas are softer and much easier to fold without tearing.

8. Assemble the Wraps

Lay one tortilla flat on a clean work surface.

Spread approximately 1 tablespoon creamy garlic sauce across the center.

Add shredded lettuce and diced tomatoes.

Sprinkle with shredded cheese.

Add red onion, avocado, pickles, or jalapeños if desired.

Place two or three crispy chicken strips over the vegetables.

Drizzle with another small amount of sauce.

9. Fold the Wraps

Fold the bottom edge of the tortilla upward over the filling.

Fold both sides toward the center.

Roll tightly until completely closed.

Be careful not to overfill the tortilla, or it may split.

Repeat with the remaining wraps.

10. Toast the Wraps

For an extra-crispy finish, heat a clean skillet over medium heat.

Place each assembled wrap seam-side down.

Cook for approximately 1–2 minutes per side until lightly golden and sealed.

This step is optional but gives the wraps a delicious toasted exterior.

11. Slice and Serve

Let the wraps rest for one minute.

Slice diagonally through the center using a sharp knife.

Serve immediately with extra creamy garlic sauce on the side.

What to Serve With Crispy Chicken Wraps

French fries are a classic choice and turn these wraps into a satisfying restaurant-style meal.

Sweet potato fries also work beautifully and add a slightly sweet contrast to the savory chicken.

For a lighter side, serve the wraps with a garden salad, Caesar salad, cucumber salad, or coleslaw.

Roasted potatoes, onion rings, corn on the cob, or grilled vegetables are other excellent options.

You can also serve the wraps with extra dipping sauces such as ranch, honey mustard, spicy mayo, barbecue sauce, or buffalo sauce.

Tips for the Best Crispy Chicken Wraps

Cut the chicken evenly. Similar-sized strips cook at the same rate.

Season both the chicken and breading. Layering the seasoning creates much better flavor.

Use panko breadcrumbs. Panko produces a crispier, lighter coating than fine breadcrumbs.

Do not overcrowd the skillet. Crowding lowers the oil temperature and can make the chicken greasy.

Drain chicken on a wire rack. This helps prevent the bottom from becoming soggy.

Warm the tortillas. Cold tortillas are more likely to tear.

Do not overfill the wraps. Moderate amounts of filling make them easier to roll.

Assemble just before serving. Leaving crispy chicken in sauce for too long can soften the coating.

Easy Recipe Variations

Spicy Crispy Chicken Wraps

Add cayenne to the breading and use spicy mayo or buffalo sauce.

Bacon Ranch Chicken Wraps

Add crispy bacon, cheddar cheese, and ranch dressing.

Honey Mustard Chicken Wraps

Replace the garlic sauce with a mixture of mayonnaise, Dijon mustard, and honey.

Avocado Chicken Wraps

Add sliced avocado and fresh lime juice for extra creaminess.

BBQ Crispy Chicken Wraps

Toss the crispy chicken lightly with barbecue sauce and add cheddar, lettuce, and red onion.

Caesar Chicken Wraps

Use romaine lettuce, Parmesan, Caesar dressing, and crispy chicken for a simple Caesar-style version.

Oven and Air Fryer Options

For an oven-baked version, arrange the breaded chicken on a lightly greased wire rack set over a baking sheet. Spray lightly with cooking oil and bake at 425°F (220°C) for about 18–22 minutes, turning halfway through.

For the air fryer, cook at 390°F (200°C) for approximately 10–14 minutes, flipping halfway. Work in batches so air can circulate around the chicken.

Always check that the chicken reaches 165°F internally.

Storage and Reheating

Store the chicken, vegetables, sauce, and tortillas separately whenever possible.

Cooked crispy chicken can be refrigerated in an airtight container for up to 3–4 days.

Reheat it in a 375°F (190°C) oven or air fryer for 5–8 minutes until hot and crispy again.

Avoid microwaving the chicken if crispness is important because microwaving softens the breading.

The garlic sauce can be refrigerated separately for up to 3 days.

Make-Ahead Instructions

The chicken can be sliced and seasoned several hours ahead.

The breadcrumb mixture can also be prepared in advance.

The creamy garlic sauce can be made the day before and stored in the refrigerator.

You can wash and chop the vegetables ahead as well.

For the best crispy texture, bread and cook the chicken shortly before assembling the wraps.

Final Thoughts

These Crispy Chicken Wraps combine crunchy Parmesan-coated chicken, fresh vegetables, melted cheese, soft tortillas, and creamy garlic sauce for an easy meal that is full of flavor and texture.

The secret is simple: season the chicken well, use panko for maximum crunch, avoid overcrowding the skillet, and wait until just before serving to assemble the wraps.

Serve them with fries for a classic comfort-food dinner, make them spicy with buffalo sauce, add bacon and ranch for an indulgent variation, or load them with extra vegetables for a fresher version. Whether you serve them for dinner, lunch, or game day, these homemade crispy chicken wraps are easy to customize and even easier to enjoy.

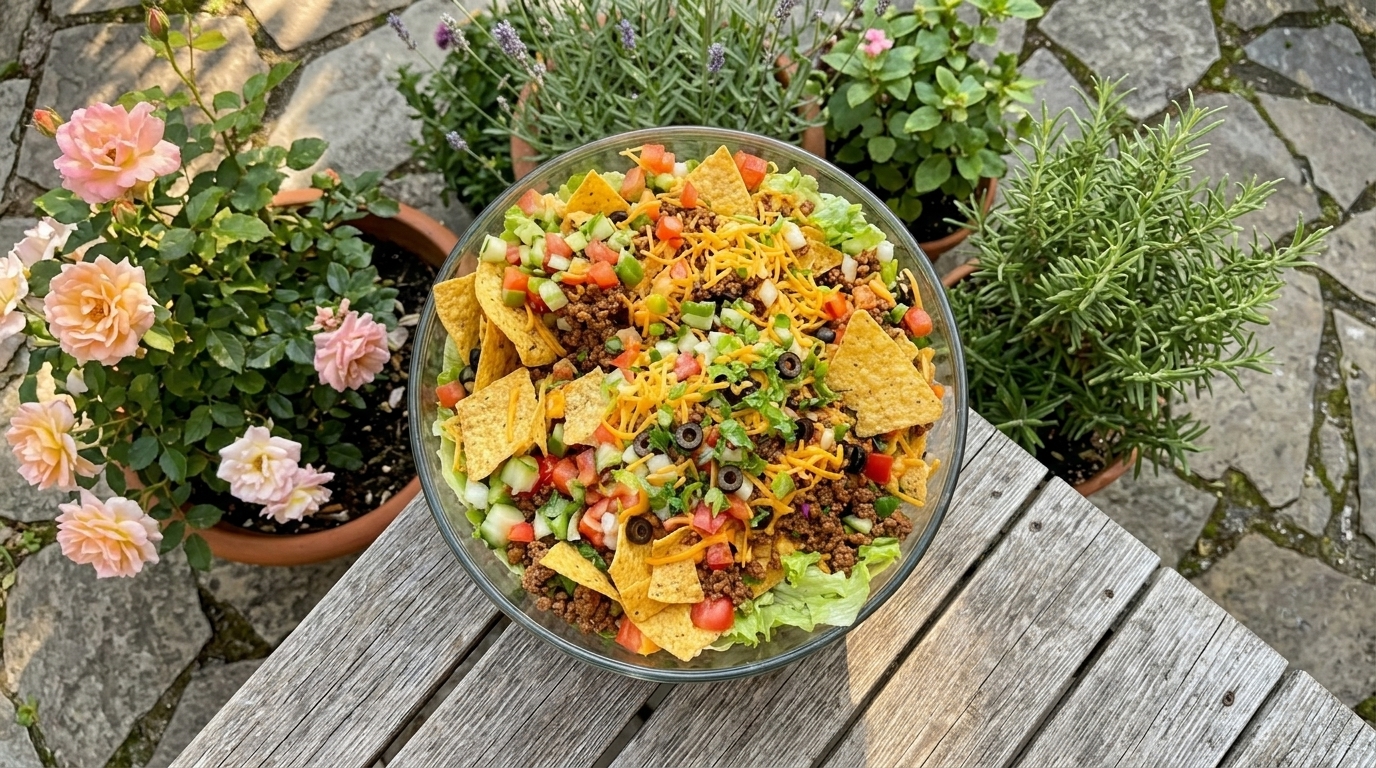
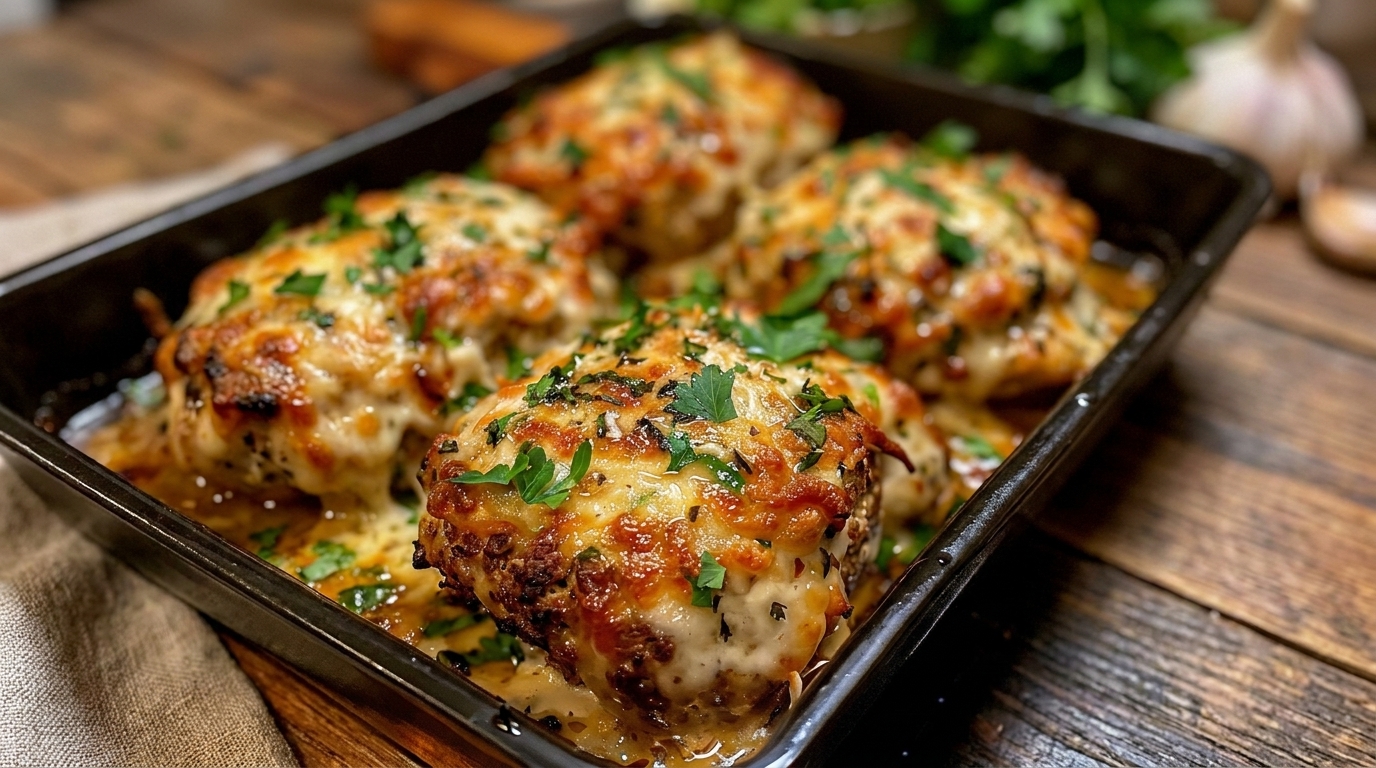
Cheesy Baked Chicken

If you are looking for a warm, comforting chicken dinner that is simple enough for a weeknight but delicious enough for guests, this Cheesy Baked Chicken is an excellent recipe to keep in your rotation. Tender chicken breasts are seasoned with garlic, paprika, and herbs, topped with a creamy Parmesan mixture, covered with mozzarella and cheddar, then baked until juicy inside and beautifully golden on top.

This recipe is all about easy comfort food. The creamy layer helps protect the chicken from drying out, while the combination of mozzarella, cheddar, and Parmesan creates a rich, bubbly topping with plenty of savory flavor.

It is also extremely versatile. Serve the chicken with mashed potatoes, roasted potatoes, pasta, rice, or vegetables. You can also customize the topping with bacon, mushrooms, spinach, jalapeños, or different cheeses depending on what you have available.

Why You’ll Love This Cheesy Baked Chicken

This recipe requires only a few simple steps and very little hands-on cooking. There is no complicated breading or deep frying involved.

The chicken stays juicy because the creamy topping acts as a protective layer while it bakes. At the same time, the cheese melts into a flavorful golden crust.

Another great feature is how easy it is to adapt. You can use chicken breasts, chicken cutlets, or boneless thighs. You can also change the cheese combination to suit your taste.

It is perfect for busy family dinners, meal prep, casual entertaining, or those nights when you want something comforting without spending hours in the kitchen.

Ingredients

For the Chicken

  • 4 boneless, skinless chicken breasts
  • 1 tablespoon olive oil
  • 1 teaspoon kosher salt
  • ½ teaspoon freshly ground black pepper
  • 1 teaspoon garlic powder
  • ½ teaspoon onion powder
  • 1 teaspoon paprika
  • ½ teaspoon dried oregano
  • ½ teaspoon dried thyme

For the Creamy Parmesan Layer

  • 4 ounces cream cheese, softened
  • ⅓ cup mayonnaise
  • ¼ cup sour cream or plain Greek yogurt
  • ½ cup freshly grated Parmesan cheese
  • 3 garlic cloves, finely minced
  • 1 teaspoon Dijon mustard
  • ½ teaspoon Italian seasoning
  • ¼ teaspoon black pepper
  • 1 tablespoon chopped fresh parsley

For the Cheese Topping

  • 1½ cups shredded mozzarella cheese
  • 1 cup shredded sharp cheddar cheese
  • ¼ cup freshly grated Parmesan cheese
  • 2 tablespoons chopped fresh parsley

How to Make Cheesy Baked Chicken

1. Preheat the Oven

Preheat your oven to 400°F (205°C).

Lightly grease a 9-by-13-inch baking dish with butter, olive oil, or nonstick cooking spray.

Set the dish aside while you prepare the chicken.

2. Prepare the Chicken

Pat the chicken breasts dry with paper towels.

If the chicken is very thick, slice each breast horizontally into thinner cutlets or gently pound it to an even thickness of about ¾ inch.

This step is important because evenly sized chicken cooks more consistently.

Place the chicken in the prepared baking dish.

3. Season the Chicken

Brush the chicken lightly with olive oil.

Season both sides with salt, black pepper, garlic powder, onion powder, paprika, oregano, and thyme.

Gently press the seasonings into the surface.

Paprika adds color and mild warmth, while the oregano and thyme give the chicken a savory herb flavor.

4. Make the Creamy Parmesan Mixture

In a medium bowl, combine the softened cream cheese, mayonnaise, sour cream, Parmesan, minced garlic, Dijon mustard, Italian seasoning, black pepper, and parsley.

Stir until smooth and evenly combined.

The mixture should be thick enough to spread easily over the chicken.

If your cream cheese is too firm, allow it to sit at room temperature for a few minutes before mixing.

5. Spread the Topping Over the Chicken

Spoon the creamy Parmesan mixture over each chicken breast.

Spread it evenly from edge to edge.

A moderate layer is enough. You do not need to completely bury the chicken.

This creamy topping helps add moisture and flavor while giving the shredded cheese something to cling to.

6. Add the Cheese

Sprinkle mozzarella evenly over the chicken.

Add the cheddar next.

Finish with grated Parmesan.

Try to keep most of the cheese directly over the chicken rather than scattered around the baking dish.

7. Bake the Chicken

Place the baking dish in the preheated oven.

Bake uncovered for approximately 22–28 minutes, depending on the thickness of the chicken breasts.

The cheese should be completely melted and bubbling around the edges.

The chicken is safely cooked when the thickest part reaches an internal temperature of 165°F (74°C).

An instant-read thermometer is the best way to check doneness without overcooking.

8. Broil for Extra Color

For a more deeply golden cheese topping, switch the oven to broil for the final 1–2 minutes.

Watch the dish closely.

Cheese can brown very quickly under direct heat.

Remove the chicken once the surface develops golden spots and lightly crisp edges.

9. Rest Before Serving

Allow the chicken to rest for approximately 5 minutes.

This gives the juices time to redistribute and allows the creamy cheese topping to settle slightly.

Sprinkle with fresh parsley before serving.

What to Serve With Cheesy Baked Chicken

Mashed potatoes are one of the best side dishes for this recipe. Their creamy texture pairs perfectly with the rich cheese topping.

Roasted potatoes are another excellent option if you want something crispier.

Rice also works beautifully. Garlic rice, herb rice, seasoned white rice, or wild rice all complement the chicken.

If you prefer pasta, serve the chicken with buttered noodles, fettuccine, penne, or garlic Parmesan pasta.

Vegetables help balance the richness of the dish. Roasted broccoli, asparagus, green beans, Brussels sprouts, carrots, or zucchini are all excellent choices.

A simple garden salad or Caesar salad also makes a refreshing side.

Tips for the Best Cheesy Baked Chicken

Use evenly thick chicken. Thin and thick pieces in the same pan can cook at different rates.

Pat the chicken dry. This helps the seasonings stick better.

Use softened cream cheese. It blends much more smoothly into the topping.

Use freshly shredded cheese. It generally melts better than heavily pre-shredded cheese.

Do not overbake. Chicken breast can become dry once cooked beyond the proper internal temperature.

Broil carefully. One or two minutes is usually enough to create a golden top.

Let the chicken rest. This helps keep it juicy and makes serving easier.

Easy Recipe Variations

Bacon Cheesy Baked Chicken

Add ½ cup cooked crumbled bacon over the creamy layer before adding the shredded cheese.

Sprinkle extra bacon over the finished chicken.

Mushroom Cheesy Chicken

Sauté 8 ounces sliced mushrooms until golden.

Arrange them over the creamy topping before adding the cheese.

Spinach Cheesy Baked Chicken

Add a layer of cooked, well-drained spinach over the creamy mixture.

Top with mozzarella and Parmesan.

Spicy Cheesy Chicken

Add chopped jalapeños or crushed red pepper flakes.

Replace some mozzarella with pepper Jack cheese.

Garlic Parmesan Chicken

Increase the Parmesan and add one extra garlic clove for a stronger garlic-cheese flavor.

Italian Cheesy Chicken

Spread a thin layer of marinara over each chicken breast before adding mozzarella.

Finish with fresh basil after baking.

Storage and Reheating

Allow leftover chicken to cool before transferring it to an airtight container.

Refrigerate for up to 3–4 days.

For the best texture, reheat in a 350°F (175°C) oven for about 10–15 minutes.

Cover loosely with foil if the cheese begins browning too much.

Individual portions can also be reheated in the microwave in short intervals.

If the chicken seems dry, add a teaspoon of chicken broth before reheating.

Make-Ahead Instructions

You can prepare this dish several hours ahead.

Season the chicken and place it in the baking dish.

Spread the creamy Parmesan mixture over the top.

Cover tightly and refrigerate.

For the best texture, add the shredded mozzarella, cheddar, and Parmesan shortly before baking.

If the chicken is going directly from the refrigerator to the oven, you may need to add a few extra minutes to the baking time.

Final Thoughts

This Cheesy Baked Chicken is a simple, comforting dinner that combines juicy chicken with garlic, herbs, cream cheese, Parmesan, mozzarella, and cheddar.

The creamy topping helps keep the chicken moist while the cheese melts into a rich, bubbly golden layer. The result is an easy baked chicken dinner that looks impressive but requires very little complicated preparation.

Serve it with mashed potatoes for classic comfort food, pair it with pasta or rice for a hearty family meal, or add roasted vegetables and salad for something lighter. You can also customize it with bacon, spinach, mushrooms, jalapeños, or different cheeses to create your own version.

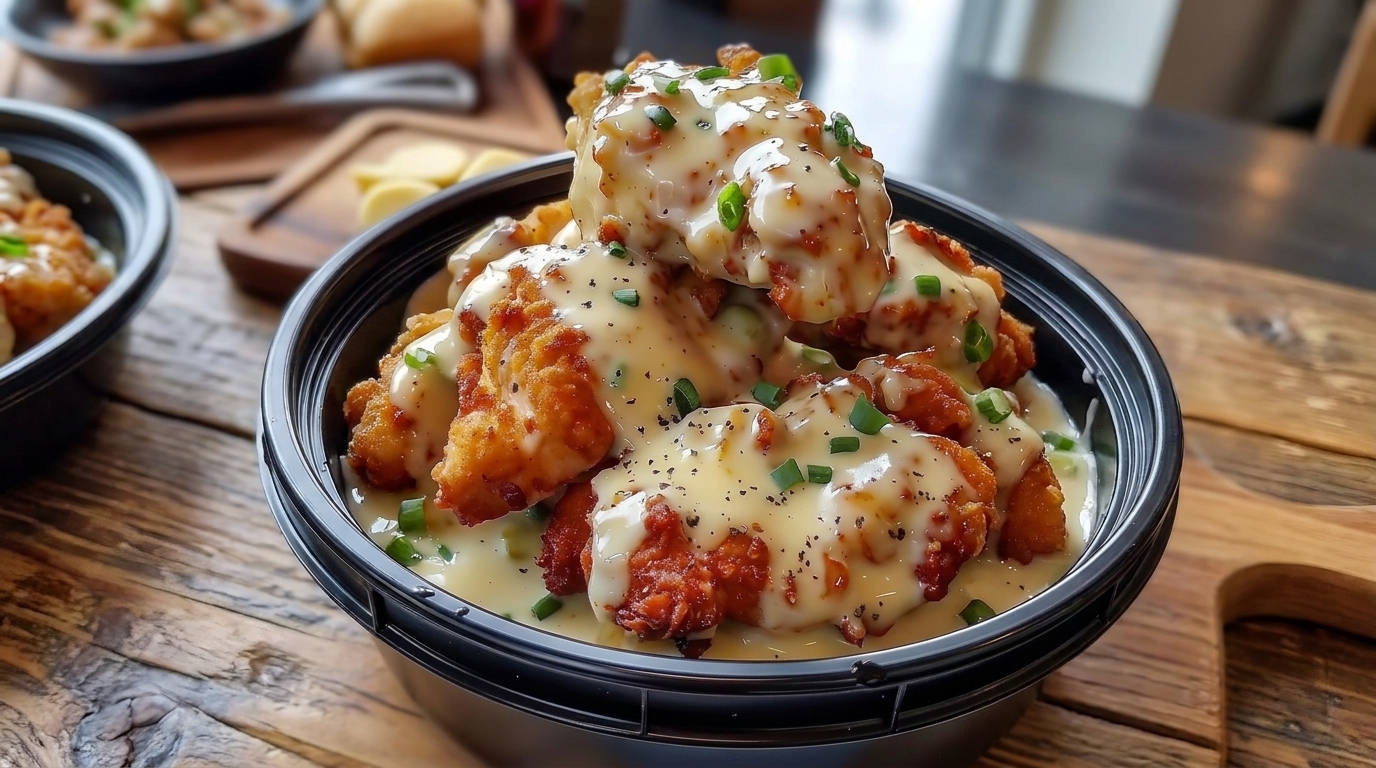
Creamy Crispy Chicken Bites

If you are craving a chicken dinner that is crispy on the outside, juicy in the center, and coated in a rich, creamy garlic sauce, these Creamy Crispy Chicken Bites are the perfect recipe to try. Bite-sized pieces of seasoned chicken are coated in a light Parmesan breading, pan-fried until golden and crunchy, then served with a smooth garlic cream sauce made with butter, Parmesan, herbs, and a touch of Dijon mustard.

This recipe gives you the best of both worlds: crunchy chicken and a velvety sauce. Instead of simmering the chicken in the sauce for a long time and losing that crisp coating, the bites are added only at the very end or served with the sauce spooned around them. That way, the chicken stays crisp while still getting plenty of creamy, garlicky flavor.

These chicken bites are perfect for family dinners, game nights, casual entertaining, or an indulgent weekend meal. Serve them over mashed potatoes, pasta, rice, or alongside roasted vegetables. You can even turn them into an appetizer by serving the cream sauce as a dip.

Why You’ll Love These Creamy Crispy Chicken Bites

The contrast in texture makes this recipe especially satisfying. The seasoned coating becomes crisp and golden while the chicken stays tender and juicy inside.

The creamy garlic Parmesan sauce is easy to make in the same skillet after cooking the chicken. Butter, fresh garlic, chicken broth, heavy cream, and Parmesan create a rich sauce with plenty of savory flavor.

This recipe is also easy to customize. You can make the chicken spicy, add Cajun seasoning, stir spinach or mushrooms into the sauce, or use mozzarella for an extra-cheesy version.

The chicken bites are also quick to cook because the pieces are small. Once everything is prepared, dinner can be on the table in around 30–40 minutes.

Ingredients

For the Chicken

  • 1½ pounds boneless, skinless chicken breasts
  • 1 teaspoon kosher salt
  • ½ teaspoon freshly ground black pepper
  • 1 teaspoon garlic powder
  • ½ teaspoon onion powder
  • 1 teaspoon paprika
  • ½ teaspoon dried Italian seasoning

For the Crispy Coating

  • ½ cup all-purpose flour
  • 2 large eggs
  • 1 tablespoon milk
  • 1 cup panko breadcrumbs
  • ½ cup freshly grated Parmesan cheese
  • ½ teaspoon garlic powder
  • ½ teaspoon paprika
  • ½ teaspoon dried oregano
  • ¼ teaspoon black pepper
  • 3–4 tablespoons olive oil or neutral cooking oil

For the Creamy Garlic Sauce

  • 2 tablespoons unsalted butter
  • 5 garlic cloves, finely minced
  • 1 tablespoon all-purpose flour
  • ¾ cup chicken broth
  • 1 cup heavy cream
  • ¾ cup freshly grated Parmesan cheese
  • 1 teaspoon Dijon mustard
  • ½ teaspoon Italian seasoning
  • ¼ teaspoon crushed red pepper flakes, optional
  • ½ teaspoon freshly ground black pepper
  • 2 tablespoons chopped fresh parsley

For Serving

  • Extra Parmesan
  • Fresh parsley
  • Freshly cracked black pepper
  • Lemon wedges, optional

How to Make Creamy Crispy Chicken Bites

1. Prepare the Chicken

Pat the chicken breasts dry with paper towels.

Cut them into bite-sized pieces, roughly 1 to 1½ inches each.

Keeping the pieces similar in size helps them cook evenly.

Place the chicken in a bowl and season with salt, black pepper, garlic powder, onion powder, paprika, and Italian seasoning.

Toss until every piece is evenly seasoned.

2. Prepare the Breading Station

Set out three shallow bowls.

Add the flour to the first bowl.

In the second bowl, whisk the eggs with 1 tablespoon milk.

In the third bowl, combine the panko breadcrumbs, Parmesan, garlic powder, paprika, oregano, and black pepper.

Using panko rather than regular breadcrumbs creates a lighter, crunchier coating.

3. Coat the Chicken

Working with a few pieces at a time, toss the chicken lightly in the flour.

Shake off the excess.

Dip each piece into the egg mixture.

Then press it into the Parmesan-panko coating.

Make sure all sides are covered.

Transfer the coated chicken to a clean plate.

4. Heat the Skillet

Heat 3 tablespoons oil in a large skillet over medium heat.

The oil should be hot enough that a breadcrumb dropped into the pan begins sizzling immediately.

Avoid extremely high heat because the breading can burn before the chicken cooks through.

5. Cook the Chicken Bites

Arrange the coated chicken pieces in the skillet in a single layer.

Do not overcrowd the pan.

Cook for approximately 3–4 minutes on the first side.

Turn and continue cooking for another 3–4 minutes, rotating as needed to brown the other surfaces.

The chicken should become crisp and golden.

Depending on your skillet size, you may need to cook in two or three batches.

6. Check for Doneness

Use an instant-read thermometer to check one of the largest pieces.

Chicken is safely cooked when the center reaches 165°F (74°C).

Transfer the cooked chicken bites to a wire rack or paper-towel-lined plate.

A wire rack is especially useful because air can circulate beneath the chicken, helping the coating remain crisp.

7. Remove Excess Oil

Once all the chicken has been cooked, carefully remove most of the excess oil from the skillet.

Leave a small amount along with the flavorful browned bits.

Reduce the heat to medium-low.

8. Start the Creamy Garlic Sauce

Add the butter to the skillet.

Once melted, add the minced garlic.

Cook for approximately 30 seconds, stirring continuously.

The garlic should become fragrant but should not brown heavily.

9. Add the Flour

Sprinkle in 1 tablespoon flour.

Stir continuously for approximately 1 minute.

This helps thicken the sauce and gives it a smooth consistency.

10. Add the Chicken Broth

Slowly pour in the chicken broth while whisking.

Scrape up the browned bits from the bottom of the skillet.

Let the broth simmer gently for approximately 2 minutes.

This step brings the savory chicken flavor from the pan into the sauce.

11. Add the Cream

Pour in the heavy cream.

Add Dijon mustard, Italian seasoning, optional red pepper flakes, and black pepper.

Stir until completely combined.

Let the sauce simmer gently over medium-low heat for about 2–3 minutes.

Do not boil aggressively.

12. Add the Parmesan

Gradually stir in the freshly grated Parmesan.

Continue stirring until the cheese melts and the sauce becomes smooth and creamy.

If the sauce is too thick, add a splash of chicken broth.

If it is too thin, let it simmer gently for another minute.

Taste before adding salt because Parmesan and chicken broth may already provide enough.

13. Add the Fresh Herbs

Stir in the chopped parsley.

For a brighter flavor, add a small squeeze of fresh lemon juice.

Remove the skillet from the heat.

14. Combine Carefully

For maximum crispiness, arrange the chicken bites on a platter and spoon the creamy sauce around them or drizzle a small amount over the top just before serving.

If you prefer fully coated chicken bites, add them to the sauce and toss very gently for only 20–30 seconds.

Do not let them simmer in the sauce, or the coating will soften.

15. Garnish and Serve

Finish with fresh parsley, extra Parmesan, and freshly cracked black pepper.

Serve immediately while the chicken is hot and crispy.

What to Serve With Creamy Crispy Chicken Bites

Creamy mashed potatoes are an excellent pairing because they soak up the garlic Parmesan sauce.

Pasta also works beautifully. Try fettuccine, penne, linguine, or bowtie pasta and spoon some sauce directly over the noodles.

Rice is another easy option, especially garlic rice or herb rice.

For vegetables, serve the chicken with roasted broccoli, green beans, asparagus, carrots, zucchini, or Brussels sprouts.

If serving the chicken bites as an appetizer, place the creamy garlic sauce in a small bowl and use it as a dipping sauce.

Tips for the Best Crispy Chicken Bites

Pat the chicken dry. Excess moisture can make the coating less crisp.

Use panko breadcrumbs. They create a crunchier coating than fine breadcrumbs.

Press the breading onto the chicken. This helps it stay attached during cooking.

Do not overcrowd the skillet. Crowding lowers the temperature and can make the chicken oily instead of crispy.

Keep the heat moderate. Medium heat gives the chicken time to cook through without burning the coating.

Drain on a wire rack. This prevents steam from softening the bottom.

Add sauce at the last moment. The longer crispy chicken sits in cream sauce, the softer the coating becomes.

Easy Recipe Variations

Spicy Creamy Chicken Bites

Add cayenne pepper to the breading and extra red pepper flakes to the cream sauce.

Cajun Chicken Bites

Replace the Italian seasoning with Cajun seasoning for a smoky, spicy flavor.

Creamy Mushroom Chicken Bites

Sauté 8 ounces sliced mushrooms until golden before making the sauce.

Creamy Spinach Chicken Bites

Stir 2 cups fresh spinach into the cream sauce until wilted.

Garlic Parmesan Chicken Bites

Increase the Parmesan in both the coating and sauce for stronger cheesy flavor.

Creamy Bacon Chicken Bites

Stir ½ cup crispy crumbled bacon into the finished sauce.

Storage and Reheating

Store leftover chicken and sauce separately whenever possible.

The chicken bites can be refrigerated in an airtight container for up to 3–4 days.

Reheat the chicken in a 375°F (190°C) oven or air fryer for 5–10 minutes until hot and crisp again.

Warm the sauce separately over low heat. Add a splash of milk or chicken broth if it becomes too thick.

Microwaving the chicken is convenient, but it will soften the crispy coating.

Make-Ahead Instructions

The chicken can be cut and seasoned several hours ahead.

You can also prepare the breadcrumb mixture and grate the Parmesan in advance.

The sauce ingredients can be measured and refrigerated until needed.

For the crispiest result, bread and cook the chicken shortly before serving.

If necessary, cooked chicken bites can be held on a wire rack in a 200°F (95°C) oven for a short time while you finish the sauce.

Final Thoughts

These Creamy Crispy Chicken Bites combine juicy chicken, crunchy Parmesan-panko coating, fresh garlic, herbs, cream, and Parmesan sauce in one satisfying dinner.

The key is keeping the crispy chicken and creamy sauce separate until the final moment. Brown the chicken in batches, cook it to 165°F, build the garlic sauce over gentle heat, and drizzle or toss everything together just before serving.

Serve these chicken bites with mashed potatoes for cozy comfort food, pair them with pasta for a restaurant-inspired dinner, or offer the creamy sauce on the side for an irresistible appetizer.

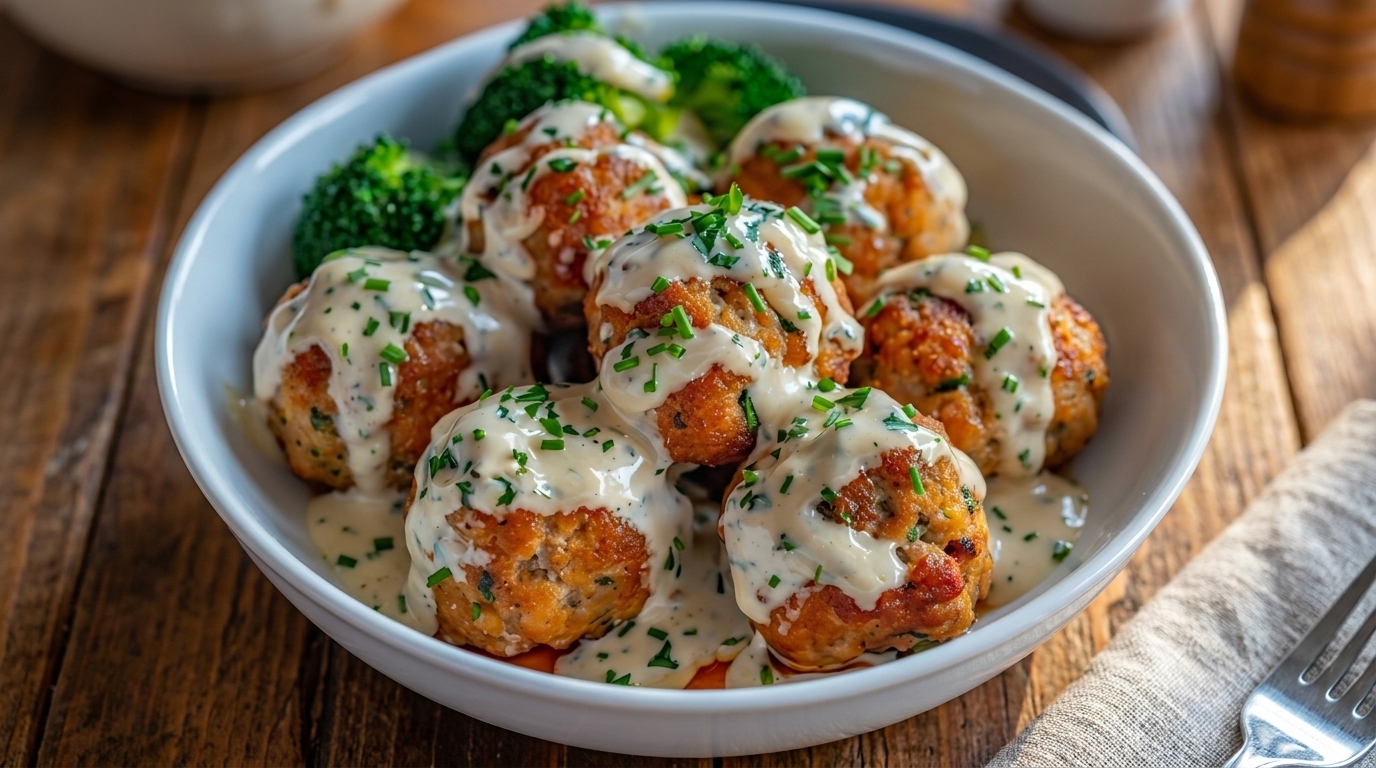
Creamy Herb Chicken Meatballs

If you are looking for a cozy, flavorful dinner that feels comforting without being too heavy, these Creamy Herb Chicken Meatballs are a perfect choice. Tender homemade chicken meatballs are seasoned with garlic, Parmesan, parsley, oregano, and thyme, then browned until golden and finished in a silky herb cream sauce.

The meatballs stay juicy thanks to breadcrumbs, egg, Parmesan, and a small amount of milk mixed into the ground chicken. Once browned, they are simmered gently in a creamy garlic sauce made with chicken broth, heavy cream, Parmesan, Dijon mustard, and fresh herbs. The result is a satisfying skillet dinner with plenty of sauce for spooning over pasta, mashed potatoes, rice, or vegetables.

This recipe works beautifully for busy weeknight dinners, family meals, meal prep, or casual entertaining. It is also easy to customize with spinach, mushrooms, sun-dried tomatoes, or additional vegetables.

Why You’ll Love This Creamy Herb Chicken Meatballs Recipe

Chicken meatballs are a lighter alternative to traditional beef or pork meatballs while still providing plenty of flavor. Parmesan, garlic, herbs, and seasonings keep them from tasting bland.

The creamy sauce is prepared in the same skillet used to brown the meatballs, which means all of those flavorful caramelized bits become part of the sauce.

Another benefit is versatility. Serve the meatballs over pasta for a restaurant-inspired dinner, spoon them over mashed potatoes for classic comfort food, or pair them with vegetables and rice.

The meatballs can also be prepared ahead, making this recipe convenient when you want to reduce cooking time later in the day.

Ingredients

For the Chicken Meatballs

  • 1½ pounds ground chicken
  • ½ cup panko breadcrumbs
  • ⅓ cup freshly grated Parmesan cheese
  • 1 large egg
  • 3 tablespoons whole milk
  • 3 garlic cloves, finely minced
  • 2 tablespoons chopped fresh parsley
  • 1 teaspoon dried Italian seasoning
  • ½ teaspoon dried oregano
  • ½ teaspoon dried thyme
  • 1 teaspoon kosher salt
  • ½ teaspoon freshly ground black pepper
  • ½ teaspoon onion powder
  • ¼ teaspoon paprika
  • 2 tablespoons olive oil, for cooking

For the Creamy Herb Sauce

  • 2 tablespoons unsalted butter
  • 4 garlic cloves, finely minced
  • 1 tablespoon all-purpose flour
  • 1 cup chicken broth
  • 1¼ cups heavy cream
  • ¾ cup freshly grated Parmesan cheese
  • 1 teaspoon Dijon mustard
  • ½ teaspoon dried thyme
  • ½ teaspoon dried oregano
  • ½ teaspoon Italian seasoning
  • ¼ teaspoon crushed red pepper flakes, optional
  • ½ teaspoon freshly ground black pepper
  • 2 tablespoons chopped fresh parsley
  • 1 tablespoon chopped fresh basil, optional
  • 1 teaspoon fresh lemon juice

For Serving

  • Extra Parmesan cheese
  • Fresh parsley
  • Freshly cracked black pepper
  • Cooked pasta, mashed potatoes, or rice

How to Make Creamy Herb Chicken Meatballs

1. Prepare the Meatball Mixture

Add the ground chicken, panko breadcrumbs, Parmesan, egg, milk, garlic, parsley, Italian seasoning, oregano, thyme, salt, black pepper, onion powder, and paprika to a large mixing bowl.

Using clean hands or a fork, gently mix everything until just combined.

Avoid aggressively kneading the mixture. Overmixing can make chicken meatballs dense rather than tender.

If the mixture feels extremely sticky, let it rest for about 5 minutes so the breadcrumbs can absorb some moisture.

2. Shape the Meatballs

Lightly wet or oil your hands.

Scoop approximately 1½ tablespoons of the mixture at a time and roll into balls.

You should get roughly 18–22 meatballs, depending on size.

Try to keep them similar in size so they cook evenly.

Place the shaped meatballs on a clean plate.

3. Heat the Skillet

Place a large skillet over medium heat.

Add the olive oil.

Once hot, arrange the chicken meatballs in a single layer.

Avoid overcrowding the skillet. If your pan is small, cook them in two batches.

4. Brown the Meatballs

Cook the meatballs for approximately 7–9 minutes, turning every couple of minutes so they brown on several sides.

They do not necessarily need to cook completely through at this stage because they will finish in the cream sauce.

Once golden, transfer the meatballs to a clean plate.

5. Start the Garlic Herb Sauce

Reduce the skillet heat to medium-low.

Add the butter to the same skillet.

Once melted, add the minced garlic.

Cook for approximately 30 seconds, stirring constantly.

The garlic should become fragrant without turning dark brown.

6. Add the Flour

Sprinkle the flour over the garlic butter.

Stir continuously for approximately 1 minute.

This creates a light roux and helps the finished sauce become creamy enough to coat the meatballs.

7. Add the Chicken Broth

Slowly pour in the chicken broth while whisking.

Scrape the bottom of the skillet to loosen any browned pieces left from cooking the chicken meatballs.

Let the broth simmer gently for approximately 2 minutes.

These browned bits add extra savory flavor to the sauce.

8. Add the Cream

Reduce the heat to low or medium-low.

Pour in the heavy cream.

Add Dijon mustard, thyme, oregano, Italian seasoning, red pepper flakes if using, and black pepper.

Stir until smooth.

Let the mixture simmer gently for 2–3 minutes.

Do not allow it to boil aggressively.

9. Add the Parmesan

Gradually sprinkle the Parmesan into the sauce while stirring.

Continue stirring until the cheese melts and the sauce becomes smooth.

If the sauce seems too thick, add a small splash of chicken broth.

If it looks too thin, let it simmer for another minute.

10. Return the Meatballs

Place the browned chicken meatballs back into the skillet.

Turn them gently so they become coated with the creamy herb sauce.

Cover loosely and simmer over low heat for approximately 5–7 minutes.

The exact cooking time depends on the size of the meatballs.

Chicken meatballs should reach an internal temperature of 165°F (74°C) in the center.

11. Add the Fresh Herbs

Once the meatballs are fully cooked, stir in the fresh parsley and optional basil.

Add the lemon juice.

The small amount of lemon brightens the sauce and helps balance the richness of the cream and Parmesan.

Taste and adjust the seasoning if necessary.

12. Serve

Remove the skillet from the heat.

Finish with extra Parmesan, parsley, and freshly cracked black pepper.

Spoon plenty of creamy herb sauce over the meatballs before serving.

What to Serve With Creamy Herb Chicken Meatballs

Pasta is one of the best pairings. Fettuccine, linguine, spaghetti, penne, or egg noodles all work beautifully with the creamy herb sauce.

Mashed potatoes are another excellent option. Spoon several meatballs over a generous portion of mashed potatoes and drizzle the sauce over everything.

Rice also works well, especially garlic rice, white rice, or herb rice.

For vegetables, try roasted broccoli, asparagus, green beans, carrots, Brussels sprouts, or zucchini.

Garlic bread or crusty bread is especially useful for soaking up any remaining sauce.

Tips for the Best Chicken Meatballs

Do not overmix the meat. Gently mixing keeps the meatballs tender.

Use Parmesan in the meatballs. It adds flavor and helps with texture.

Keep the meatballs evenly sized. Uniform meatballs finish cooking at roughly the same time.

Brown them before adding the sauce. Browning creates better flavor and helps the meatballs hold their shape.

Use freshly grated Parmesan in the sauce. It melts more smoothly.

Keep the cream sauce over gentle heat. Strong boiling can affect the texture.

Check the internal temperature. Ground chicken should reach 165°F.

Easy Recipe Variations

Creamy Mushroom Chicken Meatballs

After removing the browned meatballs, sauté 8 ounces sliced mushrooms until golden before preparing the sauce.

Creamy Spinach Chicken Meatballs

Stir 2 cups fresh baby spinach into the sauce before returning the meatballs.

Tuscan Chicken Meatballs

Add chopped sun-dried tomatoes and spinach to the cream sauce for extra color and flavor.

Spicy Chicken Meatballs

Add cayenne pepper to the meatball mixture and extra crushed red pepper flakes to the sauce.

Extra Cheesy Chicken Meatballs

Add ½ cup shredded mozzarella to the finished cream sauce for an even cheesier version.

Garlic Parmesan Chicken Meatballs

Increase the Parmesan and add an additional garlic clove to both the meatballs and sauce.

Storage and Reheating

Allow leftover meatballs and sauce to cool before transferring them to an airtight container.

Refrigerate for up to 3–4 days.

For the best texture, reheat gently in a skillet over low heat.

Add a splash of chicken broth, milk, or cream if the sauce has become too thick.

You can also microwave individual servings in short intervals until thoroughly heated.

Avoid excessive heat, which can dry out the chicken and cause the cream sauce to separate.

Make-Ahead Instructions

The chicken meatball mixture can be prepared several hours in advance.

You can also shape the meatballs, arrange them in a covered container, and refrigerate them until you are ready to cook.

The meatballs can be browned earlier in the day and stored in the refrigerator. Prepare the sauce shortly before serving and finish cooking the meatballs directly in it.

For freezer meal prep, freeze the cooked meatballs without the cream sauce for up to 2 months. Thaw overnight in the refrigerator and prepare a fresh batch of sauce when ready to serve.

Final Thoughts

These Creamy Herb Chicken Meatballs combine tender Parmesan-seasoned chicken meatballs with fresh garlic, herbs, butter, cream, and a silky Parmesan sauce for an easy dinner that feels both comforting and special.

The key is to mix the chicken gently, brown the meatballs before adding the sauce, and finish them slowly over low heat until they reach 165°F. Fresh parsley, herbs, and a little lemon at the end keep the rich cream sauce balanced and flavorful.

Serve them over pasta for a cozy Italian-inspired dinner, pair them with mashed potatoes for ultimate comfort food, or add spinach and mushrooms for an easy one-skillet variation. This versatile chicken meatball recipe is perfect for family dinners and makes delicious leftovers too.

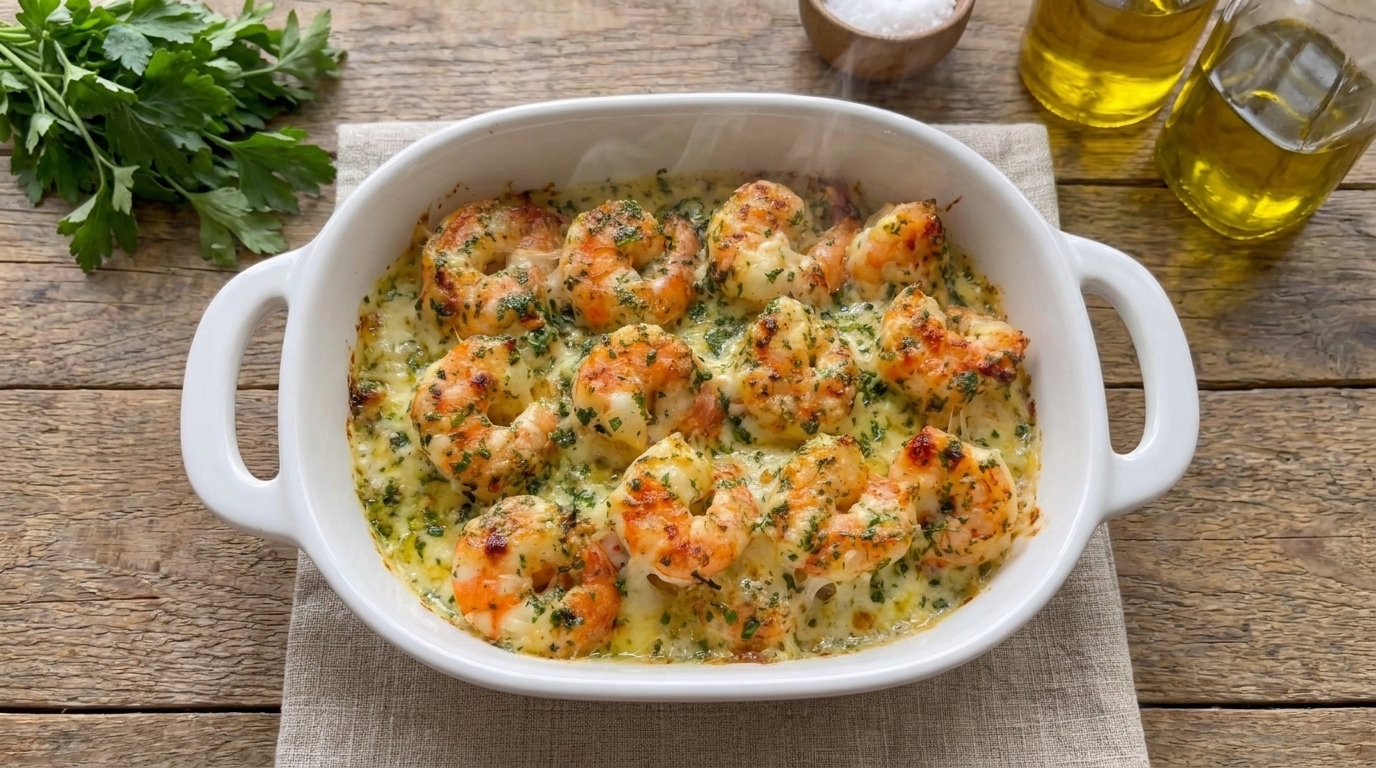
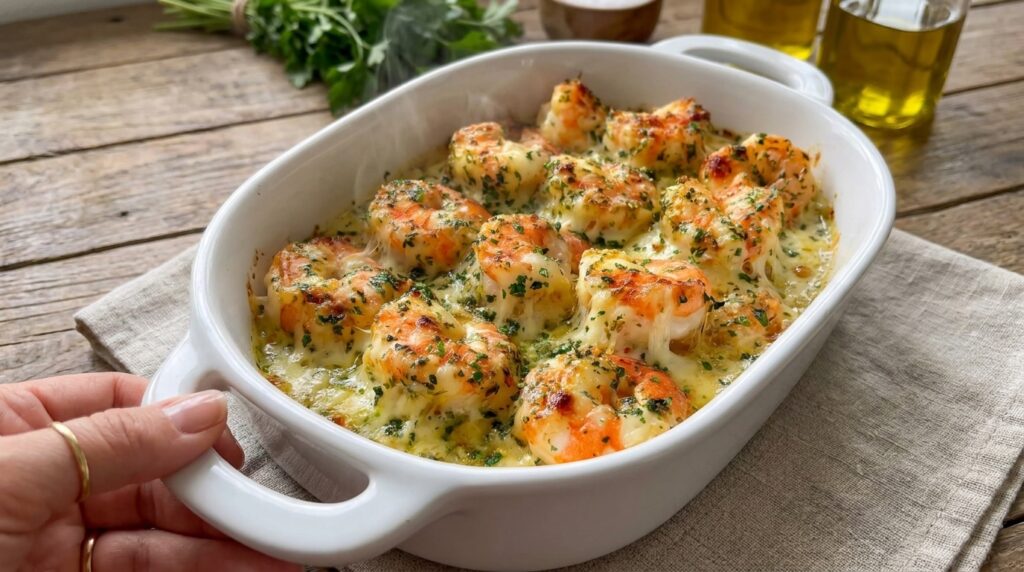
Easy Cheesy Garlic Butter Shrimp Bake Recipe – Creamy, Juicy, and Loaded with Flavor

If you are looking for a rich seafood dinner with juicy shrimp, garlic butter, melted cheese, and a golden baked topping, this Cheesy Garlic Butter Shrimp Bake is an excellent recipe to make. Large shrimp are coated in a buttery garlic mixture, layered with cream, Parmesan, mozzarella, and herbs, then baked just until tender and bubbling.

This recipe is perfect for busy weeknights, date nights, holidays, or whenever you want something that feels restaurant-style without a complicated cooking process. The shrimp cook quickly, while the garlic butter and cheese create a rich sauce that is perfect for spooning over pasta, rice, potatoes, or crusty bread.

One of the best things about this dish is how easy it is to customize. You can add spinach, mushrooms, sun-dried tomatoes, bacon, red pepper flakes, or extra Parmesan depending on the flavors you enjoy.

Why You’ll Love This Cheesy Garlic Butter Shrimp Bake

This recipe comes together quickly because shrimp require very little cooking time.

Garlic butter gives the dish plenty of savory flavor without needing a long list of ingredients.

Mozzarella creates a gooey melted topping, while Parmesan adds a deeper salty, nutty flavor.

The creamy sauce develops right in the baking dish, so there is no need to make a complicated separate sauce.

It is also versatile enough to serve as a main dish, appetizer, or topping for pasta and rice.

Ingredients

For the Shrimp

  • 1½ pounds large shrimp, peeled and deveined
  • 1 tablespoon olive oil
  • ½ teaspoon kosher salt
  • ½ teaspoon freshly ground black pepper
  • 1 teaspoon garlic powder
  • ½ teaspoon smoked paprika
  • ½ teaspoon Italian seasoning
  • ¼ teaspoon red pepper flakes, optional

For the Garlic Butter Sauce

  • 5 tablespoons unsalted butter, melted
  • 6 garlic cloves, finely minced
  • 1 tablespoon fresh lemon juice
  • 1 teaspoon lemon zest
  • ½ cup heavy cream
  • ¼ cup low-sodium chicken or seafood broth
  • 1 teaspoon Dijon mustard
  • 1 tablespoon chopped fresh parsley
  • ½ teaspoon dried Italian seasoning
  • ¼ teaspoon black pepper

For the Cheese Topping

  • 1 cup shredded mozzarella cheese
  • ½ cup freshly grated Parmesan cheese
  • ½ cup shredded Monterey Jack, optional
  • 2 tablespoons additional Parmesan for finishing

For Garnishing

  • Fresh parsley
  • Lemon wedges
  • Freshly cracked black pepper
  • Red pepper flakes, optional

How to Make Cheesy Garlic Butter Shrimp Bake

1. Preheat the Oven

Preheat your oven to 400°F (200°C).

Lightly grease a medium baking dish.

A 9×9-inch dish or similar size works well because it keeps the shrimp close enough to stay surrounded by the sauce.

2. Prepare the Shrimp

Pat the shrimp very dry with paper towels.

This is important because excess moisture can thin the garlic butter sauce.

Make sure the shrimp are fully peeled and deveined.

You can leave the tails attached for presentation or remove them for easier eating.

3. Season the Shrimp

Place the shrimp in a large bowl.

Add olive oil, salt, black pepper, garlic powder, smoked paprika, Italian seasoning, and red pepper flakes if using.

Toss until every shrimp is evenly coated.

4. Make the Garlic Butter Mixture

In a separate bowl, combine the melted butter, minced garlic, lemon juice, lemon zest, heavy cream, broth, Dijon mustard, parsley, Italian seasoning, and black pepper.

Whisk until combined.

5. Arrange the Shrimp

Spread the seasoned shrimp in the prepared baking dish.

Arrange them in a relatively even layer.

Avoid stacking the shrimp heavily because they cook very quickly.

6. Add the Garlic Butter Sauce

Pour the garlic butter cream mixture evenly over the shrimp.

Use a spoon to make sure some of the garlic settles around every portion of the dish.

7. Add Parmesan

Sprinkle approximately half of the Parmesan directly over the shrimp.

This helps flavor and slightly thicken the sauce as it bakes.

8. Add Mozzarella

Sprinkle the mozzarella evenly over the top.

If using Monterey Jack, add it now as well.

9. Add the Remaining Parmesan

Finish with the remaining Parmesan.

Try to keep some shrimp slightly visible between the cheese so you can monitor doneness.

10. Bake the Shrimp

Transfer the dish to the preheated oven.

Bake for approximately 8–12 minutes, depending on the size of the shrimp.

The shrimp should turn pink and opaque and begin curling into loose C-shapes.

Avoid overbaking.

11. Check for Doneness

The shrimp should be opaque throughout and reach 145°F (63°C) for food safety.

Because shrimp continue cooking from residual heat, remove the dish promptly once they are done.

12. Broil for a Golden Top

If the shrimp are cooked but the cheese needs more color, switch the oven to broil.

Broil for approximately 1–2 minutes.

Watch carefully because cheese can brown quickly.

13. Rest Briefly

Remove the dish from the oven.

Let it rest for approximately 2–3 minutes.

This gives the bubbling butter sauce time to settle slightly.

14. Spoon the Sauce Over the Shrimp

Before serving, spoon some of the garlic butter cream sauce from the bottom of the dish over the shrimp.

15. Garnish and Serve

Sprinkle generously with fresh parsley.

Finish with cracked black pepper, red pepper flakes, and fresh lemon wedges.

Serve immediately.

What to Serve With Cheesy Garlic Butter Shrimp Bake

Pasta is one of the best options because the garlic butter sauce coats noodles beautifully.

Try linguine, spaghetti, fettuccine, or penne.

Steamed rice, garlic rice, or creamy risotto are also excellent.

For potatoes, serve mashed potatoes, roasted baby potatoes, or crispy potato wedges.

Crusty bread or garlic bread is especially good for soaking up the cheesy butter sauce.

For vegetables, try asparagus, broccoli, green beans, zucchini, or sautéed spinach.

A simple salad adds freshness and balances the richness of the dish.

Tips for the Best Cheesy Garlic Butter Shrimp Bake

Use large or jumbo shrimp.

Thaw frozen shrimp completely.

Pat shrimp thoroughly dry.

Do not overcrowd the baking dish.

Use freshly minced garlic.

Use freshly grated Parmesan for smoother melting.

Do not overcook the shrimp.

Keep an eye on the dish during broiling.

Use lemon juice to balance the richness.

Serve immediately for the best texture.

Easy Recipe Variations

Spicy Cheesy Garlic Shrimp

Add extra red pepper flakes, cayenne pepper, or sliced jalapeños.

Creamy Spinach Shrimp Bake

Add 2 cups fresh spinach underneath the shrimp.

Garlic Mushroom Shrimp Bake

Sauté 8 ounces sliced mushrooms first and add them to the baking dish.

Tuscan Shrimp Bake

Add chopped sun-dried tomatoes and spinach to the sauce.

Bacon Garlic Shrimp Bake

Add ½ cup crispy crumbled bacon over the shrimp before adding cheese.

Cajun Shrimp Bake

Replace the Italian seasoning with Cajun seasoning.

Lemon Parmesan Shrimp

Increase the lemon zest and Parmesan for a brighter flavor.

Extra Cheesy Shrimp Bake

Add provolone or fontina along with the mozzarella.

How to Store Leftovers

Allow the shrimp to cool before transferring them to an airtight container.

Refrigerate for up to 2–3 days.

Store the shrimp with some of the garlic butter sauce to help maintain moisture.

To reheat, use gentle heat because shrimp become rubbery when overcooked.

Warm them in a covered skillet over low heat for a few minutes.

You can also reheat in a 300°F oven until just warmed through.

If the sauce becomes too thick, add a small splash of cream or broth.

Freezing is possible, but the dairy sauce may separate slightly after thawing, so this dish is best enjoyed fresh.

Frequently Asked Questions

Can I use frozen shrimp?

Yes.

Thaw them completely in the refrigerator, drain well, and pat very dry before seasoning.

What size shrimp works best?

Large or jumbo shrimp are ideal because they are less likely to overcook during baking.

Can I make this without heavy cream?

Yes.

Half-and-half can work, although the sauce will be lighter and slightly thinner.

Can I use pre-cooked shrimp?

It is not ideal.

Pre-cooked shrimp can become rubbery when baked again. Raw shrimp give a much better result.

Why is my sauce watery?

The shrimp may have contained excess moisture.

Pat them thoroughly dry and avoid overcrowding the baking dish.

Can I add pasta directly to the bake?

It is better to cook pasta separately and spoon the shrimp and sauce over it so the shrimp do not overcook.

Can I prepare this ahead?

You can prepare the garlic butter mixture and cheese ahead.

For the best texture, assemble and bake the shrimp shortly before serving.

What temperature should shrimp reach?

Cook shrimp to 145°F (63°C) and remove them promptly so they stay tender.

Final Thoughts

This Cheesy Garlic Butter Shrimp Bake combines juicy shrimp, fresh garlic, butter, cream, lemon, mozzarella, Parmesan, and herbs in one rich and satisfying seafood dinner.

The key is drying the shrimp well, keeping them in a single layer, and baking only until they become opaque and tender.

Serve the shrimp hot with pasta, rice, potatoes, vegetables, or crusty garlic bread and spoon plenty of cheesy garlic butter sauce over every serving.

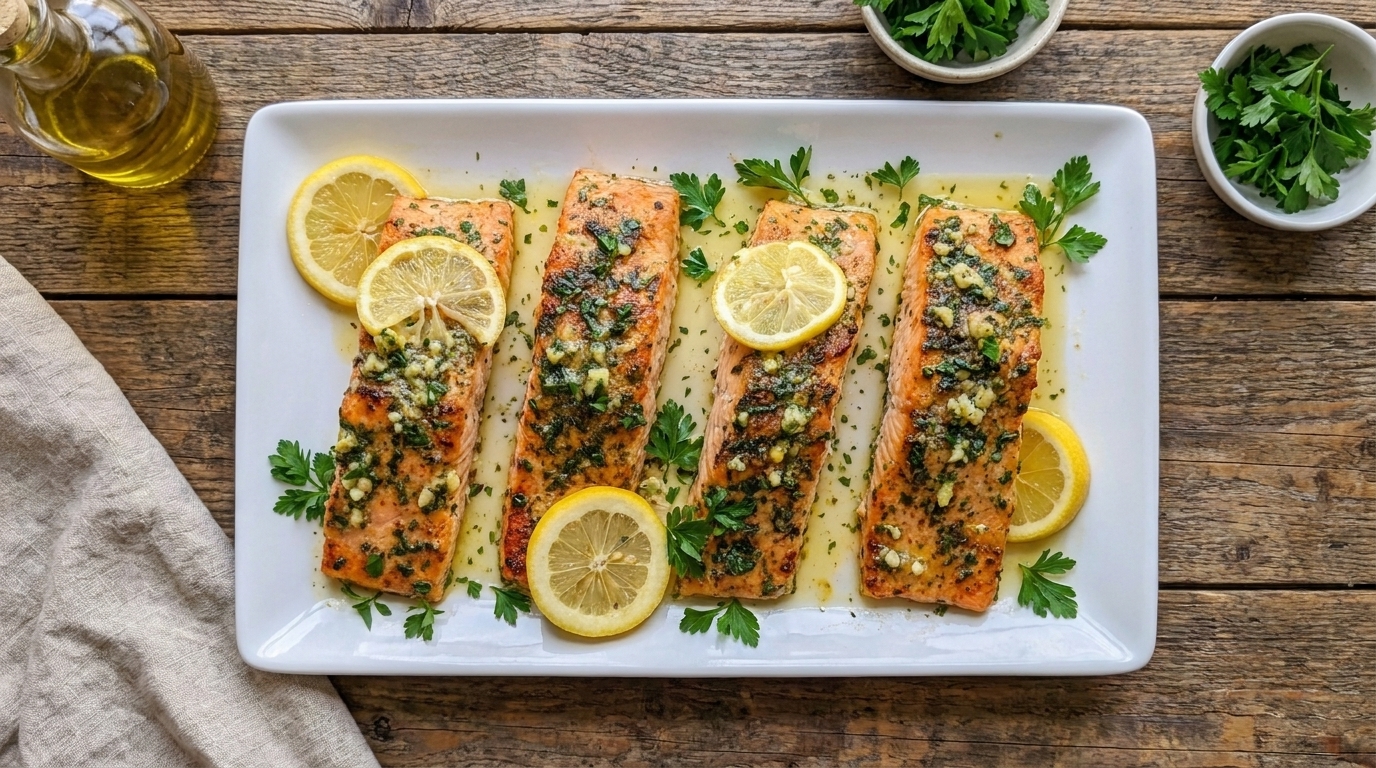
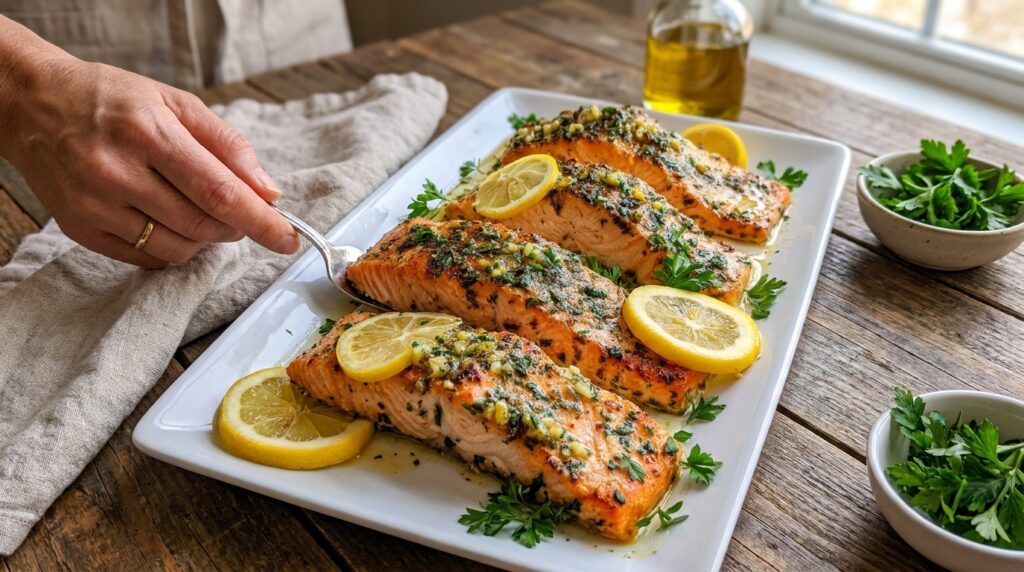
Easy High Protein Lemon Grilled Salmon Recipe – Juicy, Fresh, and Packed with Flavor

If you are looking for a simple high-protein dinner that feels fresh, satisfying, and easy enough for a busy weeknight, this High Protein Lemon Grilled Salmon is an excellent recipe to make. Salmon fillets are seasoned with garlic, lemon, herbs, paprika, and olive oil, then grilled until lightly charred outside and tender and flaky inside.

This recipe is perfect for meal prep, family dinners, summer grilling, or anyone who wants a protein-rich meal without a heavy sauce. Salmon already provides plenty of protein, and serving it with Greek yogurt sauce, quinoa, vegetables, or a fresh salad makes it easy to build a balanced, filling plate.

One of the best things about this recipe is how quickly it cooks. With a short lemon-garlic marinade and just a few minutes on the grill, you can have a flavorful seafood dinner on the table without complicated preparation.

Why You’ll Love This High Protein Lemon Grilled Salmon

Salmon is naturally rich in protein, making it a convenient centerpiece for a satisfying meal.

The lemon-garlic marinade adds bright flavor without covering up the natural richness of the fish.

Grilling gives the salmon lightly smoky edges and attractive grill marks while keeping the center moist.

The optional Greek yogurt lemon sauce adds even more protein and a cool, creamy contrast to the warm salmon.

This recipe also works beautifully for meal prep because the salmon can be served hot, chilled over salads, or added to grain bowls.

Ingredients

For the Salmon

  • 4 salmon fillets, about 6 ounces each
  • 2 tablespoons extra-virgin olive oil
  • 2 tablespoons fresh lemon juice
  • 1 teaspoon fresh lemon zest
  • 4 garlic cloves, finely minced
  • 1 teaspoon smoked paprika
  • 1 teaspoon dried oregano
  • ½ teaspoon dried thyme
  • 1 teaspoon kosher salt
  • ½ teaspoon freshly ground black pepper
  • ¼ teaspoon red pepper flakes, optional

For the High-Protein Lemon Yogurt Sauce

  • ¾ cup plain Greek yogurt
  • 1 tablespoon fresh lemon juice
  • 1 teaspoon lemon zest
  • 1 small garlic clove, finely grated
  • 1 tablespoon chopped fresh dill
  • 1 tablespoon chopped fresh parsley
  • ½ teaspoon Dijon mustard
  • ¼ teaspoon kosher salt
  • ¼ teaspoon black pepper

For Garnishing

  • Fresh dill
  • Fresh parsley
  • Lemon wedges
  • Freshly cracked black pepper

How to Make High Protein Lemon Grilled Salmon

1. Prepare the Salmon

Pat the salmon fillets thoroughly dry with paper towels.

If using skin-on salmon, leave the skin attached. It helps protect the delicate flesh during grilling and makes the fillets easier to handle.

Check for any remaining pin bones and remove them if necessary.

2. Make the Lemon Garlic Marinade

In a small bowl, combine the olive oil, lemon juice, lemon zest, minced garlic, smoked paprika, oregano, thyme, salt, black pepper, and red pepper flakes if using.

Whisk until well combined.

3. Marinate the Salmon

Place the salmon in a shallow dish.

Brush or spoon the marinade over the top and sides.

Refrigerate for approximately 15–30 minutes.

Avoid marinating salmon in lemon juice for several hours because the acidity can begin changing the texture of the fish.

4. Make the Greek Yogurt Sauce

While the salmon marinates, combine the Greek yogurt, lemon juice, lemon zest, garlic, dill, parsley, Dijon mustard, salt, and pepper.

Stir until smooth.

Refrigerate until ready to serve.

5. Preheat the Grill

Preheat your grill to medium-high heat, approximately 400–450°F.

Clean the grill grates thoroughly.

Lightly oil them to help prevent sticking.

6. Remove Excess Marinade

Take the salmon out of the marinade.

Allow excess liquid to drip away.

Too much wet marinade can interfere with browning.

7. Place the Salmon on the Grill

For skin-on salmon, place the fillets skin-side down first.

Close the grill lid.

Cook for approximately 4–6 minutes, depending on thickness.

8. Flip Carefully

Using a wide fish spatula, carefully turn the salmon.

Cook the second side for another 2–4 minutes.

Very thick fillets may require slightly longer.

9. Check for Doneness

The salmon should become opaque around the edges and flake easily with gentle pressure.

For food safety, fish should reach an internal temperature of 145°F (63°C) at the thickest part.

Avoid cooking far beyond this point because salmon can dry out quickly.

10. Remove from the Grill

Transfer the salmon to a clean plate.

Do not continue grilling once it has reached the desired temperature.

11. Rest Briefly

Let the salmon rest for approximately 3 minutes.

This allows the juices to settle slightly before serving.

12. Add Fresh Lemon

Squeeze fresh lemon juice lightly over each fillet.

Do not soak the fish; a small amount is enough to brighten the flavor.

13. Add the Yogurt Sauce

Spoon the high-protein lemon yogurt sauce alongside or over the salmon.

For the best presentation, serve most of the sauce on the side so the grilled surface remains visible.

14. Garnish and Serve

Finish with fresh dill, parsley, cracked black pepper, and lemon wedges.

Serve immediately.

What to Serve With High Protein Lemon Grilled Salmon

Quinoa is an excellent side because it complements the salmon while adding additional protein and texture.

Brown rice, wild rice, couscous, or roasted potatoes also work well.

For vegetables, try grilled asparagus, broccoli, green beans, zucchini, Brussels sprouts, or bell peppers.

A fresh cucumber tomato salad, Greek salad, or mixed green salad keeps the meal light and refreshing.

For a particularly protein-focused meal, serve the salmon with quinoa, Greek yogurt sauce, and edamame or chickpeas.

Tips for the Best High Protein Lemon Grilled Salmon

Choose salmon fillets of similar thickness.

Pat the salmon dry before marinating.

Do not marinate too long in citrus.

Preheat the grill properly.

Clean and oil the grill grates.

Leave skin-on salmon skin-side down for most of the cooking time.

Avoid flipping repeatedly.

Use a wide fish spatula.

Check temperature rather than relying only on cooking time.

Remove the salmon at 145°F.

Serve soon after grilling for the best texture.

Easy Recipe Variations

Lemon Garlic Parmesan Salmon

Sprinkle a little freshly grated Parmesan over the salmon immediately after grilling.

Spicy Lemon Salmon

Add cayenne pepper, extra red pepper flakes, or chili powder to the marinade.

Honey Lemon Salmon

Add 1 tablespoon honey to the marinade for a sweet-savory finish.

Cajun Grilled Salmon

Replace the oregano and thyme with Cajun seasoning.

Mediterranean Grilled Salmon

Add oregano and serve with tomatoes, cucumber, olives, feta, and Greek yogurt sauce.

Garlic Herb Salmon

Increase the parsley, dill, thyme, and garlic while reducing the paprika.

Lemon Dijon Salmon

Add another tablespoon of Dijon mustard to the marinade.

High-Protein Salmon Bowls

Flake the grilled salmon over quinoa with cucumbers, tomatoes, chickpeas, greens, and Greek yogurt sauce.

How to Store Leftovers

Allow leftover salmon to cool before transferring it to an airtight container.

Refrigerate for up to 2–3 days.

Store the Greek yogurt sauce separately.

For reheating, use gentle heat.

Place the salmon in a covered baking dish at approximately 300°F until just warmed through.

You can also reheat it briefly in a skillet over low heat.

Avoid prolonged microwaving because salmon can dry out quickly.

Leftover grilled salmon is also excellent served cold over salads or grain bowls.

The yogurt sauce can generally be refrigerated for approximately 3–4 days.

Frequently Asked Questions

Is salmon high in protein?

Yes.

Salmon is naturally protein-rich, making it a useful choice for protein-focused meals.

Exact protein content depends on the variety of salmon, serving size, and brand or source, so calculate nutrition from the specific ingredients if precise macros are needed.

Can I use frozen salmon?

Yes.

Thaw it completely in the refrigerator and pat it very dry before marinating.

Can I cook this without a grill?

Absolutely.

Use a grill pan or heavy skillet over medium-high heat.

You can also bake the salmon at 400°F until it reaches 145°F.

Should I grill salmon with the skin on?

Skin-on fillets are especially convenient for grilling because the skin helps protect the flesh from direct heat.

Why is my salmon sticking to the grill?

The grill may not have been clean, hot, or properly oiled.

Also avoid trying to flip the salmon too early. It often releases more easily once a good sear has developed.

Can I make the yogurt sauce ahead?

Yes.

Prepare it several hours ahead and refrigerate until serving.

Can I meal prep this recipe?

Yes.

Store the salmon, grains, vegetables, and yogurt sauce separately, then assemble bowls when ready to eat.

What temperature should grilled salmon reach?

Cook fish to 145°F (63°C) at the thickest portion.

Final Thoughts

This High Protein Lemon Grilled Salmon combines tender salmon with fresh lemon, garlic, herbs, paprika, and a cool Greek yogurt sauce for a simple meal that is fresh, satisfying, and packed with protein-rich ingredients.

The key is keeping the marinade brief, grilling over properly heated grates, and removing the salmon once it reaches 145°F so the center stays moist and flaky.

Serve it with quinoa, roasted vegetables, salad, or rice for an easy protein-focused dinner that works just as well for weeknight meals as it does for summer grilling.

Slow Cooker Beef Brisket with Onion Gravy

This Slow Cooker Beef Brisket with Onion Gravy is tender, juicy, and packed with deep savory flavor from slow-cooked onions, garlic, beef broth, and simple seasonings. The brisket cooks low and slow until fork-tender, while the onions melt into a rich, flavorful gravy that makes this hearty dish perfect for family dinners, Sunday meals, or comforting make-ahead cooking.

Why You’ll Love It

  • Tender, slow-cooked brisket that slices beautifully
  • Rich onion and garlic gravy packed with savory flavor
  • Easy slow-cooker preparation with minimal hands-on work
  • Perfect for family dinners, holidays, or meal prep

Ingredients Overview

Beef Brisket

  • 3–4 lb beef brisket
  • 1 tbsp olive oil
  • 1½ tsp salt
  • 1 tsp black pepper
  • 1 tsp garlic powder
  • 1 tsp onion powder
  • 1 tsp smoked paprika

Onion Gravy

  • 2 large yellow onions, sliced
  • 6 garlic cloves, peeled
  • 2 cups beef broth
  • 2 tbsp Worcestershire sauce
  • 1 tbsp soy sauce
  • 1 tbsp tomato paste
  • 1 tbsp brown sugar
  • 1 tsp Dijon mustard
  • 1 tsp dried thyme
  • ½ tsp black pepper

Garnish

  • 2 tbsp fresh parsley, chopped
  • Extra cracked black pepper
  • Spoonfuls of onion gravy

Step-by-Step Instructions

1. Season the Brisket

Pat the brisket completely dry with paper towels.

Season all sides with salt, black pepper, garlic powder, onion powder, and smoked paprika.

Allow the seasoned brisket to rest for about 10–15 minutes while you heat the skillet.

2. Sear the Brisket

Heat olive oil in a large skillet over medium-high heat.

Add the brisket and sear for 3–4 minutes per side, until a deep brown crust develops.

Transfer the browned brisket to the slow cooker.

3. Prepare the Onions

Add the sliced onions to the same skillet.

Cook for 4–5 minutes, stirring occasionally, until they begin to soften and pick up the browned flavor from the pan.

Add the garlic cloves and cook for another 30 seconds.

Transfer the onions and garlic around the brisket in the slow cooker.

4. Make the Braising Liquid

In a bowl, whisk together beef broth, Worcestershire sauce, soy sauce, tomato paste, brown sugar, Dijon mustard, thyme, and black pepper.

Pour the mixture over and around the brisket.

Spoon some of the onions over the top.

5. Slow Cook

Cover and cook on LOW for 8–9 hours or HIGH for 4–5 hours, until the brisket is very tender and easily pierced with a fork.

For the most tender result, LOW heat is recommended.

Transfer the brisket to a cutting board and allow it to rest for about 15 minutes.

6. Slice and Serve

Slice the brisket against the grain into thick or thin slices, depending on your preference.

Return the slices to the slow cooker or arrange them on a serving platter.

Spoon the tender onions and rich cooking juices generously over the meat.

Finish with fresh parsley and black pepper before serving.

Cooking Tips

  • Sear the brisket before slow cooking to develop a richer, deeper beef flavor.
  • Cook the brisket fat-side up so the rendered fat helps keep the meat moist.
  • Use LOW heat when possible for the most tender texture.
  • Always slice brisket against the grain so each bite stays tender.
  • Let the meat rest before slicing so the juices redistribute instead of running out.

Serving Suggestions

Serve this slow cooker beef brisket with:

  • Creamy mashed potatoes
  • Roasted carrots
  • Buttered egg noodles
  • Green beans
  • Crusty dinner rolls

Storage

Store leftover brisket with some of the onion gravy in an airtight container in the refrigerator for up to 4 days.

Reheat gently in a covered skillet, slow cooker, or 325°F (165°C) oven with some of the cooking liquid to keep the meat moist.

Leftover Ideas

  • Use sliced brisket in toasted sandwiches with melted cheese and onions.
  • Chop leftovers and serve them over mashed potatoes or rice with gravy.
  • Turn leftover brisket into tacos, quesadillas, or a hearty beef hash.

FAQs

Can I use a smaller brisket?
Yes. A 2–3 lb brisket works well, but begin checking for tenderness earlier since it may cook faster.

Do I need to sear the brisket first?
No, but searing adds a much richer crust and deeper flavor to the finished dish.

Can I add vegetables to the slow cooker?
Yes. Carrots, potatoes, mushrooms, or celery can be added around the brisket.

How do I know when brisket is done?
The brisket should be very tender and a fork should slide into the meat with little resistance. Slow-cooked brisket is typically best when cooked until tender rather than relying only on a minimum internal temperature.

Final Thoughts

Slow Cooker Beef Brisket with Onion Gravy is a hearty comfort-food dinner built around tender beef, sweet onions, garlic, and rich savory cooking juices. The slow cooker does most of the work, making this an ideal recipe for busy days, Sunday dinners, holidays, or anytime you want beautifully tender brisket with very little effort.

#BeefBrisket #SlowCookerRecipes #BrisketRecipe #ComfortFood #FamilyDinner