mb Shoulder & Shank over Fragrant Rice

Slow-Roasted Lamb Shoulder & Shank over Fragrant Rice

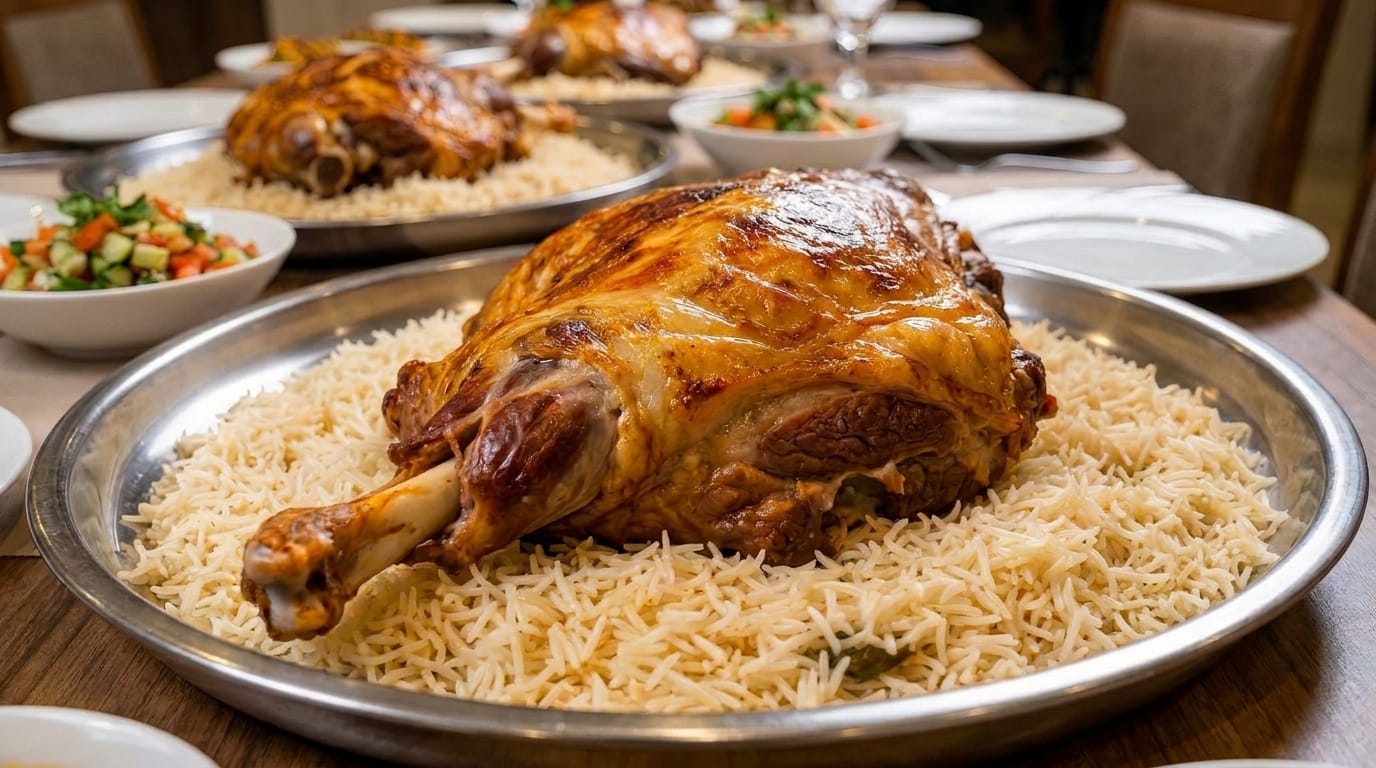
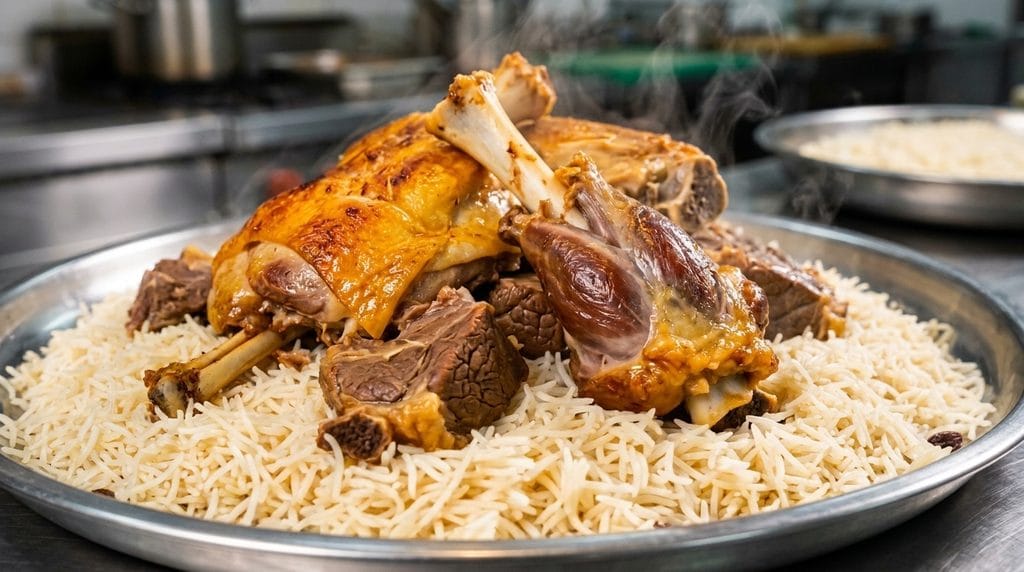
Slow-Roasted Lamb Shoulder & Shank with Fragrant Rice, AI generated

Slow-Roasted Lamb Shoulder & Shank with Fragrant Rice. Source: Lazy Sunday Club

When you want to create the ultimate showstopping feast for a special gathering, holiday celebration, or sunday family dinner, combining Slow-Roasted Lamb Shoulder & Shank over Fragrant Rice delivers an unmatched culinary experience. By roasting both the well-marbled shoulder and the collagen-rich shank together, you get the best of both worlds: rich, succulent chunks of pull-apart shoulder meat and deeply flavorful, bone-in shank tender enough to slip right off the bone.

Bedded over fluffy long-grain basmati rice infused with golden turmeric, saffron, cardamom pods, and whole spices, this dish is a sensory delight. As the lamb slow-braises in an aromatic bath of garlic, warm spices, and citrus, it produces a rich reduction that drenches the rice grains in savory perfection. Garnished with toasted pine nuts, slivered almonds, and sweet-tart pomegranate seeds, this centerpiece meal brings authentic Mediterranean and Middle Eastern banquet traditions straight to your home kitchen.

Recipe OverviewDetails
Prep Time30 minutes (plus overnight marinade)
Roasting Time4 hours
Rice Cooking Time25 minutes
Total Time~4 hours 55 minutes
Servings8 to 10 generous portions
CourseMain Banquet Centerpiece
CuisineMiddle Eastern / Eastern Mediterranean

Why You Will Love This Recipe

  • Dual-Cut Perfection: Combining the fat-marbled shoulder with the gelatin-rich shank creates incredible textural contrast and a deeper, more robust lamb gravy.
  • Melt-in-Your-Mouth Tenderness: Hours of low-temperature braising break down tough muscle fibers and connective tissues, resulting in meat you can effortlessly carve or shred with two forks.
  • Aromatics in Every Grain: The long-grain basmati rice is toasted in butter, boiled in seasoned broth skimmed with lamb drippings, and perfumed with whole spices.
  • Stunning Platter Presentation: Served family-style on a grand platter piled high with golden rice, shredded meats, and vibrant garnishes, it makes an unforgettable impression.
Essential Kitchen Equipment

  • Large Heavy-Duty Roasting Pan with Cover (or Large Dutch Oven): Must be large enough to comfortably accommodate both a 4-lb shoulder and 2 whole shanks in a single layer.
  • Heavy-Duty Aluminum Foil: For sealing the roasting pan tightly to trap steam during the braising phase.
  • Fine-Mesh Strainer: Essential for thoroughly washing starch off the basmati rice to keep the grains separate and light.
  • Heavy-Bottomed Rice Pot: Ensures even heat distribution so the spiced rice steams evenly without scorching the bottom.
  • Skillet for Nut Toasting: For gently roasting pine nuts and almond slivers to a golden crunch.

Ingredients & Substitution Guide

Executing this grand roast requires two core assemblies: the garlic-spice marinated lamb cuts and the jewel-studded fragrant rice base.

For the Lamb Cuts & Warm Spice Marinade:

IngredientQuantityPurpose & Substitution Notes
Bone-In Lamb Shoulder1 whole (approx. 4 lbs)Offers rich marbling and juicy texture throughout the long roast.
Lamb Shanks2 hind shanks (approx. 2.5 lbs total)Adds gelatin-rich collagen that enriches the pan drippings.
Olive Oil1/3 cupExtra virgin olive oil acts as the base vehicle for the spice rub.
Fresh Garlic10 cloves, paste or crushedInfuses savory depth right into the scored meat fat.
Fresh Lemon Juice & Zest1 large lemonCuts through heavy lamb fat and tenderizes outer muscle fibers.
Banquet Spice Rub1.5 tbsp ground cumin, 1.5 tbsp ground coriander, 1 tbsp smoked paprika, 1 tsp ground cinnamon, 1 tsp allspice, 1/2 tsp nutmegA warm, sweet-savory spice blend that forms a deeply aromatic crust.
Kosher Salt & Cracked Pepper2 tbsp kosher salt, 1 tbsp black pepperEssential to properly season these large, thick cuts of meat down to the bone.
Beef or Lamb Broth2 cupsCreates the steam bath in the roasting pan to keep the cuts moist.

For the Fragrant Golden Rice & Toppings:

IngredientQuantityPurpose & Substitution Notes
Extra Long-Grain Basmati Rice3 cupsLong, slender grains yield the fluffiest non-sticky texture when cooked.
Ghee or Unsalted Butter4 tbspAdds authentic rich, nutty flavor during the rice-toasting phase.
Yellow Onion1 large, finely dicedForms the sweet aromatic foundation for the rice broth.
Whole Spices2 cinnamon sticks, 6 cardamom pods, 4 cloves, 2 bay leavesInfuses the rice with genuine whole-spice aroma.
Ground Turmeric & Saffron1 tsp turmeric + pinch saffron threads soaked in 2 tbsp warm waterGives the rice its golden color and floral scent.
Chicken or Vegetable Broth4.5 cupsLow-sodium broth provides a rich cooking medium for the rice.
Garnish Assembly1/2 cup slivered almonds, 1/3 cup pine nuts, 1/2 cup pomegranate seeds, fresh mintAdds crunch, color, and sweet-acidic bursts to balance the dish.

Step-by-Step Cooking Instructions

Step 1: Score and Apply the Spice Marinade

Pat the lamb shoulder and shanks thoroughly dry with paper towels. Using a sharp chef’s knife, score the fat cap of the lamb shoulder in a crosshatch pattern, taking care not to cut into the muscle meat underneath. Lightly score the fat on the shanks as well.

In a bowl, combine the olive oil, crushed garlic, fresh lemon juice, lemon zest, ground cumin, coriander, smoked paprika, cinnamon, allspice, nutmeg, kosher salt, and black pepper. Mix until a thick, fragrant paste forms. Rub this marinade over the shoulder and shanks, pressing it into the scored fat cuts. Cover tightly and chill in the refrigerator for at least 6 hours (overnight preferred).

Step 2: Low-and-Slow Braise in the Oven

Preheat your oven to 325°F (165°C). Take the marinated lamb cuts out of the fridge 30 minutes before roasting to bring them up toward room temperature.

Place the shoulder and shanks side-by-side in a large, deep roasting pan. Pour 2 cups of broth into the bottom of the pan around the meat (avoid pouring liquid over the spiced crust). Cover the pan tightly with a lid or two thick layers of heavy-duty aluminum foil to trap every bit of steam inside.

Roast in the center of the oven for 3.5 hours without opening the foil. At this stage, the meat should be exceptionally tender and pulling away from the shank bones.

Step 3: Crisp and Caramelize the Crust

Remove the foil or cover from the roasting pan. Increase the oven temperature to 425°F (220°C). Return the pan to the oven uncovered for an additional 20 to 25 minutes to crisp up the fat cap, brown the edges, and deepen the crust color.

Transfer the roasted shoulder and shanks onto a rimmed cutting board. Tent loosely with foil and rest for 20 minutes before carving or shredding into large chunks. Pour the remaining pan drippings into a fat separator, skimming off excess surface grease while saving the rich jus beneath.

Step 4: Prepare the Fragrant Golden Rice

While the lamb is resting, wash the basmati rice in a fine-mesh sieve under cool running water until the water runs clear. Drain completely.

Melt 4 tablespoons of ghee or butter in a heavy-bottomed pot over medium heat. Add the diced yellow onion and sauté for 5 minutes until soft and translucent. Add the cinnamon sticks, crushed cardamom pods, whole cloves, and bay leaves, cooking for 1 minute until fragrant.

Stir in the turmeric, soaked saffron liquid, and drained basmati rice. Toast the rice grains in the butter for 2 minutes, stirring gently to coat every grain. Pour in 4.5 cups of broth along with 1/2 cup of the reserved, de-fated lamb pan jus. Season with 1 teaspoon of salt.

Bring to a boil over high heat. Once boiling, cover tightly, reduce heat to low, and cook for 15 minutes. Turn off heat and leave the pot covered for 10 minutes to allow the steam to finish fluffing the grains.

Step 5: Assemble and Serve the Banquet Platter

In a small dry skillet over medium heat, toast the slivered almonds and pine nuts for 3 to 4 minutes until light golden brown and fragrant.

Uncover the rice, remove the whole cinnamon sticks and bay leaves, and fluff gently with a fork. Spread the golden spiced rice across a large serving platter. Arrange the shredded lamb shoulder chunks and whole tender shanks right in the center over the rice. Drizzle warm lamb jus over the meat. Scatter the toasted nuts, fresh pomegranate arils, and torn mint leaves across the platter before serving family-style.

Culinary Secrets for Tenderness & Flavor

  • Combine Cuts for Maximum Flavor: Mixing shoulder and shank ensures your platter has a variation in texture—juicy fat-marbled shoulder paired with gelatinous, rich shank meat.
  • Trap the Steam: Ensure your roasting pan is sealed tightly with double-layered foil. Trapping moisture is what transforms tough connective tissue into succulent, fork-tender bites.
  • Toast the Rice Grains: Toasting raw basmati grains in butter before adding liquid hardens the outer starch layer, preventing the rice from turning mushy and ensuring fluffy, distinct grains.
  • Don’t Skip the Saffron: Saffron provides an irreplaceable floral aroma and deep golden hue that elevates plain yellow rice into an authentic banquet-style dish.

Popular Flavor Variations

  • Greek Lemon & Garlic Twist: Omit cinnamon and allspice; increase garlic to 12 cloves and add 2 tablespoons of dried oregano and fresh rosemary to the marinade. Serve with homemade tzatziki.
  • Moroccan Harissa & Fig Style: Mix 3 tablespoons of spicy red harissa into the lamb rub, and mix chopped dried figs or apricots into the rice along with toasted pistachios.
  • Persian Zereshk Saffron Style: Top the final assembled platter with tart, butter-sautéed dried barberries (zereshk) for a sweet-and-sour contrast to the rich meat.

Complementary Sauces & Side Dishes

While this dish is a complete feast on its own, pairing it with cool, acidic accompaniments balances the rich savory meat:

  • Garlic Mint Yogurt Dip: Whole-milk Greek yogurt whipped with minced garlic, fresh mint, lemon juice, and a pinch of salt.
  • Tomato & Cucumber Shirazi Salad: Finely diced cucumbers, tomatoes, and red onions tossed with extra virgin olive oil, lime juice, and dried mint.
  • Pickled Red Onions & Turnips: Crisp, vinegary pickled vegetables that clean the palate between bites of rich lamb.

Storage, Reheating & Meal Prep Guidelines

  • Refrigeration: Store leftover lamb and rice in separate airtight containers in the refrigerator for up to 4 days.
  • Reheating Meat: Place shredded lamb and shanks in a baking dish with 3 tablespoons of leftover jus or broth. Cover tightly with foil and heat in a 350°F (175°C) oven for 15 minutes until steaming.
  • Reheating Rice: Sprinkle a tablespoon of water over cold rice, cover with a damp paper towel, and microwave at medium power in 1-minute intervals, fluffing with a fork halfway through.
  • Freezer Instructions: Pack cooked lamb meat with pan jus into freezer-safe bags for up to 3 months. Thaw overnight in the fridge before reheating.

Estimated Nutritional Information

NutrientPer Serving (approx. 1/8th recipe)
Calories720 kcal
Protein52 g
Carbohydrates52 g
Fat34 g
Saturated Fat14 g
Cholesterol155 mg
Sodium920 mg
Dietary Fiber3 g
Sugars5 g

(Note: Nutritional values are estimates calculated based on standard recipe ingredients using 1 whole lamb shoulder, 2 shanks, and basmati rice. Values vary depending on fat trimming and portion sizes.)
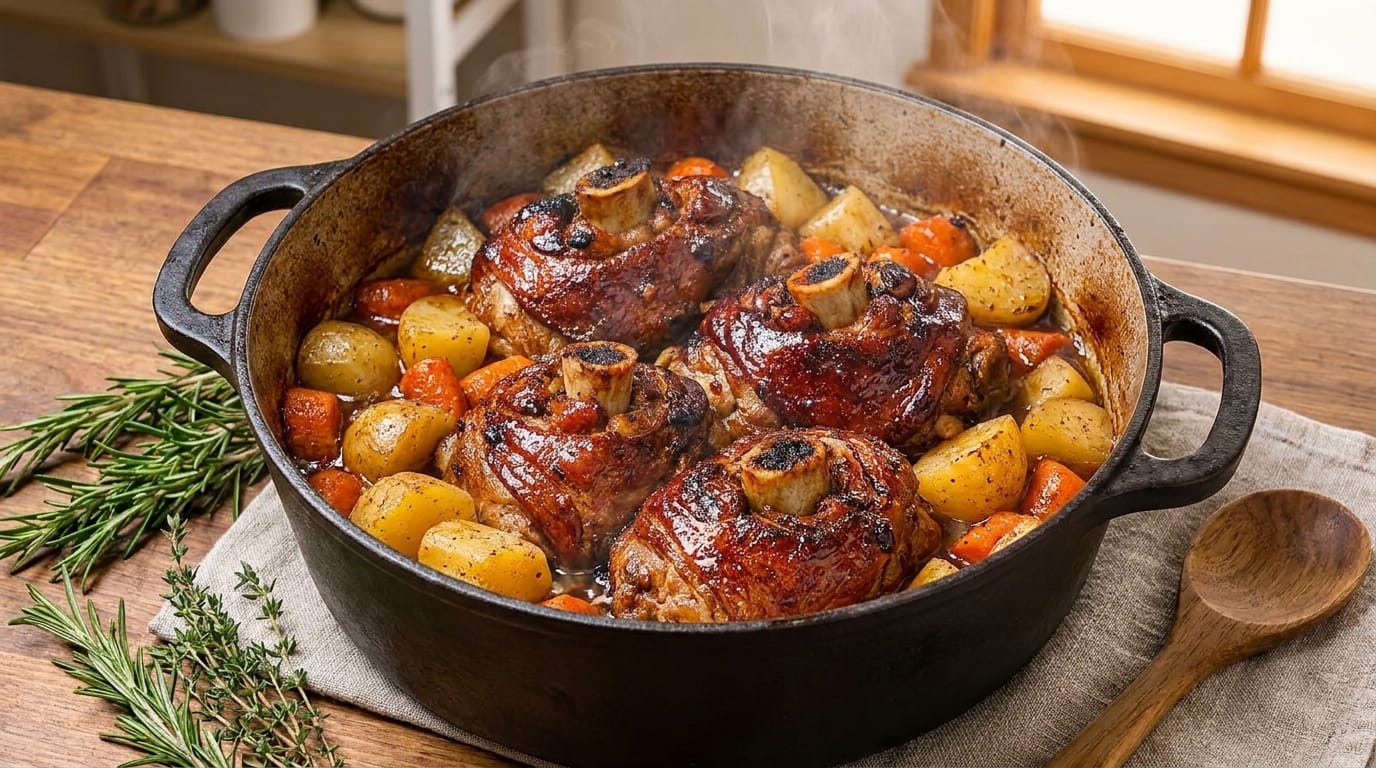
Slow-Roasted Beef Shanks with Root Vegetables

When chilly weather demands a hearty, soul-warming centerpiece, Slow-Roasted Beef Shanks with Root Vegetables is the ultimate answer. Often known in Italian culinary tradition as the cut behind osscobuco, beef shank is cut crosswise from the leg, exposing a rich ring of marrow surrounded by lean muscle heavily woven with connective collagen. When cooked fast over high heat, this cut can be notoriously tough. But when seared to a deep brown crust and slow-braised with sweet root vegetables, red wine, garlic, and fresh herbs, it transforms into an unbelievably tender, fork-tender feast.

As the beef shanks roast low and slow inside a covered Dutch oven, the rich collagen breaks down into silky gelatin, naturally thickening the braising liquid into a glossy, velvety gravy. Concurrently, a vibrant medley of hearty root vegetables—such as carrots, parsnips, Yukon Gold potatoes, and sweet red onions—absorb the savory beef juices while caramelizing to natural perfection. It is a one-pot meal that elevates rustic comfort food into fine-dining elegance.

Recipe OverviewDetails
Prep Time25 minutes
Cook Time3 hours 30 minutes
Total Time3 hours 55 minutes
Servings4 to 6 generous portions
CourseMain Course / Dinner
CuisineFrench-Inspired / Rustic American

Why You Will Love This Recipe

  • Melt-in-Your-Mouth Texture: Slow roasting melts the thick connective tissue and rich marrow, making the meat so tender you won’t even need a knife.
  • Built-in Rich Bone Marrow Flavor: The center bone releases butter-soft bone marrow directly into the gravy as it simmers, delivering unmatched umami depth.
  • Economical Yet Premium: Beef shanks are one of the most budget-friendly cuts at the butcher counter, yet they cook up into a meal fit for special dinner parties.
  • Effortless One-Pot Meal: Meat, potatoes, carrots, and pan gravy all cook together in a single pot, minimizing cleanup while maximizing flavor integration.

Essential Kitchen Equipment

Having the right tools ensures your roast braises evenly without drying out:

  • Heavy 6 to 8-Quart Cast Iron Dutch Oven: Essential for retaining heat and distributing steam evenly during a long oven braise.
  • Heavy Stainless Steel Tongs: Perfect for turning large, heavy bone-in meat cuts safely during searing.
  • Wooden Spoon or Spatula: Crucial for scraping up the caramelized brown bits (fond) stuck to the bottom of the pot after deglazing.
  • Fat Separator or Fine Mesh Strainer: Helpful for straining and skimming excess rendered surface fat from the pan juices before serving.

Ingredients & Substitution Guide

A successful beef shank roast balances deep, savory meat juices with aromatic vegetables, dry red wine, and crisp root crops.

For the Beef Shanks & Braising Base:

IngredientQuantityPurpose & Substitution Notes
Cross-Cut Beef Shanks3 to 4 thick cuts (approx. 3.5 to 4 lbs total)Look for shanks at least 1.5 inches thick with a central marrow bone. Beef short ribs or chuck roast chunks can be substituted.
All-Purpose Flour1/3 cup (seasoned with salt & pepper)Lightly coating the meat creates a rich crust when seared and helps thicken the pan gravy. (Use cornstarch for gluten-free).
Olive Oil & Butter2 tbsp olive oil + 2 tbsp unsalted butterProvides a high-smoke point cooking medium that browns the beef while adding rich flavor.
Yellow Onion & Garlic1 large diced onion, 6 smashed garlic clovesCreates the savory aromatic base for the braising liquid.
Tomato Paste2 tbspAdds deep color, acidity, and concentrated umami to the sauce.
Dry Red Wine1.5 cupsCabernet Sauvignon, Pinot Noir, or Côtes du Rhône works best to cut through the rich beef fat. (Substitute beef stock + 1 tbsp red wine vinegar).
Beef Broth or Bone Broth3 cupsLow-sodium beef broth provides the steaming liquid needed to break down the shanks.
Fresh Herbs & Bay Leaves3 sprigs rosemary, 4 sprigs thyme, 2 bay leavesTied into a bundle with twine to infuse woodsy herbal aromatics into the gravy.

For the Roasted Root Vegetable Medley:

IngredientQuantityPurpose & Substitution Notes
Yukon Gold Potatoes1 lb, washed and halved or quarteredButter-textured potatoes hold their shape well without turning mushy during braising.
Large Carrots4 large, peeled and cut into 2-inch chunksAdds natural sweetness to balance the dry red wine gravy.
Parsnips3 medium, peeled and cut into 2-inch chunksEarthy and slightly peppery, parsnips pair extraordinarily well with braised beef.
Shallots or Red Onion4 whole shallots, peeled and halvedSweet caramelized allium flavor throughout the root vegetable blend.
Fresh Parsley1/4 cup finely choppedAdds a bright pop of green color and crisp freshness right before serving.

Step-by-Step Cooking Instructions

Step 1: Season and Sear the Beef Shanks

Pat the beef shanks thoroughly dry with paper towels. Dry meat is crucial for achieving a deep, caramelized sear rather than steaming. Season both sides liberally with kosher salt and freshly cracked black pepper. Dredge each shank lightly in the flour, shaking off any excess.

Heat 2 tablespoons of olive oil and 1 tablespoon of butter in your heavy Dutch oven over medium-high heat until shimmering. Working in batches to avoid crowding the pan, add the beef shanks. Sear undisturbed for 4 to 5 minutes per side until a deep golden-brown crust forms. Transfer the seared shanks to a plate and set aside.

Step 2: Build the Aromatic Braising Base

Turn the heat down to medium. Add the remaining tablespoon of butter, diced yellow onion, and smashed garlic cloves to the pot drippings. Cook for 4 to 5 minutes until the onions soften and turn translucent.

Stir in the 2 tablespoons of tomato paste and cook for 2 minutes, stirring constantly until it turns a dark mahogany color. Pour in the 1.5 cups of dry red wine, using a wooden spoon to vigorously scrape up all the delicious browned bits (fond) caramelized on the bottom of the pot. Simmer the wine for 3 to 4 minutes until it reduces by half.

Step 3: Low and Slow Braise

Preheat your oven to 325°F (165°C).

Nestle the seared beef shanks back into the Dutch oven in a single layer along with any accumulated meat juices on the plate. Pour in the beef broth until the liquid comes about halfway up the sides of the shanks (do not completely submerge them). Tuck the rosemary, thyme sprigs, and bay leaves around the meat.

Bring the liquid to a gentle simmer over stove heat, then cover tightly with the Dutch oven lid. Transfer to the preheated oven and roast for 2 hours.

Step 4: Add the Root Vegetables

After 2 hours, carefully remove the Dutch oven from the oven and uncover. Scatter the prepared Yukon Gold potatoes, carrots, parsnips, and halved shallots around and between the beef shanks, pressing them gently into the hot braising liquid.

Cover the pot again with the lid and return it to the oven for another 1 to 1.5 hours (total cook time 3 to 3.5 hours). The beef shanks are ready when a fork slides into the meat with absolute ease and the root vegetables are fork-tender and caramelized.

Step 5: Reduce Sauce and Serve

Carefully transfer the tender beef shanks and root vegetables onto a warm serving platter using a slotted spoon. Remove and discard the spent thyme stems, rosemary sprigs, and bay leaves.

If the pan juices in the Dutch oven appear too thin, set the pot over medium heat on the stovetop and simmer uncovered for 5 to 7 minutes until reduced to a rich, velvety gravy that coats the back of a spoon. Taste and adjust seasoning with extra salt or pepper if needed. Spoon the steaming gravy over the beef shanks and root vegetables, garnish with chopped fresh parsley, and serve immediately.

Culinary Secrets for Fall-Apart Beef & Rich Gravy

  • Don’t Skip the Sear: Searing the meat over high heat triggers the Maillard reaction, developing hundreds of complex flavor compounds that form the foundational soul of your pan gravy.
  • Keep the Lid Sealed Tight: The key to transforming tough shank collagen into tender gelatin is trapped steam moisture. If your Dutch oven lid lacks a tight seal, place a sheet of heavy-duty aluminum foil over the top of the pot before snapping the lid on.
  • Cut Vegetables Large: Because root vegetables will simmer for over an hour in the pot, cut them into thick 2-inch chunks. Tiny vegetable pieces will dissolve and turn mushy before the beef finishes tenderizing.
  • Savor the Bone Marrow: Don’t let the center bone go to waste! Spread the warm, buttery bone marrow directly onto slices of toasted sourdough bread with a sprinkle of flaky sea salt.

Delicious Recipe Variations

  • French Burgundy Style (Osso Buco Red): Add 8 ounces of sautéed cremini mushrooms and 1/2 cup of diced bacon lardons during the last 45 minutes of roasting for an authentic French Boeuf Bourguignon spin.
  • Guinness Stout Braised: Replace the red wine with a 14-ounce can of dark Irish Stout beer (like Guinness) and add 1 tablespoon of brown sugar for a rich, malty, pub-style gravy.
  • Herby Citrus Gremolata Finish: Combine finely chopped fresh parsley, fresh lemon zest, and minced raw garlic. Sprinkle this cold, vibrant Italian gremolata over the hot cooked shanks to cut through the rich meat fat.

Perfect Side Dishes & Serving Ideas

While the root vegetables make this a complete meal in a pot, these sides make the feast even more memorable:

  • Crusty Sourdough or French Baguette: Essential for soaking up every drop of rich red wine beef gravy.
  • Creamy Buttered Polenta: Serving the braised beef shanks over a warm bed of parmesan polenta creates a luxurious contrast in textures.
  • Arugula Salad with Lemon Vinaigrette: A simple side salad with peppery arugula, shaved parmesan, and fresh lemon dressing provides a refreshing palate cleanser between bites.

Storage, Reheating & Meal Prep Guidelines

  • Refrigerator Storage: Allow leftover beef and vegetables to cool to room temperature. Store together in airtight glass containers in the fridge for up to 4 days. Braised meats taste even better on day two as the flavors continue to marry!
  • Reheating Instructions: Transfer meat and root vegetables to a baking dish with a few spoonfuls of gravy. Cover tightly with foil and heat in a 350°F (175°C) oven for 15 to 20 minutes until warmed through. Alternatively, reheat individual portions in the microwave at medium power.
  • Freezing Instructions: Place cooled beef shanks and pan gravy into freezer-safe containers or vacuum-seal bags (freeze root vegetables separately or consume fresh, as potatoes can change texture when frozen). Freeze for up to 3 months. Thaw overnight in the refrigerator before reheating.

Estimated Nutritional Information

NutrientPer Serving (1 Shank with Vegetables & Gravy)
Calories560 kcal
Protein48 g
Carbohydrates36 g
Fat22 g
Saturated Fat9 g
Cholesterol130 mg
Sodium720 mg
Dietary Fiber6 g
Sugar7 g

(Note: Nutritional values are estimates calculated based on 4 servings using standard ingredients. Actual nutrient content will vary based on beef trimming and exact vegetable weight.)

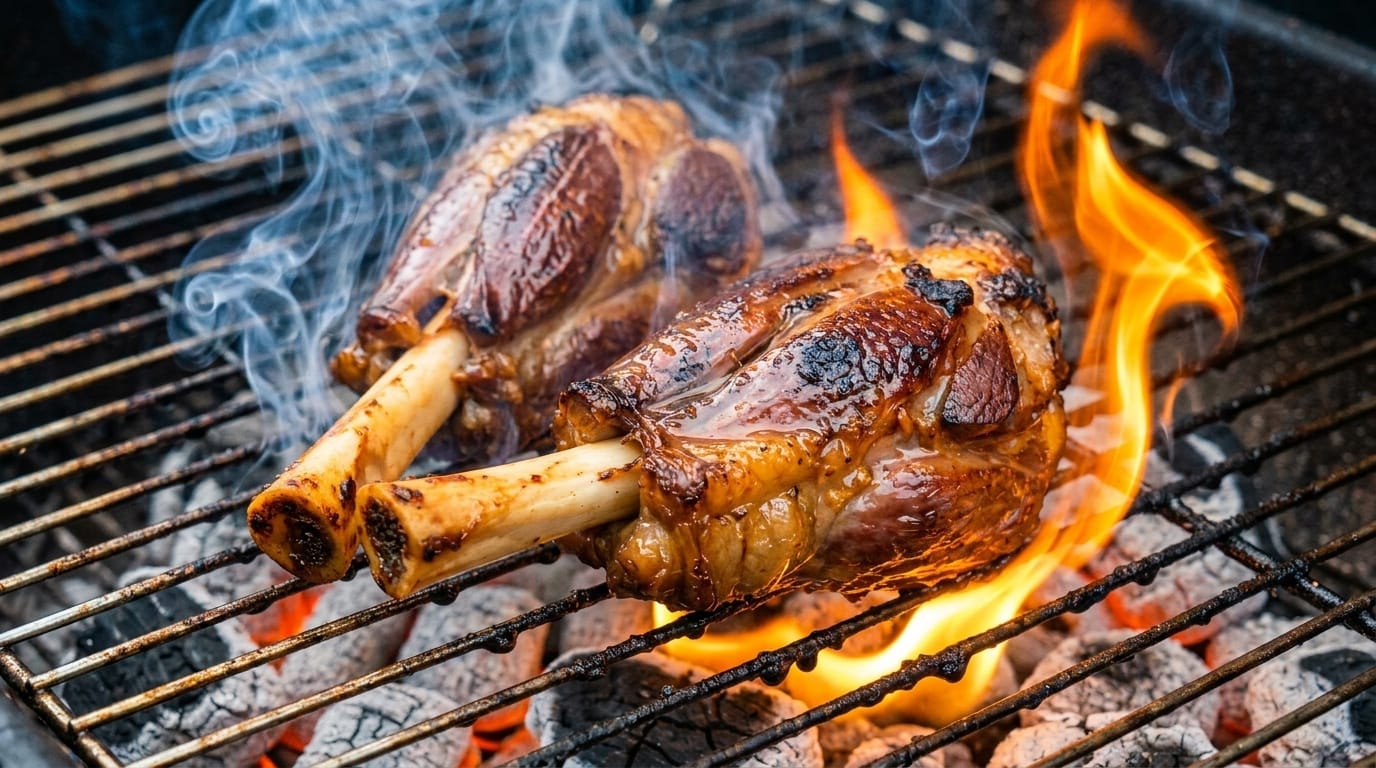
Flame-Charred Grilled Lamb Shanks

When it comes to outdoor grilling, few cuts of meat deliver the showstopping drama and rich, deeply savory satisfaction of Flame-Charred Grilled Lamb Shanks. Lamb shanks are often associated with winter stews or slow-braised comfort dishes, but bringing them out to the live fire unlocks a whole new culinary dimension. The contrast between a smoky, caramelized outer crust kissed by roaring flames and a meltingly tender, succulent interior makes this recipe the absolute crown jewel of barbecue main courses.

Because lamb shank contains a high concentration of connective tissue and heavy bone, throwing a raw shank directly over high flames will result in a tough, burnt mess. The secret to achieving restaurant-quality grilled lamb shanks lies in a master two-stage cooking method: a low-and-slow tenderizing phase (either via indirect smoker heat or a rich aromatic par-braise) followed by a high-heat open-flame finish to crisp the skin and create a sticky, charred glaze.

Recipe OverviewDetails
Prep Time20 minutes (plus overnight marinade)
Slow-Cook / Indirect Time2.5 to 3 hours
Flame-Charring Time10 to 15 minutes
Total Time~3.5 hours
Servings4 generous portions
CourseMain Course / BBQ Centerpiece
CuisineMediterranean / Open-Fire Grill

Why You Will Love This Recipe

  • Unbeatable Smokey Crust: The direct fire sear renders the surface fat, creating an addictive, crispy, flame-kissed outer char packed with caramelized garlic and fresh herbs.
  • Fall-Off-The-Bone Tenderness: By low-simmering or indirect-grilling the shanks before hitting the open flame, the tough muscle fibers completely relax into rich, buttery perfection.
  • Basting Glaze Magic: A tangy, sweet, and herbal basting glaze applied right over the open grate creates a shiny, sticky lacquer that locks in every drop of moisture.
  • Sensational Presentation: Serving whole bone-in lamb shanks right off the grill creates an impressive, rustic feast that will have your family and guests reaching for seconds.

The Secret Technique: Two-Stage Grilling

Cooking lamb shank on the grill requires patience and precision. Understanding why we use two temperature zones will guarantee success every single time:

  1. Stage 1: Low-and-Slow Tenderization (250°F – 275°F): High collagen cuts like the shank require sustained low temperatures to break collagen down into rich gelatin. You can perform this initial stage either in an aromatic oven braise or set up your charcoal/gas grill for two-zone indirect smoking.
  2. Stage 2: High-Flame Charring (450°F – 500°F): Once the interior reaches peak tenderness, the shanks are moved directly over roaring coals or high gas flames. Basted continuously with a garlic-herb butter or pomegranate molasses glaze, the fat flares slightly, crisping the exterior and sealing in intense wood-smoke flavor.

Essential Kitchen & Outdoor Grill Tools

  • Charcoal or Gas Grill: A grill capable of dual-zone setup (direct and indirect heat areas) or a smoker.
  • Heavy-Duty Aluminum Foil or Dutch Oven: Required for wrapping or par-cooking the shanks during the low-heat phase to trap moisture.
  • Instant-Read Digital Meat Thermometer: Crucial for monitoring internal temperature so the meat achieves shred-level tenderness without drying out.
  • Long Stainless-Steel Grill Tongs: Lamb shanks are heavy and hot; strong tongs ensure safe turning over open flames.
  • Silicone Basting Brush: For slathering the sticky herb marinade and glaze over the meat while it chars.

Ingredients & Substitution Guide

To create the ultimate flame-charred lamb shanks, balance rich meat with bright acids, robust herbs, and warm spices.

For the Lamb Shanks & Herb Marinade:

IngredientQuantityPurpose & Substitution Notes
Lamb Shanks4 bone-in shanks (approx. 1 to 1.25 lbs each)Look for meaty, well-trimmed hind shanks for the most yield.
Olive Oil1/3 cupExtra virgin olive oil bonds the spices to the meat and aids searing.
Fresh Garlic6 cloves, finely pasteGarlic creates a caramelized savory crust when exposed to fire.
Fresh Rosemary & Thyme2 tbsp minced fresh rosemary, 2 tbsp fresh thyme leavesClassic herbal companions that cut through the richness of lamb.
Smoked Paprika & Cumin1 tbsp smoked paprika, 1 tsp ground cuminAdds earthy undertones and a beautiful deep red color to the crust.
Red Wine Vinegar or Lemon3 tbspAcids tenderize the outer muscle fibers and brighten heavy flavors.
Coarse Sea Salt & Black Pepper1.5 tbsp sea salt, 1 tbsp cracked black pepperGenerous seasoning is vital for large bone-in cuts.

For the Flame-Char Basting Glaze:

IngredientQuantityPurpose & Substitution Notes
Melted Butter or Ghee4 tbspDripped onto hot coals, butter generates controlled smoke and rich flavor.
Honey or Pomegranate Molasses2 tbspSugars caramelize rapidly over flames, creating sticky, charred bark.
Apple Cider Vinegar2 tbspKeeps the glaze balanced so it isn’t overly sweet.
Worcestershire Sauce1 tbspAdds an intense savory umami boost to every brushed layer.

Step-by-Step Cooking Instructions

Step 1: Trim, Score, and Marinate

Inspect the lamb shanks. Use a sharp paring knife to trim away excess tough silver skin while leaving a thin layer of outer fat intact. Lightly score the remaining fat layer in a crosshatch pattern so seasonings can penetrate deep into the meat.

In a bowl, whisk together the olive oil, garlic paste, minced rosemary, fresh thyme, smoked paprika, cumin, red wine vinegar, coarse sea salt, and cracked black pepper. Rub this aromatic paste all over the shanks, massaging it into the scored fat. Cover and let marinate in the refrigerator for at least 2 to 4 hours, or ideally overnight for maximum flavor depth.

Step 2: Stage 1 – Low-and-Slow Par-Cook or Indirect Smoke

Remove the marinated shanks from the refrigerator 30 minutes before cooking to remove the cold chill.

  • Option A (Indirect Grill/Smoker): Set up your grill for two-zone cooking with coals pushed to one side, holding a steady temperature of 275°F (135°C). Place the shanks on the cool side of the grill grate away from direct fire. Throw wood chunks (apple or oak) on the coals. Cover and cook undisturbed for 2.5 to 3 hours, or until internal temperature reaches 195°F–200°F and the meat pulls back from the bone.
  • Option B (Dutch Oven Braise Pre-Cook): Place shanks in a Dutch oven with 1 cup of broth, cover tightly, and bake at 325°F (165°C) for 2 hours until tender but still holding shape on the bone. Transfer the tender shanks onto a platter to cool slightly before hitting the fire.

Step 3: Prepare the Flame Basting Glaze

While the shanks are finishing their slow cook, prepare your basting mixture. In a small heatproof saucepan, combine the melted butter, honey (or pomegranate molasses), apple cider vinegar, and Worcestershire sauce. Stir well and set near your grill.

Step 4: Stage 2 – High-Flame Charring & Glazing

Stoke your grill to high direct heat (450°F to 500°F). Clean and oil the grill grates thoroughly to prevent sticking.

Place the slow-cooked, tender lamb shanks directly over the hot, roaring flames. Using a long silicone brush, baste the shanks generously with the butter glaze. Turn the shanks every 1 to 2 minutes to ensure even contact with the fire.

As the glaze drips down onto the hot coals, small controlled flare-ups will kiss the edges of the meat, creating a deeply caramelized, crispy, flame-charred crust. Continue searing and basting for 10 to 12 minutes until the exterior is dark, glossy, and crackling with aromatic smoke.

Step 5: Rest and Serve

Carefully transfer the flame-charred lamb shanks onto a warm wooden cutting board or platter. Tent loosely with aluminum foil and let the meat rest for 10 to 15 minutes. Resting allows the internal juices to redistribute throughout the meat, guaranteeing that every bite is extraordinarily tender and succulent.

Culinary Secrets for Flawless Char & Maximum Juice

  • Avoid Cold Meat on Hot Grates: Always let your pre-cooked or marinated shanks rest at room temperature before charring over high heat. Cold meat drops the surface temperature of the grill and prevents proper crust formation.
  • Control Your Smoke & Flare-Ups: A subtle flame flare-up adds authentic smoke flavor, but prolonged soot flames can make the meat taste bitter. Keep a cool side on your grill so you can move the shanks away if flare-ups get too aggressive.
  • Use Wood Chunks for Layered Flavor: Adding hickory, oak, or fruitwood chunks during the indirect smoking phase complements the natural gamey richness of lamb with sweet, aromatic wood smoke.
  • Baste Late in the Searing Process: Sugars in honey or pomegranate molasses burn quickly. Begin brushing the sweet basting glaze on during the final 5 to 7 minutes of grilling so it caramelizes into a glossy mahogany crust without turning black.

Flavor Variations & Custom Rub Profiles

  • Greek Taverna Style: Replace paprika and cumin with dried oregano, garlic powder, and lemon zest. Baste with extra virgin olive oil, fresh lemon juice, and a pinch of dried sea salt.
  • Spicy North African Harissa: Mix 2 tablespoons of spicy harissa paste directly into the marinade and finish with a sprinkle of crushed red pepper flakes and fresh mint after charring.
  • Chimichurri Glazed: Skip the honey glaze and brush the freshly charred hot shanks immediately with a bright, herbaceous, garlicky South American chimichurri sauce.

Perfect Side Dishes & Pairing Recommendations

The bold, smokey flavors of grilled lamb shanks pair best with fresh, tangy sides that cut through the richness:

  • Crisp Cucumber & Red Onion Salad: Thinly sliced English cucumbers, pickled red onions, fresh dill, and crumbled feta tossed in a red wine vinaigrette.
  • Grilled Garlic Herb Flatbread: Warm pita or naan charred right on the grill grates and brushed with garlic oil.
  • Creamy Roasted Garlic Mash or Polenta: Provides a velvety base that catches all the smoky meat drippings.
  • Beverage Pairing: Pair with bold, tannin-rich red wines like a Syrah/Shiraz, Cabernet Sauvignon, or a classic Greek Agiorgitiko.

Storage, Reheating & Food Safety

  • Refrigeration: Store leftover grilled lamb in airtight containers in the refrigerator for up to 3 to 4 days.
  • Reheating on the Grill or Oven: To retain the crispy exterior without drying out the meat, place shanks in a baking dish with 2 tablespoons of broth, cover tightly with foil, and warm in a 350°F (175°C) oven for 15 to 20 minutes.
  • Freezing: Wrapped tightly in plastic wrap and heavy-duty foil, cooked lamb shanks can be frozen for up to 3 months. Thaw overnight in the fridge before reheating.

Estimated Nutritional Information

NutrientPer Serving (1 Shank with Glaze)
Calories590 kcal
Protein52 g
Carbohydrates10 g
Fat38 g
Saturated Fat16 g
Cholesterol165 mg
Sodium780 mg
Dietary Fiber1 g
Sugars7 g

(Note: Nutritional values are estimated based on standard recipe ingredients and meat trimming. Values will vary depending on shank size and grease rendering.)

Slow-Roasted Lamb Shoulder over Spiced Rice

If you are looking to create a showstopping centerpiece meal that captures the vibrant, comforting flavors of Mediterranean and Middle Eastern cookery, Roasted Lamb Shoulder over Spiced Rice is the gold standard. Featuring a whole bone-in lamb shoulder slow-roasted until it becomes fall-apart tender, perched atop a bed of long-grain basmati rice infused with warm aromatics like cinnamon, cardamom, cumin, and saffron, this dish turns any dinner table into an unforgettable feast.

Lamb shoulder is widely prized by chefs and home cooks alike for its rich marbling and deep, robust flavor. Unlike leaner cuts that can quickly become dry or tough under high heat, the shoulder benefits immensely from a slow-braising technique. As it roasts covered for hours, the connective tissues gently melt, bathing the meat in its own rich juices. When paired with fluffly, aromatic yellow rice that absorbs the rendered lamb drippings, every single bite offers a harmonious balance of savory, sweet, and herbal notes.

Recipe OverviewDetails
Prep Time25 minutes (plus overnight marinade)
Roasting Time3.5 to 4 hours
Rice Cook Time25 minutes
Total Time4.5 hours
Servings6 to 8 servings
CourseMain Dish / Festive Centerpiece
CuisineMiddle Eastern / Mediterranean

Why You Will Love This Recipe

  • Effortless Shred-Tender Texture: Slow roasting takes all the guesswork out of cooking lamb. The meat becomes so tender you can shred it with two dinner forks.
  • Complex Aromatic Profile: A warm spice rub featuring garlic, lemon, cumin, coriander, and smoked paprika permeates deep into the meat fibers.
  • Infused One-Pot Style Rice: The long-grain basmati rice is toasted in butter and cooked with whole spices, turmeric, and broth, ensuring maximum flavor density.
  • Perfect for Feasts & Gathering: This dish feeds a crowd easily and can be presented family-style on a large platter surrounded by fresh herbs, toasted nuts, and pomegranate seeds.

Essential Kitchen Equipment

To achieve the best results with minimal stress, equip your kitchen with the following:

  • Large Heavy Roasting Pan with Lid (or Dutch Oven): A deep roasting pan covered tightly with heavy-duty aluminum foil traps moisture to slow-braise the shoulder.
  • Fine-Mesh Sieve: Essential for washing starch off the basmati rice grains before cooking.
  • Heavy-Bottomed Stockpot or Dutch Oven: Used to sauté aromatics and simmer the spiced basmati rice.
  • Small Skillet: For dry-toasting almonds, pine nuts, or cashews for the final garnish.
  • Meat Thermometer & Tongs: For checking internal meat temperature and transferring the heavy roast safely.

Ingredients & Substitution Guide

This feast relies on two main components: the garlic-herb marinated lamb shoulder and the fragrant spiced rice base.

For the Roasted Lamb Shoulder & Marinade:

IngredientQuantityPurpose & Substitution Notes
Bone-In Lamb Shoulder4.5 to 5.5 lbsBone-in offers superior moisture and deep flavor. Boneless shoulder can be substituted (reduce cook time by 30 mins).
Olive Oil1/4 cupExtra virgin olive oil carries fat-soluble spice flavors into the meat.
Fresh Garlic8 cloves, crushedFreshly crushed garlic paste creates an intense savory crust.
Lemon Juice & Zest1 whole lemonBright acidity tenderizes muscle fibers and cuts through the rich lamb fat.
Warm Spice Blend1 tbsp ground cumin, 1 tbsp ground coriander, 1 tbsp smoked paprika, 1 tsp ground cinnamon, 1 tsp ground allspiceCreates an aromatic, earthily sweet crust over the surface of the roast.
Dried Oregano1 tbspAdds a subtle herbaceous Mediterranean undertone.
Kosher Salt & Black Pepper1.5 tbsp salt, 1 tsp pepperProper salting is crucial for large roasts to season all the way to the bone.
Chicken or Beef Broth1.5 cupsAdded to the bottom of the roasting pan to build steam and prevent burning.

For the Fragrant Spiced Rice:

IngredientQuantityPurpose & Substitution Notes
Extra Long-Grain Basmati Rice2.5 cupsRinsed well. Basmati provides light, non-sticky grains that absorb liquid beautifully.
Ghee or Unsalted Butter3 tbspAdds a traditional rich, nutty taste to the rice base.
Yellow Onion1 large, finely dicedBuilds the savory base for the rice.
Whole Spices1 cinnamon stick, 4 green cardamom pods, 3 whole cloves, 2 bay leavesInfuses the rice broth with authentic whole spice aroma.
Ground Turmeric or Saffron1 tsp turmeric (or pinch saffron threads)Gives the rice its signature vibrant golden color.
Chicken or Lamb Broth4 cupsLow-sodium broth provides more depth than plain water.
Garnish Toppings1/2 cup toasted sliced almonds, 1/4 cup pine nuts, 1/3 cup fresh pomegranate arils, fresh mintAdds crunch, color, and sweet-tart bursts to balance the dish.

Step-by-Step Cooking Instructions

Step 1: Score and Marinate the Lamb

Use a sharp chef’s knife to score the fat cap of the lamb shoulder in a crosshatch diamond pattern, cutting through the fat layer without slicing deep into the meat. This allows the seasoning to penetrate beneath the surface.

In a bowl, combine the olive oil, crushed garlic, lemon juice, lemon zest, ground cumin, coriander, smoked paprika, cinnamon, allspice, dried oregano, salt, and black pepper to form a thick paste. Rub this spice paste liberally over every inch of the lamb shoulder, working it deep into the scored fat cuts. Cover tightly and refrigerate for at least 4 hours, or ideally overnight.

Step 2: Slow-Roast the Lamb Shoulder

Preheat your oven to 325°F (165°C). Take the lamb shoulder out of the refrigerator 30 minutes prior to roasting to take off the chill.

Place the lamb shoulder into a deep roasting pan or Dutch oven. Pour 1.5 cups of broth into the bottom of the pan around the meat (do not pour liquid over the top of the spices). Cover the pan extremely tightly with a lid or two layers of heavy-duty aluminum foil to trap all moisture inside.

Roast in the center of the oven for 3.5 to 4 hours. The lamb is ready when a meat thermometer registers above 200°F and a fork inserted into the meat twists with zero resistance.

Step 3: Crisp the Outer Crust

Remove the foil or lid from the roasting pan. Increase the oven temperature to 425°F (220°C) or turn on the oven BROILER. Roast uncovered for an additional 15 to 20 minutes until the outer fat cap turns golden brown, crispy, and sizzles. Transfer the cooked lamb to a wooden cutting board and let it rest, loosely tented with foil, for 20 minutes before carving or shredding. Save the rich pan drippings in a measuring cup!

Step 4: Cook the Golden Spiced Rice

While the lamb is resting, rinse the basmati rice in a fine-mesh strainer under cold running water for 1 to 2 minutes until the water runs clear. Drain completely.

In a large stockpot or Dutch oven, melt 3 tablespoons of ghee or butter over medium heat. Add the diced yellow onion and cook for 5 to 6 minutes until soft and translucent. Add the cinnamon stick, crushed cardamom pods, whole cloves, and bay leaves, cooking for 1 minute until fragrant.

Stir in the turmeric (or blooming saffron liquid) and the rinsed basmati rice. Toast the rice grains in the spiced butter for 2 minutes, stirring constantly. Pour in 4 cups of chicken broth along with 3 tablespoons of reserved fat drippings skimmed from the roasting pan. Season with 1 teaspoon of salt.

Bring the liquid to a rolling boil over high heat. Once boiling, cover with a tight-fitting lid, lower the heat to the absolute lowest setting, and cook undisturbed for 15 minutes. Remove from heat and leave covered for another 10 minutes without opening the lid to allow the steam to finish fluffing the grains.

Step 5: Assemble and Serve

Uncover the rice and remove the whole cinnamon stick and bay leaves. Use a fork to gently fluff the rice from the bottom up.

Spread the fragrant golden rice across a massive serving platter. Shred the tender lamb shoulder into large juicy chunks (or place the whole roasted shoulder bone-in right in the middle of the platter). Drizzle extra warm pan drippings over the meat. Scatter toasted almonds, pine nuts, fresh pomegranate seeds, and fresh mint leaves over the top before serving family-style.

Culinary Secrets for Tenderness & Maximum Flavor

  • Score the Fat Cap Correctly: Scored fat melts gradually over hours of roasting, self-basting the meat underneath. Be careful not to cut away the fat completely—it is essential for keeping the shoulder juicy!
  • Rinse the Rice Thoroughly: Removing excess surface starch from basmati rice prevents the grains from sticking together, giving you individual, fluffy, restaurant-grade grains.
  • Don’t Rush the Rest: Letting the lamb shoulder rest for 20 minutes before pulling it apart allows the internal muscle fibers to reabsorb the melted collagen and hot juices. If you slice it immediately, those delicious juices will spill out onto the board.
  • Skim and Use the Pan Drippings: The liquid left in the bottom of your roasting pan contains concentrated garlic, lemon, lamb fat, and spices. Skimming off excess rendered clear fat and adding a few tablespoons of the rich sediment into your rice cooking water yields incredible flavor.

Flavor Variations to Try

  • Greek Garlic & Lemon Style: Increase garlic to 12 cloves, add 2 tablespoons of dried oregano, replace cinnamon with dried rosemary and thyme, and serve with a dollop of cold garlic cucumber tzatziki sauce.
  • Spicy Moroccan Harissa Roast: Mix 3 tablespoons of red harissa paste directly into the lamb rub paste, and toss sweet raisins or dried cranberries into the spiced rice along with toasted pistachios.
  • Persian Saffron & Barberry Twist: Omit the turmeric and use high-grade saffron water for the rice. Top the final platter with tart, butter-sautéed dried barberries (zereshk) for an authentic sweet-and-sour contrast.

Perfect Sauces & Accompaniments

While this feast is plenty rich on its own, cool or tangy condiments complement the savory spiced lamb beautifully:

  • Garlic Cucumber Tzatziki: Greek yogurt mixed with grated drained cucumber, minced garlic, lemon juice, fresh dill, and extra virgin olive oil.
  • Middle Eastern Garlic Toum: A fluffy, emulsified Lebanese garlic dip that adds a sharp, velvety punch to every bite of shredded lamb.
  • Spicy Tomato Shatta / Dagga: Freshly grated ripe tomatoes blended with minced green chilies, lemon juice, cilantro, and garlic for a zesty fresh salsa finish.

Storage, Reheating & Meal Prep Guidelines

  • Refrigerator Storage: Store leftover shredded lamb and spiced rice in separate airtight containers in the fridge for up to 4 days.
  • Reheating the Lamb: Place leftover lamb in a baking dish with a splash of beef broth or pan juices, cover tightly with foil, and warm in a 350°F oven for 15 minutes to keep it moist.
  • Reheating the Rice: Sprinkle 1 tablespoon of water over the cold rice, cover with a damp paper towel, and microwave at medium power in 1-minute intervals, fluffing with a fork halfway through.
  • Freezer Instructions: Cooked, shredded lamb shoulder freezes exceptionally well. Pack into airtight freezer bags with some of the pan juices for up to 3 months. Thaw overnight in the refrigerator before reheating.

Estimated Nutritional Information

NutrientPer Serving (approx. 1/8th recipe)
Calories680 kcal
Protein46 g
Carbohydrates48 g
Fat32 g
Saturated Fat13 g
Cholesterol145 mg
Sodium890 mg
Dietary Fiber3 g
Sugar4 g

(Note: Nutritional values are estimates based on standard recipe ingredients using a 5-lb bone-in lamb shoulder and basmati rice. Values will vary depending on fat trimming and portion sizing.)

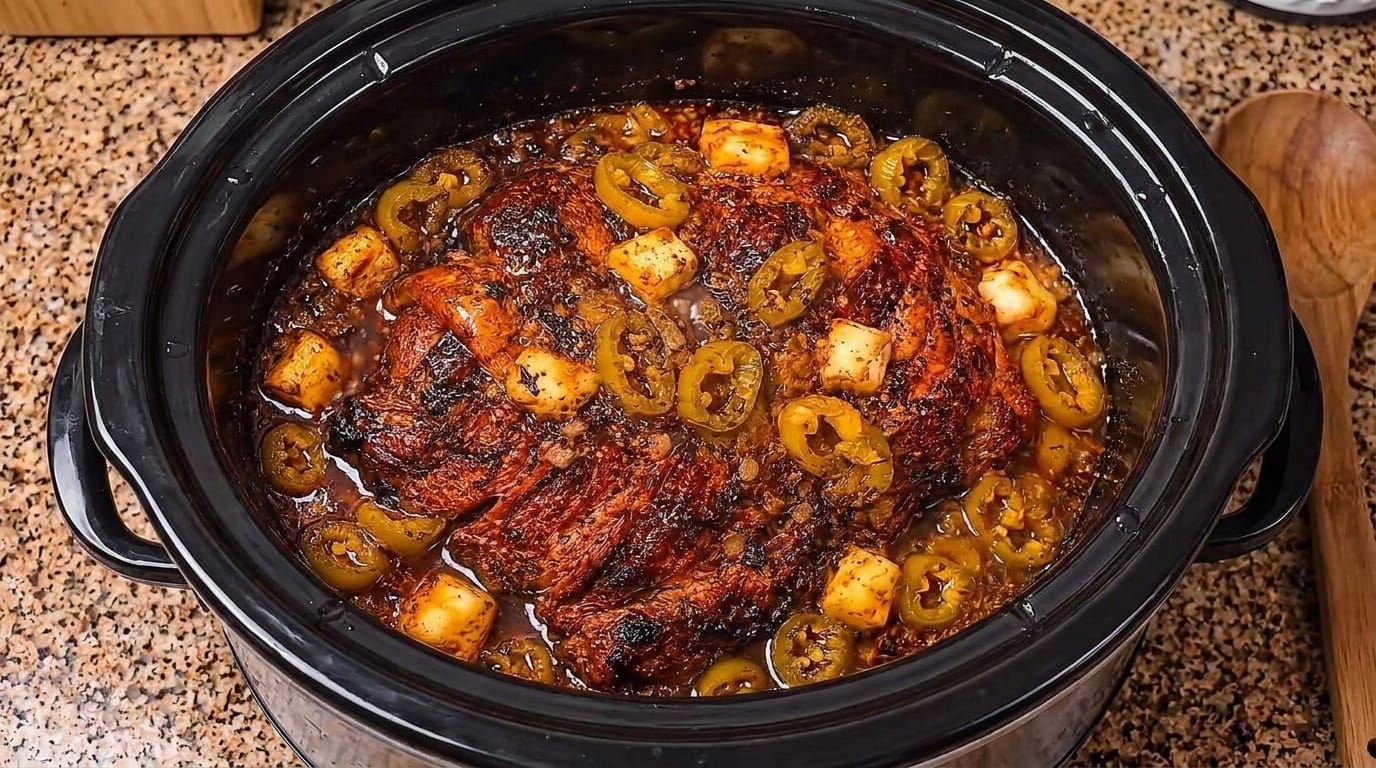
Slow Cooker Jalapeño Popper Pot Roast

If you love the creamy, smoky, kick of classic jalapeño poppers and the comforting, melt-in-your-mouth texture of a traditional beef pot roast, this Slow Cooker Jalapeño Popper Pot Roast is about to become your new favorite dinner. It takes the rich, savory depth of slow-cooked beef chuck roast and smothers it in a velvety sauce made with cream cheese, sharp cheddar, crispy bacon, ranch seasoning, and sliced jalapeños.

Pot roast is an absolute staple of American home cooking, but standard brown gravies can sometimes feel predictable. By infusing the cooking liquid with tangy pickled jalapeño juice, garlic, ranch spices, and rich dairy, the meat becomes insanely juicy while absorbing a zesty, subtle heat. The slow cooker transforms tough cuts of beef into tender, fall-apart shreds that swirl seamlessly into a thick, jalapeño-cheddar sauce. It is low-carb, keto-friendly, incredibly hearty, and requires minimal active preparation.

Recipe At-a-GlanceDetails
Prep Time15 minutes
Cook Time (Low)8 to 9 hours
Cook Time (High)4 to 5 hours
Total Time8 hours 15 minutes
Servings6 to 8 servings
CourseMain Dish
CuisineAmerican / Fusion Comfort Food

Why You Will Love This Recipe

  • Set-It-and-Forget-It Convenience: Spend 15 minutes prepping in the morning, and come home to a complete, house-filling feast ready to serve.
  • Melt-in-Your-Mouth Beef: Low and slow cooking breaks down the dense collagen in chuck roast, ensuring every bite is succulent and effortlessly shredded.
  • Irresistible Flavor Mashup: You get all the hallmark elements of game-day jalapeño poppers—smoky bacon, sharp cheddar, creamy cheese, and spicy jalapeño—elevated into an epic main course.
  • Naturally Low-Carb & Keto Friendly: Packed with protein and rich healthy fats, this recipe contains minimal carbohydrates, making it ideal for keto or low-carb lifestyles.

Essential Kitchen Equipment

Gather these basic tools before you start cooking:

  • 6-to-7-Quart Slow Cooker: A large oval crockpot allows a 3-to-4-pound beef roast to sit flat and cook evenly in the liquid.
  • Heavy Skillet (Cast Iron Preferred): Searing the roast in a screaming-hot pan before placing it in the slow cooker creates a dark, caramelized crust (Maillard reaction) that elevates the whole gravy base.
  • Meat Tongs & Two Forks: For turning the heavy roast and easily shredding the tender meat at the end.
  • Whisk & Hand Mixer (Optional): Helps blend the softened cream cheese and pan juices into a smooth, clump-free gravy.

Ingredients & Substitution Guide

This dish relies on simple, bold ingredients that work together to create a rich, balanced cream sauce.

IngredientQuantityFunction & Substitution Notes
Beef Chuck Roast3.5 to 4 lbsWell-marbled chuck roast gives the tenderest, most flavorful shredded beef results.
Cream Cheese8 oz (1 block)Full-fat brick cream cheese provides the classic jalapeño popper creaminess. Soften to room temperature before adding.
Sharp Cheddar Cheese1.5 cupsFreshly shredded sharp or extra-sharp cheddar adds rich flavor and color.
Crispy Bacon8 slicesCooked crisp and crumbled. Half goes into the sauce, half is saved for a crunchy top garnish.
Fresh Jalapeños3 to 4 mediumSeeded and sliced. Keep the seeds if you prefer a fiery kick!
Pickled Jalapeño Slices + Brine1/2 cup + 2 tbsp brinePickled jalapeños add a bright, vinegar-tangy acidity that cuts through the rich cream and fatty beef.
Dry Ranch Seasoning Mix1 packet (1 oz)Provides a punch of garlic, onion, dill, and buttermilk seasoning in one quick step.
Beef Broth1/2 cupLow-sodium beef broth helps build the initial simmering steam without making the roast salty.
Unsalted Butter2 tbspUsed for searing the beef and building extra silkiness in the pan juices.
Garlic Powder & Black Pepper1 tsp eachComplements the ranch herbs and builds deep savory notes.

Step-by-Step Cooking Instructions

Step 1: Season and Sear the Beef Chuck Roast

Pat the beef chuck roast completely dry with paper towels. Dust all sides of the roast generously with garlic powder, black pepper, and half of the packet of dry ranch seasoning, pressing the spices into the meat fibers.

Melt 2 tablespoons of butter in a heavy cast-iron skillet over medium-high heat. Once the skillet is smoking hot, sear the chuck roast for 3 to 4 minutes per side until a deep, dark golden-brown crust forms on all surfaces. Transfer the seared roast directly into the slow cooker insert.

Step 2: Assemble the Aromatics and Simmering Liquid

Pour the beef broth and 2 tablespoons of pickled jalapeño brine around the sides of the roast in the slow cooker insert (do not pour directly over the top to avoid washing away your seared spice crust).

Sprinkle the remaining dry ranch seasoning over the meat. Scatter the sliced fresh jalapeños, pickled jalapeños, and half of the crumbled bacon around and on top of the beef.

Step 3: Slow Cook to Fall-Apart Tenderness

Place the lid on the slow cooker and cook on LOW for 8 to 9 hours (or on HIGH for 4.5 to 5 hours).

The roast is ready when a fork slides into the center with zero resistance and the beef pulls apart effortlessly. Pro Tip: Cooking on LOW is strongly recommended for chuck roast, as high heat can occasionally cause beef fibers to tighten and turn chewy.

Step 4: Shred the Beef and Blend the Popper Sauce

Carefully lift the tender roast out of the slow cooker using two large forks or tongs and place it onto a cutting board. Discard any large excess fat caps, then shred the beef coarsely into large bite-sized chunks.

To the hot pan juices remaining in the slow cooker, add the softened, cubed cream cheese and 1 cup of the shredded sharp cheddar cheese. Whisk vigorously (or use an immersion blender briefly) until the cheese melts completely into the hot broth, forming a thick, glossy, pale-green speckled cream sauce.

Step 5: Combine, Garnish, and Serve

Return the shredded beef back into the slow cooker, tossing gently until every strand of meat is coated in the creamy jalapeño cheese sauce.

Top the pot roast with the remaining 1/2 cup of shredded cheddar, cover with the lid for 5 minutes until melted, then scatter the remaining crisp bacon and fresh jalapeño slices over the top before serving.

Culinary Secrets for Restaurant-Quality Success

  • Always Sear First: Skipping the searing step deprives your pot roast of complex caramelized flavors. Searing locks in juices and builds a rich base for the gravy.
  • Soften Your Cream Cheese: Cold cream cheese added to hot liquids will break into grainy clumps. Leave your cream cheese block on the counter for 30 minutes to reach room temperature, or microwave it for 15 seconds before whisking into the broth.
  • Control the Heat Level: Fresh jalapeño membranes and seeds hold most of the capsaicin (heat). For a mild family meal, remove all seeds and ribs from fresh jalapeños, or rely primarily on pickled jalapeños. For extra spice, leave the seeds in or add 1/2 teaspoon of cayenne pepper.
  • Use Block Cheese: Pre-shredded bagged cheddar contains anti-caking cellulose powders that hinder smooth melting. Shredding a block of sharp cheddar yields a far creamier gravy.

Delicious Recipe Variations

  • Jalapeño Popper Beef Sliders: Pile shredded jalapeño popper pot roast onto toasted brioche or Hawaiian sweet rolls, top with extra melted pepper jack cheese, and serve as party appetizers.
  • Instant Pot / Pressure Cooker Version: Sear the roast on Sauté mode, add broth and seasonings, and pressure cook on High for 60 minutes with a 20-minute natural pressure release. Shred beef and whisk in cheeses on Keep Warm mode.
  • Extra Smoky Bacon Edition: Use applewood-smoked bacon and stir 1/2 teaspoon of smoked paprika directly into the beef rub.
  • Loaded Vegetable Addition: Add 8 ounces of sliced button mushrooms or diced green bell peppers into the slow cooker during the last 2 hours of cooking for extra texture.

Complete Serving & Pairing Ideas

Because this pot roast features a rich, spicy cream sauce, pair it with side dishes that absorb or complement sauce:

  • Keto / Low-Carb Sides: Serve over a big mound of buttery mashed cauliflower, steamed broccoli florets, or roasted garlic zucchini noodles.
  • Classic Comfort Sides: Ladle generously over creamy garlic mashed potatoes, buttered egg noodles, or long-grain white rice.
  • Bread Pairing: Serve with warm cornbread muffins or warm garlic bread to mop up every drop of cheese sauce.

Storage, Reheating & Meal Prep Guidelines

  • Refrigerator Storage: Store cooled leftover pot roast in an airtight container in the fridge for up to 3 to 4 days. The sauce will thicken in the fridge as the cream cheese sets.
  • Reheating on the Stove (Best Method): Warm leftover beef and sauce in a skillet over medium-low heat. Add 1 to 2 tablespoons of beef broth or water to loosen the cream sauce as it heats up, stirring gently until hot.
  • Reheating in the Microwave: Microwave single portions at 50% power in 1-minute intervals, stirring between rounds to ensure the dairy sauce heats evenly without separating.
  • Freezing Guidelines: Due to the cream cheese content, freezing can alter sauce texture slightly upon thawing. However, you can freeze the cooked, shredded beef in its sauce in freezer bags for up to 2 months. Thaw overnight in the refrigerator and reheat gently on low heat while whisking in a splash of fresh cream to restore smoothness.

Estimated Nutritional Information

NutrientAmount Per Serving (approx. 1/6th recipe)
Calories560 kcal
Protein44 g
Total Fat38 g
Saturated Fat18 g
Cholesterol155 mg
Sodium820 mg
Total Carbohydrates5 g
Dietary Fiber1 g
Net Carbohydrates4 g
Sugars2 g

(Note: Nutritional values are estimates calculated using standard ingredients and a 3.5 lb beef chuck roast. Values will vary depending on specific meat trimmings and cheese brands used.)

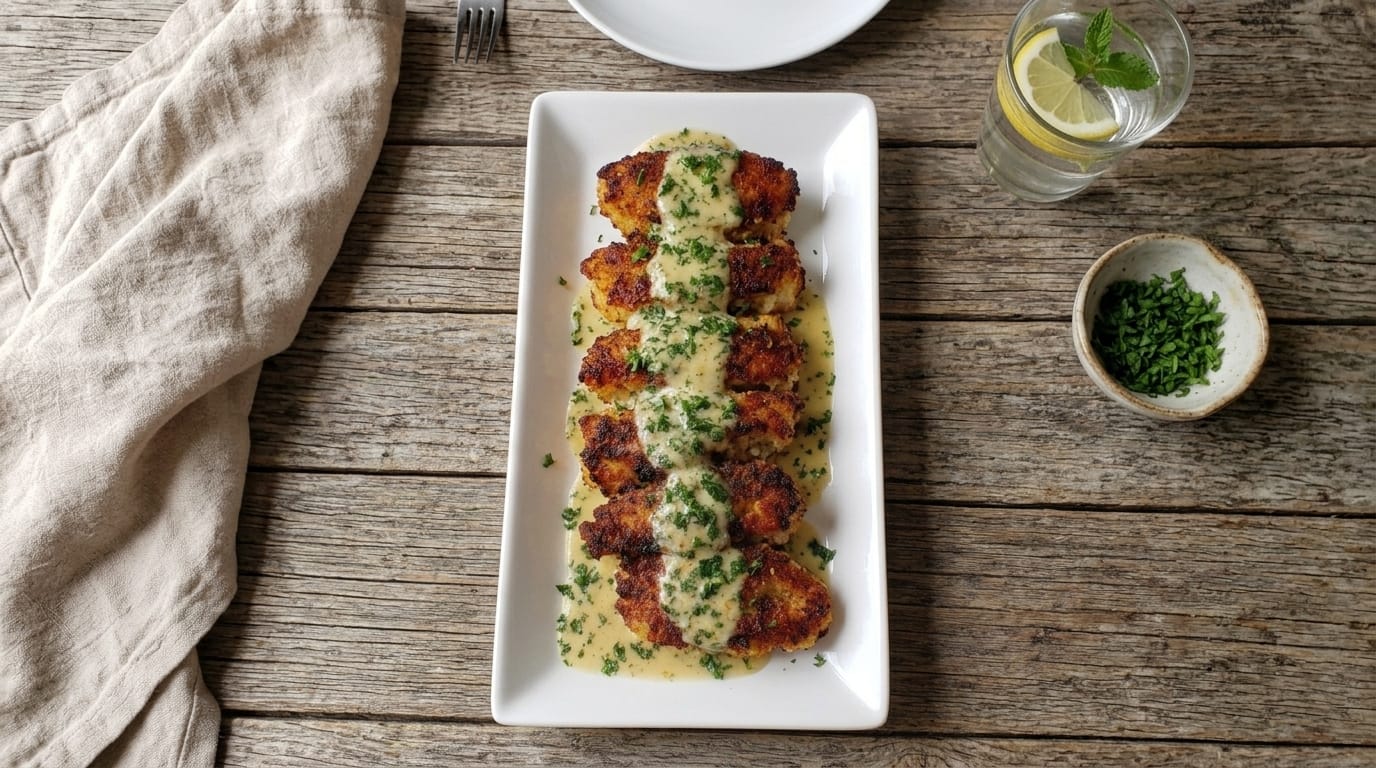
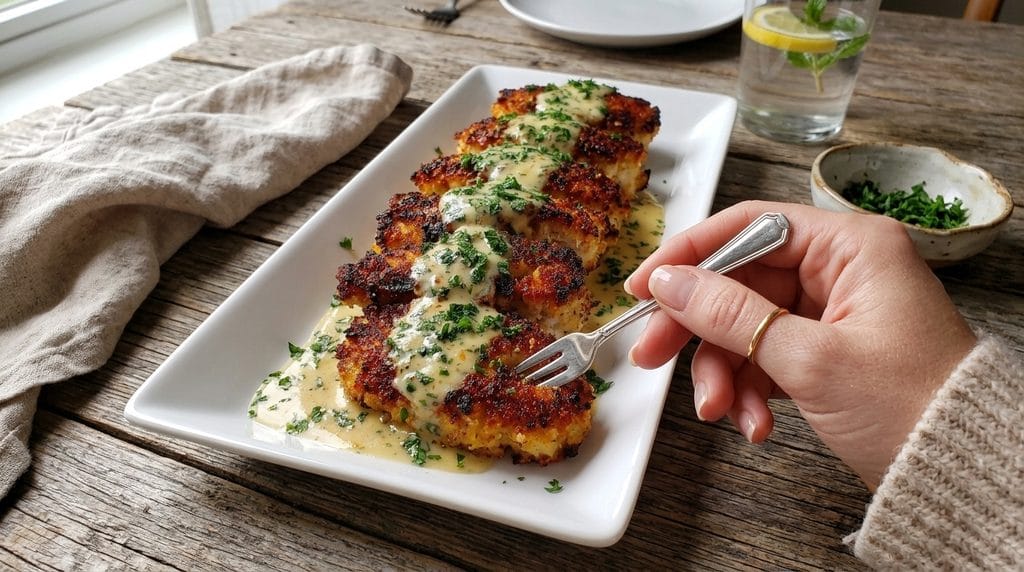
Crispy Parmesan Chicken Bites with Creamy Garlic Herb Sauce

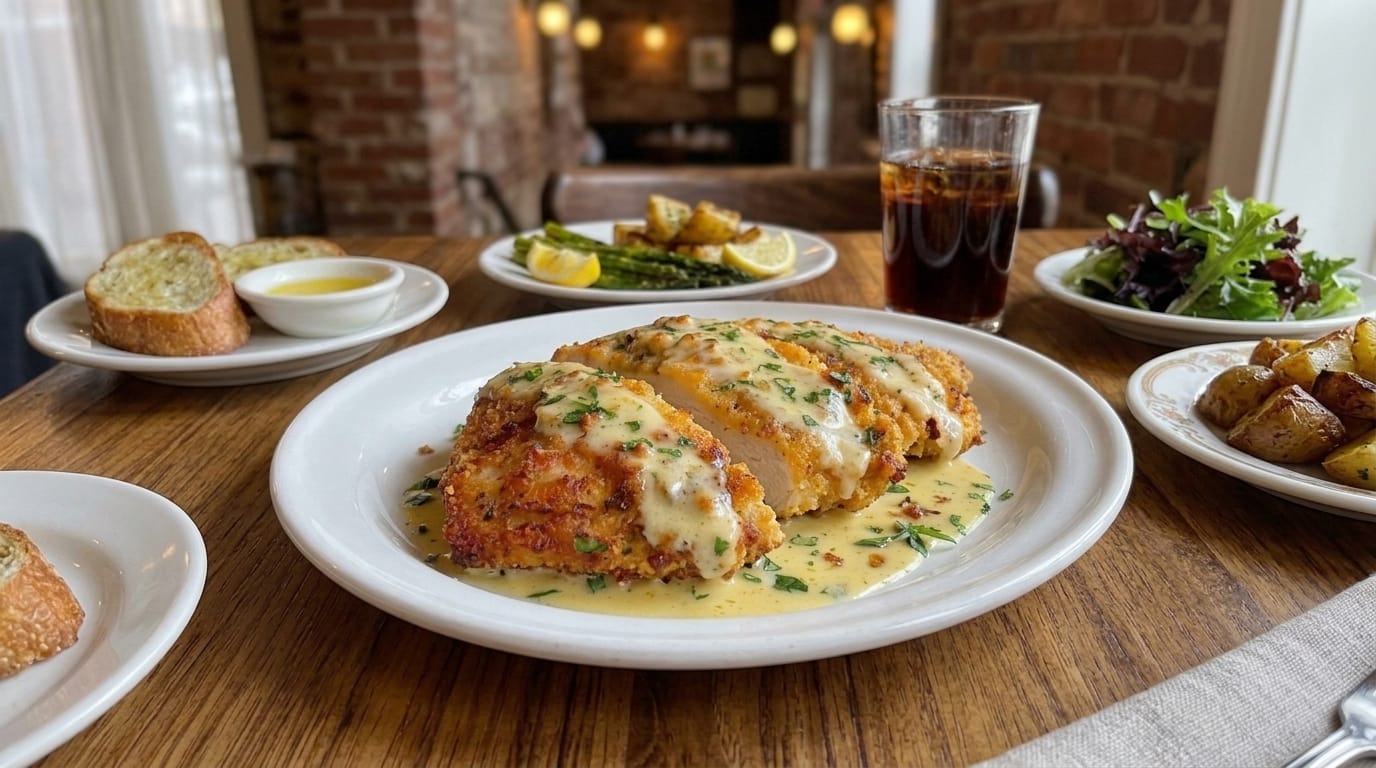
These Crispy Parmesan Chicken Bites are juicy pieces of chicken coated in a crunchy Parmesan breadcrumb crust, pan-seared until deeply golden, then served with a silky garlic herb cream sauce. The crisp exterior contrasts beautifully with the tender chicken and buttery Parmesan sauce, making this an impressive restaurant-style dinner that is still easy enough for a weeknight.

Why You’ll Love It

  • Extra-crispy Parmesan crust with juicy chicken inside
  • Rich garlic herb cream sauce adds incredible flavor
  • Bite-size pieces cook quickly and evenly
  • Perfect with potatoes, pasta, rice, or vegetables

Ingredients Overview

Chicken Bites

  • 1½ lbs boneless, skinless chicken breasts
  • 1 tsp garlic powder
  • 1 tsp onion powder
  • ½ tsp smoked paprika
  • ¾ tsp salt
  • ½ tsp black pepper

Parmesan Coating

  • ½ cup all-purpose flour
  • 2 large eggs
  • 2 tbsp milk
  • 1 cup panko breadcrumbs
  • ¾ cup freshly grated Parmesan cheese
  • 1 tsp Italian seasoning
  • ½ tsp garlic powder
  • 3 tbsp olive oil
  • 2 tbsp unsalted butter

Creamy Garlic Herb Sauce

  • 3 tbsp unsalted butter
  • 5 garlic cloves, minced
  • ½ cup chicken broth
  • 1 cup heavy cream
  • ¾ cup freshly grated Parmesan cheese
  • 1 tsp Dijon mustard
  • ½ tsp Italian seasoning
  • 2 tbsp fresh parsley, chopped
  • 1 tsp fresh thyme leaves
  • ¼ tsp crushed red pepper flakes, optional
  • Salt and black pepper to taste

Garnish

  • Fresh parsley, chopped
  • Extra Parmesan cheese
  • Freshly cracked black pepper

Step-by-Step Instructions

1. Prepare the Chicken

Cut the chicken breasts into approximately 2-inch pieces or thick strips.

Pat them thoroughly dry with paper towels.

Season evenly with garlic powder, onion powder, smoked paprika, salt, and black pepper.

2. Prepare the Breading

Place the flour in a shallow bowl.

In a second bowl, whisk together the eggs and milk.

In a third bowl, combine the panko breadcrumbs, Parmesan cheese, Italian seasoning, and garlic powder.

3. Coat the Chicken

Dip each chicken piece lightly into the flour.

Shake off the excess.

Dip into the egg mixture, then press firmly into the Parmesan breadcrumb mixture until completely coated.

Let the breaded chicken rest for about 5 minutes before cooking.

4. Cook Until Crispy

Heat olive oil and butter in a large skillet over medium heat.

Arrange the chicken in a single layer without overcrowding the pan.

Cook for approximately 3–4 minutes per side, until deeply golden and crispy.

The thickest pieces should reach an internal temperature of 165°F (74°C).

Transfer the cooked chicken to a plate.

5. Start the Garlic Sauce

Reduce the skillet heat to medium-low.

Add butter and minced garlic.

Cook for about 30 seconds, stirring constantly, until fragrant.

Pour in the chicken broth and scrape up the flavorful browned bits from the skillet.

6. Make the Cream Sauce

Add the heavy cream, Dijon mustard, Italian seasoning, parsley, thyme, red pepper flakes if using, and black pepper.

Bring to a gentle simmer.

Cook for 3–4 minutes, stirring occasionally.

7. Add the Parmesan

Reduce the heat to low.

Gradually stir in the Parmesan cheese.

Continue stirring until completely melted and the sauce becomes smooth, creamy, and slightly thickened.

Taste and adjust the salt and pepper if needed.

8. Assemble

Spoon some of the creamy garlic herb sauce across a serving platter.

Arrange the crispy Parmesan chicken bites over the sauce.

Drizzle additional sauce down the center while leaving plenty of crispy crust exposed.

9. Serve

Finish generously with chopped fresh parsley, extra Parmesan, and cracked black pepper.

Serve immediately while the chicken is crisp and the sauce is warm and creamy.

Cooking Tips

  • Cut the chicken into similar-sized pieces so everything cooks evenly.
  • Panko breadcrumbs create a crunchier crust than traditional breadcrumbs.
  • Keep the skillet at medium heat so the Parmesan coating does not burn.
  • Cook the chicken in batches if necessary rather than overcrowding the pan.
  • Use freshly grated Parmesan for a smoother cream sauce.
  • Add the sauce just before serving so the chicken stays crispy.
  • If the sauce becomes too thick, loosen it with a splash of chicken broth or cream.

Serving Suggestions

Serve these crispy Parmesan chicken bites with:

  • Creamy mashed potatoes
  • Garlic butter pasta
  • Parmesan roasted potatoes
  • Roasted asparagus
  • Garlic green beans
  • Steamed rice
  • Caesar salad

Storage

Store leftover chicken and creamy sauce separately in airtight containers in the refrigerator for up to 3 days.

Reheat the chicken in a 375°F (190°C) oven or air fryer until hot and crisp.

Warm the sauce gently over low heat, adding a splash of chicken broth or cream if necessary.

Leftover Ideas

  • Toss the chicken bites with fettuccine and extra Parmesan sauce.
  • Add them to a Caesar salad for a crispy chicken lunch.
  • Stuff them into toasted rolls with mozzarella.
  • Serve leftovers over mashed potatoes with warm garlic sauce.
  • Chop the chicken and turn it into a creamy pasta bake.

FAQs

Can I bake the chicken instead of pan-frying it?
Yes. Bake at 425°F (220°C) for approximately 18–22 minutes, flipping halfway through, until golden and cooked to 165°F.

Can I use chicken thighs?
Yes. Boneless, skinless thighs work beautifully and stay especially juicy.

Can I air fry the chicken bites?
Yes. Air fry at 400°F (200°C) for about 10–12 minutes, turning halfway through.

How do I keep the coating crispy?
Serve most of the creamy sauce underneath the chicken and drizzle only a small amount over the top immediately before serving.

Final Thoughts

Crispy Parmesan Chicken Bites with Creamy Garlic Herb Sauce combine crunchy golden chicken, buttery garlic, fresh herbs, and a silky Parmesan cream sauce in one irresistible dinner. Rich, crispy, and comforting, this restaurant-inspired recipe is perfect for family meals, entertaining, or whenever you want something extra satisfying.

Crispy Parmesan Chicken with Creamy Garlic Butter Sauce

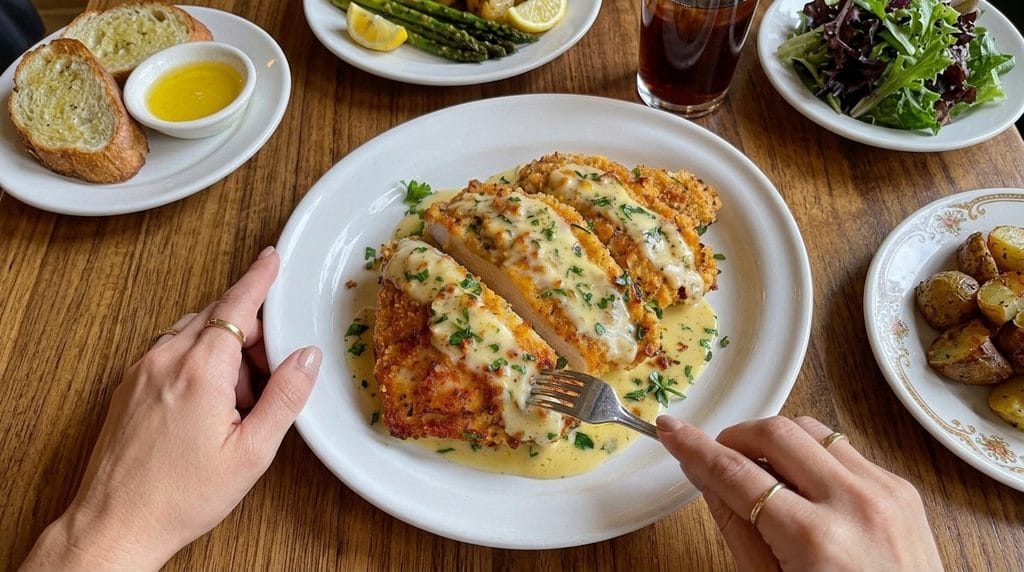
This Crispy Parmesan Chicken with Creamy Garlic Butter Sauce features juicy chicken breasts coated in a crunchy Parmesan breadcrumb crust, pan-seared until beautifully golden, then served with a rich garlic-Parmesan cream sauce. The contrast between the crisp chicken and silky herb-infused sauce makes this an impressive restaurant-style dinner that is still easy enough for a weeknight meal.

Why You’ll Love It

  • Crispy golden Parmesan crust with juicy chicken inside
  • Rich garlic butter cream sauce packed with savory flavor
  • Restaurant-style presentation using simple ingredients
  • Perfect with asparagus, mashed potatoes, pasta, or vegetables

Ingredients Overview

Chicken

  • 4 boneless, skinless chicken breasts
  • 1 tsp garlic powder
  • 1 tsp onion powder
  • ½ tsp smoked paprika
  • ¾ tsp salt
  • ½ tsp black pepper

Parmesan Crust

  • ½ cup all-purpose flour
  • 2 large eggs
  • 2 tbsp milk
  • 1 cup panko breadcrumbs
  • ¾ cup freshly grated Parmesan cheese
  • 1 tsp Italian seasoning
  • ½ tsp garlic powder
  • 3 tbsp olive oil
  • 2 tbsp unsalted butter

Creamy Garlic Butter Sauce

  • 3 tbsp unsalted butter
  • 5 garlic cloves, minced
  • 1 cup heavy cream
  • ½ cup chicken broth
  • ¾ cup freshly grated Parmesan cheese
  • 1 tsp Dijon mustard
  • ½ tsp Italian seasoning
  • 1 tbsp fresh parsley, chopped
  • 1 tsp fresh thyme leaves
  • ¼ tsp crushed red pepper flakes, optional
  • Salt and black pepper to taste

Garnish

  • Fresh parsley, chopped
  • Extra Parmesan cheese
  • Fresh thyme
  • Freshly cracked black pepper

Step-by-Step Instructions

1. Prepare the Chicken

Place the chicken breasts between two sheets of parchment paper or plastic wrap.

Gently pound them to an even thickness of about ½–¾ inch.

Pat the chicken dry and season both sides with garlic powder, onion powder, smoked paprika, salt, and black pepper.

2. Prepare the Breading Station

Place the flour in one shallow bowl.

In a second bowl, whisk together the eggs and milk.

In a third bowl, combine panko breadcrumbs, Parmesan, Italian seasoning, and garlic powder.

3. Bread the Chicken

Coat each chicken breast lightly in flour and shake off any excess.

Dip into the egg mixture.

Press firmly into the Parmesan breadcrumb mixture until completely coated on both sides.

Let the breaded chicken rest for about 5 minutes before cooking.

4. Cook the Chicken

Heat olive oil and butter in a large skillet over medium heat.

Add the chicken without overcrowding the pan.

Cook for approximately 4–5 minutes per side, until the coating is deeply golden and crisp.

The thickest part of the chicken should reach 165°F (74°C).

Transfer the cooked chicken to a plate and keep warm.

5. Start the Garlic Butter Sauce

Reduce the skillet heat to medium-low.

Add butter and minced garlic.

Cook for about 30 seconds, stirring constantly, until fragrant.

Pour in the chicken broth and scrape up the flavorful browned bits from the bottom of the skillet.

6. Make the Cream Sauce

Add heavy cream, Dijon mustard, Italian seasoning, parsley, thyme, red pepper flakes if using, and black pepper.

Bring to a gentle simmer.

Cook for 3–4 minutes, stirring occasionally.

7. Add the Parmesan

Reduce the heat to low.

Gradually stir in the Parmesan cheese.

Continue stirring until the cheese melts and the sauce becomes smooth, glossy, and slightly thickened.

Taste and adjust the seasoning if needed.

8. Slice the Chicken

Allow the chicken to rest for about 5 minutes.

Slice each breast diagonally into thick strips.

This creates an attractive presentation while making the chicken easier to serve.

9. Serve

Spoon some of the creamy garlic butter sauce onto each serving plate.

Arrange the sliced crispy chicken over the sauce.

Drizzle a small amount over the top while leaving plenty of the golden crust exposed.

Finish with chopped parsley, Parmesan, thyme, and cracked black pepper.

Cooking Tips

  • Pound the chicken evenly so every piece cooks at the same rate.
  • Panko breadcrumbs provide a crispier crust than traditional breadcrumbs.
  • Keep the skillet around medium heat so the Parmesan coating browns without burning.
  • Cook in batches if necessary rather than overcrowding the pan.
  • Use freshly grated Parmesan for a smoother cream sauce.
  • Add the sauce immediately before serving to preserve the crispy coating.
  • If the sauce becomes too thick, loosen it with a splash of chicken broth or cream.

Serving Suggestions

Serve this crispy Parmesan chicken with:

  • Roasted asparagus
  • Garlic mashed potatoes
  • Parmesan roasted potatoes
  • Fettuccine or linguine
  • Garlic green beans
  • Roasted broccoli
  • Caesar salad

Storage

Store leftover chicken and sauce separately in airtight containers in the refrigerator for up to 3 days.

Reheat the chicken in a 375°F (190°C) oven or air fryer until hot and crisp.

Warm the cream sauce gently over low heat with a small splash of broth or cream.

Leftover Ideas

  • Slice leftover chicken over Caesar salad.
  • Serve it with pasta and extra garlic Parmesan sauce.
  • Make crispy chicken sandwiches with mozzarella and toasted bread.
  • Serve chicken strips over mashed potatoes with warm sauce.
  • Chop leftovers and use them in a creamy chicken pasta bake.

FAQs

Can I bake the chicken instead of pan-frying it?
Yes. Bake at 425°F (220°C) for approximately 20–25 minutes, flipping once, until golden and cooked through.

Can I use chicken thighs?
Yes. Boneless, skinless chicken thighs work well and remain especially juicy.

Can I make the sauce lighter?
Yes. Replace some of the heavy cream with half-and-half or additional chicken broth.

How do I keep the coating crispy?
Do not completely cover the chicken with sauce. Spoon the sauce underneath and drizzle only a little over the top just before serving.

Final Thoughts

Crispy Parmesan Chicken with Creamy Garlic Butter Sauce combines juicy chicken, a crunchy Parmesan crust, buttery garlic, fresh herbs, and a silky cream sauce in one irresistible meal. Rich, golden, and restaurant-inspired, it is perfect for family dinners, date nights, or anytime you want an impressive chicken dish without complicated preparation.

Baked Lemon Garlic Chicken Thighs

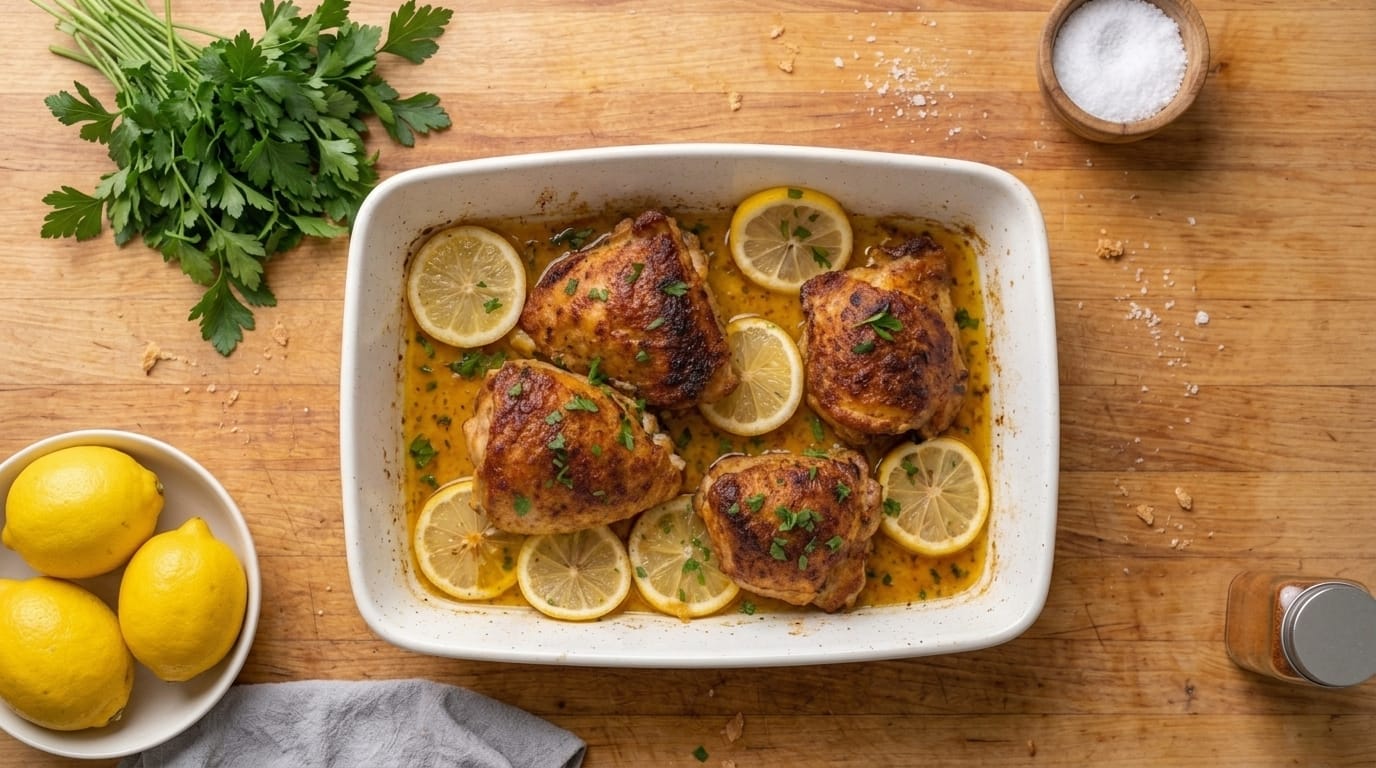
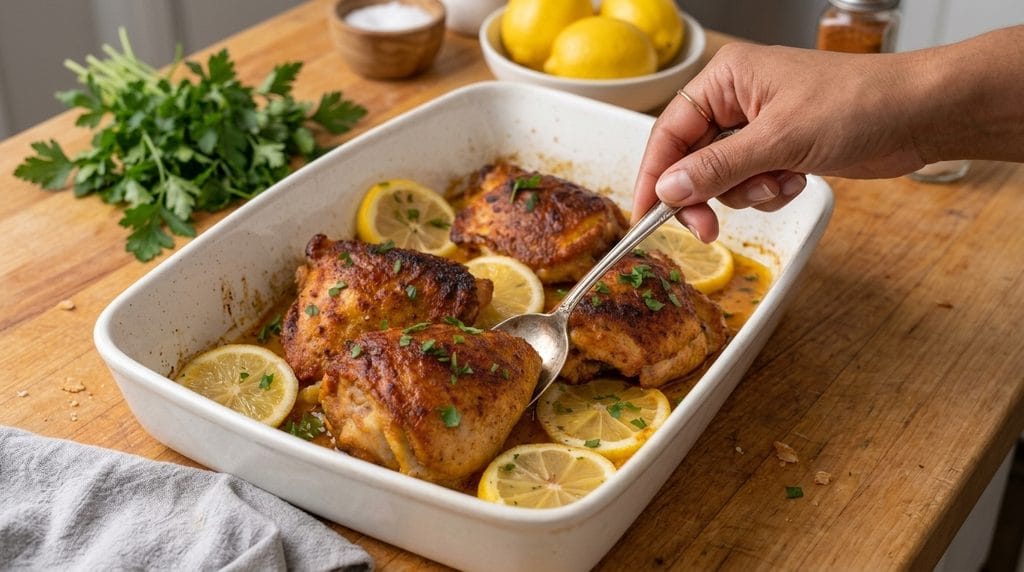
These Baked Lemon Garlic Chicken Thighs are juicy, golden, and bursting with bright citrus and savory garlic flavor. Bone-in chicken thighs are seasoned with herbs and spices, then baked with fresh lemon slices in a buttery pan sauce until the skin becomes beautifully caramelized and the meat stays incredibly tender. It’s an easy, comforting dinner that feels fresh enough for spring and summer yet cozy enough for year-round family meals.

Why You’ll Love It

  • Juicy chicken thighs with beautifully browned, flavorful skin
  • Fresh lemon and garlic create a bright, savory pan sauce
  • Easy oven-baked preparation with minimal hands-on work
  • Perfect with potatoes, rice, vegetables, or crusty bread

Ingredients Overview

Chicken

  • 6 bone-in, skin-on chicken thighs
  • 1½ tbsp olive oil
  • 1 tsp garlic powder
  • 1 tsp onion powder
  • 1 tsp smoked paprika
  • 1 tsp dried oregano
  • 1 tsp salt
  • ½ tsp black pepper

Lemon Garlic Butter Sauce

  • 4 tbsp unsalted butter, melted
  • 5 garlic cloves, minced
  • ⅓ cup fresh lemon juice
  • 1 tsp lemon zest
  • ½ cup chicken broth
  • 1 tbsp honey
  • 1 tsp Dijon mustard
  • ½ tsp dried thyme
  • ¼ tsp crushed red pepper flakes, optional

For Baking

  • 1 large lemon, thinly sliced
  • 2 tbsp fresh parsley, chopped
  • Fresh thyme or oregano, optional

Step-by-Step Instructions

1. Prepare the Chicken

Preheat the oven to 400°F (200°C).

Pat the chicken thighs thoroughly dry with paper towels.

Dry skin is important because excess moisture prevents the chicken from developing a beautifully browned exterior.

Season both sides with garlic powder, onion powder, smoked paprika, oregano, salt, and black pepper.

2. Sear the Chicken

Heat olive oil in a large oven-safe skillet over medium-high heat.

Place the chicken thighs skin-side down.

Sear without moving for 4–5 minutes, until the skin becomes deeply golden and releases easily from the pan.

Flip and cook for another 2 minutes.

Transfer the chicken briefly to a plate.

3. Make the Lemon Garlic Sauce

Reduce the skillet heat to medium-low.

Add the melted butter and minced garlic.

Cook for about 30 seconds, stirring continuously until fragrant.

Pour in the lemon juice and chicken broth.

Stir in lemon zest, honey, Dijon mustard, thyme, and red pepper flakes if using.

Simmer for 2–3 minutes.

4. Assemble the Baking Dish

If using a separate baking dish, pour the lemon garlic sauce into the bottom.

Arrange the chicken thighs skin-side up in a single layer.

Place fresh lemon slices around and between the pieces of chicken.

Spoon a small amount of sauce over the meat while keeping most of the crispy skin exposed.

5. Bake

Transfer the dish to the preheated oven.

Bake uncovered for approximately 30–35 minutes, depending on the size of the thighs.

The chicken should be golden and the juices should run clear.

For food safety, the thickest portion should reach at least 165°F (74°C) without touching the bone.

6. Caramelize the Skin

For an especially golden finish, switch the oven to broil.

Broil for 1–3 minutes, watching carefully.

The skin should become deeply caramelized without burning.

7. Rest the Chicken

Remove the baking dish from the oven.

Allow the chicken to rest for about 5 minutes.

This helps the juices redistribute through the meat.

8. Serve

Spoon the warm lemon garlic pan juices around the chicken.

Sprinkle generously with fresh parsley.

Finish with additional lemon slices, cracked black pepper, and fresh thyme if desired.

Serve immediately.

Cooking Tips

  • Use skin-on thighs for the richest flavor and most attractive golden finish.
  • Pat the chicken completely dry before seasoning.
  • Searing before baking adds deeper color and creates crispier skin.
  • Keep most of the sauce underneath the chicken so the skin stays crisp.
  • Fresh lemon juice gives a much brighter flavor than bottled juice.
  • Avoid overcooking; use an instant-read thermometer for accuracy.
  • For very tender dark meat, chicken thighs can comfortably cook slightly beyond 165°F.

Serving Suggestions

Serve these baked lemon garlic chicken thighs with:

  • Garlic mashed potatoes
  • Roasted baby potatoes
  • Steamed jasmine rice
  • Roasted asparagus
  • Green beans
  • Broccoli
  • Fresh garden salad
  • Warm crusty bread

Storage

Store leftover chicken and pan sauce in an airtight container in the refrigerator for up to 4 days.

Reheat in a 350°F (175°C) oven until warmed through.

For crispier skin, reheat uncovered or place under the broiler briefly at the end.

Leftover Ideas

  • Slice leftover chicken and serve it over rice with lemon pan sauce.
  • Add chopped chicken to pasta with Parmesan and herbs.
  • Use the meat in wraps with lettuce and garlic sauce.
  • Serve leftovers over a fresh Mediterranean-style salad.
  • Shred the chicken into a lemony soup with vegetables and rice.

FAQs

Can I use boneless chicken thighs?
Yes. Boneless thighs work well but cook faster, so begin checking them after about 20 minutes.

Can I use chicken breasts?
Yes. Bone-in or boneless chicken breasts can be substituted, although cooking times will vary depending on thickness.

Can I make this recipe ahead of time?
Yes. Season the chicken and prepare the lemon garlic sauce several hours ahead. Refrigerate separately, then assemble and bake when ready.

Can I add potatoes to the baking dish?
Absolutely. Parboiled baby potatoes can be arranged around the chicken and will soak up the flavorful lemon garlic juices.

Can I make the sauce creamier?
Yes. Stir ½ cup heavy cream into the pan sauce after the chicken has finished cooking for a creamy lemon garlic variation.

Final Thoughts

Baked Lemon Garlic Chicken Thighs combine juicy, tender chicken with fresh citrus, buttery garlic, herbs, and beautifully caramelized skin in one simple oven-baked dinner. Bright yet comforting and easy enough for weeknights, this flavorful chicken dish is perfect for family dinners, entertaining, or anytime you want a reliable meal with restaurant-style flavor.

#LemonGarlicChicken #BakedChickenThighs #ChickenRecipes #EasyDinner #FamilyDinner

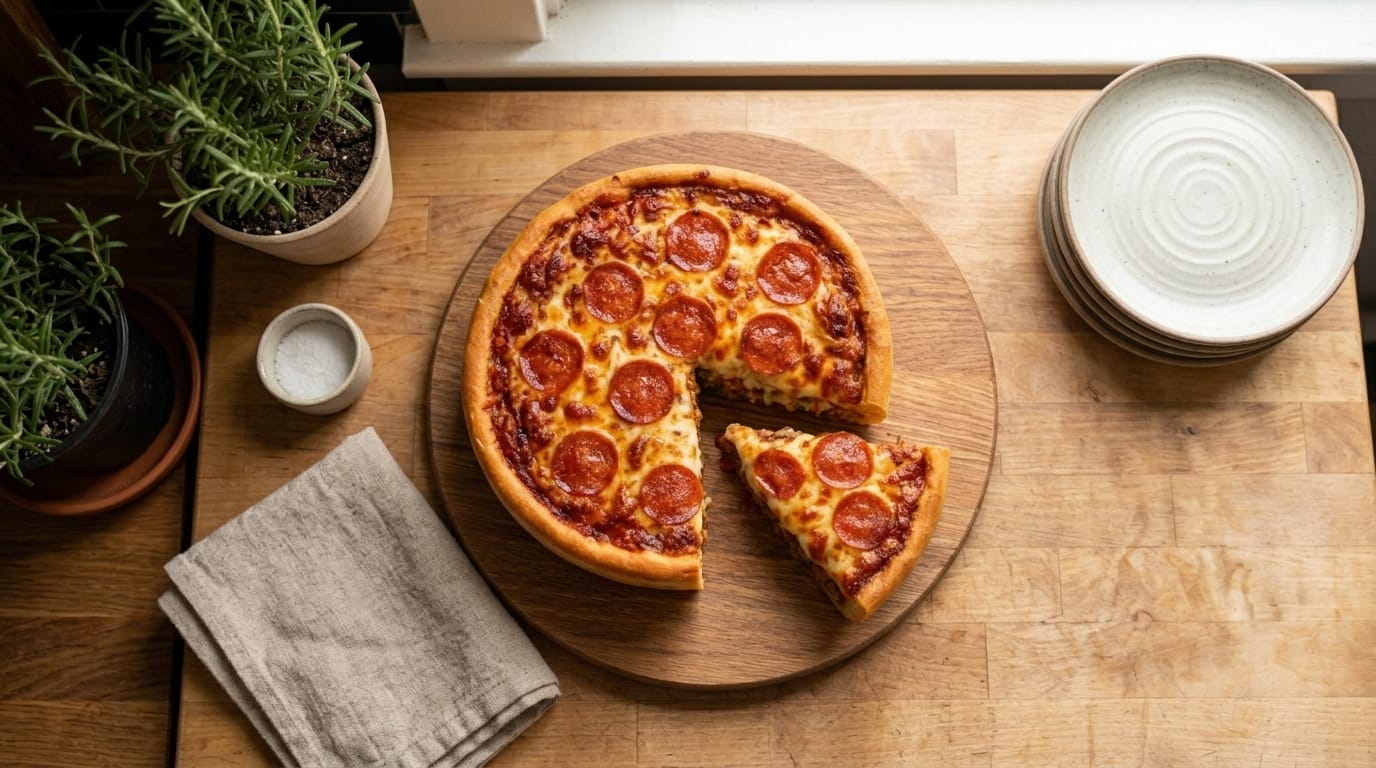
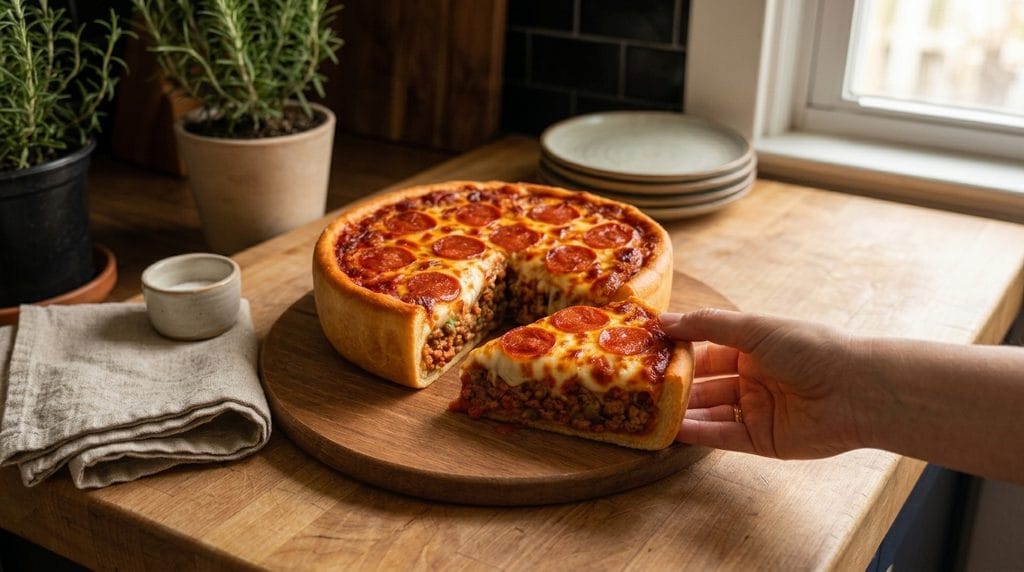
Deep-Dish Pepperoni Cheeseburger Pizza Pie

This Deep-Dish Pepperoni Cheeseburger Pizza Pie combines two comfort-food favorites in one impressive dinner. A thick, golden pizza crust is packed with savory seasoned ground beef, rich tomato sauce, and plenty of melted cheese, then topped with classic pepperoni and baked until bubbly and deeply golden. Every thick slice delivers a crisp crust, hearty beef filling, stretchy cheese, and bold pizza flavor.

Why You’ll Love It

  • Thick, golden crust filled with juicy seasoned ground beef
  • Layers of mozzarella and pepperoni make every slice extra cheesy
  • Hearty enough to serve as a complete family dinner
  • Impressive deep-dish presentation without complicated ingredients

Ingredients Overview

Pizza Dough

  • 1 lb prepared pizza dough
  • 2 tbsp olive oil
  • 1 tbsp cornmeal, optional
  • 1 tbsp melted butter

Beef Filling

  • 1½ lbs ground beef
  • 1 tbsp olive oil
  • 1 small yellow onion, finely diced
  • 3 garlic cloves, minced
  • 2 tbsp tomato paste
  • 1 tsp Italian seasoning
  • 1 tsp garlic powder
  • ½ tsp onion powder
  • ½ tsp smoked paprika
  • 1 tsp salt
  • ½ tsp black pepper
  • 1 tbsp Worcestershire sauce
  • ¾ cup pizza sauce

Cheese Layer

  • 2½ cups shredded mozzarella cheese
  • 1 cup shredded provolone or Monterey Jack
  • ½ cup freshly grated Parmesan cheese

Pizza Topping

  • 1½ cups pizza or marinara sauce
  • 25–30 pepperoni slices
  • ½ tsp Italian seasoning
  • ¼ tsp crushed red pepper flakes, optional

Step-by-Step Instructions

1. Prepare the Pan

Preheat the oven to 425°F (220°C).

Generously grease a 9-inch springform pan or deep cake pan with olive oil.

Sprinkle the bottom lightly with cornmeal if using.

This helps prevent sticking while adding a subtle crisp texture to the bottom crust.

2. Cook the Ground Beef

Heat olive oil in a large skillet over medium-high heat.

Add the ground beef and cook for 6–8 minutes, breaking it into small crumbles.

When the beef is mostly browned, add the diced onion.

Continue cooking for another 3–4 minutes, until the onion softens.

Drain excess grease.

3. Season the Filling

Add garlic and tomato paste to the beef.

Cook for about 1 minute, stirring constantly.

Add Italian seasoning, garlic powder, onion powder, smoked paprika, salt, black pepper, and Worcestershire sauce.

Stir in ¾ cup pizza sauce.

Simmer for 4–5 minutes, until the mixture is thick and saucy.

Remove from the heat and let it cool slightly.

A thick filling is important so the pizza pie slices cleanly instead of becoming watery.

4. Shape the Deep-Dish Crust

Place the pizza dough on a lightly floured surface.

Roll it into a circle approximately 14 inches wide.

Carefully transfer the dough into the prepared pan.

Press it firmly across the bottom and several inches up the sides.

Allow a little dough to rise above the edge because it will shrink slightly during baking.

5. Create the Cheese Base

Sprinkle about 1 cup mozzarella evenly across the bottom of the crust.

Add half of the provolone and a little Parmesan.

This cheese layer creates a barrier between the crust and beef filling, helping keep the bottom from becoming soggy.

6. Add the Beef Filling

Spoon the seasoned ground beef mixture over the cheese.

Spread it into an even layer and gently press it down.

Add another cup of mozzarella over the beef.

7. Add the Pizza Sauce

Spread the remaining pizza sauce evenly over the cheese.

Keep the sauce slightly away from the exposed crust edges.

Sprinkle with Italian seasoning and red pepper flakes if desired.

8. Add Cheese and Pepperoni

Cover the top generously with the remaining mozzarella, provolone, and Parmesan.

Arrange the pepperoni slices evenly across the cheese.

Brush the exposed crust with melted butter for a richer golden finish.

9. Bake

Place the pan on a baking sheet to catch any drips.

Bake for 30–40 minutes, or until the crust is deeply golden and the cheese is bubbling.

If the crust browns too quickly, loosely cover the edges with foil.

The ground beef filling should reach at least 160°F (71°C).

10. Rest Before Slicing

Remove the pizza pie from the oven.

Let it rest for at least 15–20 minutes before removing it from the pan.

This step is important because the cheese and beef filling need time to set.

Carefully release the springform pan or run a knife around the edges of a regular pan.

11. Slice and Serve

Transfer the deep-dish pizza pie to a cutting board.

Cut into thick wedges with a sharp knife.

Serve while warm, with extra pizza sauce or Parmesan if desired.

Cooking Tips

  • Drain the ground beef thoroughly so the filling stays thick rather than greasy.
  • Let the beef mixture cool slightly before assembling the pizza.
  • Use low-moisture mozzarella for better melting and less excess liquid.
  • Press the pizza dough firmly into the corners of the pan to create sturdy sides.
  • Do not skip the resting period after baking; it helps the thick slices hold together.
  • Place the springform pan on a sheet pan while baking in case cheese or sauce bubbles over.

Serving Suggestions

Serve this deep-dish pepperoni cheeseburger pizza pie with:

  • Caesar salad
  • Garlic bread
  • Roasted vegetables
  • Crispy potato wedges
  • Marinara sauce for dipping
  • Fresh cucumber and tomato salad

Storage

Allow leftovers to cool completely before storing.

Refrigerate individual slices in an airtight container for up to 4 days.

For the best texture, reheat in a 375°F (190°C) oven for approximately 10–15 minutes until the crust becomes crisp again and the cheese is hot.

An air fryer also works well for individual slices.

Leftover Ideas

  • Chop leftover slices and turn them into a cheesy pizza casserole.
  • Serve reheated wedges with fried eggs for a hearty brunch.
  • Add extra mozzarella and pepperoni before reheating.
  • Cut cold slices into smaller pieces and reheat them as party appetizers.

FAQs

Can I use store-bought pizza dough?
Yes. Refrigerated or bakery pizza dough works perfectly and saves considerable preparation time.

Can I use Italian sausage instead of ground beef?
Absolutely. Italian sausage, or a combination of sausage and beef, gives the filling even more pizza-style flavor.

Can I add vegetables?
Yes. Mushrooms, bell peppers, olives, jalapeños, or sautéed onions can be layered into the filling.

What cheese works best?
Low-moisture mozzarella is essential for that stretchy pizza texture. Provolone, cheddar, Monterey Jack, and Parmesan can be added for extra flavor.

Can I make it ahead?
You can prepare the beef filling up to 2 days ahead. Assemble the pizza shortly before baking for the best crust texture.

Final Thoughts

Deep-Dish Pepperoni Cheeseburger Pizza Pie brings together a thick golden crust, juicy seasoned beef, rich tomato sauce, bubbling mozzarella, Parmesan, and crispy-edged pepperoni in one spectacular comfort-food centerpiece. Hearty, cheesy, and impressive when sliced, it is perfect for family dinners, game nights, parties, or anytime you cannot decide between a cheeseburger and pizza.

#DeepDishPizza #PepperoniPizza #CheeseburgerPizza #GroundBeefRecipes #FamilyDinner

Garlic Butter Steak Bites with Asparagus

These Garlic Butter Steak Bites with Asparagus are loaded with tender, juicy pieces of beef seared until deeply caramelized, then tossed in a rich garlic-herb butter pan sauce. Served alongside crisp-tender asparagus, this easy skillet dinner delivers steakhouse-style flavor with minimal preparation and is perfect for weeknights, date nights, or a quick high-protein meal.

Why You’ll Love It

  • Juicy steak bites with beautifully caramelized edges
  • Rich garlic butter sauce packed with savory flavor
  • Ready in about 25 minutes
  • Asparagus makes it an easy complete skillet dinner

Ingredients Overview

Steak Bites

  • 1½ lbs sirloin, ribeye, or New York strip steak
  • 1½ tbsp olive oil
  • 1 tsp kosher salt
  • ¾ tsp freshly ground black pepper
  • 1 tsp garlic powder
  • ½ tsp onion powder
  • ½ tsp smoked paprika

Garlic Butter Sauce

  • 4 tbsp unsalted butter
  • 5 garlic cloves, minced
  • 1 tbsp Worcestershire sauce
  • ½ cup beef broth
  • 1 tsp Dijon mustard
  • 1 tsp fresh thyme leaves
  • 1 tsp fresh rosemary, finely chopped
  • ¼ tsp crushed red pepper flakes, optional

Asparagus

  • 1 lb fresh asparagus, woody ends trimmed
  • 1 tbsp olive oil
  • ½ tsp garlic powder
  • ¼ tsp salt
  • ¼ tsp black pepper

Garnish

  • 2 tbsp fresh parsley, chopped
  • Fresh thyme, optional
  • Freshly cracked black pepper

Step-by-Step Instructions

1. Prepare the Steak

Pat the steak thoroughly dry with paper towels.

Cut it into approximately 1½-inch cubes.

Season with salt, black pepper, garlic powder, onion powder, and smoked paprika.

Let the seasoned steak rest for about 10 minutes while heating the skillet.

2. Cook the Asparagus

Heat 1 tablespoon olive oil in a large cast-iron or heavy skillet over medium-high heat.

Add the asparagus and season with garlic powder, salt, and black pepper.

Cook for 4–6 minutes, turning occasionally, until bright green and lightly caramelized while still slightly crisp.

Transfer to a plate and keep warm.

3. Sear the Steak Bites

Return the skillet to high heat.

Add the remaining olive oil.

When the pan is very hot, arrange the steak pieces in a single layer.

Avoid overcrowding the skillet; cook in batches if necessary.

Sear without moving for approximately 2 minutes.

Turn and cook for another 1–2 minutes, until browned on several sides.

Transfer the steak to a plate.

4. Start the Garlic Butter Sauce

Reduce the heat to medium.

Add butter to the same skillet.

Once melted, stir in the minced garlic.

Cook for about 30 seconds, stirring constantly, until fragrant.

5. Build the Pan Sauce

Pour in the beef broth and Worcestershire sauce.

Add Dijon mustard, thyme, rosemary, and crushed red pepper flakes if using.

Scrape the bottom of the skillet with a wooden spoon to release all the caramelized steak bits.

Simmer for 2–3 minutes until the sauce reduces slightly.

6. Return the Steak

Add the steak bites and any accumulated juices back to the skillet.

Toss gently in the garlic butter sauce.

Cook for another 1–2 minutes, just until warmed through.

For medium-rare steak bites, aim for an internal temperature around 130–135°F (54–57°C). For medium, cook closer to 140–145°F (60–63°C).

7. Finish with Butter and Herbs

Remove the skillet from the heat.

Add another small pat of butter if you want an especially glossy sauce.

Sprinkle with chopped parsley and freshly cracked black pepper.

Toss gently so every steak bite is coated.

8. Serve

Arrange the steak bites on serving plates with the sautéed asparagus.

Spoon the warm garlic butter pan sauce generously over the beef.

Serve immediately while the steak is juicy and the sauce is hot.

Cooking Tips

  • Choose sirloin for a leaner option or ribeye for richer, more buttery steak bites.
  • Pat the steak completely dry before cooking to create a better crust.
  • Use a very hot skillet and avoid overcrowding it.
  • Cook the steak in batches if necessary rather than steaming the meat.
  • Add garlic only after lowering the heat so it does not burn.
  • Steak bites cook very quickly, so remove them before they become overdone.
  • Let the pan sauce reduce slightly so it coats the beef rather than running off.

Serving Suggestions

Serve these garlic butter steak bites with:

  • Roasted asparagus
  • Creamy mashed potatoes
  • Garlic roasted baby potatoes
  • Steamed rice
  • Parmesan pasta
  • Roasted broccoli
  • Fresh garden salad

For a heartier dinner, mashed potatoes are especially good because they soak up the buttery garlic sauce.

Storage

Store leftover steak bites and sauce in an airtight container in the refrigerator for up to 3 days.

Keep the asparagus separately when possible for the best texture.

Reheat the steak gently in a skillet over low heat with a spoonful of beef broth or butter. Avoid prolonged reheating, which can make the beef tough.

Leftover Ideas

  • Add leftover steak bites to scrambled eggs for a hearty breakfast.
  • Serve them over rice with vegetables.
  • Stuff them into toasted rolls with melted provolone.
  • Add sliced steak to a Caesar or garden salad.
  • Toss leftovers with pasta and extra garlic butter sauce.

FAQs

What cut of steak is best for steak bites?
Sirloin is an excellent everyday choice because it is tender and relatively lean. Ribeye and New York strip provide even richer flavor.

Can I use frozen steak?
Yes. Thaw it completely in the refrigerator and dry it thoroughly before cutting and seasoning.

Can I add mushrooms?
Absolutely. Sauté 8 oz sliced mushrooms with the asparagus or cook them separately before searing the steak.

Can I make this spicy?
Yes. Increase the crushed red pepper flakes or add a small amount of cayenne pepper to the steak seasoning.

Can I use green beans instead of asparagus?
Yes. Green beans, broccoli, zucchini, or Brussels sprouts all pair beautifully with garlic butter steak.

Final Thoughts

Garlic Butter Steak Bites with Asparagus combine deeply seared beef, fresh garlic, butter, herbs, and savory pan juices in one quick and satisfying skillet dinner. Juicy, rich, and easy to prepare, this steakhouse-inspired recipe is perfect for busy weeknights, special dinners, or anytime you want bold beef flavor without cooking a whole steak.