Easy French Onion Meatloaf Recipe – Juicy, Savory, and Topped with Caramelized Onions and Melted Cheese

If you love classic meatloaf and rich French onion flavors, this French Onion Meatloaf brings the two comfort-food favorites together in one deeply satisfying dinner. A juicy, well-seasoned beef meatloaf is baked until tender, glazed with a savory onion-infused sauce, then topped with buttery caramelized onions and plenty of melted cheese.

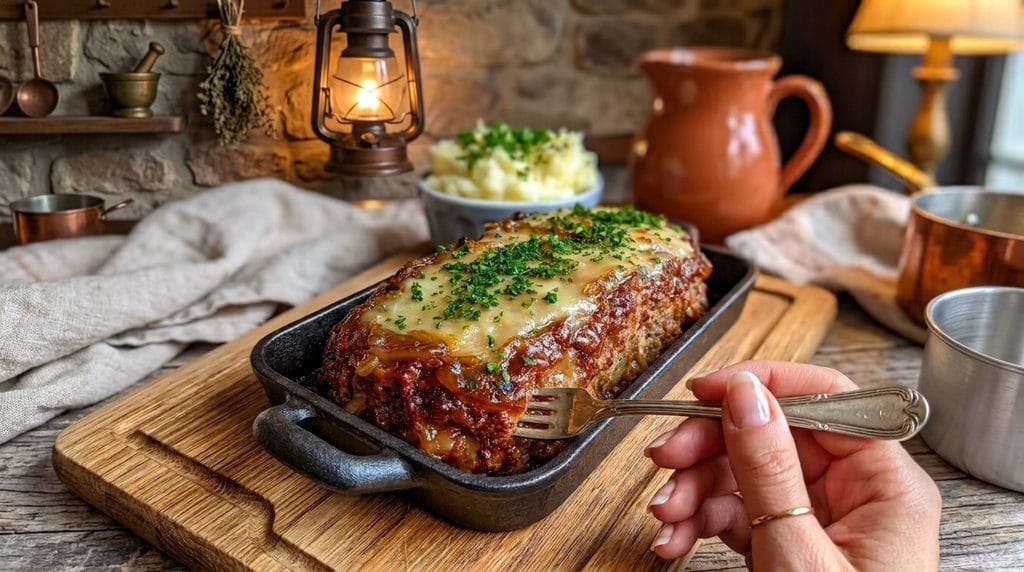
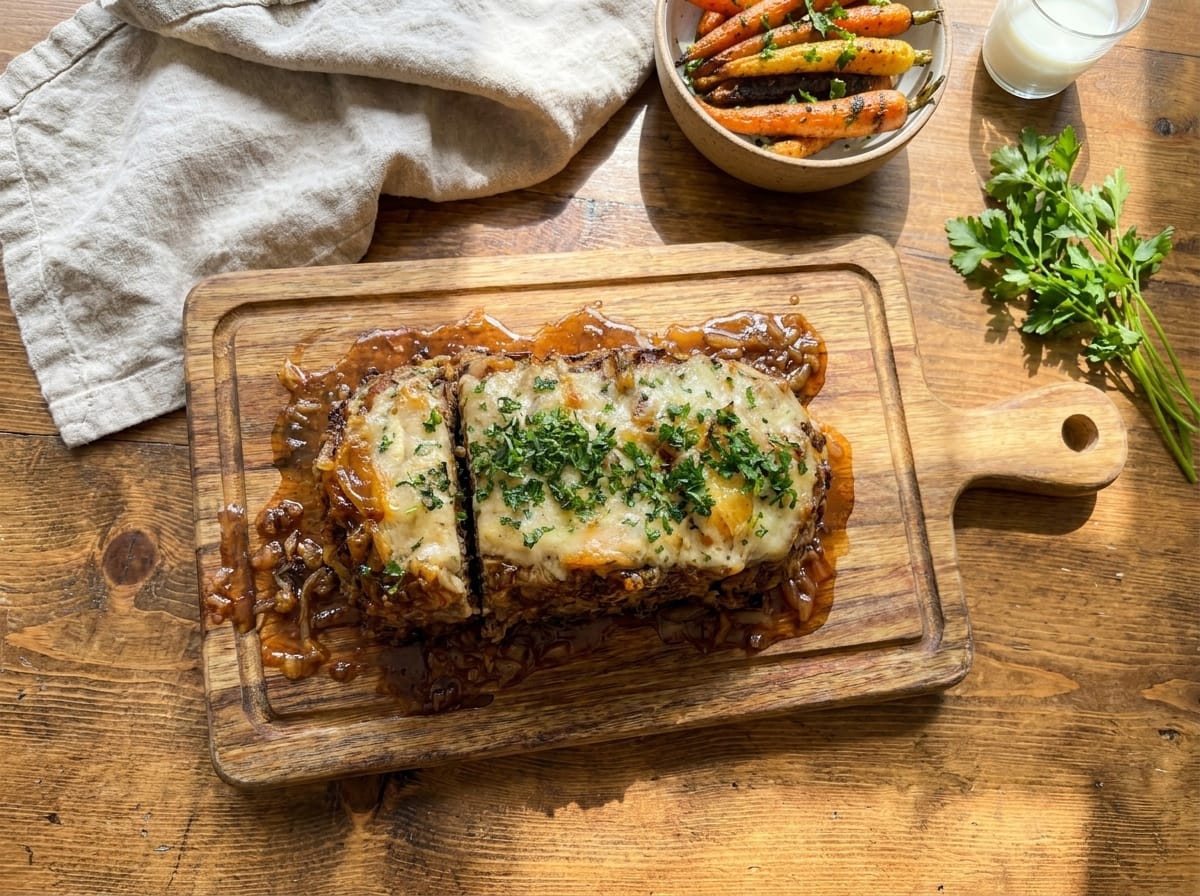
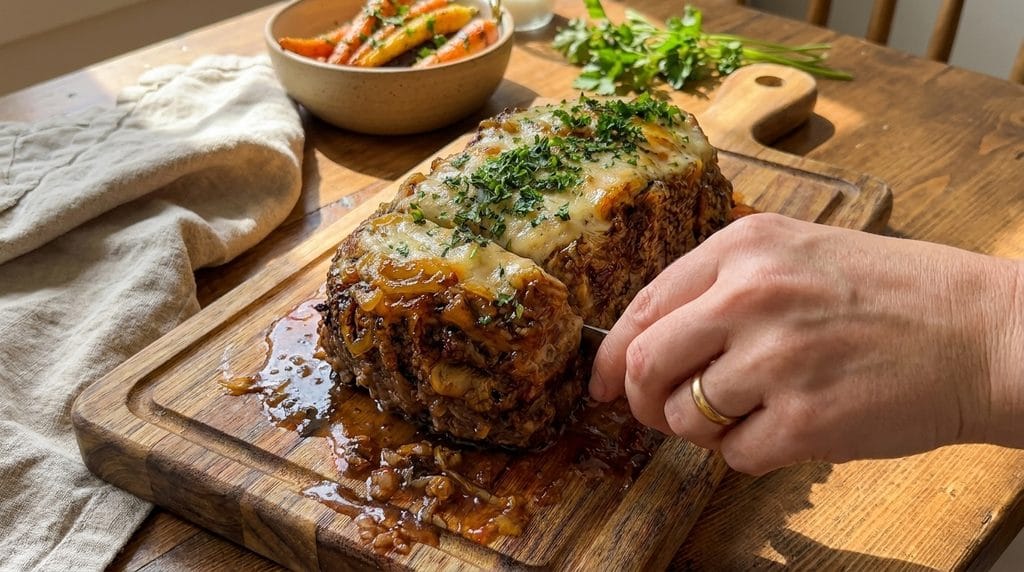
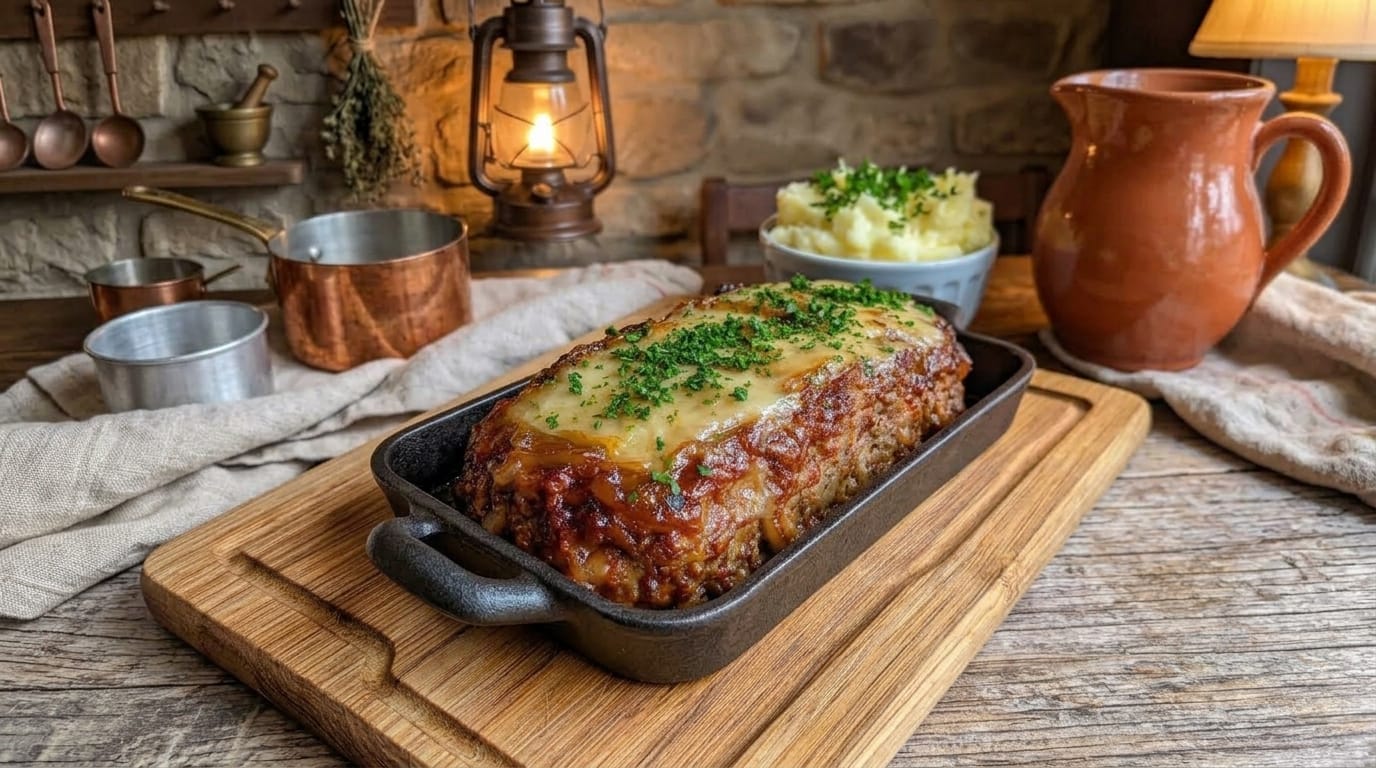
The caramelized onions provide natural sweetness and deep savory flavor, while Worcestershire sauce, garlic, beef broth, Dijon mustard, and herbs give the meatloaf a rich, steakhouse-style taste. A generous layer of melted Gruyère, Swiss, or provolone cheese over the top gives the finished loaf the creamy, golden appearance shown in the image.

This meatloaf is perfect for Sunday dinners, family meals, holidays, meal prep, or chilly evenings when you want comforting homemade food. Serve thick slices with creamy mashed potatoes and extra onion gravy for an especially satisfying meal.

Why You’ll Love This French Onion Meatloaf

The meatloaf stays tender and juicy while developing beautifully caramelized edges.

Slowly cooked onions provide the sweet and savory flavor associated with classic French onion soup.

Worcestershire sauce, beef broth, garlic, and Dijon mustard create deep beefy flavor.

Gruyère or Swiss cheese melts beautifully over the top.

The meatloaf can be assembled ahead, making it convenient for busy days.

Leftovers make excellent sandwiches and reheat very well.

You can customize the recipe with mushrooms, bacon, different cheeses, or additional herbs.

Ingredients

For the Caramelized Onions

  • 3 large yellow onions, thinly sliced
  • 3 tablespoons unsalted butter
  • 1 tablespoon olive oil
  • ½ teaspoon kosher salt
  • ¼ teaspoon freshly ground black pepper
  • 1 teaspoon brown sugar, optional
  • ½ teaspoon dried thyme
  • ½ cup low-sodium beef broth

For the Meatloaf

  • 2 pounds ground beef, preferably 80–85% lean
  • ¾ cup plain breadcrumbs
  • 2 large eggs
  • ½ cup whole milk
  • ½ cup caramelized onions, finely chopped
  • 3 garlic cloves, finely minced
  • 2 tablespoons Worcestershire sauce
  • 2 tablespoons ketchup
  • 1 tablespoon Dijon mustard
  • 1 teaspoon kosher salt
  • 1 teaspoon freshly ground black pepper
  • 1 teaspoon garlic powder
  • 1 teaspoon onion powder
  • 1 teaspoon Italian seasoning
  • ½ teaspoon dried thyme
  • ½ teaspoon smoked paprika
  • 2 tablespoons chopped fresh parsley

For the French Onion Glaze

  • ½ cup low-sodium beef broth
  • 2 tablespoons ketchup
  • 1 tablespoon Worcestershire sauce
  • 1 tablespoon Dijon mustard
  • 1 teaspoon brown sugar
  • ½ teaspoon garlic powder
  • ¼ teaspoon freshly ground black pepper

For the Cheese Topping

  • 1 cup shredded Gruyère cheese
  • ½ cup shredded Swiss, provolone, or mozzarella cheese

Optional Finishing Ingredients

  • Fresh chopped parsley
  • Fresh thyme leaves
  • Additional caramelized onions
  • Freshly cracked black pepper
  • Extra Gruyère
  • Crispy fried onions
  • Chopped chives

How to Make French Onion Meatloaf

1. Preheat the Oven

Preheat your oven to 375°F (190°C).

Lightly grease a loaf pan or small roasting dish.

For easier removal, line the pan with parchment paper, leaving some overhang along the sides.

2. Prepare the Onions

Peel the onions.

Slice them thinly and as evenly as possible.

Even slices will caramelize at approximately the same rate.

3. Heat the Skillet

Place a large skillet over medium heat.

Add:

  • Butter
  • Olive oil

Allow the butter to melt.

4. Add the Onions

Add the sliced onions.

Season with:

  • Salt
  • Black pepper

Stir until all of the onions are coated with butter.

5. Begin Caramelizing

Reduce the heat to medium-low.

Cook for approximately 20–30 minutes, stirring every few minutes.

The onions should gradually soften and turn golden rather than becoming dark immediately.

6. Add Optional Brown Sugar

If you want slightly sweeter onions, stir in 1 teaspoon brown sugar.

This is optional because onions naturally become sweeter as they caramelize.

7. Add Thyme

Stir in the dried thyme.

Continue cooking until fragrant.

8. Deglaze the Skillet

Pour in approximately ½ cup beef broth.

Scrape the bottom of the skillet to release any caramelized onion bits.

9. Reduce the Liquid

Continue cooking for approximately 3–5 minutes.

Most of the broth should evaporate.

The onions should become soft, golden, and glossy.

10. Divide the Onions

Transfer the caramelized onions to a bowl.

Reserve approximately ½ cup for mixing into the meatloaf.

Keep the remaining onions for topping.

Allow the portion going into the beef mixture to cool for several minutes.

11. Prepare the Breadcrumb Mixture

In a large mixing bowl, combine:

  • Breadcrumbs
  • Milk

Allow the mixture to sit for approximately 2–3 minutes.

This softens the breadcrumbs and helps create a tender meatloaf.

12. Add the Eggs

Add the eggs to the breadcrumb mixture.

Whisk gently until combined.

13. Add the Flavorings

Add:

  • Worcestershire sauce
  • Ketchup
  • Dijon mustard
  • Garlic
  • Salt
  • Black pepper
  • Garlic powder
  • Onion powder
  • Italian seasoning
  • Thyme
  • Smoked paprika
  • Parsley

Mix thoroughly.

14. Add the Caramelized Onions

Finely chop the reserved ½ cup caramelized onions.

Stir them into the seasoning mixture.

15. Add the Ground Beef

Add the ground beef.

16. Mix Gently

Using clean hands or a large fork, mix everything only until combined.

Do not aggressively knead or squeeze the beef.

Overmixing can make meatloaf dense and firm.

17. Shape the Meatloaf

Transfer the mixture to the prepared pan.

Shape it into a uniform loaf.

If using a loaf pan, avoid compressing the meat excessively.

18. Prepare the French Onion Glaze

In a small bowl, combine:

  • Beef broth
  • Ketchup
  • Worcestershire sauce
  • Dijon mustard
  • Brown sugar
  • Garlic powder
  • Black pepper

Whisk until smooth.

19. Add the First Layer of Glaze

Brush approximately half of the glaze over the top and exposed sides of the meatloaf.

Reserve the remainder.

20. Begin Baking

Place the meatloaf in the preheated oven.

Bake at 375°F (190°C) for approximately 40 minutes.

21. Check the Meatloaf

After 40 minutes, carefully remove it from the oven.

The exterior should already be browned, but the center will probably need additional cooking.

22. Add More Glaze

Brush the remaining glaze generously over the meatloaf.

23. Add the Caramelized Onions

Arrange the remaining caramelized onions across the top.

Spread them evenly from end to end.

24. Return to the Oven

Bake for another 15–20 minutes.

25. Check the Internal Temperature

Insert an instant-read thermometer into the thickest center portion.

Because the meatloaf contains ground beef, it should reach 160°F (71°C).

26. Add the Cheese

Once the meatloaf is nearly finished, sprinkle the Gruyère and Swiss cheese over the caramelized onions.

Cover the entire top generously.

27. Melt the Cheese

Return the meatloaf to the oven.

Bake for another 5–8 minutes, or until the cheese is completely melted.

28. Optional Broil

For a more deeply golden cheese topping, switch the oven to broil.

Broil for approximately 1–2 minutes.

Watch carefully because cheese can brown quickly.

29. Remove From the Oven

Carefully remove the finished meatloaf.

The cheese should be melted and bubbling while the onions remain visible underneath.

30. Rest the Meatloaf

Allow the meatloaf to rest for approximately 10–15 minutes.

This is important.

Cutting immediately can cause excess juices to escape and may make the slices fall apart.

31. Remove From the Pan

Carefully lift or transfer the meatloaf to a serving platter.

32. Add More Onions

If desired, spoon additional caramelized onions over the melted cheese.

33. Garnish

Finish with:

  • Chopped parsley
  • Fresh thyme
  • Cracked black pepper

34. Slice

Using a sharp knife, cut the meatloaf into thick slices.

35. Serve

Serve warm with melted cheese, caramelized onions, and any pan juices spooned over the top.

What to Serve With French Onion Meatloaf

This rich meatloaf pairs especially well with creamy potatoes.

Serve it with:

  • Creamy mashed potatoes
  • Garlic mashed potatoes
  • Parmesan mashed potatoes
  • Roasted baby potatoes
  • Scalloped potatoes
  • Potato gratin

It is also delicious with:

  • Buttered egg noodles
  • White rice
  • Parmesan rice
  • Creamy polenta
  • Macaroni and cheese

For vegetables, pair it with:

  • Garlic green beans
  • Roasted carrots
  • Steamed broccoli
  • Brussels sprouts
  • Roasted asparagus
  • Buttered peas
  • Sautéed spinach

Warm dinner rolls, biscuits, or crusty bread are excellent for soaking up the savory onion juices.

Tips for the Best French Onion Meatloaf

Use Ground Beef With Some Fat

Ground beef containing approximately 15–20% fat gives meatloaf better flavor and moisture.

Extremely lean beef can become dry.

Caramelize the Onions Slowly

Do not rush them over high heat.

Slow cooking develops the sweet, deeply savory flavor that makes this recipe taste like French onion soup.

Cool the Onions Before Adding Them to the Beef

Adding very hot onions can begin cooking the raw beef prematurely.

Soak the Breadcrumbs

Allowing breadcrumbs to absorb the milk creates a softer, more tender texture.

Don’t Overmix the Meat

Mix only until the ingredients are evenly distributed.

Don’t Pack the Loaf Too Tightly

Gentle shaping produces a lighter meatloaf.

Use a Meat Thermometer

The center should reach 160°F (71°C).

This is much more reliable than judging by color alone.

Add Cheese Near the End

Adding the cheese too early can cause it to become oily or excessively browned.

Use Gruyère for Classic French Onion Flavor

Gruyère has a nutty, savory flavor that pairs especially well with caramelized onions.

Let the Meatloaf Rest

Resting for at least 10 minutes makes cleaner slices and helps the meat retain its juices.

Easy Recipe Variations

French Onion Mushroom Meatloaf

Sauté 8 ounces finely chopped mushrooms with the onions.

Cool before adding part of the mixture to the beef.

Bacon French Onion Meatloaf

Add ½ cup chopped cooked bacon to the meat mixture.

Sprinkle additional bacon over the cheese before serving.

Swiss Cheese French Onion Meatloaf

Use 1½ cups shredded Swiss cheese instead of Gruyère.

Provolone French Onion Meatloaf

Top the loaf with overlapping slices of provolone cheese during the final few minutes.

Garlic Lovers’ Meatloaf

Increase the garlic to 5–6 cloves.

Creamy French Onion Meatloaf

Add ¼ cup sour cream to the meat mixture for an especially moist texture.

Spicy French Onion Meatloaf

Add:

  • ½ teaspoon red pepper flakes
  • ¼ teaspoon cayenne pepper

BBQ French Onion Meatloaf

Replace the ketchup in the glaze with your favorite barbecue sauce.

Stuffed French Onion Meatloaf

Shape half the beef mixture in the pan.

Add approximately 1 cup shredded Gruyère through the center.

Cover with the remaining beef before baking.

Turkey French Onion Meatloaf

Replace the beef with ground turkey.

Cook until the center reaches 165°F (74°C).

Slow Cooker Method

This French onion meatloaf can also be prepared in a slow cooker.

Prepare the caramelized onions and meatloaf mixture as directed.

Shape the beef mixture into a loaf that will fit comfortably inside a 6-quart slow cooker.

Place a large piece of parchment paper or foil underneath to make removal easier.

Brush with half of the glaze.

Cook on LOW for approximately 5–6 hours or HIGH for approximately 3–4 hours.

The center must reach 160°F (71°C).

During the final 20–30 minutes, top with caramelized onions and shredded cheese.

Cover until the cheese melts.

For additional browning, carefully transfer the finished meatloaf to a baking sheet and broil for approximately 1–2 minutes.

Make-Ahead Instructions

The caramelized onions can be prepared up to 3 days ahead.

Store them in an airtight container in the refrigerator.

The complete raw meatloaf can also be assembled approximately 1 day ahead.

Cover tightly and refrigerate.

Wait until shortly before baking to add the glaze.

You can also bake the entire meatloaf one day ahead.

Cool completely and refrigerate.

Reheat covered at 325°F (165°C) until warmed through, then add fresh cheese during the final few minutes if desired.

How to Store Leftovers

Allow leftover meatloaf to cool completely.

Transfer slices to an airtight container.

Refrigerate for up to 3–4 days.

Store any additional caramelized onions and pan juices with the meatloaf to help keep it moist.

Reheating in the Oven

Place slices in a baking dish.

Add a tablespoon or two of beef broth.

Cover loosely with foil.

Reheat at 325°F (165°C) for approximately 15–20 minutes.

Reheating on the Stovetop

Place slices in a skillet over low heat.

Add a splash of beef broth.

Cover and warm gently until heated through.

Microwave

Place one slice on a microwave-safe plate.

Cover loosely.

Microwave at medium power in short intervals until hot.

Avoid prolonged high-power heating because meatloaf can dry out.

Freezing

French onion meatloaf freezes very well.

Allow the cooked meatloaf to cool completely.

You can freeze the entire loaf or individual slices.

Wrap tightly in plastic wrap and foil, then transfer to a freezer-safe container.

Freeze for up to approximately 3 months.

For convenient meals, place parchment between individual slices before freezing.

Thaw overnight in the refrigerator.

Reheat in a covered baking dish at 325°F (165°C).

For the best cheese texture, you can freeze the meatloaf without the final cheese topping and add fresh cheese while reheating.

Frequently Asked Questions

What makes this a French onion meatloaf?

The combination of slowly caramelized onions, beef broth, Worcestershire sauce, thyme, and melted Gruyère or Swiss cheese creates flavors inspired by French onion soup.

What cheese is best for French onion meatloaf?

Gruyère is the most classic choice. Swiss, provolone, mozzarella, or a combination also work well.

Why is my meatloaf falling apart?

It may not contain enough binding ingredients, or it may have been sliced before resting. Breadcrumbs and eggs help hold everything together.

Why is my meatloaf dry?

The beef may have been too lean or the loaf may have been overcooked. Ground beef containing some fat produces a juicier result.

Can I use ground turkey?

Yes. Turkey works well, but cook it to 165°F (74°C).

Can I add mushrooms?

Absolutely. Sauté chopped mushrooms with the onions before adding them to the meatloaf or topping.

Can I make this without cheese?

Yes. The caramelized onion meatloaf is still delicious without cheese.

Can I use onion soup mix?

Yes. Add approximately 1 packet to the meat mixture, but reduce the added salt because soup mix is often high in sodium.

How do I know when meatloaf is done?

Insert a meat thermometer into the center. Ground beef meatloaf should reach 160°F (71°C).

How long should meatloaf rest before slicing?

Allow approximately 10–15 minutes for the juices to redistribute and the structure to firm.

Final Thoughts

This French Onion Meatloaf combines juicy seasoned beef, slow-caramelized onions, garlic, Worcestershire sauce, thyme, savory beef broth, and melted Gruyère cheese in one deeply comforting dinner.

The key is caramelizing the onions patiently, mixing the beef gently, baking the meatloaf only until it reaches 160°F (71°C), and adding the onions and cheese near the end so the topping remains rich, glossy, and beautifully melted.

Serve thick slices with creamy mashed potatoes, roasted vegetables, noodles, or warm bread for a hearty family meal packed with savory beef flavor, buttery onions, and gooey melted cheese.
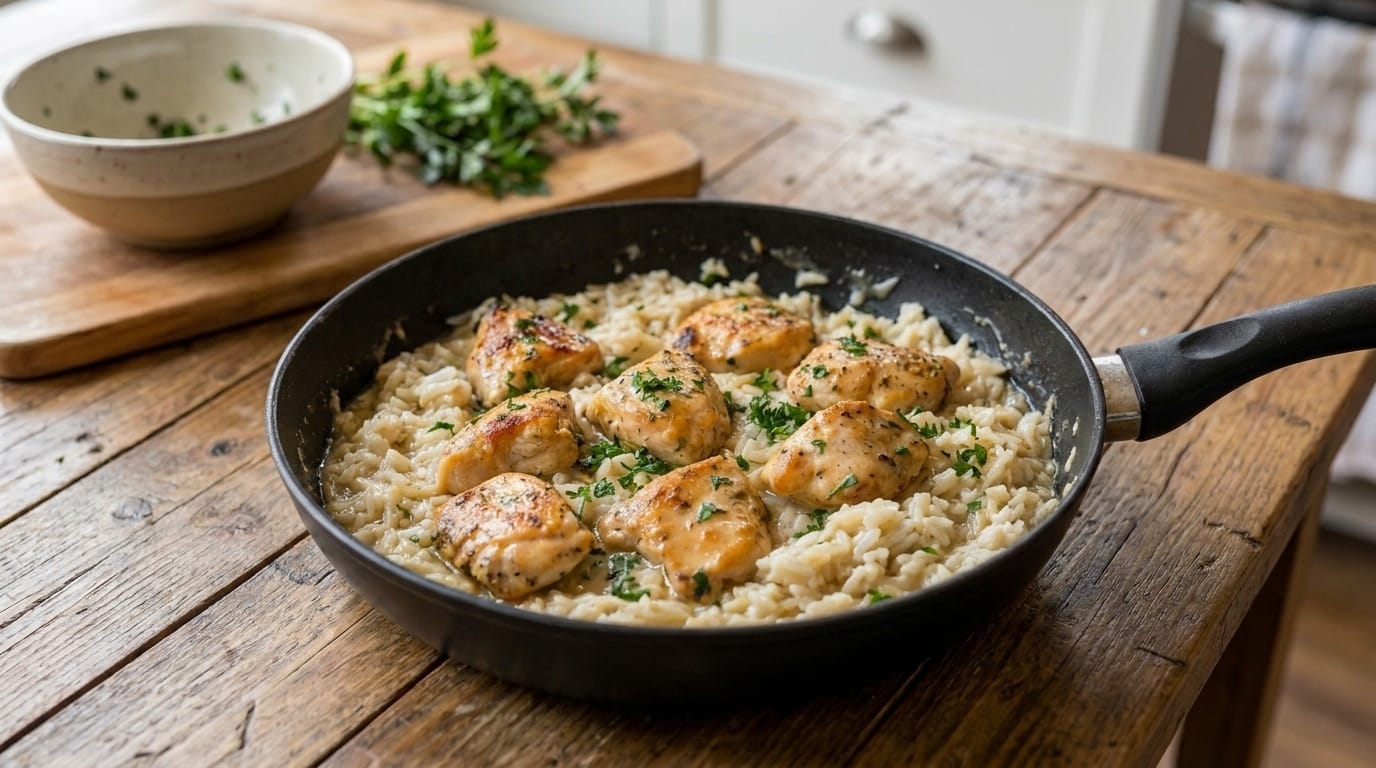
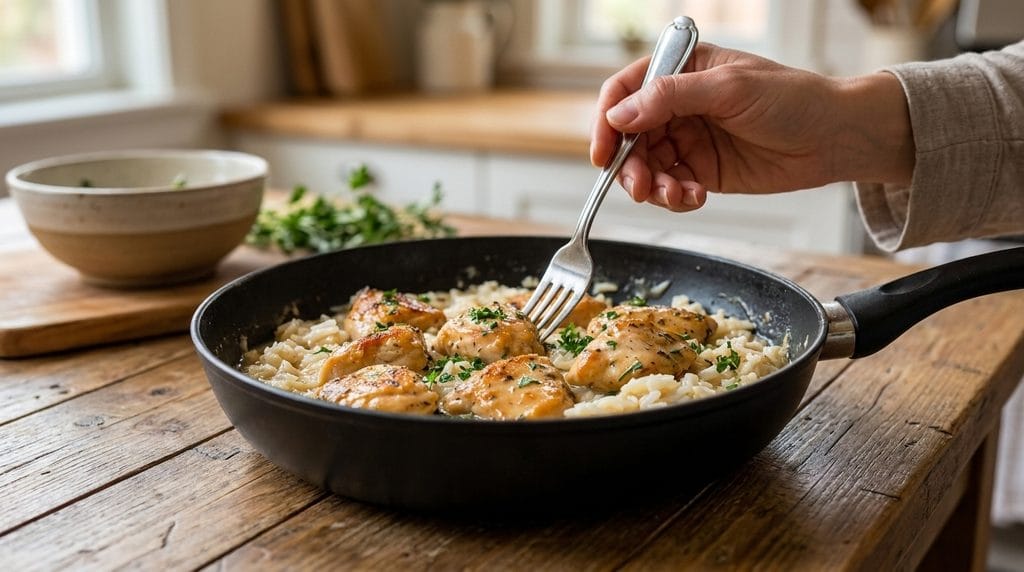
Easy Creamy Garlic Parmesan Chicken & Rice Skillet Recipe – Rich, Cozy, and Family-Friendly

If you are looking for a comforting one-pan dinner that combines juicy chicken, creamy rice, plenty of garlic, and rich Parmesan flavor, this Creamy Garlic Parmesan Chicken & Rice Skillet is an excellent recipe to make. Tender pieces of seasoned chicken are seared until golden, then cooked with long-grain rice, garlic, chicken broth, herbs, cream, and Parmesan until everything comes together in one creamy, satisfying skillet.

This recipe is especially convenient for busy weeknights because the rice cooks directly in the same pan, absorbing all the flavor from the browned chicken and garlic. Heavy cream and Parmesan are added near the end so the finished rice stays rich and silky without becoming overly heavy.

Serve this skillet on its own or pair it with roasted broccoli, asparagus, green beans, garlic bread, or a fresh salad for an easy family meal that feels warm, hearty, and comforting.

Why You’ll Love This Creamy Garlic Parmesan Chicken & Rice Skillet

Everything cooks in one skillet, which means less cleanup.

The chicken develops golden edges while staying tender and juicy.

The rice absorbs the savory chicken broth, garlic, and seasonings as it cooks.

Heavy cream and Parmesan create a rich, creamy finish.

It is easy to customize with spinach, mushrooms, broccoli, bacon, or sun-dried tomatoes.

The leftovers reheat well with a small splash of broth or cream.

Ingredients

For the Chicken

  • 1½ pounds boneless, skinless chicken breasts or chicken thighs
  • 1 tablespoon olive oil
  • 1 tablespoon unsalted butter
  • 1 teaspoon kosher salt
  • ½ teaspoon freshly ground black pepper
  • 1 teaspoon garlic powder
  • ½ teaspoon onion powder
  • ½ teaspoon smoked paprika
  • 1 teaspoon Italian seasoning

For the Garlic Rice

  • 1½ cups long-grain white rice, rinsed and drained
  • 1 small yellow onion, finely diced
  • 5 garlic cloves, finely minced
  • 2 tablespoons unsalted butter
  • 3 cups low-sodium chicken broth
  • 1 teaspoon Dijon mustard
  • ½ teaspoon dried thyme
  • ½ teaspoon Italian seasoning
  • ¼ teaspoon red pepper flakes, optional
  • ½ teaspoon freshly ground black pepper

For the Creamy Parmesan Finish

  • ¾ cup heavy cream
  • 1 cup freshly grated Parmesan cheese
  • 1 tablespoon fresh lemon juice, optional
  • 2 tablespoons chopped fresh parsley

Optional Add-Ins

  • 2 cups baby spinach
  • 8 ounces sliced mushrooms
  • 1½ cups small broccoli florets
  • ½ cup chopped sun-dried tomatoes
  • ½ cup crispy crumbled bacon
  • ½ cup shredded mozzarella

For Garnishing

  • Fresh parsley
  • Extra Parmesan
  • Freshly cracked black pepper
  • Red pepper flakes, optional

How to Make Creamy Garlic Parmesan Chicken & Rice Skillet

1. Prepare the Chicken

Pat the chicken dry with paper towels.

Cut it into approximately 1-inch bite-size pieces.

Keeping the pieces similar in size helps them cook evenly.

2. Season the Chicken

Place the chicken in a bowl.

Add:

  • Salt
  • Black pepper
  • Garlic powder
  • Onion powder
  • Smoked paprika
  • Italian seasoning

Toss thoroughly.

3. Heat the Skillet

Place a large deep skillet over medium-high heat.

Add:

  • Olive oil
  • 1 tablespoon butter

Let the skillet become hot.

4. Sear the Chicken

Add the chicken in a single layer.

Cook in batches if necessary so the skillet is not overcrowded.

5. Brown the First Side

Cook without moving for approximately 2–3 minutes.

The chicken should develop a golden crust.

6. Turn the Chicken

Flip or stir the pieces.

Cook for another 2–3 minutes.

The chicken does not need to be completely cooked at this stage because it will finish with the rice.

7. Remove the Chicken

Transfer the browned chicken to a clean plate.

Set aside.

Preparing the Garlic Rice

8. Lower the Heat

Reduce the skillet heat to medium.

9. Add Butter

Add 2 tablespoons butter.

10. Add Onion

Add the diced onion.

Cook for approximately 3–4 minutes until softened.

11. Add Garlic

Stir in the minced garlic.

Cook for approximately 30 seconds until fragrant.

Do not allow it to burn.

12. Add the Rice

Add the rinsed and drained rice.

13. Toast the Rice

Stir for approximately 1–2 minutes.

The rice should become coated in the butter and aromatics.

14. Add Chicken Broth

Pour in the chicken broth.

15. Add Dijon Mustard

Stir in the Dijon mustard.

16. Add Seasonings

Add:

  • Thyme
  • Italian seasoning
  • Red pepper flakes
  • Black pepper

17. Scrape the Skillet

Use a wooden spoon to scrape up any browned chicken bits from the bottom.

These add excellent flavor to the rice.

18. Bring to a Gentle Simmer

Increase the heat slightly until the broth begins simmering.

19. Return the Chicken

Add the browned chicken and any accumulated juices back to the skillet.

20. Reduce the Heat

Turn the heat to low.

21. Cover

Cover the skillet tightly with a lid.

22. Cook

Simmer gently for approximately 17–20 minutes.

Avoid lifting the lid repeatedly because the rice needs trapped steam to cook properly.

23. Check the Rice

The rice should be tender and most of the broth absorbed.

24. Check the Chicken

The chicken should reach 165°F (74°C) internally.

25. Add More Broth if Necessary

If the rice is still slightly firm but the skillet is dry, add approximately ¼ cup chicken broth.

Cover and continue cooking for another 3–5 minutes.

Making the Skillet Creamy

26. Reduce the Heat

Turn the heat to the lowest setting.

27. Add Heavy Cream

Pour in the heavy cream.

28. Stir Gently

Fold it through the rice and chicken.

29. Add Parmesan

Add the Parmesan gradually.

Stir until completely melted.

30. Check the Consistency

The finished rice should be creamy but not soupy.

If it becomes too thick, add a splash of:

  • Chicken broth
  • Heavy cream
  • Milk

31. Add Optional Spinach

If using spinach, fold it into the skillet.

Cover for approximately 1–2 minutes until wilted.

32. Add Lemon

Stir in lemon juice if desired.

A little acidity balances the rich cream and Parmesan.

33. Add Parsley

Stir in the fresh parsley.

34. Taste and Adjust

Taste and adjust with:

  • Salt
  • Black pepper
  • Parmesan
  • Red pepper flakes

35. Add Extra Cheese

For an extra-cheesy skillet, sprinkle mozzarella or more Parmesan over the top.

36. Melt

Cover for approximately 1–2 minutes until the cheese melts.

37. Rest

Remove from the heat.

Let the skillet rest uncovered for approximately 5 minutes.

The rice will thicken slightly as it sits.

38. Garnish

Finish with:

  • Fresh parsley
  • Parmesan
  • Black pepper
  • Red pepper flakes

39. Serve

Serve warm directly from the skillet.

What to Serve With Creamy Garlic Parmesan Chicken & Rice Skillet

This recipe is filling enough to serve as a complete meal.

For vegetables, try:

  • Garlic asparagus
  • Roasted broccoli
  • Green beans
  • Brussels sprouts
  • Roasted zucchini
  • Glazed carrots

For bread, serve with:

  • Garlic bread
  • Cheesy garlic bread
  • Dinner rolls
  • Herb biscuits
  • Crusty bread

For something fresh, add:

  • Caesar salad
  • Garden salad
  • Tomato cucumber salad
  • Arugula salad

Tips for the Best Creamy Garlic Parmesan Chicken & Rice Skillet

Use Long-Grain White Rice

Long-grain rice cooks evenly and stays fluffy while still becoming creamy.

Rinse the Rice

Rinsing removes excess surface starch and helps prevent an overly gummy texture.

Brown the Chicken First

Searing creates flavor that carries through the entire skillet.

Don’t Fully Cook the Chicken During Searing

It will finish cooking while the rice simmers.

Keep the Simmer Gentle

Too much heat can cause the liquid to evaporate before the rice is tender.

Keep the Lid Closed

Repeatedly opening the skillet releases steam.

Add Cream at the End

Cooking dairy for the entire rice cooking time is unnecessary and can affect texture.

Add Parmesan Over Low Heat

This helps keep the cheese smooth.

Let the Skillet Rest

The rice continues absorbing sauce for several minutes after cooking.

Easy Recipe Variations

Creamy Garlic Mushroom Chicken & Rice

Brown 8 ounces sliced mushrooms after removing the chicken.

Cook until golden and most of their moisture evaporates.

Add them back with the cream.

Spinach Parmesan Chicken & Rice

Fold 2–3 cups baby spinach into the finished skillet.

Broccoli Chicken & Rice

Add 1½–2 cups small broccoli florets during the final 7–10 minutes of cooking.

Bacon Garlic Parmesan Chicken & Rice

Finish with ½ cup crispy crumbled bacon.

Sun-Dried Tomato Chicken & Rice

Add ½ cup chopped sun-dried tomatoes with the cream.

Cajun Chicken & Rice

Replace the Italian seasoning and smoked paprika with Cajun seasoning.

Extra Cheesy Chicken & Rice

Add a combination of:

  • Parmesan
  • Mozzarella
  • Monterey Jack

Lemon Garlic Parmesan Chicken & Rice

Add 1 teaspoon lemon zest and additional fresh lemon juice.

Mushroom and Spinach Version

For an especially hearty variation, brown 8 ounces mushrooms after the chicken.

Remove the mushrooms.

Prepare the rice normally.

Once the rice is tender, return the mushrooms and add 2 cups spinach with the heavy cream and Parmesan.

Cook just until the spinach wilts.

Oven-Baked Version

Preheat the oven to 375°F (190°C).

Use an oven-safe skillet.

Sear the chicken and prepare the onion, garlic, rice, broth, and seasonings as directed.

Return the chicken.

Cover tightly.

Bake for approximately 25–30 minutes, or until the rice is tender and chicken reaches 165°F.

Remove from the oven.

Stir in cream and Parmesan.

Let stand for approximately 5 minutes before serving.

Make-Ahead Instructions

You can cut and season the chicken up to 1 day ahead.

Store covered in the refrigerator.

The entire skillet can also be cooked ahead, although the rice will continue absorbing sauce as it sits.

When reheating, add extra broth, milk, or cream to loosen the consistency.

How to Store Leftovers

Allow leftovers to cool before transferring them to an airtight container.

Refrigerate for up to 3–4 days.

Reheating on the Stovetop

Place leftovers in a skillet over low heat.

Add a splash of:

  • Chicken broth
  • Milk
  • Heavy cream

Cover and warm gently.

Stir occasionally.

Reheating in the Microwave

Place an individual portion in a microwave-safe bowl.

Add a small splash of broth or milk.

Cover loosely.

Microwave in short intervals, stirring between each one.

Freezing

This chicken and rice skillet can be frozen, although the rice and cream sauce may become slightly softer after thawing.

Cool completely.

Transfer to freezer-safe containers.

Freeze for up to approximately 2 months.

Thaw overnight in the refrigerator.

Reheat gently with additional broth or cream.

Frequently Asked Questions

Can I use chicken thighs instead of chicken breasts?
Yes. Boneless, skinless chicken thighs work especially well and remain very juicy.

Can I use brown rice?
You can, but brown rice needs substantially more liquid and cooking time. Long-grain white rice is recommended for this recipe.

Why is my rice still hard?
It needs more moisture or additional cooking time. Add a small amount of broth, cover, and continue cooking gently.

Why did my rice become mushy?
Too much liquid, excessive stirring, or cooking for too long can soften the rice excessively.

Can I use milk instead of heavy cream?
Yes. The result will be lighter and less rich.

Can I add broccoli?
Absolutely. Add small broccoli florets during the last 7–10 minutes so they become tender without turning mushy.

Can I use pre-cooked chicken?
Yes. Cook the rice first, then add cooked chicken during the final few minutes just to warm it through.

Why did my Parmesan sauce turn grainy?
The skillet was probably too hot. Lower the heat before adding Parmesan and stir it in gradually.

Final Thoughts

This Creamy Garlic Parmesan Chicken & Rice Skillet combines golden chicken, tender rice, butter, fresh garlic, savory chicken broth, herbs, heavy cream, and plenty of Parmesan in one cozy family dinner.

The key is browning the chicken first, gently cooking the rice under a tight lid, and adding the heavy cream and Parmesan only after the rice is tender.

Serve it straight from the skillet with roasted vegetables or garlic bread for a creamy, garlicky, cheesy dinner that is easy to prepare and packed with comforting flavor.

Easy Creamy Smothered Salisbury Steak Recipe – Juicy, Tender, and Covered in Rich Onion Gravy

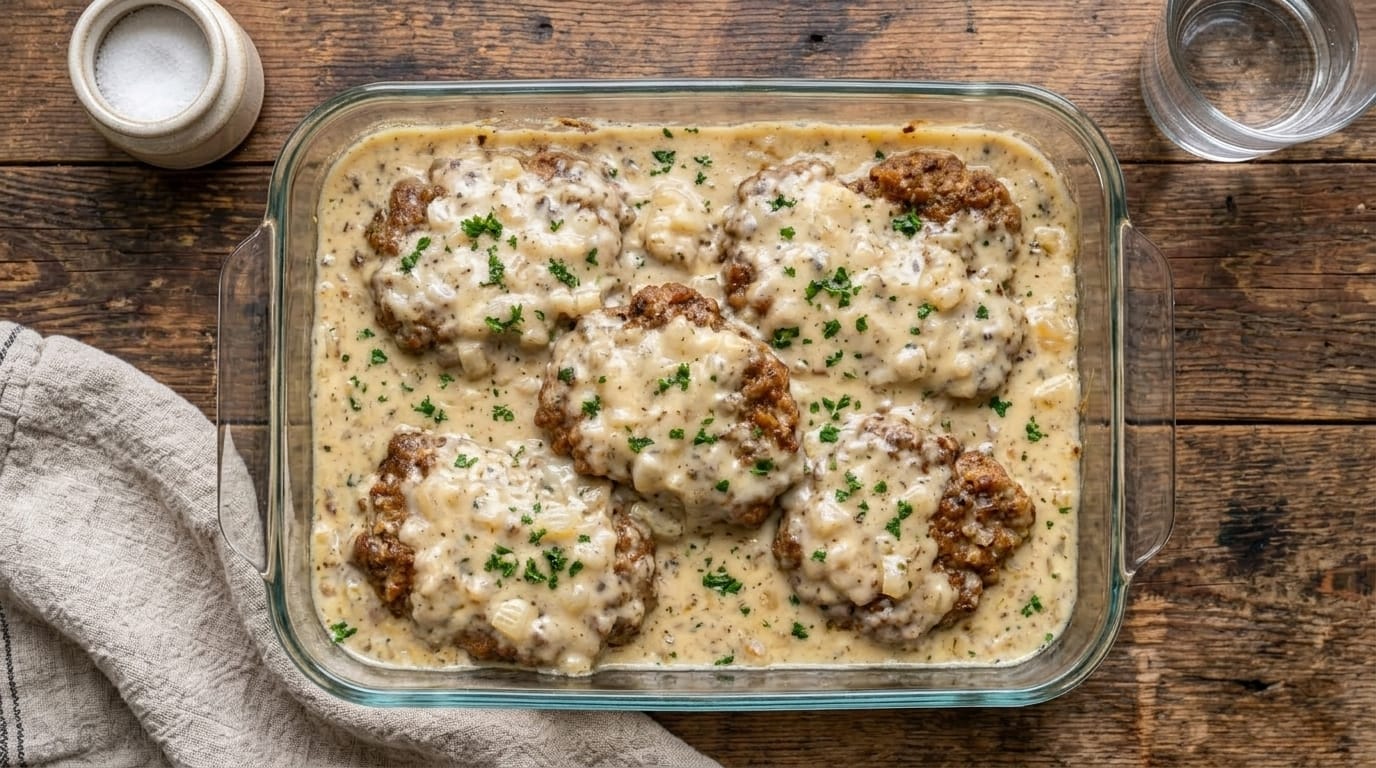
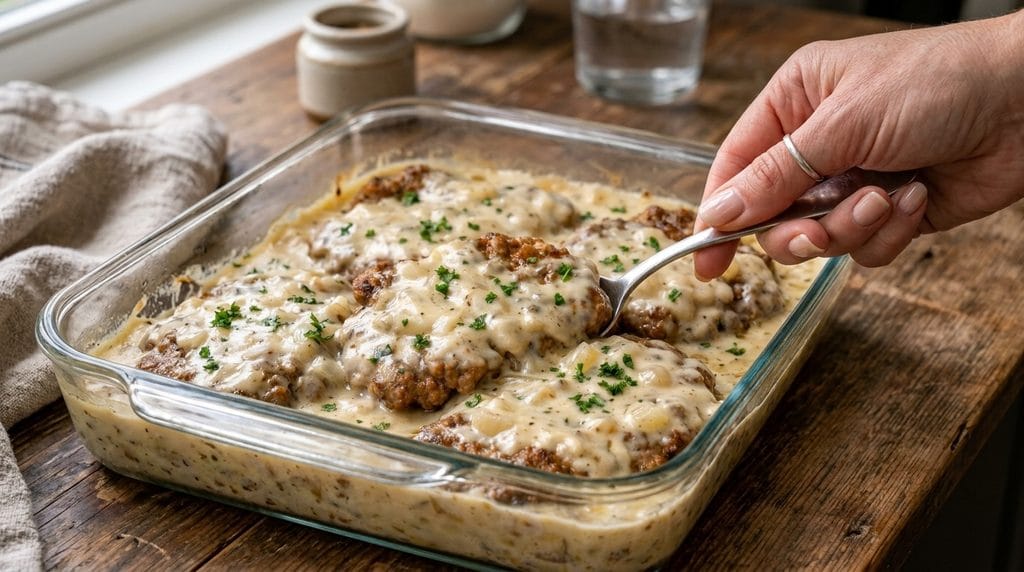
If you are looking for the ultimate comfort-food dinner, this Creamy Smothered Salisbury Steak is an excellent choice. Juicy seasoned beef patties are browned until deeply caramelized, then baked in a rich, velvety onion gravy until tender and completely smothered in creamy sauce.

The savory beef patties are flavored with Worcestershire sauce, garlic, onion, Dijon mustard, herbs, and seasonings, while the gravy combines softened onions, beef broth, cream, butter, and Parmesan for a luxurious finish. As everything bakes together, the patties absorb the sauce while the gravy thickens around them.

This creamy Salisbury steak is perfect for family dinners, Sunday comfort food, cold evenings, meal prep, or whenever you want a hearty homemade meal. Serve it over mashed potatoes, buttered noodles, rice, or roasted vegetables and spoon plenty of creamy onion gravy over every serving.

Why You’ll Love This Creamy Smothered Salisbury Steak

The beef patties stay juicy and tender while developing beautifully browned edges.

Soft onions add sweetness and classic Salisbury steak flavor.

The creamy beef gravy is thick, savory, and perfect for spooning over mashed potatoes.

Browning the patties first gives the finished dish much deeper flavor.

Everything finishes together in one baking dish for easy serving.

The recipe uses familiar, affordable ingredients but still feels rich and satisfying.

You can customize it with mushrooms, extra onions, bacon, Swiss cheese, or additional garlic.

Ingredients

For the Salisbury Steak Patties

  • 2 pounds ground beef, preferably 80–85% lean
  • ½ cup plain breadcrumbs
  • 1 large egg
  • ¼ cup whole milk
  • 2 tablespoons Worcestershire sauce
  • 1 tablespoon ketchup
  • 1 tablespoon Dijon mustard
  • 1 teaspoon garlic powder
  • 1 teaspoon onion powder
  • 1½ teaspoons kosher salt
  • 1 teaspoon freshly ground black pepper
  • ½ teaspoon smoked paprika
  • ½ teaspoon dried thyme
  • 2 tablespoons finely chopped fresh parsley
  • 2 tablespoons olive oil

For the Onions

  • 2 large yellow onions, diced or thinly sliced
  • 2 tablespoons unsalted butter
  • ½ teaspoon kosher salt
  • ¼ teaspoon freshly ground black pepper

For the Creamy Onion Gravy

  • 2 tablespoons unsalted butter
  • 3 garlic cloves, finely minced
  • 3 tablespoons all-purpose flour
  • 2 cups low-sodium beef broth
  • 1 cup heavy cream
  • 1 tablespoon Worcestershire sauce
  • 1 teaspoon Dijon mustard
  • 1 teaspoon beef bouillon paste or granules
  • ½ teaspoon dried thyme
  • ½ teaspoon Italian seasoning
  • ½ teaspoon garlic powder
  • ¼ teaspoon onion powder
  • ¼ teaspoon smoked paprika
  • ½ cup freshly grated Parmesan cheese
  • Salt, to taste
  • Freshly ground black pepper, to taste

Optional Finishing Ingredients

  • 2 tablespoons chopped fresh parsley
  • Fresh thyme leaves
  • Extra Parmesan cheese
  • Freshly cracked black pepper
  • Crispy fried onions
  • Sautéed mushrooms
  • Chopped chives
  • Red pepper flakes

How to Make Creamy Smothered Salisbury Steak

1. Preheat the Oven

Preheat your oven to 375°F (190°C).

Lightly grease a 9 x 13-inch baking dish or another large casserole dish.

Set aside.

2. Prepare the Ground Beef

Place the ground beef in a large mixing bowl.

Break it apart gently with your fingers or a fork.

3. Add the Binding Ingredients

Add:

  • Breadcrumbs
  • Egg
  • Milk

These ingredients help hold the patties together while keeping them tender.

4. Add the Flavorings

Add:

  • Worcestershire sauce
  • Ketchup
  • Dijon mustard
  • Garlic powder
  • Onion powder
  • Salt
  • Black pepper
  • Smoked paprika
  • Thyme
  • Parsley

5. Mix Gently

Use clean hands or a fork to mix everything just until combined.

Avoid squeezing or kneading the meat excessively.

Overmixing can create dense, tough Salisbury steak patties.

6. Divide the Mixture

Divide the beef into 6 equal portions.

Each portion should be approximately 5–6 ounces.

7. Shape the Patties

Shape each portion into a thick oval patty approximately ¾–1 inch thick.

Try to keep them similar in size for even cooking.

8. Make a Shallow Indentation

Press a small indentation into the center of each patty.

This helps reduce excessive puffing while cooking.

9. Chill the Patties

Place the patties on a plate.

Refrigerate for approximately 15–20 minutes.

Chilling helps them hold their shape during searing.

10. Heat the Skillet

Place a large skillet over medium-high heat.

Add the olive oil.

Allow the skillet to become hot.

11. Sear the First Side

Add the Salisbury steak patties without overcrowding the pan.

Cook for approximately 3–4 minutes.

Avoid moving them excessively.

The underside should develop a dark golden crust.

12. Flip the Patties

Carefully turn the patties.

Cook for another 2–3 minutes.

They do not need to be fully cooked at this stage.

13. Transfer to the Baking Dish

Arrange the browned patties in the prepared baking dish.

Leave a little room between them for the creamy gravy.

14. Reduce the Skillet Heat

Lower the heat to medium.

Leave the browned beef drippings in the skillet.

They provide excellent flavor for the onions and gravy.

15. Add Butter

Add 2 tablespoons butter.

Allow it to melt.

16. Add the Onions

Add the sliced or diced onions.

Season with salt and black pepper.

17. Cook the Onions

Cook for approximately 7–10 minutes, stirring occasionally.

The onions should become soft and lightly golden.

18. Add the Garlic

Add the minced garlic.

Cook for approximately 30–45 seconds.

Stir constantly until fragrant.

19. Add More Butter

Add the remaining 2 tablespoons butter for the gravy.

Allow it to melt completely.

20. Add the Flour

Sprinkle the flour evenly over the onions.

Stir constantly for approximately 1–2 minutes.

The flour should absorb the butter and form a light coating around the onions.

21. Add the Beef Broth

Slowly pour in the beef broth while whisking or stirring continuously.

Adding the broth gradually helps prevent lumps.

22. Scrape the Pan

Use a wooden spoon to scrape the browned beef bits from the bottom of the skillet.

These pieces add deep savory flavor to the gravy.

23. Add Worcestershire Sauce

Stir in the Worcestershire sauce.

24. Add Dijon Mustard

Stir in the Dijon mustard.

The mustard provides subtle tang without overpowering the gravy.

25. Add Beef Bouillon

Add the beef bouillon.

Stir until completely dissolved.

26. Add the Seasonings

Add:

  • Thyme
  • Italian seasoning
  • Garlic powder
  • Onion powder
  • Smoked paprika
  • Black pepper

Stir thoroughly.

27. Simmer the Gravy Base

Bring the mixture to a gentle simmer.

Cook for approximately 3–4 minutes.

The gravy should begin thickening.

28. Add the Heavy Cream

Reduce the heat to medium-low.

Slowly stir in the heavy cream.

29. Simmer Gently

Cook for approximately 3–5 minutes.

Avoid boiling aggressively because gentle heat produces a smoother cream sauce.

30. Add the Parmesan

Gradually add the freshly grated Parmesan.

Stir until completely melted.

31. Check the Gravy Consistency

The gravy should be creamy and thick enough to lightly coat the back of a spoon.

Remember that it will continue thickening during baking.

32. Adjust if Necessary

If the gravy seems too thick, add a small splash of beef broth.

If it seems too thin, simmer for another 1–2 minutes.

33. Taste the Gravy

Taste before adding additional salt.

Beef broth, bouillon, Worcestershire sauce, and Parmesan already contribute salt.

Adjust with additional black pepper if needed.

34. Pour the Gravy Over the Patties

Carefully pour the creamy onion gravy over the browned Salisbury steaks.

Make sure each patty is generously covered.

35. Distribute the Onions

Spoon the softened onions evenly over and around the patties.

36. Cover the Baking Dish

Cover loosely with foil.

This helps keep the beef moist while it finishes cooking.

37. Bake

Bake at 375°F (190°C) for approximately 20–25 minutes.

38. Check the Internal Temperature

Insert an instant-read thermometer into the center of a thick patty.

Because Salisbury steak is made from ground beef, the center should reach 160°F (71°C).

39. Remove the Foil

Remove the foil during the final 5 minutes.

This allows the exposed portions of the beef to develop a little extra color.

40. Check the Sauce

The gravy should now be thick, creamy, and bubbling gently around the edges.

41. Optional Broil

For slightly darker tops, broil for approximately 1–2 minutes.

Watch carefully.

42. Remove From the Oven

Carefully remove the baking dish.

43. Spoon Over the Gravy

Spoon the hot creamy onion gravy generously over every Salisbury steak.

44. Rest Briefly

Allow the dish to rest for approximately 5 minutes.

The gravy will thicken slightly as it sits.

45. Garnish

Finish with:

  • Fresh parsley
  • Fresh thyme
  • Extra Parmesan
  • Cracked black pepper

46. Serve

Serve the Salisbury steaks hot with plenty of creamy onion gravy spooned over the top.

What to Serve With Creamy Smothered Salisbury Steak

Creamy Salisbury steak is especially delicious with potatoes because they soak up the rich gravy beautifully.

Serve it with:

  • Creamy mashed potatoes
  • Garlic mashed potatoes
  • Parmesan mashed potatoes
  • Roasted potatoes
  • Crispy smashed potatoes
  • Buttered egg noodles
  • White rice
  • Brown rice
  • Creamy polenta
  • Buttered pasta

For vegetables, pair it with:

  • Garlic green beans
  • Roasted carrots
  • Steamed broccoli
  • Buttered peas
  • Brussels sprouts
  • Roasted asparagus
  • Corn
  • Sautéed spinach

Warm biscuits, dinner rolls, or crusty bread are also excellent for soaking up the extra creamy gravy.

Tips for the Best Creamy Smothered Salisbury Steak

Use Ground Beef With Some Fat

Ground beef containing approximately 15–20% fat creates juicier patties.

Extremely lean beef can become dry.

Mix the Beef Gently

Overmixing makes Salisbury steak tough.

Combine the ingredients only until evenly incorporated.

Chill Before Searing

Cold patties hold together more easily during browning.

Don’t Skip the Sear

Browning creates flavor and improves the texture of the finished patties.

Don’t Fully Cook During Searing

The patties finish cooking in the oven.

The skillet stage is primarily for building a crust.

Cook the Onions in the Beef Drippings

The onions absorb the savory browned flavor left behind by the patties.

Cook the Flour Briefly

Allowing the flour to cook for a minute prevents the gravy from tasting raw or floury.

Add Cream Over Gentle Heat

Heavy cream stays smoother when it is not aggressively boiled.

Use Freshly Grated Parmesan

Fresh Parmesan melts more smoothly into the gravy than pre-shredded cheese.

Don’t Overbake

Remove the dish once the beef reaches 160°F (71°C).

Easy Recipe Variations

Creamy Mushroom Salisbury Steak

Add 12 ounces sliced cremini mushrooms after cooking the onions.

Sauté until browned before preparing the gravy.

Mushroom Swiss Salisbury Steak

Add mushrooms to the gravy.

Top each patty with a slice of Swiss cheese during the final 5 minutes of baking.

French Onion Salisbury Steak

Increase the onions to 3–4 large onions.

Caramelize them slowly and top the patties with Gruyère cheese.

Garlic Parmesan Salisbury Steak

Increase the garlic to 6 cloves and Parmesan to ¾ cup.

Bacon Salisbury Steak

Add ½ cup chopped crispy bacon to the finished gravy.

Peppercorn Salisbury Steak

Add 1½ teaspoons coarsely crushed black peppercorns.

Extra Creamy Salisbury Steak

Increase the heavy cream to 1½ cups and Parmesan to ¾ cup.

Spicy Salisbury Steak

Add:

  • ½ teaspoon crushed red pepper flakes
  • Pinch of cayenne pepper

Herb Garlic Salisbury Steak

Add fresh rosemary, thyme, and parsley to the sauce.

Cheesy Salisbury Steak

Top the patties with mozzarella, provolone, Swiss, or Monterey Jack before the final baking stage.

Slow Cooker Method

This creamy smothered Salisbury steak can also be prepared in a slow cooker.

Prepare and brown the patties as directed.

Arrange them inside the slow cooker.

Cook the onions and garlic in the skillet.

Prepare the gravy using the beef broth, Worcestershire sauce, Dijon mustard, bouillon, and seasonings, but leave out the cream and Parmesan initially.

Pour the gravy over the patties.

Cook on LOW for approximately 4–5 hours or HIGH for 2½–3 hours.

Check that the ground beef reaches 160°F (71°C).

Remove the patties briefly.

Stir the heavy cream and Parmesan into the sauce.

If necessary, thicken with a slurry made from:

  • 1 tablespoon cornstarch
  • 1 tablespoon cold water

Cook on HIGH for approximately 10–15 minutes until creamy.

Return the patties and serve.

Make-Ahead Instructions

The Salisbury steak patties can be shaped up to 24 hours ahead.

Cover and refrigerate.

The onions can also be cooked one day ahead.

The creamy gravy can be prepared several hours in advance and refrigerated.

For maximum convenience, assemble the complete casserole earlier in the day.

Cover tightly and refrigerate.

Remove it from the refrigerator approximately 20 minutes before baking.

A cold casserole may require an additional 5–10 minutes in the oven.

How to Store Leftovers

Allow the Salisbury steak and gravy to cool completely.

Transfer to an airtight container.

Refrigerate for up to 3–4 days.

Store the patties covered with gravy whenever possible to help maintain moisture.

Reheating in the Oven

Place the Salisbury steaks and gravy in a baking dish.

Cover with foil.

Reheat at 325°F (165°C) for approximately 15–20 minutes.

Reheating on the Stovetop

Place the patties and gravy in a skillet.

Add approximately 2 tablespoons beef broth or cream.

Cover and warm over low heat until heated through.

Microwave

Place one patty with plenty of gravy in a microwave-safe dish.

Cover loosely.

Microwave in short intervals at medium power until hot.

Stir the gravy between intervals if necessary.

Freezing

Creamy Salisbury steak can be frozen, although dairy-based gravy may change slightly in texture after thawing.

Allow everything to cool completely.

Transfer the patties and gravy into freezer-safe airtight containers.

Freeze for up to approximately 2 months.

Thaw overnight in the refrigerator.

Reheat gently.

If the gravy looks slightly separated, whisk in a splash of fresh cream or beef broth while warming.

For the best freezing results, you can freeze the Salisbury steaks with the brown gravy base before adding the cream and Parmesan.

Add the dairy ingredients after thawing.

Frequently Asked Questions

What is Salisbury steak made from?

Salisbury steak is made from seasoned ground beef formed into patties and usually served with onion or mushroom gravy.

Why is Salisbury steak different from a hamburger?

Salisbury steak typically contains breadcrumbs, egg, Worcestershire sauce, and additional seasonings mixed into the beef and is served with gravy.

Can I use ground turkey instead?

Yes. Ground turkey can be substituted, but it should reach 165°F (74°C) internally.

Why are my patties falling apart?

They may need additional binding from breadcrumbs and egg, or they may have been flipped before developing a proper crust.

Can I add mushrooms?

Absolutely. Brown mushrooms with the onions before preparing the gravy.

Can I use half-and-half instead of heavy cream?

Yes. The gravy will be slightly lighter and thinner.

Why is my creamy gravy too thin?

Allow it to simmer longer before baking, or add a small cornstarch slurry.

Why is my gravy too thick?

Whisk in additional beef broth or cream a few tablespoons at a time.

Can I prepare this recipe the night before?

Yes. Assemble the patties and gravy in the baking dish, refrigerate, then bake the following day.

What temperature should Salisbury steak reach?

Because it contains ground beef, cook the center to 160°F (71°C).

Final Thoughts

This Creamy Smothered Salisbury Steak combines juicy seasoned beef patties, tender onions, garlic, Worcestershire sauce, beef broth, heavy cream, Parmesan, and herbs in one deeply comforting casserole-style dinner.

The key is mixing the beef gently, browning the patties before baking, building the creamy gravy from the flavorful pan drippings, and finishing everything together until the beef is tender and the sauce becomes thick and velvety.

Serve the Salisbury steaks generously smothered in creamy onion gravy over mashed potatoes, noodles, rice, or vegetables for a rich family dinner packed with savory, comforting flavor.

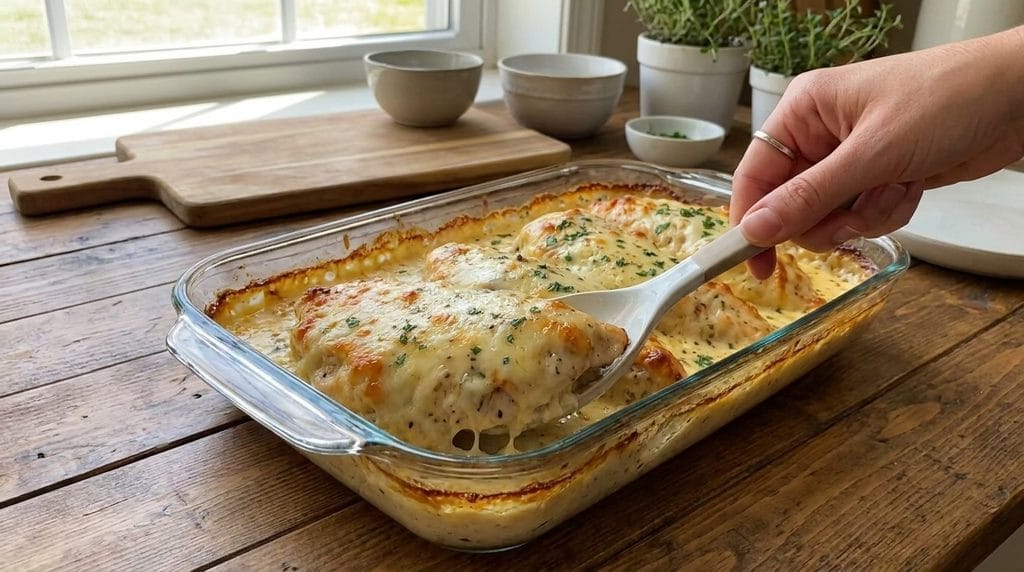
Easy Creamy Garlic Parmesan Chicken Recipe – Rich, Juicy, and Comforting

If you are looking for a simple chicken dinner with a rich, garlicky sauce and plenty of Parmesan flavor, this Creamy Garlic Parmesan Chicken is an excellent recipe to make. Tender chicken breasts are seasoned, seared until golden, then simmered in a silky sauce made with butter, fresh garlic, chicken broth, heavy cream, Dijon mustard, herbs, and Parmesan.

The sauce is creamy without being overly heavy, and the garlic and Parmesan give it plenty of savory flavor. Because everything comes together in one skillet, this recipe works especially well for weeknight dinners while still feeling special enough for guests.

Serve it over mashed potatoes, pasta, rice, or roasted vegetables for a comforting family meal with plenty of sauce to spoon over everything.

Why You’ll Love This Creamy Garlic Parmesan Chicken

The chicken stays juicy and tender.

Fresh garlic gives the sauce bold flavor.

Parmesan makes the sauce rich, savory, and smooth.

The entire dish comes together in one skillet.

It pairs well with pasta, potatoes, rice, or vegetables.

The recipe is easy to customize with mushrooms, spinach, bacon, or sun-dried tomatoes.

Ingredients

For the Chicken

  • 4 boneless, skinless chicken breasts
  • 1 tablespoon olive oil
  • 1 tablespoon unsalted butter
  • 1 teaspoon kosher salt
  • ½ teaspoon freshly ground black pepper
  • 1 teaspoon garlic powder
  • ½ teaspoon onion powder
  • ½ teaspoon smoked paprika
  • 1 teaspoon Italian seasoning

For the Creamy Garlic Parmesan Sauce

  • 3 tablespoons unsalted butter
  • 6 garlic cloves, finely minced
  • 1 cup low-sodium chicken broth
  • 1 cup heavy cream
  • 1 teaspoon Dijon mustard
  • ½ teaspoon Italian seasoning
  • ½ teaspoon dried thyme
  • ¼ teaspoon smoked paprika
  • ¼ teaspoon red pepper flakes, optional
  • 1 cup freshly grated Parmesan cheese
  • 1 teaspoon fresh lemon juice, optional

Optional Add-Ins

  • 8 ounces sliced mushrooms
  • 2 cups baby spinach
  • ½ cup chopped sun-dried tomatoes
  • ½ cup crispy crumbled bacon
  • ½ cup shredded mozzarella

For Garnishing

  • Fresh parsley
  • Extra Parmesan
  • Freshly cracked black pepper
  • Red pepper flakes, optional

How to Make Creamy Garlic Parmesan Chicken

1. Prepare the Chicken

Pat the chicken breasts dry with paper towels.

If they are very thick, slice them horizontally into thinner cutlets or pound them to an even thickness.

This helps them cook more evenly.

2. Season the Chicken

Season both sides with:

  • Salt
  • Black pepper
  • Garlic powder
  • Onion powder
  • Smoked paprika
  • Italian seasoning

Press the seasonings lightly onto the chicken.

3. Heat the Skillet

Place a large skillet over medium-high heat.

Add:

  • Olive oil
  • Butter

Let the skillet become hot before adding the chicken.

4. Add the Chicken

Place the chicken in the skillet.

Avoid overcrowding.

5. Sear the First Side

Cook for approximately 4–5 minutes without moving.

The underside should develop a golden crust.

6. Flip the Chicken

Turn the chicken.

7. Cook the Second Side

Cook for another 4–6 minutes, depending on thickness.

8. Check Doneness

The thickest part of the chicken should reach 165°F (74°C).

If the chicken is not fully cooked yet, that is fine if it will finish briefly in the sauce.

9. Remove the Chicken

Transfer the chicken to a clean plate.

Set aside.

Making the Creamy Garlic Parmesan Sauce

10. Reduce the Heat

Lower the skillet heat to medium.

11. Add Butter

Add 3 tablespoons butter.

Let it melt.

12. Add Garlic

Stir in the minced garlic.

Cook for approximately 30–45 seconds.

The garlic should become fragrant but should not brown heavily.

13. Deglaze with Chicken Broth

Pour in the chicken broth.

Use a wooden spoon to scrape up the browned bits from the bottom of the skillet.

14. Add Dijon Mustard

Whisk in the Dijon mustard.

15. Add Seasonings

Stir in:

  • Italian seasoning
  • Thyme
  • Smoked paprika
  • Red pepper flakes

16. Reduce Slightly

Let the broth simmer for approximately 2–3 minutes.

17. Add Heavy Cream

Reduce the heat to medium-low.

Pour in the heavy cream.

18. Simmer Gently

Let the sauce cook for approximately 3–5 minutes.

Avoid a hard boil.

19. Lower the Heat

Reduce to low before adding the cheese.

20. Add Parmesan

Add the Parmesan gradually.

Stir continuously until melted and smooth.

21. Check the Consistency

The sauce should be thick enough to coat the back of a spoon.

If it becomes too thick, add a splash of chicken broth.

22. Add Lemon Juice

Stir in lemon juice if desired.

A little acidity helps balance the richness.

23. Return the Chicken

Place the chicken and any juices from the plate back into the skillet.

24. Spoon Sauce Over the Chicken

Coat each piece generously.

25. Simmer Briefly

Cook over low heat for approximately 2–4 minutes, or until the chicken is fully heated and reaches 165°F.

Do not simmer for too long, or the chicken can become dry.

26. Add Optional Spinach

If using spinach, add it now.

Cook for approximately 1–2 minutes until wilted.

27. Taste and Adjust

Taste the sauce.

Adjust with:

  • Salt
  • Black pepper
  • Parmesan
  • Red pepper flakes
  • Chicken broth

28. Garnish

Finish with:

  • Fresh parsley
  • Parmesan
  • Black pepper

29. Serve

Serve immediately with plenty of creamy garlic Parmesan sauce spooned over the chicken.

What to Serve With Creamy Garlic Parmesan Chicken

This chicken pairs beautifully with creamy and starchy sides.

Try:

  • Garlic mashed potatoes
  • Creamy mashed potatoes
  • Parmesan rice
  • White rice
  • Buttered noodles
  • Fettuccine
  • Penne
  • Orzo

For vegetables, serve with:

  • Garlic asparagus
  • Roasted broccoli
  • Green beans
  • Brussels sprouts
  • Sautéed spinach
  • Roasted zucchini

For bread, try:

  • Garlic bread
  • Cheesy herb biscuits
  • Dinner rolls
  • Crusty bread

Tips for the Best Creamy Garlic Parmesan Chicken

Use Evenly Sized Chicken

Thin, even pieces cook more consistently.

Pat the Chicken Dry

Dry chicken develops a better sear.

Use a Hot Skillet

A hot pan helps create a golden crust.

Don’t Overcook

Remove chicken as soon as it reaches 165°F.

Use Fresh Garlic

Freshly minced garlic gives the sauce the best flavor.

Add Parmesan Over Low Heat

High heat can make cheese sauces grainy.

Keep the Cream at a Gentle Simmer

Avoid aggressive boiling.

Keep the Sauce Slightly Loose

It will thicken as it rests.

Easy Recipe Variations

Creamy Garlic Mushroom Chicken

Brown 8 ounces sliced mushrooms after cooking the chicken.

Add them back to the sauce near the end.

Creamy Garlic Spinach Chicken

Add 2–3 cups baby spinach to the finished sauce.

Sun-Dried Tomato Parmesan Chicken

Add ½ cup chopped sun-dried tomatoes.

Bacon Garlic Parmesan Chicken

Finish with ½ cup crispy crumbled bacon.

Creamy Cajun Chicken

Replace the Italian seasoning and paprika with Cajun seasoning.

Extra Cheesy Chicken

Add ½ cup shredded mozzarella after the Parmesan.

Lemon Garlic Parmesan Chicken

Increase the lemon juice and add fresh lemon zest.

Garlic Parmesan Chicken Pasta

Slice the cooked chicken and serve over fettuccine or penne tossed directly in the sauce.

How to Make Creamy Garlic Parmesan Chicken with Mushrooms

After removing the chicken from the skillet, add 8 ounces sliced mushrooms.

Cook over medium-high heat for approximately 5–7 minutes until golden and most of their moisture has evaporated.

Remove the mushrooms or leave them in the skillet.

Prepare the cream sauce as directed.

Return the mushrooms with the chicken before serving.

Make-Ahead Instructions

You can season the chicken several hours ahead.

Keep covered and refrigerated.

The sauce can also be prepared ahead, but it is best freshly made.

If reheating, use low heat and add a splash of broth or cream to restore the consistency.

How to Store Leftovers

Allow leftovers to cool.

Transfer the chicken and sauce to an airtight container.

Refrigerate for up to 3–4 days.

Reheating on the Stovetop

Place the chicken and sauce in a skillet over low heat.

Add a splash of:

  • Chicken broth
  • Milk
  • Heavy cream

Cover and warm gently.

Reheating in the Microwave

Microwave in short intervals.

Stir the sauce between intervals.

Avoid overheating because the chicken can become dry.

Freezing

Cooked chicken can be frozen, though cream sauces may change texture slightly after thawing.

For best results, freeze the chicken separately from the sauce.

Freeze for up to approximately 2 months.

Thaw overnight in the refrigerator before reheating gently.

Frequently Asked Questions

Can I use chicken thighs instead of chicken breasts?
Yes. Boneless, skinless chicken thighs work very well and stay especially juicy.

Why is my chicken dry?
It was likely overcooked. Use a thermometer and remove it once it reaches 165°F.

Can I use milk instead of heavy cream?
Yes, but the sauce will be thinner. Half-and-half is a better substitute.

Why did my Parmesan sauce become grainy?
The heat was probably too high when the cheese was added.

Can I add mushrooms?
Absolutely. Brown them before making the sauce.

Can I make this spicy?
Yes. Add cayenne, red pepper flakes, or Cajun seasoning.

Can I serve this with pasta?
Yes. Fettuccine, penne, rigatoni, and linguine all work well.

Can I make this ahead?
Yes, though the sauce is best when finished shortly before serving.

Final Thoughts

This Creamy Garlic Parmesan Chicken combines juicy golden chicken, butter, fresh garlic, herbs, chicken broth, heavy cream, Dijon mustard, and Parmesan in one easy skillet dinner.

The key is searing the chicken until golden, cooking it only to 165°F, and building the Parmesan sauce over gentle heat so it stays smooth and creamy.

Serve it with mashed potatoes, pasta, rice, or roasted vegetables for a comforting family meal that is rich, garlicky, cheesy, and full of savory flavor.

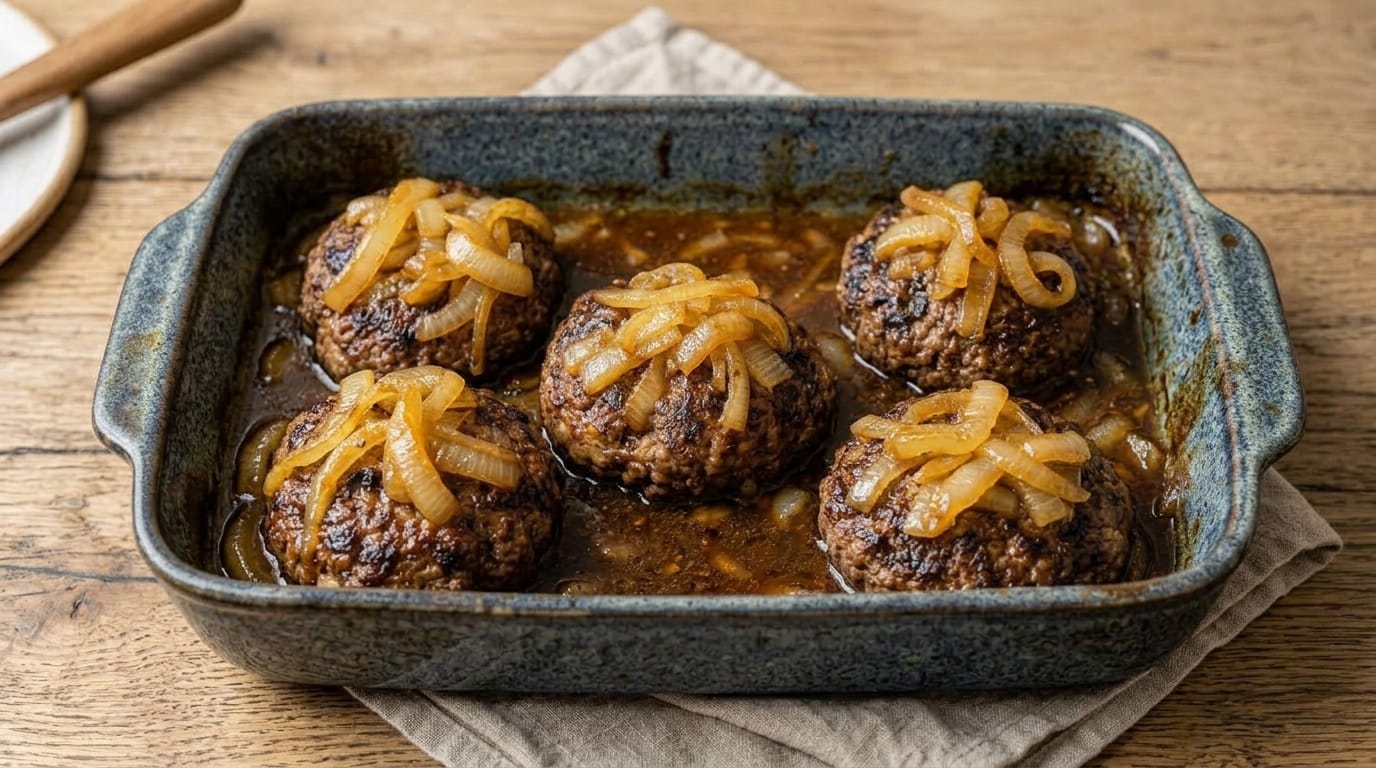
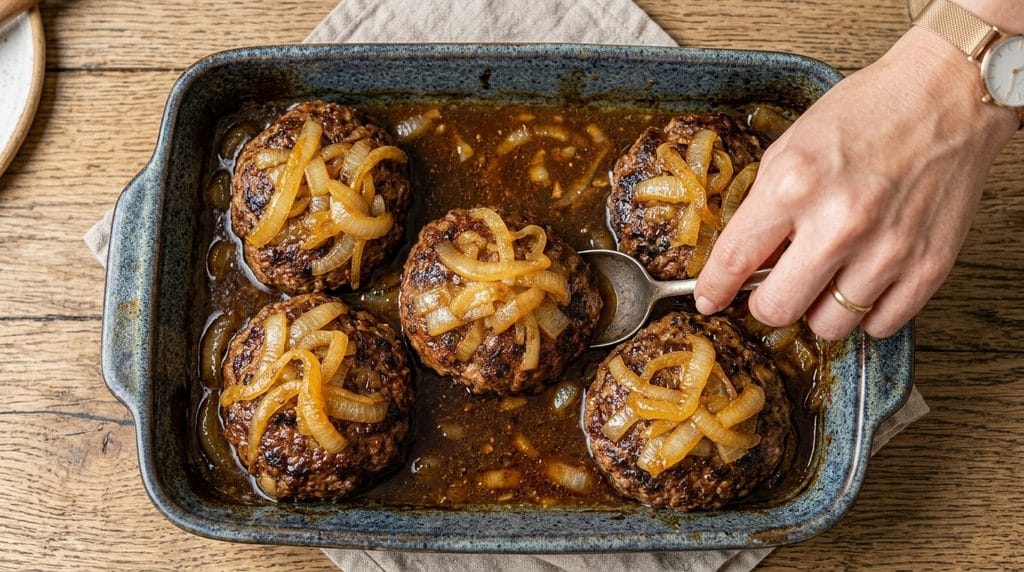
Easy Smothered Salisbury Steak with Caramelized Onion Gravy Recipe – Juicy, Savory, and Richly Comforting

If you are looking for a hearty comfort-food dinner with juicy beef patties and plenty of rich gravy, this Smothered Salisbury Steak with Caramelized Onion Gravy is an excellent choice. Seasoned ground beef patties are browned until deeply caramelized, then finished with tender golden onions in a savory beef gravy that coats every bite.

The combination of Worcestershire sauce, garlic, Dijon mustard, beef broth, butter, and slowly softened onions creates a deep, steakhouse-style flavor without requiring an expensive cut of beef. Baking the patties in the gravy keeps them moist while allowing the onions and beef juices to mingle into a glossy, flavorful sauce.

This Salisbury steak is perfect for family dinners, Sunday comfort food, meal prep, or chilly evenings. Serve it over creamy mashed potatoes, buttered noodles, rice, or roasted vegetables and spoon plenty of caramelized onion gravy over the top.

Why You’ll Love This Smothered Salisbury Steak with Caramelized Onion Gravy

The beef patties remain tender and juicy while developing beautifully browned exteriors.

Slowly cooked onions become sweet, savory, and deeply flavorful.

The homemade beef gravy is rich enough to coat the patties without being overly heavy.

Simple pantry seasonings create classic Salisbury steak flavor.

The patties can be prepared ahead, making dinner easier on busy days.

Everything can be finished together in one baking dish.

The recipe is easy to customize with mushrooms, cheese, bacon, extra garlic, or herbs.

Ingredients

For the Salisbury Steak Patties

  • 2 pounds ground beef, preferably 80–85% lean
  • ½ cup plain breadcrumbs
  • 1 large egg
  • ¼ cup whole milk
  • 2 tablespoons Worcestershire sauce
  • 1 tablespoon ketchup
  • 1 tablespoon Dijon mustard
  • 1 teaspoon garlic powder
  • 1 teaspoon onion powder
  • 1½ teaspoons kosher salt
  • 1 teaspoon freshly ground black pepper
  • ½ teaspoon smoked paprika
  • ½ teaspoon dried thyme
  • 2 tablespoons finely chopped fresh parsley
  • 2 tablespoons olive oil

For the Caramelized Onions

  • 3 large yellow onions, sliced into strips
  • 2 tablespoons unsalted butter
  • 1 tablespoon olive oil
  • ½ teaspoon kosher salt
  • ¼ teaspoon freshly ground black pepper
  • 1 teaspoon brown sugar, optional

For the Onion Gravy

  • 2 tablespoons unsalted butter
  • 2 tablespoons all-purpose flour
  • 2½ cups low-sodium beef broth
  • 1 tablespoon Worcestershire sauce
  • 1 teaspoon Dijon mustard
  • 1 teaspoon beef bouillon paste or granules
  • 3 garlic cloves, finely minced
  • ½ teaspoon dried thyme
  • ½ teaspoon garlic powder
  • ¼ teaspoon onion powder
  • ¼ teaspoon smoked paprika
  • ½ teaspoon freshly ground black pepper
  • Salt, to taste

Optional Finishing Ingredients

  • Chopped fresh parsley
  • Fresh thyme
  • Freshly cracked black pepper
  • Crispy fried onions
  • Sautéed mushrooms
  • Extra Worcestershire sauce
  • Flaky sea salt

How to Make Smothered Salisbury Steak with Caramelized Onion Gravy

1. Preheat the Oven

Preheat your oven to 375°F (190°C).

Lightly grease a large baking dish or line it securely with heavy-duty foil.

2. Prepare the Beef Mixture

Place the ground beef in a large mixing bowl.

Add:

  • Breadcrumbs
  • Egg
  • Milk
  • Worcestershire sauce
  • Ketchup
  • Dijon mustard
  • Garlic powder
  • Onion powder
  • Salt
  • Black pepper
  • Smoked paprika
  • Thyme
  • Parsley

3. Mix Gently

Use clean hands or a fork to combine the ingredients.

Mix only until evenly incorporated.

Avoid aggressively kneading the beef because overmixing can make the patties dense and firm.

4. Divide the Beef

Divide the mixture into 6 equal portions.

Each portion should be approximately 5–6 ounces.

5. Shape the Patties

Form each portion into a thick oval or round patty approximately ¾–1 inch thick.

Try to keep all patties similar in size so they cook evenly.

6. Create a Small Indentation

Press a shallow indentation into the center of each patty.

This helps prevent the centers from puffing excessively while cooking.

7. Chill Briefly

Place the patties on a plate.

Refrigerate for approximately 15–20 minutes.

This helps them firm up and makes them easier to brown.

8. Heat the Skillet

Place a large heavy skillet over medium-high heat.

Add the olive oil.

Allow the skillet to become hot.

9. Sear the First Side

Add the patties in batches without overcrowding.

Cook for approximately 3–4 minutes without moving them.

The underside should become deeply browned.

10. Flip the Patties

Turn each patty carefully.

Sear the second side for approximately 2–3 minutes.

The centers do not need to be fully cooked yet.

11. Transfer to the Baking Dish

Arrange the browned patties in the prepared baking dish.

Leave a little space between them so the gravy can surround each one.

12. Add Butter and Oil for the Onions

Reduce the skillet heat to medium-low.

Add:

  • 2 tablespoons butter
  • 1 tablespoon olive oil

Allow the butter to melt into the browned beef drippings.

13. Add the Onions

Add the sliced onions.

Season with salt and black pepper.

Stir to coat them in the butter and pan juices.

14. Begin Caramelizing

Cook the onions over medium-low heat for approximately 15–20 minutes, stirring every few minutes.

They should gradually soften and turn golden.

15. Add Optional Brown Sugar

If you want slightly sweeter caramelized onions, sprinkle in 1 teaspoon brown sugar.

Stir and continue cooking.

16. Cook Until Deeply Golden

Continue cooking until the onions are soft, glossy, and golden brown.

Do not rush this step with excessively high heat.

Slow cooking gives the onions better flavor.

17. Remove Some Onions

Transfer approximately half of the caramelized onions over the browned Salisbury steak patties.

Leave the remaining onions in the skillet for the gravy.

18. Add Garlic

Add the minced garlic to the skillet.

Cook for approximately 30–45 seconds, stirring constantly.

19. Add Butter for the Gravy

Add another 2 tablespoons butter.

Allow it to melt.

20. Add the Flour

Sprinkle in the all-purpose flour.

Whisk continuously for approximately 1–2 minutes.

The flour should absorb the butter and form a smooth paste around the onions.

21. Add the Beef Broth

Slowly pour in the beef broth while whisking.

Adding the broth gradually reduces the possibility of lumps.

22. Scrape the Skillet

Use a wooden spoon to scrape the browned beef bits from the bottom.

These caramelized pieces add significant flavor to the gravy.

23. Add Worcestershire Sauce

Stir in the Worcestershire sauce.

It deepens the savory beef flavor.

24. Add Dijon Mustard

Add the Dijon mustard.

It contributes subtle tang without overpowering the gravy.

25. Add Beef Bouillon

Stir in the beef bouillon until dissolved.

26. Add the Seasonings

Add:

  • Thyme
  • Garlic powder
  • Onion powder
  • Smoked paprika
  • Black pepper

Stir thoroughly.

27. Simmer the Gravy

Bring the mixture to a gentle simmer.

Cook for approximately 4–6 minutes, stirring frequently.

The gravy should begin thickening.

28. Check the Consistency

The gravy should coat the back of a spoon while remaining pourable.

Remember that it will thicken more while baking.

29. Taste Before Salting

Taste the gravy.

Beef broth, Worcestershire sauce, and bouillon can already contain plenty of sodium.

Add additional salt only if needed.

30. Pour the Gravy Over the Patties

Carefully pour the onion gravy over and around the Salisbury steaks.

Make sure each patty receives plenty of sauce.

31. Add Remaining Onions

Arrange the remaining caramelized onions generously over the tops of the patties.

32. Cover the Baking Dish

Cover loosely with foil.

This helps the patties remain moist while they finish cooking.

33. Bake

Bake at 375°F (190°C) for approximately 20–25 minutes.

34. Check the Internal Temperature

Insert an instant-read thermometer into the center of a thick patty.

Because Salisbury steak is made from ground beef, it should reach 160°F (71°C).

35. Remove the Foil

During the final 5–10 minutes, remove the foil.

This allows the tops of the patties and onions to develop additional color.

36. Optional Broil

For darker caramelization similar to the finished dish, broil for approximately 1–2 minutes.

Watch carefully to prevent burning.

37. Spoon Over the Gravy

Remove the baking dish from the oven.

Spoon the hot onion gravy over each patty.

38. Rest Briefly

Allow the Salisbury steaks to rest for approximately 5 minutes.

The gravy will thicken slightly while resting.

39. Garnish

Finish with:

  • Fresh parsley
  • Fresh thyme
  • Freshly cracked black pepper

40. Serve

Serve each Salisbury steak generously topped with caramelized onions and plenty of rich beef gravy.

What to Serve With Smothered Salisbury Steak with Caramelized Onion Gravy

Salisbury steak is especially delicious with creamy potatoes that can absorb the rich onion gravy.

Serve it with:

  • Creamy mashed potatoes
  • Garlic mashed potatoes
  • Roasted potatoes
  • Parmesan mashed potatoes
  • Buttered egg noodles
  • White rice
  • Brown rice
  • Creamy polenta
  • Buttered pasta

For vegetables, pair it with:

  • Garlic green beans
  • Roasted carrots
  • Steamed broccoli
  • Buttered peas
  • Brussels sprouts
  • Roasted asparagus
  • Corn
  • Sautéed spinach

Warm dinner rolls, biscuits, or crusty bread are also perfect for soaking up the remaining gravy.

Tips for the Best Smothered Salisbury Steak

Don’t Use Extremely Lean Ground Beef

Ground beef with approximately 15–20% fat produces juicier, more flavorful patties.

Don’t Overmix the Beef

Mix only until the ingredients are evenly combined.

Overworking ground beef creates a firm, meatloaf-like texture.

Chill the Patties Before Browning

A short chilling period helps them retain their shape.

Sear Before Baking

Browning creates deep caramelized flavor that cannot develop as effectively in the oven alone.

Caramelize the Onions Slowly

Medium-low heat produces sweeter, more flavorful onions.

High heat may burn the edges before the centers soften.

Use the Same Skillet for the Gravy

The browned beef bits left behind contain concentrated flavor.

Add Broth Gradually

Slowly whisking broth into the flour mixture prevents lumpy gravy.

Don’t Make the Gravy Too Thick Initially

It will continue reducing and thickening in the oven.

Use a Meat Thermometer

Ground beef should reach 160°F (71°C) for safe serving.

Rest Before Serving

A brief rest helps the patties retain their juices and allows the gravy to settle.

Easy Recipe Variations

Mushroom Salisbury Steak

Add 12 ounces sliced cremini or baby bella mushrooms with the onions.

Cook until browned before preparing the gravy.

French Onion Salisbury Steak

Increase the onions to 4 large onions.

Top each patty with Swiss or Gruyère cheese during the final 5 minutes of baking.

Garlic Onion Salisbury Steak

Increase the garlic to 6 cloves for a stronger savory flavor.

Mushroom Swiss Salisbury Steak

Add sautéed mushrooms and place one slice of Swiss cheese over each patty during the final few minutes.

Bacon Salisbury Steak

Add ½ cup crispy chopped bacon to the gravy or sprinkle it over the finished dish.

Peppercorn Salisbury Steak

Add 1½ teaspoons coarsely cracked black peppercorns to the gravy.

Creamy Salisbury Steak

Stir ½ cup heavy cream into the finished gravy before pouring it over the patties.

Spicy Salisbury Steak

Add:

  • ½ teaspoon crushed red pepper flakes
  • ¼ teaspoon cayenne pepper

Herb Butter Salisbury Steak

Finish the gravy with 1 tablespoon butter, fresh parsley, and thyme.

Cheesy Onion Salisbury Steak

Top each patty with provolone, mozzarella, Swiss, or Monterey Jack during the final 5 minutes.

Slow Cooker Method

These smothered Salisbury steaks can also be prepared in a slow cooker.

Prepare and brown the patties exactly as directed.

Arrange them in the slow cooker.

Caramelize the onions in the skillet and place them over the patties.

Prepare the gravy with the beef broth, Worcestershire sauce, Dijon mustard, garlic, seasonings, and flour.

Pour the gravy over the beef.

Cover and cook on LOW for approximately 4–5 hours or HIGH for approximately 2½–3 hours.

Check that the centers of the patties reach 160°F (71°C).

If the gravy needs additional thickening, remove the patties and stir in a slurry made from:

  • 1 tablespoon cornstarch
  • 1 tablespoon cold water

Cook on HIGH for approximately 10–15 minutes.

Return the Salisbury steaks, spoon the gravy over them, and serve with the softened onions.

Make-Ahead Instructions

The Salisbury steak patties can be shaped up to 24 hours ahead.

Arrange them on a plate or baking sheet.

Cover tightly and refrigerate.

The onions can also be caramelized one day ahead and refrigerated separately.

The gravy can be prepared in advance and reheated gently before assembling the dish.

You can also brown the patties and assemble the complete baking dish several hours ahead.

Cover and refrigerate.

When ready to cook, allow the dish to stand at room temperature for approximately 15–20 minutes, then bake as directed.

A refrigerated baking dish may require several additional minutes of cooking.

How to Store Leftovers

Allow leftover Salisbury steak and gravy to cool.

Transfer everything to an airtight container.

Refrigerate for up to 3–4 days.

Store the patties covered with plenty of gravy to help keep them moist.

Reheating on the Stovetop

Place the patties and onion gravy in a skillet.

Add approximately 2 tablespoons beef broth if the gravy has become very thick.

Cover and warm over low heat until thoroughly heated.

Reheating in the Oven

Place the Salisbury steaks in a baking dish.

Spoon the gravy and onions over them.

Cover tightly with foil.

Reheat at 325°F (165°C) for approximately 15–20 minutes.

Microwave

Place one patty with plenty of gravy in a microwave-safe dish.

Cover loosely.

Microwave at medium power in short intervals until hot.

Stir the gravy between intervals if necessary.

Freezing

Salisbury steak freezes extremely well.

Allow the patties, onions, and gravy to cool completely.

Transfer portions to airtight freezer-safe containers.

Make sure the patties are covered with some gravy.

Freeze for up to approximately 2–3 months.

Thaw overnight in the refrigerator.

Reheat gently on the stovetop or in the oven.

If the gravy becomes too thick after freezing, stir in a small amount of beef broth.

Frequently Asked Questions

What is Salisbury steak made from?

Salisbury steak is traditionally made from seasoned ground beef formed into patties and served with a savory onion or mushroom gravy.

Is Salisbury steak the same as hamburger steak?

They are similar, but Salisbury steak usually contains breadcrumbs, egg, Worcestershire sauce, and additional seasonings mixed directly into the beef.

Can I use ground turkey?

Yes. Ground turkey can be substituted, but it must reach an internal temperature of 165°F (74°C).

Why are my Salisbury steak patties falling apart?

The mixture may need more binding from the breadcrumbs and egg, or the patties may have been turned before developing a strong crust.

Can I skip caramelizing the onions?

You can sauté them for a shorter period, but slowly caramelized onions provide considerably richer flavor.

Can I add mushrooms?

Absolutely. Mushrooms are one of the best additions to Salisbury steak gravy.

Why is my gravy too thin?

Allow it to simmer longer or add a small cornstarch slurry.

Why is my gravy too thick?

Whisk in additional beef broth a few tablespoons at a time.

Can I make this without flour?

Yes. Skip the flour and thicken the gravy near the end with cornstarch mixed with cold water.

Can I prepare this one day ahead?

Yes. Salisbury steak reheats very well and often develops even deeper flavor after resting overnight in the gravy.

Final Thoughts

This Smothered Salisbury Steak with Caramelized Onion Gravy combines juicy seasoned beef patties, slowly caramelized onions, garlic, Worcestershire sauce, Dijon mustard, herbs, and rich beef gravy in one satisfying comfort-food dinner.

The key is gently mixing the beef, browning the patties before baking, giving the onions enough time to become soft and golden, and using the flavorful skillet drippings to build a deep savory gravy.

Serve the steaks generously smothered with caramelized onions and glossy brown gravy alongside mashed potatoes, noodles, rice, or vegetables for a hearty homemade meal that is juicy, savory, and packed with classic comfort-food flavor.

Easy Garlic Butter Lobster Fried Rice Recipe – Rich, Savory, and Restaurant-Style

If you are looking for a fried rice recipe that feels especially luxurious, this Garlic Butter Lobster Fried Rice is an excellent choice. Tender lobster meat is tossed with buttery garlic, day-old rice, eggs, vegetables, soy sauce, sesame oil, and green onions for a rich, savory dish that comes together quickly in one skillet or wok.

The garlic butter gives the rice a steakhouse-style richness while the lobster keeps the dish light, sweet, and elegant. Using cold cooked rice helps the grains stay separate and slightly crisp instead of turning soft or sticky.

This recipe is perfect for date night, special occasions, weekend dinners, or whenever you want to turn leftover rice into something impressive.

Why You’ll Love This Garlic Butter Lobster Fried Rice

It is rich and savory without requiring a complicated sauce.

Lobster adds a naturally sweet seafood flavor.

Cold rice fries beautifully and absorbs the garlic butter.

The recipe comes together quickly once everything is prepped.

Eggs and vegetables make it feel like a complete meal.

It is easy to customize with shrimp, crab, steak, extra vegetables, or a spicy finish.

Ingredients

For the Lobster

  • 1 pound cooked lobster meat, cut into bite-size pieces
  • 1 tablespoon unsalted butter
  • 2 garlic cloves, finely minced
  • ¼ teaspoon kosher salt
  • ¼ teaspoon freshly ground black pepper
  • 1 teaspoon fresh lemon juice

For the Fried Rice

  • 4 cups cold cooked long-grain white rice or jasmine rice
  • 2 tablespoons neutral cooking oil
  • 2 tablespoons unsalted butter
  • 4 garlic cloves, finely minced
  • 1 teaspoon finely grated fresh ginger, optional
  • 3 large eggs, lightly beaten
  • 1 cup frozen peas and carrots, thawed
  • ½ cup finely diced yellow onion
  • 4 green onions, sliced, white and green parts separated
  • 3 tablespoons low-sodium soy sauce
  • 1 tablespoon oyster sauce, optional
  • 1 teaspoon toasted sesame oil
  • ½ teaspoon freshly ground black pepper

For Finishing

  • 1 tablespoon unsalted butter
  • 1 tablespoon chopped fresh parsley
  • 1 teaspoon fresh lemon juice
  • Extra green onions
  • Sesame seeds, optional
  • Red pepper flakes, optional

How to Make Garlic Butter Lobster Fried Rice

1. Prepare the Rice

For the best fried rice, use rice that has been cooked and refrigerated.

Cold rice is firmer and contains less surface moisture than freshly cooked rice.

Break apart any large clumps with your hands or a fork.

2. Prepare the Lobster

Cut the cooked lobster meat into bite-size pieces.

Try not to shred it too finely.

Larger pieces give the finished fried rice a better texture.

3. Pat the Lobster Dry

Blot the lobster lightly with paper towels.

This helps it sauté instead of steam.

4. Heat a Large Wok or Skillet

Place a large wok or heavy skillet over medium-high heat.

Add 1 tablespoon butter.

5. Add Garlic

Add 2 minced garlic cloves.

Cook for approximately 20–30 seconds.

6. Add the Lobster

Add the lobster meat.

Season lightly with salt and black pepper.

7. Toss Briefly

Cook for approximately 1–2 minutes, just until heated through.

Because the lobster is already cooked, avoid cooking it for too long.

8. Add Lemon

Drizzle with lemon juice.

9. Remove the Lobster

Transfer the lobster to a plate.

Set aside.

Cooking the Fried Rice

10. Increase the Heat

Return the skillet to medium-high or high heat.

11. Add Oil

Add the neutral oil.

12. Add the Onion

Add the diced onion.

Cook for approximately 2 minutes.

13. Add the White Parts of the Green Onions

Stir in the white portions of the green onions.

14. Add Garlic and Ginger

Add:

  • 4 minced garlic cloves
  • Ginger, if using

Cook for approximately 30 seconds.

15. Push the Vegetables Aside

Move the onion mixture to one side of the skillet.

16. Add the Eggs

Pour the beaten eggs into the empty side.

17. Scramble

Cook for approximately 1 minute, stirring gently.

Once mostly set, break the eggs into small pieces.

18. Add Peas and Carrots

Add the peas and carrots.

Cook for approximately 1–2 minutes.

19. Add Butter

Add 2 tablespoons butter.

Let it melt across the skillet.

20. Add the Rice

Add the cold cooked rice.

21. Break Up Clumps

Use a spatula to separate the grains.

22. Spread the Rice Out

Press the rice into a fairly even layer.

Let it cook undisturbed for approximately 1 minute.

This gives some of the rice a lightly toasted texture.

23. Toss

Stir and toss the rice.

24. Add Soy Sauce

Drizzle the soy sauce around the edges of the hot skillet rather than pouring it all into one spot.

This helps distribute it more evenly.

25. Add Oyster Sauce

Stir in oyster sauce if using.

26. Add Sesame Oil

Drizzle in toasted sesame oil.

27. Add Black Pepper

Season with black pepper.

28. Toss Thoroughly

Cook for approximately 2–3 minutes, tossing frequently.

The rice should be hot, loose, and evenly seasoned.

29. Return the Lobster

Add the garlic butter lobster back to the skillet.

30. Fold Gently

Toss just enough to distribute the lobster throughout the rice.

Avoid stirring too aggressively.

31. Add the Final Butter

Add 1 tablespoon butter.

Toss until melted.

This gives the rice an extra glossy, rich finish.

32. Add Green Onion Tops

Stir in most of the remaining green onions.

33. Add Lemon

Finish with fresh lemon juice.

34. Taste and Adjust

Taste the fried rice.

Adjust with:

  • Soy sauce
  • Black pepper
  • Lemon
  • Butter

35. Garnish

Finish with:

  • Green onions
  • Parsley
  • Sesame seeds
  • Red pepper flakes, if desired

36. Serve

Serve immediately while the rice is hot and the lobster is tender.

What to Serve With Garlic Butter Lobster Fried Rice

This fried rice is hearty enough to serve as a complete meal.

For a larger seafood dinner, pair it with:

  • Garlic butter shrimp
  • Baked scallops
  • Grilled salmon
  • Crab cakes
  • Seared tuna

For vegetables, serve with:

  • Garlic broccoli
  • Green beans
  • Bok choy
  • Asparagus
  • Stir-fried vegetables

For a lighter side, try:

  • Cucumber salad
  • Asian-style slaw
  • Simple green salad

Tips for the Best Lobster Fried Rice

Use Cold Rice

This is one of the most important steps.

Freshly cooked rice is softer and more likely to become mushy.

Use a Large Pan

The rice needs space to fry instead of steam.

Cook Over High Heat

High heat helps create the lightly toasted fried-rice texture.

Don’t Overcook the Lobster

Cooked lobster only needs to be reheated briefly.

Prep Everything First

Fried rice cooks quickly, so have every ingredient ready before you begin.

Use Butter and Oil Together

Oil handles high heat while butter adds rich flavor.

Add Soy Sauce Gradually

It is easier to add more than to fix overly salty rice.

Don’t Use Too Much Sesame Oil

Sesame oil is strong and should be used as a finishing flavor rather than the main cooking fat.

Easy Recipe Variations

Spicy Lobster Fried Rice

Add:

  • Sriracha
  • Chili crisp
  • Red pepper flakes
  • Finely diced jalapeño

Lobster Shrimp Fried Rice

Use half lobster and half shrimp.

Cook raw shrimp to 145°F (63°C) before adding to the rice.

Lobster Crab Fried Rice

Add lump crab meat during the final minute.

Garlic Parmesan Lobster Fried Rice

Add a small amount of freshly grated Parmesan at the end for a fusion-style variation.

Cajun Lobster Fried Rice

Season the lobster with Cajun seasoning and add diced bell peppers.

Steak and Lobster Fried Rice

Add thinly sliced seared steak for a surf-and-turf version.

Pineapple Lobster Fried Rice

Add 1 cup diced pineapple for a sweet-savory variation.

Vegetable Lobster Fried Rice

Add:

  • Bell peppers
  • Mushrooms
  • Corn
  • Broccoli
  • Snow peas

Can I Use Freshly Cooked Rice?

Yes, but it needs to be cooled first.

Spread freshly cooked rice on a large baking sheet in a thin layer.

Let it cool slightly.

Transfer to the refrigerator for at least 30–60 minutes if possible.

The drier and firmer the rice becomes, the better it will fry.

Make-Ahead Instructions

Cook the rice up to 1–2 days ahead.

Refrigerate in an airtight container.

Prepare the vegetables and sauce ingredients ahead.

Lobster is best added shortly before serving so it does not become rubbery.

How to Store Leftovers

Cool the fried rice promptly.

Transfer to an airtight container.

Refrigerate for up to 3 days.

Reheating in a Skillet

Heat a skillet over medium-high heat.

Add a small amount of oil or butter.

Add the fried rice.

Cook until steaming hot throughout.

Add the lobster toward the end if stored separately.

Reheating in the Microwave

Place in a microwave-safe dish.

Cover loosely.

Microwave in short intervals, stirring between each one, until thoroughly hot.

Freezing

The rice portion freezes reasonably well.

For best texture, freeze the rice without the lobster.

Transfer cooled fried rice to a freezer-safe container.

Freeze for up to approximately 2 months.

Thaw overnight in the refrigerator or reheat directly from frozen in a hot skillet.

Freshly cooked lobster is best added after reheating.

Frequently Asked Questions

What type of rice is best for lobster fried rice?
Cold jasmine or long-grain white rice works especially well because the grains stay separate.

Can I use frozen lobster meat?
Yes. Thaw it completely in the refrigerator and pat it dry before cooking.

Can I use lobster tails?
Absolutely. Cook the tails first, remove the meat, chop it into pieces, and add it toward the end.

Why is my fried rice mushy?
The rice may have been too fresh or wet, the pan may have been overcrowded, or the heat may have been too low.

Can I make this without oyster sauce?
Yes. It is optional. Add a little extra soy sauce or Worcestershire sauce if desired.

Can I add shrimp?
Yes. Shrimp pairs extremely well with lobster.

Can I use brown rice?
Yes. Cold cooked brown rice also works well, though the flavor and texture will be slightly nuttier and firmer.

How do I keep the lobster tender?
Add it only briefly at the beginning and again at the very end. Avoid prolonged frying.

Final Thoughts

This Garlic Butter Lobster Fried Rice combines tender lobster, buttery garlic, cold rice, eggs, vegetables, soy sauce, sesame oil, and fresh green onions in one rich and satisfying skillet meal.

The key is using cold rice, cooking over high heat, keeping the grains moving without overcrowding the pan, and adding the lobster only briefly so it stays tender.

Finish with extra garlic butter, fresh lemon, and green onions for a restaurant-inspired fried rice that is savory, buttery, slightly crisp, and packed with sweet lobster in every bite.

Easy French Onion Meatloaf with Gruyère Cheese Recipe – Rich, Savory, and Comforting

If you love classic meatloaf and the deep savory flavor of French onion soup, this French Onion Meatloaf with Gruyère Cheese brings the two together in one comforting dinner. Juicy ground beef is mixed with caramelized onions, garlic, herbs, Worcestershire sauce, Dijon mustard, breadcrumbs, and Parmesan, then baked with a layer of melty Gruyère cheese for a rich, deeply flavored finish.

The caramelized onions are the star of this recipe. Cooking them slowly allows their natural sweetness to develop, giving the meatloaf a savory-sweet flavor that pairs beautifully with beef and Gruyère. A simple onion gravy adds even more richness and makes this meatloaf perfect for serving over mashed potatoes.

This recipe is ideal for family dinners, cozy weekends, holidays, or anytime you want to give traditional meatloaf a more elegant, French-inspired twist.

Why You’ll Love This French Onion Meatloaf with Gruyère Cheese

The meatloaf stays juicy and tender.

Slowly caramelized onions add deep, rich flavor.

Gruyère melts beautifully and gives the dish a nutty, savory finish.

Worcestershire and Dijon add extra depth without overpowering the beef.

The onion gravy makes the meatloaf especially comforting.

It pairs beautifully with mashed potatoes, roasted vegetables, or buttered noodles.

Leftovers are excellent in sandwiches and grilled melts.

Ingredients

For the Caramelized Onions

  • 3 large yellow onions, thinly sliced
  • 2 tablespoons unsalted butter
  • 1 tablespoon olive oil
  • ½ teaspoon kosher salt
  • ¼ teaspoon freshly ground black pepper
  • 1 teaspoon Worcestershire sauce
  • 1 teaspoon fresh thyme leaves

For the Meatloaf

  • 2 pounds ground beef, preferably 80/20 or 85/15
  • 1 cup soft breadcrumbs or panko breadcrumbs
  • ½ cup whole milk
  • 2 large eggs
  • ½ cup freshly grated Parmesan cheese
  • 3 garlic cloves, finely minced
  • 2 tablespoons chopped fresh parsley
  • 1 tablespoon Worcestershire sauce
  • 1 tablespoon Dijon mustard
  • 1 teaspoon kosher salt
  • ¾ teaspoon freshly ground black pepper
  • 1 teaspoon garlic powder
  • ½ teaspoon onion powder
  • 1 teaspoon dried thyme
  • ½ teaspoon smoked paprika
  • 1 cup caramelized onions, cooled
  • 1 cup shredded Gruyère cheese

For the Gruyère Topping

  • 1 cup shredded Gruyère cheese
  • ¼ cup freshly grated Parmesan cheese
  • ½ cup caramelized onions

For the French Onion Gravy

  • 2 tablespoons unsalted butter
  • 2 tablespoons all-purpose flour
  • 1½ cups low-sodium beef broth
  • ½ cup caramelized onions
  • 1 teaspoon Worcestershire sauce
  • 1 teaspoon Dijon mustard
  • ½ teaspoon dried thyme
  • ¼ teaspoon freshly ground black pepper
  • Salt to taste

For Garnishing

  • Fresh parsley
  • Fresh thyme
  • Extra Gruyère
  • Freshly cracked black pepper

How to Make French Onion Meatloaf with Gruyère Cheese

1. Preheat the Oven

Preheat your oven to 375°F (190°C).

Line a rimmed baking sheet with parchment paper or lightly grease a loaf pan.

A free-form meatloaf on a baking sheet will usually develop more browned edges, while a loaf pan creates a slightly softer exterior.

2. Prepare the Onions

Peel and thinly slice the onions.

Try to keep the slices relatively even.

3. Heat the Skillet

Place a large skillet over medium heat.

Add:

  • Butter
  • Olive oil

4. Add the Onions

Add the sliced onions.

Sprinkle with salt and black pepper.

5. Begin Cooking

Cook for approximately 5 minutes, stirring occasionally.

6. Reduce the Heat

Lower the heat to medium-low.

7. Caramelize Slowly

Continue cooking for approximately 25–35 minutes.

Stir every few minutes.

The onions should become very soft and deeply golden.

8. Deglaze if Needed

If dark bits begin sticking to the skillet, add a tablespoon or two of water or beef broth.

Scrape the bottom gently.

9. Add Worcestershire and Thyme

During the final few minutes, stir in:

  • Worcestershire sauce
  • Fresh thyme

10. Remove from Heat

Transfer the onions to a bowl.

Let them cool slightly.

Reserve approximately 1 cup for the meatloaf, ½ cup for the topping, and ½ cup for the gravy.

Preparing the Meatloaf Mixture

11. Make the Breadcrumb Mixture

In a large mixing bowl, combine:

  • Breadcrumbs
  • Milk

Let the mixture stand for approximately 3–5 minutes.

This helps keep the finished meatloaf tender.

12. Add the Eggs

Add the eggs.

13. Add the Parmesan

Stir in the Parmesan.

14. Add Garlic and Herbs

Add:

  • Garlic
  • Parsley

15. Add the Wet Seasonings

Stir in:

  • Worcestershire sauce
  • Dijon mustard

16. Add the Dry Seasonings

Add:

  • Salt
  • Black pepper
  • Garlic powder
  • Onion powder
  • Thyme
  • Smoked paprika

17. Add the Caramelized Onions

Add 1 cup cooled caramelized onions.

18. Add the Ground Beef

Add the ground beef.

19. Mix Gently

Use clean hands or a large fork to combine everything just until evenly distributed.

Avoid squeezing or overworking the meat.

Overmixing can make meatloaf dense and firm.

20. Add Gruyère

Fold in 1 cup shredded Gruyère.

Mix only enough to distribute the cheese.

21. Shape the Meatloaf

Transfer the mixture to the prepared baking sheet.

Shape into a loaf approximately 9×5 inches.

Keep the thickness relatively even.

22. Bake the First Stage

Bake uncovered for approximately 40–45 minutes.

23. Prepare the Cheese Topping

Combine:

  • Gruyère
  • Parmesan
  • Reserved caramelized onions

24. Add the Topping

Carefully remove the meatloaf from the oven.

Spread the caramelized onions over the top.

Sprinkle with Gruyère and Parmesan.

25. Return to the Oven

Bake for another 15–25 minutes.

26. Check Doneness

Insert an instant-read thermometer into the center.

Ground beef should reach 160°F (71°C).

27. Broil if Desired

For a more golden cheese crust, broil for approximately 1–2 minutes.

Watch carefully.

28. Remove from the Oven

Transfer the meatloaf to a heatproof surface.

29. Rest

Let the meatloaf rest for at least 10–15 minutes before slicing.

This helps the juices redistribute and makes the slices hold together better.

Making the French Onion Gravy

30. Melt the Butter

Place a medium saucepan over medium heat.

Add the butter.

31. Add Flour

Whisk in the flour.

Cook for approximately 1 minute.

32. Add Beef Broth

Gradually pour in the beef broth while whisking.

33. Add the Onions

Stir in the reserved caramelized onions.

34. Add Worcestershire

Stir in the Worcestershire sauce.

35. Add Dijon

Whisk in the Dijon mustard.

36. Add Seasonings

Add:

  • Thyme
  • Black pepper

37. Simmer

Cook for approximately 5–7 minutes.

The gravy should thicken enough to coat a spoon.

38. Adjust the Consistency

If too thick, add a little extra broth.

If too thin, simmer for another minute or two.

39. Taste

Adjust with:

  • Salt
  • Black pepper
  • Worcestershire
  • Dijon

40. Slice the Meatloaf

Cut the rested meatloaf into thick slices.

41. Add Gravy

Spoon the warm French onion gravy over each serving.

42. Garnish

Finish with:

  • Fresh parsley
  • Thyme
  • Black pepper
  • Extra Gruyère, if desired

43. Serve

Serve immediately while the cheese is warm and the gravy is hot.

What to Serve With French Onion Meatloaf

This meatloaf pairs especially well with creamy potato dishes.

Try:

  • Garlic mashed potatoes
  • Creamy mashed potatoes
  • Parmesan mashed potatoes
  • Scalloped potatoes
  • Crispy roasted potatoes

It also works beautifully with:

  • Buttered egg noodles
  • Rice pilaf
  • Creamy polenta

For vegetables, serve with:

  • Green beans
  • Garlic asparagus
  • Roasted broccoli
  • Brussels sprouts
  • Glazed carrots
  • Sautéed spinach

For bread, add:

  • Crusty French bread
  • Garlic bread
  • Dinner rolls
  • Cheddar herb biscuits

Tips for the Best French Onion Meatloaf

Caramelize the Onions Properly

Do not rush this step.

Deeply caramelized onions provide much more flavor than quickly sautéed onions.

Let the Onions Cool

Adding very hot onions directly to the raw beef mixture can make the mixture difficult to handle.

Don’t Overmix

Gentle mixing keeps the meatloaf tender.

Use Ground Beef with Some Fat

Very lean beef can make meatloaf dry.

Use Freshly Grated Gruyère

It melts more smoothly and gives the best flavor.

Don’t Guess Doneness

Use an instant-read thermometer.

Ground beef meatloaf should reach 160°F.

Rest Before Slicing

This is important for clean slices and better juiciness.

Save Extra Onions

Using caramelized onions both inside and on top gives the dish much deeper flavor.

Easy Recipe Variations

Mushroom French Onion Meatloaf

Brown 8 ounces finely chopped mushrooms.

Cook until their moisture evaporates.

Add half to the meatloaf and half to the gravy.

Bacon Gruyère Meatloaf

Add ½ cup crispy crumbled bacon to the meat mixture.

Stuffed Gruyère Meatloaf

Instead of mixing all the cheese throughout, shape half the meat mixture into a loaf base.

Add a layer of Gruyère in the center.

Cover with the remaining meat mixture and seal thoroughly.

Swiss Cheese French Onion Meatloaf

Replace Gruyère with Swiss cheese for a slightly milder flavor.

Garlic Parmesan French Onion Meatloaf

Increase the garlic and Parmesan and reduce the Gruyère slightly.

Spicy French Onion Meatloaf

Add:

  • Cayenne
  • Red pepper flakes
  • Pepper Jack cheese

Turkey French Onion Meatloaf

Replace the ground beef with ground turkey.

Cook to 165°F (74°C).

Mini French Onion Meatloaves

Divide the mixture into individual loaves.

Bake at 375°F for approximately 25–35 minutes, depending on size, until the centers reach 160°F.

Make-Ahead Instructions

The onions can be caramelized up to 3 days ahead.

Refrigerate in an airtight container.

The meatloaf can also be assembled up to 1 day ahead.

Cover and refrigerate.

Add the cheese-and-onion topping during the final stage of baking.

The gravy can be prepared ahead and reheated gently with a splash of beef broth.

How to Store Leftovers

Allow leftovers to cool.

Transfer sliced meatloaf to an airtight container.

Refrigerate for up to 3–4 days.

Store the gravy separately when possible.

Reheating in the Oven

Place meatloaf slices in a covered baking dish.

Add a spoonful of gravy or beef broth.

Reheat at 325°F (165°C) until hot.

Reheating on the Stovetop

Warm slices gently in a covered skillet with a little gravy.

Microwave

Microwave individual portions in short intervals.

Cover with gravy to help retain moisture.

Freezing

French onion meatloaf freezes very well.

Freezing the Whole Meatloaf

Cool completely.

Wrap tightly.

Freeze for up to approximately 2–3 months.

Freezing Individual Slices

Place parchment between cooled slices.

Transfer to a freezer-safe container.

Freeze for up to 2–3 months.

Thaw overnight in the refrigerator before reheating.

For best texture, prepare fresh gravy after thawing or freeze the gravy separately.

Leftover French Onion Meatloaf Ideas

Use leftover slices for:

  • Meatloaf sandwiches
  • Grilled meatloaf melts
  • Open-faced sandwiches
  • Loaded mashed potatoes
  • Meatloaf sliders
  • Breakfast hash
  • Meatloaf grilled cheese

For an especially good sandwich, place a slice of meatloaf on toasted sourdough with extra Gruyère and caramelized onions, then grill until the cheese melts.

Frequently Asked Questions

What cheese is best for French onion meatloaf?
Gruyère is an excellent choice because its nutty, savory flavor pairs beautifully with caramelized onions and beef.

Can I use Swiss cheese instead?
Yes. Swiss cheese is a good and more affordable substitute.

Why is my meatloaf dry?
The beef may have been too lean, the mixture may have been overworked, or the meatloaf may have been cooked beyond 160°F.

Why is my meatloaf falling apart?
It may need more binder, or it may have been sliced before resting.

Can I make the onions ahead?
Absolutely. Caramelized onions can be refrigerated for several days.

Can I use ground turkey?
Yes. Ground turkey works well, but cook it to 165°F.

Can I make this without the gravy?
Yes. The caramelized onion and Gruyère topping provides plenty of flavor on its own.

Can I make individual meatloaves?
Yes. Mini loaves cook faster and are excellent for portioning and meal prep.

Final Thoughts

This French Onion Meatloaf with Gruyère Cheese combines juicy seasoned beef, deeply caramelized onions, garlic, Dijon, Worcestershire sauce, herbs, Parmesan, and melted Gruyère in one rich comfort-food dinner.

The key is taking the time to caramelize the onions properly, mixing the beef gently, and baking only until the center reaches 160°F so the meatloaf stays juicy.

Serve thick slices with creamy mashed potatoes and plenty of warm French onion gravy for a comforting dinner that brings together the best flavors of classic meatloaf and French onion soup.

Easy Slow Cooker BBQ Pulled Beef Recipe – Tender, Juicy, and Smothered in Rich Smoky Sauce

If you are looking for a deeply comforting slow cooker dinner with fall-apart beef and a rich, glossy sauce, this Slow Cooker BBQ Pulled Beef is an excellent choice. A well-marbled beef chuck roast is seasoned, seared until deeply browned, then slowly cooked in a smoky, sweet, and savory barbecue-style sauce until it becomes tender enough to shred effortlessly.

As the beef cooks, its juices combine with garlic, onion, Worcestershire sauce, beef broth, brown sugar, and barbecue sauce to create a concentrated sauce that coats every strand of shredded beef. After pulling the meat apart, returning it to the slow cooker allows the beef to soak up even more flavor and develop the glossy, caramelized appearance shown in the finished dish.

This pulled beef is perfect for sandwiches, sliders, tacos, loaded baked potatoes, rice bowls, family dinners, game-day meals, or meal prep. It is incredibly versatile, feeds a crowd, and tastes even better after the shredded beef has had time to absorb the sauce.

Why You’ll Love This Slow Cooker BBQ Pulled Beef

Chuck roast becomes exceptionally tender during long, slow cooking and shreds beautifully.

Searing the beef first creates deeper flavor and a rich caramelized exterior.

The homemade barbecue-style sauce balances smoky, sweet, tangy, and savory flavors.

Most of the cooking is completely hands-off once everything goes into the slow cooker.

The shredded beef absorbs the sauce after cooking, making every bite juicy and flavorful.

It works beautifully for sandwiches, tacos, wraps, baked potatoes, rice bowls, or classic dinner plates.

The recipe is excellent for making ahead and freezes very well.

You can easily adjust the sweetness, smokiness, or spice level.

Ingredients

For the Beef

  • 3½–4 pound boneless beef chuck roast
  • 2 teaspoons kosher salt
  • 1 teaspoon freshly ground black pepper
  • 1½ teaspoons garlic powder
  • 1 teaspoon onion powder
  • 1 teaspoon smoked paprika
  • ½ teaspoon ground cumin
  • 2 tablespoons olive oil

For the BBQ Sauce

  • 1½ cups barbecue sauce
  • 1 cup low-sodium beef broth
  • ¼ cup ketchup
  • 3 tablespoons brown sugar
  • 2 tablespoons Worcestershire sauce
  • 2 tablespoons apple cider vinegar
  • 1 tablespoon Dijon mustard
  • 1 tablespoon tomato paste
  • 6 garlic cloves, finely minced
  • 1 medium yellow onion, finely diced
  • 1 teaspoon smoked paprika
  • 1 teaspoon chili powder
  • ½ teaspoon garlic powder
  • ½ teaspoon onion powder
  • ½ teaspoon freshly ground black pepper
  • ¼ teaspoon cayenne pepper, optional

For Thickening the Sauce

  • 1 tablespoon cornstarch
  • 1 tablespoon cold water

Optional Finishing Ingredients

  • Extra barbecue sauce
  • Chopped fresh parsley
  • Thinly sliced green onions
  • Pickled red onions
  • Jalapeño slices
  • Coleslaw
  • Crispy fried onions
  • Freshly cracked black pepper
  • Hot sauce

How to Make Slow Cooker BBQ Pulled Beef

1. Prepare the Beef

Remove the chuck roast from its packaging.

Trim away only large, hard pieces of exterior fat.

Leave most of the marbling intact because it helps keep the beef moist and tender during slow cooking.

2. Pat the Beef Dry

Use paper towels to thoroughly dry every side of the roast.

Removing excess moisture helps the beef develop a much stronger crust during searing.

3. Season the Roast

Season the entire surface with:

  • Salt
  • Black pepper
  • Garlic powder
  • Onion powder
  • Smoked paprika
  • Ground cumin

Press the seasoning gently onto the beef.

4. Preheat the Skillet

Place a large heavy skillet over medium-high heat.

Allow it to become very hot.

Add the olive oil.

5. Sear the First Side

Place the chuck roast into the skillet.

Cook without moving for approximately 4–5 minutes.

The bottom should become deeply browned.

6. Flip the Roast

Turn the beef over.

Sear the second side for another 4–5 minutes.

7. Brown the Edges

Using kitchen tongs, carefully hold the roast against the skillet to brown the remaining sides.

Sear each edge for approximately 1–2 minutes.

8. Transfer to the Slow Cooker

Place the browned roast into a 6-quart or larger slow cooker.

Set aside while you prepare the sauce.

9. Reduce the Skillet Heat

Lower the heat to medium.

Leave all of the browned beef bits in the skillet.

They will add excellent flavor to the sauce.

10. Add the Onion

Add the finely diced onion.

Cook for approximately 3–4 minutes, stirring occasionally.

The onion should soften and become lightly translucent.

11. Add the Garlic

Add the minced garlic.

Cook for approximately 30–45 seconds.

Stir constantly until fragrant.

12. Add the Tomato Paste

Stir in the tomato paste.

Cook for approximately 1 minute.

This concentrates the tomato flavor and removes its raw taste.

13. Deglaze the Skillet

Pour approximately ½ cup beef broth into the skillet.

Use a wooden spoon or silicone spatula to scrape all of the browned bits from the bottom.

14. Add the Barbecue Sauce

Stir in the barbecue sauce.

Mix thoroughly with the onions and garlic.

15. Add the Ketchup

Add the ketchup.

This provides additional tomato flavor and helps create a glossy finished sauce.

16. Add the Brown Sugar

Stir in the brown sugar.

This gives the sauce mild sweetness and helps create caramelization.

17. Add Worcestershire Sauce

Pour in the Worcestershire sauce.

It adds savory depth and complements the beef.

18. Add the Apple Cider Vinegar

Stir in the apple cider vinegar.

The acidity helps balance the richness and sweetness of the sauce.

19. Add Dijon Mustard

Mix in the Dijon mustard.

It adds subtle tang and complexity.

20. Add the Remaining Broth

Pour in the remaining beef broth.

Whisk until everything is combined.

21. Add the Seasonings

Stir in:

  • Smoked paprika
  • Chili powder
  • Garlic powder
  • Onion powder
  • Black pepper
  • Optional cayenne pepper

22. Simmer the Sauce

Bring the sauce to a gentle simmer.

Cook for approximately 2–3 minutes.

23. Pour the Sauce Over the Beef

Carefully pour the hot barbecue mixture over and around the chuck roast.

Use a spoon to coat the top of the meat.

24. Cover the Slow Cooker

Place the lid securely on the slow cooker.

Avoid repeatedly opening it while the beef cooks.

25. Cook on LOW

Cook on LOW for approximately 8–9 hours.

LOW is the preferred setting for achieving the most tender shredded beef.

26. Alternative HIGH Setting

If necessary, cook on HIGH for approximately 4½–5½ hours.

27. Check for Tenderness

Insert a fork into the roast.

The beef is ready when it separates easily with very little resistance.

Chuck roast usually becomes ideal for shredding around 195–205°F (90–96°C) internally.

28. Continue Cooking if Necessary

If the beef is still firm, cover and continue cooking for another 30–60 minutes.

A tough chuck roast usually needs more cooking time rather than less.

29. Remove the Beef

Carefully transfer the roast to a large cutting board or platter.

The meat may already be falling apart.

30. Rest Briefly

Allow the beef to rest for approximately 10 minutes.

31. Skim Excess Fat

Use a spoon to remove excessive fat from the surface of the cooking liquid if desired.

Leaving a small amount adds flavor.

32. Shred the Beef

Using two forks, pull the beef apart into thick, juicy strands.

Remove and discard any large pieces of fat or connective tissue.

33. Check the Shredded Texture

Keep some pieces larger rather than shredding everything extremely finely.

A mixture of thicker and thinner strands creates a better pulled-beef texture.

34. Return the Beef to the Slow Cooker

Place all of the shredded beef back into the sauce.

35. Toss With the Sauce

Stir gently until every piece is thoroughly coated.

36. Allow the Beef to Absorb the Sauce

Cover and cook on LOW for another 20–30 minutes.

This step allows the shredded meat to soak up the rich barbecue sauce.

37. Prepare the Cornstarch Slurry

If you want a thicker sauce, whisk together:

  • 1 tablespoon cornstarch
  • 1 tablespoon cold water

until completely smooth.

38. Thicken the Sauce

Turn the slow cooker to HIGH.

Stir the slurry into the beef and sauce.

Cook for approximately 10–15 minutes.

39. Check the Sauce Consistency

The finished sauce should cling to the shredded beef rather than appearing watery.

If necessary, leave the slow cooker uncovered for another 10–15 minutes.

40. Add Extra BBQ Sauce

For a stronger barbecue flavor, stir in another ¼–½ cup barbecue sauce.

41. Taste and Adjust

Taste the pulled beef.

Adjust with additional:

  • Salt
  • Black pepper
  • Apple cider vinegar
  • Brown sugar
  • Hot sauce

according to preference.

42. Optional Caramelized Finish

For darker, slightly crisp edges, spread some of the pulled beef onto a rimmed baking sheet.

Broil for approximately 2–4 minutes.

Watch carefully.

43. Return to the Sauce

If broiling, return the caramelized beef to the remaining sauce and toss gently.

44. Garnish

Finish with:

  • Fresh parsley
  • Green onions
  • Black pepper

if desired.

45. Serve

Serve the pulled beef hot with plenty of thick barbecue sauce coating every strand.

What to Serve With Slow Cooker BBQ Pulled Beef

Pulled beef is incredibly versatile.

Serve it with:

  • Creamy mashed potatoes
  • Garlic mashed potatoes
  • Baked potatoes
  • Roasted potatoes
  • White rice
  • Brown rice
  • Macaroni and cheese
  • Buttered noodles
  • Cornbread

For vegetables and classic barbecue sides, try:

  • Coleslaw
  • Baked beans
  • Corn on the cob
  • Green beans
  • Roasted carrots
  • Broccoli
  • Pickles
  • Potato salad

You can also serve the beef as:

  • Pulled beef sandwiches
  • Sliders
  • Tacos
  • Burritos
  • Quesadillas
  • Loaded fries
  • Loaded baked potatoes
  • Nachos
  • Rice bowls

For sandwiches, pile the beef onto toasted brioche buns and top with crunchy coleslaw and pickles.

Tips for the Best Slow Cooker BBQ Pulled Beef

Use Chuck Roast

Chuck roast has excellent marbling and connective tissue that become tender during slow cooking.

Don’t Trim Away All the Fat

A moderate amount of fat keeps the beef moist and adds flavor.

Sear the Beef First

Searing is optional but highly recommended.

The caramelized exterior adds substantial flavor.

Brown Every Side

Taking time to develop a dark crust produces a richer finished sauce.

Use Low-Sodium Broth

The sauce concentrates during cooking, so controlling sodium at the beginning is important.

Cook on LOW When Possible

Long, gentle cooking produces the best shreddable texture.

Don’t Shred the Beef Too Early

If the roast resists being pulled apart, it needs more cooking time.

Return the Meat to the Sauce

Allowing the shredded beef to cook in the sauce for another 20–30 minutes makes it significantly more flavorful.

Adjust the Sauce After Shredding

The beef changes the seasoning balance once shredded.

Taste and make final adjustments afterward.

Broil for Caramelized Edges

A brief broil creates darker, slightly crisp pieces that contrast beautifully with the juicy shredded beef.

Easy Recipe Variations

Honey BBQ Pulled Beef

Add ¼ cup honey to the sauce.

This produces a sweeter, stickier glaze.

Spicy BBQ Pulled Beef

Add:

  • 1 tablespoon hot sauce
  • ½ teaspoon cayenne pepper
  • 1 teaspoon crushed red pepper flakes

Smoky Chipotle Pulled Beef

Add 1–2 tablespoons chopped chipotle peppers in adobo.

Garlic Lovers’ Pulled Beef

Increase the fresh garlic to 10 cloves.

Bourbon-Style BBQ Pulled Beef

Add ¼ cup bourbon to the sauce and simmer it briefly in the skillet before transferring everything to the slow cooker.

Honey Garlic Pulled Beef

Add:

  • ¼ cup honey
  • 2 additional garlic cloves
  • 1 tablespoon soy sauce

Korean-Inspired Pulled Beef

Replace half of the barbecue sauce with a mixture of:

  • Soy sauce
  • Brown sugar
  • Sesame oil
  • Fresh ginger
  • Garlic

Mexican-Style Pulled Beef

Add:

  • 1 tablespoon chili powder
  • 2 teaspoons cumin
  • 1 teaspoon oregano
  • Juice of 1 lime

Serve in tortillas.

Mushroom Pulled Beef

Add 12 ounces sliced mushrooms during the final 2 hours.

Onion BBQ Pulled Beef

Add 2 additional sliced onions underneath the roast before cooking.

Oven Method

This pulled beef can also be prepared in a Dutch oven.

Preheat the oven to 325°F (165°C).

Season and sear the chuck roast as directed.

Prepare the onions, garlic, tomato paste, broth, barbecue sauce, Worcestershire sauce, vinegar, mustard, and seasonings in the Dutch oven.

Return the roast.

Cover tightly.

Bake for approximately 3½–4½ hours.

The beef is ready when it pulls apart easily with a fork.

Remove and shred the beef.

Return it to the sauce.

Cook uncovered for approximately 15–20 minutes to allow the sauce to reduce and coat the meat.

Make-Ahead Instructions

Pulled beef is an excellent make-ahead meal.

You can season the chuck roast up to 24 hours ahead.

Keep it covered in the refrigerator.

The barbecue sauce mixture can also be prepared up to 3 days ahead.

For maximum convenience, cook and shred the entire recipe one day before serving.

Allow the beef to cool in its sauce.

Refrigerate overnight.

The flavors often become even richer the following day.

Remove any solidified excess fat from the surface before reheating.

How to Store Leftovers

Allow leftover pulled beef to cool completely.

Transfer it to an airtight container with plenty of sauce.

Refrigerate for up to 4 days.

Keeping the meat covered in sauce helps prevent it from drying out.

Reheating on the Stovetop

Place the beef and sauce in a saucepan or skillet.

Add a small splash of beef broth or water if necessary.

Cover and warm over low heat, stirring occasionally.

Reheating in the Oven

Place the beef in a baking dish.

Add a small amount of sauce or broth.

Cover tightly with foil.

Reheat at 325°F (165°C) for approximately 20–25 minutes.

Microwave

Place an individual portion in a microwave-safe dish.

Cover loosely.

Microwave in short intervals, stirring between each interval, until thoroughly heated.

Freezing

Slow cooker pulled beef freezes extremely well.

Allow the beef and sauce to cool completely.

Divide into freezer-safe portions.

Transfer to airtight containers or freezer bags.

Include enough sauce to coat the meat.

Freeze for up to approximately 3 months.

Thaw overnight in the refrigerator.

Reheat gently on the stovetop, in the oven, or in the slow cooker.

If the sauce becomes too thick, stir in a small splash of beef broth.

Frequently Asked Questions

What cut of beef is best for pulled beef?

Chuck roast is one of the best choices because its marbling and connective tissue become exceptionally tender during slow cooking.

Can I use brisket?

Yes. Brisket can also be used, although the texture and cooking time may vary slightly.

Do I have to sear the beef first?

No, but searing adds substantial flavor and creates a richer finished sauce.

Why won’t my beef shred?

It most likely needs additional cooking time. Properly cooked chuck roast should separate easily with a fork.

Can I use store-bought barbecue sauce?

Absolutely. Choose a barbecue sauce you already enjoy because its flavor will be concentrated in the finished dish.

Can I make this less sweet?

Yes. Reduce or omit the brown sugar and use a less-sweet barbecue sauce.

Can I make this spicy?

Yes. Add cayenne, chili flakes, hot sauce, chipotle peppers, or jalapeños.

Why is my pulled beef sauce watery?

Slow cookers retain moisture. Remove the lid near the end, use a cornstarch slurry, or transfer the sauce to a saucepan and reduce it.

Can I make sandwiches with this beef?

Absolutely. Pulled beef is excellent on toasted buns with coleslaw, pickles, onions, and additional barbecue sauce.

Can I freeze leftover pulled beef?

Yes. It freezes extremely well for up to approximately 3 months when stored with its sauce.

Final Thoughts

This Slow Cooker BBQ Pulled Beef combines deeply seared chuck roast, garlic, onions, smoky barbecue sauce, beef broth, Worcestershire sauce, brown sugar, and tangy vinegar into a rich slow-cooked meal that becomes exceptionally tender and flavorful.

The key is using a well-marbled chuck roast, browning it before slow cooking, giving it enough time to become truly fork-tender, and returning the shredded meat to the sauce so every strand absorbs the concentrated flavor.

Serve the pulled beef in sandwiches, sliders, tacos, rice bowls, baked potatoes, or alongside mashed potatoes and vegetables for a comforting meal that is juicy, smoky, saucy, and packed with slow-cooked barbecue flavor.

Easy Slow Cooker Pepper Steak with Bell Peppers Recipe – Tender, Saucy, and Packed with Savory Flavor

If you are looking for an easy slow cooker beef dinner with tender steak, colorful vegetables, and a rich savory sauce, this Slow Cooker Pepper Steak with Bell Peppers is an excellent choice. Thin strips of beef are seasoned, quickly browned for extra flavor, then slowly cooked with onions, garlic, soy sauce, beef broth, and seasonings until tender and deeply flavorful.

Red, green, and yellow bell peppers add sweetness, freshness, and beautiful color, while sliced onions become soft and absorb the rich beef sauce. The combination of soy sauce, Worcestershire sauce, garlic, black pepper, and beef broth creates a glossy savory gravy that coats every strip of steak.

This slow cooker pepper steak is perfect for busy weeknights, family dinners, meal prep, or anytime you want comforting takeout-style flavor at home. Serve it over rice, noodles, mashed potatoes, or cauliflower rice for a satisfying complete meal.

Why You’ll Love This Slow Cooker Pepper Steak with Bell Peppers

The beef becomes tender and flavorful during slow cooking.

Browning the steak first creates richer flavor and helps the meat develop the caramelized appearance shown in the finished dish.

Colorful bell peppers provide sweetness, texture, and freshness.

Onions slowly soften and absorb the savory beef sauce.

The sauce is rich, garlicky, peppery, and perfect for spooning over rice.

Most of the cooking is hands-off once everything goes into the slow cooker.

The recipe can easily be customized with mushrooms, extra vegetables, ginger, chili flakes, or additional garlic.

Ingredients

For the Steak

  • 2 pounds sirloin steak, flank steak, or chuck steak
  • 1½ teaspoons kosher salt
  • 1 teaspoon freshly ground black pepper
  • 1 teaspoon garlic powder
  • 1 teaspoon onion powder
  • 1 teaspoon smoked paprika
  • 2 tablespoons cornstarch
  • 2 tablespoons olive oil

For the Bell Peppers and Onions

  • 1 large red bell pepper, sliced into strips
  • 1 large green bell pepper, sliced into strips
  • 1 large yellow bell pepper, sliced into strips
  • 2 medium yellow onions, sliced
  • 5 garlic cloves, finely minced

For the Savory Pepper Steak Sauce

  • 1½ cups low-sodium beef broth
  • ⅓ cup low-sodium soy sauce
  • 2 tablespoons Worcestershire sauce
  • 1 tablespoon brown sugar
  • 1 tablespoon tomato paste
  • 1 tablespoon Dijon mustard
  • 1 teaspoon sesame oil, optional
  • 1 teaspoon freshly ground black pepper
  • ½ teaspoon smoked paprika
  • ½ teaspoon garlic powder
  • ½ teaspoon onion powder
  • ½ teaspoon dried thyme
  • ¼ teaspoon crushed red pepper flakes, optional

For Thickening the Sauce

  • 2 tablespoons cornstarch
  • 2 tablespoons cold water

Optional Finishing Ingredients

  • Sliced green onions
  • Chopped fresh parsley
  • Sesame seeds
  • Extra freshly cracked black pepper
  • Red pepper flakes
  • Fresh cilantro
  • Chili garlic sauce

How to Make Slow Cooker Pepper Steak with Bell Peppers

1. Prepare the Steak

Place the steak on a clean cutting board.

Trim away any large pieces of excess fat or tough connective tissue.

2. Slice the Beef

Slice the steak against the grain into strips approximately ½ inch thick and 2–3 inches long.

Cutting against the grain shortens the muscle fibers and helps the finished beef feel more tender.

3. Pat the Beef Dry

Use paper towels to thoroughly dry the steak strips.

Removing excess moisture allows the beef to brown instead of steaming in the skillet.

4. Season the Steak

Place the steak strips in a large bowl.

Season with:

  • Salt
  • Black pepper
  • Garlic powder
  • Onion powder
  • Smoked paprika

Toss until evenly coated.

5. Add Cornstarch

Sprinkle approximately 2 tablespoons cornstarch over the seasoned beef.

Toss until every strip has a very light coating.

The cornstarch encourages browning and later helps give the sauce a slightly thicker texture.

6. Heat the Skillet

Place a large heavy skillet over medium-high heat.

Add approximately 1 tablespoon olive oil.

Allow the skillet to become very hot.

7. Brown the First Batch

Add half of the steak strips in a single layer.

Avoid overcrowding the skillet.

Cook for approximately 1–2 minutes without moving them excessively.

8. Turn the Beef

Flip or stir the steak.

Cook for another 1 minute.

The beef does not need to cook completely.

You are only creating browned edges.

9. Transfer to the Slow Cooker

Move the browned beef to the slow cooker.

10. Brown the Remaining Beef

Add the remaining olive oil if needed.

Repeat the browning process with the second batch.

Transfer it to the slow cooker.

11. Prepare the Onions

Slice the onions into thick strips.

Keeping the pieces slightly larger helps prevent them from completely disappearing during slow cooking.

12. Prepare the Bell Peppers

Remove the stems, seeds, and white membranes from the peppers.

Slice them into strips approximately ½ inch wide.

13. Add Some of the Onions

Scatter approximately half of the sliced onions over the beef.

Reserve the remaining onions for later if you prefer more texture.

14. Prepare the Garlic

Finely mince the garlic cloves.

Set aside while preparing the sauce.

15. Deglaze the Skillet

Return the skillet to medium heat.

Pour approximately ½ cup beef broth into the hot pan.

Use a wooden spoon or silicone spatula to scrape up all the browned bits.

16. Add the Garlic

Add the minced garlic.

Cook for approximately 30 seconds, stirring constantly.

17. Add the Tomato Paste

Stir in the tomato paste.

Cook for approximately 1 minute.

Briefly cooking tomato paste gives it a deeper, less raw flavor.

18. Add the Soy Sauce

Pour in the low-sodium soy sauce.

Stir thoroughly.

19. Add Worcestershire Sauce

Add the Worcestershire sauce.

This contributes additional savory depth.

20. Add Brown Sugar

Stir in the brown sugar.

The small amount of sweetness balances the salty and savory ingredients.

21. Add Dijon Mustard

Stir in the Dijon mustard.

It adds subtle tang and complexity without making the sauce strongly mustard-flavored.

22. Add the Remaining Broth

Pour in the rest of the beef broth.

Whisk until everything is evenly combined.

23. Add the Seasonings

Stir in:

  • Black pepper
  • Smoked paprika
  • Garlic powder
  • Onion powder
  • Thyme
  • Optional red pepper flakes
  • Optional sesame oil

24. Simmer Briefly

Bring the sauce to a gentle simmer.

Cook for approximately 2–3 minutes.

25. Pour the Sauce Over the Beef

Carefully pour the sauce into the slow cooker.

Stir gently so the steak is evenly coated.

26. Cover the Slow Cooker

Place the lid securely on the slow cooker.

27. Cook on LOW

Cook on LOW for approximately 5–6 hours.

The exact time depends on the beef cut and your slow cooker.

28. Alternative HIGH Setting

You can cook the pepper steak on HIGH for approximately 2½–3½ hours.

LOW generally provides a more tender result.

29. Check the Beef

Toward the end of cooking, test one strip of beef.

It should be tender and easy to bite through.

If it still feels firm or chewy, continue cooking for another 30–60 minutes.

30. Add the Bell Peppers

Approximately 45–60 minutes before serving, add:

  • Red bell pepper
  • Green bell pepper
  • Yellow bell pepper

Adding them near the end prevents them from becoming overly soft.

31. Add the Remaining Onions

If you reserved some onions, add them at the same time.

This creates a mixture of very soft onions and slightly firmer pieces.

32. Stir Gently

Fold the vegetables into the beef and sauce.

Cover again.

33. Continue Slow Cooking

Cook until the bell peppers are tender but still retain some shape and color.

This generally takes approximately 45 minutes on LOW or 20–30 minutes on HIGH.

34. Prepare the Cornstarch Slurry

In a small bowl, whisk together:

  • 2 tablespoons cornstarch
  • 2 tablespoons cold water

Mix until completely smooth.

35. Thicken the Sauce

Turn the slow cooker to HIGH.

Slowly stir the cornstarch slurry into the sauce.

36. Cook Until Thickened

Cover and cook for approximately 10–15 minutes.

The sauce should become glossy and thick enough to coat the beef and vegetables.

37. Adjust the Consistency

If the sauce is too thick, stir in a small splash of beef broth.

If it remains too thin, cook uncovered for another 5–10 minutes.

38. Taste the Sauce

Taste before adding additional salt.

Soy sauce and Worcestershire sauce already contribute plenty of seasoning.

Add extra:

  • Black pepper
  • Soy sauce
  • Red pepper flakes

only if needed.

39. Coat the Beef

Gently stir the steak strips through the thickened sauce.

Make sure the peppers and onions are evenly distributed.

40. Add Fresh Black Pepper

For the classic pepper steak flavor, finish with another generous amount of freshly cracked black pepper.

41. Garnish

Top with any combination of:

  • Green onions
  • Parsley
  • Sesame seeds
  • Cilantro
  • Red pepper flakes

42. Serve

Serve the pepper steak hot with plenty of savory sauce spooned over the beef, peppers, and onions.

What to Serve With Slow Cooker Pepper Steak with Bell Peppers

Pepper steak is especially delicious served over rice because the rice absorbs the flavorful sauce.

Serve it with:

  • Steamed white rice
  • Jasmine rice
  • Brown rice
  • Garlic butter rice
  • Fried rice
  • Cauliflower rice

It also pairs beautifully with:

  • Egg noodles
  • Lo mein noodles
  • Rice noodles
  • Mashed potatoes
  • Roasted potatoes
  • Quinoa

For vegetables, serve alongside:

  • Steamed broccoli
  • Green beans
  • Bok choy
  • Roasted asparagus
  • Stir-fried vegetables
  • Brussels sprouts

For a lower-carbohydrate meal, serve it over cauliflower rice, shredded cabbage, zucchini noodles, or simply enjoy it with extra vegetables.

Tips for the Best Slow Cooker Pepper Steak

Cut Against the Grain

Always slice beef across the visible muscle fibers.

This creates noticeably more tender strips.

Don’t Slice the Beef Too Thin

Very thin strips can become dry or fall apart during slow cooking.

Approximately ½ inch thick works well.

Brown the Beef in Batches

Crowding the skillet traps steam.

Smaller batches give the steak better caramelization.

Don’t Cook the Beef Completely While Searing

The slow cooker will finish cooking it.

The skillet step is only for developing flavor.

Use Low-Sodium Soy Sauce

The sauce concentrates during cooking, so regular soy sauce can make the final dish overly salty.

Add Bell Peppers Near the End

Cooking them for the entire slow-cooker period can make them extremely soft.

Adding them toward the end preserves better texture and color.

Use Several Pepper Colors

Red, green, and yellow peppers create the colorful appearance associated with classic pepper steak.

Add Plenty of Black Pepper

Freshly cracked pepper is one of the defining flavors of the dish.

Thicken the Sauce at the End

Slow cookers retain moisture, so thickening near the end gives better control over the final consistency.

Taste Before Adding Salt

Soy sauce, Worcestershire sauce, and beef broth can all contain significant sodium.

Easy Recipe Variations

Slow Cooker Mushroom Pepper Steak

Add 12 ounces sliced mushrooms during the final 60–90 minutes.

Spicy Pepper Steak

Add:

  • 1 teaspoon red pepper flakes
  • 1 tablespoon chili garlic sauce
  • ½ teaspoon cayenne pepper

Adjust according to your preferred heat level.

Garlic Pepper Steak

Increase the garlic to 8 cloves.

Add another ½ teaspoon garlic powder.

Ginger Pepper Steak

Add 1 tablespoon freshly grated ginger with the garlic.

This gives the dish a fragrant Asian-inspired flavor.

Teriyaki Pepper Steak

Add:

  • ¼ cup teriyaki sauce
  • 1 teaspoon sesame oil
  • 1 teaspoon fresh ginger

Reduce the soy sauce slightly.

Honey Garlic Pepper Steak

Add 2 tablespoons honey to the sauce.

This creates a slightly sweeter, stickier finish.

Pepper Steak With Pineapple

Add 1 cup pineapple chunks during the final 30 minutes.

The sweet acidity works especially well with peppers and savory beef.

Extra Vegetable Pepper Steak

Add:

  • Mushrooms
  • Snap peas
  • Broccoli
  • Carrots

during the final portion of cooking.

Onion Lovers’ Pepper Steak

Increase the onions to 3 large onions.

Extra Saucy Pepper Steak

Increase the beef broth to 2 cups and double the cornstarch slurry.

This is especially useful if serving the dish over plenty of rice.

Stovetop Method

You can also make pepper steak entirely on the stovetop.

Slice, season, and lightly coat the beef as directed.

Brown the steak in batches.

Transfer it temporarily to a plate.

Cook the onions and peppers in the same skillet for approximately 4–5 minutes.

Remove the peppers if you prefer them crisp.

Prepare the garlic and sauce in the skillet.

Return the beef.

Cover and simmer over low heat for approximately 15–20 minutes, or until tender.

Add the peppers back during the final 5 minutes.

Stir in the cornstarch slurry.

Simmer until the sauce becomes thick and glossy.

Serve immediately.

Make-Ahead Instructions

The steak can be sliced and seasoned up to 24 hours ahead.

Store it covered in the refrigerator.

The bell peppers and onions can also be sliced a day ahead.

Store them in separate airtight containers.

The savory sauce mixture can be prepared up to 3 days ahead.

Refrigerate until ready to cook.

For especially convenient meal preparation, brown the beef the evening before.

Cool it promptly and refrigerate.

The next morning, assemble everything in the slow cooker and cook as directed.

Wait until near the end to add the bell peppers.

How to Store Leftovers

Allow leftover pepper steak to cool.

Transfer it to an airtight container.

Refrigerate for up to 3–4 days.

Store the beef, peppers, onions, and sauce together.

Reheating on the Stovetop

Place the pepper steak in a skillet or saucepan.

Add approximately 1–2 tablespoons beef broth or water.

Cover and warm over low to medium-low heat until hot.

Reheating in the Microwave

Place an individual portion in a microwave-safe dish.

Cover loosely.

Microwave in short intervals, stirring between each interval.

Reheating in the Slow Cooker

For larger portions, return the leftovers to the slow cooker.

Heat on LOW until thoroughly warmed.

Do not leave reheated beef in the slow cooker for several additional hours because it can become overly soft.

Freezing

Slow cooker pepper steak freezes very well.

Allow everything to cool completely.

Transfer to freezer-safe airtight containers.

Freeze for up to approximately 2–3 months.

For the best vegetable texture, you can freeze the beef and sauce separately and add freshly cooked peppers after reheating.

Thaw overnight in the refrigerator.

Reheat gently on the stovetop.

If the sauce becomes too thick after freezing, add a small splash of beef broth.

Frequently Asked Questions

What type of beef is best for slow cooker pepper steak?

Sirloin, flank steak, chuck steak, or round steak can all work. Chuck is especially suitable for longer cooking, while sirloin generally needs less time.

Should I sear the beef first?

It is not strictly necessary, but browning greatly improves the flavor and appearance.

Why is my pepper steak tough?

The beef may either need additional cooking time or may have been sliced with the grain rather than against it.

When should I add bell peppers to the slow cooker?

Add them during approximately the final 45–60 minutes on LOW so they remain tender without becoming mushy.

Can I add the peppers at the beginning?

Yes, but they will become very soft and may lose much of their color.

Can I use frozen bell peppers?

Yes. Add them during the final 30–45 minutes because frozen peppers soften quickly.

Can I use chicken instead of beef?

Yes, although the cooking time should be reduced because chicken cooks much faster.

Why is my sauce watery?

Slow cookers trap moisture. Stir in a cornstarch slurry near the end and cook on HIGH until thickened.

Can I double the recipe?

Yes, provided your slow cooker is large enough and is not filled beyond approximately two-thirds to three-quarters capacity.

Can I make this recipe spicy?

Absolutely. Add crushed red pepper flakes, cayenne, chili garlic sauce, or sliced jalapeños.

Final Thoughts

This Slow Cooker Pepper Steak with Bell Peppers combines tender strips of beef, colorful peppers, softened onions, garlic, soy sauce, Worcestershire sauce, black pepper, and rich beef broth in one comforting slow cooker meal.

The key is slicing the beef against the grain, browning it before slow cooking, adding the bell peppers near the end so they retain their color and texture, and thickening the cooking liquid into a glossy savory sauce before serving.

Serve the pepper steak generously over rice, noodles, potatoes, or cauliflower rice for an easy family dinner packed with tender beef, sweet peppers, savory onions, and bold peppery flavor.

Easy Crispy Garlic Butter Potato Galette Recipe – Golden, Buttery, and Perfectly Layered

If you are looking for a potato side dish that feels elegant but still uses simple ingredients, this Crispy Garlic Butter Potato Galette is an excellent choice. Thinly sliced potatoes are layered with garlic butter, herbs, Parmesan, salt, and black pepper, then baked until the edges are deeply golden and crisp while the center stays tender and buttery.

A potato galette looks impressive on the table because the overlapping slices form beautiful layers and a crisp, golden surface. The garlic butter works its way between the potatoes as they bake, while Parmesan adds savory flavor and helps create extra browning around the edges.

This recipe is perfect for holidays, steak dinners, roast chicken, pork, brunch, or any meal where you want a potato dish that feels a little more special than ordinary roasted potatoes.

Why You’ll Love This Crispy Garlic Butter Potato Galette

The edges become crisp and deeply golden.

The center stays tender and buttery.

Garlic and herbs add plenty of savory flavor.

Parmesan gives the galette a rich, slightly nutty finish.

The presentation looks elegant without requiring complicated techniques.

It pairs well with beef, chicken, pork, fish, or eggs.

You can prepare much of the dish ahead, making it useful for entertaining.

Ingredients

For the Potato Galette

  • 2½ pounds Yukon Gold or russet potatoes
  • 5 tablespoons unsalted butter
  • 4 garlic cloves, finely minced
  • 2 tablespoons olive oil
  • ¾ cup freshly grated Parmesan cheese
  • 1 teaspoon kosher salt
  • ½ teaspoon freshly ground black pepper
  • 1 teaspoon dried thyme
  • ½ teaspoon dried rosemary
  • ½ teaspoon garlic powder
  • ¼ teaspoon onion powder

For Finishing

  • 1 tablespoon fresh thyme leaves
  • 2 tablespoons chopped fresh parsley
  • ¼ cup freshly grated Parmesan cheese
  • Flaky sea salt, optional
  • Freshly cracked black pepper

Optional Add-Ins

  • ½ cup shredded Gruyère
  • ½ cup shredded mozzarella
  • ¼ cup crispy crumbled bacon
  • 1 tablespoon chopped fresh rosemary
  • ½ teaspoon red pepper flakes

How to Make Crispy Garlic Butter Potato Galette

1. Preheat the Oven

Preheat your oven to 425°F (220°C).

Place a 10-inch cast-iron or oven-safe skillet in the oven while it preheats.

A hot skillet helps the bottom of the galette begin crisping immediately.

2. Prepare the Potatoes

Wash and peel the potatoes if desired.

Yukon Gold potatoes give a creamy center, while russets produce slightly crispier edges.

3. Slice Very Thinly

Use a mandoline slicer or a sharp knife to cut the potatoes into rounds approximately ⅛ inch thick.

Try to keep all the slices similar in thickness.

4. Dry the Potato Slices

Place the sliced potatoes on clean kitchen towels or paper towels.

Pat them dry.

Removing excess moisture helps the layers crisp instead of steam.

5. Make the Garlic Butter

In a small saucepan over low heat, melt the butter.

6. Add Garlic

Add the minced garlic.

Cook for approximately 30 seconds until fragrant.

Do not brown the garlic.

7. Add Olive Oil

Stir in the olive oil.

This helps keep the butter from browning too quickly during baking.

8. Add Seasonings

Stir in:

  • Thyme
  • Rosemary
  • Garlic powder
  • Onion powder
  • Black pepper

Remove from the heat.

9. Season the Potatoes

Place the potato slices in a large bowl.

Add:

  • Garlic butter mixture
  • Parmesan
  • Salt

Toss gently until every slice is lightly coated.

10. Remove the Hot Skillet

Carefully remove the skillet from the oven.

Brush the bottom and sides lightly with a little extra butter or oil if needed.

11. Begin Layering

Arrange the potato slices in overlapping circles around the outside of the skillet.

Each slice should overlap the previous one by roughly one-third to one-half.

12. Work Toward the Center

Continue arranging the slices in concentric circles until the bottom is covered.

13. Add Another Layer

Continue layering the remaining potatoes in the same pattern.

Press gently as you work.

14. Add Extra Parmesan

Sprinkle a little extra Parmesan between some of the layers if desired.

15. Press the Galette

Use a spatula or the bottom of a smaller pan to press the potatoes gently and compact the layers.

16. Cover

Cover the skillet tightly with foil.

17. Begin Baking

Bake for approximately 25 minutes.

The covered stage helps the center become tender before the exterior is fully browned.

18. Remove the Foil

Carefully uncover the skillet.

19. Continue Baking

Bake uncovered for another 25–35 minutes.

20. Check for Tenderness

Insert a thin knife into the center.

It should slide through easily.

21. Check the Edges

The edges should be crisp and deeply golden.

22. Add More Parmesan

Sprinkle the top with the remaining Parmesan.

23. Bake Again

Return to the oven for approximately 5 minutes.

24. Broil if Needed

For a darker golden top, broil for approximately 1–2 minutes.

Watch closely because Parmesan can brown quickly.

25. Remove from the Oven

Transfer the skillet to a heatproof surface.

26. Rest

Let the galette rest for approximately 8–10 minutes.

This helps the layers firm up and makes slicing easier.

27. Loosen the Edges

Run a thin spatula or knife around the outside edge.

28. Invert if Desired

For a dramatic presentation, place a large plate over the skillet and carefully invert the galette.

Alternatively, serve it directly from the skillet.

29. Garnish

Finish with:

  • Fresh thyme
  • Parsley
  • Parmesan
  • Flaky sea salt
  • Cracked black pepper

30. Slice

Cut into wedges like a pie.

31. Serve

Serve warm while the edges are crisp and the center is buttery and tender.

What to Serve With Crispy Garlic Butter Potato Galette

This potato galette is especially good with steak.

Try it with:

  • Ribeye steak
  • Sirloin steak
  • Filet mignon
  • Bavette steak
  • Steak bites

It also pairs beautifully with:

  • Roast chicken
  • Garlic butter chicken
  • Herb-crusted pork loin
  • Beef roast
  • Lamb chops
  • Salmon
  • Baked fish

For brunch, serve alongside:

  • Fried eggs
  • Scrambled eggs
  • Bacon
  • Sausage

Tips for the Best Crispy Potato Galette

Slice the Potatoes Evenly

Uniform slices cook at the same rate and create cleaner layers.

Use a Mandoline if Possible

It gives you very thin, even slices quickly.

Dry the Potatoes

Surface moisture can prevent crisping.

Don’t Rinse After Slicing

The potato starch helps the layers stick together.

Use a Hot Skillet

Preheating encourages a crisp bottom.

Layer Tightly

Tightly overlapping slices help the galette hold its shape.

Cover First, Then Uncover

The covered stage helps cook the center before crisping the surface.

Let It Rest

Resting gives the galette time to set.

Use Fresh Parmesan

Freshly grated cheese melts and browns more evenly.

Easy Recipe Variations

Cheesy Gruyère Potato Galette

Add ½ cup shredded Gruyère between the potato layers.

Bacon Parmesan Galette

Add ½ cup crispy crumbled bacon between the layers.

Rosemary Garlic Potato Galette

Double the rosemary and add another garlic clove.

Spicy Parmesan Potato Galette

Add:

  • Red pepper flakes
  • Cayenne
  • Smoked paprika

Three-Cheese Potato Galette

Use:

  • Parmesan
  • Gruyère
  • Mozzarella

Caramelized Onion Potato Galette

Layer in 1 cup caramelized onions.

Make sure the onions are not overly wet.

Herb Butter Potato Galette

Add fresh:

  • Thyme
  • Rosemary
  • Parsley
  • Chives

Truffle Parmesan Galette

Finish with a very small drizzle of truffle oil after baking.

Baking Dish Version

If you do not have a cast-iron skillet, use a well-greased 9- or 10-inch round baking dish.

Layer and bake the potatoes as directed.

The bottom may be slightly less crisp, but the galette will still be delicious.

Mini Potato Galettes

For individual servings, prepare the recipe in a muffin pan.

Layer thin potato slices into each greased muffin cup.

Brush with garlic butter and sprinkle with Parmesan.

Bake at 400°F (200°C) for approximately 35–45 minutes until tender and crisp.

Let rest for 5 minutes before removing.

Make-Ahead Instructions

You can slice and season the potatoes shortly before assembly.

For best texture, avoid leaving raw sliced potatoes exposed for long periods.

You can also bake the galette completely up to 1 day ahead.

Cool and refrigerate.

Reheat in a hot oven before serving to restore crispness.

How to Store Leftovers

Allow leftover galette to cool completely.

Transfer to an airtight container.

Refrigerate for up to 3–4 days.

Reheating in the Oven

Place wedges on a baking sheet.

Reheat at 400°F (200°C) for approximately 8–12 minutes.

Reheating in the Air Fryer

Air fry at approximately 375°F for 5–7 minutes.

This is one of the best ways to restore crisp edges.

Reheating in a Skillet

Warm over medium-low heat with a small amount of butter.

Microwave

Microwaving will warm the galette but will soften the crisp exterior.

Freezing

The galette can be frozen, although the potato texture may become slightly softer after thawing.

Cool completely.

Cut into wedges.

Freeze in airtight containers with parchment between layers.

Freeze for up to approximately 1 month for best quality.

Thaw overnight in the refrigerator.

Reheat in a hot oven or air fryer.

Frequently Asked Questions

What potatoes are best for a galette?
Yukon Gold and russet potatoes both work well. Yukon Gold gives a creamier interior, while russets can become slightly crispier.

Do I need to peel the potatoes?
No. You can leave the skins on if the potatoes are scrubbed well.

Why is my potato galette not crispy?
The slices may have been too wet, too thick, or packed into a cold pan.

Can I use a regular baking dish?
Yes. A cast-iron skillet gives the crispiest bottom, but an oven-safe baking dish also works.

Can I add cheese between the layers?
Absolutely. Gruyère, Parmesan, mozzarella, and cheddar all work well.

Can I prepare it ahead?
Yes. Bake it ahead and reheat in a hot oven before serving.

Should I rinse the potatoes after slicing?
No. Keeping the starch helps the slices adhere and form a cohesive galette.

How do I keep it from falling apart?
Slice evenly, overlap tightly, press the layers together, and let the galette rest before cutting or inverting.

Final Thoughts

This Crispy Garlic Butter Potato Galette combines thin layers of potatoes, fresh garlic, butter, herbs, and Parmesan in one beautiful and satisfying side dish.

The key is slicing the potatoes very thinly, keeping their natural starch, layering them tightly in a hot skillet, and baking covered first before uncovering to create crisp, golden edges.

Serve it in wedges with steak, roast chicken, pork loin, seafood, or brunch dishes for an elegant potato recipe with a buttery tender center and irresistibly crispy exterior.