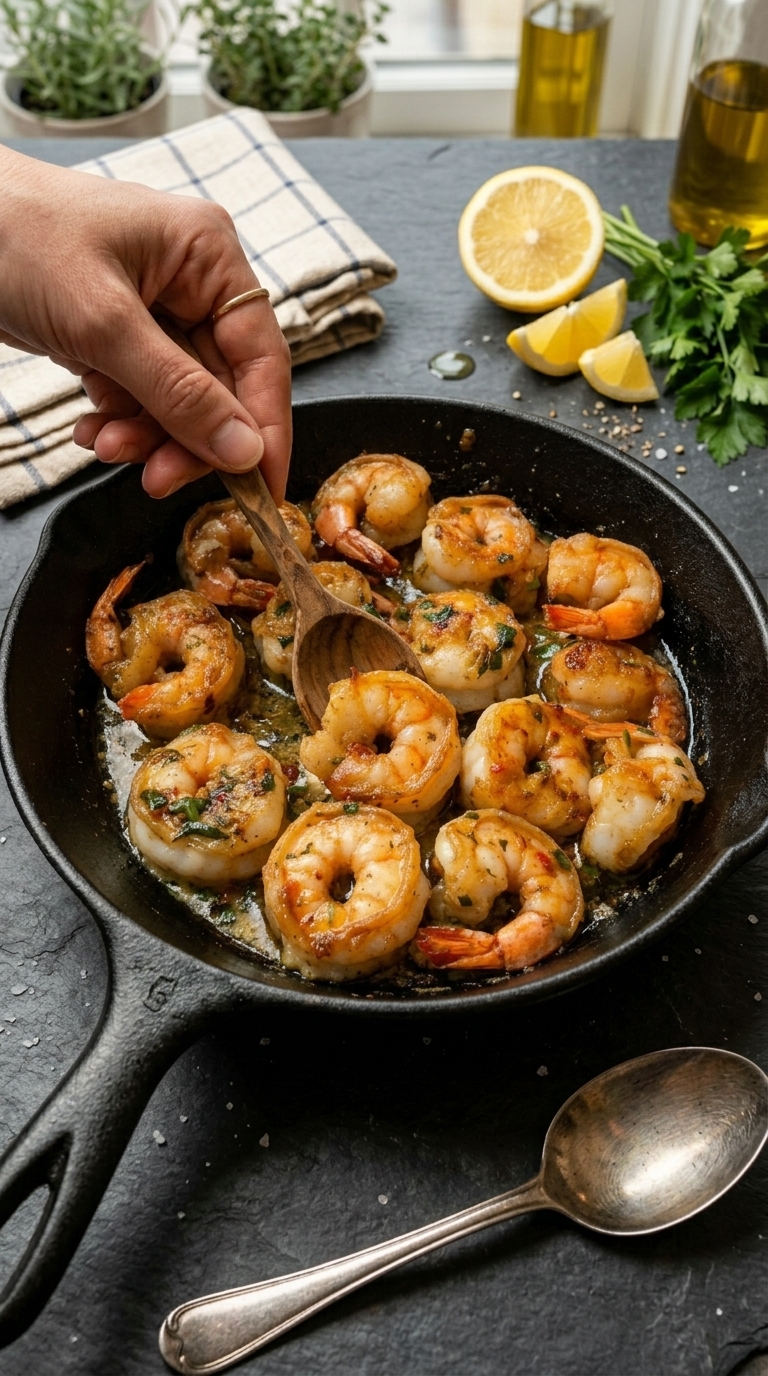
Garlic Butter Shrimp Skillet

This Garlic Butter Shrimp Skillet is a simple yet elegant seafood recipe featuring juicy shrimp cooked in a rich garlic butter sauce with fresh herbs, a touch of lemon, and perfectly balanced seasoning. The shrimp are lightly seared until golden, then coated in a flavorful buttery sauce that makes every bite deliciously savory.

Perfect for busy weeknights, romantic dinners, or a quick restaurant-style meal at home, this recipe comes together in less than 20 minutes. Serve it with crusty bread, pasta, rice, or roasted vegetables to soak up every drop of the flavorful garlic butter sauce.

Why You’ll Love This Recipe

There is something incredibly satisfying about a dish that is both simple and full of flavor. This garlic butter shrimp recipe uses a handful of fresh ingredients but creates a rich, impressive result.

You’ll love this recipe because it is:

  • Quick and easy to prepare
  • Packed with fresh garlic and buttery flavor
  • Made with simple everyday ingredients
  • Perfect for seafood lovers
  • Great for dinner parties or casual meals

The shrimp stay tender and juicy while absorbing the delicious garlic, herbs, and lemon flavors. The buttery sauce becomes infused with the natural sweetness of the shrimp, creating a sauce you will want to enjoy with every bite.

Ingredients

For the Shrimp

  • 1½ pounds large shrimp, peeled and deveined
  • 2 tablespoons olive oil
  • 1 teaspoon salt
  • ½ teaspoon black pepper
  • 1 teaspoon paprika
  • ½ teaspoon red pepper flakes (optional)
  • 1 teaspoon garlic powder

For the Garlic Butter Sauce

  • 4 tablespoons unsalted butter
  • 5 cloves garlic, minced
  • 2 tablespoons fresh parsley, chopped
  • 1 tablespoon fresh lemon juice
  • 1 teaspoon lemon zest
  • ½ teaspoon Italian seasoning
  • 2 tablespoons chicken broth or white wine (optional)

For Garnishing

  • Extra chopped parsley
  • Lemon wedges
  • Fresh cracked black pepper

Step-by-Step Instructions

1. Prepare the Shrimp

Start by preparing the shrimp. If using frozen shrimp, thaw them completely and pat them dry with paper towels.

Removing excess moisture is important because dry shrimp will sear better and develop a beautiful golden color instead of releasing too much water into the pan.

Place the shrimp in a bowl and season with salt, black pepper, paprika, and garlic powder.

Toss gently until each shrimp is evenly coated with seasoning.

Let the shrimp sit for about 5–10 minutes while you prepare the skillet.

2. Heat the Skillet

Heat a large skillet over medium-high heat.

Add olive oil and allow it to warm.

A hot skillet helps create a light golden sear on the shrimp while keeping the inside tender.

Arrange the shrimp in a single layer. Avoid overcrowding the pan because shrimp need direct contact with the hot surface to cook properly.

3. Cook the Shrimp

Cook the shrimp for approximately 1–2 minutes per side until they turn pink, slightly golden, and curl into a loose “C” shape.

Be careful not to overcook shrimp. Overcooked shrimp become rubbery and lose their delicate texture.

Once cooked, transfer the shrimp to a plate and set aside.

4. Make the Garlic Butter Sauce

Reduce the heat to medium.

Add butter to the same skillet and allow it to melt.

Add minced garlic and sauté for about 30 seconds until fragrant.

Be careful not to burn the garlic because it can create a bitter taste.

Add lemon zest, lemon juice, Italian seasoning, parsley, and red pepper flakes if using.

If you want extra sauce, add chicken broth or white wine and allow it to simmer for a minute.

The browned bits left in the pan from the shrimp will blend into the butter sauce, adding incredible flavor.

5. Combine Shrimp and Sauce

Return the cooked shrimp to the skillet.

Toss gently so every piece is coated with the garlic butter sauce.

Cook for another 1–2 minutes to allow the flavors to combine.

The shrimp should look glossy, golden, and covered with fresh herbs.

Remove from heat and garnish with additional parsley and lemon wedges.

Tips for Perfect Garlic Butter Shrimp

Use Fresh Shrimp When Possible

Fresh shrimp usually have the best texture and flavor, but high-quality frozen shrimp work very well too. Just make sure they are completely thawed and dried before cooking.

Do Not Overcook the Shrimp

Shrimp cook very quickly. They are ready when they become pink and opaque. Cooking them too long will make them tough.

Use Real Butter

Butter creates the rich, creamy sauce that makes this dish special. For the best flavor, use unsalted butter so you can control the seasoning.

Cook Garlic Carefully

Garlic burns quickly. Keep the heat moderate when making the sauce and stir constantly.

Add Lemon at the End

Fresh lemon juice brightens the buttery sauce and balances the richness of the dish.

Serving Suggestions

This garlic butter shrimp pairs beautifully with many side dishes.

Serve it with:

  • Garlic bread
  • Creamy pasta
  • White rice
  • Lemon herb rice
  • Mashed potatoes
  • Roasted vegetables
  • Fresh garden salad
  • Zucchini noodles

For a complete seafood dinner, serve alongside grilled vegetables and a refreshing lemon salad.

Storage and Reheating

Store leftover shrimp in an airtight container in the refrigerator for up to 2 days.

To reheat, warm gently in a skillet over low heat with a small amount of butter.

Avoid reheating for too long because shrimp can quickly become chewy.

Leftover shrimp can also be used in:

  • Pasta dishes
  • Seafood salads
  • Wraps
  • Rice bowls
  • Tacos

Recipe Variations

Creamy Garlic Butter Shrimp

Add ½ cup heavy cream and Parmesan cheese to the sauce for a rich creamy version.

Spicy Garlic Shrimp

Increase the red pepper flakes and add a splash of hot sauce for extra heat.

Mediterranean Shrimp

Add cherry tomatoes, spinach, and extra herbs for a fresh Mediterranean-style meal.

Cajun Shrimp

Replace the seasoning with Cajun spice mix for a bold Southern-inspired flavor.

Frequently Asked Questions

Can I use frozen shrimp?

Yes. Frozen shrimp work perfectly. Thaw them completely and dry them well before cooking.

How do I know when shrimp are done?

Shrimp are cooked when they turn pink, opaque, and curl into a gentle “C” shape. A tight curl usually means they have been overcooked.

Can I make this recipe ahead of time?

You can prepare the sauce ingredients ahead, but shrimp are best cooked fresh because they have the best texture immediately after cooking.

What size shrimp work best?

Large or jumbo shrimp are ideal because they stay juicy and are easier to cook without overcooking.

Final Thoughts

This Garlic Butter Shrimp Skillet proves that a simple recipe can create a truly memorable meal. With tender shrimp, fragrant garlic, fresh herbs, bright lemon, and a rich buttery sauce, it delivers incredible flavor with minimal effort.

Whether served as a quick weeknight dinner or an elegant meal for guests, this recipe is guaranteed to become a seafood favorite. Pair it with your favorite side dish, enjoy the delicious sauce, and experience restaurant-quality shrimp made right in your own kitchen.
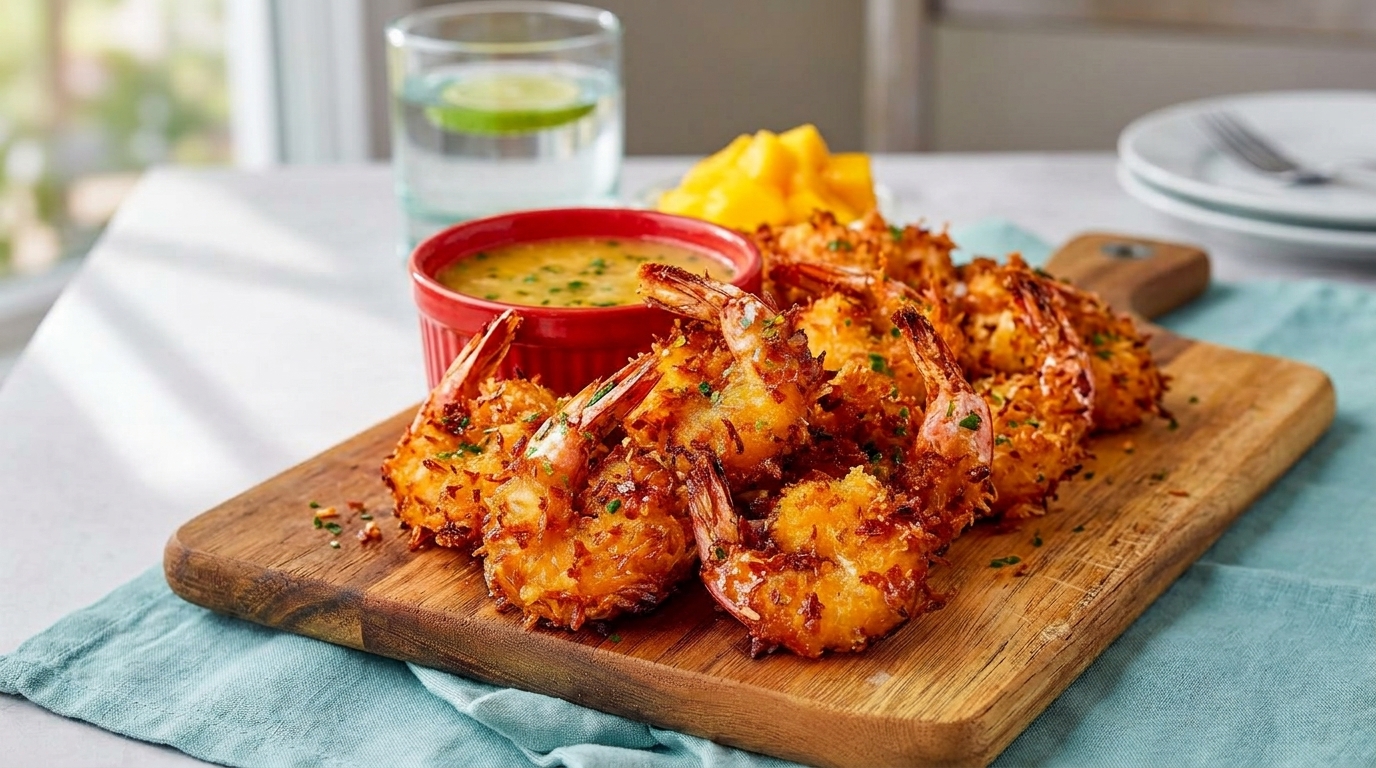
Easy Crispy Coconut Shrimp Recipe – Golden, Crunchy, and Irresistibly Delicious

If you love restaurant-style appetizers that combine sweet, savory, and crunchy flavors, these Crispy Coconut Shrimp deserve a place in your recipe collection. Large juicy shrimp are coated in seasoned flour, dipped in egg, covered with a combination of shredded coconut and crispy panko breadcrumbs, then cooked until beautifully golden on the outside and tender inside.

The coconut gives the coating a subtle tropical sweetness, while panko breadcrumbs provide the light, airy crunch that makes every bite satisfying. Pair the shrimp with a sweet chili dipping sauce, mango sauce, pineapple salsa, or creamy spicy mayo and you have an appetizer that looks impressive but is surprisingly easy to prepare.

Coconut shrimp are perfect for parties, game days, holiday gatherings, summer dinners, or even as the main protein in a rice bowl. They can be deep-fried for the crispiest traditional result, air-fried for a lighter option, or baked when you want an easy hands-off method.

Why You’ll Love This Crispy Coconut Shrimp

The biggest appeal of coconut shrimp is the incredible texture. The outside becomes deeply golden and crunchy while the shrimp inside stay soft, juicy, and tender.

Using a combination of panko breadcrumbs and shredded coconut is important. Coconut alone can become heavy or burn before the shrimp are finished cooking. Panko creates additional structure and gives the coating that restaurant-style crunch.

The recipe is also quick. Shrimp only need a few minutes to cook, so once the breading station is prepared, you can have a fresh batch ready in about 20–30 minutes.

These shrimp are also highly versatile. Serve them as an appetizer with dipping sauce, over jasmine rice for dinner, inside tacos, or alongside a tropical fruit salad.

Ingredients

For the Shrimp

  • 1 pound large or jumbo shrimp, peeled and deveined
  • ½ teaspoon kosher salt
  • ½ teaspoon garlic powder
  • ½ teaspoon paprika
  • ¼ teaspoon freshly ground black pepper

For the Crispy Coconut Coating

  • ¾ cup all-purpose flour
  • 2 large eggs
  • 2 tablespoons milk or coconut milk
  • 1 cup sweetened shredded coconut
  • ¾ cup panko breadcrumbs
  • ¼ teaspoon salt

For Frying

  • Vegetable, canola, or avocado oil, as needed

For Sweet Chili Dipping Sauce

  • ½ cup sweet chili sauce
  • 1 tablespoon fresh lime juice
  • 1 teaspoon honey
  • ½ teaspoon sriracha, optional

For Serving

  • Fresh lime wedges
  • Chopped cilantro or parsley
  • Extra sweet chili sauce

How to Make Crispy Coconut Shrimp

1. Prepare the Shrimp

Start with peeled and deveined shrimp.

You can leave the tails attached if you are serving the shrimp as an appetizer. The tails make them easier to pick up and create a restaurant-style presentation.

Pat the shrimp very thoroughly with paper towels.

This step is important because excess moisture can prevent the flour and coconut coating from adhering properly.

Season the shrimp with salt, garlic powder, paprika, and black pepper.

Set them aside while you prepare the breading station.

2. Prepare the Coconut Breading

Add the shredded coconut and panko breadcrumbs to a shallow bowl.

Sprinkle in a small pinch of salt and mix thoroughly.

If the coconut strands are especially long, lightly crush or chop them before mixing. Smaller pieces adhere to the shrimp more evenly and are less likely to fall off during cooking.

3. Set Up the Breading Station

Place the flour in one shallow bowl.

In a second bowl, whisk the eggs with the milk or coconut milk until smooth.

Place the coconut-panko mixture in a third bowl.

Arrange the bowls in order:

Flour → Egg → Coconut-Panko Mixture

This makes coating the shrimp much easier and keeps the process organized.

4. Coat the Shrimp

Take one shrimp and coat it lightly in flour.

Shake off any excess.

Dip the shrimp into the egg mixture, making sure the entire surface is coated.

Allow excess egg to drip away.

Transfer the shrimp to the coconut mixture and press the coating firmly onto both sides.

Be gentle around the tail if you are leaving it attached.

Place the breaded shrimp on a clean plate or baking sheet.

Repeat with the remaining shrimp.

5. Let the Coating Rest

Once all the shrimp are breaded, let them sit for approximately 5–10 minutes.

This short resting time helps the coating adhere better during cooking.

If you immediately place freshly breaded shrimp into hot oil, some of the coconut mixture can fall off.

6. Heat the Oil

Pour approximately 1½–2 inches of oil into a deep skillet or heavy-bottomed pot.

Heat the oil to around 350°F (175°C).

Temperature is important for coconut shrimp. If the oil is too cool, the coating absorbs excess oil and becomes greasy. If it is too hot, the coconut can burn before the shrimp finish cooking.

A kitchen thermometer is helpful for maintaining the correct temperature.

7. Fry the Shrimp

Carefully lower several shrimp into the hot oil.

Do not overcrowd the pan.

Fry for approximately 2–3 minutes total, turning if necessary, until the coating is golden brown and the shrimp are cooked through.

Shrimp cook very quickly, so watch them carefully.

The shrimp should be opaque inside and curled into a loose “C” shape.

8. Drain Properly

Remove the shrimp using a slotted spoon or kitchen tongs.

Transfer them to a wire rack placed over a baking sheet.

Using a wire rack instead of placing the shrimp directly on paper towels helps air circulate underneath, keeping the coconut coating crisp.

Lightly season with a tiny pinch of salt while still hot.

9. Make the Sweet Chili Sauce

In a small bowl, combine sweet chili sauce, fresh lime juice, honey, and optional sriracha.

Stir until smooth.

Taste and adjust the heat level according to your preference.

The sweet, tangy sauce works especially well with the toasted coconut coating.

10. Garnish and Serve

Arrange the crispy coconut shrimp on a serving platter.

Garnish with chopped cilantro or parsley and fresh lime wedges.

Serve immediately with the dipping sauce on the side.

Air Fryer Coconut Shrimp

For a lighter version, preheat your air fryer to 390°F (200°C).

Arrange the coated shrimp in a single layer, leaving space between each one.

Lightly spray both sides with cooking oil.

Air fry for approximately 7–9 minutes, turning halfway through, until golden and crisp.

Cooking times can vary depending on shrimp size and air fryer model, so check them early.

Baked Coconut Shrimp

Preheat the oven to 425°F (220°C).

Place a wire rack over a baking sheet and lightly grease it.

Arrange the breaded shrimp on the rack and lightly spray with oil.

Bake for approximately 10–12 minutes, turning once halfway through.

For extra color, broil for the final minute while watching carefully.

What to Serve With Crispy Coconut Shrimp

Sweet chili sauce is the classic dipping option, but there are many delicious alternatives.

Try a spicy mayo made with mayonnaise, sriracha, and lime juice.

Mango salsa is another excellent pairing. The fresh fruit adds sweetness and acidity that complement the coconut beautifully.

For a complete dinner, serve the shrimp over jasmine or coconut rice with steamed vegetables.

You can also turn them into tacos with shredded cabbage, avocado, lime crema, and fresh cilantro.

For parties, pair coconut shrimp with pineapple salsa, spring rolls, crab cakes, or other finger foods.

Tips for the Best Crispy Coconut Shrimp

Dry the shrimp thoroughly. A dry surface helps the breading stick.

Use large shrimp. Large or jumbo shrimp are easier to coat and less likely to overcook before the coconut becomes golden.

Combine coconut with panko. This creates a crunchier and more balanced coating.

Press the breading firmly. Gently pressing the mixture onto the shrimp prevents it from falling off.

Let the breaded shrimp rest. Five to ten minutes improves adhesion.

Maintain the oil temperature. Around 350°F provides crisp results without burning the coconut.

Cook in small batches. Adding too many shrimp at once lowers the oil temperature.

Serve immediately. Coconut shrimp are crispiest shortly after cooking.

Easy Recipe Variations

Spicy Coconut Shrimp

Add ½ teaspoon cayenne pepper or chili powder to the flour mixture.

Serve with spicy sweet chili sauce.

Lime Coconut Shrimp

Add 1 teaspoon finely grated lime zest to the coconut-panko mixture.

Finish the cooked shrimp with fresh lime juice.

Garlic Coconut Shrimp

Add an extra teaspoon of garlic powder to the flour and serve with creamy garlic dipping sauce.

Unsweetened Coconut Shrimp

Use unsweetened shredded coconut if you prefer a more savory flavor.

Coconut Shrimp Tacos

Place crispy shrimp inside warm tortillas with shredded cabbage, avocado, mango salsa, and lime crema.

Storage and Reheating

Coconut shrimp are best served freshly cooked, but leftovers can be refrigerated for up to 2 days.

Store them in an airtight container after they have completely cooled.

For the best texture, reheat in an air fryer at 350°F for 3–5 minutes.

You can also reheat them in a 375°F oven for about 6–8 minutes.

Avoid microwaving if possible because it can make the coconut coating soft and chewy.

Final Thoughts

These Crispy Coconut Shrimp combine juicy seafood with an irresistibly crunchy coconut-panko coating for an appetizer or dinner that feels restaurant-worthy without requiring complicated techniques.

The secret is to use dry shrimp, press the breading firmly onto each piece, maintain the correct cooking temperature, and avoid overcooking the seafood. A bright sweet chili-lime sauce completes the dish with the perfect balance of sweetness, tanginess, and gentle heat.

Whether you deep-fry them for maximum crunch, prepare them in the air fryer for a lighter option, or bake them for convenience, coconut shrimp are easy to customize and perfect for everything from casual family dinners to party platters.

Easy Fresh Fruit Pizza with Cream Cheese Frosting Recipe – Colourful, Creamy, and Perfect for Parties

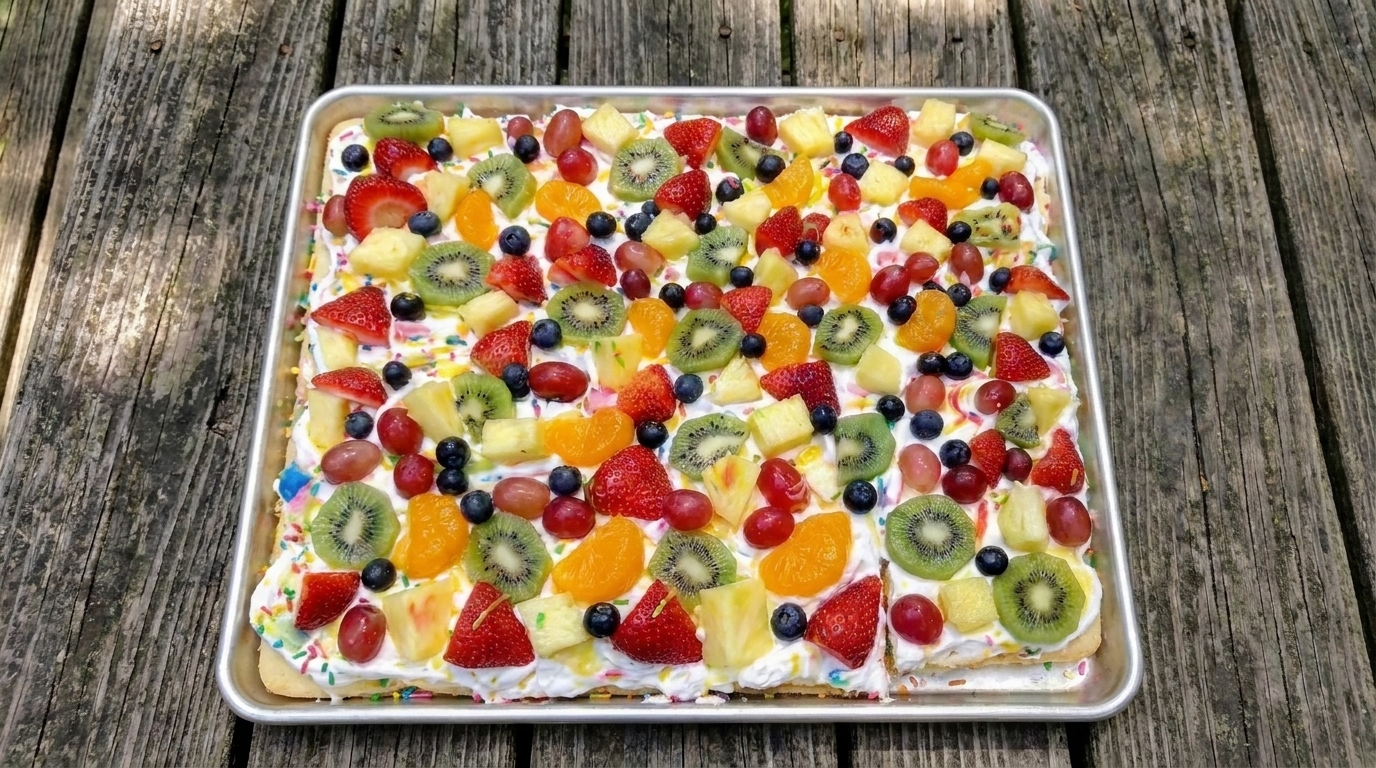
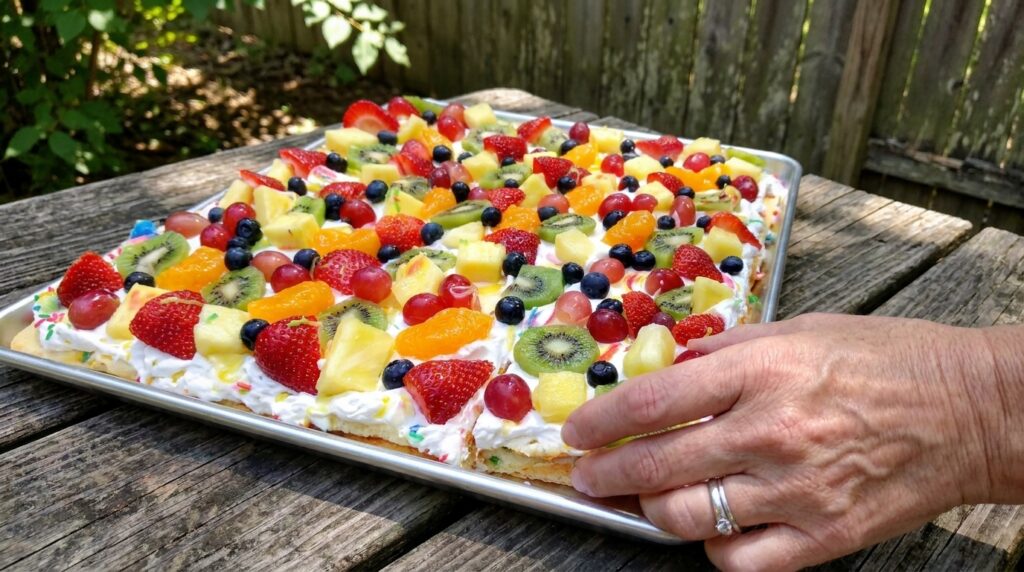
If you are looking for a beautiful dessert that is fresh, colorful, and easy to serve, this Fresh Fruit Pizza with Cream Cheese Frosting is a perfect recipe to make. A soft sugar-cookie crust is topped with smooth, lightly sweetened cream cheese frosting and decorated with an assortment of fresh fruit for a dessert that is bright, creamy, and refreshing.

This recipe is perfect for summer parties, birthdays, brunches, potlucks, baby showers, holidays, or any occasion when you want a dessert that looks impressive without requiring complicated decorating skills. The buttery cookie crust provides sweetness and structure, while the tangy cream cheese frosting balances the fresh fruit beautifully.

One of the best things about homemade fruit pizza is how easy it is to customize. You can use strawberries, kiwi, blueberries, raspberries, grapes, mandarins, mango, pineapple, or whatever colorful fruit is in season.

Why You’ll Love This Fresh Fruit Pizza with Cream Cheese Frosting

This easy dessert combines three delicious textures in every bite: a soft cookie crust, creamy frosting, and juicy fresh fruit.

The sugar-cookie base is sturdy enough to hold the toppings while remaining tender rather than becoming overly crisp.

Cream cheese frosting adds richness and a subtle tang that keeps the dessert from tasting excessively sweet.

It is also one of the easiest desserts to decorate because the fruit naturally creates a colorful presentation. Arrange it in rings, rows, or a casual scattered pattern depending on the occasion.

Ingredients

For the Sugar Cookie Crust

  • ½ cup unsalted butter, softened
  • ¾ cup granulated sugar
  • 1 large egg
  • 1 teaspoon vanilla extract
  • 1½ cups all-purpose flour
  • ½ teaspoon baking powder
  • ¼ teaspoon baking soda
  • ¼ teaspoon salt

For the Cream Cheese Frosting

  • 8 ounces cream cheese, softened
  • ¼ cup unsalted butter, softened
  • ¾ cup powdered sugar
  • 1 teaspoon vanilla extract
  • 1 teaspoon fresh lemon juice
  • ½ teaspoon finely grated lemon zest, optional

For the Fresh Fruit Topping

  • 1 cup strawberries, sliced
  • 1 kiwi, peeled and sliced
  • ½ cup blueberries
  • ½ cup raspberries
  • ½ cup seedless grapes, halved
  • ½ cup mandarin orange segments, well drained
  • ½ cup diced pineapple or mango, optional

For the Optional Fruit Glaze

  • ¼ cup apricot preserves or apple jelly
  • 1 tablespoon water

How to Make Fresh Fruit Pizza with Cream Cheese Frosting

1. Preheat the Oven

Preheat your oven to 350°F (175°C).

Lightly grease a 12-inch pizza pan or line a large round baking pan with parchment paper.

You can also use a 9×13-inch rectangular pan if you prefer fruit-pizza bars.

Set the pan aside while you prepare the cookie dough.

2. Cream the Butter and Sugar

Place the softened butter and granulated sugar in a large mixing bowl.

Beat with an electric mixer on medium speed for approximately 2–3 minutes.

The mixture should become lighter in color and fluffy.

Properly creaming the butter and sugar helps create a soft, tender cookie crust.

3. Add the Egg and Vanilla

Add the egg and vanilla extract.

Beat for approximately 30–60 seconds until completely incorporated.

Scrape down the sides of the bowl as needed.

The mixture should look smooth and creamy.

4. Combine the Dry Ingredients

In a separate bowl, whisk together the flour, baking powder, baking soda, and salt.

Gradually add the dry mixture to the butter mixture.

Mix on low speed just until a soft dough forms.

Avoid overmixing once the flour has been added because too much mixing can make the crust tougher.

5. Shape the Cookie Crust

Transfer the dough to the prepared pan.

Using lightly floured fingers or the back of a spoon, press the dough into an even circle approximately 10–11 inches wide.

Keep the thickness as even as possible so the crust bakes uniformly.

Leave a little space around the edge because the cookie will spread slightly while baking.

6. Bake the Crust

Bake for approximately 12–16 minutes.

The center should look set and the outer edges should be lightly golden.

Avoid baking until the entire surface is dark brown.

A slightly softer cookie crust is easier to slice and pairs better with the creamy topping.

Remove from the oven and place the pan on a wire rack.

Cool completely before adding frosting.

7. Prepare the Cream Cheese Frosting

Place the softened cream cheese and butter in a mixing bowl.

Beat on medium speed for approximately 1–2 minutes until smooth.

Add the powdered sugar gradually.

Add the vanilla, lemon juice, and lemon zest if using.

Beat for another 1–2 minutes until smooth, fluffy, and spreadable.

If the frosting is very soft, refrigerate it for approximately 15 minutes before assembling the pizza.

8. Prepare the Fruit

Wash all fresh fruit thoroughly.

Dry it very well with paper towels or a clean kitchen towel.

Slice the strawberries and kiwi.

Halve the grapes.

Drain mandarin oranges and pineapple thoroughly if using canned fruit.

Removing excess moisture is important because wet fruit can make the frosting watery and the cookie crust soggy.

9. Frost the Cookie Crust

Once the cookie crust is completely cool, carefully remove it from the pan if desired or leave it on the serving pan.

Spread the cream cheese frosting evenly over the surface.

Leave approximately ½ inch of the outer crust visible to create a pizza-like border.

Use an offset spatula or the back of a spoon to create a smooth layer.

10. Arrange the Fresh Fruit

Begin arranging the fruit over the frosting.

For a decorative look, start around the outside edge with strawberries.

Create additional rings using kiwi, mandarin oranges, grapes, blueberries, and raspberries.

You can also scatter the fruit randomly for a more casual appearance.

Try to distribute the colors evenly so every slice looks bright and attractive.

11. Add the Optional Fruit Glaze

Place the apricot preserves or apple jelly in a small microwave-safe bowl.

Add the water.

Warm for approximately 10–20 seconds, then stir until smooth.

Allow the glaze to cool slightly.

Using a pastry brush, gently brush a very thin layer over the fruit.

The glaze adds shine and can help prevent some fruits from drying out.

Do not use too much because excess glaze can make the dessert overly wet.

12. Chill Before Serving

Refrigerate the assembled fruit pizza for approximately 30–60 minutes before serving.

This helps the cream cheese frosting firm slightly and makes slicing cleaner.

Do not leave the fruit pizza at room temperature for extended periods because the frosting contains cream cheese.

13. Slice and Serve

Use a sharp knife or pizza cutter to slice the fruit pizza into wedges.

Wipe the blade between cuts if necessary for cleaner portions.

Serve chilled or slightly cool.

What to Serve With Fresh Fruit Pizza with Cream Cheese Frosting

This fruit pizza is delicious on its own and works especially well as part of a brunch or dessert table.

Serve it alongside muffins, croissants, cinnamon rolls, pastries, or breakfast casseroles for brunch.

For parties, pair it with brownies, cookies, cupcakes, cheesecake bites, or chocolate-covered strawberries.

Coffee, tea, lemonade, iced tea, or fruit punch all complement the fresh flavors beautifully.

Individual slices can also be served with a small spoonful of whipped cream.

Tips for the Best Fresh Fruit Pizza with Cream Cheese Frosting

Cool the cookie crust completely before frosting it.

Use fully softened cream cheese and butter for a smooth frosting.

Dry all fruit thoroughly before decorating.

Avoid fruits that release large amounts of liquid unless they are very well drained.

Do not overbake the cookie crust.

Arrange delicate berries near the end so they are less likely to be crushed.

Add bananas only shortly before serving because they brown quickly.

Keep the dessert refrigerated until shortly before serving.

For the prettiest presentation, use several different fruit colors.

Wait to assemble the fruit pizza until the day you plan to serve it for the freshest texture.

Easy Recipe Variations

Berry Fruit Pizza

Use strawberries, raspberries, blueberries, and blackberries for a colorful berry-only version.

Tropical Fruit Pizza

Top with mango, pineapple, kiwi, mandarin oranges, and toasted coconut.

Lemon Cream Cheese Fruit Pizza

Increase the lemon zest and juice in the frosting for a brighter citrus flavor.

Chocolate Fruit Pizza

Add 2 tablespoons cocoa powder to the cookie crust or drizzle melted chocolate over the finished fruit.

Mini Fruit Pizzas

Bake individual sugar cookies and decorate each with cream cheese frosting and fruit.

Strawberry Kiwi Fruit Pizza

Use only sliced strawberries and kiwi for a simple two-fruit design.

Patriotic Fruit Pizza

Use strawberries, raspberries, blueberries, and a pale cream cheese frosting for a red, white, and blue dessert.

Cinnamon Sugar Fruit Pizza

Add ½ teaspoon cinnamon to the cookie crust for a warmer flavor.

How to Store Leftovers

Cover leftover fruit pizza tightly with plastic wrap or transfer slices to an airtight container.

Store in the refrigerator for up to 2–3 days.

The cookie crust will gradually soften as it absorbs moisture from the frosting and fruit.

For the best texture, enjoy the dessert within the first 24–48 hours.

Freezing an assembled fruit pizza is not recommended because fresh fruit and cream cheese frosting can become watery after thawing.

However, the unfrosted cookie crust can be frozen for up to approximately 2 months.

Wrap it tightly and thaw completely before decorating.

Frequently Asked Questions

Can I use refrigerated sugar cookie dough?

Yes.

Prepared refrigerated sugar cookie dough is an excellent shortcut.

Press approximately 16–18 ounces of dough into a pizza pan and bake according to the package directions until lightly golden.

What fruit works best on fruit pizza?

Strawberries, blueberries, raspberries, kiwi, grapes, mandarins, mango, and pineapple are excellent choices.

Choose fruit that is ripe but still firm.

Can I make fruit pizza ahead of time?

Yes, but for the best result, prepare the crust and frosting ahead and assemble the pizza on the day you plan to serve it.

How do I keep fruit pizza from getting soggy?

Dry the fruit thoroughly, cool the crust completely, and avoid assembling it too far in advance.

Can I use whipped cream instead of cream cheese frosting?

Yes.

A stabilized whipped cream can be used, although the dessert will be lighter and less tangy.

Can I add bananas?

Yes, but add them shortly before serving.

You can lightly coat banana slices with lemon juice to slow browning.

Do I have to use a fruit glaze?

No.

The glaze is optional and mainly adds shine.

The fruit pizza is delicious without it.

Can I make individual fruit pizzas?

Absolutely.

Bake large sugar cookies, allow them to cool, then decorate each with cream cheese frosting and fresh fruit.

Final Thoughts

This Fresh Fruit Pizza with Cream Cheese Frosting combines a soft buttery sugar-cookie crust, creamy vanilla frosting, and colorful fresh fruit in one beautiful dessert.

It is simple enough for casual family gatherings but attractive enough for birthdays, showers, brunches, holidays, and summer parties.

Serve it chilled with your favorite seasonal fruits and enjoy the delicious combination of soft cookie, tangy cream cheese frosting, and juicy fresh fruit in every colorful bite.

Easy Golden Crab Cakes Recipe – Crispy Outside, Tender Inside, and Packed with Crab Flavor

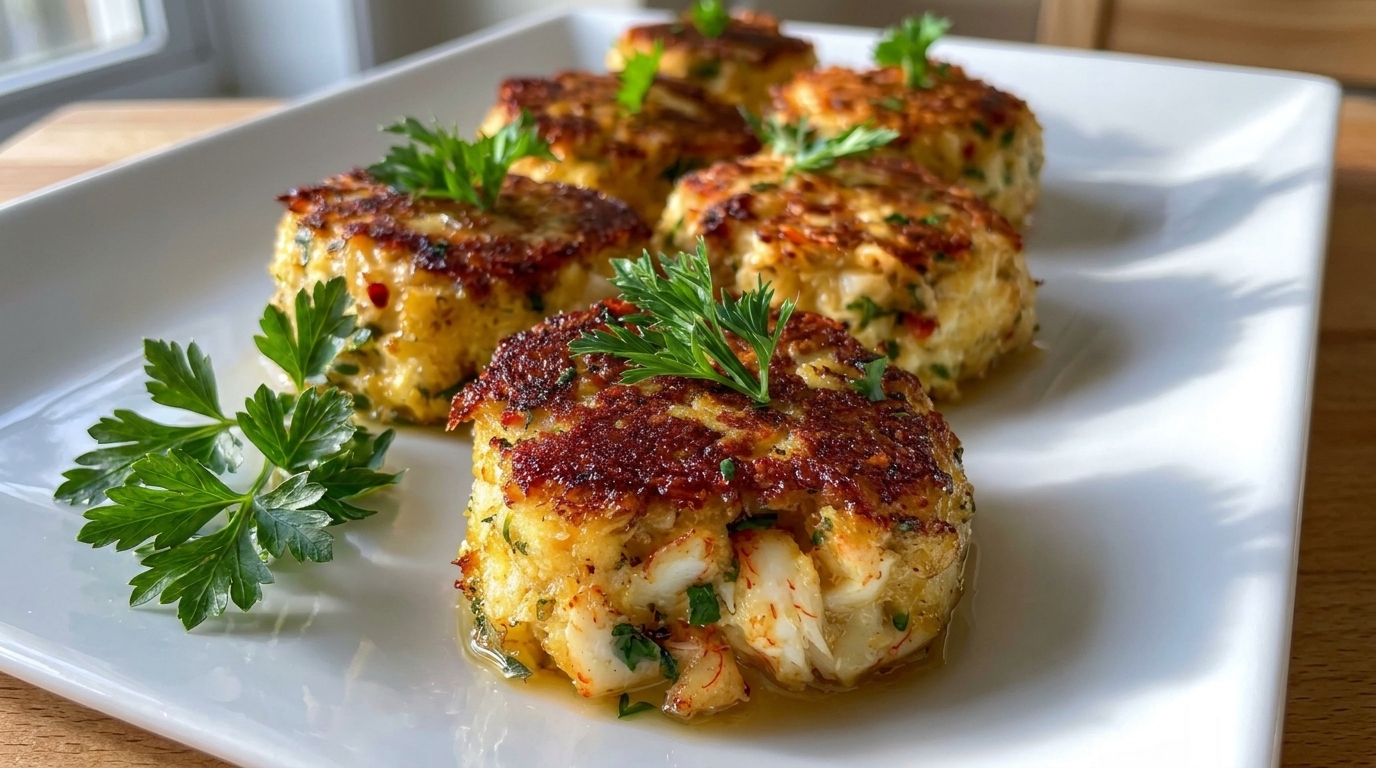
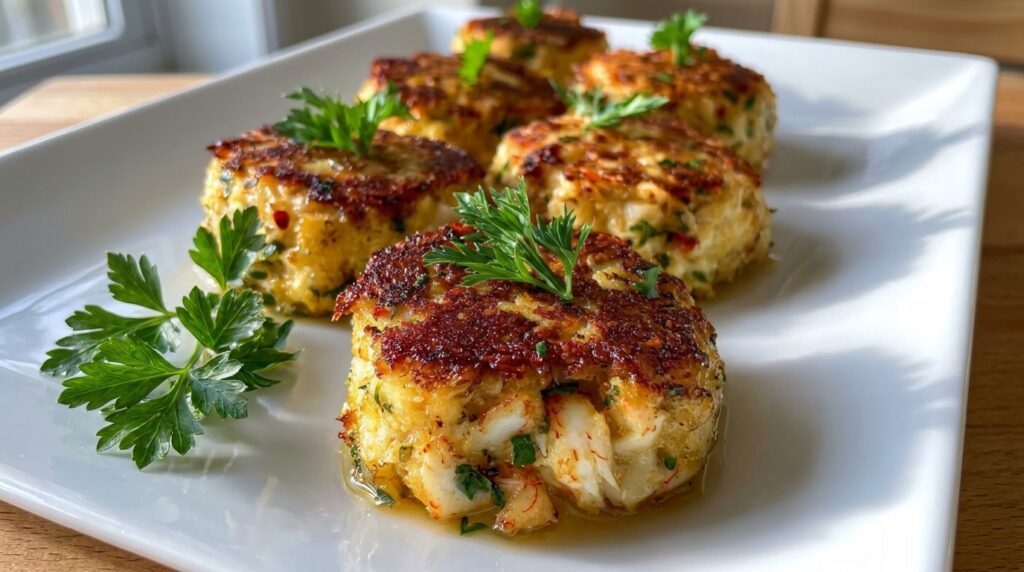
If you love seafood recipes that feel elegant but are still easy enough to make at home, these Golden Crab Cakes are a perfect choice. They are crisp and deeply golden on the outside while remaining tender, moist, and packed with sweet crab flavor in the center. A small amount of breadcrumbs and a creamy binder hold everything together without overwhelming the seafood.

The key to truly great crab cakes is keeping the crab meat as the star. Instead of loading the mixture with too much filler, this recipe uses just enough mayonnaise, egg, mustard, breadcrumbs, herbs, and seasonings to create cakes that hold their shape while still tasting unmistakably like crab.

Golden Crab Cakes are ideal for seafood dinners, brunch, holidays, entertaining, date nights, or appetizers. Serve them with lemon wedges and a creamy dipping sauce, place them over salad for a lighter meal, or pair them with roasted potatoes and vegetables for a complete dinner.

Why You’ll Love These Golden Crab Cakes

One of the biggest advantages of homemade crab cakes is that you control how much crab goes into them. Restaurant and frozen versions can sometimes contain more breadcrumbs than seafood, but these cakes stay crab-forward.

Their texture is another highlight. The exterior develops a beautiful crispy crust when pan-seared, while the center stays delicate and tender. Chilling the formed cakes before cooking helps them hold together without requiring excessive breadcrumbs.

The recipe is also flexible. You can pan-fry the cakes for maximum golden crispness, bake them for a lighter preparation, or cook them in an air fryer. You can also adjust the seasonings and dipping sauces to create different variations.

Ingredients

For the Crab Cakes

  • 1 pound lump or jumbo lump crab meat
  • 1 large egg
  • ¼ cup mayonnaise
  • 1 tablespoon Dijon mustard
  • 1 teaspoon Worcestershire sauce
  • 1 teaspoon fresh lemon juice
  • 1 teaspoon Old Bay seasoning
  • ½ teaspoon garlic powder
  • ¼ teaspoon onion powder
  • ¼ teaspoon freshly ground black pepper
  • 2 tablespoons finely chopped fresh parsley
  • 1 tablespoon finely chopped green onion
  • ¾ cup panko breadcrumbs, divided
  • 2 tablespoons unsalted butter
  • 2 tablespoons olive oil

For the Creamy Lemon Sauce

  • ½ cup mayonnaise
  • 1 tablespoon fresh lemon juice
  • 1 teaspoon Dijon mustard
  • 1 teaspoon finely chopped parsley
  • ½ teaspoon garlic powder
  • 1 teaspoon finely chopped capers or dill pickles, optional
  • Salt and black pepper, to taste

For Serving

  • Lemon wedges
  • Fresh parsley
  • Green onions
  • Extra dipping sauce

How to Make Golden Crab Cakes

1. Check the Crab Meat

Place the crab meat in a large shallow bowl.

Carefully pick through it with clean fingers to check for any small pieces of shell or cartilage.

Work gently so you do not break up the large pieces of crab too much. Keeping some of the lumps intact gives the finished crab cakes a much better texture.

Once checked, set the crab aside while you prepare the binder.

2. Make the Crab Cake Binder

In a separate bowl, whisk together the egg, mayonnaise, Dijon mustard, Worcestershire sauce, lemon juice, Old Bay seasoning, garlic powder, onion powder, and black pepper.

Stir in the parsley and green onion.

Mix until smooth and evenly combined.

This mixture provides flavor and moisture while helping hold the crab cakes together.

3. Combine with the Crab

Pour the binder mixture over the crab meat.

Add approximately ½ cup of panko breadcrumbs.

Using a rubber spatula or large spoon, fold everything together gently.

Avoid stirring aggressively. You want to preserve the texture of the crab instead of turning it into a completely uniform paste.

The mixture should be moist but able to hold together when gently pressed.

If it seems excessively wet, add another tablespoon or two of breadcrumbs.

4. Shape the Crab Cakes

Divide the mixture into approximately 6 medium crab cakes.

Use your hands to gently shape each portion into a patty about ¾ to 1 inch thick.

Do not compact them too firmly. A lightly formed crab cake stays more tender after cooking.

Place the remaining panko breadcrumbs in a shallow dish.

Lightly press each crab cake into the breadcrumbs on both sides. You do not need a heavy coating—just enough to help create a crispy golden exterior.

5. Chill Before Cooking

Arrange the shaped cakes on a parchment-lined plate or baking sheet.

Refrigerate for at least 30 minutes.

This is an important step because chilling allows the ingredients to firm up and makes the crab cakes less likely to fall apart when flipped.

You can refrigerate them for several hours if you want to prepare them ahead.

6. Make the Creamy Lemon Sauce

While the crab cakes chill, combine mayonnaise, lemon juice, Dijon mustard, parsley, garlic powder, and optional capers or chopped pickles in a small bowl.

Season with salt and black pepper.

Cover and refrigerate until serving.

The tangy sauce balances the richness of the golden crab cakes beautifully.

7. Heat the Skillet

Place a large nonstick, stainless-steel, or cast-iron skillet over medium heat.

Add the olive oil and butter.

Allow the butter to melt and foam.

You want the skillet hot enough to crisp the cakes but not so hot that the breadcrumb coating burns before the centers are heated.

8. Cook the Crab Cakes

Carefully place the chilled crab cakes in the skillet.

Leave a little space between them and work in batches if necessary.

Cook for approximately 3–4 minutes on the first side without moving them.

Once the bottoms are deeply golden and crisp, carefully flip using a thin spatula.

Cook the second side for another 3–4 minutes.

The cakes should be browned on the outside and hot throughout. Because commercial crab meat is typically already cooked, the goal is to heat the cakes thoroughly and cook the egg binder.

For food safety, the center should reach 165°F (74°C).

9. Drain and Rest Briefly

Transfer the cooked crab cakes to a wire rack or paper towel-lined plate.

Let them rest for about 2–3 minutes.

This short resting period allows the structure to settle while keeping the exterior crisp.

10. Garnish and Serve

Transfer the crab cakes to a serving platter.

Sprinkle with fresh parsley or sliced green onions.

Serve with lemon wedges and plenty of creamy lemon sauce on the side.

For the best texture, enjoy them while they are still warm and crisp.

What to Serve With Golden Crab Cakes

Crab cakes are versatile enough to serve as an appetizer or main course.

For a lighter seafood dinner, place them over mixed greens with cucumber, tomatoes, avocado, and lemon vinaigrette.

Roasted asparagus, green beans, broccoli, or zucchini also pair beautifully with the rich crab cakes.

For something more comforting, serve them with crispy roasted potatoes, French fries, mashed potatoes, or rice.

Coleslaw is another excellent pairing because its cool, crunchy texture provides contrast to the warm cakes.

You can also serve crab cakes inside toasted brioche buns with lettuce, tomato, pickles, and lemon aioli for delicious crab cake sandwiches.

Tips for the Best Golden Crab Cakes

Use good-quality crab meat. Lump or jumbo lump crab provides the best flavor and texture.

Do not overmix. Gentle folding preserves the larger pieces of crab.

Keep filler to a minimum. Add only enough breadcrumbs to hold the mixture together.

Chill before cooking. This significantly reduces the chance of the cakes breaking apart.

Use medium heat. Excessively high heat can burn the crust before the cakes are fully heated.

Flip only once. Repeatedly turning the crab cakes can cause them to break.

Use lemon at serving time. A fresh squeeze of lemon brightens the rich seafood flavor.

Easy Recipe Variations

Spicy Crab Cakes

Add ¼ teaspoon cayenne pepper and 1 teaspoon hot sauce to the binder.

Serve with spicy mayonnaise or remoulade.

Garlic Parmesan Crab Cakes

Add ¼ cup grated Parmesan and an extra ½ teaspoon garlic powder to the mixture.

Cajun Crab Cakes

Replace the Old Bay with Cajun seasoning and add sliced green onions.

Herb Crab Cakes

Add fresh dill, chives, or additional parsley for a brighter herb flavor.

Baked Crab Cakes

Arrange chilled crab cakes on a greased baking sheet.

Lightly brush or spray them with oil and bake at 425°F for approximately 12–15 minutes, carefully flipping halfway through.

Broil for a minute at the end if you want additional browning.

Air Fryer Crab Cakes

Lightly spray the crab cakes with cooking oil.

Air fry at 375°F for approximately 10–12 minutes, flipping carefully halfway through, until golden and heated through.

Storage and Reheating

Store leftover crab cakes in an airtight container in the refrigerator for up to 2–3 days.

For the best texture, reheat them in a 375°F oven for about 8–10 minutes or in an air fryer at 350°F for 4–6 minutes.

Avoid microwaving if possible because it can soften the crispy coating.

Uncooked crab cakes can also be formed ahead and refrigerated for up to 24 hours before cooking.

Freezing Instructions

To freeze uncooked crab cakes, arrange them on a parchment-lined baking sheet and freeze until firm.

Transfer to a freezer-safe container with parchment between the layers.

Freeze for up to about 2 months.

Thaw overnight in the refrigerator before cooking.

You can also freeze cooked crab cakes, although freshly cooked cakes usually have the best texture.

Final Thoughts

These Golden Crab Cakes offer everything you want from a great seafood recipe: sweet crab meat, a tender interior, fresh herbs, subtle seasoning, and a beautifully crisp golden crust.

The most important secrets are using plenty of good-quality crab, limiting the breadcrumbs, mixing gently, and chilling the cakes before cooking. Those simple techniques help produce crab cakes that hold together without becoming dense or bread-heavy.

Serve them with creamy lemon sauce for an appetizer, pair them with vegetables and potatoes for dinner, or turn them into sandwiches for an easy seafood lunch. However you serve them, these homemade golden crab cakes are an elegant yet approachable recipe worth adding to your collection.

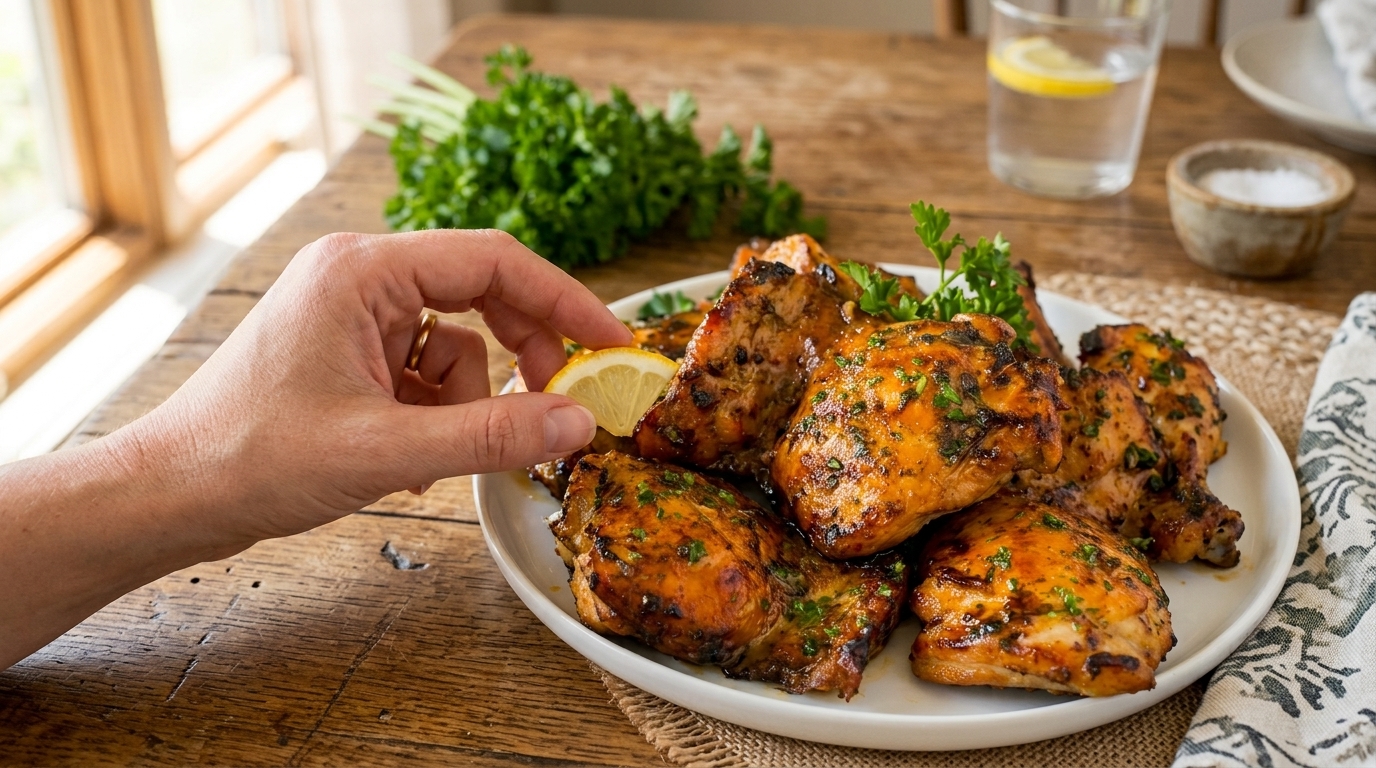
Grilled Lemon Herb Chicken Thighs

Grilled Lemon Herb Chicken Thighs are juicy, golden, and packed with bright Mediterranean-inspired flavor. The chicken is marinated in fresh lemon juice, garlic, olive oil, parsley, and herbs before being grilled until beautifully caramelized on the outside and succulent inside.

This easy chicken recipe is perfect for summer cookouts, family dinners, weekly meal preparation, or any occasion when you need a flavorful main dish without complicated ingredients. The marinade takes only a few minutes to mix, and the chicken can be prepared outdoors on a grill or indoors using a grill pan.

Serve it with roasted potatoes, rice, grilled vegetables, or a crisp salad for a satisfying meal everyone will enjoy.

Why You’ll Love This Recipe

Chicken thighs are naturally juicy and flavorful, making them ideal for grilling. Unlike chicken breasts, they are more forgiving and less likely to become dry if cooked for an extra minute or two.

The lemon-herb marinade adds flavor while helping tenderize the meat. Garlic contributes savory depth, honey encourages caramelization, and smoked paprika creates an appealing golden-red color.

This recipe is also versatile. You can use boneless or bone-in thighs, adjust the herbs, increase the garlic, or add chili flakes for a spicier finish.

The chicken tastes delicious hot from the grill, but it is equally good chilled and sliced for salads, sandwiches, or meal-prep bowls.

Ingredients

For the Chicken

  • 2 pounds boneless, skinless chicken thighs
  • 1 teaspoon salt
  • ½ teaspoon ground black pepper
  • 1 teaspoon smoked paprika
  • ½ teaspoon onion powder

For the Lemon-Herb Marinade

  • ¼ cup extra-virgin olive oil
  • 3 tablespoons fresh lemon juice
  • 1 tablespoon lemon zest
  • 4 garlic cloves, finely minced
  • 1 tablespoon honey
  • 1 tablespoon Dijon mustard
  • 2 tablespoons chopped fresh parsley
  • 1 tablespoon chopped fresh oregano
  • 1 teaspoon fresh thyme leaves
  • ½ teaspoon dried rosemary
  • ¼ teaspoon crushed red pepper flakes, optional

For Serving

  • Fresh lemon wedges
  • Chopped fresh parsley
  • Extra-virgin olive oil, optional
  • Flaky salt and black pepper

Ingredients Overview

Boneless, skinless chicken thighs cook quickly and develop plenty of color on the grill. Bone-in, skin-on thighs can also be used, but they require a longer cooking time.

Fresh lemon juice provides acidity, while lemon zest contributes concentrated citrus aroma without adding more liquid. Using both creates a brighter and more complete lemon flavor.

Olive oil carries the seasonings and keeps the surface of the chicken moist. Honey balances the acidity and helps the exterior caramelize.

Dijon mustard adds subtle sharpness and helps emulsify the marinade. Fresh parsley, oregano, thyme, and rosemary create a fragrant herbal profile that complements grilled chicken beautifully.

How to Make Grilled Lemon Herb Chicken Thighs

1. Prepare the Chicken

Remove the chicken thighs from their packaging and pat them thoroughly dry with paper towels.

Trim away any large pieces of excess fat. Small amounts can remain because they add flavor and moisture during grilling.

If some thighs are significantly thicker than others, gently pound the thickest sections to create a more uniform shape. Even thickness promotes consistent cooking.

Season both sides lightly with salt, black pepper, smoked paprika, and onion powder.

2. Make the Marinade

In a medium bowl, combine the olive oil, lemon juice, lemon zest, minced garlic, honey, Dijon mustard, parsley, oregano, thyme, rosemary, and optional red pepper flakes.

Whisk vigorously until the ingredients are well blended and the mixture appears slightly thickened.

Taste a small amount of the marinade before it touches the raw chicken. Adjust the lemon, honey, or seasonings if necessary.

Reserve approximately three tablespoons in a separate clean container for brushing over the cooked chicken. Never reuse marinade that has been in contact with raw poultry unless it is thoroughly boiled.

3. Marinate the Chicken

Place the seasoned chicken thighs in a shallow container or resealable bag. Pour the remaining marinade over the chicken.

Turn each piece until it is evenly coated. Seal the container and refrigerate for at least 30 minutes.

For deeper flavor, marinate the chicken for two to four hours. Avoid leaving it in a strongly acidic lemon marinade for more than eight hours, as the surface can develop a soft or slightly mushy texture.

4. Bring the Chicken Toward Room Temperature

Remove the marinated chicken from the refrigerator approximately 20 minutes before grilling.

Allowing it to lose some of its chill helps it cook more evenly. Do not leave raw chicken at room temperature for an extended period.

Lift the thighs from the marinade and allow excess liquid to drip away. Too much liquid can cause flare-ups on an outdoor grill and may prevent browning.

Discard the used marinade.

5. Preheat the Grill

Preheat a gas or charcoal grill to medium-high heat, approximately 400–425°F.

Clean the grill grates thoroughly and oil them lightly. You can dip a folded paper towel in oil and use long-handled tongs to wipe the grates.

A properly heated and oiled grill creates attractive marks and reduces sticking.

6. Grill the First Side

Arrange the chicken thighs on the grill with the smooth side facing down. Leave a little space between the pieces.

Cook without moving them for approximately five to six minutes. This uninterrupted contact allows a golden crust and clear grill marks to develop.

If flames begin rising around the chicken, move the affected pieces to a cooler area of the grill rather than spraying water onto the fire.

7. Turn and Finish Cooking

Flip the thighs with tongs and cook for another five to seven minutes.

The exact time will depend on their size, thickness, and grill temperature. Boneless thighs are fully cooked when the thickest section reaches at least 165°F.

For especially tender thighs, many cooks prefer an internal temperature between 175°F and 185°F. Dark meat contains connective tissue that becomes more tender at slightly higher temperatures.

Avoid piercing the chicken repeatedly with a fork, as this allows flavorful juices to escape.

8. Brush with Reserved Marinade

During the final minute of grilling, brush the chicken lightly with the clean reserved marinade.

Turn it once more for approximately 30 seconds to caramelize the honey and intensify the lemon-herb flavor.

Watch carefully because the honey can burn if exposed to high heat for too long.

9. Rest the Chicken

Transfer the grilled thighs to a clean serving platter. Cover them loosely with foil and allow them to rest for five to eight minutes.

Resting gives the juices time to redistribute throughout the meat, producing moister chicken.

Finish with chopped parsley, fresh lemon juice, black pepper, and a light drizzle of olive oil if desired.

Indoor Cooking Method

If you do not have an outdoor grill, heat a cast-iron grill pan or heavy skillet over medium-high heat.

Add a small amount of oil, then arrange the chicken in a single layer. Cook for approximately six minutes on each side, adjusting the heat if the outside browns too quickly.

Depending on thickness, you may need to reduce the heat, cover the skillet, and cook for an additional two to four minutes.

You can also bake the marinated chicken at 425°F for approximately 25 to 30 minutes. Broil it briefly at the end for extra browning.

Helpful Cooking Tips

Always pat the chicken dry before seasoning. Excess moisture dilutes the marinade and prevents proper caramelization.

Do not overcrowd the grill. Crowding lowers the temperature and causes the chicken to steam.

Use an instant-read thermometer for reliable results. Visual color alone is not always an accurate indicator of doneness.

Fresh lemon juice provides the brightest flavor, but do not marinate the chicken for too long.

Let the grilled chicken rest before serving. Cutting into it immediately will release its juices onto the plate.

If using bone-in thighs, grill them over indirect heat after searing and allow approximately 30 to 40 minutes total.

Serving Suggestions

Serve Grilled Lemon Herb Chicken Thighs with roasted potatoes, mashed potatoes, rice pilaf, couscous, or buttered noodles.

For a lighter meal, pair them with Greek salad, cucumber-tomato salad, grilled zucchini, asparagus, broccoli, or green beans.

Warm pita bread, hummus, tzatziki, and olives can transform the chicken into a Mediterranean-style platter.

The meat also works well in grain bowls with rice, quinoa, lettuce, tomatoes, cucumbers, feta cheese, and lemon dressing.

Recipe Variations

For spicy chicken, increase the red pepper flakes or add cayenne pepper to the marinade.

Replace parsley with fresh cilantro and use lime instead of lemon for a different citrus-herb profile.

For an Italian variation, add basil and grated Parmesan. For a Greek-inspired flavor, include oregano and serve the chicken with feta and tzatziki.

You may also use the marinade for chicken breasts, drumsticks, or wings. Adjust the cooking time according to the cut.

Storage and Reheating

Allow leftover chicken to cool before placing it in an airtight container. Refrigerate for up to four days.

Reheat the thighs in a covered skillet over low heat with a small splash of chicken broth. They can also be warmed in a 325°F oven until heated through.

Avoid overheating, as repeated exposure to high heat can dry out the chicken.

Cooked chicken thighs may be frozen for up to three months. Thaw them overnight in the refrigerator before reheating.

Leftover Ideas

Slice leftover chicken and add it to salads, wraps, sandwiches, or pasta. It also makes an excellent topping for homemade flatbread or pizza.

Chop the thighs and serve them in rice bowls with roasted vegetables and yogurt sauce.

For an easy lunch, place the sliced chicken in pita bread with lettuce, tomato, cucumber, and tzatziki.

Frequently Asked Questions

Can I use chicken breasts?

Yes. Pound them to an even thickness and cook until the centers reach 165°F. Chicken breasts may cook faster and require closer attention.

How long should chicken thighs marinate?

Thirty minutes provides good flavor, while two to four hours produces better results. Avoid marinating for more than eight hours.

Why is my chicken sticking to the grill?

The grill may not be hot or clean enough, or the chicken may have been turned too early. Meat generally releases naturally once a crust has formed.

Can I prepare the marinade ahead?

Yes. Mix it and refrigerate it in a sealed container for up to three days. Stir or whisk before using.

Final Thoughts

Grilled Lemon Herb Chicken Thighs are juicy, aromatic, and wonderfully easy to prepare. Fresh citrus, garlic, herbs, and smoky seasoning create a bright yet deeply savory flavor, while grilling gives the chicken irresistible caramelized edges.

Whether served at a summer cookout or prepared indoors for a weeknight dinner, this versatile recipe delivers dependable results and a delicious meal the entire family can enjoy.

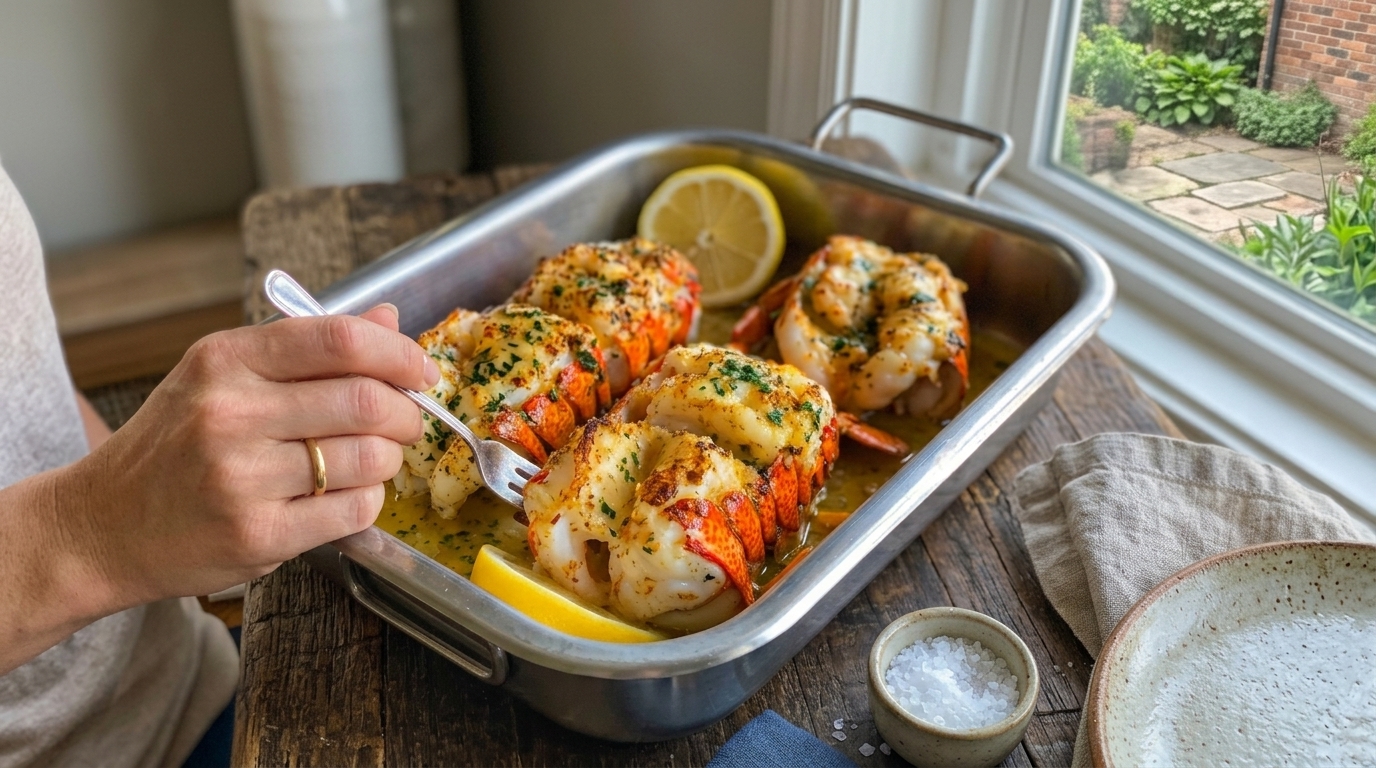
Baked Garlic Butter Lobster Tails

Baked Garlic Butter Lobster Tails are an elegant seafood dinner featuring sweet, tender lobster meat coated in a rich mixture of melted butter, fresh garlic, lemon, and herbs. Baking the lobster gently in the oven keeps the meat succulent while allowing the buttery seasoning to soak into every bite.

This restaurant-quality dish is surprisingly easy to make at home. It requires only a few ingredients, minimal preparation, and approximately 20 minutes of cooking. Whether you are planning an anniversary dinner, holiday celebration, date night, or special family meal, these buttery lobster tails create an unforgettable centerpiece.

Why You’ll Love This Recipe

One of the best things about this recipe is its simplicity. Lobster may appear intimidating, but preparing lobster tails is much easier than cooking a whole lobster. Kitchen shears make opening the shells straightforward, and the oven handles most of the work.

The garlic butter complements the lobster without overwhelming its natural sweetness. Fresh lemon adds brightness, parsley contributes color, and paprika gives the surface a warm golden appearance.

Baking is also a convenient cooking method because you can prepare several tails at once. Unlike pan-searing, there is no need to cook them in multiple batches.

Ingredients

  • 4 lobster tails, approximately 6 to 8 ounces each
  • ½ cup unsalted butter, melted
  • 4 garlic cloves, finely minced
  • 1 tablespoon fresh lemon juice
  • 1 teaspoon lemon zest
  • 1 teaspoon smoked or sweet paprika
  • ½ teaspoon garlic powder
  • ½ teaspoon onion powder
  • ½ teaspoon salt
  • ¼ teaspoon ground black pepper
  • ¼ teaspoon crushed red pepper flakes, optional
  • 1 tablespoon chopped fresh parsley
  • 1 teaspoon fresh thyme leaves
  • 1 tablespoon olive oil
  • 1 lemon, cut into wedges
  • Additional melted butter for serving

Ingredients Overview

Cold-water lobster tails are an excellent choice because they are known for their sweet flavor and firm texture. Look for shells that appear intact and meat that does not have gray discoloration or a strong odor.

Unsalted butter allows you to control the final salt level. Butter carries the flavors of the garlic and herbs while helping the surface of the lobster develop a beautiful golden finish.

Fresh garlic delivers the strongest aroma, while a small amount of garlic powder distributes flavor evenly over the meat. Lemon juice and zest balance the richness of the butter.

Paprika provides color and a mild smoky or sweet flavor. Fresh parsley and thyme bring freshness to the finished dish.

How to Make Baked Garlic Butter Lobster Tails

1. Thaw the Lobster Tails

If using frozen lobster tails, thaw them completely before cooking. The best method is to place them in the refrigerator overnight.

For faster thawing, seal the lobster tails in a leakproof bag and submerge them in cold water for approximately 30 to 60 minutes. Replace the water every 15 minutes to keep it cold.

Do not thaw lobster at room temperature or in warm water. Uneven thawing can affect its texture and may create a food-safety concern.

2. Preheat the Oven

Preheat the oven to 425°F. Lightly grease a roasting pan or baking dish with olive oil.

Choose a pan large enough to hold the lobster tails without overcrowding. Leaving a little room around each one helps the heat circulate evenly.

3. Cut the Lobster Shells

Place one lobster tail on a cutting board with the hard, rounded side of the shell facing upward.

Using sharp kitchen shears, cut lengthwise through the center of the top shell. Begin at the open end and stop just before reaching the tail fan. Be careful not to cut all the way through the bottom shell.

Gently spread the shell apart with your fingers. Loosen the meat from the inner sides of the shell, taking care not to detach it from the tail end.

4. Lift the Lobster Meat

Carefully pull the loosened meat upward through the opening. Rest it on top of the shell while keeping it connected at the base.

This method, often called butterflying, creates an attractive presentation and exposes more of the meat to the garlic-butter seasoning.

If you notice a dark intestinal vein running down the center of the meat, remove it with the tip of a knife or a paper towel.

Repeat the process with the remaining tails.

5. Make the Garlic-Herb Butter

Place the melted butter in a small bowl. Add the minced garlic, lemon juice, lemon zest, paprika, garlic powder, onion powder, salt, black pepper, optional red pepper flakes, parsley, and thyme.

Whisk until everything is evenly combined.

Reserve approximately one-third of the mixture in a separate clean bowl for serving. Keeping the serving butter separate prevents it from coming into contact with raw lobster.

6. Season the Lobster

Arrange the prepared lobster tails in the baking dish. Pat the exposed meat dry with paper towels.

Brush the garlic-herb butter generously over the lobster, making sure some of it reaches between the natural sections of the meat.

Pour a few tablespoons of water into the bottom of the baking dish. This creates gentle steam and helps prevent the lobster from drying out. Do not pour water directly over the seasoned meat.

7. Bake the Lobster Tails

Place the baking dish in the preheated oven. Bake the lobster tails for approximately 12 to 15 minutes, depending on their size.

Smaller tails may be ready in 10 to 12 minutes, while larger tails can require 15 to 18 minutes.

Halfway through cooking, carefully open the oven and spoon some of the melted butter from the bottom of the dish over the lobster meat.

The lobster is finished when the meat becomes opaque, firm, and white with a small amount of pearly translucence in the thickest section. Its internal temperature should reach approximately 135–140°F.

8. Broil for Extra Color

For a more golden finish, switch the oven to broil during the final one or two minutes.

Watch the lobster continuously while broiling. The exposed meat and garlic can brown very quickly under intense heat.

This optional step produces lightly caramelized edges similar to those found on restaurant-style lobster tails.

9. Rest and Serve

Remove the lobster tails from the oven and allow them to rest for approximately two minutes.

Brush or spoon the reserved garlic butter over the warm meat. Garnish with additional chopped parsley and serve immediately with fresh lemon wedges.

Helpful Cooking Tips

Avoid overcooking lobster. It changes from tender to rubbery very quickly, so begin checking it several minutes before the expected cooking time.

Use an instant-read thermometer in the thickest part of the meat. Be careful not to touch the shell with the thermometer, as this can affect the reading.

Pat the lobster dry before seasoning. Removing excess moisture helps the garlic butter cling to the meat.

Adjust the cooking time according to the size of the tails rather than relying on one fixed number. As a general guide, lobster tails need approximately one minute of cooking for each ounce.

If the tails begin curling excessively, insert a wooden skewer lengthwise through the meat before baking. Remove the skewers before serving.

Serving Suggestions

Baked Garlic Butter Lobster Tails pair beautifully with creamy mashed potatoes, roasted baby potatoes, rice pilaf, or buttered pasta.

For vegetables, consider roasted asparagus, green beans, broccoli, Brussels sprouts, or glazed carrots. A crisp garden salad offers a refreshing contrast to the rich butter sauce.

Warm crusty bread is perfect for collecting the seasoned butter left in the baking dish. For a classic seafood dinner, serve the lobster with baked potatoes, corn on the cob, and coleslaw.

If you are creating a surf-and-turf meal, pair each lobster tail with a grilled steak or tender beef medallion.

Storage and Reheating

Lobster is best enjoyed immediately after cooking. If you have leftovers, remove the meat from the shells and place it in an airtight container.

Refrigerate cooked lobster for up to two days. Store extra garlic butter in a separate container.

To reheat, place the lobster meat in a covered baking dish with a small amount of butter. Warm it in a 300°F oven for approximately five to eight minutes.

Avoid overheating and do not use high temperatures. Gentle reheating is essential for preserving the tender texture.

Leftover Ideas

Chop leftover lobster and fold it into creamy pasta or homemade macaroni and cheese. It can also be used to prepare lobster rolls with mayonnaise, lemon juice, celery, and fresh herbs.

Add it to scrambled eggs for an elegant breakfast or use it as a topping for risotto.

For a quick lunch, combine the chopped lobster with greens, avocado, cucumber, and a light lemon dressing.

Frequently Asked Questions

Can I use frozen lobster tails?

Yes. Frozen lobster tails work very well, but they must be completely thawed before cooking.

Should I rinse lobster tails?

A quick rinse under cold water is acceptable after cutting the shells. Pat them thoroughly dry before seasoning.

How can I tell when lobster is cooked?

The meat should be opaque and firm, and its internal temperature should reach approximately 135–140°F.

Can I prepare the tails ahead of time?

You may butterfly the tails and make the garlic butter several hours in advance. Keep both refrigerated and add the seasoning shortly before baking.

What can I use instead of fresh parsley?

Fresh chives, dill, or a small amount of dried parsley can be used. Fresh herbs provide the brightest flavor and best presentation.

Final Thoughts

Baked Garlic Butter Lobster Tails offer the perfect combination of tender seafood, fragrant garlic, fresh herbs, and rich melted butter. The recipe looks luxurious but is simple enough for any home cook to prepare successfully.

Serve these golden lobster tails with lemon wedges, creamy potatoes, vegetables, and warm bread for a restaurant-inspired dinner that makes any occasion feel special.

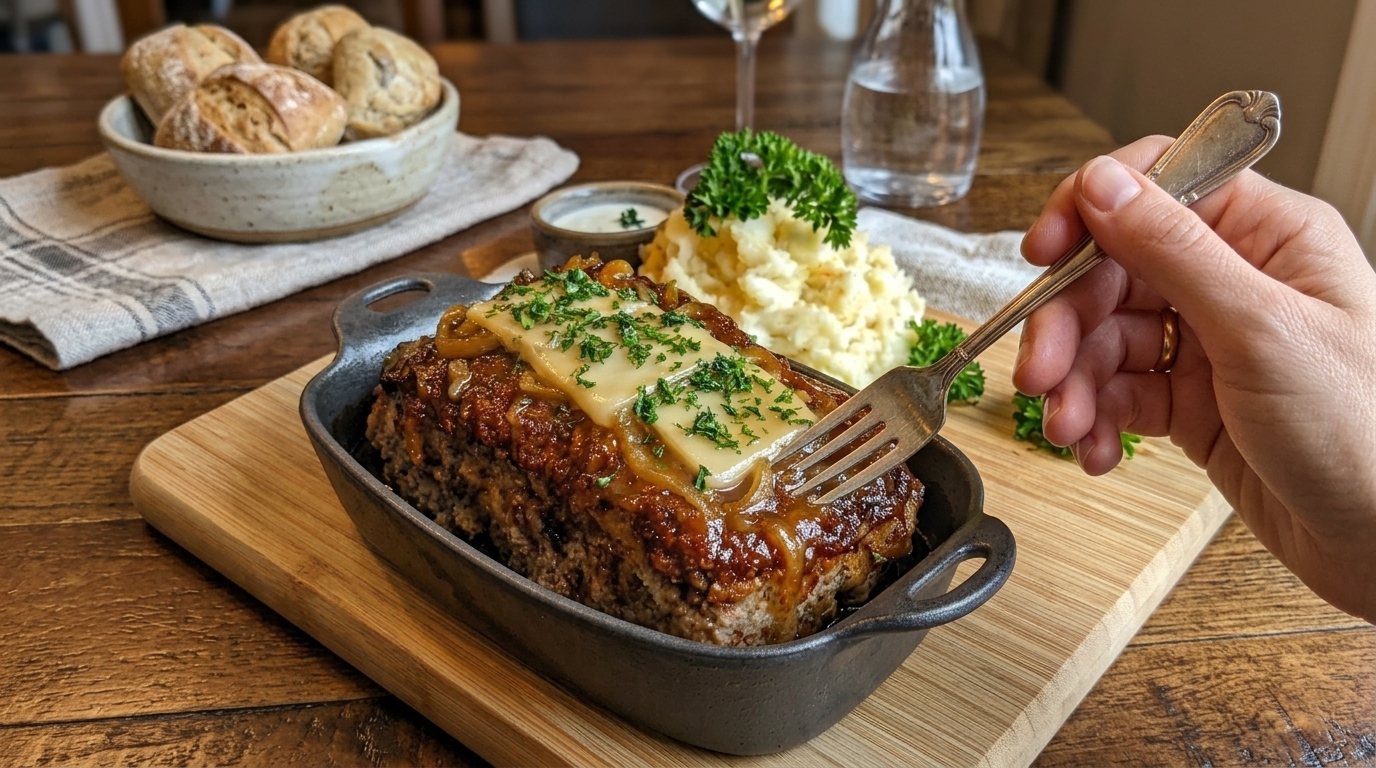
French Onion Meatloaf with Melted Swiss Cheese

French Onion Meatloaf is a rich and comforting twist on a classic family dinner. It combines juicy, perfectly seasoned ground beef with deeply caramelized onions, savory gravy, and melted Swiss cheese. Every slice delivers the hearty satisfaction of traditional meatloaf along with the unmistakable flavors of French onion soup.

Served with fluffy mashed potatoes and warm bread, this dish makes an unforgettable homestyle meal. It is elegant enough for a relaxed dinner with guests yet familiar enough for an ordinary family supper. The sweet onions, beefy gravy, and creamy melted cheese transform a simple meatloaf into something truly special.

Why You’ll Love This Recipe

This recipe brings together two popular comfort foods in one satisfying dish. The meatloaf remains tender and moist inside while developing a flavorful caramelized crust. A generous layer of onion gravy keeps it succulent, and melted Swiss cheese adds a smooth, slightly nutty finish.

It is also a convenient make-ahead recipe. The meatloaf mixture and caramelized onions can be prepared in advance, assembled in the baking dish, and refrigerated until you are ready to cook.

Leftovers reheat well and can be transformed into sandwiches, sliders, or a hearty breakfast hash. This is the kind of comforting recipe that tastes just as delicious the following day.

Ingredients

For the Caramelized Onions

  • 3 tablespoons butter
  • 2 large yellow onions, thinly sliced
  • ½ teaspoon salt
  • ½ teaspoon granulated sugar
  • 2 garlic cloves, finely minced
  • 1 teaspoon fresh thyme leaves
  • 1 tablespoon Worcestershire sauce
  • ½ cup beef broth

For the Meatloaf

  • 2 pounds ground beef
  • 1 cup plain breadcrumbs
  • ½ cup whole milk
  • 2 large eggs
  • ½ cup finely diced onion
  • 2 garlic cloves, minced
  • 2 tablespoons Worcestershire sauce
  • 1 tablespoon Dijon mustard
  • 1 teaspoon salt
  • ¾ teaspoon ground black pepper
  • 1 teaspoon dried parsley
  • ½ teaspoon dried thyme
  • ½ teaspoon smoked paprika
  • ½ cup shredded Parmesan cheese
  • 2 tablespoons chopped fresh parsley

For the Onion Gravy and Topping

  • 2 tablespoons butter
  • 2 tablespoons all-purpose flour
  • 1½ cups beef broth
  • 1 teaspoon Worcestershire sauce
  • ½ teaspoon Dijon mustard
  • Salt and black pepper to taste
  • 4 to 6 slices Swiss, Gruyère, or provolone cheese
  • Fresh parsley for garnishing

Ingredients Overview

Ground beef with approximately 80 to 85 percent lean meat works best. Extremely lean beef may produce a dry meatloaf, while beef with too much fat can leave excessive grease in the baking dish.

Breadcrumbs and milk form a panade, which helps the meatloaf retain moisture. Eggs provide structure, while Parmesan adds savory depth without making the dish taste noticeably cheesy.

Yellow onions are ideal for caramelizing because their natural sugars develop a deep golden color and mellow sweetness. Worcestershire sauce and beef broth add the bold, savory flavor associated with French onion soup.

Swiss cheese melts beautifully and has a mild nuttiness. Gruyère provides a stronger, more traditional French onion flavor, while provolone offers a smooth and creamy alternative.

How to Make French Onion Meatloaf

1. Caramelize the Onions

Melt three tablespoons of butter in a large skillet over medium-low heat. Add the sliced onions, salt, and sugar.

Cook the onions slowly for approximately 25 to 30 minutes, stirring every few minutes. They should gradually become soft, golden, and deeply caramelized.

Do not increase the heat to rush this process. Slow cooking allows the onions’ natural sweetness to develop without burning them.

Add the minced garlic and fresh thyme, then cook for another minute. Stir in the Worcestershire sauce and beef broth. Simmer until most of the liquid has reduced, approximately three to five minutes.

Transfer the onions to a bowl and allow them to cool slightly.

2. Prepare the Oven and Baking Dish

Preheat the oven to 375°F. Lightly grease a loaf pan, small roasting dish, or cast-iron baking dish.

A free-form meatloaf baked on a rimmed sheet pan will develop more browned surface area. A loaf pan creates a taller shape and keeps the meatloaf especially moist. Either method works well.

3. Make the Panade

Combine the breadcrumbs and milk in a large mixing bowl. Let the mixture rest for approximately five minutes.

The breadcrumbs will absorb the milk and create a soft paste. This simple step is one of the best ways to prevent dry, crumbly meatloaf.

Add the eggs and whisk them gently into the breadcrumb mixture.

4. Mix the Meatloaf

Add the ground beef, diced onion, garlic, Worcestershire sauce, Dijon mustard, salt, black pepper, parsley, thyme, smoked paprika, Parmesan, and half of the caramelized onions.

Mix gently with clean hands or a large fork until the ingredients are just combined. Do not knead or compress the mixture excessively. Overmixing can make the finished meatloaf dense and tough.

5. Shape the Meatloaf

Transfer the mixture to the prepared baking dish. Shape it into a compact loaf with an even thickness from one end to the other.

Smooth the top gently without pressing down too firmly. An evenly shaped loaf will cook more consistently.

Place the meatloaf in the preheated oven and bake for approximately 45 minutes.

6. Prepare the Onion Gravy

While the meatloaf is baking, melt two tablespoons of butter in the skillet used for the onions. Sprinkle in the flour and whisk continuously for one to two minutes.

Slowly pour in the beef broth while whisking to prevent lumps. Add the Worcestershire sauce and Dijon mustard.

Bring the gravy to a gentle simmer and cook for approximately five minutes, or until it becomes smooth and slightly thickened.

Stir the remaining caramelized onions into the gravy. Taste and adjust the salt and black pepper as needed.

7. Add the Gravy and Cheese

After the meatloaf has baked for 45 minutes, remove it carefully from the oven. Spoon some of the onion gravy over the top.

Arrange the slices of Swiss or Gruyère cheese over the gravy. Return the meatloaf to the oven and bake for another 15 to 20 minutes.

The cheese should be fully melted, and the internal temperature in the center of the meatloaf should reach 160°F.

For a lightly browned cheese topping, switch the oven to broil for the final one or two minutes. Watch it carefully to prevent burning.

8. Rest Before Serving

Remove the meatloaf from the oven and allow it to rest for 10 to 15 minutes before slicing.

Resting is essential because it allows the juices to redistribute and helps the slices hold their shape. Cutting the meatloaf immediately may cause it to release its juices and fall apart.

Garnish with fresh parsley and serve with the remaining warm onion gravy.

Helpful Cooking Tips

Handle the ground beef gently. Overworking it is the most common reason meatloaf develops a firm or rubbery texture.

Allow the caramelized onions to cool slightly before adding them to the raw meat. Very hot onions can begin cooking the eggs and beef prematurely.

Use an instant-read thermometer instead of relying only on cooking time. The exact baking time can change depending on the thickness of the loaf and the material of the baking dish.

If the gravy becomes too thick, add a splash of beef broth. If it is too thin, let it simmer uncovered for several additional minutes.

Letting the finished meatloaf rest before slicing will produce cleaner, more attractive portions.

Serving Suggestions

Creamy mashed potatoes are the perfect side dish because they absorb the savory onion gravy. Roasted garlic potatoes, buttered noodles, or steamed rice also work beautifully.

For vegetables, serve the meatloaf with green beans, roasted carrots, peas, asparagus, Brussels sprouts, or broccoli. A crisp green salad provides a fresh contrast to the rich beef and cheese.

Warm dinner rolls, crusty French bread, or homemade biscuits complete this comforting meal.

Storage and Reheating

Place leftover meatloaf in an airtight container and refrigerate it for up to four days. Store the extra gravy separately if possible.

Reheat individual slices in a covered skillet over low heat with a spoonful of gravy. You can also place them in a covered baking dish and warm them in a 325°F oven.

For microwave reheating, cover the slice and use short intervals to prevent the meat from becoming tough.

The meatloaf can be frozen for up to three months. Wrap individual slices tightly, place them in a freezer-safe container, and thaw them overnight in the refrigerator before reheating.

Leftover Ideas

Turn leftover meatloaf into a hearty sandwich with toasted sourdough, extra Swiss cheese, and caramelized onions.

You can also crumble it into a skillet with diced potatoes for a savory breakfast hash. Another option is to place sliced meatloaf inside slider buns, add extra gravy and cheese, and bake until warm.

For a quick lunch, chop the leftovers and serve them over mashed potatoes or rice with reheated onion gravy.

Frequently Asked Questions

Can I prepare the meatloaf ahead of time?

Yes. Assemble the uncooked meatloaf, cover it tightly, and refrigerate it for up to 24 hours. Allow it to stand at room temperature for about 20 minutes before baking.

Can I use a different type of meat?

Yes. You may use a mixture of ground beef and ground turkey, or combine beef with ground pork. Avoid using meat that is extremely lean unless you add extra moisture.

Why is my meatloaf falling apart?

This can happen if there are not enough eggs or breadcrumbs, if the mixture is too wet, or if the loaf is sliced before it has rested.

Which cheese is best?

Gruyère provides the richest French onion flavor. Swiss cheese is mild and affordable, while provolone creates a smooth, creamy topping.

Final Thoughts

French Onion Meatloaf with Melted Swiss Cheese takes a familiar comfort-food favorite and gives it a rich, restaurant-inspired upgrade. Tender beef, caramelized onions, savory gravy, and bubbling cheese come together in a dish that feels nostalgic and special at the same time.

Serve it with mashed potatoes and vegetables for a warm, satisfying dinner that is certain to bring everyone to the table.

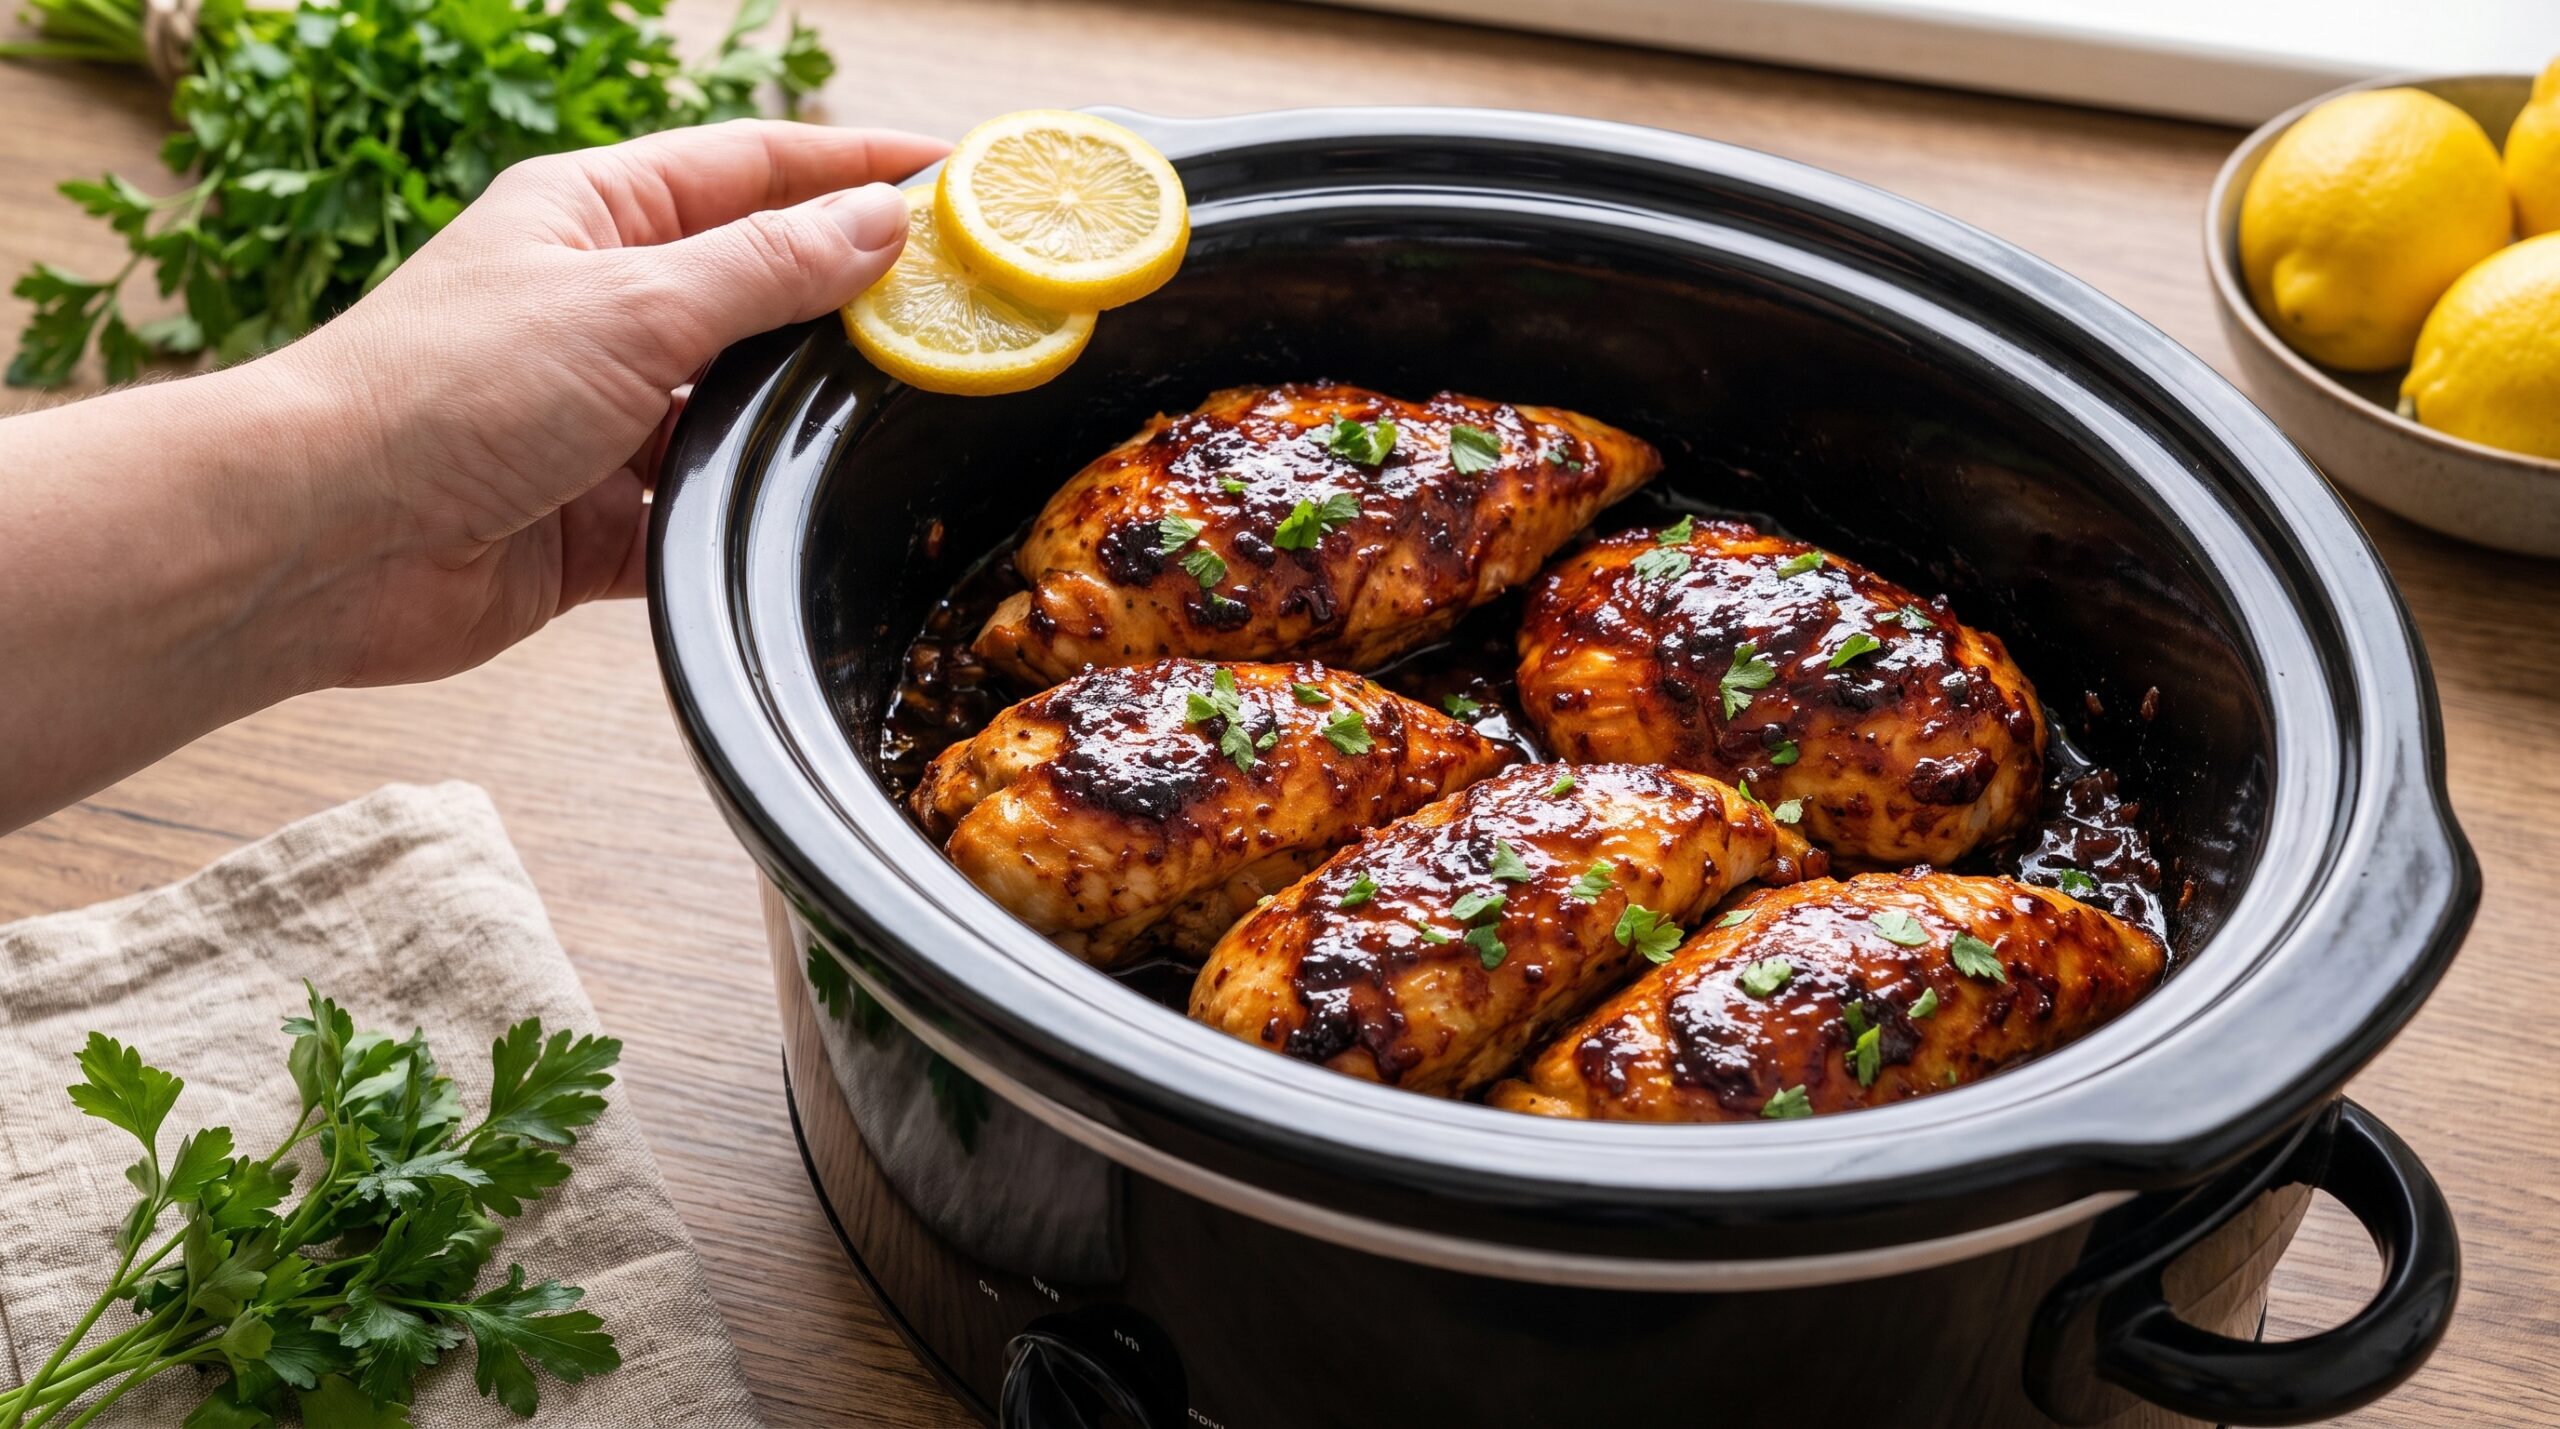
Easy Slow Cooker Lemon Herb Chicken Breasts – Juicy, Tender, and Brightly Flavorful 🍋🍗

These Slow Cooker Lemon Herb Chicken Breasts are an easy, fresh, and comforting dinner made with tender chicken slowly cooked in a flavorful mixture of lemon, garlic, herbs, butter, and chicken broth. The result is juicy chicken with a bright citrus flavor and a savory herb-infused sauce that is perfect for spooning over rice, mashed potatoes, pasta, or vegetables.

This recipe is especially useful on busy days because the slow cooker handles most of the work. After seasoning the chicken and preparing a simple lemon-herb cooking liquid, everything goes into the slow cooker and gently cooks until tender. Fresh lemon juice and zest give the dish brightness, while garlic, thyme, rosemary, parsley, and oregano create a fragrant Mediterranean-inspired flavor.

Unlike heavier creamy chicken recipes, this version is light enough for spring and summer while still being warm and satisfying during cooler months. It works beautifully for family dinners, weekly meal prep, or an easy Sunday meal.

Why You’ll Love This Slow Cooker Lemon Herb Chicken

One of the biggest advantages of this recipe is its simplicity. You only need a few familiar ingredients to create chicken that tastes fresh and flavorful.

The slow cooker gently cooks the chicken in broth, butter, garlic, and herbs, allowing the meat to absorb plenty of flavor. Lemon juice gives the sauce a pleasant acidity, while lemon zest provides even more citrus aroma without adding excess liquid.

This dish is also extremely versatile. You can serve the chicken whole, slice it for rice bowls, shred it for wraps and salads, or pair it with vegetables for a lighter meal.

It is also easy to customize with potatoes, carrots, asparagus, spinach, or a splash of cream if you want a richer sauce.

Ingredients

For the Chicken

  • 4 large boneless, skinless chicken breasts
  • 1 tablespoon olive oil
  • 1 teaspoon garlic powder
  • 1 teaspoon onion powder
  • 1 teaspoon dried oregano
  • 1/2 teaspoon dried thyme
  • 1/2 teaspoon smoked paprika
  • 3/4 teaspoon salt
  • 1/2 teaspoon freshly ground black pepper

For the Lemon Herb Sauce

  • 1 cup chicken broth
  • 3 tablespoons unsalted butter, melted
  • 5 garlic cloves, minced
  • 3 tablespoons fresh lemon juice
  • 1 tablespoon fresh lemon zest
  • 1 teaspoon dried oregano
  • 1/2 teaspoon dried thyme
  • 1/2 teaspoon dried rosemary
  • 1 teaspoon Dijon mustard
  • 1 teaspoon honey, optional
  • 1/4 teaspoon black pepper

For Finishing

  • 2 tablespoons chopped fresh parsley
  • 1 tablespoon fresh lemon juice
  • Fresh lemon slices
  • Fresh thyme or rosemary, optional

How to Make Slow Cooker Lemon Herb Chicken Breasts

1. Prepare the Chicken

Pat the chicken breasts dry thoroughly with paper towels.

If some breasts are significantly thicker than the others, gently pound the thickest parts so the pieces are more even in size. This helps them cook at approximately the same rate.

Season both sides of the chicken with garlic powder, onion powder, oregano, thyme, smoked paprika, salt, and black pepper.

Rub the seasonings gently into the surface.

2. Optional: Sear the Chicken

Searing is optional, but it gives the chicken extra flavor and a more attractive golden exterior.

Heat the olive oil in a large skillet over medium-high heat.

Add the seasoned chicken breasts and cook for approximately 2 minutes per side.

You are not trying to cook the chicken completely. The goal is simply to create some browned color on the surface.

Transfer the chicken to the slow cooker.

If you want the easiest possible preparation, you can skip this step and add the seasoned chicken directly to the slow cooker.

3. Make the Lemon Herb Sauce

In a medium bowl, whisk together the chicken broth, melted butter, minced garlic, lemon juice, lemon zest, oregano, thyme, rosemary, Dijon mustard, optional honey, and black pepper.

The honey is not necessary, but a teaspoon can soften the sharpness of the lemon and create a nicely balanced sauce.

4. Add Everything to the Slow Cooker

Arrange the chicken breasts in the bottom of the slow cooker.

Try to keep them in a single layer when possible.

Pour the lemon-herb mixture evenly over the chicken.

Spoon some of the garlic and herbs directly over the tops of the breasts.

5. Slow Cook the Chicken

Cover the slow cooker.

Cook on LOW for approximately 3 to 4 hours or on HIGH for about 1 1/2 to 2 1/2 hours.

Cooking time can vary considerably depending on the size of the chicken breasts and your slow cooker.

Chicken breasts are lean, so they do not benefit from extremely long cooking in the same way that beef chuck or pork shoulder does.

Begin checking the internal temperature near the lower end of the cooking range.

6. Check for Doneness

Insert an instant-read thermometer into the thickest part of the chicken.

The chicken is ready when it reaches an internal temperature of 165°F.

Once it reaches that temperature, avoid leaving it in the slow cooker for several additional hours because chicken breast can become dry and stringy.

Transfer the chicken temporarily to a plate if you need extra time to finish the sauce.

7. Finish the Lemon Herb Sauce

Taste the cooking liquid.

Add another tablespoon of fresh lemon juice if you want a brighter lemon flavor.

Stir in chopped fresh parsley.

If the sauce tastes too acidic, a small amount of butter or honey can help balance it.

If it tastes too mild, add a little extra salt, pepper, lemon zest, or fresh herbs.

8. Thicken the Sauce if Desired

The natural cooking liquid in a slow cooker is relatively thin because very little moisture evaporates.

If you prefer a thicker sauce, mix:

  • 1 tablespoon cornstarch
  • 1 tablespoon cold water

Remove the chicken and stir the slurry into the slow cooker.

Cook on HIGH for approximately 10 to 15 minutes, stirring occasionally, until slightly thickened.

Return the chicken once the sauce reaches your preferred consistency.

9. Add Fresh Lemon

A fresh citrus finish makes a noticeable difference.

Drizzle a little fresh lemon juice over the chicken immediately before serving.

This provides a brighter flavor than relying entirely on lemon that has cooked for several hours.

10. Garnish and Serve

Arrange the chicken on a serving platter or individual plates.

Spoon the lemon-garlic herb sauce generously over the top.

Garnish with chopped parsley, fresh thyme, lemon slices, and freshly cracked black pepper.

Serve warm.

What to Serve With Slow Cooker Lemon Herb Chicken Breasts

Rice

White rice, jasmine rice, basmati rice, or Mediterranean-style rice pilaf are excellent choices.

The rice absorbs the lemon-herb cooking juices and turns them into part of the meal.

Mashed Potatoes

Creamy mashed potatoes are especially good if you thicken the cooking liquid into a gravy-like sauce.

Roasted Potatoes

Garlic herb roasted potatoes complement the flavors of the chicken without making the meal overly heavy.

Pasta

Serve sliced chicken over linguine, angel hair pasta, or buttered noodles.

Spoon some of the lemon sauce over the pasta before adding the chicken.

Vegetables

Broccoli, asparagus, green beans, zucchini, Brussels sprouts, and carrots all pair beautifully with lemon-herb chicken.

For a lighter option, serve it with a cucumber, tomato, and herb salad.

Tips for the Best Slow Cooker Lemon Herb Chicken

Do not overcook chicken breast. This is the most important tip. Start checking the chicken early.

Use fresh lemon. Fresh lemon juice and zest provide much better flavor than bottled juice.

Add some lemon at the end. Long cooking softens citrus flavor, so a fresh squeeze before serving brings it back to life.

Use a thermometer. It is much more reliable than guessing based on appearance.

Sear for extra flavor. Searing is optional but creates a more savory exterior.

Do not use too much liquid. Chicken releases moisture while cooking, and slow cookers trap steam.

Use fresh herbs for finishing. Dried herbs work well during cooking, but fresh parsley and thyme give the finished dish a fresher appearance and aroma.

Easy Recipe Variations

Creamy Lemon Herb Chicken

After the chicken has finished cooking, stir 1/2 cup heavy cream and 1/3 cup Parmesan cheese into the sauce.

Cook for another 10 minutes until creamy.

Lemon Herb Chicken with Potatoes

Add 1 pound small baby potatoes around the chicken.

Cut larger potatoes in half so they cook more evenly.

Lemon Herb Chicken with Carrots

Add thickly sliced carrots to the slow cooker at the beginning.

The carrots will become tender and absorb the lemony chicken broth.

Garlic Lemon Chicken

Increase the garlic to 7 or 8 cloves for a more pronounced garlic flavor.

Mediterranean Lemon Chicken

Add Kalamata olives, oregano, and a little crumbled feta after cooking.

Spicy Lemon Herb Chicken

Add 1/2 teaspoon crushed red pepper flakes to the cooking liquid.

The mild heat works especially well with lemon and garlic.

Can I Use Chicken Thighs?

Yes.

Boneless, skinless chicken thighs are an excellent substitute and are especially good for slow-cooker recipes because they contain slightly more fat and tend to remain juicy.

Cook until they reach at least 165°F internally.

They may require a little more cooking time depending on their thickness.

Meal Prep Ideas

Slow Cooker Lemon Herb Chicken is excellent for meal prep.

Slice the cooked chicken and divide it between containers with rice, quinoa, roasted potatoes, or vegetables.

Spoon a little cooking sauce over each portion to keep the chicken moist.

For a cold lunch, slice the chicken and serve it over mixed greens with cucumber, tomato, feta, and a simple lemon vinaigrette.

The chicken can also be shredded and used in wraps or pita pockets.

Storage and Reheating

Allow the chicken to cool before transferring it to an airtight container.

Store it with some of the cooking liquid in the refrigerator for up to 3 to 4 days.

Keeping the chicken in the sauce helps prevent it from drying out.

For reheating, place the chicken and a few spoonfuls of sauce in a covered skillet over low heat.

Warm gently until heated through.

Individual servings can also be microwaved in short intervals.

Avoid excessive reheating because chicken breast can dry out quickly.

Can You Freeze Lemon Herb Chicken?

Yes.

Allow the chicken to cool completely and place it in a freezer-safe container with some of the sauce.

Freeze for up to 2 to 3 months.

Thaw overnight in the refrigerator before reheating.

For the freshest citrus flavor, add a little new lemon juice and parsley after reheating.

Frequently Asked Questions

Why is my slow cooker chicken dry?

It was most likely cooked too long. Chicken breast usually needs much less slow-cooking time than tougher cuts of meat.

Can I use bottled lemon juice?

You can, but fresh lemon juice and zest provide significantly better flavor.

Can I put frozen chicken directly in the slow cooker?

It is better to thaw chicken safely in the refrigerator before slow cooking so it heats more evenly and predictably.

Can I add vegetables?

Absolutely. Potatoes and carrots can cook with the chicken, while quicker-cooking vegetables such as broccoli or asparagus should be added near the end.

Can I make the sauce creamy?

Yes. Stir heavy cream and Parmesan into the cooking liquid after the chicken is cooked.

Final Thoughts

These Slow Cooker Lemon Herb Chicken Breasts are an easy way to create a fresh, flavorful dinner with very little hands-on effort. Juicy chicken slowly cooks with garlic, lemon, butter, herbs, and broth, creating a light but savory sauce that works beautifully with a variety of sides.

The key to the best result is keeping an eye on the cooking time. Once the chicken reaches 165°F, it is ready to serve. Finishing the dish with fresh lemon and parsley brings back the bright citrus and herb flavors just before it reaches the table.

Serve this tender lemon chicken with rice, mashed potatoes, pasta, roasted vegetables, or a fresh Mediterranean-style salad for an easy family meal that feels both comforting and refreshing. 🍋🍗

Easy Loaded Mashed Potato Cups Recipe – Cheesy, Crispy, and Perfect for Parties

If you love creamy mashed potatoes but want a fun new way to serve them, these Loaded Mashed Potato Cups are the perfect recipe. They combine fluffy mashed potatoes with melted cheddar cheese, crispy bacon, green onions, and sour cream, all baked in individual muffin-sized portions until the edges become golden and slightly crisp.

These little potato cups are perfect for parties, holiday dinners, game-day snacks, brunches, potlucks, or family meals. They are easy to serve, easy to customize, and a great way to transform leftover mashed potatoes into something completely new.

The best part is the contrast in texture. The centers remain soft, creamy, and cheesy, while the outside develops deliciously browned edges in the muffin pan. Top each cup with extra cheese, bacon, sour cream, and fresh chives, and you get all the flavors of a loaded baked potato in a convenient bite-sized form.

Why You’ll Love These Loaded Mashed Potato Cups

Loaded Mashed Potato Cups are easy enough for everyday cooking but attractive enough to serve at a party or holiday gathering. Because they bake individually, there is no need to scoop mashed potatoes onto plates at the last minute.

They are also an excellent recipe for leftovers. If you already have cold mashed potatoes in the refrigerator, you can turn them into a completely different side dish with just a few extra ingredients.

Cheddar cheese adds richness and helps the cups hold together, while egg provides structure during baking. Bacon gives them smoky crunch, and green onions add fresh flavor.

You can also customize them with different cheeses, vegetables, herbs, or proteins.

Ingredients

For the Mashed Potato Cups

  • 4 cups cold prepared mashed potatoes
  • 1 large egg
  • 1 cup shredded sharp cheddar cheese
  • ½ cup grated Parmesan cheese
  • 4 slices bacon, cooked until crisp and crumbled
  • 3 green onions, finely sliced
  • 2 tablespoons sour cream
  • ½ teaspoon garlic powder
  • ½ teaspoon onion powder
  • ¼ teaspoon smoked paprika
  • ½ teaspoon salt, or to taste
  • ¼ teaspoon freshly ground black pepper
  • 2 tablespoons chopped fresh chives or parsley

For the Topping

  • ½ cup shredded cheddar cheese
  • 2 slices cooked bacon, crumbled
  • ¼ cup sour cream
  • 2 green onions or fresh chives, sliced
  • Freshly cracked black pepper

For the Pan

  • 1 tablespoon melted butter or nonstick cooking spray

How to Make Loaded Mashed Potato Cups

1. Preheat the Oven

Preheat your oven to 400°F (205°C).

Generously grease a standard 12-cup muffin pan with melted butter or nonstick cooking spray.

Do not skip greasing the pan. The cheese around the edges becomes crisp while baking and can stick if the muffin cups are not properly coated.

A silicone muffin pan can also work well and makes the finished potato cups especially easy to remove.

2. Prepare the Mashed Potatoes

Cold mashed potatoes are ideal for this recipe because they are firmer and easier to shape than freshly prepared hot potatoes.

Place the mashed potatoes in a large mixing bowl.

If they are extremely stiff after refrigeration, let them sit at room temperature for about 10 minutes before mixing.

The mashed potatoes should be creamy but thick enough to hold their shape.

3. Add the Egg and Seasonings

Add the egg, sour cream, garlic powder, onion powder, paprika, salt, and black pepper to the mashed potatoes.

Mix until everything is evenly combined.

The egg is especially important because it helps bind the potato mixture during baking so the cups do not fall apart when removed from the muffin pan.

4. Add the Cheese and Bacon

Stir in the cheddar cheese, Parmesan, crumbled bacon, sliced green onions, and fresh chives or parsley.

Mix gently until the ingredients are distributed throughout the potatoes.

Try not to overmix. You want the potatoes creamy rather than dense or gummy.

Taste the mixture before adding extra salt, especially if your mashed potatoes, cheese, and bacon are already well seasoned.

5. Fill the Muffin Pan

Divide the potato mixture evenly between the 12 prepared muffin cups.

A large cookie scoop makes this step easy and helps create even portions.

Fill each cup almost to the top.

Use the back of a spoon to gently press the potato mixture into the muffin cup and smooth the surface.

You can create a small indentation in the center if you plan to add sour cream after baking.

6. Add More Cheese

Sprinkle a little shredded cheddar over the top of each mashed potato cup.

This additional cheese melts in the oven and creates a bubbly, golden finish.

For even more flavor, add a few pieces of crumbled bacon over the cheese.

7. Bake Until Golden

Transfer the muffin pan to the preheated oven.

Bake for approximately 20–25 minutes, or until the cheese has melted and the edges of the potato cups are golden brown.

For slightly crispier tops, broil them for the final 1–2 minutes.

Watch carefully during broiling because cheese can brown quickly.

8. Let Them Rest

Remove the muffin pan from the oven.

Allow the potato cups to rest in the pan for approximately 5–10 minutes.

This resting time is important because the cups firm as they cool slightly, making them easier to remove without breaking.

9. Remove from the Pan

Run a thin butter knife gently around the edge of each cup.

Carefully lift the cups from the muffin pan using a small offset spatula or spoon.

Arrange them on a serving platter.

10. Add the Loaded Toppings

Top each warm potato cup with a small spoonful of sour cream.

Sprinkle with additional bacon, sliced green onions, or fresh chives.

Finish with freshly cracked black pepper.

Serve warm while the centers are creamy and the cheese is melted.

What to Serve With Loaded Mashed Potato Cups

These potato cups work beautifully alongside almost any main dish.

Serve them with roasted chicken, baked chicken breasts, grilled steak, meatloaf, pork chops, or pot roast for a hearty comfort-food dinner.

They also pair well with seafood such as garlic butter shrimp, baked salmon, or grilled fish.

For holiday dinners, serve them instead of traditional mashed potatoes alongside turkey, roast beef, ham, green beans, roasted carrots, or Brussels sprouts.

At parties, serve smaller potato cups as appetizers with sour cream, ranch dressing, or creamy garlic sauce for dipping.

Tips for the Best Loaded Mashed Potato Cups

Use cold mashed potatoes. Cold potatoes are firmer and hold their shape much better than freshly mashed potatoes.

Make sure the potatoes are thick. Very loose or runny mashed potatoes can produce soft cups that are difficult to remove.

Grease the muffin pan thoroughly. Cheese can easily stick around the edges.

Do not skip the egg. It provides important structure.

Use freshly shredded cheese when possible. Freshly grated cheddar melts better than many pre-shredded varieties.

Let the cups rest before removing them. They become noticeably firmer after several minutes.

Avoid overmixing. Excessive mixing can make mashed potatoes gummy.

Easy Recipe Variations

Garlic Parmesan Potato Cups

Replace some of the cheddar with extra Parmesan and add 2 finely minced garlic cloves.

Finish with parsley and garlic butter.

Broccoli Cheddar Mashed Potato Cups

Stir 1 cup finely chopped steamed broccoli into the potato mixture along with the cheddar.

This variation works especially well for family dinners.

Jalapeño Loaded Potato Cups

Add finely diced jalapeños to the potatoes and use pepper jack cheese instead of cheddar.

Chicken Bacon Ranch Potato Cups

Add 1 cup finely chopped cooked chicken and 1 tablespoon dry ranch seasoning to the mixture.

Top with bacon, cheddar, and ranch dressing.

Extra Cheesy Potato Cups

Use a combination of cheddar, mozzarella, Monterey Jack, and Parmesan.

Vegetarian Loaded Potato Cups

Leave out the bacon and replace it with sautéed mushrooms, roasted peppers, broccoli, or corn.

How to Store Loaded Mashed Potato Cups

Allow leftover potato cups to cool completely.

Place them in an airtight container and refrigerate for up to 3–4 days.

If possible, store sour cream and fresh toppings separately and add them after reheating.

These cups also work well for meal prep because they can be reheated individually.

How to Reheat

For the best texture, place the potato cups in a 350°F oven for approximately 10–15 minutes.

An air fryer works especially well. Reheat at 350°F for 5–7 minutes until hot and lightly crisp around the edges.

You can microwave individual cups for approximately 30–60 seconds, although the exterior will be softer.

Add fresh sour cream, green onions, and bacon after reheating.

Make-Ahead Instructions

You can prepare the potato mixture up to 24 hours in advance.

Cover and refrigerate until ready to bake.

You can also fill the muffin pan ahead of time, cover it tightly, and refrigerate. Add the cheese topping shortly before baking.

If the mixture goes directly from the refrigerator into the oven, you may need to add about 3–5 minutes to the baking time.

Final Thoughts

These Loaded Mashed Potato Cups are a creative and delicious way to serve one of the most familiar comfort foods. Creamy mashed potatoes, cheddar, Parmesan, smoky bacon, green onions, and sour cream come together in individual portions with crispy golden edges and soft, cheesy centers.

They are especially useful when you have leftover mashed potatoes, but they are tasty enough to make from scratch specifically for the recipe.

Serve them alongside steak or chicken for dinner, add them to your holiday table, or make a tray for parties and game day. With plenty of ways to customize the fillings and toppings, these cheesy loaded mashed potato cups can easily become a favorite side dish for almost any occasion.

Easy Creamy Mandarin Orange Trifle Recipe – Light, Fruity, and Perfectly Layered

If you are looking for an easy dessert that feels fresh, creamy, and beautiful enough for special occasions, this Creamy Mandarin Orange Trifle is a wonderful recipe to make. Soft cake, sweet mandarin oranges, silky vanilla pudding, and fluffy whipped cream are layered together to create a dessert that is light, refreshing, and full of citrus flavour.

This trifle is perfect for holidays, brunches, family gatherings, potlucks, summer parties, or any time you need a make-ahead dessert that looks impressive without requiring complicated decorating. The bright orange flavor balances the creamy filling beautifully, while the cake absorbs just enough moisture to become soft and tender.

One of the best things about homemade mandarin orange trifle is how easy it is to customize. You can use pound cake, angel food cake, vanilla cake, or sponge cake, add pineapple, berries, coconut, or extra citrus, and make the dessert as simple or decorative as you like.

Why You’ll Love This Creamy Mandarin Orange Trifle

This easy trifle combines soft cake, juicy fruit, creamy pudding, and whipped topping in one beautiful layered dessert.

The mandarin oranges add sweetness and freshness, while the vanilla pudding creates a smooth, rich layer that holds everything together. Whipped cream keeps the dessert light and airy, making it less heavy than many traditional cakes.

It is also an excellent make-ahead dessert because the flavors improve after chilling for several hours. This gives the cake time to soften and absorb some of the creamy filling without becoming soggy.

Because everything is layered in a glass trifle bowl or individual cups, the presentation is naturally impressive with very little effort.

Ingredients

For the Cake Layer

  • 1 prepared pound cake, angel food cake, or vanilla cake, about 10–12 ounces
  • 1 teaspoon finely grated orange zest, optional

For the Creamy Filling

  • 1 package (3.4 ounces) instant vanilla pudding mix
  • 2 cups cold whole milk
  • 4 ounces cream cheese, softened
  • ½ cup powdered sugar
  • 1 teaspoon vanilla extract
  • 1 teaspoon orange zest
  • 1 tablespoon fresh orange juice

For the Fruit Layer

  • 2 cans (15 ounces each) mandarin oranges, well drained
  • 1 cup crushed pineapple, well drained, optional

For the Whipped Cream

  • 2 cups heavy whipping cream
  • ¼ cup powdered sugar
  • 1 teaspoon vanilla extract

For Garnishing

  • Extra mandarin orange segments
  • Fresh orange zest
  • Fresh mint leaves, optional
  • Toasted coconut, optional

How to Make Creamy Mandarin Orange Trifle

1. Prepare the Cake

Cut the prepared cake into approximately 1-inch cubes.

Try to keep the pieces relatively even so the layers look neat and the cake absorbs the creamy filling consistently.

Place the cake cubes in a large bowl.

If desired, sprinkle them lightly with fresh orange zest.

You can also drizzle a tablespoon or two of orange juice over the cake for stronger citrus flavor, but avoid adding too much liquid because the cake will also absorb moisture from the pudding and fruit.

Set the cake aside while you prepare the filling.

2. Drain the Mandarin Oranges

Open the cans of mandarin oranges and pour them into a fine-mesh strainer.

Allow them to drain thoroughly for several minutes.

Excess liquid can make the trifle watery, so this step is important.

Pat the oranges lightly with paper towels if they still appear very wet.

If using crushed pineapple, drain it thoroughly as well.

Set the fruit aside.

3. Prepare the Vanilla Pudding

Pour the cold milk into a large mixing bowl.

Add the instant vanilla pudding mix.

Whisk for approximately 2 minutes, or until the mixture becomes smooth and begins to thicken.

Let the pudding stand for approximately 5 minutes.

The pudding should become thick enough to hold its shape while still being easy to spread.

Set aside.

4. Prepare the Cream Cheese Mixture

Place the softened cream cheese in a separate mixing bowl.

Add the powdered sugar, vanilla extract, orange zest, and fresh orange juice.

Beat with an electric mixer on medium speed for approximately 1–2 minutes.

The mixture should become smooth and creamy.

Make sure the cream cheese is properly softened before mixing to prevent lumps.

5. Combine the Creamy Filling

Add the prepared vanilla pudding to the cream cheese mixture.

Beat on low speed until completely combined.

The finished filling should be smooth, thick, and creamy.

Taste and adjust with a little extra orange zest if you want a stronger citrus flavor.

Set the filling aside.

6. Prepare the Whipped Cream

Pour the cold heavy whipping cream into a chilled mixing bowl.

Add the powdered sugar and vanilla extract.

Beat with an electric mixer on medium-high speed until soft to medium peaks form.

Avoid overbeating.

The whipped cream should be fluffy and spreadable, not stiff or grainy.

Reserve approximately one-third of the whipped cream for the final topping.

Gently fold the remaining whipped cream into the pudding mixture.

This creates a lighter, mousse-like filling.

7. Begin Layering the Trifle

Place approximately one-third of the cake cubes into the bottom of a large glass trifle bowl.

Spread them into an even layer.

Spoon approximately one-third of the creamy filling over the cake.

Use the back of a spoon or spatula to spread it gently toward the edges.

Arrange approximately one-third of the mandarin oranges over the cream.

If using pineapple, sprinkle some over the oranges.

8. Repeat the Layers

Add another layer of cake cubes.

Top with more creamy filling.

Arrange another layer of mandarin oranges and optional pineapple.

Repeat the process one more time.

Try to press some of the orange segments close to the glass bowl so the fruit remains visible from the outside.

This creates a beautiful layered presentation.

9. Add the Final Whipped Cream Layer

Spread the reserved whipped cream over the top of the trifle.

You can keep the surface smooth or create soft swirls with the back of a spoon.

Decorate with extra mandarin orange segments.

Sprinkle with fresh orange zest.

If desired, add mint leaves or toasted coconut for extra color and texture.

10. Chill Before Serving

Cover the trifle loosely with plastic wrap.

Refrigerate for at least 2–4 hours before serving.

For even better flavor, allow it to chill overnight.

The resting time gives the cake a chance to soften and allows the orange, vanilla, and cream flavors to blend together.

Serve chilled.

What to Serve With Creamy Mandarin Orange Trifle

This trifle is delicious on its own and works especially well after rich or savory meals.

Serve it after roast chicken, ham, barbecue dishes, pasta dinners, or holiday meals as a light and refreshing finish.

For brunch, pair it with fresh fruit, muffins, pastries, coffee, or tea.

It also fits beautifully on a dessert table alongside cookies, brownies, lemon bars, fruit tarts, or cupcakes.

If you want to keep the dessert presentation simple, serve individual portions in clear glasses so the cake, cream, and fruit layers remain visible.

Tips for the Best Creamy Mandarin Orange Trifle

Drain the mandarin oranges thoroughly. Excess syrup can make the dessert watery.

Use cold milk when preparing instant pudding so it thickens properly.

Make sure the cream cheese is fully softened before mixing.

Do not overwhip the cream. Stop once soft to medium peaks form.

Allow the trifle to chill for several hours before serving.

Do not soak the cake heavily with juice because it will absorb plenty of moisture from the filling.

Use a clear glass bowl whenever possible so the colorful layers are visible.

For the cleanest presentation, place fruit against the sides of the bowl while layering.

Easy Recipe Variations

For Mandarin Orange Pineapple Trifle, add well-drained crushed pineapple between the layers.

For Mandarin Orange Coconut Trifle, sprinkle toasted coconut between each layer and over the top.

For Mandarin Orange Berry Trifle, add strawberries, raspberries, or blueberries along with the oranges.

For Orange Creamsicle Trifle, use orange-flavored pudding or add additional orange zest and vanilla to the filling.

For Chocolate Orange Trifle, use chocolate cake instead of vanilla cake and add chocolate shavings.

For Lemon Mandarin Trifle, replace the vanilla pudding with lemon pudding.

For Individual Mandarin Trifles, assemble the dessert in small glasses or jars instead of one large bowl.

For an extra-rich version, add mascarpone cheese to the creamy filling.

How to Store Leftovers

Cover leftover trifle tightly with plastic wrap or transfer individual portions to airtight containers.

Store in the refrigerator for up to 3 days.

The cake will continue softening as the dessert sits.

For the best texture and appearance, enjoy the trifle within the first 1–2 days.

Freezing is not recommended.

Whipped cream, pudding, and mandarin oranges can change texture significantly after freezing and thawing.

Always keep the trifle chilled until shortly before serving.

Frequently Asked Questions

Can I make mandarin orange trifle ahead of time?

Yes.

This dessert is actually better when made several hours ahead.

Prepare it the night before and refrigerate until ready to serve.

What cake works best?

Pound cake, angel food cake, vanilla sponge cake, or yellow cake all work very well.

Pound cake creates a richer dessert, while angel food cake makes it lighter.

Can I use fresh oranges instead of canned mandarins?

Yes.

Fresh mandarin or clementine segments can be used.

Remove as much white pith as possible and make sure the fruit is not overly juicy.

Can I use whipped topping instead of homemade whipped cream?

Yes.

Prepared whipped topping can be used as a convenient shortcut.

Use approximately 4 cups total.

Can I use homemade pudding?

Absolutely.

Homemade vanilla custard or pudding works beautifully and can make the trifle even richer.

Make sure it is fully cooled before layering.

Why is my trifle watery?

The fruit may not have been drained thoroughly, or the cake may have been soaked with too much juice.

Drain the oranges well and use only a small amount of added liquid.

Can I make individual servings?

Yes.

Layer the cake, cream, and oranges in clear dessert cups, jars, or glasses.

Individual trifles are excellent for parties and portion control.

Can I add other fruit?

Absolutely.

Pineapple, strawberries, raspberries, blueberries, peaches, or mango can all work well with mandarin oranges.

Final Thoughts

This easy Creamy Mandarin Orange Trifle combines soft cake, juicy mandarin oranges, creamy vanilla filling, and fluffy whipped cream in a beautiful layered dessert that is both refreshing and satisfying.

It is simple enough for casual family dinners but attractive enough for holidays, parties, brunches, and special occasions.

Serve it well chilled with extra orange segments, fresh zest, or toasted coconut, and enjoy a light, creamy, citrus-filled dessert in every spoonful.