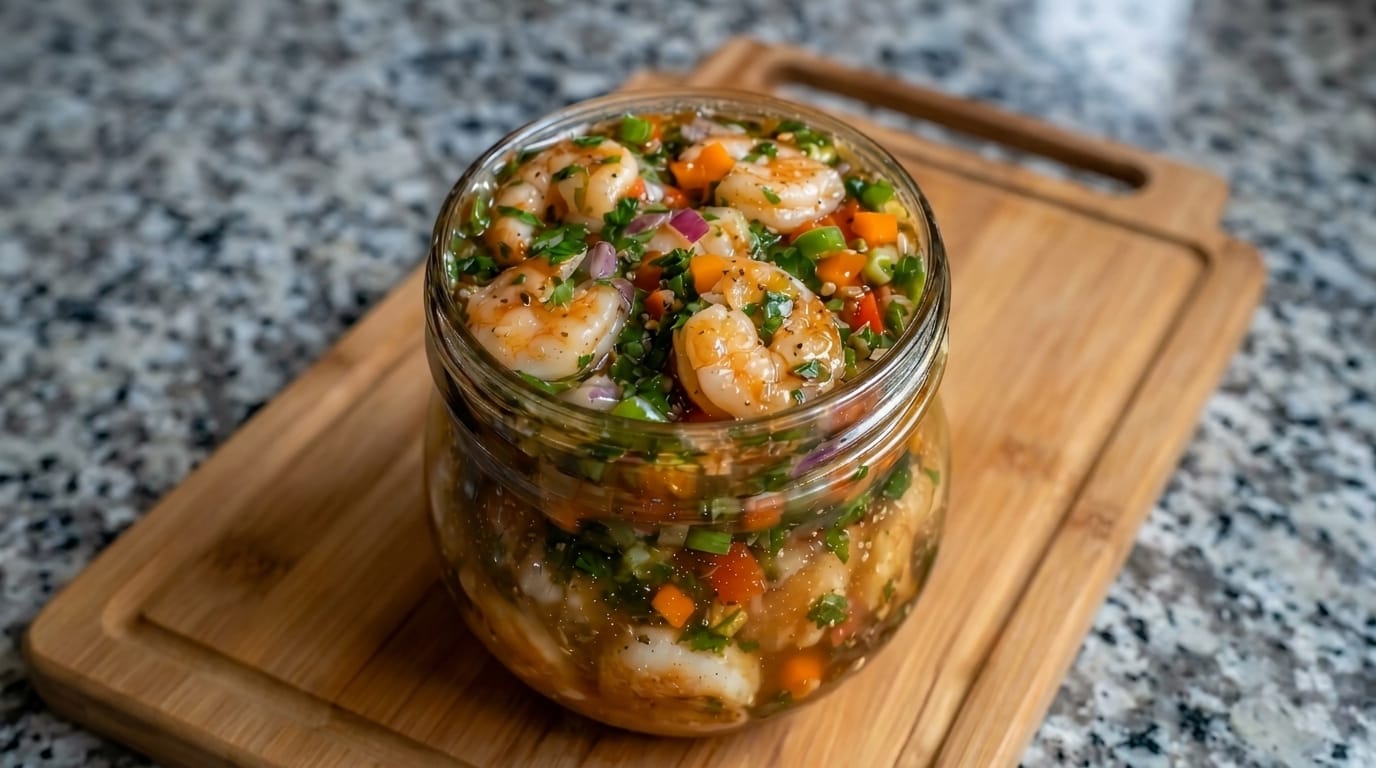
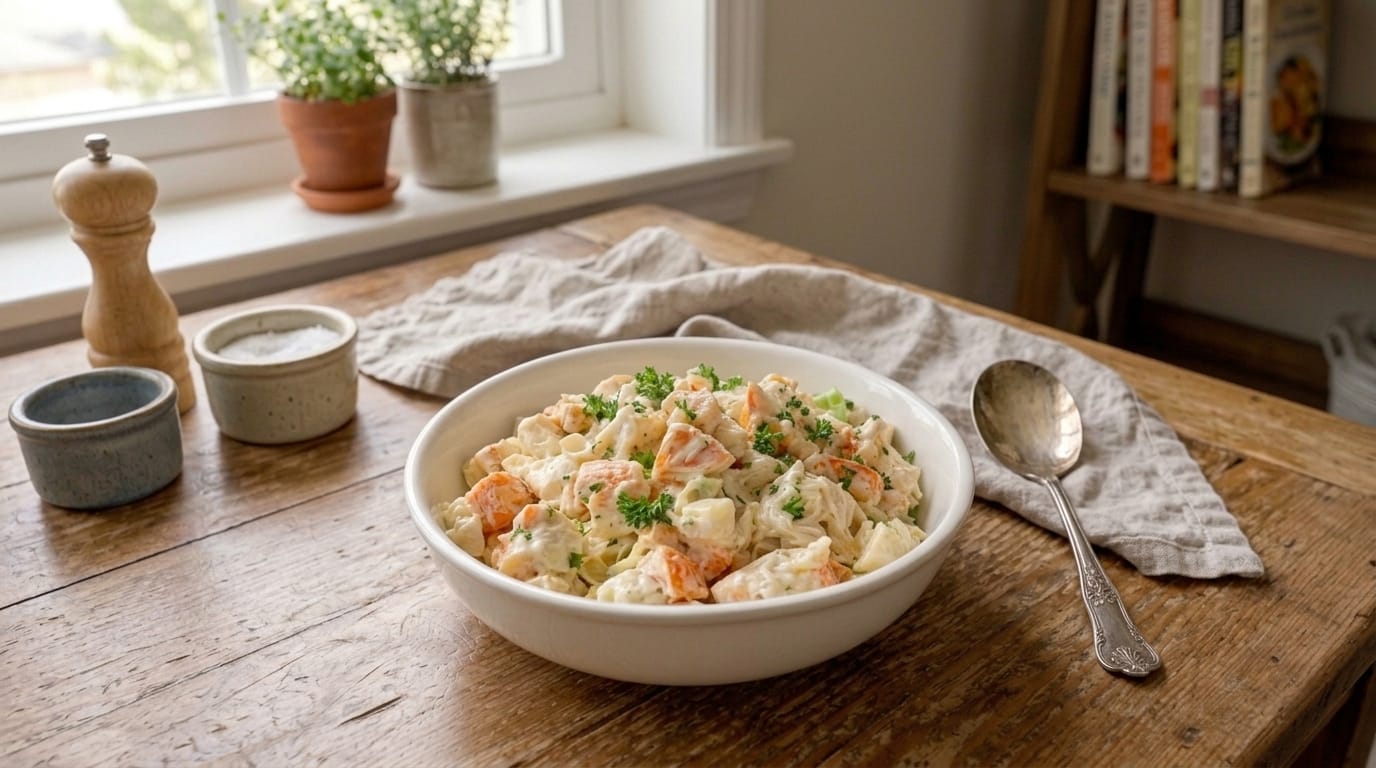
Welcome to your ultimate guide for preparing a vibrant, refreshing, and protein-packed culinary masterpiece: Marinated Seafood Shrimp Jar. If you want a brilliant make-ahead appetizer or light meal that delivers explosive flavor with minimal effort, this comprehensive recipe masterclass is designed just for you.
Why This Recipe Works
Marinated seafood jars have taken social media by storm because they offer an irresistible combination of visual appeal and bold flavor. By soaking tender shrimp in a tangy, aromatic marinade alongside fresh vegetables, you get a dish that tastes better with every single hour it sits.
Make-Ahead Magic: The flavors deepen as it marinates in the refrigerator, making it the ultimate stress-free dish for gatherings or weekly meal prep.
The Perfect Flavor Contrast: The bright, acidic punch of citrus and vinegar cuts through the savory, succulent shrimp and crunchy diced vegetables.
Stunning Presentation: Layering the vibrant pink shrimp, green herbs, and colorful peppers inside a glass jar creates an eye-catching look that pops on any table.
Essential Ingredients
To recreate this savory masterpiece in your own kitchen, gather the following high-quality ingredients:
The Seafood: 1 pound large cooked shrimp, peeled, deveined, and tails removed.
The Marinade Base: 1/3 cup extra-virgin olive oil; 1/4 cup fresh lemon juice or white wine vinegar; 1 tablespoon Worcestershire sauce.
The Crunch & Veggies: 1/2 cup finely diced bell peppers (red, orange, or green); 1/4 cup finely chopped red onion; 2 tablespoons sliced green onions.
The Herbs & Seasonings: 2 tablespoons freshly chopped cilantro or parsley; 2 cloves minced garlic; salt, freshly cracked black pepper, and a pinch of red pepper flakes for heat.
Step-by-Step Cooking Instructions
Prep the Shrimp: Ensure your shrimp are fully cooked, peeled, and dried gently with paper towels. Cut larger shrimp in half if desired for easier eating.
Whisk the Marinade: In a medium bowl, whisk together the extra-virgin olive oil, lemon juice (or vinegar), minced garlic, Worcestershire sauce, salt, black pepper, and red pepper flakes until well combined.
Mix the Vegetables: Stir the diced bell peppers, chopped red onion, green onions, and fresh herbs directly into the marinade mixture.
Layer in the Jar: Carefully pack the cooked shrimp and the vegetable marinade into a clean glass jar, alternating layers to ensure the flavors distribute evenly throughout.
Chill and Marinate: Seal the jar tightly and place it in the refrigerator for at least 2 hours (or up to 24 hours) to allow all the flavors to meld together.
Serve: Spoon the chilled marinated shrimp into small bowls or serve straight from the jar with toothpicks or crackers on the side.
Chef’s Pro-Tips for Success
Do Not Over-Marinate with Citrus: If using raw shrimp, you would need to cure them in citrus juice (like ceviche), but starting with pre-cooked shrimp keeps the texture firm and prevents the meat from becoming mushy over long storage.
Customize the Heat: Feel free to add thin slices of fresh jalapeño or serrano peppers into the jar if you love a spicy kick.
Serving Suggestions: Serve this marinated shrimp over a crisp bed of mixed greens, spoon it over avocado halves, or enjoy it with crusty baguette slices to soak up the flavorful oil.
What is your favorite type of seafood to preserve or marinate in a glass jar for easy snacking?
If you are looking for an easy appetizer or side dish that is crispy outside, soft inside, and packed with sweet corn and melted cheese, these Crispy Cheesy Corn Fritters are a perfect recipe to make. Every bite combines juicy corn kernels, sharp cheddar, Parmesan, green onions, garlic, and simple seasonings in a golden pan-fried fritter.
The contrast in texture is what makes these so satisfying. The outside becomes crisp and deeply golden, while the center stays tender and cheesy with little bursts of sweet corn. A small amount of flour and cornstarch helps bind everything together without making the fritters heavy.
Serve them with sour cream, ranch, spicy mayo, garlic aioli, or a fresh herb dip for an easy snack, brunch side, party appetizer, or family-friendly vegetable dish.
Why You’ll Love These Crispy Cheesy Corn Fritters
They are crisp on the outside and tender in the center.
Sweet corn and savory cheese create a delicious balance.
The batter comes together quickly with everyday ingredients.
You can use fresh, frozen, or canned corn.
Cheddar and Parmesan add plenty of rich, cheesy flavor.
They are easy to customize with jalapeños, bacon, herbs, or different cheeses.
You can also cook them in a skillet, air fryer, or oven.
Ingredients
For the Corn Fritters
3 cups corn kernels
1 cup shredded sharp cheddar cheese
½ cup freshly grated Parmesan cheese
3 green onions, thinly sliced
2 large eggs
½ cup all-purpose flour
¼ cup cornstarch
¼ cup milk
2 garlic cloves, finely minced
1 teaspoon baking powder
1 teaspoon garlic powder
½ teaspoon onion powder
½ teaspoon smoked paprika
½ teaspoon kosher salt
½ teaspoon freshly ground black pepper
¼ teaspoon red pepper flakes, optional
2 tablespoons chopped fresh parsley or cilantro
For Cooking
3–4 tablespoons olive oil or neutral cooking oil
1 tablespoon unsalted butter, optional
Optional Creamy Dipping Sauce
½ cup sour cream
¼ cup mayonnaise or plain Greek yogurt
1 tablespoon fresh lime or lemon juice
1 tablespoon chopped green onions
½ teaspoon garlic powder
Pinch of smoked paprika
Salt and black pepper to taste
Optional Garnishes
Extra green onions
Fresh parsley or cilantro
Extra shredded cheddar
Parmesan
Red pepper flakes
Lime wedges
How to Make Crispy Cheesy Corn Fritters
1. Prepare the Corn
If using fresh corn, cut the kernels from approximately 4 medium ears.
If using frozen corn, thaw completely.
If using canned corn, drain thoroughly.
2. Dry the Corn
Pat the corn with paper towels.
Removing excess moisture helps the fritters hold together and become crisp.
3. Add Corn to a Bowl
Place the corn in a large mixing bowl.
4. Add the Cheese
Add:
Cheddar
Parmesan
5. Add Green Onions
Stir in the sliced green onions.
6. Add Garlic
Add the minced fresh garlic.
7. Add Fresh Herbs
Add chopped parsley or cilantro.
8. Add the Dry Ingredients
Sprinkle in:
Flour
Cornstarch
Baking powder
Garlic powder
Onion powder
Smoked paprika
Salt
Black pepper
Red pepper flakes
9. Toss
Stir until the corn is lightly coated with the dry ingredients.
10. Add Eggs
Crack the eggs into the bowl.
11. Add Milk
Pour in the milk.
12. Mix the Batter
Stir until everything is combined.
The mixture should be thick enough to hold together when scooped.
It should not resemble a thin pancake batter.
13. Check the Consistency
Scoop a small amount and press it together.
If the batter seems too loose, add flour 1 tablespoon at a time.
If it seems extremely dry, add another tablespoon of milk.
14. Rest the Batter
Let the mixture rest for approximately 5–10 minutes.
This gives the flour time to absorb moisture.
15. Heat the Skillet
Place a large skillet over medium heat.
Add approximately 2 tablespoons oil.
Add butter if desired for extra flavor.
16. Heat the Oil Properly
Let the oil become hot before adding the batter.
It should shimmer but not smoke.
17. Scoop the Fritters
Scoop approximately ¼ cup batter into the skillet for each fritter.
18. Flatten Gently
Use the back of a spoon or spatula to flatten each mound to approximately ½ inch thick.
19. Leave Space Between Fritters
Do not overcrowd the skillet.
Crowding lowers the pan temperature and can prevent crisping.
20. Cook the First Side
Cook for approximately 3–4 minutes.
The bottom should become deeply golden and firm.
21. Flip Carefully
Use a wide spatula to turn each fritter.
22. Cook the Second Side
Cook for another 2–4 minutes.
The second side should also become crisp and golden.
23. Check the Center
The middle should be hot and set, and the cheese should be melted.
24. Transfer to a Rack
Move cooked fritters to a wire rack or paper towel-lined plate.
A wire rack helps preserve the crisp texture.
25. Repeat
Add more oil as needed and continue cooking the remaining batter.
26. Season While Hot
Sprinkle lightly with salt or Parmesan immediately after cooking if desired.
27. Make the Optional Dip
In a small bowl, combine:
Sour cream
Mayonnaise or Greek yogurt
Lime or lemon juice
Green onions
Garlic powder
Paprika
Salt
Black pepper
Mix until smooth.
28. Garnish
Top the fritters with:
Green onions
Herbs
Parmesan
Red pepper flakes
29. Serve
Serve hot with the creamy dipping sauce and lime wedges.
What to Serve With Crispy Cheesy Corn Fritters
These fritters are versatile enough for breakfast, lunch, appetizers, or dinner.
Serve them with:
Grilled chicken
Fried chicken
Steak
BBQ beef
Pulled pork
Burgers
Salmon
Shrimp
For brunch, serve alongside:
Scrambled eggs
Fried eggs
Bacon
Sausage
Avocado
For lighter sides, try:
Garden salad
Coleslaw
Tomato cucumber salad
Avocado salad
Roasted vegetables
Tips for the Best Crispy Cheesy Corn Fritters
Dry the Corn Well
Excess moisture can make the fritters soft and difficult to flip.
Use Cornstarch
Cornstarch helps create a crisp exterior.
Keep the Batter Thick
A loose batter can spread too much in the skillet.
Don’t Make Them Too Thick
Thinner fritters cook more evenly and become crispier.
Use Medium Heat
Very high heat can burn the outside before the center sets.
Wait Before Flipping
If the fritter feels fragile, give it another minute.
A properly browned crust makes flipping easier.
Use Freshly Grated Cheese
Fresh cheddar and Parmesan melt better and generally give stronger flavor.
Cook in Batches
Give each fritter enough room for proper browning.
Easy Recipe Variations
Jalapeño Cheddar Corn Fritters
Add:
1 finely diced jalapeño
½ cup Pepper Jack cheese
Bacon Corn Fritters
Add ½ cup crispy crumbled bacon.
Garlic Parmesan Corn Fritters
Increase the Parmesan to ¾ cup and add an extra garlic clove.
Mexican-Inspired Corn Fritters
Add:
½ teaspoon cumin
½ teaspoon chili powder
Cilantro
Jalapeño
Finish with lime and cotija-style cheese.
Spicy Corn Fritters
Add:
Cayenne
Extra red pepper flakes
Hot sauce
Herb Corn Fritters
Add extra:
Parsley
Chives
Cilantro
Dill
Mozzarella Corn Fritters
Replace part of the cheddar with low-moisture mozzarella for an extra-melty center.
Zucchini Corn Fritters
Add 1 cup grated zucchini.
Squeeze the zucchini extremely dry before mixing it into the batter.
Air Fryer Method
Preheat the air fryer to 390°F (200°C).
Lightly spray the basket with oil.
Shape the mixture into small patties.
Arrange in a single layer.
Spray the tops lightly with oil.
Air fry for approximately 10–14 minutes, carefully flipping halfway through.
Cook until golden and crisp.
Because air fryer baskets vary, work in batches as needed.
Oven-Baked Method
Preheat the oven to 425°F (220°C).
Line a baking sheet with parchment paper.
Brush the parchment lightly with oil.
Form the batter into small patties.
Brush or spray the tops with oil.
Bake for approximately 18–24 minutes, carefully flipping halfway through.
Broil briefly at the end if you want deeper browning.
Make-Ahead Instructions
You can prepare the fritter mixture several hours ahead.
Cover and refrigerate.
Before cooking, stir gently and check the consistency.
If the corn has released additional moisture, add 1–2 tablespoons flour as needed.
For the crispiest results, fry the fritters shortly before serving.
How to Store Leftovers
Allow cooked fritters to cool completely.
Transfer to an airtight container.
Refrigerate for up to 3–4 days.
Place parchment between layers if stacking.
Reheating in a Skillet
Warm in a lightly oiled skillet over medium-low heat for a few minutes per side.
Reheating in the Oven
Bake at 375°F (190°C) for approximately 8–10 minutes.
Reheating in the Air Fryer
Air fry at approximately 375°F for 4–6 minutes.
This is one of the best methods for restoring crispness.
Microwave
Microwave in short intervals until hot.
The fritters will become softer.
Freezing
Corn fritters freeze well.
Cool them completely.
Arrange in a single layer on a tray and freeze until firm.
Transfer to a freezer-safe container with parchment between layers.
Freeze for up to approximately 2 months.
Reheat directly from frozen in the oven or air fryer until hot and crisp.
Frequently Asked Questions
Can I use frozen corn? Yes. Thaw it completely and dry it well before mixing.
Can I use canned corn? Absolutely. Drain and pat it dry thoroughly.
Why are my fritters falling apart? The batter may be too wet, the fritters may have been flipped too early, or they may need a little more flour.
Why aren’t my fritters crispy? The corn may have contained too much moisture, the skillet may not have been hot enough, or the pan may have been overcrowded.
Can I make these without cheese? Yes. Omit the cheese and add an extra tablespoon or two of flour if necessary.
Can I use mozzarella instead of cheddar? Yes. Low-moisture mozzarella works well, though cheddar gives stronger flavor.
Can I air fry corn fritters? Yes. Air frying produces a crisp exterior with less oil.
What dipping sauce goes best with corn fritters? Sour cream, ranch, garlic aioli, spicy mayo, avocado crema, or a lime-herb sauce all pair beautifully.
Final Thoughts
These Crispy Cheesy Corn Fritters combine sweet corn, sharp cheddar, Parmesan, green onions, garlic, herbs, and a lightly seasoned batter in one easy golden appetizer or side dish.
The key is removing excess moisture from the corn, keeping the batter thick enough to hold its shape, and cooking the fritters over moderate heat until each side develops a crisp, deeply golden crust.
Serve them hot with sour cream, spicy mayo, or a creamy lime dip for a cheesy corn recipe that is crunchy around the edges, tender in the center, and packed with savory-sweet flavor.
If you are looking for an elegant appetizer that is easy to assemble but still feels impressive, these Cheesy Shrimp Puff Pastries are an excellent recipe to make. Flaky puff pastry is filled with a creamy shrimp mixture made with garlic, cream cheese, mozzarella, Parmesan, herbs, and a little lemon for brightness.
The puff pastry bakes up crisp and golden on the outside while the center stays creamy, cheesy, and packed with tender shrimp. The contrast between buttery pastry and savory seafood makes these little bites especially good for parties, holidays, brunches, or special dinners.
They can be shaped into turnovers, small squares, pinwheels, or mini pastry cups, making the recipe easy to adapt to whatever presentation you prefer.
Why You’ll Love These Cheesy Shrimp Puff Pastries
The puff pastry becomes crisp, flaky, and golden with very little effort.
Shrimp cooks quickly and gives the filling plenty of savory seafood flavor.
Cream cheese, mozzarella, and Parmesan create a rich, creamy center.
Garlic, herbs, and lemon keep the filling from tasting too heavy.
They can be assembled ahead and baked shortly before serving.
The recipe works well for parties, holiday appetizers, brunches, and entertaining.
Ingredients
For the Shrimp Filling
1 pound raw shrimp, peeled, deveined, and finely chopped
1 tablespoon olive oil
1 tablespoon unsalted butter
4 garlic cloves, finely minced
4 ounces cream cheese, softened
1 cup shredded low-moisture mozzarella cheese
½ cup freshly grated Parmesan cheese
2 tablespoons chopped fresh parsley
1 tablespoon chopped fresh chives
1 teaspoon fresh lemon zest
1 tablespoon fresh lemon juice
½ teaspoon garlic powder
½ teaspoon onion powder
½ teaspoon smoked paprika
½ teaspoon Italian seasoning
¼ teaspoon red pepper flakes, optional
½ teaspoon kosher salt, or to taste
¼ teaspoon freshly ground black pepper
For the Puff Pastry
2 sheets frozen puff pastry, thawed according to package directions
1 large egg
1 tablespoon water
2 tablespoons freshly grated Parmesan
1 teaspoon sesame seeds or everything seasoning, optional
Optional Add-Ins
¼ cup finely chopped spinach
¼ cup chopped sun-dried tomatoes
2 tablespoons finely diced roasted red peppers
2 tablespoons crispy crumbled bacon
¼ cup shredded Pepper Jack cheese
For Garnishing
Fresh parsley
Chives
Extra Parmesan
Lemon wedges
Red pepper flakes
How to Make Cheesy Shrimp Puff Pastries
1. Preheat the Oven
Preheat your oven to 400°F (200°C).
Line two large baking sheets with parchment paper.
2. Prepare the Shrimp
Pat the shrimp very dry with paper towels.
Chop them into small pieces.
Keeping the pieces fairly small makes the filling easier to portion and helps prevent the pastries from tearing.
3. Heat the Skillet
Place a large skillet over medium-high heat.
Add:
Olive oil
Butter
4. Add the Shrimp
Add the chopped shrimp in an even layer.
5. Season Lightly
Sprinkle with a little:
Salt
Black pepper
Smoked paprika
6. Cook Briefly
Cook for approximately 1–2 minutes.
Stir and continue cooking for another 1 minute, just until the shrimp begin turning pink.
Do not fully overcook them because they will continue cooking inside the pastry.
7. Add Garlic
Reduce the heat slightly.
Add the minced garlic.
Cook for approximately 30 seconds.
8. Remove from Heat
Transfer the shrimp mixture to a bowl.
Let it cool for approximately 10–15 minutes.
The filling should not be hot when added to puff pastry.
9. Add Cream Cheese
Stir the softened cream cheese into the cooled shrimp.
10. Add the Mozzarella
Add shredded mozzarella.
11. Add Parmesan
Stir in freshly grated Parmesan.
12. Add Fresh Herbs
Add:
Parsley
Chives
13. Add Lemon
Stir in:
Lemon zest
Lemon juice
14. Add the Seasonings
Add:
Garlic powder
Onion powder
Italian seasoning
Red pepper flakes
Salt
Black pepper
15. Mix the Filling
Stir until everything is evenly combined.
The mixture should be thick and creamy, not watery.
16. Add Optional Ingredients
Fold in any desired:
Spinach
Sun-dried tomatoes
Roasted peppers
Bacon
Pepper Jack
17. Chill the Filling
Refrigerate for approximately 10–15 minutes if it feels too soft.
A cooler filling is easier to work with.
Preparing the Puff Pastry
18. Unfold the Pastry
Place one thawed puff pastry sheet on a lightly floured work surface.
Keep the second sheet refrigerated while you work.
19. Roll Lightly
Use a rolling pin to smooth the folds and slightly enlarge the pastry.
Do not roll it too thin.
20. Cut Into Squares
Cut each sheet into approximately 9 equal squares.
For larger turnovers, cut into 6 squares instead.
21. Prepare the Egg Wash
In a small bowl, whisk together:
Egg
Water
22. Add Filling
Place approximately 1–1½ tablespoons of shrimp filling in the center of each square.
Do not overfill.
23. Shape the Pastries
For triangular turnovers, fold one corner over to the opposite corner.
For rectangular pastries, fold one side over the filling.
24. Seal the Edges
Press the edges together firmly.
Use a fork to crimp the edges.
25. Check the Seal
Make sure no filling is trapped directly between the sealed edges.
This helps prevent leaking.
26. Transfer to Baking Sheet
Arrange the pastries on the prepared baking sheet.
Leave space between them.
27. Chill Briefly
Place the shaped pastries in the refrigerator for approximately 10 minutes.
Keeping puff pastry cold helps it rise more evenly.
28. Brush with Egg Wash
Brush the tops lightly with egg wash.
Avoid letting too much egg wash drip onto the cut edges because it can inhibit the layers from puffing.
29. Add Parmesan
Sprinkle the tops lightly with Parmesan.
30. Add Optional Seeds
Sprinkle with sesame seeds or everything seasoning if desired.
31. Cut Steam Vents
Use a sharp knife to make a small slit in the top of each pastry.
32. Bake
Bake for approximately 16–22 minutes.
33. Check for Browning
The pastries should be deeply golden and puffed.
34. Check the Filling
The filling should be hot and the shrimp should be fully cooked.
Shrimp should reach 145°F (63°C) for food safety.
35. Remove from the Oven
Transfer the pastries to a wire rack.
36. Rest Briefly
Let them cool for approximately 5 minutes.
The filling will be extremely hot right out of the oven.
37. Garnish
Finish with:
Parsley
Chives
Parmesan
Red pepper flakes
38. Serve
Serve warm with lemon wedges or your favorite dipping sauce.
What to Serve With Cheesy Shrimp Puff Pastries
These pastries are excellent on an appetizer platter.
Serve them with:
Garlic aioli
Spicy mayo
Marinara sauce
Lemon herb dip
Ranch dressing
Creamy Parmesan sauce
They also pair well with:
Caesar salad
Garden salad
Tomato cucumber salad
Roasted vegetables
Soup
For a party spread, serve alongside:
Garlic herb marinated mozzarella
Stuffed mushrooms
Crostini
Crab cakes
Shrimp cocktail
Cheese boards
Tips for the Best Cheesy Shrimp Puff Pastries
Dry the Shrimp Well
Excess moisture can make the filling watery.
Don’t Overcook the Shrimp Initially
The shrimp will continue cooking inside the pastry.
Cool the Filling
Hot filling can soften the butter layers in puff pastry before baking.
Keep the Pastry Cold
Cold pastry creates better puff and flakiness.
Don’t Overfill
Too much filling increases the chance of leakage.
Seal the Edges Well
Crimp firmly with a fork.
Use Low-Moisture Mozzarella
This helps keep the filling creamy without becoming watery.
Bake Until Deeply Golden
Pale puff pastry may still be doughy inside.
Easy Recipe Variations
Garlic Parmesan Shrimp Pastries
Increase the Parmesan to ¾ cup and add an extra garlic clove.
Spicy Cajun Shrimp Pastries
Replace Italian seasoning with Cajun seasoning.
Add:
Cayenne
Pepper Jack cheese
Spinach Shrimp Pastries
Add ½ cup cooked spinach.
Squeeze it extremely dry before adding.
Bacon Shrimp Pastries
Add ½ cup crispy crumbled bacon.
Crab and Shrimp Puff Pastries
Replace approximately half the shrimp with lump crab meat.
Lobster Shrimp Pastries
Add chopped cooked lobster for a richer seafood version.
Sun-Dried Tomato Shrimp Pastries
Add chopped sun-dried tomatoes and extra basil.
Jalapeño Shrimp Pastries
Add finely diced jalapeño and Pepper Jack cheese.
Mini Puff Pastry Cup Version
You can also bake the filling in mini muffin tins.
Cut puff pastry into small squares.
Press each square gently into a greased mini muffin cup.
Add approximately 1 tablespoon filling.
Bake at 400°F for approximately 14–18 minutes.
The pastry should be golden and the filling bubbling.
These are especially convenient for parties.
Make-Ahead Instructions
You can prepare the shrimp filling up to 1 day ahead.
Keep it refrigerated in an airtight container.
You can also assemble the pastries several hours ahead.
Arrange them on a baking sheet, cover lightly, and refrigerate.
Brush with egg wash immediately before baking.
How to Store Leftovers
Allow leftover pastries to cool completely.
Transfer to an airtight container.
Refrigerate for up to 2–3 days.
Because the filling contains seafood, keep the pastries chilled.
Reheating in the Oven
Place pastries on a baking sheet.
Reheat at 375°F (190°C) for approximately 7–10 minutes.
Reheating in the Air Fryer
Air fry at approximately 350°F for 4–6 minutes.
This is one of the best methods for restoring the crisp exterior.
Microwave
Microwave in short intervals until hot.
The pastry will become softer.
Freezing
These pastries can be frozen before baking.
Arrange assembled, unbaked pastries on a tray.
Freeze until firm.
Transfer to a freezer-safe container.
Freeze for up to approximately 1 month for best quality.
Bake from frozen at 400°F, adding several extra minutes as needed.
Make sure the filling reaches a safe temperature before serving.
Frequently Asked Questions
Can I use cooked shrimp? Yes. Chop cooked shrimp and add it directly to the cheese mixture. Avoid sautéing it again before baking.
Can I use frozen shrimp? Yes. Thaw completely and pat very dry before using.
Why did my pastries become soggy? The shrimp may have contained too much moisture, the filling may have been too warm, or the pastries may have been underbaked.
Can I make these ahead? Yes. Assemble several hours in advance and refrigerate until ready to bake.
Can I use crescent dough instead of puff pastry? Yes, although the texture will be softer and less flaky.
What cheese works best? Mozzarella, Parmesan, cream cheese, Pepper Jack, Monterey Jack, and Gruyère all work well.
Can I air fry these? Yes. Cook at approximately 375°F in batches until golden and the filling is hot.
Can I add crab or lobster? Absolutely. Both work very well with the creamy shrimp filling.
Final Thoughts
These Cheesy Shrimp Puff Pastries combine flaky golden pastry, tender shrimp, garlic, cream cheese, mozzarella, Parmesan, herbs, and fresh lemon in one rich and elegant appetizer.
The key is drying the shrimp well, cooking it only briefly before filling, allowing the mixture to cool, and keeping the puff pastry cold until it goes into the oven.
Bake until deeply golden and serve warm with garlic aioli, lemon, or a creamy dipping sauce for a crispy, cheesy seafood appetizer that looks impressive but is surprisingly easy to prepare.
If you have ever wanted to make bakery-style croissants at home, these Classic French Butter Croissants deliver everything you want in a perfect pastry: deeply golden exteriors, crisp delicate layers, airy honeycomb centers, and a rich buttery flavor in every bite. The dough is repeatedly folded around a cold butter block to create dozens of thin alternating layers that puff dramatically in the oven.
Homemade croissants require patience more than difficult techniques. The key is keeping the dough and butter cool, allowing enough resting time between folds, and giving the shaped croissants plenty of time to proof before baking. When done correctly, the result is a glossy, deeply caramelized pastry with clearly defined flaky layers like the croissants shown in the image.
These croissants are perfect for weekend breakfasts, brunches, holidays, special occasions, afternoon coffee, or turning into sandwiches and filled pastries. They are also ideal for freezing, which means you can prepare a batch ahead and bake fresh croissants whenever you want them.
Why You’ll Love These Classic French Butter Croissants
The laminated dough creates dozens of crisp, delicate layers that separate beautifully during baking.
European-style butter gives the croissants a rich bakery-quality flavor and helps produce defined layers.
The overnight resting process develops flavor while making the dough easier to handle.
You can prepare most of the recipe ahead of time and bake the croissants the following morning.
The same dough can also be used for chocolate croissants, almond croissants, ham-and-cheese croissants, and other laminated pastries.
Once you understand the folding and shaping technique, homemade croissants become much easier to reproduce consistently.
Ingredients
For the Croissant Dough
4 cups bread flour, approximately 500 g
¼ cup granulated sugar, approximately 50 g
2 teaspoons fine sea salt, approximately 10 g
1 tablespoon instant yeast, approximately 9–10 g
1¼ cups whole milk, cold, approximately 300 mL
2 tablespoons unsalted butter, softened
1 teaspoon pure vanilla extract, optional
For the Butter Block
1 cup plus 2 tablespoons European-style unsalted butter, approximately 255 g
For the Egg Wash
1 large egg
1 tablespoon whole milk
Pinch of salt
Optional Finishing Ingredients
Flaky sea salt
Powdered sugar
Melted chocolate
Fruit preserves
Honey
Salted butter
Almond cream
Chocolate batons
Sesame seeds
Sliced almonds
How to Make Classic French Butter Croissants
1. Combine the Dry Ingredients
In a large mixing bowl, combine:
Bread flour
Granulated sugar
Salt
Instant yeast
Keep the salt and yeast on opposite sides of the bowl initially before mixing them together.
Whisk everything until evenly distributed.
2. Add the Milk
Pour in the cold whole milk.
Add the softened butter and optional vanilla extract.
Mix with a wooden spoon or dough hook until a rough dough begins to form.
3. Knead the Dough
Transfer the dough to a lightly floured surface.
Knead for approximately 5–7 minutes until relatively smooth.
If using a stand mixer, knead with the dough hook on low to medium-low speed for approximately 4–5 minutes.
The dough should become elastic but does not need to develop extremely strong gluten at this stage.
4. Check the Dough Texture
The dough should feel soft and slightly tacky but should not be wet or sticky enough to cling heavily to your hands.
Avoid adding excessive flour because a stiff dough will make lamination more difficult.
5. Shape the Dough
Form the dough into a rectangular shape.
Flatten it to approximately 1 inch thick.
This rectangular shape will make rolling easier later.
6. Chill the Dough
Wrap the dough tightly in plastic wrap.
Refrigerate for at least 2 hours, preferably overnight.
A long refrigeration period allows the gluten to relax and makes the dough easier to laminate.
7. Prepare the Butter Block
Place the cold European-style butter between two sheets of parchment paper.
Arrange the butter pieces close together.
8. Pound the Butter
Using a rolling pin, gently pound and roll the butter into a rectangle approximately 7 x 8 inches.
Fold the parchment around the butter to create clean edges.
Continue rolling until the butter fills the parchment evenly.
9. Chill the Butter Block
Refrigerate the butter block for approximately 15–30 minutes.
It should be cold but flexible.
The butter should bend slightly without cracking.
If it is extremely hard, let it sit at room temperature for a few minutes before laminating.
10. Roll the Dough
Remove the chilled dough from the refrigerator.
Place it on a lightly floured work surface.
Roll it into a rectangle approximately 8 x 16 inches.
Try to keep the corners reasonably square.
11. Position the Butter
Remove the butter block from the parchment.
Place it over one half of the dough.
The butter should fit neatly inside with a small border around the edges.
12. Enclose the Butter
Fold the uncovered half of the dough over the butter.
Pinch the edges gently to completely seal the butter inside.
You should now have a rectangular packet containing one even layer of butter.
13. Begin the First Roll
Turn the dough so the folded edge is positioned to one side.
Lightly flour the surface.
Roll the dough lengthwise into a rectangle approximately 8 x 24 inches.
14. Roll Gently
Use long, even strokes with the rolling pin.
Avoid pressing excessively hard.
The goal is to lengthen the dough without forcing the butter through the layers.
15. Perform the First Fold
Brush away excess flour.
Fold the top third of the dough downward.
Fold the bottom third upward over it, similar to folding a business letter.
This creates your first single fold.
16. Chill After the First Fold
Wrap the dough.
Refrigerate for approximately 30–45 minutes.
Chilling allows the gluten to relax and prevents the butter from becoming too soft.
17. Perform the Second Fold
Place the dough on the counter with the open edge facing you.
Roll it again into an approximately 8 x 24-inch rectangle.
Fold it into thirds again.
18. Chill Again
Wrap and refrigerate for another 30–45 minutes.
The dough should remain cool throughout the process.
19. Perform the Third Fold
Repeat the rolling and folding process one final time.
Roll to approximately 8 x 24 inches.
Fold into thirds.
20. Refrigerate the Laminated Dough
Wrap the dough tightly.
Refrigerate for at least 1–2 hours, or preferably overnight.
This final resting period makes shaping easier and improves flavor.
21. Prepare the Baking Sheets
Line two large baking sheets with parchment paper or silicone baking mats.
Set aside.
22. Roll the Dough for Shaping
Place the chilled laminated dough on a lightly floured surface.
Roll it into a long rectangle approximately 10–12 inches wide and ¼ inch thick.
Keep the thickness as even as possible.
23. Trim the Edges
Using a pizza cutter or very sharp knife, trim the outer edges.
Removing compressed edges allows the laminated layers to expand more freely.
24. Cut the Triangles
Mark the dough into triangles approximately 4–5 inches wide at the base and 9–10 inches long.
Cut using clean, confident strokes.
Avoid dragging the knife back and forth because this can compress the layers.
25. Stretch the Triangles
Take one triangle and gently stretch it lengthwise.
Do not pull aggressively.
The triangle should become slightly longer and thinner.
26. Make a Small Notch
Cut a small ½-inch notch in the center of the wide end of each triangle.
This helps create the classic crescent shape.
27. Roll the Croissants
Starting at the wide end, gently roll the dough toward the pointed tip.
Keep the roll snug but do not squeeze the layers.
28. Position the Tip
Place each croissant on the prepared baking sheet with the pointed tip underneath.
This prevents the croissant from unrolling during proofing and baking.
29. Curve Slightly
For a traditional crescent appearance, gently curve the ends inward.
For a straighter bakery-style croissant like those in the image, leave the ends mostly straight.
30. Space the Croissants
Arrange the croissants several inches apart.
They will expand significantly during proofing and again in the oven.
31. Prepare the Egg Wash
Whisk together:
1 egg
1 tablespoon milk
Pinch of salt
Mix until completely smooth.
32. Apply the First Egg Wash
Brush a very thin layer over the shaped croissants.
Avoid allowing egg wash to pool along the cut edges because this can seal the laminated layers.
33. Proof the Croissants
Leave the croissants in a draft-free area at approximately 75–78°F (24–26°C).
Proof for approximately 2–3 hours.
Avoid extremely warm environments because the butter may melt out of the dough.
34. Check for Proper Proofing
Properly proofed croissants should look noticeably larger and feel light.
When the tray is gently shaken, the croissants should have a delicate jiggle.
The laminated layers should also become more visible.
35. Preheat the Oven
Preheat the oven to 400°F (200°C) during the final 20–30 minutes of proofing.
Make sure the oven is fully heated before baking.
36. Apply the Second Egg Wash
Very gently brush the croissants with another thin layer of egg wash.
Be careful not to deflate them.
37. Begin Baking
Place the croissants in the preheated oven.
Bake at 400°F (200°C) for approximately 8 minutes.
The high initial heat creates rapid steam expansion between the butter layers.
38. Reduce the Temperature
Reduce the oven temperature to 375°F (190°C).
Continue baking for approximately 10–15 minutes.
39. Rotate the Baking Sheet
If your oven browns unevenly, rotate the tray approximately halfway through baking.
Avoid opening the oven excessively during the first several minutes.
40. Check the Color
The croissants should become a deep golden brown rather than pale yellow.
Deep caramelization gives them better flavor and ensures the interior layers are properly baked.
41. Check for Doneness
The croissants are ready when:
The exterior is deeply golden
The layers look crisp and separated
The croissants feel relatively light
The bottoms are evenly browned
Total baking time is usually approximately 18–23 minutes.
42. Cool the Croissants
Transfer the croissants to a wire rack.
Allow them to cool for at least 15–20 minutes.
The interior continues setting as the croissants cool.
43. Listen for Crispness
Fresh croissants may make subtle crackling sounds as their delicate crust cools.
This is a good sign that the exterior layers are crisp.
44. Serve
Serve slightly warm or at room temperature.
Pull one apart to reveal the airy, laminated interior and enjoy with butter, jam, honey, coffee, or your favorite filling.
What to Serve With Classic French Butter Croissants
Fresh croissants are delicious simply served warm with butter.
Pair them with:
Strawberry preserves
Raspberry jam
Apricot preserves
Honey
Nutella
Salted butter
Lemon curd
Almond butter
Peanut butter
For breakfast or brunch, serve alongside:
Scrambled eggs
Omelets
Fresh fruit
Yogurt
Bacon
Breakfast sausage
Smoked salmon
Fresh berries
For drinks, croissants pair beautifully with:
Espresso
Cappuccino
Café au lait
Latte
Hot chocolate
Black tea
Fresh orange juice
They can also be sliced and used for breakfast sandwiches with eggs, cheese, ham, turkey, or smoked salmon.
Tips for the Best Classic French Butter Croissants
Use European-Style Butter
Butter with approximately 82–84% butterfat contains less water and generally performs better during lamination.
It also provides richer flavor.
Keep the Butter and Dough Similar in Firmness
The butter should be cold but flexible.
If the butter is too hard, it may crack into pieces.
If it is too soft, it can blend into the dough instead of forming layers.
Keep Everything Cool
If the dough begins feeling warm or sticky at any point, stop and refrigerate it for 20–30 minutes.
Don’t Add Too Much Flour
Excess flour can make the dough dry and interfere with proper lamination.
Use only enough to prevent sticking.
Brush Away Extra Flour
Before every fold, remove excess flour from the surface of the dough.
This helps the layers adhere correctly.
Don’t Rush the Resting Periods
Resting relaxes the gluten and prevents the dough from shrinking during rolling.
Avoid Crushing the Edges
Compressed edges can prevent the laminated layers from separating properly.
Proof at Moderate Temperature
Do not proof croissants somewhere extremely warm.
Temperatures significantly above 80°F (27°C) may cause the butter to melt.
Look for the Jiggle
A gently wobbling croissant is one of the best signs that proofing is complete.
Bake Until Deeply Golden
Underbaked croissants may collapse or become gummy inside.
A rich golden-brown exterior usually indicates better structure and flavor.
Easy Recipe Variations
Chocolate Croissants
Place approximately ½ ounce chocolate baton or chopped dark chocolate along the wide end of each piece before rolling.
Almond Croissants
Slice baked croissants horizontally.
Fill with almond cream.
Brush with light syrup, top with additional almond cream and sliced almonds, then bake until golden.
Ham and Cheese Croissants
Place thinly sliced ham and Gruyère or Swiss cheese inside the dough before rolling.
Nutella Croissants
Spread approximately 1 tablespoon Nutella near the base of each triangle before shaping.
Cinnamon Sugar Croissants
Lightly sprinkle the dough with cinnamon sugar before rolling.
Pistachio Croissants
Fill baked croissants with pistachio cream and garnish with chopped pistachios.
Strawberry Cream Croissants
Split cooled baked croissants and fill with whipped cream and sliced strawberries.
Chocolate-Dipped Croissants
Dip one end of each cooled croissant into melted dark or milk chocolate.
Allow the chocolate to set before serving.
Everything Croissants
Sprinkle the egg-washed croissants with everything bagel seasoning before baking.
Parmesan Herb Croissants
Sprinkle finely grated Parmesan and fresh herbs over the dough before shaping.
Air Fryer Method
Croissants can also be baked in an air fryer, although you will need to work in small batches.
Preheat the air fryer to 325°F (165°C).
Arrange proofed croissants in the basket with plenty of space between them.
Brush lightly with egg wash.
Air fry for approximately 12–16 minutes.
Check frequently during the final few minutes.
If the tops brown too quickly, reduce the temperature slightly.
Croissants are done when they are deeply golden and fully baked through.
Because air fryers vary considerably, baking time may need adjustment.
Make-Ahead Instructions
Croissant dough is ideal for preparing ahead.
After completing the final fold, refrigerate the laminated dough overnight.
The next morning, roll, cut, shape, proof, and bake.
You can also shape the croissants the evening before.
Place them on parchment-lined baking sheets, cover carefully, and refrigerate overnight.
The following morning, allow them to finish proofing at room temperature before applying the final egg wash and baking.
Another convenient option is freezing the shaped unbaked croissants.
How to Store Leftovers
Allow baked croissants to cool completely.
Store them in an airtight container or sealed food-storage bag at room temperature for approximately 1–2 days.
Refrigeration is generally not recommended because it can cause croissants to become stale more quickly.
Reheating in the Oven
Preheat the oven to 325°F (165°C).
Place the croissants directly on a baking sheet.
Heat for approximately 5–7 minutes.
This restores much of their original crispness.
Reheating in the Air Fryer
Air fry at 300°F (150°C) for approximately 2–4 minutes.
Watch carefully because they can brown quickly.
Microwave
Microwaving is possible, but it will soften the crisp exterior.
Heat individual croissants for approximately 10–15 seconds.
For the best texture, use the oven or air fryer.
Freezing
Croissants freeze extremely well.
Freezing Baked Croissants
Allow the croissants to cool completely.
Wrap each one individually.
Place them inside a freezer-safe bag or airtight container.
Freeze for up to approximately 2 months.
Reheat directly from frozen at 325°F (165°C) for approximately 8–12 minutes.
Freezing Unbaked Croissants
Arrange shaped croissants on a parchment-lined tray.
Freeze until completely firm.
Transfer to an airtight freezer bag.
Freeze for approximately 1 month for the best yeast activity and texture.
When ready to bake, place them on a prepared baking sheet and allow them to thaw and proof until noticeably expanded and jiggly.
Depending on room temperature, this may take several hours.
Brush with egg wash and bake as directed.
Frequently Asked Questions
Why didn’t my croissants have visible layers?
The butter may have become too warm and blended into the dough during lamination. Keep both dough and butter cold while rolling and folding.
Why did butter leak from my croissants while baking?
A small amount of butter is normal, but excessive leakage usually indicates insufficient proofing, damaged lamination, or an oven that was not hot enough initially.
Can I use regular American-style butter?
Yes, but European-style butter generally produces better lamination because of its higher butterfat content.
Can I make croissants without a stand mixer?
Absolutely. Croissant dough can be mixed and kneaded completely by hand.
Why are my croissants dense inside?
They may have been underproofed, the yeast may have been weak, or the laminated layers may have been compressed during shaping.
How do I know when the croissants are fully proofed?
They should become noticeably larger, the layers should be visible, and the pastries should gently wobble when the tray is moved.
Can I proof croissants overnight at room temperature?
No. An extended warm proof can cause the butter to melt and may lead to overproofing. Refrigerate them overnight instead.
Can I use all-purpose flour instead of bread flour?
Yes. The croissants may be slightly more tender and less chewy, but all-purpose flour can still produce excellent results.
Why do my croissants shrink while rolling?
The gluten needs additional relaxation. Refrigerate the dough for approximately 20–30 minutes before continuing.
Why should croissants be baked until deeply golden?
Proper browning develops flavor and helps ensure the interior layers are fully baked instead of remaining doughy or gummy.
Final Thoughts
These Classic French Butter Croissants combine a carefully laminated yeast dough with rich European-style butter to create crisp golden shells, delicate flaky layers, and beautifully airy interiors.
The most important parts of successful croissant making are maintaining the right butter temperature, allowing the dough to rest between folds, rolling without crushing the layers, and giving the shaped pastries enough time to fully proof before baking.
Serve them warm with butter and preserves, transform them into breakfast sandwiches, or use the same laminated dough for chocolate, almond, pistachio, or savory croissants. With patience and careful temperature control, you can create deeply golden, glossy bakery-style croissants right in your own kitchen.
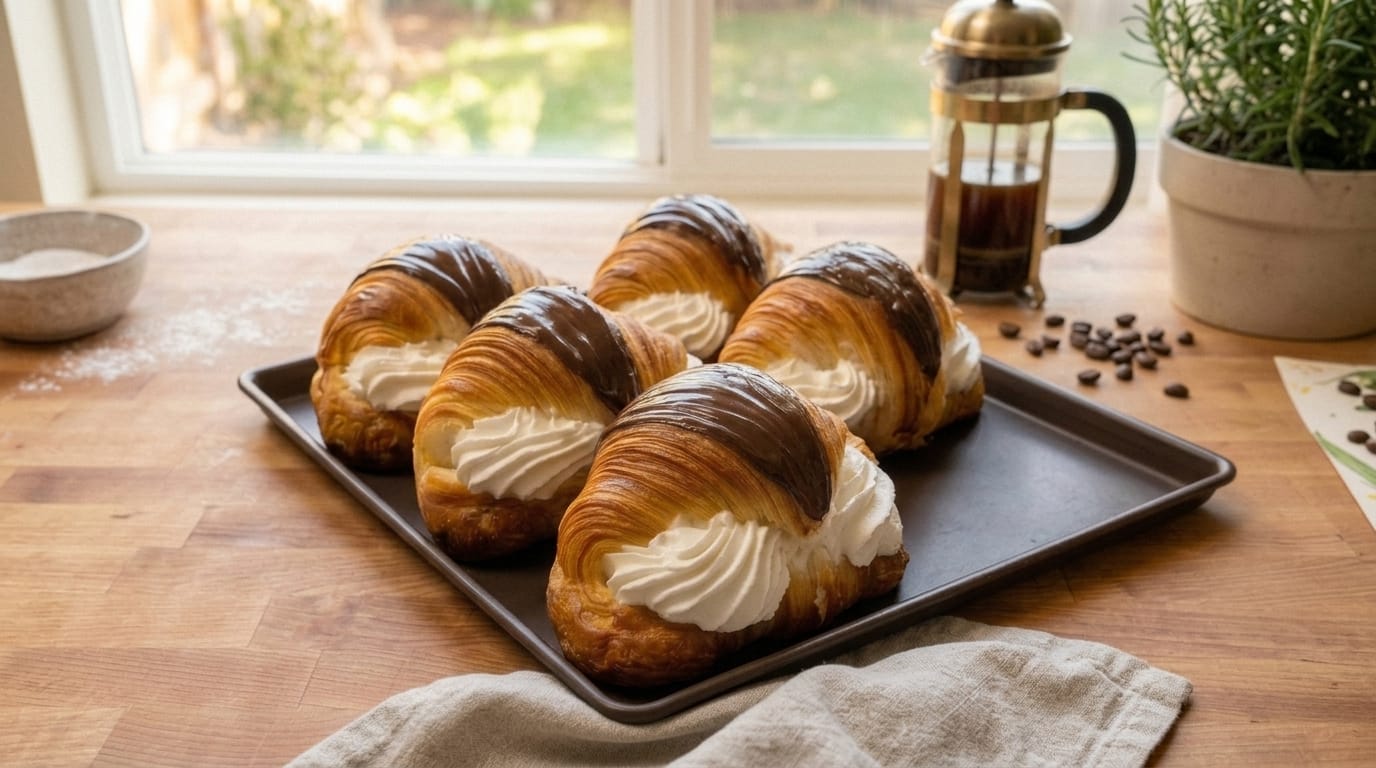
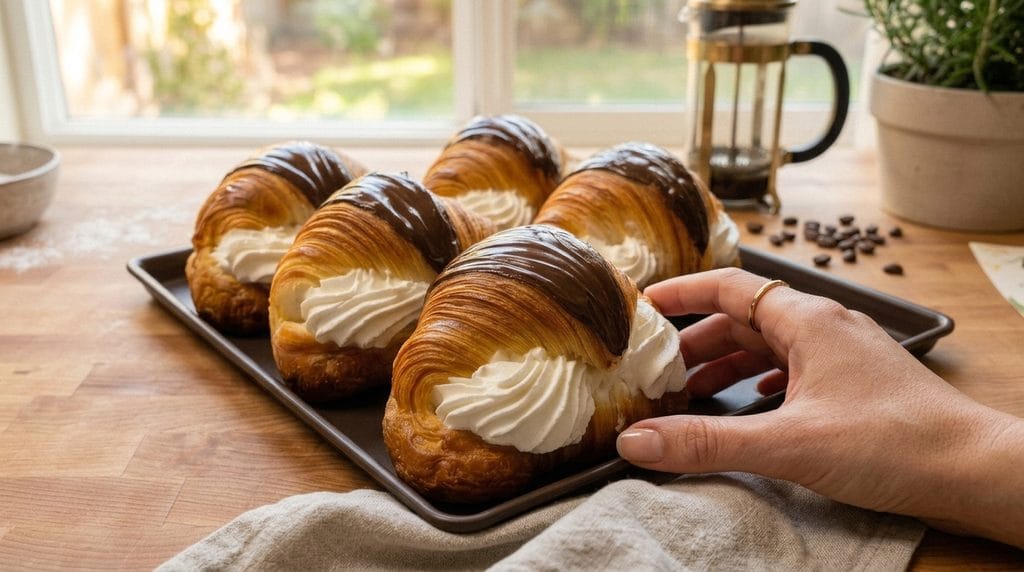
If you are looking for a bakery-style pastry that feels extra special, these Chocolate-Dipped Cream-Filled Croissants are an irresistible choice. Buttery, flaky croissants are generously filled with fluffy vanilla whipped cream and finished with a glossy layer of rich melted chocolate.
The contrast of crisp, laminated pastry, soft creamy filling, and smooth chocolate makes every bite incredibly satisfying. Using ready-made croissants keeps the recipe simple, while the piped cream and chocolate coating give them an elegant pastry-shop appearance.
These cream-filled croissants are perfect for brunch, holiday breakfasts, dessert tables, birthdays, afternoon coffee, or whenever you want an impressive sweet treat without complicated pastry-making.
Why You’ll Love These Chocolate-Dipped Cream-Filled Croissants
The combination of buttery croissants, fluffy vanilla cream, and rich chocolate creates a classic bakery-style dessert.
Using baked croissants makes the recipe quick and beginner-friendly.
The whipped cream filling is light, smooth, and easy to pipe.
A little mascarpone or cream cheese can be added to make the filling more stable.
The chocolate coating creates a beautiful glossy finish and adds just the right amount of richness.
They can be prepared ahead for parties, brunches, or special occasions.
You can easily customize them with strawberries, hazelnuts, caramel, pistachios, or different types of chocolate.
Ingredients
For the Croissants
6 large bakery-style butter croissants
1 tablespoon powdered sugar, optional
For the Vanilla Cream Filling
1½ cups cold heavy whipping cream
½ cup mascarpone cheese, cold
⅓ cup powdered sugar
1½ teaspoons pure vanilla extract
⅛ teaspoon fine salt
For the Chocolate Coating
8 ounces semisweet or dark chocolate, finely chopped
1 tablespoon coconut oil or neutral vegetable oil
1 teaspoon unsalted butter, optional
Optional Finishing Ingredients
Powdered sugar
Chocolate shavings
Mini chocolate chips
Chopped toasted hazelnuts
Chopped pistachios
Sliced strawberries
Fresh raspberries
Caramel sauce
Chocolate drizzle
Flaky sea salt
Cocoa powder
How to Make Chocolate-Dipped Cream-Filled Croissants
1. Prepare the Croissants
Place the croissants on a clean cutting board.
For the best texture, use croissants that are completely cooled and slightly crisp on the outside.
Avoid warm croissants because they can melt the cream filling.
2. Refresh the Croissants if Needed
If your croissants have softened, preheat the oven to 325°F (165°C).
Place the croissants on a baking sheet.
Bake for approximately 4–6 minutes.
This will restore some of their crisp, flaky texture.
3. Cool Completely
Remove the croissants from the oven.
Transfer them to a cooling rack and let them cool completely for approximately 20–30 minutes.
Do not fill the croissants while they are warm.
4. Prepare the Mixing Bowl
For the fluffiest whipped cream, place a large mixing bowl and whisk attachment in the refrigerator or freezer for approximately 10 minutes.
A cold bowl helps the cream whip more efficiently.
5. Add the Mascarpone
Place the cold mascarpone in the chilled mixing bowl.
Beat on low speed for approximately 15–20 seconds, just until smooth.
Do not overmix mascarpone because it can become grainy.
6. Add the Heavy Cream
Pour in the cold heavy whipping cream.
Begin beating on medium-low speed until the mascarpone and cream are evenly combined.
7. Add the Sugar and Vanilla
Add:
Powdered sugar
Vanilla extract
Salt
Continue beating on medium speed.
8. Whip Until Stiff Peaks Form
Increase the mixer to medium-high speed.
Whip for approximately 2–4 minutes, depending on your mixer.
The filling is ready when firm peaks hold their shape after the whisk is lifted.
Avoid overwhipping, or the cream can become grainy and eventually turn buttery.
9. Prepare a Piping Bag
Fit a large piping bag with a large open-star tip.
A star tip creates the decorative swirled cream appearance shown in bakery-style pastries.
Transfer the whipped cream mixture into the piping bag.
10. Refrigerate the Cream
Place the filled piping bag in the refrigerator while you prepare the croissants and chocolate.
Keeping the filling cold helps it remain firm.
11. Cut the Croissants
Using a sharp serrated knife, carefully slice each croissant horizontally.
Do not cut completely through the opposite side.
Leave a small hinge so the croissant opens like a sandwich.
12. Create Space for the Filling
Very gently open each croissant.
If necessary, lightly press down a small amount of the interior crumb to make room for the cream.
Be careful not to crush the flaky layers.
13. Melt the Chocolate
Place the chopped chocolate in a microwave-safe bowl.
Microwave for 20-second intervals, stirring thoroughly after each interval.
Continue until approximately 90% of the chocolate has melted.
14. Stir Until Smooth
Remove the bowl from the microwave.
Continue stirring until the remaining chocolate melts from the residual heat.
This helps prevent overheating.
15. Add the Oil
Stir in:
Coconut oil or neutral oil
Optional butter
Mix until completely smooth and glossy.
The oil slightly thins the chocolate and makes dipping easier.
16. Check the Chocolate Consistency
The chocolate should be fluid enough to coat the pastry smoothly without being watery.
If it seems too thick, add another ½ teaspoon oil.
17. Dip the Croissants
Hold one croissant carefully.
Dip the upper portion or curved top into the melted chocolate.
Alternatively, spoon chocolate over the center section of the croissant for the decorative appearance shown in the image.
18. Remove Excess Chocolate
Allow excess chocolate to drip back into the bowl.
Avoid creating an excessively thick coating because it can become difficult to bite once chilled.
19. Place on a Tray
Place the chocolate-coated croissants on a parchment-lined baking sheet or tray.
Repeat with the remaining croissants.
20. Allow the Chocolate to Set Slightly
Leave the croissants at room temperature for approximately 10 minutes.
The chocolate should begin to thicken but does not need to become completely firm yet.
21. Pipe the Cream Filling
Remove the whipped cream from the refrigerator.
Gently open the first croissant.
Starting at one end, pipe generous swirls of vanilla cream inside.
22. Fill the Entire Croissant
Continue piping until the cream extends from one side of the croissant to the other.
For a dramatic bakery-style presentation, allow some of the cream to remain visible around the opening.
23. Repeat
Fill all remaining croissants with the whipped cream mixture.
Try to divide the filling evenly among all six pastries.
24. Chill Briefly
Place the finished croissants in the refrigerator for approximately 15–20 minutes.
This firms the cream and helps the chocolate finish setting.
25. Add Optional Toppings
Before the chocolate completely hardens, you can sprinkle it with:
Toasted hazelnuts
Pistachios
Chocolate shavings
Mini chocolate chips
Flaky sea salt
26. Add a Chocolate Drizzle
For additional chocolate flavor, drizzle a little melted white, milk, or dark chocolate over the set coating.
27. Dust With Powdered Sugar
If desired, lightly dust the exposed pastry with powdered sugar immediately before serving.
28. Serve
Serve the croissants chilled or allow them to sit at room temperature for approximately 5–10 minutes before eating.
The pastry should remain flaky while the filling stays cool and creamy.
What to Serve With Chocolate-Dipped Cream-Filled Croissants
These croissants are rich enough to serve as a dessert but also work beautifully as part of a special breakfast or brunch.
Serve them with:
Fresh strawberries
Raspberries
Blueberries
Mixed fruit
Strawberry compote
Raspberry sauce
Chocolate sauce
Caramel sauce
For breakfast or brunch, pair them with:
Freshly brewed coffee
Cappuccino
Espresso
Café latte
Hot chocolate
Black tea
Vanilla tea
For a larger brunch spread, serve them alongside fresh fruit, scrambled eggs, yogurt parfaits, or lighter pastries.
Tips for the Best Chocolate-Dipped Cream-Filled Croissants
Use Good-Quality Croissants
Fresh bakery-style butter croissants provide the best flaky texture and rich flavor.
Make Sure the Croissants Are Cold
Warm pastry will soften or melt the whipped cream filling.
Always cool the croissants completely before filling.
Keep the Cream Cold
Cold heavy cream and mascarpone whip more reliably and create a sturdier filling.
Don’t Overwhip the Cream
Stop mixing once stiff peaks form.
Overwhipped cream can become grainy.
Add Mascarpone for Stability
Mascarpone helps the whipped cream hold its piped shape longer than regular whipped cream alone.
Use Finely Chopped Chocolate
Small pieces melt more evenly and reduce the risk of overheating.
Melt Chocolate Slowly
Chocolate burns easily.
Short microwave intervals with frequent stirring produce the smoothest result.
Don’t Make the Chocolate Too Thick
A thick chocolate shell can overpower the delicate pastry.
Adding a little coconut oil creates a thinner, smoother coating.
Use a Serrated Knife
A serrated bread knife cuts through flaky croissants without crushing their layers.
Fill Shortly Before Serving
For the crispest texture, fill the croissants only a few hours before serving.
Easy Recipe Variations
Nutella Cream Croissants
Add ⅓ cup Nutella to the mascarpone before whipping with the cream.
Finish with chopped toasted hazelnuts.
Strawberry Cream Croissants
Add thinly sliced fresh strawberries inside each croissant before piping in the cream.
Chocolate Cream Croissants
Add 2 tablespoons unsweetened cocoa powder to the powdered sugar before whipping the filling.
White Chocolate Croissants
Replace the dark chocolate coating with 8 ounces melted white chocolate.
Top with crushed freeze-dried strawberries.
Milk Chocolate Croissants
Use milk chocolate for a sweeter, milder chocolate coating.
Pistachio Cream Croissants
Add ¼ cup pistachio cream to the mascarpone mixture.
Finish with chopped roasted pistachios.
Salted Caramel Croissants
Drizzle approximately 1 tablespoon salted caramel sauce inside each croissant before adding the whipped cream.
Raspberry Chocolate Croissants
Place fresh raspberries along the cream filling and finish with dark chocolate.
Coffee Cream Croissants
Dissolve 1 teaspoon instant espresso powder in 1 teaspoon vanilla extract before adding it to the cream.
Cookies and Cream Croissants
Fold approximately ½ cup finely crushed chocolate sandwich cookies into the finished whipped cream.
Air Fryer Method
If the croissants need refreshing, you can use an air fryer instead of the oven.
Place the unfilled croissants in the air fryer basket.
Air fry at 300°F (150°C) for approximately 2–4 minutes.
Check frequently because laminated pastries can brown very quickly.
Remove and cool completely before adding chocolate and cream.
Do not air fry the croissants after filling them, because the whipped cream will melt.
Make-Ahead Instructions
The mascarpone whipped cream can be prepared approximately 1 day ahead.
Transfer it to an airtight container or piping bag and keep refrigerated.
The chocolate can also be melted several hours ahead, although it may need to be gently reheated before dipping.
You can dip the croissants in chocolate up to 1 day ahead and store them in a cool location.
For the best pastry texture, pipe the cream into the croissants no more than 3–4 hours before serving.
How to Store Leftovers
Because these croissants contain fresh dairy cream, they must be refrigerated.
Place them in a single layer inside an airtight container.
Refrigerate for up to 2 days.
The croissants will gradually soften as moisture from the cream migrates into the pastry, so they are best enjoyed on the day they are filled.
Refrigerating
Keep the croissants covered and refrigerated at 40°F (4°C) or below.
Remove them approximately 5–10 minutes before serving if you prefer a slightly softer filling.
Reheating
Filled croissants should not be reheated, because heat will melt the whipped cream filling.
If you want warm croissants, refresh the plain croissants before filling them, allow them to cool, and then add the cream.
Serving Leftovers
Serve refrigerated leftovers cold or allow them to stand briefly at room temperature.
Do not leave cream-filled pastries at room temperature for extended periods.
Freezing
The assembled cream-filled croissants are not ideal for freezing because whipped cream can lose some of its smooth texture after thawing.
However, plain croissants freeze extremely well.
Wrap each unfilled croissant tightly in plastic wrap.
Transfer them to a freezer-safe bag or airtight container.
Freeze for up to approximately 2 months.
Thaw at room temperature, then refresh in a 325°F (165°C) oven for approximately 4–6 minutes.
Cool completely before filling and coating with chocolate.
Frequently Asked Questions
What kind of croissants should I use?
Large bakery-style butter croissants work best because they have enough space for a generous amount of cream filling.
Can I use store-bought croissants?
Absolutely. Good-quality store-bought croissants make this recipe considerably faster and easier.
Can I use whipped cream without mascarpone?
Yes. Use 2 cups heavy whipping cream instead and increase the powdered sugar slightly if desired. Mascarpone simply helps stabilize the filling.
Can I use cream cheese instead of mascarpone?
Yes. Use approximately 4 ounces softened full-fat cream cheese, although the filling will have a slightly tangier flavor.
Why isn’t my whipped cream holding its shape?
The cream may not have been cold enough or may not have been whipped to stiff peaks. Chilling the bowl and ingredients helps.
Why did my chocolate become thick or grainy?
Chocolate can seize if exposed to water or become grainy if overheated. Melt it slowly and keep all bowls and utensils completely dry.
Can I use milk chocolate?
Yes. Milk, semisweet, dark, or white chocolate can all be used.
Can I add fruit inside the croissants?
Absolutely. Strawberries, raspberries, blueberries, or sliced bananas pair beautifully with the cream and chocolate.
How long can cream-filled croissants sit at room temperature?
Because the filling contains fresh dairy, avoid leaving them out for more than approximately 2 hours, and less in very warm conditions.
Can I prepare these the night before?
Yes, but the croissants will be slightly softer the next day. For maximum flakiness, coat the croissants with chocolate ahead of time and pipe in the cream shortly before serving.
Final Thoughts
These Chocolate-Dipped Cream-Filled Croissants combine crisp, buttery pastry, silky vanilla mascarpone cream, and glossy melted chocolate in an impressive bakery-style dessert.
The key is keeping the croissants and cream completely cool, whipping the filling until it holds firm peaks, and applying a thin layer of chocolate so the delicate pastry remains easy to bite.
Serve them with fresh berries, coffee, or a little extra chocolate drizzle for a beautiful treat that is flaky on the outside, luxuriously creamy inside, and rich with chocolate in every bite.
If you are looking for a refreshing appetizer that feels elegant but takes very little effort, these Watermelon Feta Mint Bites are an excellent recipe to make. Juicy watermelon cubes are topped with creamy feta, fresh mint, and a light drizzle of balsamic glaze for a beautiful sweet-and-savory bite.
The combination works because the watermelon is naturally sweet and crisp, while feta adds saltiness and richness. Fresh mint brings a cooling herbal flavor, and a little lime or balsamic glaze adds enough acidity to brighten everything.
These bites are perfect for summer parties, brunches, picnics, barbecues, baby showers, holiday appetizer platters, or whenever you want a no-cook recipe that looks colorful and impressive.
Why You’ll Love These Watermelon Feta Mint Bites
They require no cooking.
The combination of sweet watermelon and salty feta is simple but flavorful.
Fresh mint adds brightness and makes the bites especially refreshing.
They can be assembled quickly for parties and entertaining.
The individual portions are easy to serve with toothpicks or cocktail picks.
You can also customize them with cucumber, prosciutto, honey, chili, or balsamic glaze.
Ingredients
For the Watermelon Bites
4 cups seedless watermelon, cut into approximately 1-inch cubes
6 ounces feta cheese, cut into small cubes or crumbled into firm pieces
¼ cup fresh mint leaves
1 tablespoon fresh lime juice
1 teaspoon extra virgin olive oil
Pinch of flaky sea salt, optional
¼ teaspoon freshly ground black pepper
For the Optional Balsamic Finish
3 tablespoons balsamic glaze
Optional Garnishes
Lime zest
Extra mint
Fresh basil
Crushed pistachios
Red pepper flakes
Honey
Freshly cracked black pepper
For Serving
Cocktail picks or toothpicks
How to Make Watermelon Feta Mint Bites
1. Choose the Watermelon
Use a ripe, seedless watermelon.
The flesh should feel firm, juicy, and deeply colored.
Avoid watermelon that is overly soft because it will be harder to assemble neatly.
2. Cut the Watermelon
Remove the rind.
Cut the watermelon into approximately 1-inch cubes.
Try to keep the pieces similar in size for a more polished presentation.
3. Remove Excess Moisture
Place the watermelon cubes on paper towels.
Pat the surfaces gently.
This helps the feta stay in place and prevents excess juice from pooling on the serving platter.
4. Prepare the Feta
If using a block of feta, cut it into small cubes that are slightly smaller than the watermelon pieces.
Block feta works especially well because it holds its shape better than very crumbly feta.
5. Prepare the Mint
Wash and thoroughly dry the mint leaves.
Use small whole leaves or tear larger leaves into smaller pieces.
6. Arrange the Watermelon
Place the watermelon cubes on a large serving platter.
Leave a little space between each one.
7. Add the Feta
Place one piece of feta on top of each watermelon cube.
8. Add Mint
Top each piece of feta with a small mint leaf.
9. Secure with Picks
Insert a cocktail pick through:
Mint
Feta
Watermelon
This keeps each bite together and makes them easy to serve.
10. Add Lime Juice
Drizzle the bites very lightly with fresh lime juice.
Do not add too much because excess liquid can make the serving platter watery.
11. Add Olive Oil
Drizzle a very small amount of extra virgin olive oil over the bites.
This step is optional but adds a smooth savory note.
12. Add Black Pepper
Finish with a light sprinkle of freshly ground black pepper.
13. Add Salt Carefully
If desired, add a tiny pinch of flaky sea salt.
Taste first because feta is already salty.
14. Add Balsamic Glaze
Drizzle balsamic glaze lightly over the platter immediately before serving.
A little goes a long way.
15. Add Lime Zest
For extra brightness, grate a small amount of fresh lime zest over the bites.
16. Garnish
Scatter extra mint leaves around the platter.
17. Chill Briefly
If the ingredients are not already cold, refrigerate the assembled bites for approximately 10–15 minutes.
18. Serve
Serve chilled or cool.
These bites are best eaten shortly after assembly while the watermelon is crisp and the mint is fresh.
What to Serve With Watermelon Feta Mint Bites
These bites are excellent as part of a summer appetizer spread.
Serve them alongside:
Cucumber bites
Caprese skewers
Marinated mozzarella balls
Hummus and vegetables
Crostini
Olives
Fresh fruit
They also pair well with grilled dishes such as:
Grilled chicken
Steak
Salmon
Shrimp
Burgers
For brunch, serve them with:
Fresh fruit
Eggs
Pastries
Yogurt
Breakfast sandwiches
Tips for the Best Watermelon Feta Mint Bites
Use Cold Watermelon
Chilled watermelon tastes especially refreshing.
Use Seedless Watermelon
This makes the bites easier and more pleasant to eat.
Use Block Feta
Block feta is easier to cut neatly and stays in place better.
Dry the Watermelon
Removing surface moisture prevents the appetizer from becoming messy.
Keep the Mint Fresh
Dry mint thoroughly and add it close to serving time.
Don’t Overdo the Balsamic
Too much glaze can overpower the watermelon.
Assemble Close to Serving
The watermelon releases juice as it sits.
For the best appearance and texture, assemble shortly before serving.
Easy Recipe Variations
Cucumber Watermelon Feta Bites
Add a thin cucumber slice between the watermelon and feta.
This gives the bites even more crunch.
Honey Watermelon Feta Bites
Drizzle lightly with honey instead of balsamic glaze.
Spicy Watermelon Feta Bites
Add:
Red pepper flakes
Chili powder
Tajín-style seasoning
Basil Watermelon Feta Bites
Replace mint with fresh basil.
Prosciutto Watermelon Bites
Add a small folded piece of prosciutto.
The salty cured meat pairs beautifully with sweet watermelon.
Pistachio Feta Bites
Sprinkle crushed pistachios over the top.
Balsamic Strawberry Watermelon Bites
Add a strawberry slice along with the watermelon and feta.
Avocado Watermelon Bites
Add a small avocado cube.
Finish with lime and black pepper.
Watermelon Feta Skewer Version
For a larger appetizer, make mini skewers.
Thread onto each skewer:
Watermelon cube
Feta cube
Cucumber slice
Mint leaf
Another watermelon cube
Arrange on a platter.
Drizzle lightly with lime juice and balsamic glaze.
Watermelon Feta Salad Version
You can turn the same ingredients into an easy salad.
Combine:
6 cups watermelon cubes
6 ounces feta
½ cup mint leaves
½ sliced cucumber
2 tablespoons lime juice
1 tablespoon olive oil
Black pepper
Toss gently.
Add balsamic glaze immediately before serving.
Make-Ahead Instructions
You can prepare the components ahead.
Cut the watermelon and refrigerate in an airtight container.
Cut the feta separately.
Wash and dry the mint.
For the best texture and appearance, assemble the bites approximately 30–60 minutes before serving.
Do not add balsamic glaze until close to serving.
How to Store Leftovers
Store leftover bites in an airtight container in the refrigerator.
For the best texture, enjoy within approximately 1 day.
Watermelon releases moisture as it sits, so the bites will become softer and wetter over time.
If possible, remove excess liquid before serving leftovers.
Can You Freeze Watermelon Feta Mint Bites?
Freezing is not recommended.
Watermelon becomes very soft after freezing and thawing, while feta may become crumbly.
This recipe is best made fresh.
Frequently Asked Questions
What type of watermelon works best? Seedless watermelon with firm, ripe flesh works best.
What type of feta should I use? Block feta is ideal because it is easier to cut into neat pieces.
Can I make these ahead? Yes, but assemble them close to serving time for the best texture.
Can I use basil instead of mint? Absolutely. Basil gives the bites a slightly different but equally fresh flavor.
Do I need balsamic glaze? No. The watermelon, feta, mint, and lime are already flavorful. Balsamic is optional.
Can I add cucumber? Yes. Cucumber adds excellent crunch and freshness.
How do I keep the platter from becoming watery? Pat the watermelon dry before assembling and avoid making the bites too far ahead.
Can I serve these without toothpicks? Yes. Arrange them as stacked bites on a platter and serve with small forks.
Final Thoughts
These Watermelon Feta Mint Bites combine juicy watermelon, creamy salty feta, fresh mint, lime, and optional balsamic glaze in one simple no-cook appetizer.
The key is using cold, firm watermelon, drying it well before assembly, choosing block feta that holds its shape, and adding the mint and balsamic close to serving time.
Serve them chilled for summer gatherings, brunches, barbecues, or appetizer platters for a colorful bite that is sweet, salty, refreshing, and incredibly easy to make.
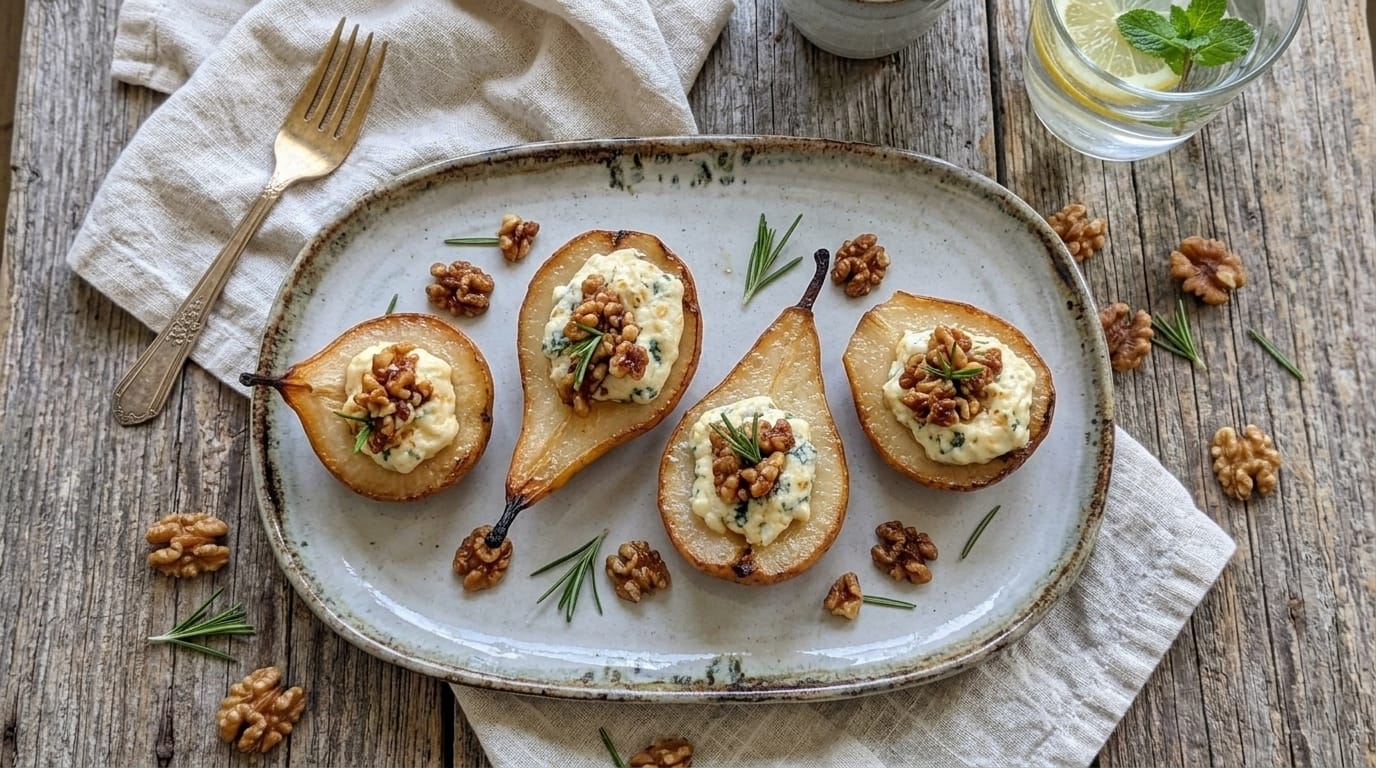
These Honey Roasted Pears with Blue Cheese & Walnuts are an elegant sweet-and-savory appetizer featuring tender caramelized pears filled with creamy blue cheese, crunchy toasted walnuts, fragrant rosemary, and a drizzle of warm honey. The combination of juicy fruit, tangy cheese, buttery nuts, and herbal sweetness makes this beautiful dish perfect for holiday gatherings, dinner parties, brunches, or a sophisticated dessert course.
Why You’ll Love It
Sweet roasted pears pair beautifully with tangy, creamy blue cheese
Toasted walnuts add irresistible crunch and nutty flavor
Elegant presentation with very little hands-on preparation
Perfect as an appetizer, brunch dish, or savory-sweet dessert
Ingredients Overview
Roasted Pears
4 ripe but firm pears
2 tbsp unsalted butter, melted
2 tbsp honey
1 tbsp fresh lemon juice
½ tsp ground cinnamon
Pinch of salt
Blue Cheese Filling
4 oz blue cheese or Gorgonzola, softened
3 oz cream cheese, softened
1 tsp honey
½ tsp fresh rosemary, finely chopped
¼ tsp black pepper
Walnut Topping
½ cup walnuts, roughly chopped
1 tbsp honey
1 tsp butter
Pinch of salt
Garnish
Fresh rosemary sprigs
Extra honey
Freshly cracked black pepper
Extra chopped walnuts
Step-by-Step Instructions
1. Prepare the Pears
Preheat the oven to 400°F (200°C).
Slice each pear in half lengthwise and carefully remove the core and seeds with a spoon or melon baller, creating a small cavity for the cheese filling.
Arrange the pears cut-side up in a lightly greased baking dish.
2. Season the Pears
Combine melted butter, honey, lemon juice, cinnamon, and a small pinch of salt.
Brush the mixture generously over the cut sides of the pears.
Turn the pears cut-side down and roast for 12–15 minutes.
3. Caramelize the Pears
Carefully flip the pears cut-side up.
Spoon some of the pan juices over the fruit.
Continue roasting for another 8–10 minutes, or until tender and lightly caramelized around the edges.
4. Prepare the Blue Cheese Filling
While the pears roast, combine blue cheese, cream cheese, honey, rosemary, and black pepper in a small bowl.
Mix until creamy while leaving a little texture from the blue cheese.
5. Toast the Walnuts
Melt 1 teaspoon butter in a small skillet over medium-low heat.
Add the chopped walnuts and cook for 2–3 minutes until fragrant.
Stir in honey and a pinch of salt and cook for another minute.
Remove from the heat.
6. Fill the Pears
Remove the roasted pears from the oven.
Spoon a generous amount of the blue cheese mixture into the center of each pear.
Return to the oven for 3–5 minutes, just until the cheese becomes soft and creamy.
7. Garnish and Serve
Arrange the warm pears on a serving platter.
Sprinkle with honey-toasted walnuts.
Drizzle lightly with additional honey and garnish with fresh rosemary and cracked black pepper.
Serve warm.
Cooking Tips
Choose pears that are ripe but still firm so they hold their shape during roasting.
Bosc, Anjou, or Bartlett pears all work beautifully.
Do not overbake the pears or they may become too soft to fill.
Toasting the walnuts enhances their flavor and gives the dish extra crunch.
If blue cheese is too strong for your taste, use goat cheese, Brie, or mascarpone instead.
Serving Suggestions
Serve these honey roasted pears with:
Crostini or toasted baguette slices
Arugula salad
Prosciutto
Crackers and cheese boards
Fresh grapes or figs
Storage
Store leftover roasted pears in an airtight container in the refrigerator for up to 2 days.
Reheat gently in a 325°F (165°C) oven for about 8–10 minutes. Add the walnuts after reheating so they remain crunchy.
Leftover Ideas
Slice leftover pears and add them to an arugula and walnut salad.
Serve them over toasted sourdough with extra cheese and honey.
Chop the pears and spoon them over oatmeal or yogurt for a sweet-savory breakfast.
FAQs
Can I use goat cheese instead of blue cheese? Yes. Goat cheese is an excellent substitute and gives the pears a milder, tangy flavor.
What pears work best for roasting? Bosc and Anjou pears are especially good because they hold their shape well when heated.
Can I make these ahead of time? Yes. Roast the pears and prepare the cheese filling several hours ahead, then warm and assemble shortly before serving.
Can I make this recipe without nuts? Yes. Simply omit the walnuts or replace them with toasted pumpkin seeds if desired.
Final Thoughts
Honey Roasted Pears with Blue Cheese & Walnuts combine caramelized fruit, creamy tangy cheese, crunchy nuts, rosemary, and warm honey in one beautifully balanced dish. Elegant yet simple, these stuffed pears are perfect for entertaining, holiday menus, brunch tables, or whenever you want an appetizer that feels sophisticated without complicated preparation.
This Creamy Crab and Shrimp Seafood Salad is a cool, refreshing dish featuring tender crab, juicy shrimp, crisp celery, fresh herbs, and a creamy lemon dressing. Rich yet light, this easy seafood salad is perfect for sandwiches, lettuce wraps, crackers, summer lunches, parties, or an elegant make-ahead appetizer.
Why You’ll Love It
Tender crab and shrimp coated in a creamy, flavorful dressing
Fresh lemon and herbs balance the richness beautifully
Quick and easy to prepare with minimal cooking
Perfect for meal prep, sandwiches, appetizers, or light lunches
Ingredients Overview
Seafood
1 lb cooked crab meat or imitation crab, chopped
½ lb cooked shrimp, peeled, deveined, and chopped
2 celery stalks, finely diced
¼ cup red onion, finely diced
2 tbsp fresh parsley, chopped
1 tbsp fresh dill, chopped
Creamy Dressing
¾ cup mayonnaise
¼ cup sour cream or Greek yogurt
1 tbsp fresh lemon juice
1 tsp lemon zest
1 tsp Dijon mustard
½ tsp garlic powder
½ tsp Old Bay seasoning
¼ tsp black pepper
Salt to taste
Garnish
Fresh parsley, chopped
Fresh dill
Lemon wedges
Extra black pepper
Step-by-Step Instructions
1. Prepare the Seafood
Drain the crab meat well and check for any pieces of shell if using fresh or canned crab.
Chop the crab into bite-sized pieces.
Pat the cooked shrimp dry and chop into medium pieces.
Place both seafood ingredients in a large mixing bowl.
2. Prepare the Vegetables
Finely dice the celery and red onion.
Add them to the bowl with the crab and shrimp.
Add chopped parsley and fresh dill.
3. Make the Creamy Dressing
In a separate bowl, combine mayonnaise, sour cream or Greek yogurt, lemon juice, lemon zest, Dijon mustard, garlic powder, Old Bay seasoning, black pepper, and a small pinch of salt.
Whisk until smooth and creamy.
4. Combine Everything
Pour the creamy dressing over the seafood mixture.
Gently fold everything together until the crab, shrimp, vegetables, and herbs are evenly coated.
Avoid stirring too aggressively so the seafood pieces remain intact.
5. Chill
Cover the bowl and refrigerate for at least 30 minutes.
This allows the flavors to blend and gives the seafood salad a cool, creamy texture.
6. Serve
Stir gently before serving.
Transfer the salad to a serving bowl and garnish with fresh parsley, dill, and black pepper.
Serve chilled with lemon wedges on the side.
Cooking Tips
Drain the seafood thoroughly so the salad does not become watery.
Use chilled cooked shrimp for the best texture.
Add lemon juice gradually so the dressing stays creamy.
Fresh herbs provide brighter flavor than dried herbs.
Chill the salad before serving for the best flavor and consistency.
Serving Suggestions
Serve this creamy crab and shrimp seafood salad with:
Croissants or sandwich rolls
Crackers
Lettuce cups
Toasted baguette slices
Fresh cucumber slices
Storage
Store the seafood salad in an airtight container in the refrigerator for up to 2 days.
Keep it refrigerated until serving and stir gently before enjoying again.
Leftover Ideas
Use leftovers as a filling for sandwiches or wraps.
Spoon the seafood salad over mixed greens for a quick lunch.
Serve it inside avocado halves or cucumber cups.
Add it to toasted bread for an easy seafood crostini.
FAQs
Can I use imitation crab? Yes. Imitation crab works very well and makes this recipe especially affordable and easy.
Can I use frozen shrimp? Yes. Thaw the shrimp completely, cook if necessary, and pat dry before adding.
Can I make this seafood salad ahead of time? Yes. Prepare it several hours ahead and refrigerate until ready to serve.
Can I make the dressing lighter? Yes. Replace some of the mayonnaise with Greek yogurt for a lighter version.
Final Thoughts
Creamy Crab and Shrimp Seafood Salad combines tender seafood, crisp vegetables, fresh herbs, and a smooth lemony dressing in one refreshing and versatile dish. Easy to prepare and perfect for serving chilled, it makes an excellent choice for lunches, parties, sandwiches, or light summer meals.
A fresh and elegant appetizer featuring creamy avocado halves filled with a rich salmon tartare made from tender salmon, herbs, lemon, and a light creamy dressing, then topped with bright salmon roe for a luxurious finish. This restaurant-style dish is refreshing, flavorful, and perfect for brunches, gatherings, or special occasions.
Why You’ll Love It
Fresh, creamy, and full of delicate seafood flavor
Beautiful presentation that feels elegant and impressive
Easy to prepare with no heavy cooking required
Perfect as a light appetizer, brunch dish, or party starter
Ingredients Overview
Avocado Boats
4 ripe avocados, halved and pitted
1 tbsp fresh lemon juice
¼ tsp salt
¼ tsp black pepper
Salmon Tartare Filling
8 oz fresh salmon fillet, finely diced
2 tbsp mayonnaise
1 tbsp sour cream or Greek yogurt
1 tsp Dijon mustard
1 tbsp fresh lemon juice
1 tsp lemon zest
1 tbsp finely chopped chives
1 tbsp finely chopped dill
1 tbsp finely chopped green onion
¼ tsp garlic powder
¼ tsp salt
¼ tsp black pepper
Topping
3 tbsp salmon roe
Fresh dill sprigs
Extra chopped chives
Lemon zest, optional
Step-by-Step Instructions
1. Prepare the Avocados
Cut the avocados in half and remove the pits.
If needed, trim a very thin slice from the bottom of each avocado half so they sit flat.
Brush or drizzle the avocado flesh with lemon juice and season lightly with salt and black pepper.
2. Prepare the Salmon
Pat the salmon dry with paper towels.
Remove the skin if necessary and dice the salmon into very small cubes.
Place the diced salmon in a chilled mixing bowl.
3. Make the Tartare Mixture
Add mayonnaise, sour cream or Greek yogurt, Dijon mustard, lemon juice, lemon zest, chives, dill, green onion, garlic powder, salt, and black pepper to the diced salmon.
Gently stir until everything is evenly combined.
Do not overmix so the salmon keeps its delicate texture.
4. Fill the Avocado Boats
Spoon the salmon tartare mixture into the center of each avocado half.
Mound the filling slightly for a fuller, elegant presentation.
5. Add the Toppings
Top each avocado boat with a small spoonful of salmon roe.
Garnish with fresh dill sprigs, extra chives, and a little lemon zest if desired.
6. Serve
Arrange the avocado boats on a chilled platter.
Serve immediately for the freshest flavor and best texture.
Cooking Tips
Use ripe but firm avocados so they hold their shape well.
Make sure the salmon is sushi-grade or very fresh if serving raw.
Chill the tartare mixture before serving for the best flavor.
Add lemon juice to the avocados right away to help prevent browning.
Spoon the salmon roe on just before serving to keep it bright and glossy.
Serving Suggestions
Serve these salmon and avocado tartare boats with:
Crackers or crostini
A fresh green salad
Cucumber slices
A light sparkling drink
Lemon wedges on the side
Storage
These are best enjoyed fresh.
If needed, store the salmon tartare filling separately in an airtight container in the refrigerator for up to 1 day.
Prepare and fill the avocado halves just before serving for the best appearance and texture.
Leftover Ideas
Spoon the leftover salmon tartare onto toast or crostini.
Serve it over cucumber rounds for a light snack.
Use the filling in lettuce cups or as a topping for crackers.
FAQs
Can I use smoked salmon instead of fresh salmon? Yes. Smoked salmon works well and gives the dish a richer, saltier flavor.
Can I make this ahead of time? You can prepare the salmon filling a few hours ahead, but fill the avocados just before serving.
What can I use instead of salmon roe? You can use extra herbs, finely diced cucumber, or a small sprinkle of sesame seeds if preferred.
Can I make it without mayonnaise? Yes. Greek yogurt or mashed avocado can be used instead for a lighter option.
Final Thoughts
Salmon & Avocado Tartare Boats With Salmon Roe are a fresh, creamy, and elegant appetizer that combines delicate salmon, buttery avocado, and bright bursts of roe in every bite. Beautiful, flavorful, and easy to prepare, they are perfect for entertaining, brunch spreads, or anytime you want a light dish with a luxurious touch.