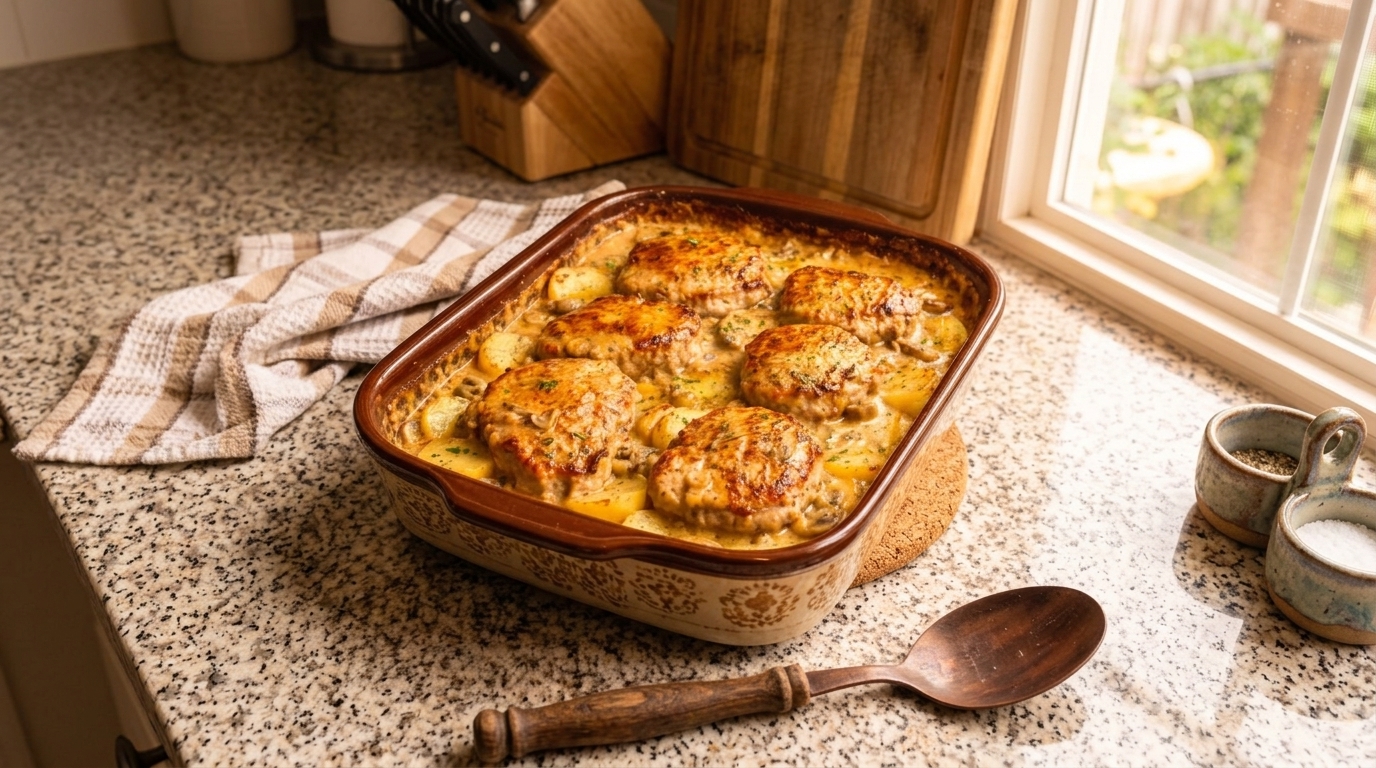
Creamy Mushroom Pork Chops & Scalloped Potatoes: The Ultimate Comfort Food Feast

There are few culinary combinations as profoundly comforting as tender, juicy pork chops smothered in a rich, earthy mushroom cream sauce, served alongside a pan of bubbling, ultra-creamy scalloped potatoes. This Creamy Mushroom Pork Chops & Scalloped Potatoes recipe merges two classic comfort food favorites into one showstopping meal. Whether you are planning a cozy weekend dinner for family or looking for a hearty, restaurant-style dish to impress guests, this recipe delivers deep, savory flavors in every single bite.

Pork chops often get a bad reputation for drying out, but when seared properly and paired with a velvety sauce, they become succulent and tender. Combined with thinly sliced potatoes baked in a decadent garlic-infused cream and cheese sauce, this meal is the definition of home-cooked satisfaction.

Recipe At-a-GlanceDetails
Prep Time25 minutes
Cook Time55 minutes
Total Time1 hour 20 minutes
Servings4 to 6 servings
CourseMain Dish
CuisineAmerican Comfort Food

Why You Will Love This Recipe

  • The Ultimate Flavor Pairing: Earthy cremini mushrooms and garlic-infused cream sauce complement both the savory pork and the starchy, tender potatoes.
  • Dual-Action Cooking: Baking the scalloped potatoes while you prepare the stovetop pork chops ensures everything comes together hot and ready to serve at the exact same time.
  • Restaurant Quality at Home: No complicated culinary degrees required—just simple techniques like proper meat searing and layered baking.
  • Make-Ahead Friendly: The scalloped potatoes can be prepped in advance, making weeknight assembly surprisingly streamlined.

Essential Kitchen Equipment

To execute this recipe smoothly, make sure you have these key tools on hand:

  • Mandoline Slicer: Ensures uniform, paper-thin potato slices so they bake evenly without hard centers.
  • Cast-Iron Skillet: Ideal for getting a deep, golden-brown sear on the pork chops while locking in juices.
  • 9×13-Inch Baking Dish: Perfect for baking a deep, layered batch of scalloped potatoes.
  • Sharp Chef’s Knife & Cutting Board: For prepping mushrooms, onions, and trimming pork.

Ingredients & Substitution Guide

This recipe is divided into two major components: the decadent scalloped potatoes and the pan-seared pork chops with creamy mushroom sauce.

For the Scalloped Potatoes:

IngredientQuantityPurpose & Substitution Notes
Russet or Yukon Gold Potatoes3 lbsPeeled and sliced 1/8-inch thick. Yukon Golds offer a buttery texture; Russets release starch to naturally thicken the sauce.
Heavy Whipping Cream1.5 cupsCreates a rich, velvety sauce base. Half-and-half can be substituted, though the sauce will be thinner.
Chicken Broth1 cupLow-sodium preferred. Balances the richness of the heavy cream.
Garlic4 clovesMinced fresh for an aromatic punch throughout the potato layers.
Sharp Cheddar & Gruyère1.5 cups combinedFreshly shredded cheese adds a nutty, savory depth to the potato bake.
Unsalted Butter3 tbspUsed to create a roux base and enrich the sauce.
All-Purpose Flour3 tbspThickens the cream and cheese sauce mixture.
Salt, Pepper, & NutmegTo tasteA pinch of ground nutmeg is the secret ingredient that elevates potato cream sauces.

For the Mushroom Pork Chops:

IngredientQuantityPurpose & Substitution Notes
Bone-In Pork Chops4 thick-cut (approx. 1 inch)Bone-in chops retain moisture and flavor much better than boneless alternatives.
Cremini (Baby Bella) Mushrooms8 ozSliced thin. They offer an earthier, deeper flavor profile than standard white button mushrooms.
Yellow Onion1 mediumDiced fine to build the aromatic base for the sauce.
Garlic4 clovesMinced fresh for the mushroom pan-sauce.
Chicken Broth3/4 cupUsed to deglaze the skillet and pick up the flavorful browned bits (fond).
Heavy Cream1/2 cupTies the mushroom sauce together into a luxurious glaze.
Olive Oil & Butter2 tbsp eachUsed for achieving a high-heat sear on the pork while adding rich buttery flavor.
Dried Thyme & Rosemary1 tsp combinedClassic herbal pairings for pork and mushrooms.
Salt & Black PepperTo tasteEssential for seasoning the pork crust.

Step-by-Step Cooking Instructions

Step 1: Bake the Scalloped Potatoes

  1. Preheat and Prep: Preheat your oven to 375°F (190°C). Grease a 9×13-inch baking dish generously with butter or cooking spray.
  2. Slice the Potatoes: Peel the potatoes and slice them uniformly into 1/8-inch rounds using a mandoline or sharp knife.
  3. Make the Cream Sauce: In a medium saucepan, melt 3 tablespoons of butter over medium heat. Whisk in the flour and cook for 1 minute to remove the raw flour taste. Gradually pour in the chicken broth and heavy cream, whisking constantly to prevent lumps.
  4. Add Seasonings & Cheese: Stir in the minced garlic, salt, black pepper, and a pinch of ground nutmeg. Bring to a gentle simmer until thickened. Remove from heat and stir in half of your shredded cheese blend until melted.
  5. Layer and Bake: Arrange half of the sliced potatoes in the bottom of the prepared baking dish in a slightly overlapping pattern. Pour half of the cream sauce over the potatoes. Repeat with the remaining potatoes and sauce. Top with the remaining cheese.
  6. Bake: Cover the dish tightly with aluminum foil and bake for 45 minutes. Remove the foil and bake for an additional 20 to 25 minutes until the top is golden-brown, bubbling, and a fork slides easily through the tender potato slices. Let rest 10 minutes before serving.

Step 2: Sear the Pork Chops

  1. Season the Meat: Pat the thick-cut pork chops completely dry with paper towels. Season both sides generously with kosher salt, black pepper, dried thyme, and rosemary.
  2. Sear to Golden Perfection: Heat a large cast-iron skillet over medium-high heat. Add 1 tablespoon of olive oil and 1 tablespoon of butter. Once hot and foaming, add the pork chops. Sear undisturbed for 4 to 5 minutes until a deep golden-brown crust forms.
  3. Flip and Finish: Flip the chops and cook for another 3 to 4 minutes. Use a meat thermometer to check internal temperature—remove them to a warm plate when they reach 140°F to 145°F (they will finish cooking slightly while resting). Cover loosely with foil.

Step 3: Build the Creamy Mushroom Sauce

  1. Sauté Aromatics and Mushrooms: In the same skillet with the pork drippings, melt the remaining tablespoon of butter. Add the sliced cremini mushrooms and diced onions. Cook undisturbed for 5 minutes until the mushrooms release their moisture and turn golden brown.
  2. Add Garlic and Herbs: Stir in the minced garlic and cook for 1 minute until fragrant.
  3. Deglaze the Pan: Pour in the chicken broth, using a wooden spoon to scrape up all the delicious browned bits stuck to the bottom of the skillet. Let the liquid simmer and reduce by half.
  4. Incorporate Cream: Lower the heat to medium-low and pour in the heavy cream. Let the sauce simmer gently for 3 to 4 minutes until it thickens enough to coat the back of a spoon. Taste and adjust seasoning with salt and pepper.
  5. Combine: Return the rested pork chops (along with any accumulated juices) back into the skillet, spooning the rich mushroom cream sauce generously over the top. Simmer for 2 minutes until everything is piping hot.

Culinary Secrets for Success

  • Do Not Rinse Sliced Potatoes: Keep the natural starches on your potato slices. Those starches mix with the flour, cream, and cheese to create a naturally thick, luxurious sauce without needing excessive thickeners.
  • Rest Your Pork Chops: Letting the pork chops rest for 5 to 10 minutes off the heat allows the muscle fibers to relax and reabsorb their juices, guaranteeing every bite remains tender and moist.
  • Choose Thick-Cut Chops: Thin pork chops dry out within seconds in a hot skillet. Thick-cut (1-inch or greater) bone-in chops provide a buffer that keeps the interior juicy while allowing you to achieve a dark, savory sear on the outside.

Delicious Variations

  • Bacon & White Wine Upgrade: Deglaze the mushroom pan with 1/3 cup of dry white wine (like Sauvignon Blanc) before adding the chicken broth, and toss in crisp chopped bacon bits into the mushroom sauce.
  • Herb & Parmesan Twist: Substitute Gruyère in the scalloped potatoes with freshly grated Parmigiano-Reggiano and top the final dish with chopped fresh chives.
  • Spicy Mushroom Kick: Add 1/2 teaspoon of crushed red pepper flakes along with the garlic in the mushroom sauce for a subtle warming heat that cuts through the cream.

Storage, Freezing, and Reheating Guidelines

  • Refrigerator Storage: Store leftover pork chops and scalloped potatoes in separate airtight containers in the refrigerator for up to 3 to 4 days.
  • Reheating Pork Chops: To prevent dry meat, reheat pork chops in a skillet over medium-low heat with a splash of chicken broth or extra mushroom sauce, covered, for 5 to 7 minutes.
  • Reheating Scalloped Potatoes: Reheat individual portions in the microwave at 50% power, or bake covered in an oven at 350°F for 15 minutes until warm through. Freezing cream-based potato bakes is generally discouraged because dairy tends to separate and turn grainy upon thawing.

Estimated Nutritional Information

NutrientAmount Per Serving (1 Pork Chop + 1 Slice Potato Casserole)
Calories685 kcal
Protein44 g
Carbohydrates38 g
Fat41 g
Saturated Fat22 g
Cholesterol160 mg
Sodium780 mg
Dietary Fiber4 g
Sugar6 g

(Note: Nutritional values are estimates calculated using standard ingredient databases and may vary based on exact portion sizes and brands utilized.)
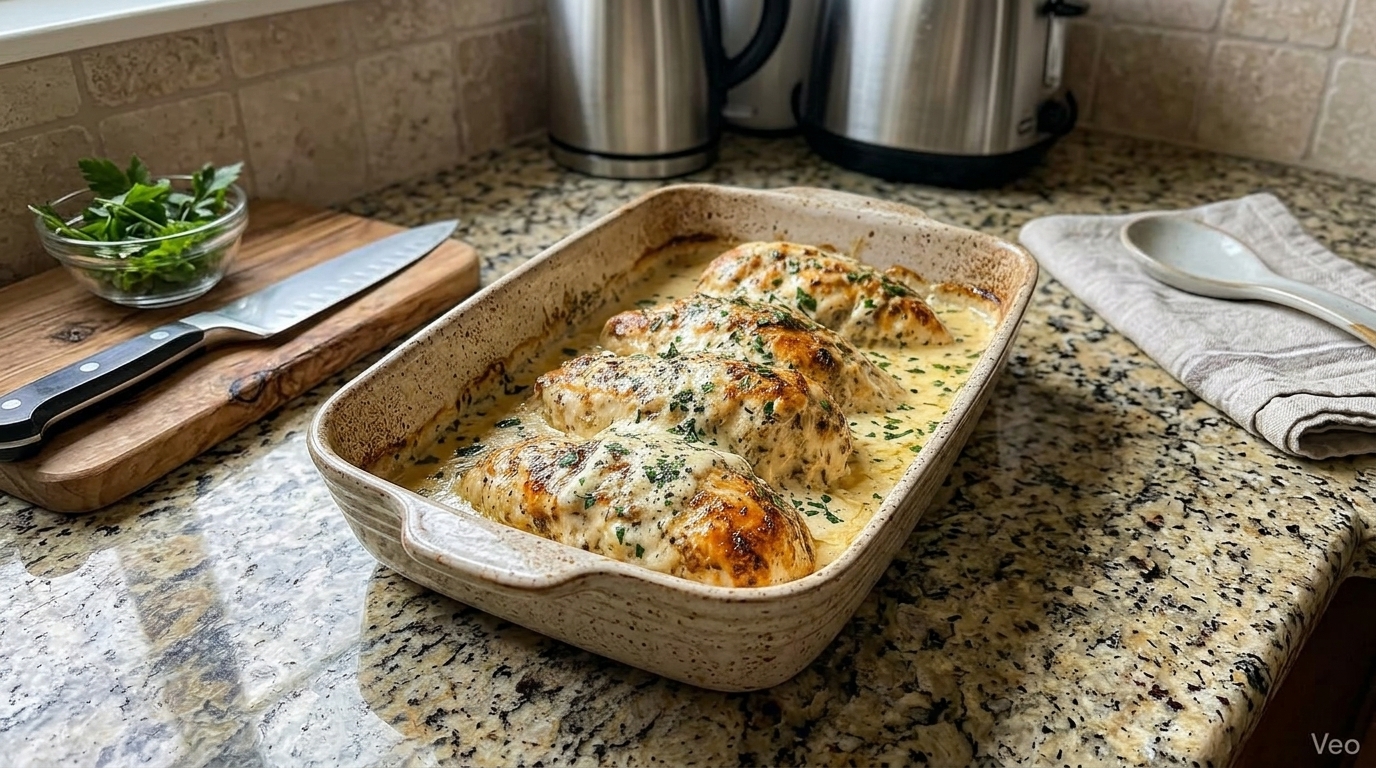
Ultimate One-Skillet Creamy Garlic Parmesan Chicken in 30 Minutes

The Ultimate Creamy Garlic Parmesan Chicken

If you are looking for a restaurant-quality dinner that comes together in under 30 minutes, use basic pantry staples. Additionally, this Creamy Garlic Parmesan Chicken is guaranteed to become a permanent fixture in your weekly rotation. Golden-seared chicken cutlets are simmered in a velvety, garlic-infused cream sauce enriched with freshly grated Parmesan cheese. It strikes the perfect balance between high-end comfort food and quick weeknight efficiency.

Cooking rich, skillet-style chicken dishes at home often comes with the risk of tough meat.

Additionally, it can also yield broken, greasy sauces.

This approach ensures you achieve The Ultimate Creamy Garlic Parmesan Chicken with tender meat and silky sauce.

Recipe At-a-GlanceDetails
Prep Time10 minutes
Cook Time15 minutes
Total Time25 minutes
Servings4 servings
CourseMain Dish
CuisineItalian-American

Why You Will Love This Recipe

  • One-Skillet Convenience: Everything cooks in a single pan, keeping kitchen cleanup fast and hassle-free.
  • Rapid Cook Time: Thin chicken cutlets cook through in under 10 minutes, making this an ideal meal for busy weeknights.
  • Decadent, Balanced Flavor: A combination of freshly minced garlic, chicken broth, heavy cream, and real Parmigiano-Reggiano creates a rich sauce without feeling overly heavy.
  • Versatile Pairing Options: The glossy garlic cream sauce pairs effortlessly with pasta, rice, roasted vegetables, or crusty bread.

Essential Kitchen Equipment

To get the best results, gather the following tools before starting:

  • Large Heavy-Bottomed Skillet: A 12-inch cast-iron or stainless-steel skillet provides superior heat retention for Sears.
  • Tongs: For easy flipping without tearing the delicate flour coating.
  • Cheese Grater: A microplane or fine box grater to shred fresh Parmesan blocks smoothly.
  • Whisk & Wooden Spoon: A wooden spoon helps scrape up browned bits (fond), while a whisk incorporates the cream and cheese smoothly.

Ingredients & Substitution Guide

IngredientQuantityFunction & Substitution Notes
Chicken Breasts2 large (approx. 1.5 lbs)Sliced horizontally into 4 thin cutlets. You can also use chicken thighs.
All-Purpose Flour1/3 cupCreates a crust that locks in juices and naturally thickens the sauce. Use gluten-free 1:1 flour if needed.
Olive Oil1 tbspHigh-smoke-point oil for searing the chicken without burning.
Unsalted Butter2 tbsp (divided)Adds richness; 1 tbsp for searing, 1 tbsp for sautéing garlic.
Fresh Garlic6 clovesMinced fresh. Avoid pre-minced jarred garlic for the best flavor profile.
Chicken Broth1/2 cupLow-sodium preferred. Used to deglaze the skillet and balance the heavy cream.
Heavy Whipping Cream1 cupHeavy cream or double cream works best. Milk or half-and-half will yield a thinner sauce.
Parmesan Cheese3/4 cupFreshly grated Parmigiano-Reggiano melts effortlessly without clumping.
Italian Seasoning1 tspA blend of dried oregano, basil, thyme, and rosemary.
Onion Powder1/2 tspEnhances savory notes in the sauce base.
Crushed Red Pepper1/4 tsp (optional)Provides a subtle warm finish without making the dish spicy.
Salt & Black PepperTo tasteEssential for seasoning both the flour dredge and liquid sauce.
Fresh Parsley2 tbspFinely chopped for garnish and visual contrast.

Step-by-Step Cooking Instructions

Step 1: Prepare and Season the Chicken Cutlets

Place the chicken breasts flat on a cutting board. Holding your hand flat on top of one breast, carefully slice through the center horizontally using a sharp chef’s knife to create two thin cutlets. Repeat with the second breast so you have four cutlets of equal thickness.

Pat the chicken thoroughly dry using paper towels. Moisture is the enemy of a good sear. Season both sides of each cutlet evenly with salt, black pepper, and ½ teaspoon of Italian seasoning.

Step 2: Dredge the Cutlets

Place the all-purpose flour in a wide, shallow bowl or pie dish. Lightly press each seasoned chicken cutlet into the flour, turning to coat both sides. Gently shake off any excess flour so only a thin, powdery layer remains. This light flour coating seals in moisture and gives the pan juices body later on.

Step 3: Sear the Chicken

Place a 12-inch heavy skillet over medium-high heat. Add the olive oil and 1 tablespoon of unsalted butter. Once the butter foams and stops sputtering, arrange the chicken cutlets in a single layer in the pan.

Sear undisturbed for 4 to 5 minutes until the bottom develops a deep golden-brown crust. Flip the cutlets and cook for another 3 to 4 minutes on the second side until cooked through (internal temperature reaches 165°F on an instant-read thermometer). Transfer the cooked chicken to a warm plate and cover loosely with foil.

Step 4: saute the Aromatic Garlic

Reduce the stove heat to medium. Melt the remaining 1 tablespoon of butter in the same skillet, stirring into the left-behind browned chicken bits (fond). Add the finely minced garlic and crushed red pepper flakes. saute for 45 to 60 seconds until fragrant, stirring constantly to prevent the garlic from scorching or turning bitter.

Step 5: Deglaze and Build the Cream Sauce

Pour the chicken broth into the pan to deglaze it. Use your wooden spoon to scrape up all the golden browned bits stuck to the bottom of the skillet—this is pure concentrated flavor. Allow the broth to simmer for 2 minutes until it reduces by half.

Lower the heat to medium-low and pour in the heavy cream. Stir in the onion powder and the remaining ½ teaspoon of Italian seasoning. Bring the sauce to a gentle, steady simmer (do not let it come to a rolling boil) for 3 to 4 minutes until it begins to coat the back of a spoon.

Step 6: Melt the Parmesan & Combine

Turn the burner heat down to low. Gradually sprinkle in the freshly grated Parmesan cheese, whisking continuously until the cheese melts completely into a silky, cohesive sauce. Taste the sauce and adjust with additional salt or black pepper if desired.

Return the seared chicken cutlets (along with any rested juices accumulated on the plate) back into the skillet. Spoon the creamy sauce generously over the top of each piece. Simmer on low for 2 minutes so the chicken absorbs the sauce flavors. Remove from heat and sprinkle with fresh parsley before serving.

Culinary Secrets for Restaurant-Quality Success

  • Grate Block Cheese Yourself: Pre-packaged shredded Parmesan is coated in cellulose and anti-caking additives to prevent sticking in the bag. These agents prevent the cheese from melting smoothly, resulting in a grainy sauce. Buying a block of Parmigiano-Reggiano and grating it finely creates a velvety finish.
  • Control Your Heat: Boiling heavy cream at high temperatures can cause the dairy fat to separate from the liquid, making the sauce look oily. Always reduce the heat to low before whisking in dairy and cheese.
  • Slice Horizontally Instead of Pounding: Slicing chicken breasts into thin cutlets yields neat, flat surfaces that cook fast and uniformly without damaging the delicate meat fibers.

Delicious Recipe Variations

  • Tuscan Garlic Chicken: Stir in 1 cup of chopped fresh baby spinach and ⅓ cup of drained, sliced sun-dried tomatoes along with the heavy cream.
  • Garlic Parmesan Mushroom Chicken: saute 8 ounces of sliced cremini or button mushrooms in butter for 5 minutes before adding the garlic.
  • Keto / Low-Carb Option: Omit the flour dredge entirely. Season the chicken cutlets directly with salt, pepper, and Italian seasoning, then sear in oil and butter as directed.
  • Spicy Garlic Parmesan: Double the crushed red pepper flakes to 1/2 teaspoon and add 1 tablespoon of Calabrian chili paste into the sauteed garlic base.

Complete Serving & Pairing Suggestions

This rich main course pairs exceptionally well with a variety of side dishes:

  • Pasta Options: Serve over fettuccine, linguine, or penne pasta tossed directly in extra garlic cream sauce.
  • Low-Carb Bases: Serve over zucchini noodles (zoodles), cauliflower mash, or roasted spaghetti squash.
  • Classic Comfort Sides: Pair with roasted garlic mashed potatoes, buttered rice pilaf, or warm garlic bread.
  • Fresh Greens: Balance the rich cream sauce with a crisp Caesar salad, steamed broccoli florets, or roasted asparagus spears.

Storage, Meal Prep & Reheating Guidelines

  • Refrigerator Storage: Allow leftovers to cool completely at room temperature. Transfer to an airtight container and store in the refrigerator for up to 3 to 4 days.
  • Freezer Advice: Cream-based sauces do not always freeze well, as dairy can separate when thawed. If you choose to freeze this dish, store it in an airtight freezer bag for up to 2 months and thaw overnight in the fridge.
  • Reheating on the Stove (Best Method): Place leftover chicken and sauce in a skillet over low heat. Add 1 to 2 tablespoons of chicken broth or milk to splash moisture back into the sauce. Cover and heat gently for 5 to 7 minutes until warm.
  • Reheating in the Microwave: Microwave individual portions on 50% power in 45-second intervals, stirring the sauce between rounds to prevent it from splitting.

Estimated Nutritional Information

NutrientPer Serving (1 Cutlet + Sauce)
Calories485 kcal
Protein42 g
Carbohydrates10 g
Fat31 g
Saturated Fat17 g
Cholesterol165 mg
Sodium690 mg
Dietary Fiber0.5 g
Sugar2 g

(Note: Nutritional values are estimates calculated using standard ingredients and may vary based on exact brands used.)

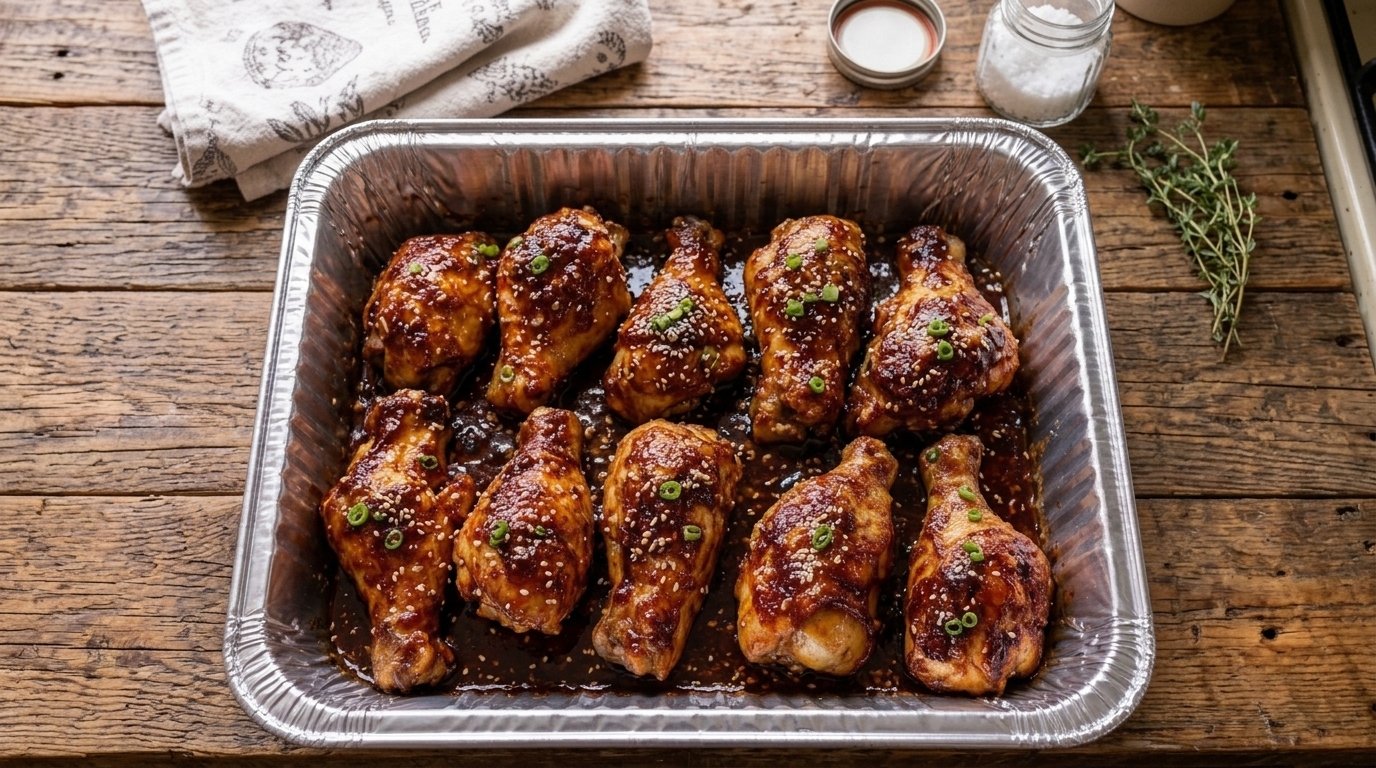
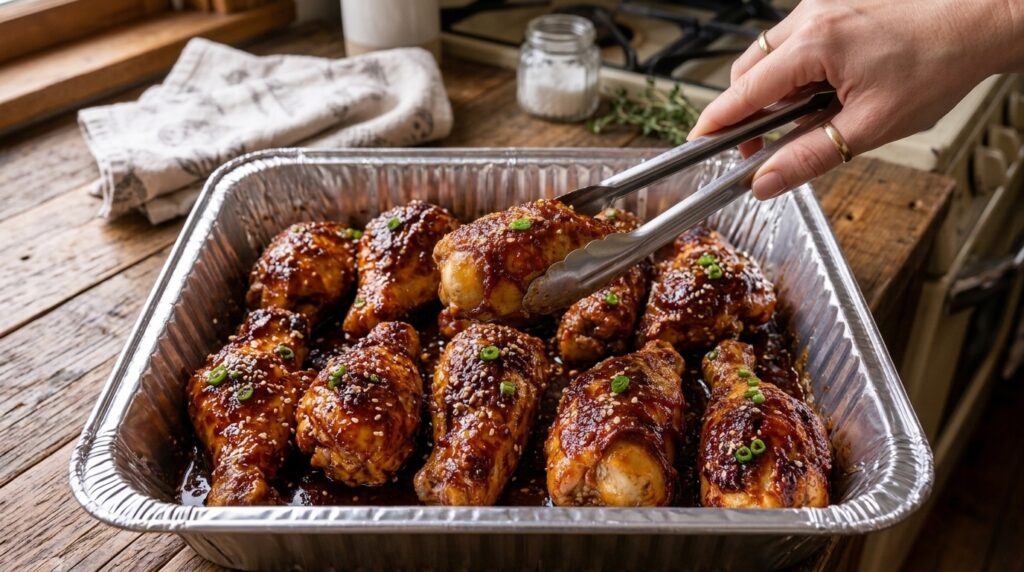
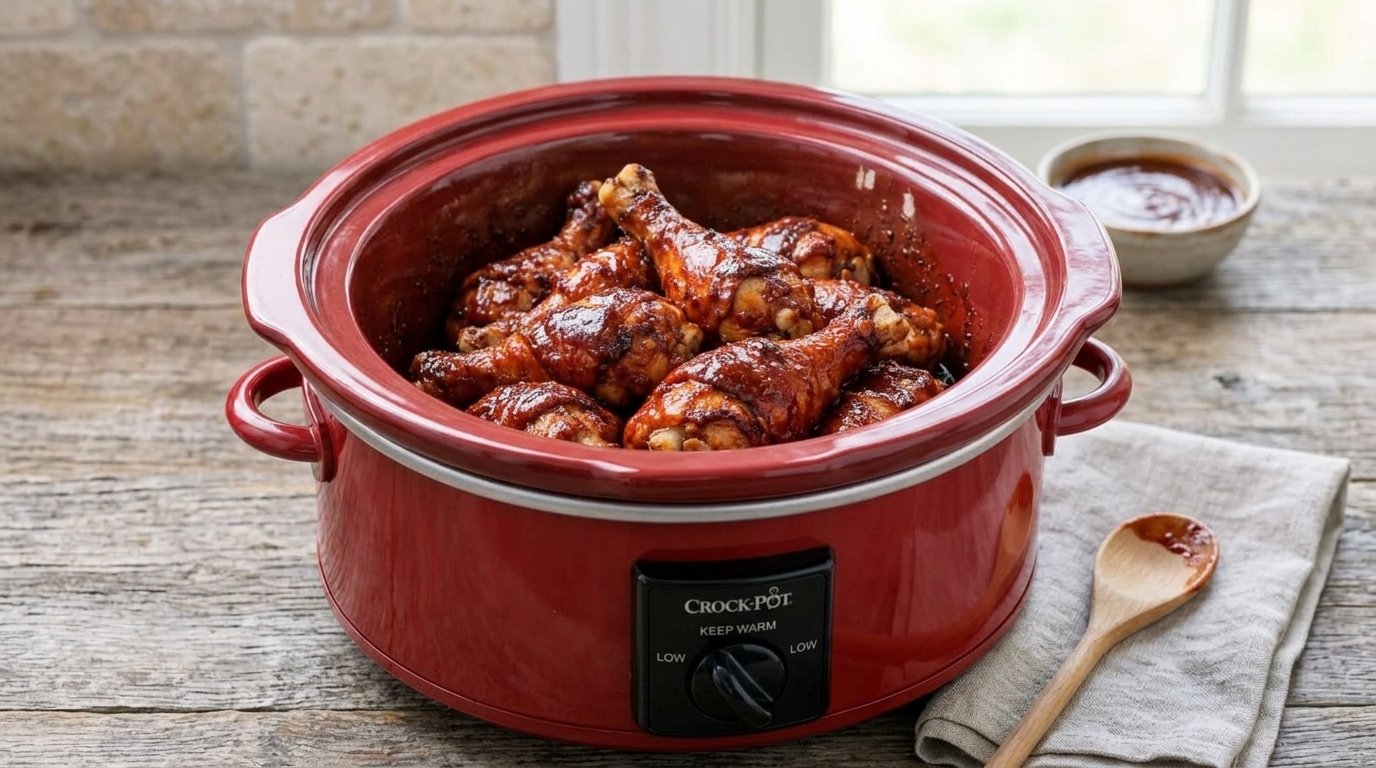
The Ultimate Slow Cooker Honey Barbecue Drumsticks

There is something undeniably satisfying about coming home to a house filled with the warm, smoky-sweet aroma of slow-cooked barbecue. These Slow Cooker Honey Barbecue Drumsticks represent the golden standard of effortless weeknight cooking: minimal hands-on preparation, inexpensive ingredients, and a final result that delivers fall-off-the-bone tender chicken coated in a thick, sticky, caramelized glaze.

Chicken drumsticks are naturally budget-friendly, juicy, and almost impossible to overcook in a slow cooker. By combining a sweet wildflower honey base with tangy barbecue sauce, umami-rich seasonings, and an essential finishing broil in the oven, this recipe transforms basic poultry into a crowd-pleasing feast suitable for busy weeknights, summer cookouts, or Sunday game days.

Quick Recipe FactsDetails
Prep Time10 minutes
Cook Time (Low)4 to 5 hours
Cook Time (High)2.5 to 3 hours
Finish Time (Broil)4 to 5 minutes
Servings5 to 6 (about 10–12 drumsticks)
CourseMain Dish

Why You Will Love This Recipe

  • Effortless Prep: You only need 10 minutes to prep the spice rub and sauce before letting the slow cooker handle the heavy lifting.
  • Fall-Off-The-Bone Tenderness: Dark meat drumsticks contain connective tissue that breaks down slowly over hours, turning tough meat into tender, succulent bites.
  • Perfect Balance of Flavors: Honey brings natural sweetness, apple cider vinegar adds sharp acidity, smoked paprika delivers grill flavor, and Worcestershire sauce provides deep umami.
  • Versatile Meal Prep Option: These drumsticks hold up exceptionally well in the fridge and reheat beautifully in an air fryer or oven.

The Secret to Crispy, Sticky Crockpot BBQ Chicken

The biggest complaint about slow cooker chicken recipes is that the skin ends up soft, rubbery, or boiled, and the sauce gets diluted by the meat’s natural juices. You can easily solve these issues using a two-step technique:

  1. Avoid Liquid in the Pot: Do not add water or broth to the slow cooker. The chicken will release plenty of moisture as it cooks.
  2. The Broiler Finish: Transfer cooked drumsticks to a baking sheet, brush generously with extra glaze, and broil under high heat for 3 to 5 minutes. This step caramelizes the honey, darkens the barbecue sauce, and gives the chicken an authentic off-the-grill texture.

Ingredients Breakdown

IngredientQuantityPurpose & Substitution Notes
Chicken Drumsticks3.5 to 4 lbsBone-in, skin-on drumsticks provide optimal flavor. Bone-in thighs also work well.
Barbecue Sauce1.5 cupsHickory or Kansas City-style BBQ sauce provides a solid smoky baseline.
Honey1/3 cupClover or wildflower honey adds stickiness and natural sweetness.
Apple Cider Vinegar2 tbspCuts through the heavy sweetness and tenderizes the meat.
Worcestershire Sauce1 tbspAdds savory depth and complexity to the sauce glaze.
Smoked Paprika1 tspProvides wood-smoked aroma and rich color without adding heat.
Garlic Powder1 tspInfuses savory garlic flavor evenly through the dry rub.
Onion Powder1 tspEnhances savory profile of the chicken coating.
Kosher Salt & Pepper1/2 tsp eachEssential seasoning base to draw out natural chicken juices.

Step-by-Step Cooking Instructions

Step 1: Prep and Dry-Rub the Chicken

Pat the drumsticks dry with paper towels. Excess surface moisture prevents spices from sticking properly. In a small dish, mix the garlic powder, onion powder, smoked paprika, kosher salt, and black pepper. Sprinkle the blend over the chicken drumsticks, rubbing it into the skin on all sides.

Step 2: Mix the Honey Barbecue Glaze

Whisk together the barbecue sauce, honey, apple cider vinegar, and Worcestershire sauce in a bowl until smooth. Reserve approximately 1/3 cup of this sauce mixture in a separate container in the refrigerator to use for the final broil.

Step 3: Layer and Slow Cook

Place the seasoned drumsticks inside the slow cooker insert, arranging them in a slightly staggered layer so heat circulates evenly. Pour the remaining honey barbecue sauce over the top, making sure every drumstick is thoroughly coated. Cover with the lid and set your slow cooker to:

  • LOW: 4 to 5 hours (recommended for maximum tenderness)
  • HIGH: 2.5 to 3 hours

Check internal temperature near the bone using a meat thermometer—it should read at least 165°F, though drumsticks are best around 175°F to 185°F when collagen fully melts.

Step 4: Broil for Sticky Caramelization

Preheat your oven broiler to HIGH and line a large baking sheet with aluminum foil. Carefully remove the drumsticks from the slow cooker using tongs and place them on the baking sheet in a single layer.

Brush the drumsticks generously with the reserved honey barbecue sauce you set aside earlier. Broil 6 inches below the heat element for 3 to 5 minutes, watching closely until the glaze turns bubbly, sticky, and slightly charred at the edges.

Step 5: Thicken and Serve

If you want extra dipping sauce, pour the remaining cooking juices from the slow cooker into a small saucepan. Bring to a simmer over medium heat, stir in a cornstarch slurry (1 tbsp cornstarch mixed with 1 tbsp cold water), and cook for 3 minutes until thick and glossy. Drizzle over drumsticks before serving.

Flavor Customizations & Recipe Variations

  • Spicy Honey BBQ: Add 1 tablespoon of Sriracha, 1 teaspoon of hot sauce, or 1/2 teaspoon of cayenne pepper to the glaze for a spicy kick.
  • Garlic Butter Glaze: Stir 2 tablespoons of melted unsalted butter and 3 minced garlic cloves into the barbecue glaze during the final broiling step.
  • Bourbon Barbecue: Add 2 tablespoons of smooth bourbon whiskey to the sauce mix for a complex, oaky undertone.
  • Low-Carb / Keto Friendly: Use a sugar-free barbecue sauce (such as G. Hughes) and swap the honey with a sugar-free keto honey substitute.

Serving Ideas

Complement the sweet and smoky flavors of these drumsticks with classic side dishes:

  • Starches: Garlic mashed potatoes, loaded baked potatoes, macaroni and cheese, or warm buttered cornbread.
  • Vegetables: Creamy southern coleslaw, grilled corn on the cob, steamed green beans, or a crisp garden salad with ranch dressing.

Storage, Freezing, and Reheating

  • Refrigerator Storage: Store leftovers in an airtight container for up to 4 days.
  • Freezer Storage: Allow drumsticks to cool completely, wrap tightly in foil, and place in a freezer bag for up to 3 months. Thaw overnight in the refrigerator before reheating.
  • Reheating in the Air Fryer: Place drumsticks in an air fryer basket at 375°F for 4 to 5 minutes until crispy and heated through.
  • Reheating in the Oven: Bake on a foil-lined tray at 350°F for 10 to 12 minutes, brushing with extra BBQ sauce if desired.

Estimated Nutrition Facts

NutrientAmount Per Serving (2 Drumsticks)
Calories380 kcal
Protein28 g
Carbohydrates26 g
Fat18 g
Saturated Fat5 g
Sodium680 mg
Sugar22 g

(Note: Nutritional values are estimates based on standard ingredients and may vary based on the specific barbecue sauce brand used.)

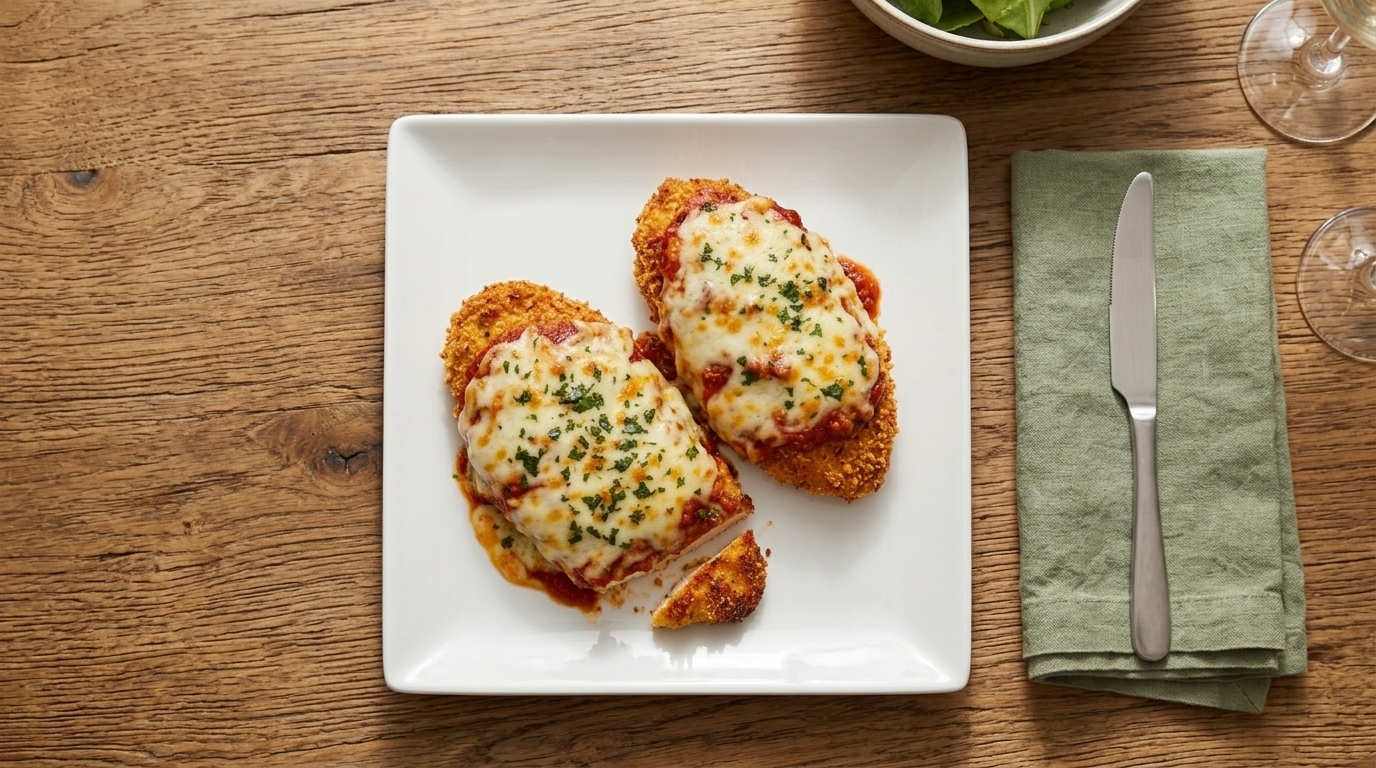
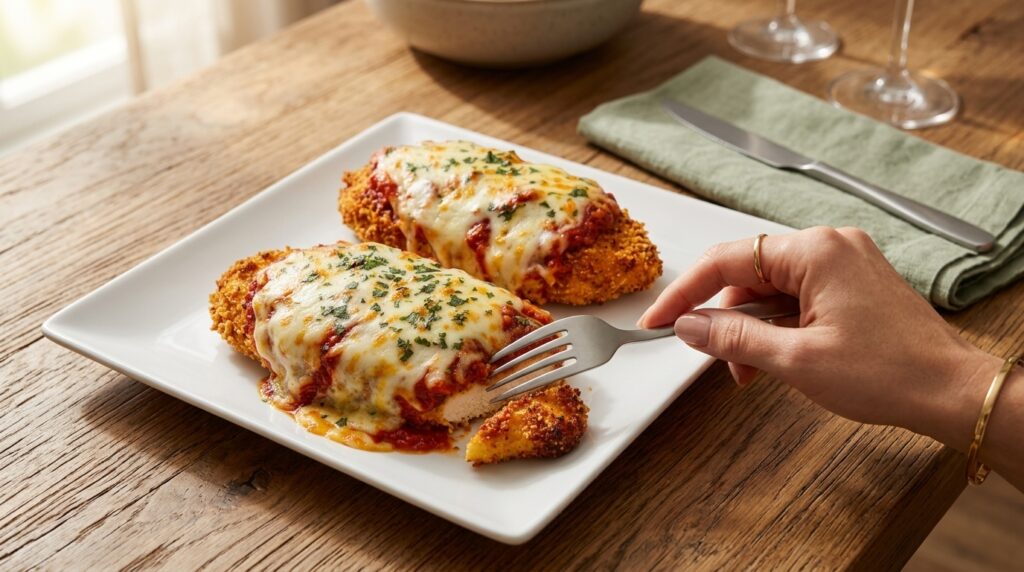
Chicken Parmesan

Chicken Parmesan is a classic Italian-American comfort dish featuring crispy breaded chicken breasts topped with rich marinara sauce, melted mozzarella, and Parmesan cheese. Baked until bubbly and golden, this hearty meal combines crunchy texture, savory sauce, and gooey cheese for a restaurant-style dinner that is easy to make at home and perfect for family meals or special occasions.

Why You’ll Love It

  • Crispy breaded chicken topped with rich marinara and melted cheese
  • Classic comfort-food flavor that feels both hearty and satisfying
  • Perfect for serving with pasta, salad, or garlic bread
  • Easy enough for a weeknight and impressive enough for guests

Ingredients Overview

Chicken

  • 2 large boneless, skinless chicken breasts
  • 1 tsp salt
  • ½ tsp black pepper
  • 1 tsp garlic powder
  • 1 tsp Italian seasoning

Breading

  • 1 cup all-purpose flour
  • 2 large eggs
  • 2 tbsp milk
  • 1½ cups Italian-style breadcrumbs
  • ½ cup grated Parmesan cheese
  • ½ tsp paprika
  • ½ tsp garlic powder

Sauce and Cheese

  • 1½ cups marinara sauce
  • 1½ cups shredded mozzarella cheese
  • ¼ cup grated Parmesan cheese

For Cooking

  • 3 tbsp olive oil
  • 2 tbsp chopped fresh parsley or dried parsley, for garnish

Step-by-Step Instructions

1. Prepare the Chicken

Preheat the oven to 400°F (200°C).

Slice each chicken breast in half horizontally to create thinner cutlets, or pound them to an even thickness.

Season both sides with salt, black pepper, garlic powder, and Italian seasoning.

2. Set Up the Breading Station

Place the flour in one shallow bowl.

In a second bowl, whisk together the eggs and milk.

In a third bowl, combine the breadcrumbs, Parmesan cheese, paprika, and garlic powder.

3. Bread the Chicken

Dredge each chicken piece first in the flour, coating both sides and shaking off the excess.

Dip it into the egg mixture.

Then press it into the breadcrumb mixture until fully coated.

Repeat with all chicken pieces.

4. Pan-Fry the Chicken

Heat the olive oil in a large skillet over medium heat.

Cook the breaded chicken for 3–4 minutes per side, until golden brown and crispy. You do not need to cook it completely through at this stage.

Transfer the browned chicken to a baking dish or baking sheet.

5. Add Sauce and Cheese

Spoon marinara sauce over each piece of chicken.

Top each one with shredded mozzarella and a sprinkle of Parmesan cheese.

6. Bake

Bake for 15–20 minutes, or until the chicken is fully cooked and reaches an internal temperature of 165°F (74°C).

For a golden cheesy top, broil for 1–2 minutes at the end if desired.

7. Serve

Remove from the oven and let the chicken rest for 2–3 minutes.

Sprinkle with chopped parsley before serving.

Serve hot with extra marinara sauce if desired.

Cooking Tips

  • Pound the chicken evenly so it cooks at the same rate.
  • Do not overcrowd the skillet when frying, or the breading may not crisp properly.
  • Use freshly grated Parmesan for the best flavor.
  • A quick broil at the end gives the cheese a beautiful bubbly golden finish.
  • Serve immediately for the crispiest texture.

Serving Suggestions

Serve this chicken parmesan with:

  • Spaghetti or fettuccine
  • Garlic bread
  • Caesar salad
  • Roasted vegetables
  • Mashed potatoes or buttered noodles

Storage

Store leftovers in an airtight container in the refrigerator for up to 3 days.

Reheat in the oven at 350°F (175°C) until warmed through so the breading stays as crisp as possible.

Leftover Ideas

  • Slice it and use it in a sandwich with extra marinara and mozzarella.
  • Serve leftovers over pasta for an easy next-day dinner.
  • Chop it up and add it to a baked pasta casserole.

FAQs

Can I use chicken thighs instead of chicken breasts?
Yes. Boneless, skinless chicken thighs can be used, though the cooking time may vary slightly.

Can I bake the breaded chicken instead of frying it?
Yes. Bake the breaded chicken at 425°F (220°C) for about 20 minutes, flipping once, then add the sauce and cheese and bake again until done.

What is the best cheese for chicken parmesan?
Mozzarella is the classic choice for meltiness, while Parmesan adds extra savory flavor.

Can I make it ahead of time?
Yes. You can bread and fry the chicken ahead, then add the sauce and cheese and bake when ready to serve.

Final Thoughts

Chicken Parmesan is a timeless comfort-food favorite that combines crispy breaded chicken, tangy marinara sauce, and melted cheese in every delicious bite. It is easy to make, incredibly satisfying, and perfect for everything from cozy family dinners to special homemade meals that feel just a little more special.

#ChickenParmesan #ItalianDinner #ComfortFood #EasyDinner #ChickenRecipes

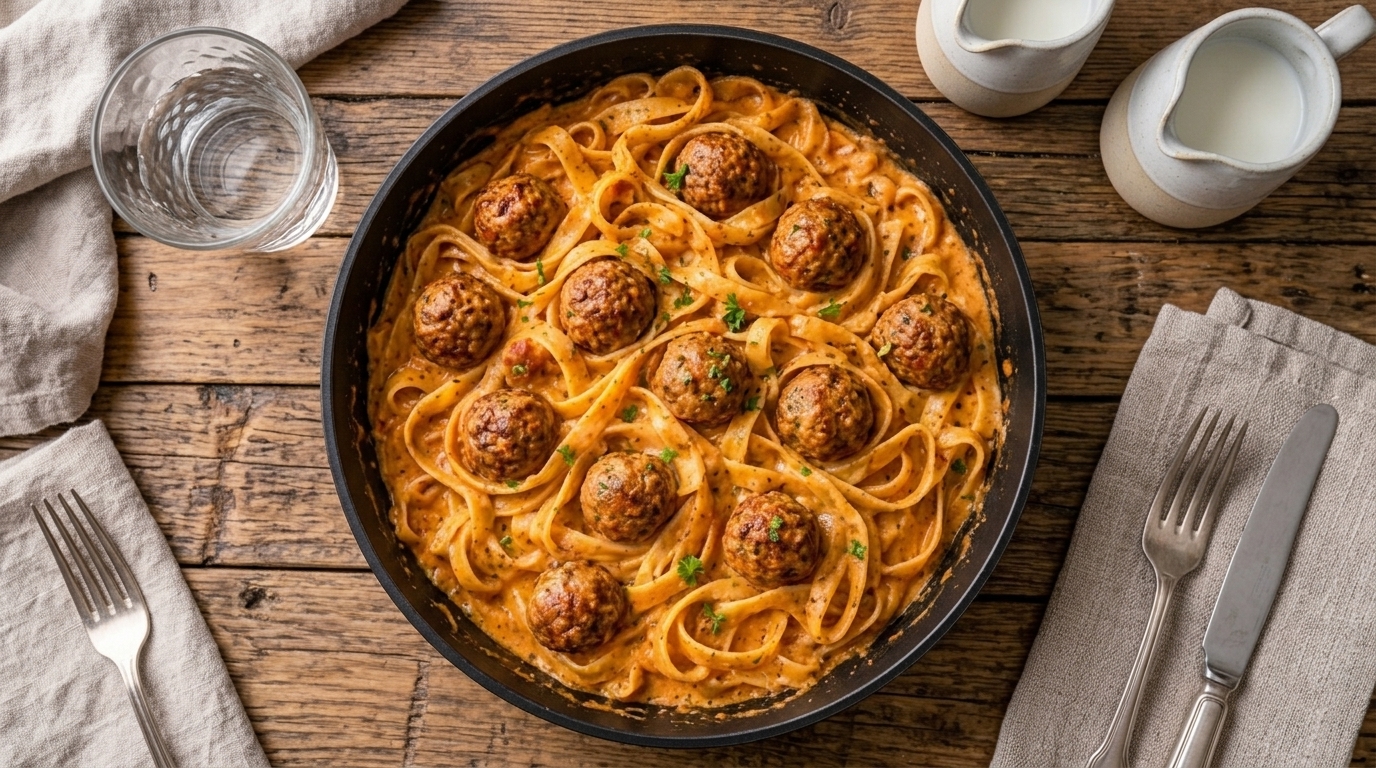
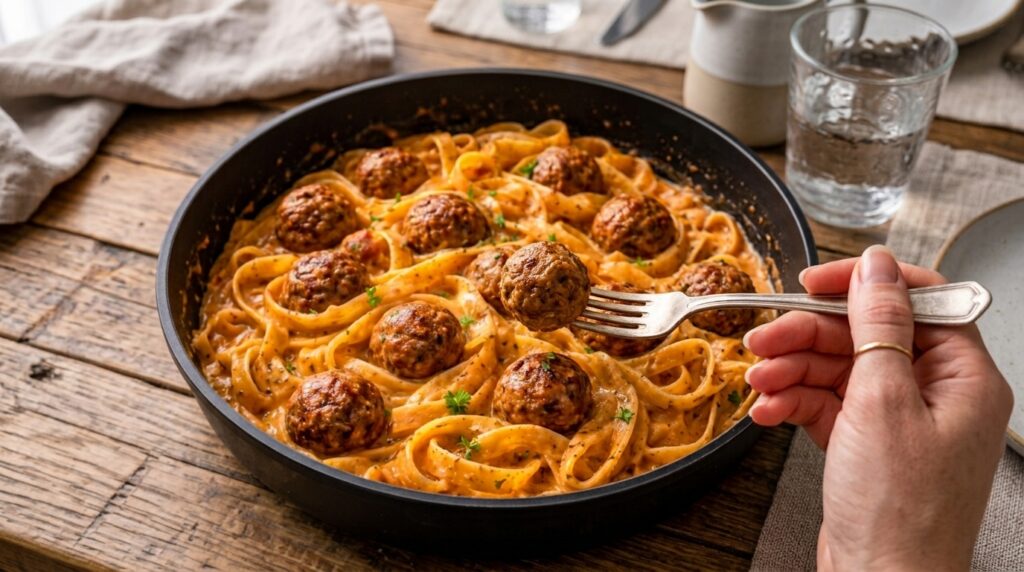
Creamy Pasta and Meatballs

This Creamy Pasta and Meatballs is a rich, comforting dinner made with juicy homemade meatballs served over tender pasta in a silky, savory cream sauce. The combination of perfectly seasoned beef meatballs, creamy Parmesan sauce, and hearty pasta creates a family-friendly meal that feels cozy, satisfying, and perfect for any night of the week.

Why You’ll Love It

  • Tender, flavorful meatballs paired with a rich and creamy pasta sauce
  • A comforting one-pan-style dinner that feels hearty and satisfying
  • Perfect for family dinners, meal prep, or cozy weekend meals
  • Easy to customize with your favorite pasta, herbs, or vegetables

Ingredients Overview

Meatballs

  • 1 lb ground beef
  • ½ cup breadcrumbs
  • 1 large egg
  • ¼ cup grated Parmesan cheese
  • 2 garlic cloves, minced
  • 2 tbsp fresh parsley, chopped
  • 1 tsp Italian seasoning
  • ½ tsp onion powder
  • ½ tsp salt
  • ¼ tsp black pepper
  • 1 tbsp olive oil, for cooking

Pasta

  • 12 oz fettuccine or linguine
  • Salt, for the pasta water
  • ½ cup reserved pasta water

Creamy Sauce

  • 2 tbsp butter
  • 3 garlic cloves, minced
  • 1 small onion, finely chopped
  • 1½ cups heavy cream
  • 1 cup beef or chicken broth
  • ¾ cup grated Parmesan cheese
  • 1 tbsp tomato paste
  • 1 tsp Italian seasoning
  • ½ tsp paprika
  • ½ tsp salt
  • ¼ tsp black pepper
  • ¼ tsp crushed red pepper flakes (optional)

Garnish

  • Fresh parsley, chopped
  • Extra Parmesan cheese
  • Freshly cracked black pepper

Step-by-Step Instructions

1. Prepare the Meatball Mixture

In a large bowl, combine the ground beef, breadcrumbs, egg, Parmesan cheese, minced garlic, parsley, Italian seasoning, onion powder, salt, and black pepper.

Mix gently until everything is just combined. Avoid overmixing so the meatballs stay tender.

Shape the mixture into about 16–18 small meatballs.

2. Cook the Pasta

Bring a large pot of salted water to a boil.

Cook the pasta until al dente according to package directions.

Before draining, reserve about ½ cup of pasta water. Drain the pasta and set it aside.

3. Brown the Meatballs

Heat the olive oil in a large skillet over medium heat.

Add the meatballs in a single layer and cook for 8–10 minutes, turning occasionally, until browned on all sides and cooked through.

Transfer the cooked meatballs to a plate and set aside.

4. Make the Creamy Sauce

In the same skillet, melt the butter over medium heat.

Add the chopped onion and cook for 2–3 minutes until softened.

Stir in the garlic and cook for another 30 seconds until fragrant.

Add the tomato paste, Italian seasoning, paprika, salt, black pepper, and crushed red pepper flakes if using.

Stir well, then pour in the broth and heavy cream.

Let the sauce simmer gently for 3–4 minutes.

5. Add the Parmesan

Stir in the grated Parmesan cheese and mix until melted and smooth.

If the sauce seems too thick, add a little reserved pasta water until it reaches a silky consistency.

6. Combine the Pasta and Meatballs

Add the drained pasta to the skillet and toss gently to coat it in the creamy sauce.

Return the meatballs to the pan and spoon some sauce over them.

Let everything simmer together for 2–3 minutes so the flavors blend well.

7. Serve

Remove from the heat and sprinkle with fresh parsley, extra Parmesan, and freshly cracked black pepper.

Serve immediately while the sauce is hot and creamy.

Cooking Tips

  • Use freshly grated Parmesan for the smoothest and creamiest sauce.
  • Do not overmix the meatball mixture or the meatballs may become dense.
  • Brown the meatballs well for deeper flavor before adding them back to the sauce.
  • Reserve pasta water to help loosen the sauce if needed.
  • Keep the sauce at a gentle simmer so the cream does not separate.

Serving Suggestions

Serve this creamy pasta and meatballs with:

  • Garlic bread
  • Caesar salad
  • Roasted broccoli
  • Green beans
  • A side of sautéed mushrooms

Storage

Store leftovers in an airtight container in the refrigerator for up to 3 days.

Reheat gently in a skillet over low heat or in the microwave with a splash of cream, milk, or broth to loosen the sauce.

Leftover Ideas

  • Turn leftovers into a baked pasta dish with extra mozzarella on top.
  • Slice the meatballs and serve them in toasted sandwich rolls with extra sauce.
  • Add spinach or peas while reheating for an easy variation.

FAQs

Can I use frozen meatballs?
Yes. Cook them according to package directions, then add them to the creamy sauce before serving.

What pasta works best for this recipe?
Fettuccine, linguine, spaghetti, tagliatelle, or penne all work very well.

Can I use ground turkey instead of beef?
Yes. Ground turkey or chicken can be used for a lighter version.

Can I make the sauce lighter?
Yes. You can replace part of the heavy cream with half-and-half or milk, though the sauce will be less rich.

Final Thoughts

Creamy Pasta and Meatballs is the perfect comfort-food dinner when you want something rich, hearty, and family-friendly. With juicy homemade meatballs, tender pasta, and a velvety Parmesan cream sauce, this recipe is both easy enough for a weeknight and delicious enough to become a repeat favorite.

#CreamyPasta #Meatballs #PastaDinner #ComfortFood #EasyDinner

Easy Smoky Lamb Chops with Dark Rum Recipe – Tender, Caramelized, and Boldly Flavored

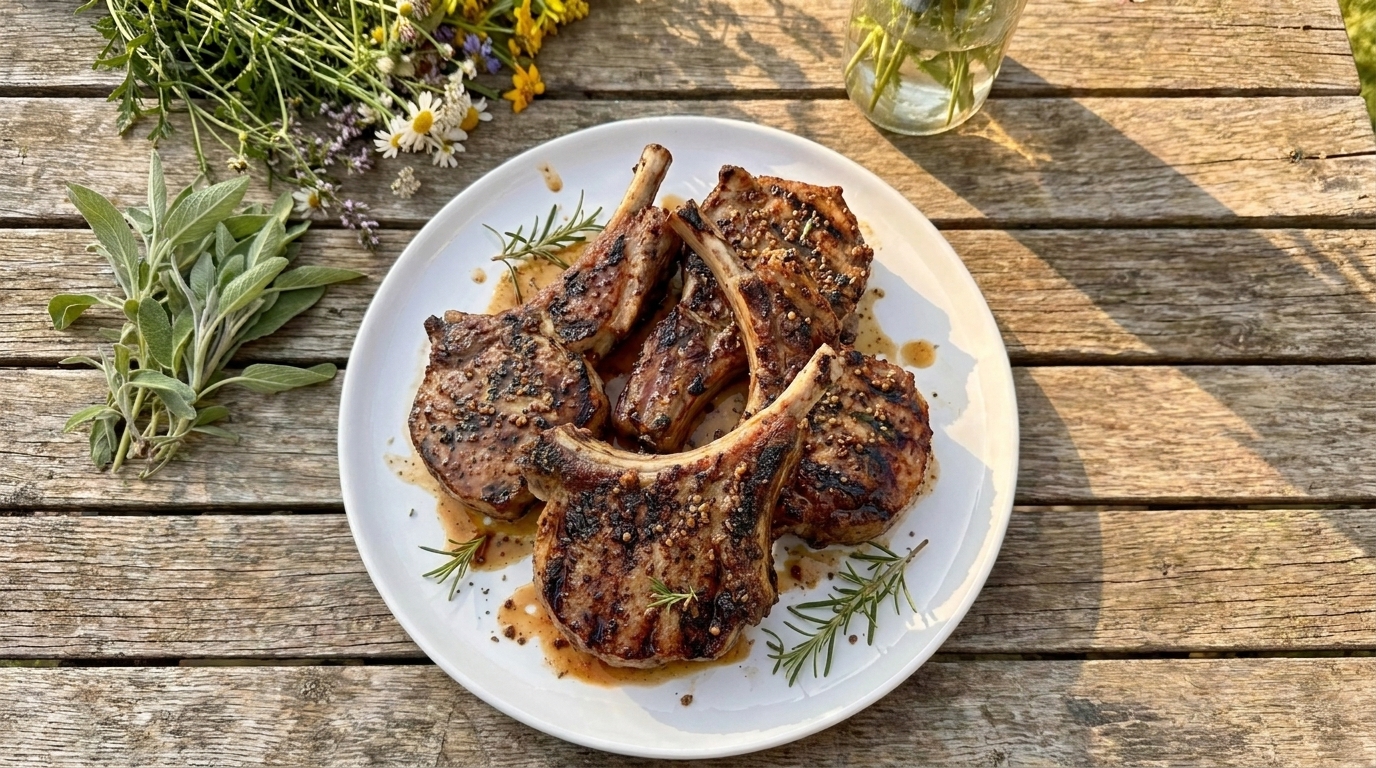
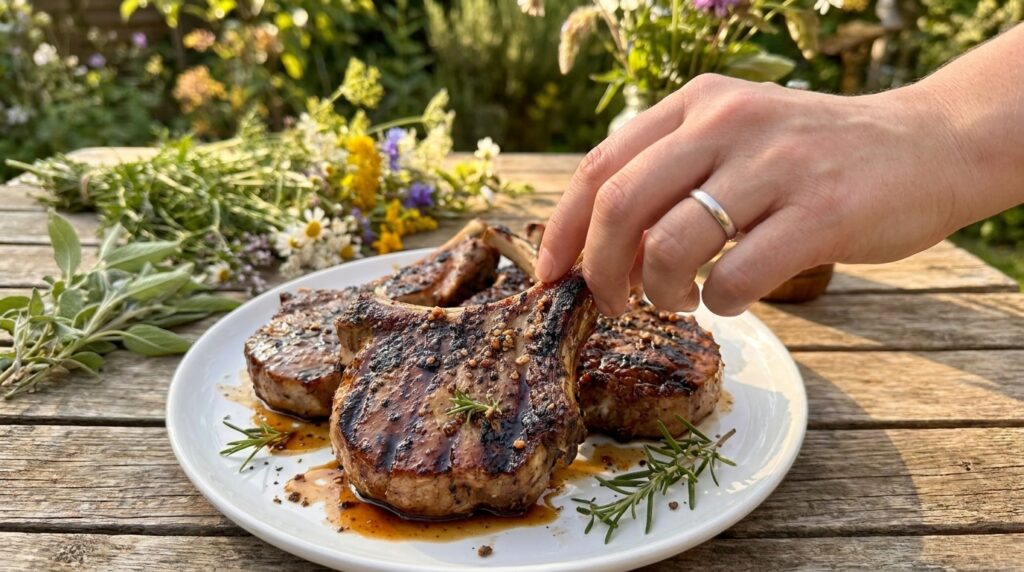
If you are looking for a rich, impressive lamb dinner with smoky spices, garlic, herbs, and a slightly sweet dark rum glaze, these Smoky Lamb Chops with Dark Rum are an excellent recipe to make. The lamb chops are seasoned with smoked paprika, cumin, garlic, rosemary, and black pepper, seared until deeply browned, then finished with a glossy dark rum butter sauce.

The dark rum adds warm caramel and molasses-like notes that pair especially well with the richness of lamb. A little brown sugar, Dijon mustard, Worcestershire sauce, and citrus balance the sauce so it tastes savory rather than overly sweet.

This recipe is perfect for date nights, dinner parties, holiday meals, or weekends when you want something that feels restaurant-style without requiring complicated preparation.

Why You’ll Love These Smoky Lamb Chops with Dark Rum

Lamb chops cook quickly, making this an impressive dinner that can still be prepared without spending hours in the kitchen.

Smoked paprika and cumin create a warm, savory crust that complements the natural richness of the lamb.

The dark rum sauce develops a deep caramelized flavor when combined with butter, garlic, Dijon, and brown sugar.

Fresh rosemary and thyme add an aromatic finish, while lime or lemon juice keeps the sauce balanced.

The recipe can be prepared in a grill pan, cast-iron skillet, or outdoor grill.

Ingredients

For the Lamb Chops

  • 8 lamb rib or loin chops, about 1–1½ inches thick
  • 2 tablespoons olive oil
  • 1½ teaspoons kosher salt
  • 1 teaspoon freshly ground black pepper
  • 1½ teaspoons smoked paprika
  • 1 teaspoon garlic powder
  • ½ teaspoon onion powder
  • ½ teaspoon ground cumin
  • ½ teaspoon dried thyme
  • ½ teaspoon dried rosemary
  • ¼ teaspoon cayenne pepper, optional

For the Dark Rum Glaze

  • ⅓ cup dark rum
  • 3 tablespoons unsalted butter
  • 3 garlic cloves, finely minced
  • 2 tablespoons low-sodium beef broth
  • 1½ tablespoons brown sugar
  • 1 tablespoon Worcestershire sauce
  • 1 tablespoon Dijon mustard
  • 1 tablespoon fresh lime or lemon juice
  • 1 teaspoon fresh rosemary, finely chopped
  • ½ teaspoon fresh thyme leaves
  • ¼ teaspoon smoked paprika
  • Freshly ground black pepper, to taste

For Garnishing

  • Fresh rosemary
  • Fresh thyme
  • Chopped parsley
  • Lime or lemon wedges
  • Flaky salt, optional

How to Make Smoky Lamb Chops with Dark Rum

1. Prepare the Lamb

Remove the lamb chops from their packaging and pat them thoroughly dry with paper towels.

Drying the surface helps the chops develop a better browned crust.

2. Season the Chops

In a small bowl, combine the salt, black pepper, smoked paprika, garlic powder, onion powder, cumin, thyme, rosemary, and cayenne if using.

Brush the lamb lightly with olive oil.

Rub the seasoning mixture over both sides of every chop.

3. Let the Seasoning Set

Allow the seasoned lamb to sit while you prepare the remaining ingredients.

Even 15–20 minutes helps the seasoning adhere well.

4. Heat the Skillet

Place a heavy cast-iron skillet over medium-high to high heat.

Allow it to become very hot.

Add a small amount of olive oil if needed.

5. Sear the First Side

Arrange the lamb chops in the skillet without overcrowding.

Sear for approximately 3–4 minutes on the first side.

Avoid moving them too frequently so a dark crust can develop.

6. Flip the Lamb

Turn the chops with tongs.

Cook for approximately 2–4 minutes on the second side, depending on thickness and desired doneness.

7. Sear the Fat Edge

If your lamb chops have a thick exterior fat cap, hold them upright with tongs.

Sear the fat for approximately 30–60 seconds.

8. Check the Temperature

Use an instant-read thermometer inserted into the thickest part without touching bone.

For whole cuts of lamb, 145°F (63°C) followed by at least a 3-minute rest is the food-safe minimum.

If you prefer more doneness, continue cooking until the chops reach your desired temperature.

9. Remove the Lamb

Transfer the chops to a clean plate.

Cover loosely while you prepare the sauce.

10. Lower the Heat

Reduce the skillet heat to medium-low.

If there is excessive fat in the pan, carefully remove some while leaving the browned bits behind.

11. Add the Butter

Add the butter to the skillet.

Allow it to melt.

12. Cook the Garlic

Stir in the minced garlic.

Cook for approximately 30 seconds, until fragrant.

Do not let it burn.

13. Deglaze with Rum

Remove the skillet briefly from direct heat before adding the dark rum.

Pour in the rum carefully.

Return the skillet to medium heat.

Scrape up the browned bits from the bottom with a wooden spoon.

14. Reduce the Rum

Allow the rum to simmer for approximately 2–3 minutes.

The sharp alcohol aroma should mellow as the liquid reduces.

Do not ignite the rum.

15. Build the Glaze

Add the beef broth, brown sugar, Worcestershire sauce, Dijon mustard, lime or lemon juice, rosemary, thyme, smoked paprika, and black pepper.

Whisk until combined.

16. Simmer the Sauce

Cook for approximately 3–5 minutes, stirring occasionally.

The sauce should reduce into a glossy consistency that lightly coats the back of a spoon.

17. Taste the Sauce

Taste carefully.

If the sauce is too sweet, add another squeeze of citrus.

If you want a richer flavor, whisk in another teaspoon of butter.

18. Return the Lamb

Place the lamb chops back into the skillet.

Spoon the dark rum glaze over the meat.

19. Glaze Briefly

Cook for approximately 30–60 seconds per side, just long enough to coat the chops and rewarm them.

Avoid cooking much longer or the lamb may become overdone.

20. Rest

Transfer the glazed chops to a serving platter.

Let them rest for at least 3 minutes.

21. Spoon Over the Sauce

Drizzle any remaining dark rum glaze from the skillet over the chops.

22. Garnish

Finish with fresh rosemary, thyme, parsley, cracked black pepper, and a small pinch of flaky salt if desired.

Serve with fresh lemon or lime wedges.

What to Serve With Smoky Lamb Chops

These lamb chops pair especially well with rich and savory sides such as:

  • Garlic mashed potatoes
  • Parmesan roasted potatoes
  • Crispy baby potatoes
  • Creamy polenta
  • Buttered couscous
  • Herbed rice
  • Roasted sweet potatoes
  • Grilled asparagus
  • Green beans
  • Roasted carrots
  • Brussels sprouts

For something lighter, serve with an arugula salad, cucumber tomato salad, or Mediterranean-style chopped salad.

Tips for the Best Smoky Lamb Chops

Choose chops of similar thickness.

Pat the lamb thoroughly dry.

Use a very hot skillet for the initial sear.

Do not overcrowd the pan.

Turn the chops with tongs instead of piercing them with a fork.

Measure doneness with an instant-read thermometer.

Add the rum away from an open flame.

Allow the rum sauce to reduce before returning the lamb.

Do not simmer the cooked chops in the sauce for too long.

Rest the meat before serving.

Easy Recipe Variations

Spicy Rum Lamb Chops

Increase the cayenne and add red pepper flakes to the glaze.

Honey Rum Lamb Chops

Replace the brown sugar with 2 tablespoons honey for a floral sweetness.

Garlic Herb Lamb Chops

Skip the brown sugar and increase the garlic, rosemary, and thyme.

Rum Peppercorn Lamb Chops

Add 1 teaspoon coarsely cracked black peppercorns to the sauce.

Maple Rum Lamb Chops

Replace the brown sugar with maple syrup.

Jamaican-Inspired Rum Lamb Chops

Add allspice, thyme, cayenne, ginger, and a small amount of cinnamon to the seasoning.

Grilled Rum Lamb Chops

Grill the chops over high heat, then prepare the glaze separately in a small saucepan and brush it over the cooked lamb.

Alcohol-Free Version

Replace the dark rum with ¼ cup beef broth plus 1 tablespoon molasses and 1 teaspoon lime juice for a similar sweet, deep flavor profile without alcohol.

How to Store Leftovers

Allow the lamb chops to cool before transferring them to an airtight container.

Refrigerate for up to 3–4 days.

Store extra glaze separately if possible.

To reheat, place the chops in a covered skillet over low heat with a spoonful of broth or sauce.

Warm gently rather than cooking aggressively, which can make the lamb tough.

You can also reheat them in a 300°F (150°C) oven until warmed through.

For freezing, wrap the cooked chops tightly and freeze for up to approximately 2 months.

Thaw overnight in the refrigerator before reheating.

Frequently Asked Questions

What kind of lamb chops should I use?

Rib chops and loin chops both work well. Rib chops are especially elegant, while loin chops tend to be slightly meatier.

What dark rum works best?

Use a regular dark rum with caramel or molasses-style notes. There is no need to use an expensive bottle for cooking.

Does all the alcohol cook out?

Not necessarily. Cooking reduces the alcohol considerably, but it should not be assumed that every trace is removed.

Can I make this without alcohol?

Yes.

Use beef broth, molasses, and citrus as described in the alcohol-free variation.

Should I flambé the rum?

No.

Flambéing is unnecessary for this recipe. Simply simmering the rum safely in the sauce gives plenty of flavor.

Can I grill the lamb instead?

Absolutely.

Grill the lamb over high heat and prepare the sauce separately.

How do I prevent lamb chops from becoming tough?

Avoid overcooking them and let them rest after cooking.

Can I make the glaze ahead?

Yes.

Prepare the glaze ahead, refrigerate it, and gently reheat before serving.

Final Thoughts

These Smoky Lamb Chops with Dark Rum combine tender lamb, smoky paprika, garlic, rosemary, thyme, dark rum, Dijon, and a buttery caramelized glaze for a bold restaurant-style dinner.

The key is developing a deep crust over high heat, reducing the dark rum sauce until glossy, and returning the chops to the pan only briefly so they stay tender.

Serve them with roasted potatoes, creamy mashed potatoes, vegetables, or herbed rice for an elegant dinner with smoky, buttery, sweet-savory flavor.

Crispy Garlic Butter Chicken Thighs with Golden Herb Pan Sauce

Introduction

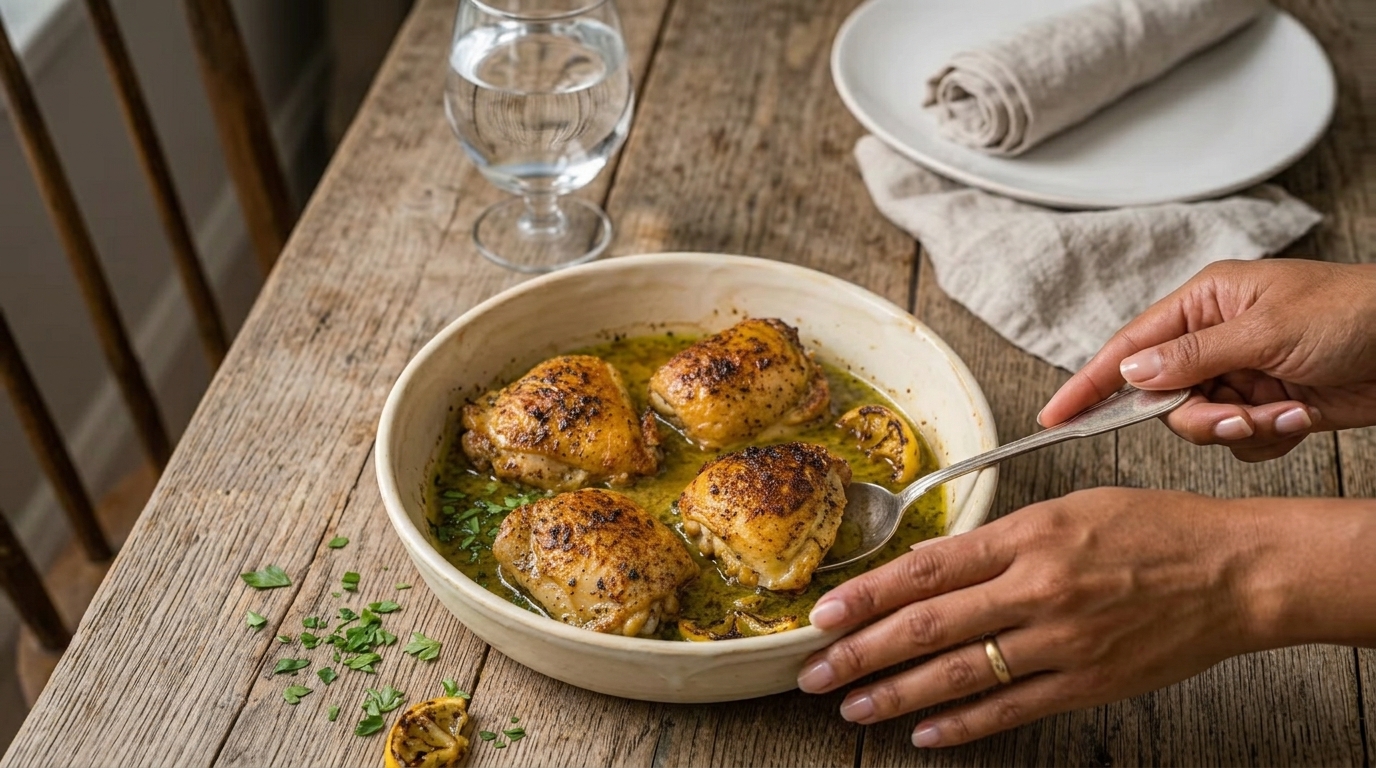
Crispy Garlic Butter Chicken Thighs are the perfect example of how simple ingredients can create an incredibly flavorful homemade meal. This dish features juicy, tender chicken thighs cooked until the skin becomes beautifully golden and crisp, while the meat stays moist and packed with savory flavor.

The image showcases perfectly seared chicken thighs with a deep golden-brown crust, surrounded by a pool of rich buttery juices. The crispy skin has a beautifully caramelized texture, while the garlic-infused butter sauce underneath adds incredible richness and aroma. The natural chicken juices blend with herbs and seasonings to create a simple yet luxurious pan sauce.

This recipe is ideal for busy weeknight dinners, family meals, or special occasions when you want something impressive without spending hours in the kitchen. With a crispy exterior, juicy center, and flavorful garlic butter finish, this chicken dish is guaranteed to become a regular favorite.


Why You’ll Love This Recipe

These garlic butter chicken thighs are everything you want in a comforting dinner: crispy, juicy, flavorful, and easy to prepare.

You’ll love this recipe because it is:

  • Crispy on the outside and tender inside
  • Made with simple pantry ingredients
  • Ready in under an hour
  • Naturally rich in flavor
  • Perfect with many side dishes
  • Great for meal prep

The secret is using bone-in chicken thighs with the skin on. The fat under the skin slowly renders during cooking, creating a crispy golden surface while keeping the meat incredibly juicy.


Ingredients

For the Chicken

  • 6 bone-in, skin-on chicken thighs
  • 2 tablespoons olive oil
  • 3 tablespoons unsalted butter
  • 5 cloves garlic, minced
  • 1½ teaspoons kosher salt
  • 1 teaspoon black pepper
  • 1 teaspoon smoked paprika
  • 1 teaspoon garlic powder
  • 1 teaspoon onion powder
  • 1 teaspoon dried thyme
  • ½ teaspoon dried rosemary
  • 1 tablespoon fresh parsley, chopped

For the Garlic Butter Pan Sauce

  • 3 tablespoons chicken broth
  • 1 tablespoon lemon juice
  • 1 tablespoon butter
  • 2 cloves garlic, minced
  • 1 teaspoon fresh thyme
  • 1 tablespoon chopped parsley

Step-by-Step Instructions

1. Prepare the Chicken

Remove the chicken thighs from the refrigerator about 20–30 minutes before cooking.

Pat the chicken completely dry using paper towels. This step is important because moisture prevents the skin from becoming crispy.

Season both sides of the chicken thighs with salt, black pepper, smoked paprika, garlic powder, onion powder, thyme, and rosemary.

Make sure the seasoning is rubbed evenly into the skin.


2. Sear the Chicken Skin

Heat a large cast-iron skillet or oven-safe pan over medium-high heat.

Add olive oil and place the chicken thighs skin-side down.

Cook without moving them for 6–8 minutes until the skin becomes deeply golden brown and crispy.

This step creates the beautiful crust and locks in flavor.


3. Add Garlic Butter Flavor

Flip the chicken thighs carefully.

Reduce the heat to medium.

Add butter and minced garlic around the chicken.

Allow the garlic to cook gently in the melted butter for about 30 seconds until fragrant.

Spoon the garlic butter over the chicken to coat the surface with rich flavor.


4. Finish Cooking the Chicken

Transfer the skillet to a preheated oven at 400°F (200°C).

Bake for approximately 20–25 minutes until the chicken reaches an internal temperature of 165°F (74°C).

The skin should remain golden and crisp while the inside stays juicy.


5. Make the Pan Sauce

Remove the chicken from the skillet and place it on a plate to rest.

Place the skillet back over medium heat.

Add chicken broth and scrape the bottom of the pan to release the flavorful browned bits.

Add lemon juice, butter, garlic, and fresh herbs.

Simmer for 2–3 minutes until the sauce becomes slightly reduced and glossy.


6. Serve the Chicken

Return the chicken thighs to the skillet or serve them with the garlic butter sauce spooned over the top.

Garnish with fresh parsley and cracked black pepper.

Serve immediately while the skin is crispy and the sauce is warm.


Expert Cooking Tips

Dry the Chicken Skin Thoroughly

The drier the skin, the crispier it becomes. This simple step makes a huge difference.

Start Skin-Side Down

Searing the skin first allows the fat to render slowly and creates the perfect golden crust.

Don’t Crowd the Pan

Too many chicken pieces in a small pan create steam, preventing crispy skin.

Use a Cast-Iron Skillet

Cast iron holds heat extremely well and creates excellent browning.

Let the Chicken Rest

Resting for 5 minutes after cooking helps the juices redistribute, keeping the meat tender.


Substitutions and Variations

Boneless Chicken Thighs

You can use boneless thighs, but reduce cooking time because they cook faster.

Chicken Breast Version

Chicken breasts can work, but they are leaner and require careful cooking to avoid drying out.

Spicy Garlic Butter Chicken

Add crushed red pepper flakes, cayenne, or chili powder for extra heat.

Creamy Garlic Chicken

Add ½ cup heavy cream to the pan sauce for a rich creamy version.

Herb Roasted Chicken

Add fresh rosemary, sage, and oregano for a stronger herb flavor.


Serving Suggestions

These crispy garlic butter chicken thighs pair beautifully with:

  • Creamy mashed potatoes
  • Garlic roasted potatoes
  • Buttered rice
  • Pasta
  • Roasted vegetables
  • Green beans
  • Fresh garden salad
  • Crusty bread

The garlic butter sauce is especially delicious when soaked up with mashed potatoes or warm bread.


Storage and Reheating

Store leftover chicken thighs in an airtight container in the refrigerator for up to 4 days.

To reheat while keeping the skin crispy, warm the chicken in an oven or air fryer at 375°F until heated through.

Avoid microwaving if possible because it can soften the crispy skin.

The garlic butter sauce can be stored separately and reheated gently on the stove.


Frequently Asked Questions

How do I make chicken skin extra crispy?

Dry the chicken thoroughly, avoid covering it while cooking, and begin with a hot skillet.

Can I use chicken drumsticks instead?

Yes. Drumsticks work well with the same seasoning and cooking method.

Why is my chicken skin not crispy?

The most common reasons are excess moisture, overcrowding the pan, or cooking at too low a temperature.

Can I prepare this recipe ahead of time?

Yes. Season the chicken several hours ahead and store it covered in the refrigerator before cooking.

What temperature should chicken thighs reach?

Chicken thighs are safe at 165°F, but many people prefer cooking them closer to 175°F–185°F because the texture becomes even more tender.


Final Thoughts

Crispy Garlic Butter Chicken Thighs are a timeless comfort food recipe that proves you don’t need complicated ingredients to create an unforgettable meal. The combination of golden crispy skin, juicy chicken, fragrant garlic butter, and fresh herbs creates a dish that feels both rustic and elegant.

Whether you are preparing a simple family dinner or hosting guests, this recipe delivers incredible flavor with minimal effort. Serve it with your favorite comforting side dish, pour over the buttery pan sauce, and enjoy a homemade meal that tastes like it came straight from a restaurant kitchen.

Red Wine Braised Beef Short Ribs with Rosemary and Onion Gravy

Introduction

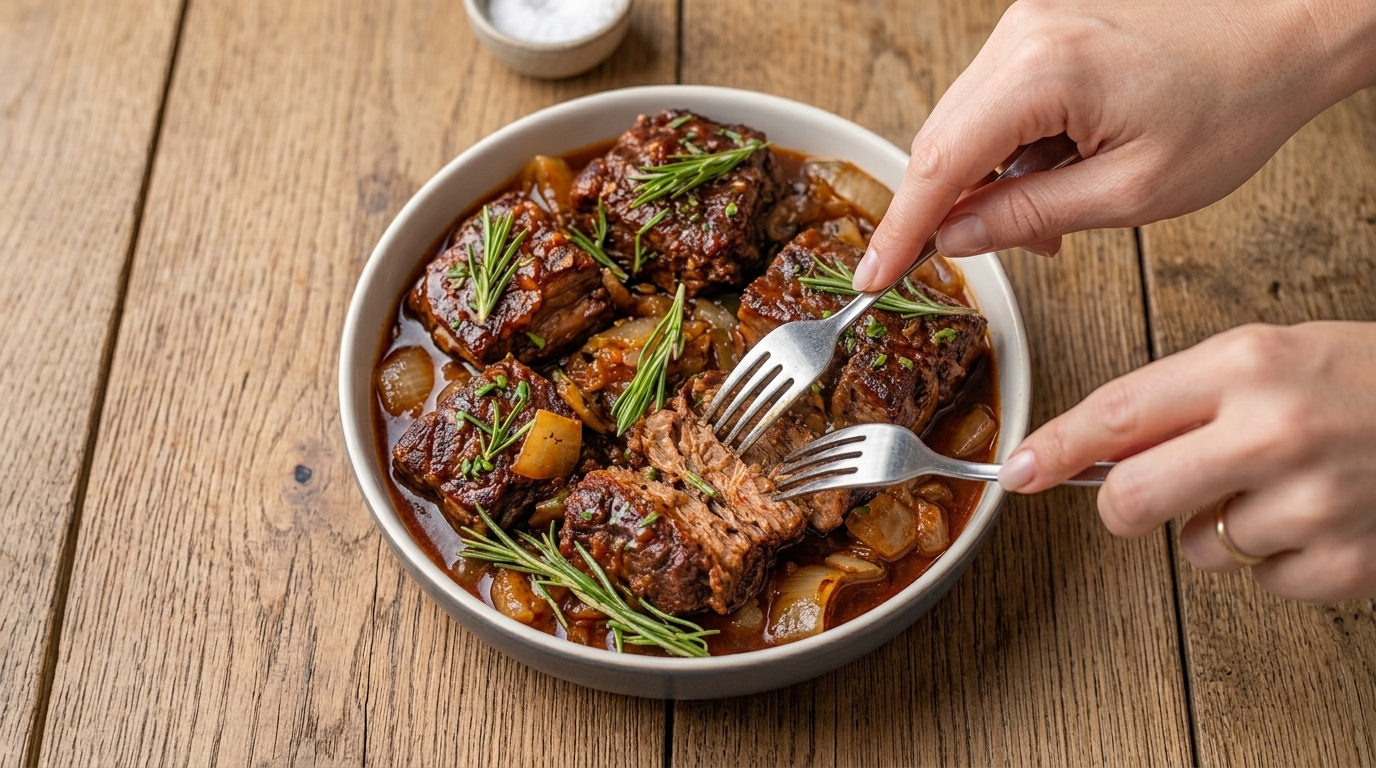
Red Wine Braised Beef Short Ribs are the ultimate expression of slow-cooked comfort food. This luxurious dish features thick, meaty pieces of beef slowly simmered until they become incredibly tender, surrounded by a rich sauce infused with caramelized onions, aromatic herbs, and deep savory flavors.

The image showcases beautifully browned beef short ribs resting in a rich, glossy reddish-brown sauce with tender onions and fresh rosemary scattered throughout. The meat appears fork-tender, with the center easily pulling apart to reveal juicy, flavorful layers. The combination of deeply seared beef, slow-braised vegetables, and herb-infused gravy creates a restaurant-quality dish that feels perfect for a special dinner.

This recipe is ideal for holidays, Sunday family dinners, dinner parties, or any occasion where you want to serve a memorable meal. While the cooking time is long, the preparation is simple, and most of the magic happens while the beef slowly transforms in the oven.


Why You’ll Love This Recipe

This braised short rib recipe creates incredible flavor through simple cooking techniques. Searing the beef first develops a rich crust, while slow cooking allows the connective tissues to break down, creating meat that practically melts with a fork.

You’ll love this recipe because it is:

  • Extremely tender and flavorful
  • Perfect for special occasions
  • Made with simple ingredients
  • Rich and comforting
  • Great for preparing ahead
  • Restaurant-quality at home

The sauce is the true highlight — a deep, savory gravy with sweet onions, garlic, herbs, and beef juices that perfectly complements the tender meat.


Ingredients

For the Short Ribs

  • 4 pounds bone-in beef short ribs
  • 2 tablespoons olive oil
  • 2 teaspoons kosher salt
  • 1 teaspoon freshly ground black pepper
  • 1 teaspoon garlic powder
  • 2 tablespoons all-purpose flour (optional)

For the Braising Sauce

  • 2 tablespoons butter
  • 2 large yellow onions, sliced
  • 3 carrots, chopped into chunks
  • 5 cloves garlic, minced
  • 2 tablespoons tomato paste
  • 2 cups dry red wine
  • 3 cups beef broth
  • 2 tablespoons Worcestershire sauce
  • 1 tablespoon soy sauce
  • 3 sprigs fresh rosemary
  • 5 sprigs fresh thyme
  • 2 bay leaves
  • 1 teaspoon brown sugar (optional)

Garnish

  • Fresh rosemary
  • Fresh parsley
  • Cracked black pepper

Step-by-Step Instructions

1. Prepare the Beef Short Ribs

Remove the short ribs from the refrigerator about 30 minutes before cooking.

Pat the ribs completely dry with paper towels. Drying the surface helps create a beautiful brown crust during searing.

Season all sides generously with salt, black pepper, and garlic powder.

If using flour, lightly coat the ribs. This helps create a thicker, richer sauce later.


2. Sear the Short Ribs

Heat olive oil in a large Dutch oven over medium-high heat.

Place the short ribs into the hot pot, working in batches if necessary.

Sear each side for 3–5 minutes until deeply browned.

Do not rush this step. The dark caramelized crust is where much of the final flavor comes from.

Remove the ribs and set aside.


3. Cook the Aromatic Vegetables

Reduce the heat to medium.

Add butter to the same pot.

Add sliced onions and carrots, cooking for 6–8 minutes until softened and lightly golden.

Add minced garlic and cook for 30 seconds until fragrant.

Stir in tomato paste and cook for another 1–2 minutes.

This helps intensify the flavor and creates a richer-colored sauce.


4. Create the Braising Liquid

Pour in the red wine, scraping the bottom of the pot with a wooden spoon to release the flavorful browned pieces.

Allow the wine to simmer for 5 minutes to reduce slightly.

Add beef broth, Worcestershire sauce, soy sauce, rosemary, thyme, bay leaves, and brown sugar if using.

Stir everything together.


5. Slow Braise the Beef

Return the short ribs to the pot along with any juices that collected on the plate.

The liquid should cover about two-thirds of the meat.

Bring the mixture to a gentle simmer.

Cover the pot and place it in a preheated oven at 325°F (165°C).

Cook for 3–3½ hours until the beef is extremely tender.

The meat should easily pull away from the bone with a fork.


6. Finish the Sauce

Carefully remove the short ribs from the pot and place them on a serving dish.

Remove the rosemary stems, thyme stems, and bay leaves.

If there is excess fat floating on the sauce, skim it off.

Simmer the sauce uncovered for 10–15 minutes until it becomes thick, glossy, and rich.

For an extra smooth sauce, strain it before serving.


7. Serve the Short Ribs

Return the beef to the sauce or spoon the gravy generously over the top.

Garnish with fresh rosemary and parsley.

Serve warm with your favorite side dishes.


Expert Cooking Tips

Choose Meaty Short Ribs

Look for ribs with plenty of meat around the bone. More marbling creates a richer and more tender result.

Sear for Maximum Flavor

A proper sear creates the deep roasted flavor that makes braised dishes unforgettable.

Don’t Rush the Cooking Time

Short ribs become tender because collagen slowly breaks down. Cooking too quickly will leave the meat tough.

Make It Ahead

Short ribs taste even better the next day. The flavors continue to develop, and excess fat is easier to remove after chilling.

Use Good Wine

Choose a red wine you would enjoy drinking. The flavor concentrates as it cooks.


Substitutions and Variations

No Wine Version

Replace red wine with extra beef broth and add a tablespoon of balsamic vinegar for depth.

Mushroom Short Ribs

Add sliced mushrooms during the final hour of cooking for an earthy variation.

Spicy Braised Short Ribs

Add crushed red pepper flakes or a small amount of chili paste to the sauce.

Herb Variation

Replace rosemary with oregano or add fresh sage for a different flavor profile.


Serving Suggestions

Red wine braised short ribs pair beautifully with:

  • Creamy mashed potatoes
  • Garlic mashed cauliflower
  • Buttered egg noodles
  • Creamy polenta
  • Roasted vegetables
  • Crusty French bread
  • Parmesan risotto

Mashed potatoes are especially popular because they absorb the rich gravy and create the perfect bite with the tender beef.


Storage and Reheating

Store leftover short ribs with their sauce in an airtight container.

Refrigerate for up to 4 days.

To reheat, warm slowly on the stovetop over low heat until heated through. Add a splash of beef broth if the sauce becomes too thick.

Short ribs freeze very well. Store in freezer-safe containers for up to 3 months.

Thaw overnight in the refrigerator before reheating.


Frequently Asked Questions

Why are my short ribs not tender?

They likely need more time. Short ribs require several hours of gentle cooking for the connective tissue to break down.

Can I make this in a slow cooker?

Yes. Sear the ribs first, then cook with the sauce on LOW for 7–8 hours.

Can I use boneless short ribs?

Yes. Boneless short ribs work well but may cook slightly faster.

What red wine is best?

Dry wines such as Cabernet Sauvignon, Merlot, or Pinot Noir work beautifully.

Can I make this recipe without a Dutch oven?

Absolutely. Use any oven-safe covered pot or a deep baking dish tightly covered with foil.


Final Thoughts

Red Wine Braised Beef Short Ribs are the definition of slow-cooked comfort and elegance. The combination of tender beef, aromatic rosemary, sweet onions, and rich gravy creates a meal that feels special from the first bite.

Although this recipe requires patience, the result is worth every minute. The slow braising process transforms simple ingredients into a deeply flavorful dish that is perfect for celebrations, family dinners, or any night when you want unforgettable homemade comfort food.

Serve it with creamy potatoes and plenty of sauce, and you’ll have a meal that feels like it came straight from a fine restaurant while still carrying the warmth of home cooking.

Honey Garlic Chicken

A sweet, savory, and incredibly flavorful chicken dish featuring juicy baked chicken pieces coated in a sticky honey garlic sauce. This comforting recipe combines tender chicken with rich garlic, soy sauce, and honey for a glossy, caramelized finish that makes it perfect for weeknight dinners, family meals, or casual gatherings.

Why You’ll Love It

  • Sweet and savory honey garlic sauce that coats every piece beautifully
  • Juicy, tender chicken with a rich caramelized finish
  • Easy to prepare with simple pantry-friendly ingredients
  • Perfect for serving with rice, vegetables, noodles, or potatoes

Ingredients Overview

Chicken

  • 8 chicken drumsticks or bone-in chicken thighs
  • 1 tbsp olive oil
  • 1 tsp paprika
  • 1 tsp garlic powder
  • 1 tsp onion powder
  • 1 tsp salt
  • ½ tsp black pepper

Honey Garlic Sauce

  • ½ cup honey
  • ⅓ cup low-sodium soy sauce
  • 6 garlic cloves, minced
  • 2 tbsp ketchup
  • 1 tbsp brown sugar
  • 1 tbsp apple cider vinegar or rice vinegar
  • 1 tsp sesame oil
  • ½ tsp crushed red pepper flakes (optional)
  • 1 tbsp cornstarch
  • 2 tbsp water

Garnish

  • 2 tbsp chopped green onions
  • 1 tsp sesame seeds (optional)
  • Extra sauce for drizzling

Step-by-Step Instructions

1. Prepare the Chicken

Preheat your oven to 400°F (200°C).

Pat the chicken dry with paper towels.

Place the chicken in a large bowl and toss with olive oil, paprika, garlic powder, onion powder, salt, and black pepper until evenly coated.

Arrange the chicken pieces in a lightly greased baking dish or foil pan in a single layer.

2. Make the Honey Garlic Sauce

In a medium bowl, whisk together honey, soy sauce, minced garlic, ketchup, brown sugar, vinegar, sesame oil, and crushed red pepper flakes if using.

In a small separate bowl, stir together the cornstarch and water to make a slurry.

Add the slurry to the sauce mixture and whisk until smooth.

3. Bake the Chicken

Bake the chicken uncovered for 25 minutes.

Remove the dish from the oven and spoon some of the honey garlic sauce over each piece.

Return the chicken to the oven and bake for another 20–25 minutes, or until the chicken is cooked through and the internal temperature reaches 165°F (74°C).

4. Glaze and Caramelize

During the last 10 minutes of baking, spoon the pan sauce over the chicken once or twice so it becomes glossy and sticky.

If you want deeper caramelization, broil the chicken for 2–3 minutes at the end, watching carefully so the sauce does not burn.

5. Serve

Remove the chicken from the oven and let it rest for 5 minutes.

Sprinkle with chopped green onions and sesame seeds if desired.

Serve hot with plenty of the honey garlic sauce spooned over the top.

Cooking Tips

  • Pat the chicken dry before seasoning so it roasts better and develops more color.
  • Use bone-in, skin-on chicken for extra juicy meat and richer flavor.
  • Do not broil too long, as honey can burn quickly.
  • Basting during baking helps build that sticky, glossy coating.
  • If the sauce seems too thin, simmer it in a small saucepan for a few minutes before serving.

Serving Suggestions

Serve this honey garlic chicken with:

  • Steamed white rice
  • Garlic butter noodles
  • Roasted broccoli
  • Mashed potatoes
  • Stir-fried green beans

Storage

Store leftovers in an airtight container in the refrigerator for up to 3 days.

Reheat gently in the oven at 350°F (175°C) or in the microwave until heated through. Add a spoonful of water or extra sauce if needed to keep the chicken moist.

Leftover Ideas

  • Shred the chicken and use it in wraps or sandwiches.
  • Serve leftovers over rice bowls with vegetables.
  • Chop the chicken and toss it into stir-fried noodles.
  • Use extra sauce as a glaze for roasted vegetables.

FAQs

Can I use boneless chicken instead?
Yes. Boneless chicken thighs or breasts work well, but adjust the cooking time since they cook faster.

Can I make this recipe less sweet?
Yes. Reduce the honey slightly and add a little extra soy sauce or vinegar to balance the flavor.

Can I make it spicy?
Yes. Add more crushed red pepper flakes or a drizzle of sriracha to the sauce.

Can I cook this in an air fryer?
Yes. Cook the chicken at 375°F (190°C) until nearly done, then brush with the sauce and cook a few minutes more until sticky and caramelized.

Final Thoughts

Honey Garlic Chicken is a simple yet irresistible dinner packed with sweet, savory, garlicky flavor. With its sticky glaze, juicy chicken, and easy preparation, this recipe is a reliable favorite for busy weeknights or any time you want a crowd-pleasing meal that feels both comforting and delicious.

#HoneyGarlicChicken #ChickenRecipes #EasyDinner #FamilyMeals #ComfortFood

Creamy Mushroom Salisbury Steak with Rich Onion Gravy

Introduction

Creamy Mushroom Salisbury Steak is a classic comfort food dish that brings together tender seasoned beef patties, caramelized onions, earthy mushrooms, and a rich homemade gravy. This recipe transforms simple ground beef into a hearty, restaurant-style meal that feels warm, nostalgic, and incredibly satisfying.

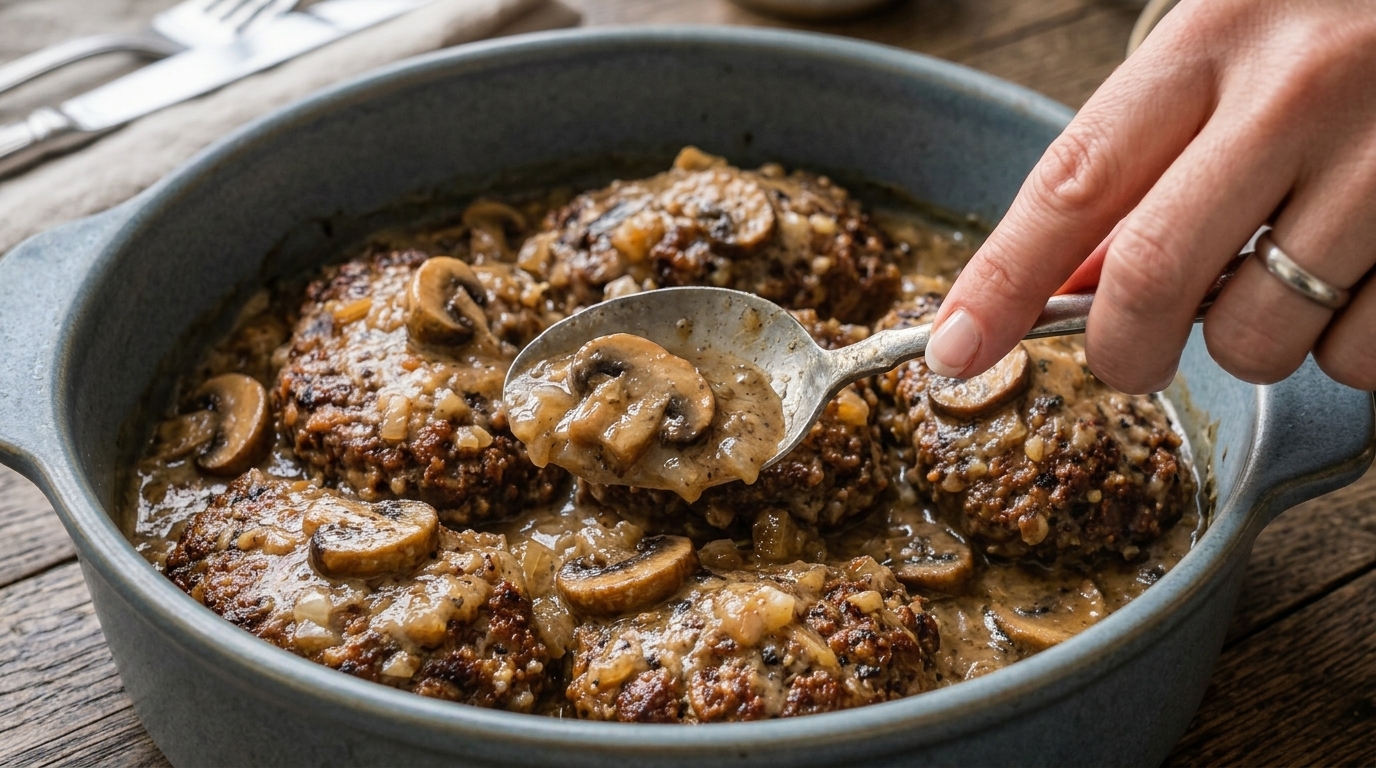
The image shows beautifully browned Salisbury steak patties covered in a creamy mushroom sauce, with sliced mushrooms and onions distributed throughout the glossy gravy. The beef patties have a deep seared crust, while the sauce appears rich, savory, and full of flavor. This combination of juicy beef, buttery mushrooms, and creamy gravy creates the perfect dish for cozy family dinners.

Unlike ordinary burgers, Salisbury steak is designed to be served with sauce. The patties absorb the mushroom gravy while simmering, creating a tender texture and incredible depth of flavor. Served over mashed potatoes, rice, or noodles, this meal becomes the ultimate comfort dinner.


Why You’ll Love This Recipe

This homemade Salisbury steak recipe is easy enough for a weeknight dinner but flavorful enough for special occasions.

You’ll love it because it is:

  • Rich, creamy, and comforting
  • Made with affordable ingredients
  • Full of classic homemade flavors
  • Perfect with mashed potatoes
  • Ready in under an hour
  • Great for meal prep and leftovers

The combination of seasoned beef patties and creamy mushroom gravy makes every bite satisfying. The mushrooms add an earthy richness, while the onions bring sweetness and depth to the sauce.


Ingredients

For the Salisbury Steak Patties

  • 2 pounds ground beef (80/20 recommended)
  • ½ cup breadcrumbs
  • 1 large egg
  • 3 tablespoons milk
  • 2 tablespoons Worcestershire sauce
  • 2 cloves garlic, minced
  • 1 teaspoon onion powder
  • 1 teaspoon garlic powder
  • 1 teaspoon smoked paprika
  • 1 teaspoon salt
  • ½ teaspoon black pepper
  • 2 tablespoons chopped fresh parsley

For the Mushroom Gravy

  • 2 tablespoons butter
  • 1 tablespoon olive oil
  • 12 ounces mushrooms, sliced
  • 1 large onion, thinly sliced
  • 3 cloves garlic, minced
  • 2 tablespoons all-purpose flour
  • 2½ cups beef broth
  • ½ cup heavy cream
  • 1 tablespoon Worcestershire sauce
  • 1 teaspoon Dijon mustard
  • 1 teaspoon thyme
  • ½ teaspoon black pepper
  • Salt to taste

For Serving

  • Creamy mashed potatoes
  • Egg noodles
  • White rice
  • Fresh parsley for garnish

Step-by-Step Instructions

1. Prepare the Beef Patties

In a large bowl, combine ground beef, breadcrumbs, egg, milk, Worcestershire sauce, minced garlic, onion powder, garlic powder, smoked paprika, salt, pepper, and parsley.

Mix gently until everything is combined. Avoid overmixing because it can make the patties dense.

Shape the mixture into oval-shaped patties, about ¾-inch thick.


2. Sear the Salisbury Steaks

Heat olive oil in a large skillet over medium-high heat.

Add the beef patties and cook for about 3–4 minutes per side until they develop a deep brown crust.

The patties do not need to be fully cooked at this stage because they will finish cooking in the gravy.

Remove them from the skillet and set aside.


3. Cook the Mushrooms and Onions

Reduce the heat to medium.

Add butter to the same skillet.

Add sliced mushrooms and cook until they release their moisture and begin to brown, about 5–7 minutes.

Add sliced onions and cook until softened and lightly caramelized.

Stir in minced garlic and cook for 30 seconds until fragrant.

The browned bits left from the beef will add incredible flavor to the gravy.


4. Make the Creamy Mushroom Gravy

Sprinkle flour over the mushrooms and onions.

Stir continuously for 1 minute to cook out the raw flour taste.

Slowly pour in beef broth while stirring to prevent lumps.

Add Worcestershire sauce, Dijon mustard, thyme, black pepper, and salt.

Allow the sauce to simmer until it begins to thicken.

Stir in heavy cream for a smooth, creamy finish.


5. Simmer the Salisbury Steak

Return the browned beef patties to the skillet.

Spoon the mushroom gravy over the patties.

Cover and simmer on low heat for 15–20 minutes until the patties are cooked through and tender.

The beef will absorb the flavors of the creamy mushroom sauce while finishing.


6. Serve and Enjoy

Place the Salisbury steak patties over mashed potatoes, noodles, or rice.

Generously spoon the mushroom gravy over the top.

Finish with fresh parsley and cracked black pepper.

Serve warm while the sauce is rich and creamy.


Expert Cooking Tips

Don’t Overwork the Beef

Mix the meat mixture gently. Overmixing creates tough patties instead of tender ones.

Brown the Patties Properly

A deep golden crust creates extra flavor and makes the gravy richer.

Use Fresh Mushrooms

Fresh mushrooms provide better texture and a deeper earthy flavor than canned mushrooms.

Let the Gravy Simmer

A slow simmer allows the flavors to blend and creates a silky, restaurant-quality sauce.

Make Extra Gravy

The mushroom gravy is the best part of the dish and pairs beautifully with mashed potatoes or noodles.


Substitutions and Variations

Turkey Salisbury Steak

Replace ground beef with ground turkey for a lighter version.

Cheesy Salisbury Steak

Add shredded cheese into the beef mixture or melt cheese over the patties before serving.

Garlic Herb Version

Add rosemary, thyme, and extra garlic for a stronger herb flavor.

Low-Carb Option

Serve over cauliflower mash or roasted vegetables instead of potatoes.

Extra Mushroom Version

Add a variety of mushrooms such as cremini, shiitake, or portobello for deeper flavor.


Serving Suggestions

Creamy Mushroom Salisbury Steak pairs perfectly with:

  • Garlic mashed potatoes
  • Buttered egg noodles
  • Steamed rice
  • Roasted vegetables
  • Green beans
  • Dinner rolls
  • Side salad

The creamy gravy makes mashed potatoes the perfect companion because they soak up every drop of sauce.


Storage and Reheating

Store leftover Salisbury steak and gravy in an airtight container in the refrigerator for up to 4 days.

To reheat, warm gently in a skillet over medium-low heat. Add a splash of beef broth or cream if the gravy becomes too thick.

This recipe also freezes well. Store cooled patties with gravy in freezer-safe containers for up to 3 months.

Thaw overnight in the refrigerator before reheating.


Frequently Asked Questions

Why is my Salisbury steak falling apart?

The patties may need more binding ingredients. Breadcrumbs and egg help hold everything together.

Can I make Salisbury steak ahead of time?

Yes. Prepare the patties and gravy, refrigerate, and reheat gently before serving.

What mushrooms work best?

Cremini mushrooms provide excellent flavor, but button, baby bella, or mixed mushrooms all work well.

Can I use milk instead of heavy cream?

Yes. The gravy will be slightly lighter but still delicious.

How do I make the gravy thicker?

Simmer uncovered longer, or add a small cornstarch slurry if needed.


Final Thoughts

Creamy Mushroom Salisbury Steak is the perfect example of classic comfort food done right. Tender beef patties, golden mushrooms, sweet onions, and a rich creamy gravy come together to create a meal that feels homemade, satisfying, and timeless.

Whether served for a family dinner, a cozy weekend meal, or a comforting night at home, this recipe delivers incredible flavor with simple ingredients. Pair it with creamy mashed potatoes and plenty of mushroom gravy, and you have a classic dish that everyone will love.