
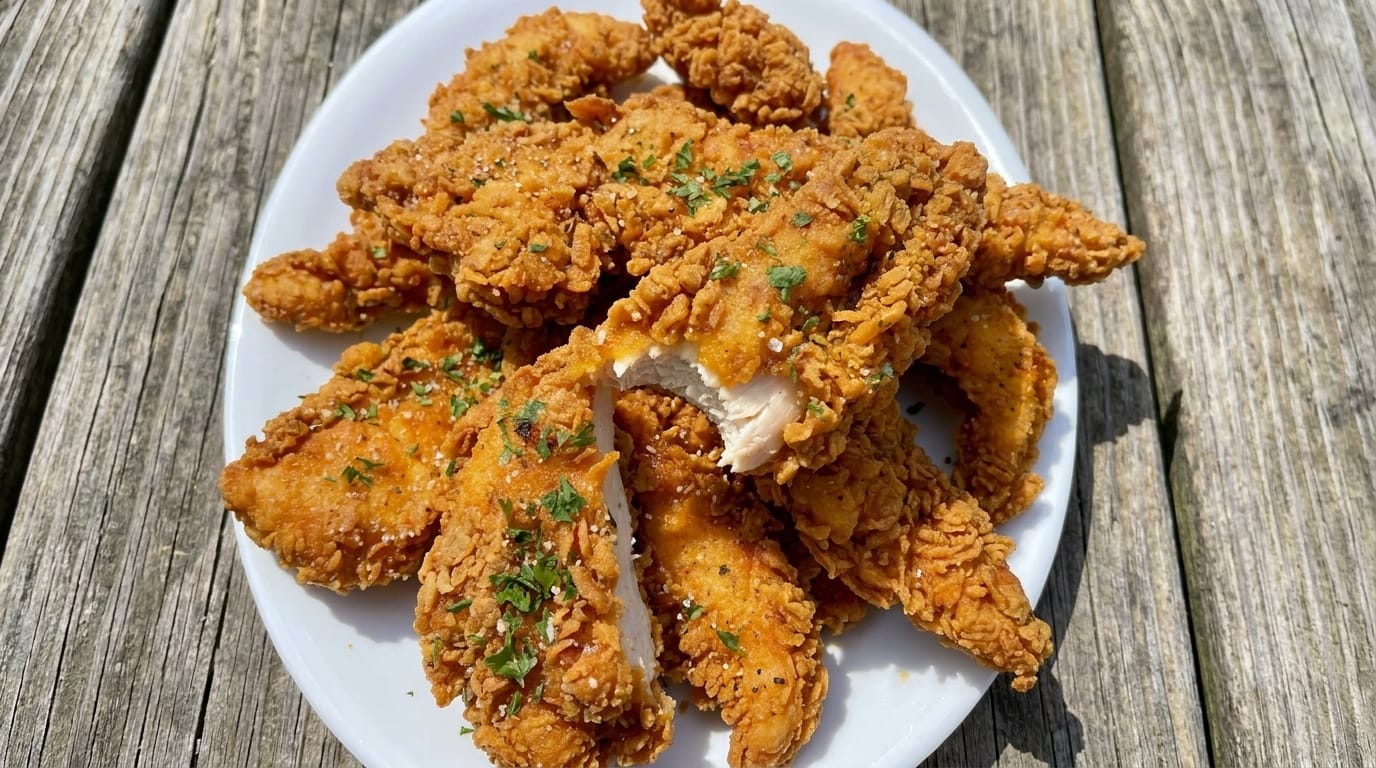
If you are looking for restaurant-style fried chicken with a deeply crunchy coating and tender, juicy meat inside, these Crispy Buttermilk Fried Chicken Tenders are an excellent recipe to make. Chicken tenderloins are soaked in a seasoned buttermilk marinade, coated in a flavorful flour mixture, and fried until crisp, craggy, and beautifully golden.
The buttermilk does two important things: it adds tangy flavor and helps the seasoning cling to the chicken. A little of the marinade is drizzled into the seasoned flour before breading, creating small clumps that fry into the extra-crispy ridges people love on fried chicken.
These chicken tenders are perfect for family dinners, game day, parties, lunch, or a homemade fast-food-style meal. Serve them with fries, coleslaw, biscuits, mac and cheese, or your favorite dipping sauces.
Why You’ll Love These Crispy Buttermilk Fried Chicken Tenders
The buttermilk marinade helps the chicken stay flavorful and juicy.
A combination of flour and cornstarch creates a lighter, crispier coating.
Paprika, garlic powder, onion powder, and cayenne give the breading plenty of flavor.
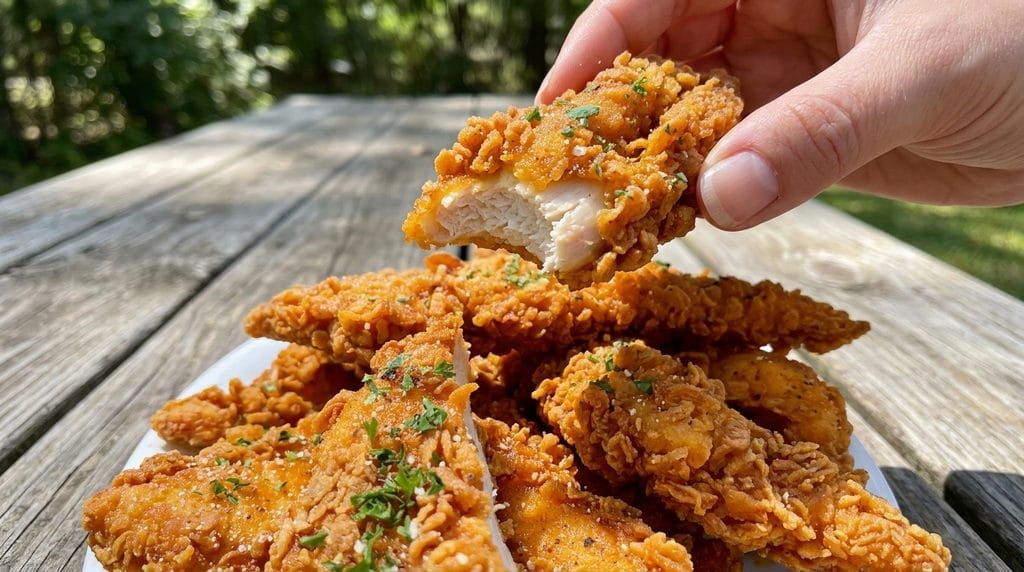
Pressing the coating firmly onto the chicken creates a thick, crunchy crust.
The tenders cook quickly, making them easier to fry than large bone-in chicken pieces.
They are also easy to customize from mild to spicy.
Ingredients
For the Chicken
- 2 pounds chicken tenderloins
- 1½ teaspoons kosher salt
- 1 teaspoon freshly ground black pepper
For the Buttermilk Marinade
- 2 cups buttermilk
- 2 teaspoons hot sauce
- 1 teaspoon Worcestershire sauce
- 1 teaspoon kosher salt
- 1 teaspoon garlic powder
- 1 teaspoon onion powder
- 1 teaspoon smoked paprika
- ½ teaspoon freshly ground black pepper
- ½ teaspoon cayenne pepper, optional
For the Crispy Coating
- 2 cups all-purpose flour
- ½ cup cornstarch
- 2 teaspoons kosher salt
- 1½ teaspoons garlic powder
- 1½ teaspoons onion powder
- 1½ teaspoons smoked paprika
- 1 teaspoon regular paprika
- 1 teaspoon freshly ground black pepper
- 1 teaspoon dried oregano
- ½ teaspoon dried thyme
- ½ teaspoon cayenne pepper, optional
- ½ teaspoon baking powder
For Frying
- Vegetable, canola, or peanut oil, enough for approximately 2 inches in a heavy pot
Optional Finishing Seasoning
- ½ teaspoon kosher salt
- ¼ teaspoon garlic powder
- ¼ teaspoon smoked paprika
For Serving
- Ranch dressing
- Honey mustard
- Barbecue sauce
- Buffalo sauce
- Garlic aioli
- Spicy mayo
How to Make Crispy Buttermilk Fried Chicken Tenders
1. Prepare the Chicken
Pat the chicken tenderloins lightly with paper towels.
Trim away any obvious pieces of fat or connective tissue.
2. Season Lightly
Season the chicken with salt and black pepper.
This gives the meat itself flavor rather than relying only on the breading.
3. Make the Buttermilk Marinade
In a large bowl, combine:
- Buttermilk
- Hot sauce
- Worcestershire sauce
- Salt
- Garlic powder
- Onion powder
- Smoked paprika
- Black pepper
- Cayenne, if using
Whisk until combined.
4. Add the Chicken
Place the chicken tenderloins into the buttermilk mixture.
Turn them until every piece is coated.
5. Marinate
Cover and refrigerate for at least 2 hours.
For deeper flavor, marinate for approximately 4–8 hours.
Avoid unnecessarily long marinating because chicken tenders are small and delicate.
6. Prepare the Flour Mixture
In a large shallow bowl, combine:
- Flour
- Cornstarch
- Salt
- Garlic powder
- Onion powder
- Smoked paprika
- Regular paprika
- Black pepper
- Oregano
- Thyme
- Cayenne
- Baking powder
Mix thoroughly.
7. Create Extra-Crispy Flour Clumps
Drizzle approximately 3–4 tablespoons of the buttermilk marinade into the flour mixture.
Use your fingertips or a fork to toss it around.
You want little uneven clumps of flour throughout the breading.
These clumps fry into crunchy, craggy pieces.
8. Remove the Chicken from the Marinade
Take one tenderloin from the buttermilk.
Let the excess drip off for a few seconds.
Do not wipe it dry.
9. Coat the Chicken
Place the tender into the seasoned flour mixture.
Cover it completely with flour.
10. Press the Coating Firmly
Use your hands to press the flour mixture firmly onto every side.
This helps create a thicker crust.
11. Shake Off Loose Flour
Lift the chicken gently.
Shake off only the flour that is completely loose.
Do not knock off the rough coating.
12. Repeat
Bread the remaining chicken tenders.
Arrange them on a wire rack or baking sheet.
13. Let the Breading Rest
Let the coated chicken rest for approximately 10–15 minutes.
This step helps the coating hydrate slightly and stick to the chicken during frying.
14. Heat the Oil
Pour approximately 2 inches of oil into a heavy Dutch oven or deep skillet.
Heat to 350°F (175°C).
A thermometer is extremely helpful for maintaining consistent oil temperature.
15. Prepare a Draining Rack
Place a wire rack over a baking sheet.
This is better than placing freshly fried chicken directly on paper towels because air can circulate underneath, keeping the crust crisp.
16. Fry in Batches
Carefully place a few chicken tenders into the hot oil.
Do not overcrowd the pan.
The oil temperature will drop when the chicken is added.
17. Maintain the Temperature
Try to keep the oil around 325–350°F while frying.
If it gets too cool, the coating can absorb too much oil.
If it gets too hot, the outside may brown before the chicken is cooked.
18. Fry the First Side
Cook for approximately 3 minutes.
The coating should begin turning golden.
19. Turn the Chicken
Carefully flip each tender with tongs.
20. Finish Frying
Cook for another 2–4 minutes, depending on thickness.
The total frying time is usually approximately 5–7 minutes.
21. Check the Internal Temperature
Insert an instant-read thermometer into the thickest part of a tender.
Chicken should reach 165°F (74°C).
22. Remove from the Oil
Transfer the cooked tenders to the prepared wire rack.
23. Season Immediately
While the crust is still hot, sprinkle lightly with the optional finishing seasoning.
24. Bring the Oil Back to Temperature
Before adding the next batch, allow the oil to return to approximately 350°F.
25. Repeat
Continue frying until all chicken tenders are cooked.
26. Rest Briefly
Allow the fried chicken to rest for approximately 3–5 minutes.
This keeps the crust crisp while allowing the extremely hot interior to cool slightly.
27. Serve
Serve immediately with your favorite dipping sauces.
What to Serve With Crispy Buttermilk Fried Chicken Tenders
These tenders pair perfectly with classic comfort-food sides.
Try:
- French fries
- Garlic Parmesan fries
- Potato wedges
- Mashed potatoes
- Mac and cheese
- Biscuits
- Cornbread
- Coleslaw
For vegetables, serve with:
- Corn on the cob
- Green beans
- Roasted broccoli
- Garden salad
- Cucumber salad
For dipping, try:
- Honey mustard
- Ranch
- Barbecue sauce
- Buffalo sauce
- Spicy mayo
- Garlic aioli
Tips for the Crispiest Fried Chicken Tenders
Use Buttermilk
The slightly acidic marinade adds flavor and helps the coating adhere.
Add Cornstarch
Cornstarch helps create a lighter and crisper exterior than flour alone.
Make Flour Clumps
A little buttermilk mixed into the flour creates those rough, crunchy pieces associated with excellent fried chicken.
Press the Breading On
Do not simply toss the tenders through the flour.
Press the coating firmly onto the chicken.
Rest Before Frying
Allowing the breading to sit for 10–15 minutes reduces the chance that it will separate during frying.
Monitor the Oil Temperature
Temperature control is one of the biggest factors in successful fried chicken.
Don’t Overcrowd the Pot
Too many pieces at once will rapidly lower the temperature.
Drain on a Wire Rack
Paper towels can trap steam underneath the chicken and soften the crust.
Season While Hot
Salt sticks better immediately after the tenders leave the oil.
Easy Recipe Variations
Spicy Buttermilk Chicken Tenders
Increase the cayenne and add more hot sauce to the marinade.
Serve with spicy mayo.
Nashville-Inspired Hot Chicken Tenders
After frying, brush the tenders lightly with a mixture of:
- Hot frying oil
- Cayenne
- Brown sugar
- Paprika
- Garlic powder
Garlic Parmesan Chicken Tenders
After frying, toss lightly with:
- Melted butter
- Garlic
- Parmesan
- Parsley
Cajun Chicken Tenders
Replace some of the breading seasonings with Cajun seasoning.
Ranch Chicken Tenders
Add 1 tablespoon ranch seasoning to the flour mixture.
Honey Garlic Fried Chicken Tenders
Drizzle the cooked tenders with a sticky honey-garlic sauce immediately before serving.
Extra-Crunchy Double-Coated Tenders
After the first flour coating:
- Dip the chicken briefly back into buttermilk.
- Coat it in seasoned flour a second time.
- Press firmly.
- Fry as directed.
This creates a noticeably thicker crust.
Air Fryer Version
For a lighter version, you can air-fry the breaded chicken.
Preheat the air fryer to 390°F (200°C).
Spray or brush the breaded tenders thoroughly with oil.
Arrange in a single layer.
Air fry for approximately 10–14 minutes, turning halfway through.
Cook until the crust is golden and the chicken reaches 165°F.
The texture will be different from deep frying but can still be very crisp.
Oven-Baked Version
Preheat the oven to 425°F (220°C).
Place the breaded tenders on a wire rack set over a baking sheet.
Spray both sides generously with cooking oil.
Bake for approximately 18–24 minutes, turning once, until golden and cooked to 165°F.
How to Store Leftovers
Allow leftover chicken tenders to cool completely.
Transfer them to an airtight container.
Refrigerate for up to 3–4 days.
For the best results, place a paper towel in the container to absorb excess moisture.
Reheating in the Oven
Place the tenders on a wire rack over a baking sheet.
Reheat at 375°F (190°C) for approximately 8–12 minutes.
Reheating in the Air Fryer
Air fry at approximately 375°F for 4–7 minutes or until hot and crisp.
Microwave
Microwaving will heat the chicken but soften the breading.
Use the oven or air fryer whenever crispness is important.
Freezing
Fried chicken tenders freeze well.
Allow them to cool completely.
Arrange on a tray and freeze until firm.
Transfer to a freezer-safe container.
Freeze for up to approximately 2 months.
Reheat directly from frozen in a 375°F oven or air fryer until hot and crisp.
Frequently Asked Questions
Why use buttermilk for fried chicken?
Buttermilk adds tangy flavor and provides a surface that helps seasoned flour adhere well to the chicken.
Can I use chicken breasts instead of tenderloins?
Yes. Slice chicken breasts lengthwise into similarly sized strips so they cook evenly.
Why is my breading falling off?
The chicken may have had too much excess marinade, the coating may not have been pressed firmly enough, or the chicken may have been moved too soon after entering the oil.
Why isn’t my fried chicken crispy?
The oil may have been too cool, the pot may have been overcrowded, or the finished chicken may have been left sitting on a surface that trapped steam.
Can I make these spicy?
Absolutely. Increase the cayenne and hot sauce or add a spicy finishing glaze.
Can I marinate the chicken overnight?
You can, but chicken tenders are small. A shorter 4–8 hour marinade is usually plenty.
What temperature should the frying oil be?
Start at approximately 350°F (175°C) and try to keep it between 325–350°F while cooking.
How do I know when the chicken is done?
The center should reach 165°F (74°C) when checked with an instant-read thermometer.
Final Thoughts
These Crispy Buttermilk Fried Chicken Tenders combine juicy chicken, tangy seasoned buttermilk, flour, cornstarch, garlic, paprika, and herbs in one seriously crunchy homemade dinner.
The key is giving the chicken enough time in the buttermilk marinade, creating little flour clumps for extra texture, pressing the breading firmly onto each tender, and controlling the frying temperature carefully.
Serve them straight from the rack with fries, coleslaw, biscuits, and honey mustard or ranch for crispy homemade chicken tenders with a deeply golden crust and juicy center.