Creamy Garlic Herb Scallops Recipe with Golden Seared Crust

Introduction

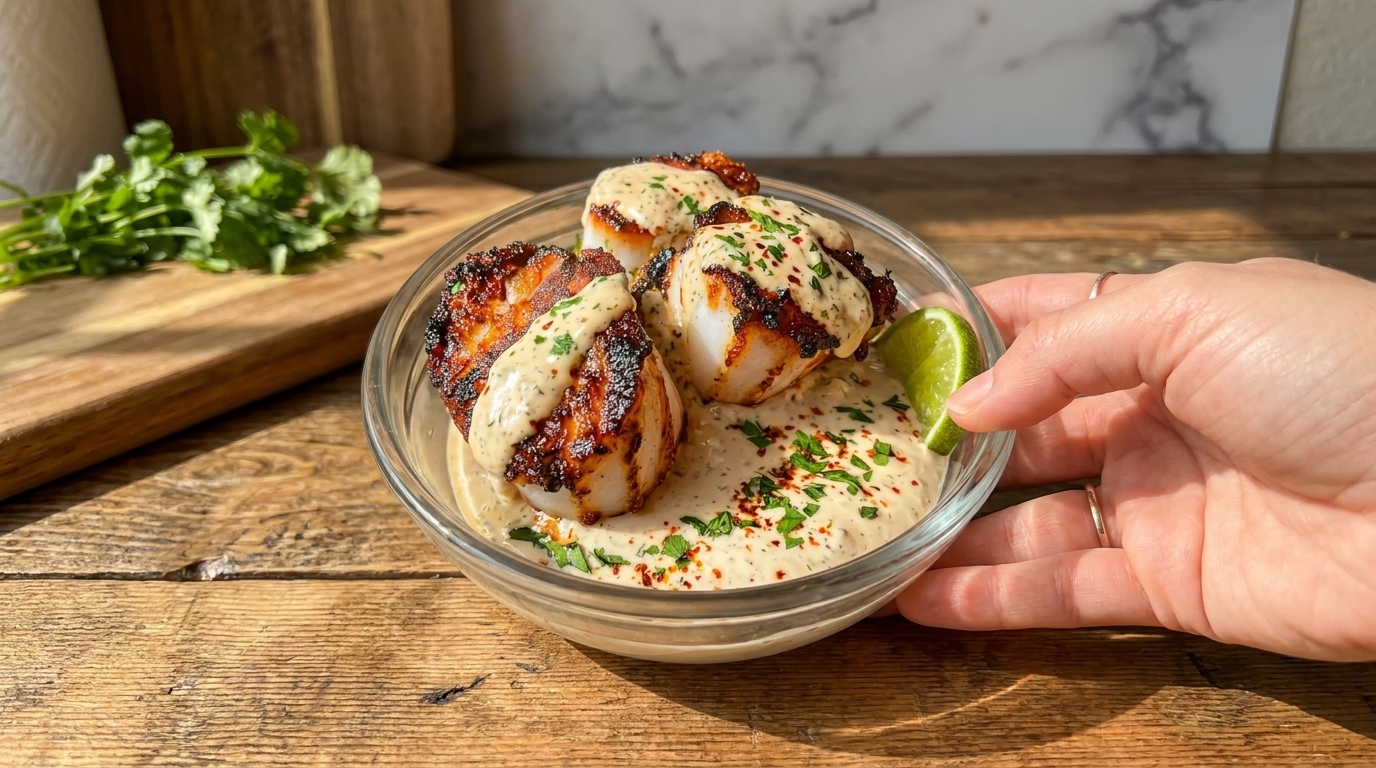
This stunning dish features perfectly seared scallops coated with a rich creamy garlic herb sauce, creating an elegant seafood meal that looks restaurant-quality while being surprisingly simple to prepare at home. The image captures beautifully browned scallops resting in a smooth, flavorful cream sauce, finished with fresh herbs, red pepper flakes, and a bright wedge of lime for a fresh citrus contrast.

The combination of textures makes this recipe truly special. The scallops have a golden caramelized crust on the outside while remaining tender and juicy inside. The creamy sauce adds richness with every bite, bringing together garlic, herbs, butter, and subtle spices into a luxurious coating that complements the natural sweetness of the seafood.

Perfect for a romantic dinner, special occasion, holiday meal, or an elevated weeknight dinner, these creamy garlic scallops bring the feeling of fine dining directly to your kitchen.


About This Recipe

Scallops are one of the most delicate and flavorful seafood options, and the key to preparing them perfectly is creating a beautiful golden sear while keeping the inside tender.

The scallops in this recipe are cooked at high heat for a short amount of time, allowing the natural sugars on the surface to caramelize and create a deep golden crust. This process develops a slightly sweet, buttery flavor while maintaining the soft texture inside.

The creamy garlic sauce is the perfect partner for the scallops. Made with aromatic garlic, butter, cream, herbs, and seasonings, the sauce adds richness without overpowering the delicate seafood flavor. The fresh herbs and hint of spice balance the creaminess, while the citrus garnish adds brightness and freshness.

This dish is simple enough for a home cook but impressive enough to serve to guests.


Ingredients

For the Seared Scallops

  • 1½ pounds large sea scallops
  • 2 tablespoons olive oil
  • 2 tablespoons butter
  • 1 teaspoon salt
  • ½ teaspoon black pepper
  • ½ teaspoon paprika
  • ½ teaspoon garlic powder

For the Creamy Garlic Herb Sauce

  • 3 tablespoons butter
  • 4 cloves garlic, minced
  • 1 cup heavy cream
  • ½ cup chicken broth or seafood stock
  • ¼ cup grated Parmesan cheese
  • 1 teaspoon Italian seasoning
  • 1 tablespoon fresh parsley, chopped
  • 1 tablespoon fresh basil or thyme
  • ½ teaspoon red pepper flakes
  • Salt and black pepper to taste

For Garnishing

  • Fresh parsley
  • Red pepper flakes
  • Lime or lemon wedges
  • Extra herbs

Step-by-Step Cooking Instructions

Step 1: Prepare the Scallops

Begin by preparing the scallops carefully.

Remove the small side muscle if it is still attached. Pat the scallops completely dry using paper towels. This step is extremely important because excess moisture prevents proper browning.

Season both sides of the scallops with salt, black pepper, paprika, and garlic powder.

Allow them to sit for a few minutes while preparing the pan.


Step 2: Create the Perfect Golden Sear

Heat olive oil in a large skillet over medium-high heat.

When the pan is hot, carefully place the scallops in a single layer. Avoid overcrowding the pan because this can cause the scallops to steam instead of sear.

Cook for approximately 2–3 minutes on each side until the surface develops a deep golden-brown crust.

The scallops should have a caramelized exterior while remaining soft and tender inside.

Remove the scallops from the pan and set them aside.


Step 3: Prepare the Creamy Garlic Sauce

Using the same skillet, reduce the heat slightly and add butter.

Once melted, add minced garlic and cook for about 30 seconds until fragrant.

Be careful not to burn the garlic because it can create bitterness.

Add chicken broth or seafood stock and scrape the bottom of the pan. This releases all the flavorful browned bits left from searing the scallops.

Pour in the heavy cream and stir gently.

Allow the sauce to simmer until it begins to slightly thicken.


Step 4: Add Flavor and Finish the Sauce

Stir in Parmesan cheese, Italian seasoning, red pepper flakes, and fresh herbs.

Season with salt and black pepper according to taste.

The sauce should become smooth, creamy, and flavorful with a balance of richness, garlic aroma, and herbal freshness.


Step 5: Combine the Scallops with the Sauce

Return the seared scallops to the skillet.

Spoon the creamy sauce over the scallops and allow them to warm together for 1–2 minutes.

Avoid overcooking because scallops can become rubbery if cooked too long.

The final scallops should remain tender with a slightly firm bite.


Flavor and Texture Experience

The beauty of this recipe comes from the contrast between textures and flavors.

The outside of each scallop has a beautifully browned crust with slightly crispy caramelized edges. Inside, the seafood remains soft, juicy, and naturally sweet.

The creamy sauce adds a luxurious texture with rich notes of garlic, butter, herbs, and Parmesan. The slight heat from red pepper flakes adds depth without overwhelming the seafood.

The fresh herbs brighten the dish, while the lime or lemon wedge provides acidity that cuts through the richness and creates a balanced final bite.


Serving Suggestions

These creamy garlic scallops can be served in many delicious ways.

With Pasta

Serve over linguine, fettuccine, or angel hair pasta to create a restaurant-style seafood pasta dish.

With Rice

Creamy scallops pair beautifully with steamed white rice, jasmine rice, or risotto.

With Vegetables

Serve alongside:

  • Roasted asparagus
  • Steamed broccoli
  • Green beans
  • Garlic roasted vegetables

With Bread

A warm crusty bread is perfect for soaking up the extra creamy sauce.


Cooking Tips for Perfect Scallops

Use Dry Scallops

Dry-packed scallops create the best sear because they contain less moisture.

Do Not Move Them Too Soon

Allow the scallops to cook undisturbed so they can develop a golden crust.

Use High Heat

A hot pan is essential for achieving restaurant-style caramelization.

Avoid Overcooking

Scallops cook quickly. They are ready when they are opaque and slightly firm.

Add Citrus at the End

Fresh lemon or lime juice should be added before serving to keep the flavor bright.


Storage and Reheating

Creamy scallops are best enjoyed immediately, but leftovers can be stored in an airtight container in the refrigerator for up to 2 days.

To reheat, warm gently over low heat. Avoid high temperatures because seafood can become tough when reheated aggressively.

If the sauce becomes too thick, add a small splash of cream or broth while warming.


Final Thoughts

These creamy garlic herb scallops are a perfect example of how simple ingredients can create an unforgettable meal. With tender golden-seared seafood, a rich homemade cream sauce, fresh herbs, and a touch of spice, this recipe delivers incredible flavor in every bite.

Whether you are preparing a special dinner for someone you love or simply want to enjoy a restaurant-quality seafood dish at home, these scallops are guaranteed to impress.
Slow-Braised Beef with Creamy Mashed Potatoes Recipe

Introduction

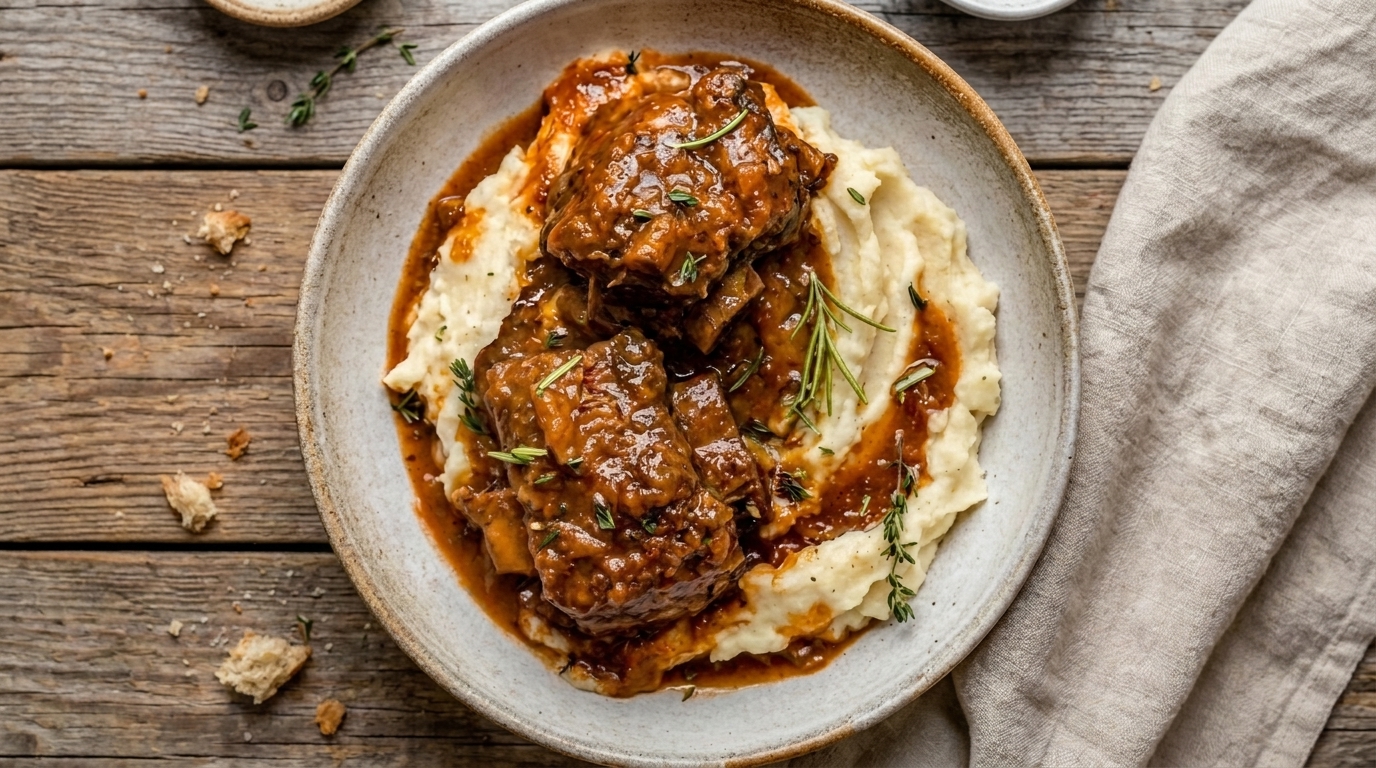
There is something timeless and comforting about a plate of slow-braised beef served with creamy mashed potatoes and rich homemade gravy. This classic dish represents everything people love about traditional comfort food: tender meat that falls apart effortlessly, a deeply flavorful sauce developed over hours of cooking, and smooth buttery potatoes that perfectly balance the richness of the beef.

The image captures a beautiful rustic presentation of this beloved meal. Thick pieces of braised beef sit generously over a bed of creamy mashed potatoes, covered with a glossy brown gravy and finished with fresh herbs. The warm colors, rustic ceramic bowl, and wooden table create the feeling of a cozy homemade dinner prepared with patience and care.

This recipe is perfect for Sunday dinners, family gatherings, holiday meals, or any evening when you want something hearty and satisfying. While the cooking process takes time, the result is worth every minute—a restaurant-quality meal made right in your own kitchen.


About This Recipe

Braised beef is a slow-cooking technique where beef is first browned to create deep flavor and then gently cooked in a seasoned liquid until it becomes incredibly tender. This method transforms a simple cut of beef into a luxurious dish with rich flavor and a melt-in-your-mouth texture.

The secret to this recipe is the slow cooking process. As the beef simmers, the connective tissues break down, creating soft, tender meat while naturally enriching the gravy. The sauce absorbs flavors from the beef, herbs, vegetables, and seasonings, creating a deep and savory finish.

The creamy mashed potatoes serve as the perfect companion. Their smooth, buttery texture absorbs the flavorful gravy, creating the ideal bite every time. The combination of tender beef, silky potatoes, and rich sauce makes this a true comfort food favorite.


Ingredients

For the Braised Beef

  • 3 pounds beef chuck roast or beef short ribs
  • 2 tablespoons olive oil
  • 2 teaspoons kosher salt
  • 1 teaspoon freshly ground black pepper
  • 2 tablespoons flour
  • 1 large yellow onion, chopped
  • 4 cloves garlic, minced
  • 2 carrots, diced
  • 2 celery stalks, diced
  • 2 tablespoons tomato paste
  • 2 cups beef broth
  • 1 cup red wine or extra beef broth
  • 1 tablespoon Worcestershire sauce
  • 3 sprigs fresh thyme
  • 2 sprigs fresh rosemary
  • 2 bay leaves

For the Creamy Mashed Potatoes

  • 3 pounds Yukon Gold potatoes
  • ½ cup unsalted butter
  • ¾ cup warm heavy cream or whole milk
  • 1 teaspoon salt
  • ½ teaspoon black pepper
  • 2 tablespoons sour cream (optional)

For Garnishing

  • Fresh thyme leaves
  • Fresh rosemary
  • Chopped parsley
  • Extra black pepper

Step-by-Step Cooking Instructions

Step 1: Prepare the Beef

Start by preparing the beef. Pat the meat completely dry using paper towels. Removing moisture helps create a better seared crust.

Season all sides generously with salt and black pepper. Lightly coat the beef pieces with flour. The flour helps create a beautiful browned exterior and later helps naturally thicken the gravy.


Step 2: Brown the Beef

Heat olive oil in a large Dutch oven or heavy pot over medium-high heat.

Add the beef pieces and sear them on all sides until they develop a deep golden-brown crust. This step is essential because the caramelized surface creates the foundation of flavor for the entire dish.

Do not rush this process. A properly browned piece of beef will create a much richer final sauce.

Remove the beef from the pot and set it aside.


Step 3: Build the Flavor Base

Using the same pot, add chopped onions, carrots, and celery.

Cook the vegetables until they soften and begin to develop color. These vegetables add sweetness, depth, and aroma to the gravy.

Add minced garlic and cook for about 30 seconds until fragrant.

Stir in tomato paste and allow it to cook briefly. Cooking the tomato paste enhances its natural sweetness and creates a richer sauce.


Step 4: Create the Braising Liquid

Pour in the red wine or a small amount of beef broth.

Use a wooden spoon to scrape the bottom of the pot, releasing all the flavorful browned pieces left behind from searing the beef.

Add beef broth, Worcestershire sauce, thyme, rosemary, and bay leaves.

Return the beef to the pot and make sure it is partially covered with the liquid.


Step 5: Slow Cook Until Tender

Cover the pot and cook slowly until the beef becomes fork tender.

Oven Method:

Cook at 325°F (160°C) for approximately 3–4 hours.

Slow Cooker Method:

Cook on low heat for 7–8 hours.

The beef is ready when it easily pulls apart and feels soft when pressed with a fork.


Making the Creamy Mashed Potatoes

While the beef cooks, prepare the mashed potatoes.

Wash, peel, and cut the potatoes into equal-sized pieces. Place them in a large pot filled with cold salted water.

Bring the water to a boil and cook until the potatoes are completely tender.

Drain the potatoes well and allow them to sit for a minute to remove excess moisture.

Mash the potatoes while they are still warm. Add butter first and mix until melted.

Slowly add warm cream or milk until the potatoes reach a smooth and creamy texture.

Season with salt and black pepper. Add sour cream for extra richness and a slightly tangy flavor.

The perfect mashed potatoes should be soft, creamy, and able to hold the delicious gravy without becoming watery.


Preparing the Rich Beef Gravy

Once the beef is finished cooking, carefully remove the meat from the pot.

The remaining liquid contains all the concentrated flavors from the beef, vegetables, herbs, and seasonings.

For a smoother gravy, strain the liquid and remove the vegetables. For a rustic homemade style, keep some vegetables in the sauce.

Simmer the liquid until it thickens slightly and develops a glossy texture.

Taste and adjust seasoning if needed.

The finished gravy should be rich, savory, and full of deep beef flavor.


How to Serve

To serve this comforting meal, place a generous portion of creamy mashed potatoes into a bowl or plate.

Arrange pieces of tender braised beef on top.

Pour the rich gravy generously over the meat and potatoes.

Finish with fresh thyme, rosemary, or parsley for a beautiful presentation.

This dish pairs wonderfully with:

  • Warm crusty bread
  • Roasted vegetables
  • Green beans
  • Buttered dinner rolls
  • Simple side salad

The gravy makes this meal especially satisfying when served with something that can soak up every last drop.


Cooking Tips for Perfect Braised Beef

Choose the Right Beef Cut

Chuck roast and short ribs are excellent choices because they contain enough connective tissue to become incredibly tender during slow cooking.

Brown the Beef Properly

Never skip searing. The browned crust creates layers of flavor that make the final dish taste richer.

Cook Slowly

Low and slow cooking is the key to tender beef. Cooking too quickly can leave the meat tough.

Make It Ahead

Braised beef often tastes even better the next day because the flavors continue to develop overnight.

Adjust the Gravy

If the gravy is too thin, simmer longer. If it becomes too thick, add a little beef broth.


Storage and Reheating

Store leftover braised beef and gravy in an airtight container in the refrigerator for up to four days.

To reheat, warm gently on the stovetop or in the oven until heated through. Add a small splash of broth if needed to loosen the sauce.

Mashed potatoes can be reheated with additional butter or cream to bring back their creamy texture.


Final Thoughts

This slow-braised beef with creamy mashed potatoes is the ultimate example of comforting homemade cooking. Every part of this recipe works together—the tender beef, rich gravy, and smooth potatoes create a meal that feels warm, satisfying, and unforgettable.

It is the type of recipe that brings people together around the table and creates memories with every bite. With simple ingredients, careful preparation, and a little patience, you can create a dish that tastes like it has been perfected over generations.

Whether served for a family dinner, special occasion, or cozy weekend meal, this recipe delivers everything you want from comfort food: deep flavor, incredible tenderness, and the feeling of a homemade meal made with love.

Slow-Cooked Braised Beef with Creamy Mashed Potatoes Recipe

Introduction

Few dishes capture the feeling of homemade comfort food quite like slow-cooked braised beef with creamy mashed potatoes. This classic dinner combines melt-in-your-mouth beef, a rich and flavorful gravy, and smooth buttery mashed potatoes to create a meal that feels warm, satisfying, and perfect for any cozy gathering.

The image showcases a beautifully prepared plate of tender braised beef resting on a generous bed of creamy mashed potatoes. The deep brown sauce covering the meat creates a luxurious appearance, while fresh herbs scattered on top add a touch of freshness and color. This dish represents everything people love about slow cooking—the incredible aroma, the deep flavors, and the tender texture that develops when simple ingredients are given enough time to transform.

Perfect for family dinners, weekend meals, holiday gatherings, or a comforting meal on a chilly evening, this recipe brings restaurant-style flavor straight to your kitchen.


About This Recipe

Braised beef is a cooking method that turns a tougher cut of meat into something incredibly tender and flavorful. The process involves first creating a beautiful seared crust on the beef, then slowly cooking it in a rich liquid until the meat becomes soft enough to fall apart with a fork.

The secret behind this recipe is patience. Slow cooking allows the beef to absorb the flavors of the sauce while releasing its natural juices, creating a rich gravy with incredible depth. The result is beef that is juicy, flavorful, and surrounded by a sauce that pairs perfectly with creamy mashed potatoes.

The mashed potatoes provide the perfect balance to the richness of the beef. Their smooth and buttery texture absorbs the savory gravy, creating the ultimate comfort food combination. Every bite brings together tender meat, creamy potatoes, and a deeply flavored sauce.


Ingredients

For the Braised Beef

  • 3–4 pounds beef chuck roast or beef short ribs
  • 2 tablespoons olive oil
  • 2 teaspoons salt
  • 1 teaspoon black pepper
  • 2 tablespoons all-purpose flour
  • 1 large onion, diced
  • 4 garlic cloves, minced
  • 2 carrots, chopped
  • 2 celery stalks, chopped
  • 2 tablespoons tomato paste
  • 2 cups beef broth
  • 1 cup red wine or additional beef broth
  • 2 tablespoons Worcestershire sauce
  • 3–4 sprigs fresh thyme
  • 2 sprigs fresh rosemary
  • 2 bay leaves

For the Creamy Mashed Potatoes

  • 3 pounds Yukon Gold or russet potatoes
  • ½ cup butter
  • ¾ cup warm heavy cream or milk
  • 1 teaspoon salt
  • ½ teaspoon black pepper
  • 2 tablespoons sour cream (optional)

For Garnishing

  • Fresh thyme leaves
  • Fresh rosemary
  • Extra black pepper

Step-by-Step Cooking Instructions

Step 1: Prepare the Beef

Begin by preparing the beef. Pat the meat dry using paper towels to remove excess moisture. This step is important because dry meat develops a much better golden-brown crust when seared.

Season the beef generously with salt and black pepper. Lightly coat it with flour, which helps create a beautiful crust and later contributes to a thicker, richer gravy.


Step 2: Sear the Meat

Heat olive oil in a large Dutch oven or heavy-bottomed pot over medium-high heat.

Add the beef pieces and sear them on all sides until they develop a deep brown color. This usually takes several minutes per side. The caramelized crust created during this step adds incredible flavor to the final dish.

Once browned, remove the beef and set it aside.


Step 3: Build the Flavor Base

In the same pot, add diced onions, carrots, and celery. Cook until the vegetables begin to soften and develop color.

Add minced garlic and cook briefly until fragrant.

Stir in tomato paste and allow it to cook for a minute or two. This helps intensify its sweetness and adds richness to the sauce.


Step 4: Create the Braising Sauce

Pour in the red wine or additional beef broth, scraping the bottom of the pot to release all the flavorful browned pieces stuck to the surface.

Add beef broth, Worcestershire sauce, thyme, rosemary, and bay leaves.

Return the beef to the pot and make sure it is partially covered by the liquid.


Step 5: Slow Cook the Beef

Cover the pot and cook slowly until the beef becomes incredibly tender.

Oven Method:

Cook at 325°F (160°C) for approximately 3–4 hours.

Slow Cooker Method:

Cook on low for 7–8 hours or until the beef easily pulls apart.

The beef is ready when a fork can slide into the meat without resistance.


Preparing the Creamy Mashed Potatoes

While the beef cooks, prepare the mashed potatoes.

Peel and cut the potatoes into evenly sized pieces. Place them in a large pot of salted water and bring to a boil.

Cook until the potatoes are completely tender when pierced with a fork.

Drain well and allow excess moisture to evaporate for a minute. This helps create lighter, fluffier mashed potatoes.

Mash the potatoes while they are still warm. Add butter first, allowing it to melt completely into the potatoes.

Gradually add warm cream or milk while mixing until the potatoes become smooth and creamy.

Season with salt and black pepper. Add sour cream if you prefer extra richness and a slight tang.


Making the Perfect Gravy

Once the beef is finished cooking, remove the meat carefully from the sauce.

Strain the cooking liquid if you prefer a smoother gravy, or keep the vegetables for a more rustic texture.

Simmer the sauce until it reaches your preferred thickness.

Taste and adjust seasoning with salt and pepper.

The finished gravy should be rich, glossy, and full of deep beef flavor.


Serving Suggestions

To serve, place a generous scoop of creamy mashed potatoes onto a plate or shallow bowl.

Top with pieces of tender braised beef and spoon plenty of gravy over everything.

Finish with fresh thyme or rosemary for a beautiful presentation.

This dish pairs wonderfully with:

  • Warm crusty bread
  • Roasted vegetables
  • Green beans
  • A simple garden salad
  • Buttered dinner rolls

The bread is especially perfect for soaking up the rich gravy left on the plate.


Cooking Tips for the Best Results

Choose the Right Cut of Beef

Cuts like chuck roast and short ribs are ideal because they contain connective tissue that breaks down during slow cooking, creating tender and flavorful meat.

Do Not Skip Searing

The browned crust adds layers of flavor that cannot be achieved through slow cooking alone.

Cook Low and Slow

High heat can make beef tough. Gentle cooking allows the fibers to soften gradually.

Rest Before Serving

Allow the beef to rest for a few minutes before plating. This helps keep the meat juicy.

Make It Ahead

Braised beef often tastes even better the next day because the flavors continue to develop. Simply refrigerate and gently reheat before serving.


Storage and Reheating

Store leftover beef and gravy in an airtight container in the refrigerator for up to 4 days.

To reheat, warm gently on the stovetop or in the oven until heated through. Add a splash of broth if the gravy becomes too thick.

Mashed potatoes can also be reheated with a little butter or cream to restore their creamy texture.


Final Thoughts

This slow-cooked braised beef with creamy mashed potatoes is the definition of comfort food. It combines tender, flavorful meat with silky potatoes and a rich homemade gravy to create a meal that feels both special and familiar.

The beauty of this recipe is that it transforms simple ingredients into something unforgettable. With time, patience, and a few classic cooking techniques, you can create a dinner that fills the kitchen with incredible aromas and brings everyone together around the table.

Whether served for a family gathering, Sunday dinner, or a cozy night at home, this dish delivers everything a great comfort meal should be—rich flavor, tender texture, and the feeling of a homemade meal made with care.

Easy Garlic Butter Baked Lobster – Tender, Juicy & Restaurant-Style

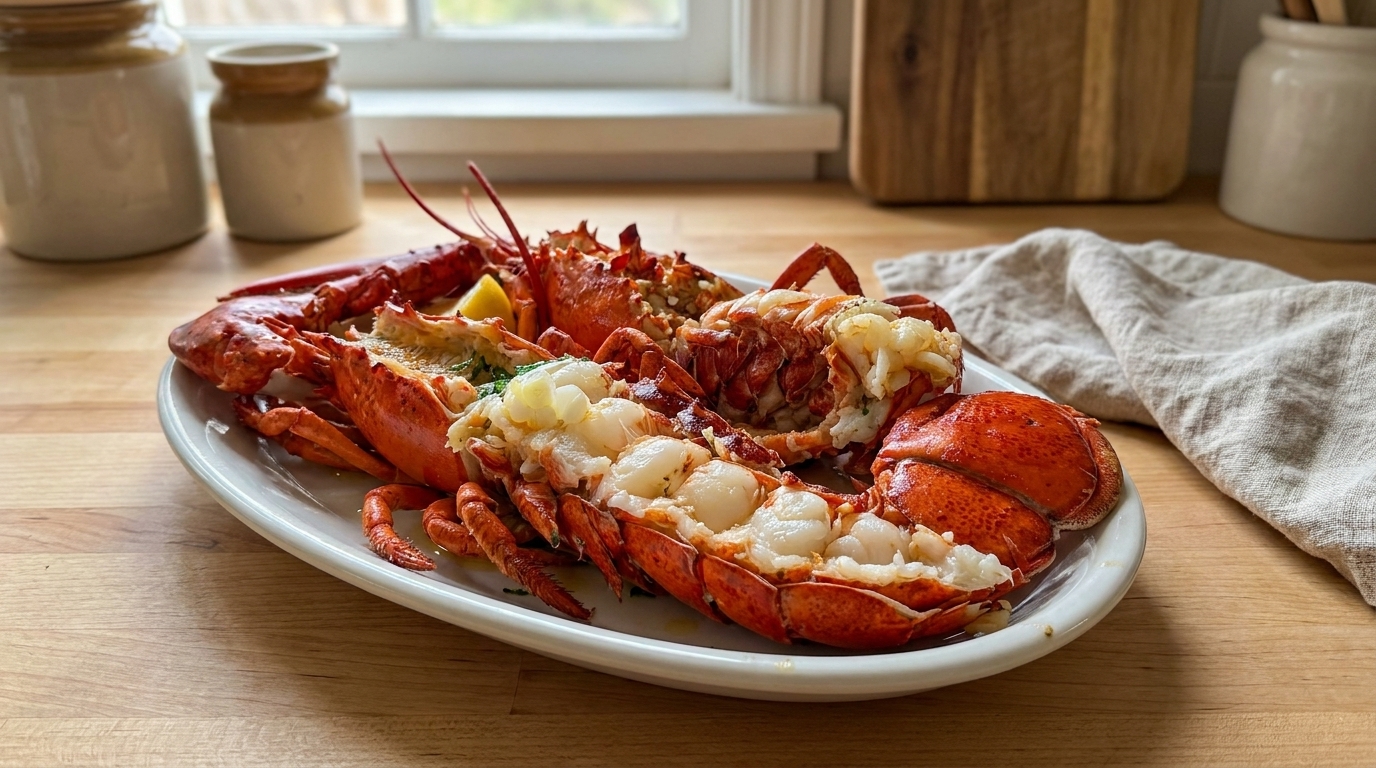
This Garlic Butter Baked Lobster is an elegant seafood dinner featuring tender, sweet lobster meat brushed with rich garlic butter, fresh herbs, and bright lemon. Inspired by the dish in the image, whole lobsters are split open to expose the succulent meat, then roasted until the shells turn beautifully red and the lobster becomes juicy, opaque, and buttery.

Although a platter of whole lobster looks impressive enough for a fine-dining restaurant, cooking lobster at home is much easier than many people expect. The key is keeping the flavors simple and controlling the cooking time. Lobster has a naturally sweet, delicate flavor, so it doesn’t need a complicated marinade or heavy sauce. Butter, garlic, lemon, herbs, salt, and pepper are enough to transform it into an unforgettable dinner.

This recipe is perfect for anniversaries, date nights, holidays, Valentine’s Day, birthdays, Christmas dinner, or any occasion when you want to serve something extra special.

Why You’ll Love This Garlic Butter Lobster

This recipe is all about allowing the lobster itself to shine. Instead of hiding the seafood beneath a thick sauce, garlic-herb butter gently enhances its natural sweetness.

Splitting the lobster before roasting also creates an impressive presentation while allowing the butter and seasonings to reach the meat directly.

Another advantage is how quickly lobster cooks. Once prepared, most lobsters need only about 10–15 minutes in a hot oven, depending on their size.

The recipe is also easy to customize. You can make it spicy, add Parmesan, increase the lemon and herbs, or serve it alongside shrimp or scallops for a complete seafood feast.

Ingredients

For the Lobster

  • 2 whole lobsters, about 1¼–1½ pounds each
  • 1 tablespoon olive oil
  • ½ teaspoon kosher salt
  • ¼ teaspoon freshly ground black pepper
  • ½ teaspoon paprika

For the Garlic Herb Butter

  • 6 tablespoons unsalted butter, melted
  • 5 cloves garlic, finely minced
  • 2 tablespoons fresh lemon juice
  • 1 teaspoon finely grated lemon zest
  • 2 tablespoons chopped fresh parsley
  • 1 teaspoon chopped fresh thyme
  • ¼ teaspoon paprika
  • ¼ teaspoon red pepper flakes, optional
  • ¼ teaspoon salt
  • Freshly ground black pepper to taste

For Serving

  • Lemon wedges
  • Chopped fresh parsley
  • Extra melted garlic butter

How to Make Garlic Butter Baked Lobster

1. Prepare the Oven

Preheat your oven to 425°F (220°C).

Line a large rimmed baking sheet with parchment paper or foil for easier cleanup.

Because lobster cooks relatively quickly, make sure your garlic butter and other ingredients are prepared before the lobster goes into the oven.

2. Prepare the Lobsters

If using whole lobsters, they should be prepared humanely immediately before cooking. If you’re not comfortable splitting whole lobster yourself, ask your seafood counter to prepare them for roasting.

Place each prepared lobster on a sturdy cutting board.

Using a large sharp chef’s knife, split the lobster lengthwise so the meat is exposed, creating the open presentation similar to the image.

Remove the stomach sac and intestinal tract if present. The green tomalley and coral may also be removed according to personal preference.

Lightly rinse away any unwanted material and gently pat the lobster dry with paper towels.

Arrange the lobster halves cut-side up on the prepared baking sheet.

3. Make the Garlic Butter

Melt the butter in a small saucepan or microwave-safe bowl.

Add the minced garlic, lemon juice, lemon zest, chopped parsley, thyme, paprika, optional red pepper flakes, salt, and black pepper.

Stir until everything is evenly combined.

The butter should smell fragrant and fresh, with plenty of garlic and a bright citrus aroma.

Reserve approximately one-third of the garlic butter for serving.

4. Season the Lobster

Drizzle the exposed lobster meat with a small amount of olive oil.

Sprinkle lightly with salt, black pepper, and paprika.

Brush a generous amount of garlic butter over the lobster meat, including the tail, claw areas, and exposed body meat.

Allow some of the butter to collect naturally inside the shell. As the lobster roasts, this butter mixes with its juices and creates an incredibly flavorful sauce.

5. Bake Until Tender

Transfer the lobster to the preheated oven.

Roast at 425°F for approximately 10–15 minutes, depending on the size and thickness of the lobster.

The shells should become a bright orange-red, while the meat changes from translucent to opaque white.

For food safety, lobster and other seafood should reach about 145°F (63°C) at the thickest part.

Avoid leaving it in the oven significantly longer once cooked. Lobster is naturally tender but can become firm and rubbery when overdone.

6. Baste With More Butter

Halfway through baking, carefully remove the pan and brush the lobster with another layer of garlic butter.

This keeps the exposed meat moist while building additional flavor.

Return it immediately to the oven.

For slightly golden edges, switch the oven to broil during the final 1–2 minutes.

Watch closely because butter and garlic can brown very quickly under a broiler.

7. Rest Briefly

Remove the cooked lobster from the oven and allow it to rest for about 2–3 minutes.

Unlike large cuts of meat, lobster doesn’t need an extended resting period.

Brush or spoon some of the reserved garlic butter over the hot lobster just before serving.

Finish with freshly chopped parsley and lemon wedges.

What to Serve With Garlic Butter Lobster

Lobster is rich enough to be the centerpiece of the meal, so simple side dishes usually work best.

Creamy mashed potatoes are an excellent option because they absorb the garlic butter beautifully.

For a lighter starch, serve the lobster with lemon rice, wild rice, or Parmesan risotto.

Pasta also pairs naturally with lobster. Try linguine tossed with garlic butter, angel hair pasta with lemon and herbs, or a simple Parmesan cream pasta.

For vegetables, roasted asparagus, garlic green beans, steamed broccoli, sautéed spinach, or roasted Brussels sprouts balance the richness of the seafood.

Warm crusty bread is another great addition because it gives you something to soak up the garlic butter left on the plate.

Pro Tips for Perfect Baked Lobster

Don’t overcook it. Lobster can go from tender to rubbery relatively quickly.

Use real butter. Because the sauce contains so few ingredients, good-quality butter makes a noticeable difference.

Use fresh garlic. Freshly minced garlic gives the butter a stronger, more natural aroma than garlic powder alone.

Add lemon strategically. A little lemon balances butter beautifully, but too much can overpower lobster’s subtle sweetness.

Keep extra butter for serving. Don’t use the entire batch before cooking. Fresh garlic butter spooned over the finished lobster gives the dish a glossy, luxurious appearance.

Use fresh herbs. Parsley and thyme add color and freshness without dominating the lobster.

Easy Recipe Variations

Cajun Garlic Butter Lobster

Add 1–2 teaspoons Cajun seasoning to the melted butter for a smoky, spicy version.

Garlic Parmesan Lobster

Sprinkle freshly grated Parmesan over the exposed meat during the final few minutes of cooking.

Spicy Chili Butter Lobster

Increase the red pepper flakes and add a small pinch of cayenne.

Lemon Herb Lobster

Increase the lemon zest and add fresh dill, parsley, and chives.

Seafood Feast

Serve the baked lobster alongside seared scallops, garlic butter shrimp, or crab legs for an impressive seafood platter.

Surf and Turf

Pair each lobster portion with filet mignon, ribeye, or sirloin steak for a classic steakhouse-style dinner.

Storage and Reheating

Lobster is best served immediately, but leftovers can be stored in an airtight container in the refrigerator for up to 2 days.

For easier storage, remove the cooked meat from the shell first.

To reheat, place the lobster in a covered skillet with a spoonful of butter over low heat. Warm gently just until heated through.

Avoid aggressive reheating because lobster becomes tough when repeatedly exposed to high heat.

Leftover lobster can also be used cold in lobster rolls, salads, sandwiches, pasta salads, or seafood dips.

Final Thoughts

This Garlic Butter Baked Lobster proves that an impressive seafood dinner doesn’t have to involve complicated cooking. With tender lobster, fragrant garlic, melted butter, fresh herbs, and lemon, you can create a restaurant-style meal using only a handful of ingredients.

The key is careful cooking. Prepare the lobster properly, coat the exposed meat generously with garlic butter, roast only until tender and opaque, and finish with fresh herbs and another spoonful of warm butter.

Presented on a large platter with vibrant red shells, juicy white lobster meat, and lemon wedges, this recipe makes a stunning centerpiece for holidays, celebrations, romantic dinners, or any evening when you want to serve something truly special.

Easy Slow Cooker Beef Roast with Mushroom Gravy – Tender, Juicy & Richly Savory

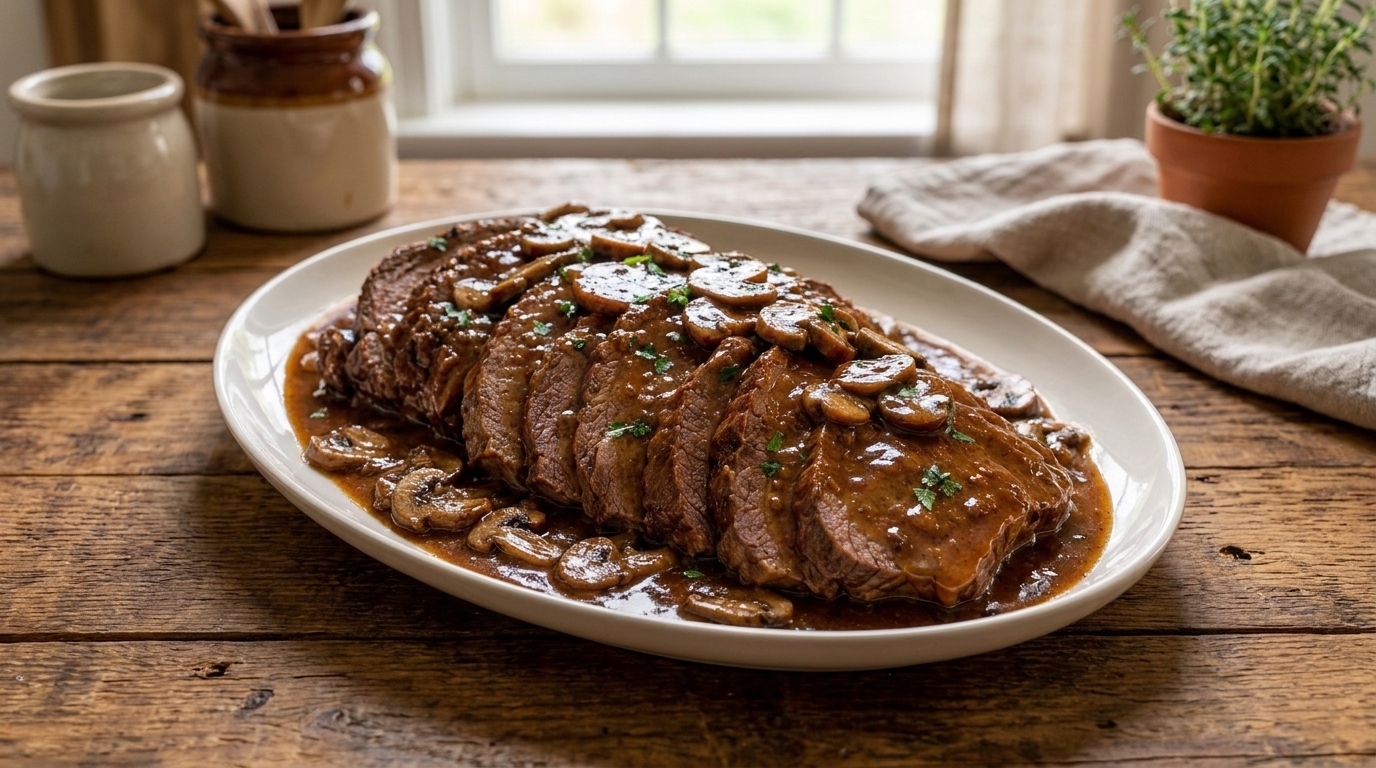
This Slow Cooker Beef Roast with Mushroom Gravy is the kind of comforting, satisfying dinner that makes the whole kitchen smell incredible. Inspired by the dish in the image, tender slices of slow-cooked beef are covered in a glossy, deeply savory mushroom gravy filled with buttery sliced mushrooms, garlic, onions, beef broth, and herbs.

The slow cooker is ideal for this recipe because it gently transforms an economical beef roast into tender, juicy meat without requiring constant attention. Searing the roast before slow cooking develops a flavorful browned crust, while several hours of gentle cooking allow the beef to absorb the rich flavors of the broth, mushrooms, and seasonings.

Once the beef is tender, the cooking liquid is transformed into a luxurious mushroom gravy and spooned generously over the sliced roast. Serve it with mashed potatoes, egg noodles, rice, or roasted vegetables for a hearty family dinner that feels both rustic and restaurant-worthy.

Why You’ll Love This Beef Roast with Mushroom Gravy

One of the biggest advantages of this recipe is how little hands-on cooking it requires. After searing the beef and sautéing the mushrooms, most of the cooking happens unattended in the slow cooker.

The mushroom gravy is another reason this dish stands out. Mushrooms soak up the savory beef juices while releasing their own earthy flavor into the sauce. Worcestershire sauce, garlic, onions, thyme, and beef broth add even more depth.

This recipe is also excellent for entertaining because the roast can stay warm in the slow cooker until you’re ready to serve dinner.

And unlike a traditional fall-apart pot roast, this version can be cooked until tender while still holding together well enough to slice beautifully, similar to the presentation shown in the image.

Ingredients

For the Beef Roast

  • 3½–4 pound chuck roast, bottom round roast, or sirloin tip roast
  • 2 teaspoons kosher salt
  • 1 teaspoon freshly ground black pepper
  • 1 teaspoon garlic powder
  • 1 teaspoon onion powder
  • ½ teaspoon smoked paprika
  • 2 tablespoons olive oil

For the Mushrooms and Aromatics

  • 16 ounces cremini or white button mushrooms, sliced
  • 1 large yellow onion, finely chopped
  • 4 cloves garlic, minced
  • 2 tablespoons butter
  • 1 tablespoon tomato paste

For the Slow Cooker Sauce

  • 2½ cups beef broth
  • 2 tablespoons Worcestershire sauce
  • 1 tablespoon soy sauce
  • 1 teaspoon dried thyme
  • ½ teaspoon dried rosemary
  • 1 teaspoon Dijon mustard
  • 2 bay leaves
  • ½ teaspoon black pepper

For the Mushroom Gravy

  • 2 tablespoons cornstarch
  • 3 tablespoons cold water
  • 1 tablespoon butter
  • Salt and pepper to taste

For Garnish

  • 2 tablespoons freshly chopped parsley
  • Fresh thyme, optional

How to Make Slow Cooker Beef Roast with Mushroom Gravy

1. Prepare the Beef

Remove the beef from the refrigerator approximately 20–30 minutes before cooking.

Pat the roast thoroughly dry using paper towels.

This is an important step because excess surface moisture prevents the meat from developing a proper brown crust.

Mix the salt, black pepper, garlic powder, onion powder, and smoked paprika together.

Season the roast generously on all sides, pressing the seasonings gently into the surface.

2. Sear the Roast

Heat the olive oil in a large cast-iron skillet or heavy-bottomed pan over medium-high heat.

Once the oil is shimmering, carefully add the beef.

Sear for approximately 3–4 minutes per side until a deep brown crust develops.

Don’t constantly move the meat. Leaving it undisturbed against the hot pan allows the surface to caramelize.

You are not trying to cook the roast through. This step is simply about creating flavor.

Once browned on all sides, transfer the roast to the slow cooker.

3. Sauté the Mushrooms

Reduce the skillet heat to medium and add the butter.

Add the sliced mushrooms and spread them across the pan.

Allow them to cook for approximately 5–7 minutes, stirring occasionally.

At first, the mushrooms will release moisture. Continue cooking until most of that liquid evaporates and they begin developing golden-brown edges.

Reserve approximately one-third of the browned mushrooms for adding near the end if you’d like them to maintain a more distinct texture and appearance.

4. Add the Onion and Garlic

Add the chopped onion to the remaining mushrooms.

Cook for another 3–4 minutes, until the onion begins to soften.

Stir in the minced garlic and cook for approximately 30 seconds.

Add the tomato paste and cook for another minute.

Cooking the tomato paste briefly allows it to caramelize slightly and adds extra depth to the finished gravy.

5. Deglaze the Skillet

Pour approximately ½ cup of beef broth into the skillet.

Use a wooden spoon to scrape the browned pieces from the bottom of the pan.

These caramelized bits are packed with flavor and should become part of your gravy rather than remaining stuck to the skillet.

Pour the entire mushroom and onion mixture over the beef in the slow cooker.

6. Add the Slow Cooker Sauce

Pour the remaining beef broth around the roast.

Add Worcestershire sauce, soy sauce, Dijon mustard, thyme, rosemary, black pepper, and bay leaves.

The liquid doesn’t need to completely cover the roast.

As the beef cooks, it will release additional juices that combine with the broth to create the gravy base.

Cover the slow cooker.

7. Slow Cook Until Tender

Cook the roast on LOW for approximately 7–8 hours.

You can cook it on HIGH for approximately 4–5 hours, but the LOW setting usually creates more evenly tender beef.

Cooking time depends on the size and cut of your roast.

For a sliceable roast like the one shown in the image, remove the meat once it is tender enough to cut easily but before it completely falls apart.

Chuck roast naturally becomes more shreddable, while bottom round and sirloin tip tend to retain a more sliceable texture.

8. Rest the Beef

Carefully transfer the cooked roast to a cutting board.

Tent loosely with aluminum foil and let it rest for approximately 15 minutes.

Resting helps the juices redistribute through the beef and makes slicing easier.

Remove and discard the bay leaves from the slow cooker.

9. Make the Mushroom Gravy

Pour about 3 cups of the cooking liquid, mushrooms, and onions into a saucepan.

Bring to a gentle simmer over medium heat.

In a small bowl, whisk together:

  • 2 tablespoons cornstarch
  • 3 tablespoons cold water

Whisk until completely smooth.

Slowly pour the cornstarch mixture into the simmering sauce while whisking continuously.

Cook for approximately 2–4 minutes, until the gravy becomes glossy and thick enough to coat the back of a spoon.

Add the reserved mushrooms if you kept some aside earlier.

For an extra-rich finish, stir one tablespoon of butter into the gravy immediately before serving.

Taste and adjust the salt and pepper.

10. Slice and Serve

Using a sharp carving knife, slice the roast against the grain.

Cutting against the grain shortens the muscle fibers and helps produce more tender slices.

Arrange the beef slices slightly overlapping on a large serving platter, similar to the presentation shown in the image.

Spoon plenty of hot mushroom gravy over the beef.

Arrange additional mushrooms over the top and finish with freshly chopped parsley or thyme.

Serve immediately.

What to Serve With Beef Roast and Mushroom Gravy

Creamy mashed potatoes may be the ultimate side dish for this recipe because they soak up the rich mushroom gravy beautifully.

Buttered egg noodles are another classic pairing. Place noodles in a serving bowl, add slices of roast, and spoon plenty of gravy over everything.

You can also serve the beef with steamed rice, roasted potatoes, Parmesan polenta, or crusty bread.

For vegetables, try roasted carrots, garlic green beans, Brussels sprouts, asparagus, or broccoli.

If you’re serving this as a large Sunday dinner, add warm dinner rolls and a simple garden salad.

Pro Tips for the Best Beef Roast

Sear the beef first. Browning adds much more flavor than placing an uncooked roast directly into the slow cooker.

Don’t overcrowd mushrooms. Give them enough room to brown instead of steam.

Deglaze the skillet. Those browned bits left behind after searing the beef contain concentrated flavor.

Choose your beef according to texture. Chuck roast becomes extremely tender and may eventually shred, while sirloin tip or bottom round can hold their shape better for neat slices.

Cook primarily by tenderness. Slow cookers vary, so exact cooking times are only guidelines.

Rest before slicing. Cutting the beef immediately can release more of its juices.

Slice against the grain. This simple technique noticeably improves tenderness.

Thicken the gravy at the end. This gives you much better control over the final consistency.

Easy Recipe Variations

Creamy Mushroom Beef Roast

After thickening the gravy, stir in ½ cup heavy cream for a lighter-colored, creamy mushroom sauce.

Garlic Herb Beef Roast

Increase the garlic to six cloves and add fresh rosemary and thyme.

Onion Mushroom Roast

Use two large onions instead of one for an especially rich onion gravy.

Beef Roast with Potatoes and Carrots

Add baby potatoes and thick carrot pieces to the slow cooker during the final 3–4 hours.

Red Wine Mushroom Gravy

Replace approximately ½ cup of the beef broth with dry red wine for a deeper, more complex sauce.

Storage and Reheating

Store leftover beef and mushroom gravy together in an airtight container in the refrigerator for up to 4 days.

Keeping the meat in the gravy helps prevent it from drying out.

For reheating, place the beef and sauce in a covered skillet over low heat. Add a splash of beef broth if the gravy has thickened too much.

Heat gently until warmed through rather than allowing the mixture to boil.

You can also freeze the roast and gravy for up to 3 months. Thaw overnight in the refrigerator before reheating.

Final Thoughts

This Slow Cooker Beef Roast with Mushroom Gravy is a comforting dinner built around tender beef, golden mushrooms, onions, garlic, herbs, and a deeply savory gravy. It looks impressive enough for a holiday table but remains simple enough for an everyday family meal.

The secret is building flavor before the slow cooker takes over: brown the beef thoroughly, caramelize the mushrooms, sauté the onions and garlic, and scrape every flavorful browned bit from the skillet into your sauce. After several hours of slow cooking, slice the tender roast and cover it generously with that glossy mushroom gravy.

Serve it with mashed potatoes or noodles, add your favorite vegetables, and you have a hearty classic that works beautifully for Sunday dinner, cold-weather comfort food, or whenever you’re craving a rich homemade beef dinner.

Easy Creamy Salmon Lasagna Recipe – Rich, Cheesy & Perfectly Comforting

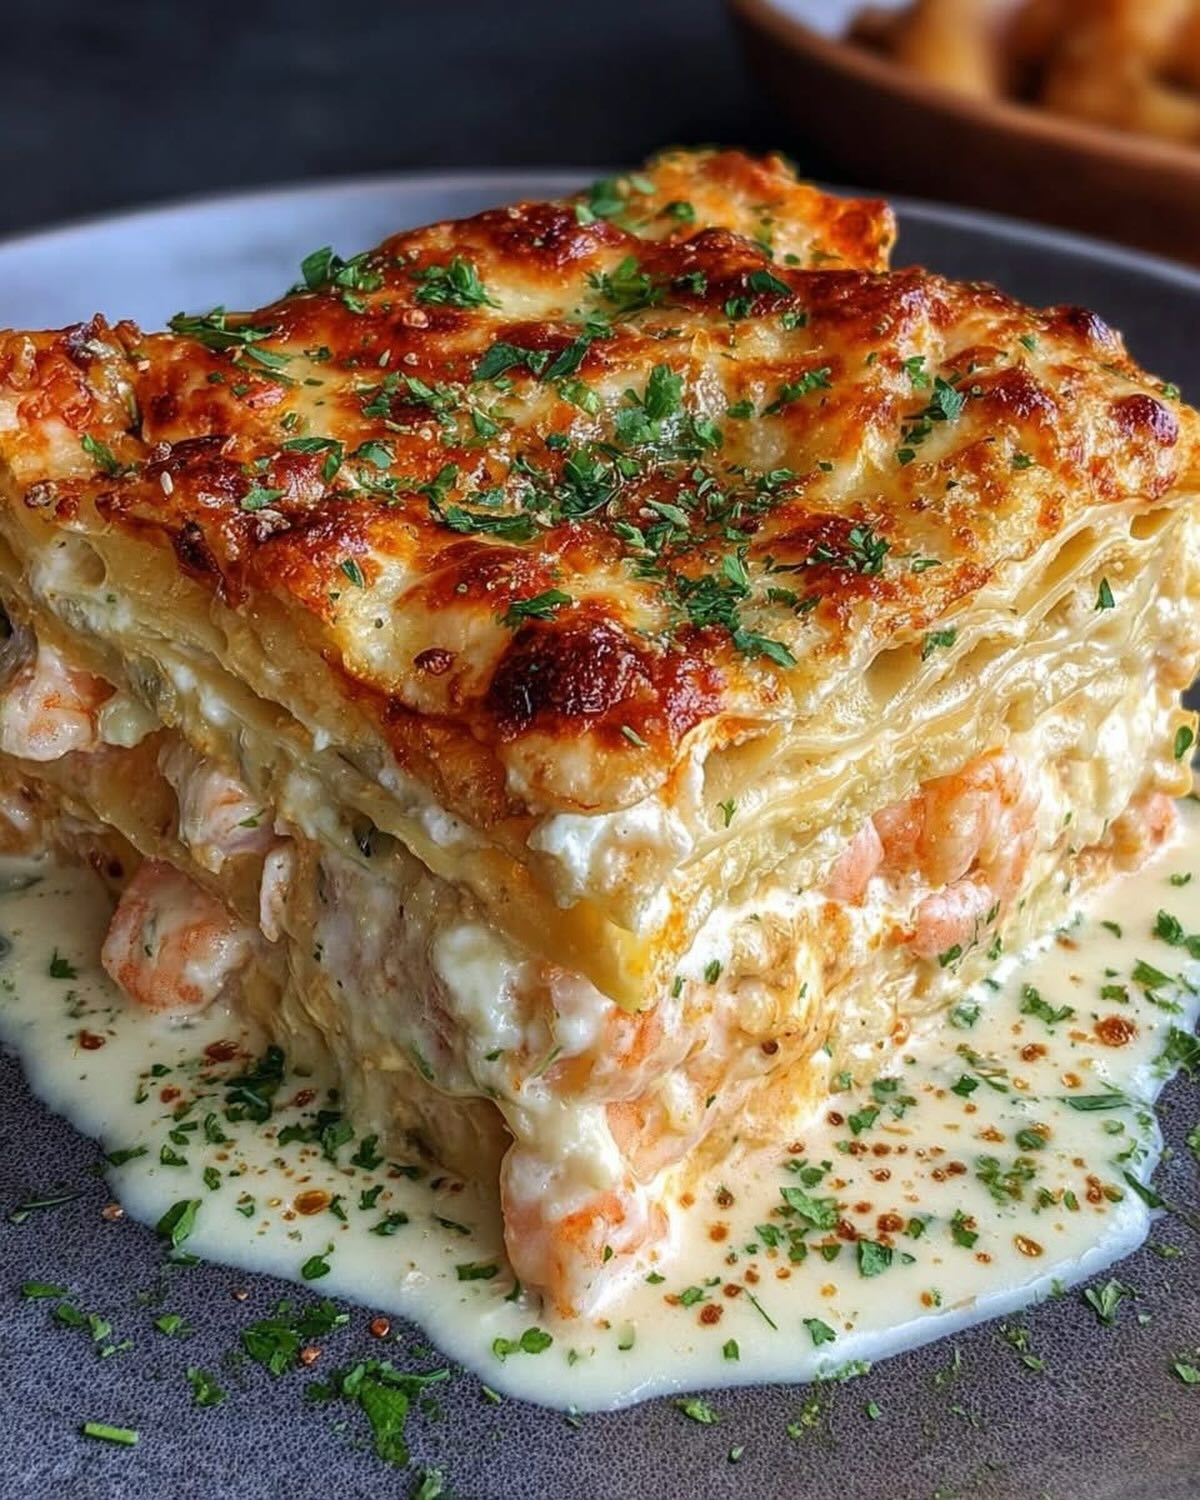
This Creamy Salmon Lasagna is a rich and elegant twist on traditional lasagna, featuring tender layers of pasta, flaky salmon, creamy white sauce, melted cheese, and fresh herbs. Inspired by the dish in the image, each slice has beautifully defined layers with a golden, lightly crisp cheese topping and plenty of silky sauce underneath.

Instead of the usual tomato-and-beef filling, this seafood lasagna uses salmon with a smooth garlic-Parmesan cream sauce. The mild richness of salmon works especially well with mozzarella, Parmesan, garlic, and herbs, creating a comforting pasta bake that still feels sophisticated enough for a special dinner.

It is an excellent option for Sunday dinner, date night, holidays, or entertaining. You can also assemble the lasagna ahead of time and refrigerate it until you’re ready to bake.

Why You’ll Love This Creamy Salmon Lasagna

This recipe has all the comforting qualities people love about classic lasagna while offering something different from the usual meat sauce version.

The salmon adds a tender, flaky texture between the pasta layers, while the creamy sauce keeps every bite moist and luxurious. Mozzarella creates the stretchy cheese layers, and Parmesan adds a deeper savory flavor.

Another reason this recipe works so well is that the salmon doesn’t need complicated preparation. It is simply seasoned, cooked until just tender, then flaked into pieces before being layered into the lasagna.

The finished dish also looks impressive. Once rested and sliced, you get thick layers of pasta, salmon, cream sauce, and golden cheese similar to the beautiful serving shown in the image.

Ingredients

For the Salmon

  • 1½ pounds salmon fillets, skin removed
  • 1 tablespoon olive oil
  • 1 teaspoon salt
  • ½ teaspoon black pepper
  • ½ teaspoon garlic powder
  • ½ teaspoon paprika
  • 1 tablespoon fresh lemon juice

For the Creamy Garlic Sauce

  • 4 tablespoons unsalted butter
  • 4 cloves garlic, finely minced
  • ¼ cup all-purpose flour
  • 3 cups whole milk
  • 1 cup heavy cream
  • ¾ cup freshly grated Parmesan cheese
  • ½ teaspoon Italian seasoning
  • ¼ teaspoon ground nutmeg, optional
  • ½ teaspoon salt
  • ¼ teaspoon black pepper

For the Cheese Filling

  • 15 ounces ricotta cheese
  • 1 large egg
  • ½ cup grated Parmesan cheese
  • 2 tablespoons chopped fresh parsley
  • 1 tablespoon chopped fresh dill
  • ¼ teaspoon salt
  • ¼ teaspoon black pepper

For Assembly

  • 9–12 lasagna noodles
  • 3 cups shredded mozzarella cheese
  • ½ cup grated Parmesan cheese
  • 2 tablespoons chopped fresh parsley or dill
  • Lemon wedges for serving, optional

How to Make Creamy Salmon Lasagna

1. Cook the Salmon

Preheat the oven to 400°F (205°C).

Place the salmon fillets in a lightly greased baking dish. Brush them with olive oil and lemon juice, then season with salt, black pepper, garlic powder, and paprika.

Bake for approximately 10–14 minutes, depending on thickness.

You don’t want to aggressively overcook the salmon because it will spend additional time in the oven once assembled into the lasagna.

When the salmon flakes easily with a fork, remove it from the oven and allow it to cool slightly.

Break it into medium-sized flakes. Avoid shredding it too finely; visible pieces of salmon make the finished lasagna more flavorful and attractive.

Reduce the oven temperature to 375°F (190°C).

2. Prepare the Lasagna Noodles

Bring a large pot of salted water to a boil.

Add the lasagna noodles and cook according to package directions until just al dente.

The noodles should still have a little firmness because they will continue cooking in the oven.

Drain carefully and spread them on parchment paper or a clean kitchen towel to prevent them from sticking together.

If you’re using oven-ready noodles, you can skip the boiling step, but make sure there is enough sauce in the lasagna to properly hydrate them.

3. Make the Creamy Garlic Sauce

Melt the butter in a saucepan over medium heat.

Add the minced garlic and cook for about 30 seconds, stirring constantly.

Sprinkle in the flour and whisk continuously for approximately 1–2 minutes. This cooks away the raw flour flavor while creating the base for your creamy sauce.

Slowly pour in the milk while whisking continuously.

Add the heavy cream and continue stirring.

Cook over medium-low heat for approximately 5–7 minutes, or until the sauce thickens enough to coat the back of a spoon.

Reduce the heat to low and stir in Parmesan, Italian seasoning, optional nutmeg, salt, and black pepper.

The finished sauce should be creamy and smooth but not overly thick. Remember that the noodles will absorb some of the moisture during baking.

4. Prepare the Ricotta Filling

In a medium bowl, combine the ricotta, egg, Parmesan, parsley, dill, salt, and black pepper.

Mix until evenly combined.

The ricotta creates a creamy layer between the salmon and pasta, while the egg helps the lasagna hold its shape after baking.

Fresh dill is especially delicious with salmon, but parsley can be used on its own if you prefer a milder herb flavor.

5. Assemble the Salmon Lasagna

Spread approximately ¾ cup of creamy garlic sauce over the bottom of a 9 × 13-inch baking dish.

Arrange a layer of lasagna noodles over the sauce.

Spread about one-third of the ricotta mixture over the noodles.

Add a layer of flaked salmon.

Spoon creamy sauce over the salmon and sprinkle with mozzarella.

Repeat the layers:

Lasagna noodles → ricotta → salmon → cream sauce → mozzarella.

Continue until you’ve used the ingredients.

Finish with a final pasta layer followed by plenty of cream sauce, mozzarella, and Parmesan.

Make sure the upper noodles are completely covered so they don’t dry out while baking.

6. Bake the Lasagna

Cover the baking dish loosely with aluminum foil.

Bake at 375°F (190°C) for 25 minutes.

Remove the foil and continue baking uncovered for another 15–20 minutes.

The lasagna is ready when the sauce is bubbling around the edges and the cheese on top is completely melted with golden-brown spots.

For the deeply golden surface visible in the image, place the lasagna under the broiler for 1–2 minutes at the end.

Watch it closely because cheese can brown very quickly.

7. Rest Before Slicing

Allow the salmon lasagna to rest for at least 15 minutes before cutting.

This may be the hardest part because the lasagna smells amazing straight from the oven, but resting is essential.

Freshly baked lasagna is extremely soft. Giving it time to settle allows the cheese and cream sauce to thicken slightly so you can cut clean, impressive squares.

Finish each serving with chopped parsley or dill and, if desired, a little extra warm cream sauce around the plate.

What to Serve With Creamy Salmon Lasagna

Because salmon lasagna is rich and creamy, fresh vegetables make excellent side dishes.

Try roasted asparagus, sautéed spinach, garlic green beans, steamed broccoli, or roasted zucchini.

A crisp salad with lettuce, cucumber, tomatoes, and lemon vinaigrette provides acidity that balances the creamy pasta.

Garlic bread is another delicious option, especially because it can soak up the extra white sauce.

For a lighter dinner, simply serve one generous piece of lasagna with a large mixed-green salad.

Tips for the Best Salmon Lasagna

Don’t overcook the salmon initially. It will continue cooking inside the lasagna.

Keep the sauce slightly loose. An overly thick sauce can make baked lasagna dry.

Use freshly grated Parmesan. It melts more smoothly and gives the sauce better flavor.

Season every component. Pasta, salmon, ricotta, and sauce should each have enough seasoning.

Use fresh herbs. Dill and parsley add freshness that pairs especially well with salmon.

Cover during the first part of baking. This traps moisture and prevents the upper layers from drying out.

Let the lasagna rest. Waiting 15 minutes produces much cleaner slices.

Easy Recipe Variations

For Creamy Salmon and Spinach Lasagna, sauté 4 cups of fresh spinach until wilted and add it between the salmon layers.

To make a seafood lasagna, combine salmon with cooked shrimp or crab meat.

For additional vegetable flavor, add sautéed mushrooms, zucchini, or leeks.

You can also replace part of the mozzarella with Gruyère or fontina for a richer cheese flavor.

If you prefer extra lemon flavor, add about 1 teaspoon of finely grated lemon zest to the ricotta mixture.

Storage and Reheating

Store leftover salmon lasagna in an airtight container in the refrigerator for up to 3 days.

For oven reheating, place individual portions in a covered baking dish and warm at 325°F (165°C) for about 15–20 minutes.

You can also microwave individual portions, but use moderate power and shorter intervals to avoid drying out the salmon.

If the lasagna seems dry after refrigeration, spoon a little milk or cream sauce around the portion before reheating.

Final Thoughts

This Creamy Salmon Lasagna turns a familiar comfort-food favorite into an elegant seafood dinner. Layers of tender pasta, flaky salmon, creamy ricotta, garlic-Parmesan sauce, and bubbling mozzarella create a dish that is rich, satisfying, and beautiful enough for entertaining.

The key is keeping the salmon tender, making enough creamy sauce to keep the pasta moist, and allowing the finished lasagna to rest before slicing. Add a sprinkle of fresh herbs and a little extra sauce when serving, and you’ll have a restaurant-style salmon lasagna that’s equally suited to family dinner or a special occasion.

Easy Slow Cooker Creamy Garlic Chicken and Broccoli – Tender, Cheesy, and Comforting

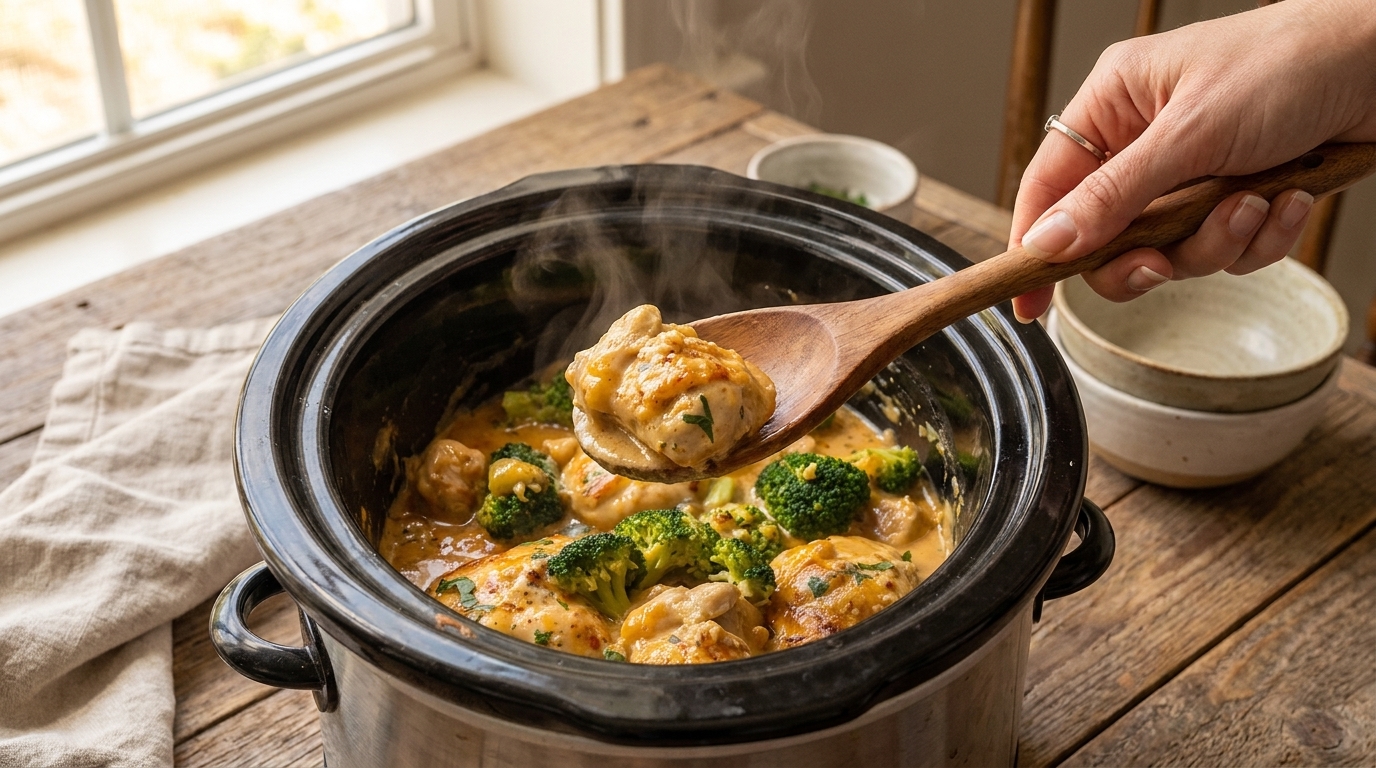
This Slow Cooker Creamy Garlic Chicken and Broccoli is a cozy, satisfying dinner featuring tender pieces of chicken surrounded by bright green broccoli in a rich, velvety garlic cream sauce. Inspired by the dish in your image, the chicken cooks slowly until juicy and flavorful, while broccoli is added toward the end so it stays colorful and slightly crisp instead of becoming overly soft.

The creamy sauce is packed with garlic, Parmesan, herbs, chicken broth, and a touch of cream cheese. As everything cooks together, the chicken releases flavorful juices that blend into the sauce, creating a restaurant-style gravy that is perfect for spooning over rice, mashed potatoes, pasta, or noodles.

This is an excellent recipe for busy weekdays because most of the work can be done at the beginning. Once the chicken is in the slow cooker, you can leave it to cook while you handle the rest of your day. Add the broccoli near the end, finish the sauce, and dinner is ready.

Why You’ll Love This Slow Cooker Creamy Garlic Chicken and Broccoli

This recipe combines protein, vegetables, and a creamy sauce in one comforting dish. Chicken and broccoli are familiar family-friendly ingredients, but the rich garlic Parmesan sauce makes them feel much more special.

Using the slow cooker also allows the seasonings to gradually flavor the chicken. Garlic, Italian herbs, paprika, broth, and Parmesan create layers of savory flavor without requiring complicated cooking techniques.

Another benefit is versatility. You can use boneless chicken breasts or thighs, add mushrooms or spinach, increase the Parmesan, or turn the dish into a complete one-pot meal with potatoes.

The leftovers also reheat well, making this a useful recipe for preparing lunches or dinners in advance.

Ingredients

For the Chicken

  • 2 pounds boneless, skinless chicken breasts or chicken thighs
  • 1 tablespoon olive oil
  • 1 teaspoon garlic powder
  • 1 teaspoon onion powder
  • 1 teaspoon Italian seasoning
  • 1/2 teaspoon smoked paprika
  • 3/4 teaspoon salt
  • 1/2 teaspoon freshly ground black pepper

For the Creamy Garlic Sauce

  • 2 tablespoons unsalted butter
  • 5 garlic cloves, finely minced
  • 1 1/2 cups chicken broth
  • 4 ounces cream cheese, softened and cubed
  • 3/4 cup heavy cream
  • 3/4 cup freshly grated Parmesan cheese
  • 1 teaspoon Italian seasoning
  • 1/2 teaspoon dried thyme
  • 1 teaspoon Dijon mustard
  • 1/4 teaspoon crushed red pepper flakes, optional
  • Salt and black pepper to taste

For the Broccoli

  • 4 cups fresh broccoli florets
  • 1 tablespoon olive oil
  • Pinch of salt
  • Pinch of black pepper

For Garnishing

  • 2 tablespoons chopped fresh parsley
  • Extra Parmesan cheese
  • Freshly cracked black pepper

How to Make Slow Cooker Creamy Garlic Chicken and Broccoli

1. Prepare the Chicken

Pat the chicken dry with paper towels.

Season both sides with garlic powder, onion powder, Italian seasoning, smoked paprika, salt, and black pepper.

If using very large chicken breasts, you can cut them into smaller portions so they cook more evenly.

Chicken thighs are another excellent choice because they remain especially juicy during slow cooking.

2. Optional: Sear the Chicken

Although you can place the seasoned chicken directly into the slow cooker, quickly browning it first adds extra flavor and gives the chicken the golden appearance seen in this style of dish.

Heat olive oil in a large skillet over medium-high heat.

Add the chicken and sear for approximately 2 to 3 minutes per side.

You are not trying to cook it completely. The goal is simply to create some caramelized color on the outside.

Transfer the chicken to the slow cooker.

3. Cook the Garlic

Reduce the skillet heat to medium.

Add the butter.

Once melted, add the minced garlic and cook for about 30 seconds, stirring continuously.

The garlic should become fragrant but should not turn dark brown.

4. Deglaze the Skillet

Pour approximately 1/2 cup of the chicken broth into the skillet.

Scrape the bottom of the pan with a wooden spoon to loosen the browned pieces left behind from the chicken.

Those browned bits add tremendous flavor to the sauce.

Pour this mixture over the chicken in the slow cooker.

5. Add the Seasonings

Pour the remaining chicken broth around the chicken.

Add Italian seasoning, thyme, Dijon mustard, crushed red pepper flakes if using, and a little additional black pepper.

Cover the slow cooker.

6. Slow Cook the Chicken

Cook on LOW for approximately 3 1/2 to 5 hours or on HIGH for 2 to 3 hours, depending on the size and type of chicken used.

Chicken breasts usually cook more quickly than thighs, so begin checking them earlier.

The chicken should reach an internal temperature of 165°F at the thickest part.

Avoid cooking chicken breasts unnecessarily long because they can eventually become dry even when surrounded by sauce.

7. Add the Cream Cheese

About 30 to 40 minutes before serving, add the softened cream cheese to the slow cooker.

Cutting it into small cubes helps it melt more easily.

Gently stir some of the hot cooking liquid around the cream cheese until it begins to dissolve into the broth.

Try not to break up the chicken while stirring.

8. Add the Heavy Cream

Pour in the heavy cream and gently stir.

Cover the slow cooker and allow the sauce to heat for another 10 minutes.

Do not allow the cream to cook for several hours from the beginning. Adding it toward the end helps maintain a smoother sauce.

9. Add the Parmesan

Gradually stir in the freshly grated Parmesan cheese.

Add it a little at a time rather than dumping it in all at once.

Continue stirring until the cheese melts and the sauce becomes creamy.

Freshly grated Parmesan is recommended because it melts more smoothly than many packaged pre-shredded cheeses.

10. Add the Broccoli

Add the fresh broccoli florets during approximately the last 20 to 30 minutes of cooking.

Gently push some of the florets into the sauce while leaving others near the surface.

Cover and continue cooking until the broccoli reaches your preferred tenderness.

For broccoli that stays bright green and slightly crisp, start checking around 20 minutes.

If you prefer very soft broccoli, allow it to cook longer.

11. Adjust the Sauce

Check the sauce before serving.

If it seems too thick, stir in a small amount of chicken broth.

If it seems too thin, leave the slow cooker uncovered on HIGH for 10 to 15 minutes.

You can also make a slurry using:

  • 1 tablespoon cornstarch
  • 1 tablespoon cold water

Stir the slurry into the sauce and cook until slightly thickened.

12. Finish and Serve

Taste the sauce and adjust with additional salt, black pepper, garlic, or Parmesan if needed.

Sprinkle chopped parsley over the chicken and broccoli.

Finish with freshly cracked black pepper and extra Parmesan.

Serve immediately with plenty of creamy garlic sauce spooned over each portion.

What to Serve With Creamy Garlic Chicken and Broccoli

Mashed Potatoes

Creamy mashed potatoes are one of the best side dishes for this recipe. The potatoes absorb the garlic Parmesan sauce and turn it into an especially comforting meal.

Rice

Serve the chicken and broccoli over jasmine rice, basmati rice, or regular white rice.

The rice absorbs the creamy sauce beautifully and makes the meal more filling.

Pasta

Fettuccine, penne, linguine, or egg noodles all work well.

You can place the pasta in a bowl and spoon the creamy chicken, broccoli, and sauce over the top.

Crusty Bread

Warm French bread, sourdough, or garlic bread is ideal for soaking up any sauce remaining on the plate.

For a lighter meal, serve the chicken and broccoli with a fresh green salad.

Tips for the Best Slow Cooker Chicken and Broccoli

Add broccoli near the end. Cooking broccoli for several hours will make it extremely soft and dull in color.

Use fresh broccoli when possible. Fresh florets generally retain their texture better than frozen broccoli.

Do not overcook chicken breast. Begin checking it toward the lower end of the cooking range.

Use chicken thighs for extra juiciness. Thighs are especially forgiving in slow-cooker recipes.

Sear the chicken for more flavor. It is optional, but browning adds another layer of savory flavor.

Add dairy later. Cream, cream cheese, and Parmesan generally perform better when added toward the end.

Grate your own Parmesan. It usually creates the smoothest sauce.

Easy Recipe Variations

Creamy Chicken, Broccoli and Mushroom

Add 8 ounces sliced cremini mushrooms.

For the best texture, sauté them until golden before placing them in the slow cooker.

Extra Cheesy Chicken and Broccoli

Increase the Parmesan to 1 cup and add 1/2 cup shredded mozzarella during the final 10 minutes.

Spicy Creamy Garlic Chicken

Add 1/2 teaspoon crushed red pepper flakes or a pinch of cayenne.

Chicken and Spinach

Stir 2 cups baby spinach into the sauce during the final 5 to 10 minutes.

Lemon Garlic Chicken and Broccoli

Add 1 tablespoon fresh lemon juice and 1 teaspoon lemon zest immediately before serving.

The citrus gives the creamy sauce a brighter finish.

Chicken and Potato Version

Add 1 pound of small baby potatoes with the chicken at the beginning.

Cut larger potatoes into smaller pieces so they cook completely.

Can I Use Frozen Broccoli?

Yes, although frozen broccoli generally becomes softer and may release additional liquid.

There is usually no need to thaw it completely.

Add frozen florets during approximately the last 15 to 20 minutes and monitor their texture carefully.

Fresh broccoli is preferable when you want the bright green, crisp-tender appearance shown in this type of dish.

Storage and Reheating

Allow leftovers to cool before transferring them to an airtight container.

Store in the refrigerator for up to 3 to 4 days.

The cream sauce will thicken as it chills.

When reheating, add a small splash of chicken broth, milk, or cream and warm gently.

For stovetop reheating, place the chicken, broccoli, and sauce in a covered skillet over low heat.

Individual portions can also be microwaved in short intervals.

Avoid boiling the sauce during reheating because excessive heat can cause creamy sauces to separate.

Frequently Asked Questions

Can I use chicken breasts instead of thighs?

Absolutely. Both work well. Chicken breasts are leaner, while thighs tend to stay juicier during slow cooking.

Why is my sauce too thin?

Slow cookers trap moisture, so sauces sometimes need extra thickening. Use a cornstarch slurry or cook uncovered briefly on HIGH.

Why did my broccoli become mushy?

It was probably added too early. Broccoli needs only the final portion of the cooking time.

Can I make this without cream cheese?

Yes. Increase the heavy cream slightly and add extra Parmesan. The sauce will be a little lighter but still creamy.

Can I prepare this ahead?

Yes. Season and sear the chicken ahead of time and refrigerate it. You can also prepare the garlic and seasonings in advance. Add the dairy and broccoli during the final stage of cooking for the best texture.

Final Thoughts

This Slow Cooker Creamy Garlic Chicken and Broccoli combines juicy chicken, vibrant broccoli, garlic, herbs, Parmesan, and a rich creamy sauce in one comforting meal.

The slow cooker makes the preparation easy while the final addition of cream, cheese, and broccoli gives the dish its luxurious texture and fresh color. With only a short amount of hands-on cooking, you can create a dinner that looks impressive and tastes wonderfully rich.

Serve it over mashed potatoes, rice, or pasta and spoon plenty of creamy garlic sauce over the top. Whether you’re preparing a family dinner, an easy weeknight meal, or several portions for meal prep, this creamy chicken and broccoli recipe is a delicious addition to your comfort-food collection.

Easy Bacon Cheeseburger Sliders Recipe – Juicy, Cheesy, and Perfect for Parties

If you love the flavors of a classic cheeseburger but want something easier to serve for parties, family dinners, or game day, these Bacon Cheeseburger Sliders are a perfect choice. Soft slider rolls are packed with juicy seasoned ground beef, smoky bacon, melted cheese, pickles, and a tangy burger sauce, then brushed with buttery seasoning and baked until warm and golden.

These mini cheeseburgers are simple enough for a weeknight meal but fun enough for entertaining. Instead of forming and cooking individual burger patties, the ground beef is browned in one skillet and spread evenly across an entire tray of rolls. That makes preparation faster while ensuring every slider gets plenty of beef, bacon, and cheese.

Serve these sliders with French fries, potato wedges, onion rings, coleslaw, or a simple salad. They are also an excellent addition to a party spread because guests can easily grab individual sandwiches without needing plates and utensils.

Why You’ll Love These Bacon Cheeseburger Sliders

One of the best things about Bacon Cheeseburger Sliders is how much classic burger flavor they pack into a small sandwich. You get seasoned beef, melted cheese, crispy bacon, pickles, soft bread, and creamy burger sauce in every bite.

The recipe is also extremely convenient when cooking for a crowd. Instead of standing over the stove flipping burgers, you prepare one skillet of beef and assemble all the sliders at once.

Another advantage is that these sliders can be customized easily. Add caramelized onions, jalapeños, barbecue sauce, extra cheese, or different burger toppings depending on what your family enjoys.

You can even assemble them ahead of time and bake shortly before serving.

Ingredients

For the Beef Filling

  • 1½ pounds lean ground beef
  • 1 small yellow onion, finely diced
  • 2 garlic cloves, minced
  • 1 tablespoon Worcestershire sauce
  • 1 tablespoon ketchup
  • 1 teaspoon yellow mustard
  • 1 teaspoon smoked paprika
  • ½ teaspoon garlic powder
  • ½ teaspoon onion powder
  • ¾ teaspoon salt
  • ½ teaspoon freshly ground black pepper

For the Sliders

  • 12 soft slider rolls or Hawaiian-style rolls
  • 8 slices cheddar cheese
  • 8 slices cooked bacon, crumbled or cut into pieces
  • ½ cup sliced dill pickles
  • ¼ cup finely diced onion, optional

For the Burger Sauce

  • ½ cup mayonnaise
  • 2 tablespoons ketchup
  • 1 tablespoon yellow mustard
  • 2 tablespoons finely chopped dill pickles or pickle relish
  • ½ teaspoon garlic powder
  • ¼ teaspoon smoked paprika

For the Butter Topping

  • 3 tablespoons unsalted butter, melted
  • ½ teaspoon garlic powder
  • 1 teaspoon sesame seeds
  • 1 teaspoon dried parsley
  • Pinch of salt

How to Make Bacon Cheeseburger Sliders

1. Preheat the Oven

Preheat your oven to 350°F (175°C).

Lightly grease a 9 x 13-inch baking dish or line a rimmed baking sheet with parchment paper.

Keeping the sliders close together during baking helps the rolls stay soft while the tops become beautifully golden.

2. Cook the Bacon

If your bacon is not already cooked, place the slices in a skillet over medium heat.

Cook until browned and crisp, turning as necessary.

Transfer the bacon to a paper towel-lined plate to drain.

Once slightly cooled, crumble or chop it into small pieces.

Set aside while you prepare the beef.

3. Cook the Ground Beef

Place a large skillet over medium-high heat.

Add the ground beef and diced onion.

Cook for approximately 6–8 minutes, breaking the beef apart with a wooden spoon or spatula.

Continue cooking until the meat is browned and the onion is soft.

Drain excess grease from the skillet if necessary.

4. Season the Beef

Reduce the heat to medium.

Add the garlic and cook for approximately 30 seconds, stirring constantly.

Stir in the Worcestershire sauce, ketchup, mustard, smoked paprika, garlic powder, onion powder, salt, and black pepper.

Cook for another 1–2 minutes, until everything is well combined and flavorful.

Remove the skillet from the heat.

Taste the filling and adjust the seasoning if necessary.

5. Make the Burger Sauce

In a small bowl, combine mayonnaise, ketchup, mustard, chopped pickles, garlic powder, and smoked paprika.

Stir until smooth.

Taste and adjust with a little more mustard or pickle relish if you prefer extra tanginess.

Set the sauce aside.

6. Prepare the Slider Rolls

Keep the rolls connected and use a long serrated knife to carefully slice the entire slab horizontally through the center.

You should now have one large top section and one large bottom section.

Place the bottom half of the rolls into the prepared baking dish.

7. Add the Burger Sauce

Spread a thin layer of burger sauce over the bottom rolls.

Do not use too much at this stage because excess sauce can make the bread soggy.

Reserve additional sauce for serving alongside the finished sliders.

8. Layer the Cheese

Place half of the cheddar cheese slices across the bottom rolls.

Creating a cheese layer underneath the beef helps protect the bread from moisture while also giving you extra melted cheese in every bite.

9. Add the Beef and Bacon

Spread the seasoned ground beef evenly across the cheese.

Use the back of a spoon to distribute the filling from edge to edge.

Sprinkle the crispy bacon evenly over the beef.

Add sliced pickles and optional diced onion.

10. Add More Cheese

Arrange the remaining cheddar slices over the bacon and beef.

You can also use American cheese, Monterey Jack, pepper Jack, or a combination of cheeses.

Place the top section of rolls over the filling.

11. Add the Butter Topping

Combine melted butter, garlic powder, sesame seeds, parsley, and a pinch of salt.

Brush the mixture generously over the tops of the slider rolls.

Make sure some of the butter reaches the edges.

This creates flavorful, golden tops as the sliders bake.

12. Bake the Sliders

Cover the baking dish loosely with aluminum foil.

Bake for approximately 12 minutes.

Remove the foil and continue baking for another 5–8 minutes, until the cheese is melted and the tops of the rolls are lightly golden.

Avoid baking too long, as the bread can become dry.

13. Rest and Slice

Remove the sliders from the oven and let them rest for approximately 5 minutes.

Use a sharp knife to cut between the individual rolls.

Serve warm with the remaining burger sauce, ketchup, mustard, or additional pickles.

What to Serve With Bacon Cheeseburger Sliders

French fries are an obvious favorite alongside these sliders. Regular fries, seasoned wedges, waffle fries, or sweet potato fries all work beautifully.

For another classic burger side, serve them with crispy onion rings and dipping sauce.

Coleslaw provides a cool, crunchy contrast to the rich beef and melted cheese. Potato salad or macaroni salad are also excellent options for parties and cookouts.

For something lighter, pair the sliders with a simple garden salad, cucumber salad, roasted vegetables, or fresh fruit.

If serving them for game day, combine the sliders with chicken wings, mozzarella sticks, nachos, and dipping sauces for a larger party spread.

Tips for the Best Bacon Cheeseburger Sliders

Drain the beef well. Excess grease can soak into the rolls and make them soggy.

Use crispy bacon. Crisp bacon provides better texture once baked inside the sliders.

Create a cheese barrier. Putting cheese beneath the beef helps keep the bottom rolls from absorbing too much moisture.

Do not add too much sauce before baking. Serve additional burger sauce on the side instead.

Keep the rolls connected during assembly. This makes it much easier to build the sliders quickly and evenly.

Cover during the first part of baking. Foil allows the cheese to melt without over-browning the bread.

Serve them warm. The sliders are best when the cheese is melted and the rolls are soft.

Easy Recipe Variations

BBQ Bacon Cheeseburger Sliders

Replace the ketchup and mustard in the beef mixture with ⅓ cup barbecue sauce. Top with cheddar and crispy fried onions.

Jalapeño Bacon Cheeseburger Sliders

Add sliced jalapeños and use pepper Jack cheese for extra heat.

Mushroom Swiss Sliders

Sauté 8 ounces sliced mushrooms and add them over the beef. Replace cheddar with Swiss cheese.

Bacon Double Cheeseburger Sliders

Increase the ground beef to 2 pounds and add an extra layer of cheese for an especially hearty version.

Garlic Parmesan Slider Tops

Mix 2 tablespoons grated Parmesan into the melted butter topping before brushing it over the rolls.

How to Store and Reheat

Allow leftover sliders to cool before storing them in an airtight container.

Refrigerate for up to 3 days.

For the best texture, reheat them in a 325°F oven for approximately 8–12 minutes. Cover loosely with foil for the first several minutes to prevent the tops from becoming too dark.

An air fryer also works well at approximately 325°F for 4–6 minutes.

Microwaving is convenient but may soften the rolls.

Make-Ahead Instructions

You can prepare the beef filling and burger sauce up to 24 hours ahead and store them separately in the refrigerator.

You can also assemble the sliders several hours before baking. Cover them tightly and refrigerate, but wait to brush the butter mixture over the rolls until shortly before they go into the oven.

If baking directly from the refrigerator, add approximately 3–5 minutes to the covered baking time.

Final Thoughts

These Bacon Cheeseburger Sliders combine everything people love about a classic bacon cheeseburger in an easy, shareable form. Juicy seasoned beef, crispy bacon, melted cheddar, tangy pickles, creamy burger sauce, and buttery golden rolls make every bite rich and satisfying.

They are ideal for parties and game day but simple enough for a casual family dinner. Better yet, the recipe can be assembled quickly, customized with different toppings, and prepared ahead when you are feeding a crowd.

Serve them with crispy fries for a classic burger meal, pile them onto a party platter with dipping sauces, or create your own variation with barbecue sauce, jalapeños, mushrooms, or extra cheese. These cheesy bacon-loaded sliders are the kind of easy comfort food that tends to disappear quickly once they hit the table.

Easy Loaded Baked Potatoes Recipe – Crispy, Cheesy, and Packed with Flavor

Few comfort foods are as satisfying as a perfectly baked potato loaded with melted cheese, crispy bacon, sour cream, green onions, and plenty of savory toppings. These Loaded Baked Potatoes are crisp on the outside, fluffy on the inside, and hearty enough to serve as either a side dish or a complete meal.

The secret to an excellent baked potato starts with choosing the right potato and baking it properly. Russet potatoes work especially well because their thick skins become beautifully crisp while the centers turn light and fluffy. Once baked, the potatoes are opened, seasoned with butter, and piled high with classic toppings.

This recipe is perfect for family dinners, game nights, casual gatherings, cookouts, or an easy weeknight meal. You can keep the toppings traditional or create a loaded baked potato bar so everyone can build their own combination. Add shredded chicken, seasoned beef, broccoli, chili, or extra vegetables to turn them into an even heartier dinner.

Why You’ll Love These Loaded Baked Potatoes

Loaded baked potatoes are incredibly easy to customize. Start with a hot, fluffy potato and add as much or as little cheese, bacon, sour cream, and green onion as you like.

They are also inexpensive and filling, making them a practical option when feeding a family or crowd. A single large russet potato can become a substantial meal once it is topped generously.

Another reason this recipe works so well is the contrast of textures. The potato skin becomes crisp and salty, while the inside stays soft and buttery. Melted cheddar adds richness, bacon brings a smoky crunch, and cool sour cream balances everything.

You can also prepare many of the toppings in advance, leaving only the potatoes to bake before serving.

Ingredients

For the Baked Potatoes

  • 4 large russet potatoes
  • 1 tablespoon olive oil
  • 1 teaspoon kosher salt
  • ¼ teaspoon freshly ground black pepper
  • 4 tablespoons unsalted butter

For the Classic Loaded Toppings

  • 1½ cups shredded sharp cheddar cheese
  • 6 slices bacon, cooked until crisp and crumbled
  • ¾ cup sour cream
  • 4 green onions, thinly sliced
  • 2 tablespoons chopped fresh parsley or chives
  • Freshly ground black pepper, to taste

Optional Toppings

  • Shredded mozzarella cheese
  • Steamed broccoli
  • Diced cooked chicken
  • Seasoned ground beef
  • Chili
  • Jalapeño slices
  • Diced tomatoes
  • Avocado
  • Ranch dressing
  • Garlic butter
  • Extra crispy bacon

How to Make Loaded Baked Potatoes

1. Choose and Wash the Potatoes

Russet potatoes are the best choice for traditional baked potatoes because they have a high starch content that produces a fluffy center.

Choose four potatoes that are approximately the same size so they cook at a similar rate.

Scrub each potato thoroughly under cool running water to remove any dirt.

Dry them completely using a clean kitchen towel.

Drying the skins helps them become crisp during baking.

2. Prepare the Potatoes

Preheat your oven to 425°F (220°C).

Use a fork to prick each potato several times around the surface.

This allows steam to escape while the potatoes bake.

Rub each potato lightly with olive oil, then sprinkle generously with kosher salt.

The oil and salt help create that restaurant-style crispy skin.

Arrange the potatoes directly on the oven rack or place them on a wire rack set over a baking sheet.

3. Bake Until Tender

Bake the potatoes for approximately 50–65 minutes, depending on their size.

They are ready when the skins are crisp and a knife or fork easily slides into the center.

The internal temperature of a properly baked potato is usually around 205–210°F.

Avoid wrapping the potatoes in foil if you want crispy skins. Foil traps steam and creates a softer exterior.

4. Prepare the Bacon

While the potatoes bake, cook the bacon in a skillet over medium heat until crisp.

Transfer it to a paper towel-lined plate and let it cool slightly.

Crumble or finely chop the bacon.

You can prepare bacon ahead of time and refrigerate it until needed.

5. Prepare the Other Toppings

Shred the cheddar cheese if you have not already done so.

Thinly slice the green onions and chop the parsley or chives.

Place the sour cream in a small serving bowl.

If you are serving additional toppings such as broccoli, chicken, ground beef, or chili, prepare those while the potatoes finish baking.

6. Open the Potatoes

Remove the baked potatoes carefully from the oven.

Let them rest for about 5 minutes, just long enough to make them easier to handle.

Cut a long slit across the top of each potato without cutting completely through.

Gently press the ends toward the center so the potato opens.

Use a fork to fluff the inside.

7. Season the Fluffy Centers

Add approximately 1 tablespoon of butter to each potato while it is still very hot.

Use a fork to gently mix the butter into the potato.

Season lightly with salt and freshly ground black pepper.

This step is important because seasoning only the toppings can leave the potato itself tasting bland.

8. Add the Cheese

Sprinkle a generous amount of shredded cheddar over each potato.

For especially gooey cheese, return the loaded potatoes to the oven for approximately 3–5 minutes.

The residual heat from the potato will melt cheese on its own, but this extra oven time creates a smoother, more melted topping.

9. Add Bacon and Sour Cream

Remove the potatoes from the oven.

Sprinkle each one generously with crispy bacon.

Add a spoonful of sour cream in the center.

Finish with sliced green onions and chopped parsley or chives.

10. Serve Immediately

Serve the Loaded Baked Potatoes while the centers are steaming hot and the cheese is fully melted.

Place additional toppings on the table so everyone can customize their potato.

What to Serve With Loaded Baked Potatoes

Loaded potatoes can work as either a side dish or a main course.

For a classic steakhouse-style meal, serve them alongside grilled steak, roasted chicken, pork chops, or garlic butter shrimp.

They also pair beautifully with barbecue dishes such as ribs, grilled chicken, or pulled beef.

For something lighter, add roasted broccoli, asparagus, green beans, or a fresh garden salad.

If you are serving them as the main dish, load them with extra protein such as shredded chicken, ground beef, chili, or pulled barbecue meat.

Tips for the Best Loaded Baked Potatoes

Use russet potatoes. Their fluffy texture and sturdy skin make them ideal for baking.

Dry the potatoes thoroughly. Moisture can prevent the skins from becoming properly crisp.

Do not wrap them in foil. Baking uncovered creates a much better exterior.

Season the skins. Olive oil and coarse salt make baked potato skins delicious enough to eat.

Fluff the centers before topping. This creates a lighter texture and helps the butter melt throughout the potato.

Add butter before cheese. Butter seasons the potato itself instead of leaving all the flavor on top.

Use freshly shredded cheese. Freshly grated cheddar melts more smoothly than many pre-shredded cheeses.

Easy Recipe Variations

Loaded Chicken Baked Potatoes

Top the potatoes with diced or shredded cooked chicken, cheddar cheese, sour cream, bacon, and green onions.

Broccoli Cheddar Potatoes

Add steamed broccoli and plenty of cheddar cheese. This version works especially well for a meatless meal.

BBQ Loaded Potatoes

Top with pulled chicken or beef, barbecue sauce, cheddar cheese, and green onions.

Chili Cheese Baked Potatoes

Spoon hot beef or bean chili over the potato and finish with cheddar, sour cream, and jalapeños.

Garlic Parmesan Loaded Potatoes

Mix garlic butter into the fluffy potato and top with Parmesan, mozzarella, parsley, and black pepper.

Taco Loaded Potatoes

Add seasoned ground beef, cheddar, tomatoes, sour cream, avocado, green onions, and jalapeños.

How to Store Loaded Baked Potatoes

Allow leftover potatoes to cool before placing them in an airtight container.

Store in the refrigerator for up to 3–4 days.

If possible, store cold toppings such as sour cream and green onions separately from the potatoes.

For meal prep, bake several potatoes at once and refrigerate them without toppings.

How to Reheat Loaded Baked Potatoes

For the best texture, reheat baked potatoes in a 375°F oven for approximately 15–20 minutes.

An air fryer also works well. Reheat at approximately 350°F for 6–10 minutes until the skin becomes crisp and the center is hot.

You can microwave the potatoes when you are short on time, although the skins will become softer.

Add fresh sour cream, herbs, and green onions after reheating.

Make-Ahead Instructions

You can prepare most of the toppings up to a day ahead.

Cook and crumble the bacon, shred the cheese, slice the onions, and prepare any additional toppings. Store everything separately in covered containers in the refrigerator.

Bake the potatoes shortly before serving for the best crispy skin.

If you are hosting a party, place all the toppings in individual bowls and create a Loaded Baked Potato Bar. Guests can add their favorite combinations, making this an easy option for feeding a crowd.

Final Thoughts

These Loaded Baked Potatoes prove that simple ingredients can create an incredibly satisfying meal. Crispy potato skins, fluffy buttery centers, melted cheddar, smoky bacon, cool sour cream, and fresh green onions deliver the perfect combination of flavors and textures.

They are easy enough for a weeknight dinner but customizable enough for parties and gatherings. Keep them classic with bacon and cheddar, turn them into a full meal with chicken or beef, or build a loaded potato bar with several toppings.

Once you learn the simple technique of baking russet potatoes directly in the oven until crisp outside and fluffy inside, you have the perfect base for countless comforting dinner combinations.

Easy Spinach and Cheese Lasagna Recipe – Creamy, Cheesy, and Perfectly Comforting

If you are craving a comforting pasta dinner without meat, this Spinach and Cheese Lasagna is an excellent choice. Tender lasagna noodles are layered with rich tomato sauce, creamy ricotta, nutritious spinach, melted mozzarella, and plenty of Parmesan cheese. Every slice is cheesy, satisfying, and packed with classic Italian-inspired flavor.

This vegetarian lasagna is perfect for family dinners, holidays, potlucks, Sunday meals, or meal prep. Even though there is no meat, the combination of ricotta, mozzarella, Parmesan, spinach, and flavorful tomato sauce makes it hearty enough to serve as a complete main course.

Another great thing about spinach and cheese lasagna is that it can be assembled ahead of time. Prepare the entire dish the night before, refrigerate it, and bake when you are ready. It also freezes beautifully, making it a useful recipe when you want to prepare meals in advance.

Why You’ll Love This Spinach and Cheese Lasagna

The creamy cheese filling is the heart of this lasagna. Ricotta creates a soft, rich texture, mozzarella provides that irresistible melted cheese pull, and Parmesan adds a salty, savory finish.

Spinach brings freshness and color while balancing the richness of the cheese. You can use either fresh or frozen spinach as long as excess moisture is removed before adding it to the filling.

This recipe also uses a simple tomato sauce seasoned with garlic, onion, basil, and oregano. The acidity of the tomatoes provides the perfect contrast to the creamy cheese layers.

Most importantly, the lasagna holds together beautifully when allowed to rest after baking, giving you attractive, clearly defined layers in every serving.

Ingredients

For the Tomato Sauce

  • 2 tablespoons olive oil
  • 1 small yellow onion, finely chopped
  • 4 garlic cloves, minced
  • 2 tablespoons tomato paste
  • 1 can (28 ounces) crushed tomatoes
  • 1 can (15 ounces) tomato sauce
  • 1 teaspoon dried basil
  • 1 teaspoon dried oregano
  • 1 teaspoon Italian seasoning
  • ½ teaspoon salt
  • ¼ teaspoon freshly ground black pepper
  • ¼ teaspoon red pepper flakes, optional
  • 1 teaspoon sugar, optional

For the Spinach Ricotta Filling

  • 15 ounces whole-milk ricotta cheese
  • 10 ounces frozen chopped spinach, thawed and thoroughly drained
  • 1 large egg
  • ¾ cup freshly grated Parmesan cheese
  • 1 cup shredded mozzarella cheese
  • 2 tablespoons chopped fresh parsley
  • ½ teaspoon garlic powder
  • ½ teaspoon salt
  • ¼ teaspoon black pepper

For Assembly

  • 12 lasagna noodles
  • 3 cups shredded mozzarella cheese
  • ½ cup freshly grated Parmesan cheese
  • Fresh basil or parsley, for garnish

How to Make Spinach and Cheese Lasagna

1. Prepare the Tomato Sauce

Heat the olive oil in a large saucepan over medium heat.

Add the finely chopped onion and cook for approximately 4–5 minutes, stirring occasionally, until softened.

Add the minced garlic and cook for another 30 seconds, just until fragrant.

Stir in the tomato paste and cook for about 1 minute. Briefly cooking the tomato paste helps deepen its flavor.

Pour in the crushed tomatoes and tomato sauce.

Add basil, oregano, Italian seasoning, salt, black pepper, and optional red pepper flakes.

Bring the sauce to a gentle simmer.

Reduce the heat and cook uncovered for approximately 20–25 minutes, stirring occasionally.

If the tomatoes taste particularly acidic, stir in the optional teaspoon of sugar.

The sauce should be flavorful and slightly thickened rather than watery.

2. Prepare the Spinach

If using frozen spinach, thaw it completely.

Place the spinach inside a clean kitchen towel or several layers of paper towels and squeeze firmly until as much liquid as possible has been removed.

This is an important step. Excess moisture from spinach can make the finished lasagna watery.

If using fresh spinach instead, sauté approximately 1 pound of fresh spinach in a large skillet until wilted. Allow it to cool, chop finely, and squeeze away any excess moisture.

3. Make the Ricotta Filling

In a large bowl, combine ricotta cheese, drained spinach, egg, Parmesan, 1 cup mozzarella, parsley, garlic powder, salt, and black pepper.

Mix until the spinach is evenly distributed throughout the creamy cheese mixture.

The egg helps the filling set while baking so the layers hold together better when sliced.

Set the filling aside.

4. Cook the Lasagna Noodles

Bring a large pot of generously salted water to a boil.

Add the lasagna noodles and cook according to package directions until al dente.

Avoid cooking the noodles until extremely soft because they will continue cooking in the oven.

Drain carefully and arrange the noodles separately on a lightly oiled baking sheet or clean kitchen towels to prevent sticking.

If you are using oven-ready lasagna noodles, follow the package instructions and skip boiling.

5. Prepare the Baking Dish

Preheat your oven to 375°F (190°C).

Lightly grease a 9 x 13-inch baking dish.

Spread approximately 1 cup of tomato sauce evenly over the bottom.

The sauce prevents the noodles from sticking and provides moisture as the lasagna bakes.

6. Build the First Layer

Arrange 3–4 lasagna noodles over the tomato sauce.

Spread approximately one-third of the spinach ricotta mixture evenly over the noodles.

Spoon another layer of tomato sauce over the cheese mixture.

Sprinkle with approximately ¾ cup mozzarella.

Try to distribute everything evenly so each portion gets plenty of spinach, cheese, and sauce.

7. Continue Layering

Repeat the process:

Lasagna noodles, spinach ricotta filling, tomato sauce, and mozzarella.

Continue until the filling has been used.

For the final layer, place noodles over the filling and cover them with the remaining tomato sauce.

Make sure most of the pasta surface is covered so the noodles stay tender during baking.

8. Add the Cheese Topping

Sprinkle the remaining mozzarella over the top.

Finish with the remaining Parmesan.

The entire surface should have a generous cheese layer because this will become golden and bubbly as the lasagna bakes.

9. Bake the Lasagna

Cover the baking dish loosely with aluminum foil.

Lightly grease the underside of the foil so the melted cheese does not stick.

Bake at 375°F for 25 minutes.

Remove the foil and continue baking for another 20–25 minutes, or until the sauce bubbles around the edges and the cheese is completely melted.

For a more golden top, broil the lasagna for 1–3 minutes at the end.

Watch carefully because cheese can brown quickly under the broiler.

10. Let the Lasagna Rest

Remove the lasagna from the oven and allow it to rest for at least 15–20 minutes before slicing.

This step is extremely important.

Resting allows the melted cheese and sauce to settle, helping the lasagna maintain its beautiful layers instead of collapsing when cut.

11. Garnish and Serve

Sprinkle the finished lasagna with fresh basil or parsley.

Add extra Parmesan and freshly cracked black pepper if desired.

Slice into generous squares and serve warm.

What to Serve With Spinach and Cheese Lasagna

Garlic bread is one of the easiest and most delicious sides for this dish. The crispy bread is perfect for soaking up extra tomato sauce.

A Caesar salad or simple mixed-green salad adds freshness and balances the richness of the cheese.

Roasted broccoli, asparagus, zucchini, Brussels sprouts, or green beans are also excellent vegetable sides.

For a larger dinner, serve Spinach and Cheese Lasagna with garlic bread, salad, and roasted vegetables for a complete Italian-inspired meal.

Tips for the Best Spinach and Cheese Lasagna

Remove as much moisture from the spinach as possible. Wet spinach is one of the biggest causes of watery lasagna.

Use whole-milk ricotta. It creates a richer and creamier filling.

Use freshly grated cheese. Fresh mozzarella and Parmesan generally melt more smoothly than pre-shredded varieties.

Do not overcook the noodles. Al dente noodles maintain their structure during baking.

Keep the tomato sauce relatively thick. Excess liquid can make the layers slide apart.

Cover during the first half of baking. This allows the center to heat thoroughly without over-browning the cheese.

Always let the lasagna rest. Waiting 15–20 minutes makes slicing much easier.

Easy Recipe Variations

Spinach and Mushroom Lasagna

Sauté 8 ounces sliced mushrooms until golden and add them between the spinach ricotta layers.

Extra Cheesy Spinach Lasagna

Add shredded provolone, fontina, or extra mozzarella between the layers.

Spinach Alfredo Lasagna

Replace some or all of the tomato sauce with creamy Alfredo sauce for a rich white lasagna.

Spinach and Artichoke Lasagna

Add 1 cup chopped artichoke hearts to the ricotta mixture for a spinach-artichoke-inspired version.

Spicy Spinach Lasagna

Increase the crushed red pepper flakes in the tomato sauce for extra heat.

Storage and Reheating

Allow leftover lasagna to cool before transferring it to an airtight container.

Refrigerate for up to 4 days.

To reheat a larger portion, cover with foil and warm in a 350°F oven for approximately 20–25 minutes.

Individual slices can be microwaved until hot throughout.

For best results, add a small spoonful of tomato sauce before reheating to keep the pasta moist.

Freezing and Make-Ahead Instructions

Spinach and Cheese Lasagna is excellent for preparing in advance.

Assemble the complete lasagna, cover tightly, and refrigerate for up to 24 hours before baking. Add approximately 5–10 minutes to the baking time if it goes into the oven cold.

You can also freeze the assembled unbaked lasagna for up to 2–3 months. Wrap the dish securely with plastic wrap and foil.

Thaw overnight in the refrigerator before baking for the most even results.

Cooked individual portions can also be frozen for convenient future meals.

Final Thoughts

This Spinach and Cheese Lasagna proves that you do not need meat to create a hearty and satisfying lasagna. Layers of tender pasta, creamy ricotta and spinach filling, rich tomato sauce, mozzarella, and Parmesan combine into a comforting dish that is both colorful and packed with flavor.

It is easy enough for family dinners yet impressive enough for holidays and gatherings. Better still, it can be assembled in advance, refrigerated, frozen, and reheated beautifully.

Serve it with garlic bread and salad for a classic dinner, add roasted vegetables for extra freshness, or simply enjoy a generous slice on its own. This creamy, cheesy spinach lasagna is the kind of dependable comfort-food recipe that deserves a permanent place in your dinner rotation.