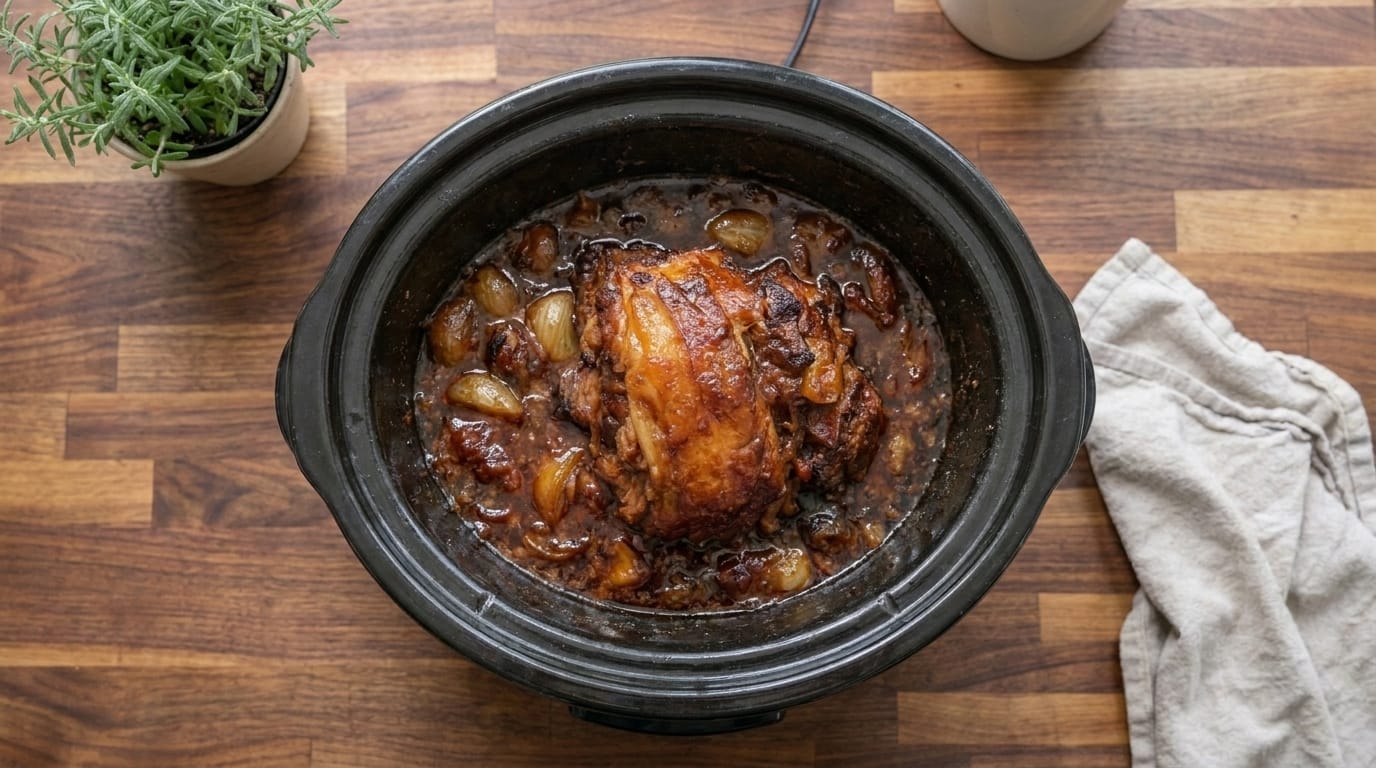
Easy Slow Cooker BBQ Beef Brisket Recipe – Tender, Juicy, and Full of Smoky Flavor

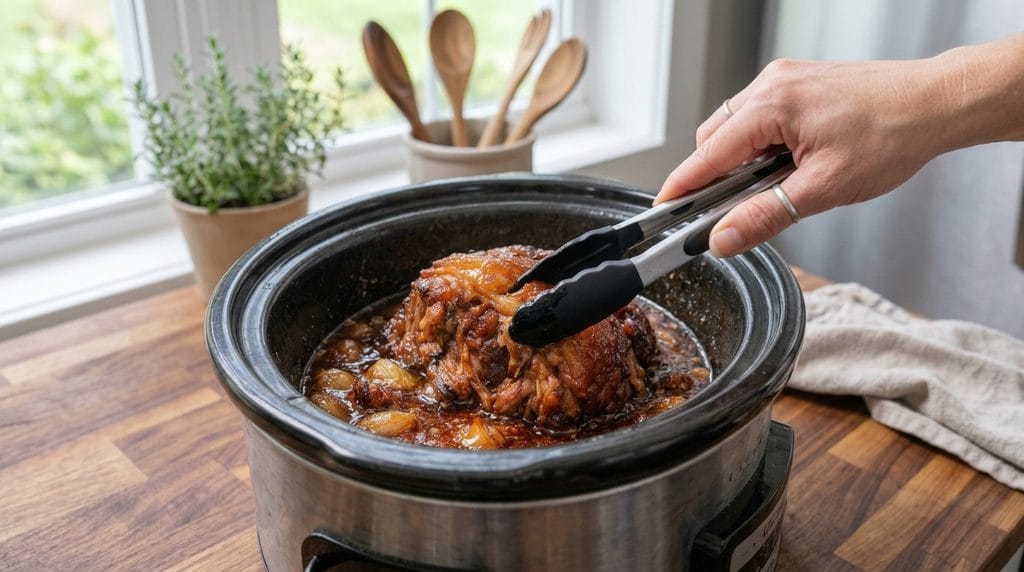
If you are craving a melt-in-your-mouth comfort meal, this Slow Cooker BBQ Beef Brisket is the perfect recipe. A tender beef brisket is slow cooked with a rich blend of barbecue flavors, garlic, onions, and savory seasonings until it becomes incredibly juicy and easy to shred.

The long cooking process allows the beef to absorb every bit of smoky, sweet, and savory flavor while creating a delicious sauce that coats every bite. This recipe brings classic BBQ flavor straight to your kitchen with minimal effort.

Perfect for family dinners, weekend gatherings, holidays, sandwiches, or meal prep, this slow cooker brisket is a guaranteed crowd favorite.

Why You’ll Love This Slow Cooker BBQ Beef Brisket

The beef becomes incredibly tender and juicy.

The BBQ sauce creates a rich, smoky, and flavorful glaze.

The slow cooker makes cooking easy and hands-off.

Perfect for sandwiches, tacos, bowls, or classic BBQ plates.

Great for leftovers because the flavor gets even better.

A restaurant-quality meal made with simple ingredients.

Ingredients

For the Beef Brisket

  • 4–5 pounds beef brisket
  • 2 tablespoons olive oil
  • 2 teaspoons salt
  • 2 teaspoons black pepper
  • 2 tablespoons smoked paprika
  • 2 teaspoons garlic powder
  • 2 teaspoons onion powder
  • 1 tablespoon brown sugar
  • 1 teaspoon chili powder
  • 1 teaspoon cumin
  • 1 teaspoon dried thyme

For the BBQ Sauce

  • 1½ cups barbecue sauce
  • ½ cup beef broth
  • 3 tablespoons Worcestershire sauce
  • 3 tablespoons brown sugar
  • 2 tablespoons apple cider vinegar
  • 5 garlic cloves, minced
  • 2 large onions, sliced
  • 1 tablespoon Dijon mustard

Optional Additions

  • 1 teaspoon liquid smoke
  • 1 teaspoon red pepper flakes
  • ½ teaspoon cayenne pepper

Garnish

  • Fresh parsley
  • Green onions
  • Extra BBQ sauce

How to Make Slow Cooker BBQ Beef Brisket

1. Prepare the Brisket

Pat the brisket dry with paper towels.

Trim excess fat if needed, leaving a thin layer for flavor.

2. Season the Beef

Mix together:

  • Salt
  • Black pepper
  • Smoked paprika
  • Garlic powder
  • Onion powder
  • Brown sugar
  • Chili powder
  • Cumin
  • Thyme

Rub the seasoning generously over all sides of the brisket.

3. Sear the Brisket

Heat olive oil in a large skillet over medium-high heat.

Sear the brisket for:

3–4 minutes per side

until browned.

This creates deeper flavor.

4. Prepare the Slow Cooker

Place sliced onions and garlic in the bottom of the slow cooker.

Set the brisket on top.

5. Make the BBQ Sauce

In a bowl, combine:

  • BBQ sauce
  • Beef broth
  • Worcestershire sauce
  • Brown sugar
  • Apple cider vinegar
  • Dijon mustard
  • Liquid smoke (optional)

Mix well.

6. Add Sauce and Cook

Pour the BBQ sauce mixture over the brisket.

Cover and cook:

LOW: 8–10 hours
HIGH: 5–6 hours

The brisket is ready when it easily pulls apart with a fork.

7. Rest the Brisket

Remove the brisket from the slow cooker.

Rest for:

15 minutes

before slicing.

8. Slice or Shred

Slice against the grain for serving.

For sandwiches or bowls, shred the beef using two forks.

9. Thicken the Sauce

If desired, simmer the leftover sauce on the stove until slightly reduced.

Pour over the brisket before serving.

10. Serve Warm

Top with:

  • Fresh parsley
  • Green onions
  • Extra BBQ sauce

Serve immediately.

What to Serve With Slow Cooker BBQ Beef Brisket

Classic BBQ sides:

  • Creamy coleslaw
  • Mac and cheese
  • Cornbread
  • Baked beans
  • Potato salad

Other great options:

  • Mashed potatoes
  • Roasted vegetables
  • Garlic bread
  • Rice bowls
  • Pickles

For sandwiches:

  • Brioche buns
  • Pickled onions
  • Extra BBQ sauce
  • Cheddar cheese

Tips for the Best Slow Cooker BBQ Beef Brisket

Choose the Right Cut

Brisket with good marbling creates the most tender result.

Don’t Skip the Sear

Browning adds a deeper BBQ-style flavor.

Cook Low and Slow

Brisket needs time to break down and become tender.

Slice Against the Grain

This creates softer, easier-to-chew slices.

Let It Rest

Resting keeps the juices inside the meat.

Save the Sauce

The leftover BBQ sauce is perfect for dipping or leftovers.

Avoid Overcooking

Once tender, remove the brisket to prevent it from drying.

Easy Recipe Variations

Honey Garlic BBQ Brisket

Add:

  • ¼ cup honey
  • Extra garlic

for a sweet and savory flavor.

Spicy BBQ Brisket

Add:

  • Jalapeños
  • Cayenne
  • Hot sauce

for extra heat.

Smoky Chipotle Brisket

Add:

  • Chipotle peppers
  • Adobo sauce

for a smoky kick.

Garlic Herb Brisket

Add:

  • Rosemary
  • Thyme
  • Extra garlic

for a savory roast-style flavor.

Beer BBQ Brisket

Replace beef broth with:

  • Dark beer

for deeper flavor.

Make-Ahead Instructions

Season the brisket and prepare the BBQ sauce up to 24 hours ahead.

Store covered in the refrigerator.

Cook fresh when ready.

Cooked brisket can also be prepared ahead and reheated before serving.

How to Store Leftovers

Store leftover brisket with sauce in an airtight container.

Refrigerate for up to:

4 days

Reheating Instructions

Warm gently in a skillet with extra sauce or broth.

Oven:

300°F (150°C) for 15–20 minutes

until heated through.

Freezing Instructions

Freeze shredded or sliced brisket with sauce in freezer-safe containers.

Freeze for up to:

3 months

Thaw overnight before reheating.

Frequently Asked Questions

What cut of beef is best for brisket?

Whole brisket or brisket flat works best because it becomes tender during slow cooking.

Can I make this without searing?

Yes, but searing adds better flavor.

Why is my brisket tough?

It usually needs more cooking time. Brisket becomes tender when cooked slowly.

Can I use a different cut of beef?

Chuck roast can be used, but brisket gives the classic BBQ texture.

Can I make this ahead of time?

Yes. Brisket reheats very well.

How do I keep brisket juicy?

Store and reheat it with the cooking sauce.

Can I shred the brisket?

Yes. Once tender, it easily pulls apart.

What BBQ sauce works best?

Use your favorite smoky, sweet, or spicy BBQ sauce.

Final Thoughts

This Slow Cooker BBQ Beef Brisket delivers everything you want from a classic BBQ meal: tender beef, rich smoky flavor, and a delicious sauce that makes every bite unforgettable.

With simple preparation and slow cooking, you can create a comforting homemade brisket perfect for family dinners, gatherings, and weekend meals.

Serve it with your favorite BBQ sides and enjoy a meal everyone will remember.

Easy Cheeseburger Crescent Rolls Recipe – Flaky, Cheesy, and Loaded with Savory Beef Flavor

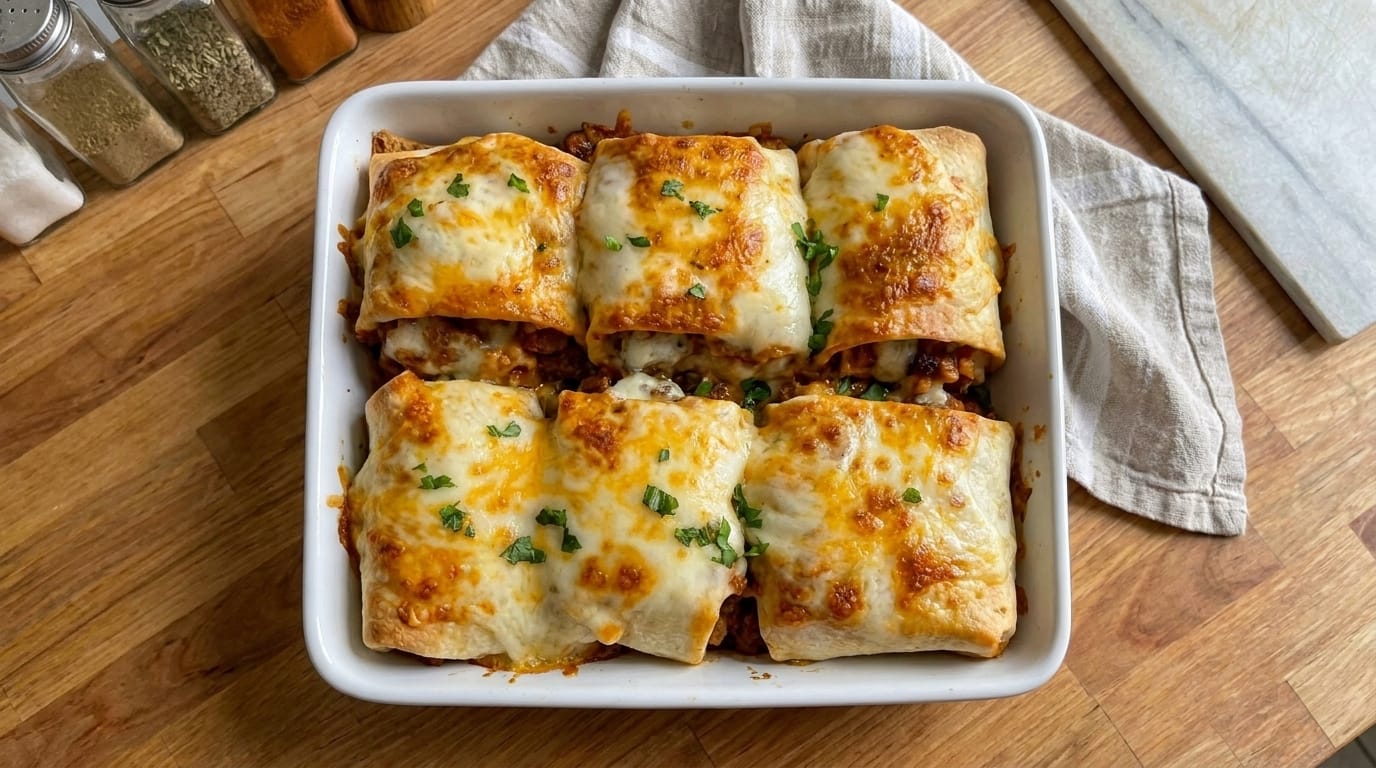
If you love classic cheeseburgers and buttery baked pastries, these Cheeseburger Crescent Rolls are the perfect combination of both. Flaky crescent dough is wrapped around juicy seasoned beef, melted cheddar cheese, and delicious burger-inspired flavors, then baked until golden brown and perfectly cheesy.

Each bite delivers a crispy, buttery outside with a warm, savory beef and cheese filling inside. They are quick, easy, and make the perfect family dinner, party appetizer, game-day snack, or grab-and-go meal.

These cheesy crescent rolls bring all the flavors of a cheeseburger into a fun handheld recipe everyone will enjoy.

Why You’ll Love These Cheeseburger Crescent Rolls

They taste like a cheeseburger in a flaky golden roll.

The filling is cheesy, savory, and satisfying.

Perfect for busy weeknights.

Great for kids and family gatherings.

Easy to customize with your favorite burger toppings.

Ready in less than an hour.

Ingredients

For the Beef Filling

  • 1½ pounds ground beef
  • 1 tablespoon olive oil
  • 1 small onion, finely diced
  • 3 garlic cloves, minced
  • 1 teaspoon salt
  • 1 teaspoon black pepper
  • 1 teaspoon garlic powder
  • 1 teaspoon onion powder
  • 1 teaspoon smoked paprika
  • 2 tablespoons Worcestershire sauce
  • 2 tablespoons ketchup
  • 1 tablespoon yellow mustard

For the Crescent Rolls

  • 2 cans refrigerated crescent roll dough (16 rolls)
  • 2 cups shredded cheddar cheese
  • 1 cup shredded mozzarella cheese
  • 1 egg, beaten (for brushing)
  • 1 tablespoon sesame seeds (optional)

Optional Cheeseburger Add-Ins

  • Pickle slices, chopped
  • Cooked bacon pieces
  • Diced jalapeños
  • Diced bell peppers
  • Extra cheese

Garnish

  • Fresh parsley
  • Sesame seeds
  • Extra shredded cheese

How to Make Cheeseburger Crescent Rolls

1. Cook the Beef Filling

Heat olive oil in a large skillet over medium heat.

Add ground beef and cook for:

5–7 minutes

until browned.

Break the meat apart while cooking.

2. Add Onion and Garlic

Add diced onion.

Cook for:

3–4 minutes

until softened.

Add garlic and cook for another 30 seconds.

3. Season the Beef

Stir in:

  • Salt
  • Black pepper
  • Garlic powder
  • Onion powder
  • Smoked paprika
  • Worcestershire sauce
  • Ketchup
  • Mustard

Mix well and cook for another:

2–3 minutes

until flavorful.

Remove from heat and let cool slightly.

4. Prepare the Crescent Dough

Preheat oven to:

375°F (190°C)

Line a baking sheet with parchment paper.

Separate crescent dough triangles.

5. Add the Filling

Place a spoonful of beef mixture onto the wide end of each crescent triangle.

Add shredded cheddar and mozzarella cheese.

Avoid overfilling.

6. Roll the Crescent Rolls

Roll each triangle tightly from the wide end toward the tip.

Place seam-side down on the baking sheet.

7. Add the Topping

Brush each roll with beaten egg.

Sprinkle with sesame seeds if desired.

8. Bake the Rolls

Bake for:

15–18 minutes

until golden brown and the cheese is melted.

9. Rest Before Serving

Allow rolls to cool for:

5 minutes

before serving.

10. Serve Warm

Garnish with fresh parsley.

Serve with your favorite dipping sauces.

What to Serve With Cheeseburger Crescent Rolls

These rolls pair perfectly with classic sides.

Serve with:

  • French fries
  • Sweet potato fries
  • Onion rings
  • Coleslaw
  • Garden salad

Dipping sauces:

  • Ketchup
  • Burger sauce
  • Ranch dressing
  • Garlic aioli
  • Cheese sauce

For a complete meal:

  • Pickle spears
  • Fresh vegetables
  • Potato wedges

Tips for the Best Cheeseburger Crescent Rolls

Cool the Beef Before Filling

Warm filling can make crescent dough harder to roll.

Don’t Overfill

Too much filling can cause the rolls to open while baking.

Use Fresh Crescent Dough

Fresh dough gives the best flaky texture.

Add Cheese Between Layers

Layering cheese creates a better melted filling.

Seal the Rolls Properly

Roll tightly to keep the filling inside.

Bake Until Golden

A golden crust gives the best texture.

Serve Warm

The cheese is best when melted and stretchy.

Easy Recipe Variations

Bacon Cheeseburger Crescent Rolls

Add:

  • Crispy bacon
  • Extra cheddar

for a smoky flavor.

Mushroom Swiss Rolls

Add:

  • Sautéed mushrooms
  • Swiss cheese

for a steakhouse-style filling.

Spicy Cheeseburger Rolls

Add:

  • Jalapeños
  • Hot sauce
  • Pepper jack cheese

BBQ Cheeseburger Rolls

Mix barbecue sauce into the beef filling.

Add cheddar cheese.

Pizza Cheeseburger Rolls

Add:

  • Pepperoni
  • Mozzarella
  • Pizza seasoning

Breakfast Cheeseburger Rolls

Add:

  • Scrambled eggs
  • Breakfast sausage
  • Cheddar cheese

Make-Ahead Instructions

Prepare the beef filling up to:

3 days ahead

Store covered in the refrigerator.

When ready:

  • Assemble crescent rolls
  • Bake fresh
  • Serve warm

You can also assemble them a few hours before baking.

How to Store Leftovers

Store leftover crescent rolls in an airtight container.

Refrigerate for up to:

4 days

Reheating Instructions

Oven:

350°F (175°C) for 8–10 minutes

Air fryer:

350°F (175°C) for 4–5 minutes

Microwave:

Heat briefly until warmed through.

Freezing Instructions

Freeze baked crescent rolls in a freezer-safe container.

Store for up to:

3 months

Thaw and reheat before serving.

Frequently Asked Questions

Can I use puff pastry instead of crescent dough?

Yes. Puff pastry creates a flakier, more buttery texture.

Can I use leftover cooked beef?

Yes. Warm and season the beef before filling.

What cheese works best?

Cheddar, mozzarella, and pepper jack melt beautifully.

Can I make these without beef?

Yes. Try chicken, turkey, or vegetables.

How do I stop the filling from leaking?

Avoid overfilling and roll the dough tightly.

Can I prepare these ahead of time?

Yes. Assemble ahead and bake when ready.

Can I add pickles?

Yes. Chopped pickles add classic cheeseburger flavor.

What dipping sauce is best?

Burger sauce, ketchup, ranch, or cheese sauce are great choices.

Final Thoughts

These Cheeseburger Crescent Rolls are the perfect comfort food with flaky golden dough, juicy seasoned beef, and gooey melted cheese in every bite.

They are easy enough for weeknight dinners but fun enough for parties and gatherings.

Serve them warm with your favorite dipping sauce and enjoy a delicious handheld cheeseburger-inspired meal everyone will love.

Easy Cheesy Beef Stuffed Bread Rolls Recipe – Golden, Gooey, and Loaded with Savory Flavor

If you love warm homemade bread filled with cheesy, savory goodness, these Cheesy Beef Stuffed Bread Rolls are the perfect comfort food. Soft golden bread is packed with seasoned ground beef, melted cheese, and delicious Italian-inspired flavors, then baked until beautifully golden and bubbling.

Every bite delivers a crispy, buttery outside with a juicy beef and cheese filling inside. The melted cheese stretches perfectly while the flavorful beef filling makes these rolls taste like a homemade cheeseburger wrapped in fresh baked bread.

Perfect for family dinners, party appetizers, game nights, lunch boxes, or a satisfying snack, these stuffed bread rolls are easy to make and guaranteed to disappear quickly.

Why You’ll Love These Cheesy Beef Stuffed Bread Rolls

They combine soft homemade bread with a rich cheesy beef filling.

The golden crust is buttery, warm, and delicious.

The beef filling is savory, juicy, and full of flavor.

Perfect for serving as a meal or appetizer.

Great for kids, parties, and family gatherings.

Easy to customize with your favorite fillings.

Ingredients

For the Beef Filling

  • 1½ pounds ground beef
  • 2 tablespoons olive oil
  • 1 medium onion, finely diced
  • 4 garlic cloves, minced
  • 1 teaspoon salt
  • 1 teaspoon black pepper
  • 1 teaspoon garlic powder
  • 1 teaspoon onion powder
  • 1 teaspoon smoked paprika
  • 1 teaspoon Italian seasoning
  • 2 tablespoons Worcestershire sauce
  • 2 tablespoons tomato paste
  • ½ cup marinara sauce

For the Cheese Filling

  • 2 cups shredded mozzarella cheese
  • 1 cup shredded cheddar cheese
  • ½ cup shredded Parmesan cheese
  • 4 ounces cream cheese (optional for extra creaminess)

For the Bread Rolls

  • 1 pound pizza dough or homemade bread dough
  • 2 tablespoons melted butter
  • 2 garlic cloves, minced
  • 1 tablespoon fresh parsley, chopped
  • 1 teaspoon Italian seasoning

Optional Add-Ins

  • Bell peppers
  • Mushrooms
  • Jalapeños
  • Cooked bacon
  • Spinach
  • Extra cheese

How to Make Cheesy Beef Stuffed Bread Rolls

1. Prepare the Beef Filling

Heat olive oil in a large skillet over medium heat.

Add ground beef and cook for:

5–7 minutes

until browned and fully cooked.

Break the beef apart while cooking.

2. Add Aromatics

Add diced onion.

Cook for:

3–4 minutes

until softened.

Add minced garlic and cook for another 30 seconds.

3. Season the Beef

Add:

  • Salt
  • Black pepper
  • Garlic powder
  • Onion powder
  • Smoked paprika
  • Italian seasoning
  • Worcestershire sauce
  • Tomato paste

Stir well.

4. Finish the Filling

Add marinara sauce.

Simmer for:

3–5 minutes

until the mixture becomes flavorful and slightly thickened.

Remove from heat and allow it to cool slightly.

5. Prepare the Dough

Divide the dough into equal portions.

Roll each piece into a small circle.

Keep the center slightly thicker than the edges.

6. Add the Filling

Place a spoonful of beef mixture in the center.

Add:

  • Mozzarella cheese
  • Cheddar cheese
  • Parmesan cheese

Do not overfill to prevent leaking.

7. Seal the Rolls

Fold the dough around the filling.

Pinch the edges tightly to seal.

Place seam-side down in a greased baking dish.

8. Add Garlic Butter Topping

Mix:

  • Melted butter
  • Garlic
  • Parsley
  • Italian seasoning

Brush over the top of each roll.

9. Bake the Rolls

Bake in a preheated oven at:

375°F (190°C)

for:

20–25 minutes

until golden brown and the cheese is melted.

10. Rest Before Serving

Allow the rolls to cool for:

5 minutes

before serving.

This helps the filling set.

11. Garnish and Serve

Top with:

  • Fresh parsley
  • Extra Parmesan
  • Cracked black pepper

Serve warm.

What to Serve With Cheesy Beef Stuffed Bread Rolls

These rolls are delicious with classic comfort sides.

Serve with:

  • Marinara dipping sauce
  • Garlic butter sauce
  • Ranch dressing
  • Caesar salad
  • Garden salad

Other great pairings:

  • Tomato soup
  • French fries
  • Roasted vegetables
  • Potato wedges
  • Coleslaw

They also make a great party platter with:

  • Buffalo chicken dip
  • Cheese dip
  • Vegetable trays

Tips for the Best Cheesy Beef Stuffed Bread Rolls

Cool the Filling Before Stuffing

Hot filling can make the dough difficult to seal.

Don’t Overfill

Too much filling can cause the rolls to burst while baking.

Seal the Dough Well

Press edges firmly to keep the cheese inside.

Use Fresh Dough

Fresh dough creates the softest, fluffiest rolls.

Add Cheese Layers

Adding cheese above and below the beef creates extra gooey bites.

Brush With Garlic Butter

This creates a flavorful golden crust.

Serve Warm

The cheese is best when melted and stretchy.

Easy Recipe Variations

Cheeseburger Stuffed Rolls

Add:

  • Pickles
  • Mustard
  • Ketchup
  • Cheddar cheese

for a cheeseburger flavor.

Philly Cheesesteak Rolls

Replace ground beef with sliced steak.

Add:

  • Peppers
  • Onions
  • Provolone cheese

Pizza Beef Rolls

Add:

  • Pepperoni
  • Mozzarella
  • Pizza sauce

Spicy Beef Rolls

Add:

  • Jalapeños
  • Hot sauce
  • Red pepper flakes

Garlic Parmesan Beef Rolls

Add extra:

  • Parmesan cheese
  • Garlic butter
  • Fresh herbs

BBQ Beef Rolls

Mix barbecue sauce into the beef filling.

Top with cheddar cheese.

Make-Ahead Instructions

The beef filling can be prepared up to 3 days ahead.

Store covered in the refrigerator.

When ready:

  • Prepare dough
  • Fill rolls
  • Bake fresh

You can also assemble the rolls several hours before baking.

How to Store Leftovers

Allow rolls to cool completely.

Store in an airtight container.

Refrigerate for up to 4 days.

Reheating Instructions

Reheat in the oven at:

350°F (175°C) for 8–10 minutes

for the best texture.

Air fryer:

350°F (175°C) for 4–5 minutes

Microwave works but may soften the bread.

Freezing Instructions

These stuffed rolls freeze well.

Freeze baked rolls in a freezer-safe container.

Store for up to 3 months.

Thaw and reheat in the oven before serving.

Frequently Asked Questions

Can I use store-bought dough?

Yes. Pizza dough, crescent dough, or dinner roll dough works well.

Can I use leftover cooked beef?

Yes. Season and warm the beef before filling.

What cheese melts best?

Mozzarella, cheddar, and provolone create the best stretch and flavor.

Can I make these without beef?

Yes. Try chicken, turkey, or vegetables.

How do I prevent the rolls from opening?

Avoid overfilling and seal the edges tightly.

Can I make them spicy?

Yes. Add jalapeños, hot sauce, or chili flakes.

Can I prepare these ahead?

Yes. Assemble ahead and bake when ready.

What dipping sauce goes best?

Marinara, garlic butter, ranch, or cheese sauce are all delicious.

Final Thoughts

These Cheesy Beef Stuffed Bread Rolls are the perfect combination of soft golden bread, savory seasoned beef, and gooey melted cheese.

With a flavorful filling and buttery garlic crust, they make an amazing family dinner, party appetizer, or comforting snack.

Serve them warm with your favorite dipping sauce and enjoy a homemade recipe everyone will love.

Ultimate Grilled Chicken and Tomato Penne Pasta

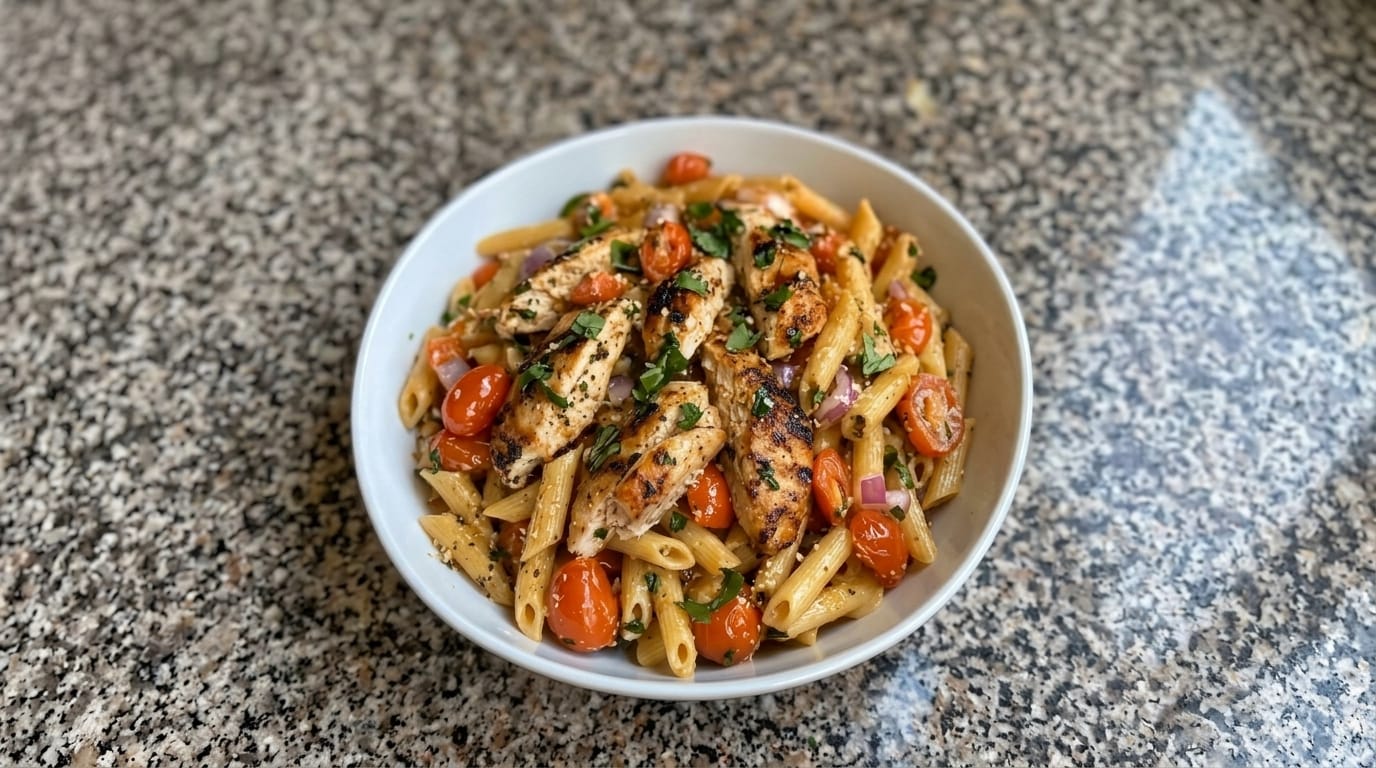
Welcome to your ultimate guide for preparing a vibrant, restaurant-quality meal right at home: Grilled Chicken and Tomato Penne Pasta. If you want a comforting yet fresh dish loaded with savory grilled chicken, sweet blistered tomatoes, and perfectly al dente pasta, this comprehensive recipe masterclass is designed just for you.

Why This Recipe Works

Pasta dishes are a universal favorite because they bring people together around the table. By combining smoky grilled chicken with fresh cherry tomatoes, aromatic red onion, and herbs, this recipe strikes the ideal balance between comforting indulgence and vibrant freshness.

  • Restaurant Quality at Home: The smoky char from the grilled chicken combined with the juicy sweetness of burst tomatoes creates layers of complex flavor.
  • Balanced and Satisfying: Featuring lean protein from the chicken and satisfying carbohydrates from the penne, it is a wholesome meal that keeps you energized.
  • Versatile and Customizable: You can easily swap out ingredients, add extra vegetables, or adjust the herbs to match what you have in your kitchen.

Essential Ingredients

To recreate this flavorful masterpiece in your own kitchen, gather the following high-quality ingredients:

  • The Protein: 2 boneless, skinless chicken breasts, seasoned with olive oil, garlic powder, dried oregano, salt, and black pepper.
  • The Pasta: 8 oz (half a box) of penne pasta, cooked al dente according to package instructions.
  • The Veggies & Aromatics: 1 cup cherry tomatoes, halved; 1/4 cup finely diced red onion; 2 cloves minced garlic.
  • The Sauce & Finish: 2 tablespoons extra-virgin olive oil; 1 tablespoon fresh lemon juice or balsamic vinegar; grated Parmesan cheese and fresh basil leaves for garnish.

Step-by-Step Cooking Instructions

  1. Cook the Pasta: Bring a large pot of salted water to a boil, add the penne pasta, and cook until al dente. Drain, reserving 1/4 cup of the pasta cooking water.
  2. Grill the Chicken: Preheat your grill or grill pan over medium-high heat. Season the chicken breasts with olive oil, garlic powder, oregano, salt, and pepper. Grill for 6 to 7 minutes per side until fully cooked and beautifully charred. Let rest for 5 minutes before slicing.
  3. Sauté the Tomatoes and Aromatics: In a large skillet, heat olive oil over medium heat. Add the minced garlic and diced red onion, sautéing until fragrant. Toss in the halved cherry tomatoes and cook until they begin to burst and release their juices.
  4. Combine Pasta and Sauce: Add the cooked penne pasta directly into the skillet with the tomatoes. Toss well, adding a splash of the reserved pasta water to create a glossy, cohesive sauce.
  5. Assemble and Serve: Divide the warm tomato penne pasta into bowls. Top with slices of the freshly grilled chicken.
  6. Garnish: Sprinkle generously with grated Parmesan cheese and freshly chopped basil leaves before serving.

Chef’s Pro-Tips for Success

  • Do Not Overcook the Pasta: Keeping the penne strictly al dente ensures it holds up perfectly when tossed in the warm tomato sauce without turning mushy.
  • Let the Chicken Rest: Allowing the grilled chicken breasts to rest before slicing locks in all the natural juices, keeping every bite tender and moist.
  • Boost the Freshness: A squeeze of fresh lemon juice right before serving lifts all the savory flavors and brightens the entire dish.

What is your favorite type of cheese to sprinkle over a warm bowl of chicken pasta?

Ultimate Creamy Egg Salad Lettuce Boats

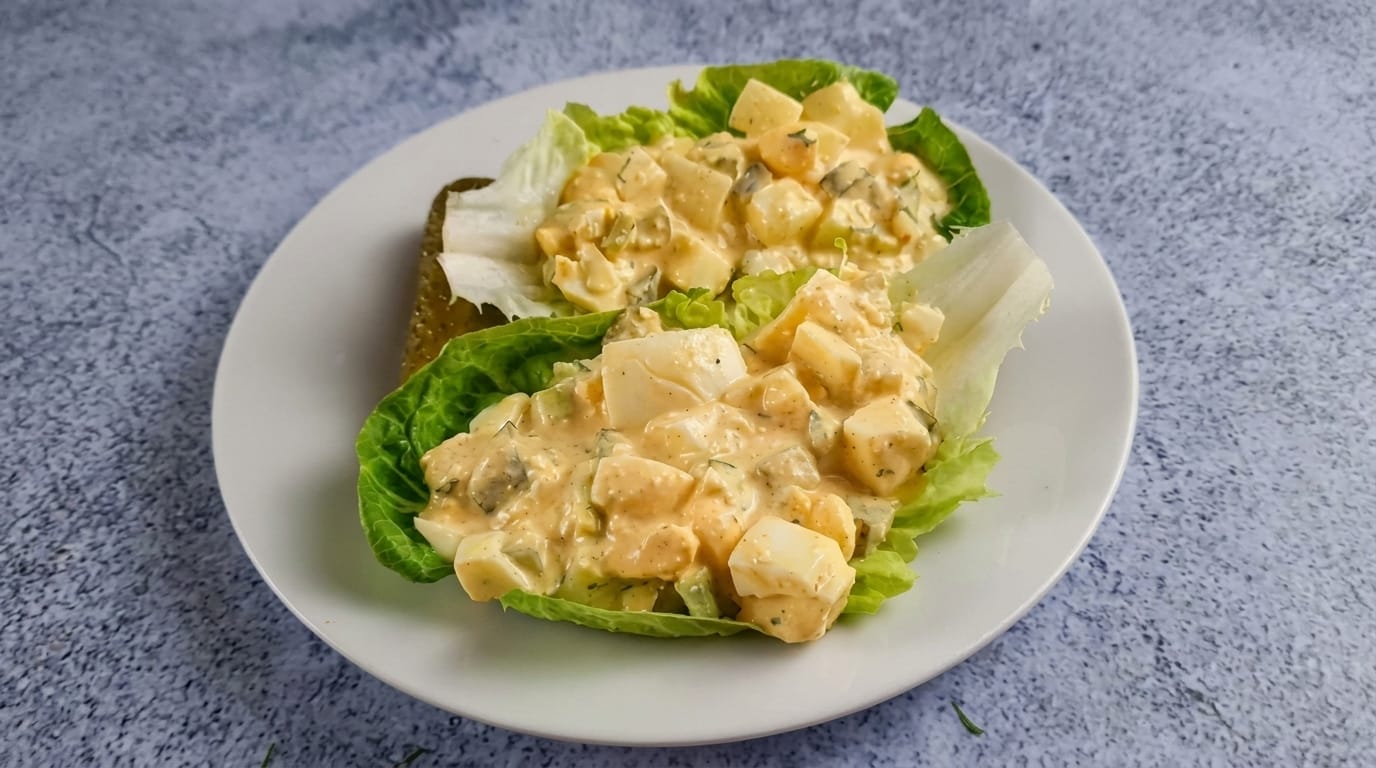
Welcome to your ultimate guide for creating a light, refreshing, and high-protein meal classic: Creamy Egg Salad Lettuce Boats. If you want a crisp, low-carb lunch that delivers rich, velvety flavor with minimal effort, this comprehensive recipe masterclass is designed just for you.

Why This Recipe Works

Egg salad has remained a lunchtime favorite for generations because of its simple ingredients and comforting taste. By pairing creamy, perfectly hard-boiled eggs with crisp lettuce boats, you get a modern, refreshing twist that satisfies your cravings without weighing you down.

  • Light and Low-Carb: Serving traditional egg salad in fresh lettuce leaves cuts out heavy bread while adding an incredible crunch.
  • The Perfect Texture Contrast: The smooth, creamy richness of the egg and mayonnaise mixture pairs harmoniously with the crisp, snappy texture of fresh lettuce.
  • Effortless Convenience: With just a few minutes of active prep time, you can whip up a batch of delicious egg salad and assemble your boats in moments.

Essential Ingredients

To recreate this savory masterpiece in your own kitchen, gather the following high-quality ingredients:

  • The Base: 6 large hard-boiled eggs, peeled and diced.
  • The Creaminess: 1/4 cup mayonnaise; 1 teaspoon Dijon mustard or yellow mustard.
  • The Crunch & Flavor: 2 tablespoons finely diced celery; 2 tablespoons finely chopped dill pickles or pickle relish.
  • The Seasonings: Salt and freshly cracked black pepper to taste; a pinch of paprika or dried dill.
  • The Vessel: Crisp leaves of romaine or butterhead lettuce, washed and dried.

Step-by-Step Cooking Instructions

  1. Boil and Cool the Eggs: Place your eggs in a saucepan, cover them with water, bring to a boil, then cook for 9 to 10 minutes. Transfer them immediately to an ice bath to cool before peeling.
  2. Chop the Eggs: Dice the peeled hard-boiled eggs into uniform pieces and place them into a medium mixing bowl.
  3. Mix the Dressing: In a small bowl, whisk together the mayonnaise, Dijon mustard, diced celery, chopped pickles, salt, and black pepper until smooth.
  4. Combine: Gently fold the creamy dressing into the diced eggs until every piece is evenly coated without breaking down the eggs too much.
  5. Assemble the Boats: Arrange your clean, crisp lettuce leaves on a serving plate. Spoon generous amounts of the creamy egg salad directly into the center of each leaf.
  6. Garnish and Serve: Dust lightly with paprika or extra black pepper, and serve immediately alongside pickles or your favorite fresh sides.

Chef’s Pro-Tips for Success

  • Perfect Peeling: Use older eggs for boiling, as they peel much easier than ultra-fresh farm eggs.
  • Add a Tangy Kick: A tiny splash of lemon juice or pickle juice adds an extra layer of brightness to the creamy dressing.
  • Meal Prep Friendly: You can make the egg salad ahead of time and store it in an airtight container in the refrigerator for up to 3 days before assembling your lettuce boats.

What is your absolute favorite herb or seasoning to mix into a classic egg salad?

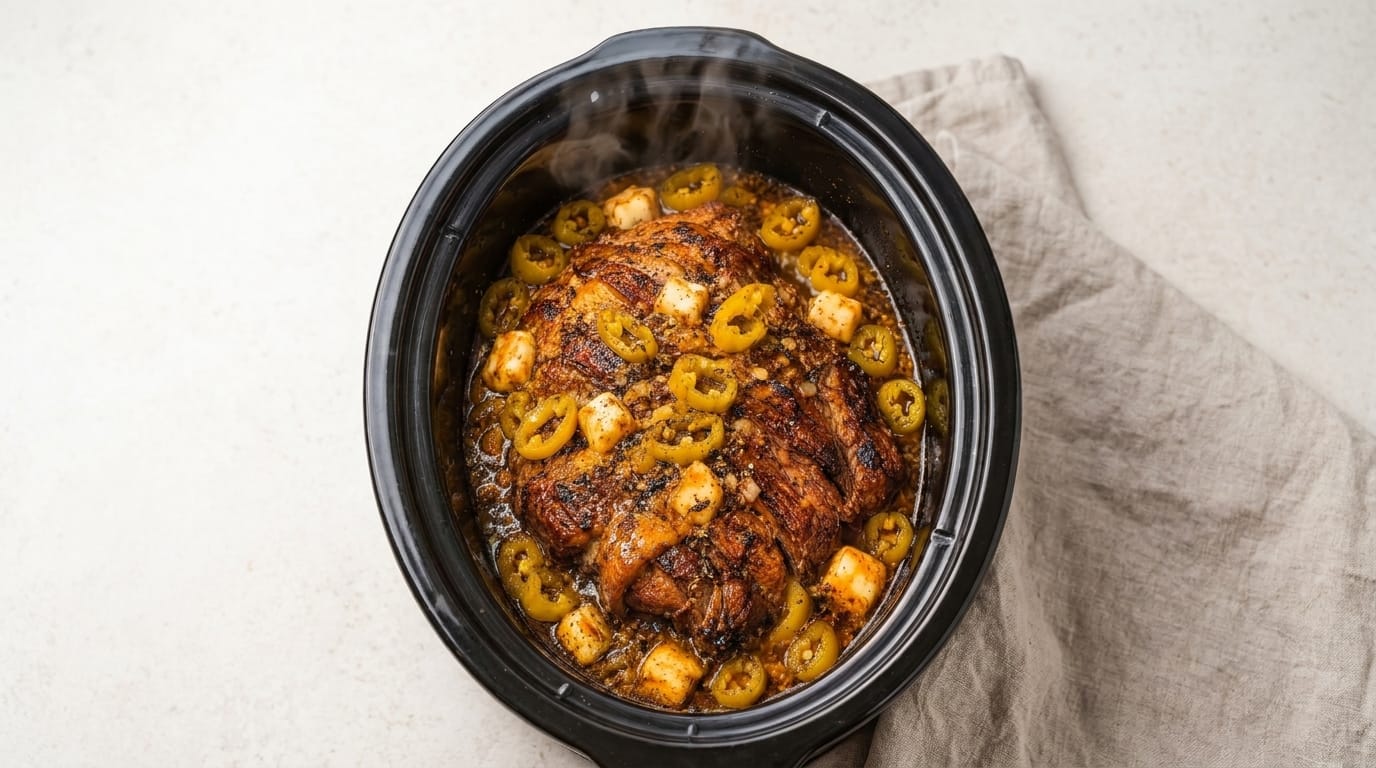
Ultimate Slow-Cooker Mississippi Pepperoncini Beef Pot Roast

Welcome to your ultimate guide for preparing a legendary comfort food classic: Slow-Cooker Mississippi Pepperoncini Beef Pot Roast. If you want a hands-off, melt-in-your-mouth meal that delivers explosive flavor with minimal effort, this comprehensive recipe masterclass is designed just for you.

Why This Recipe Works

Mississippi pot roast has captured the hearts of home cooks worldwide because of its foolproof method and incredible flavor profile. By combining a rich cut of beef with a distinct blend of seasonings and tangy peppers, you get a dish that transforms ordinary weeknight dinners into a gourmet experience.

  • Ultimate Tenderness: Cooking a well-marbled chuck roast on low heat for hours breaks down tough connective tissues, yielding buttery, shreddable beef.
  • The Perfect Flavor Contrast: The sharp, tangy bite of pickled pepperoncini peppers cuts right through the rich, savory depth of butter, gravy, and ranch seasoning.
  • Effortless Convenience: With less than five minutes of active kitchen time, you can load your slow cooker and let it work its magic all day long.

Essential Ingredients

To recreate this savory masterpiece in your own kitchen, gather the following high-quality ingredients:

  • The Beef: A 3 to 4-pound beef chuck roast, well-marbled for maximum moisture and flavor.
  • The Seasonings: 1 packet of dry ranch seasoning mix; 1 packet of brown gravy mix (or au jus mix).
  • The Fat: 1/2 cup (1 stick) of unsalted butter, cut into small pats.
  • The Zest: 6 to 8 whole pickled pepperoncini peppers, plus 2 to 3 tablespoons of juice straight from the jar.
  • The Aromatics (Optional): 4 cloves of peeled garlic and small cubes of cheese to melt over the top during the final minutes of cooking.

Step-by-Step Cooking Instructions

  1. Prep the Slow Cooker: Place your clean slow cooker insert on a stable countertop and ensure it is ready for loading.
  2. Position the Roast: Pat your chuck roast completely dry using paper towels, then place it directly into the center of the slow cooker insert.
  3. Add the Seasonings: Evenly sprinkle the packet of dry ranch seasoning mix and the brown gravy mix directly over the top of the beef, making sure the surface is well coated.
  4. Layer Butter and Peppers: Arrange the pats of butter evenly across the seasoned roast. Scatter the whole pepperoncini peppers around the meat and pour the pepper juice directly into the bottom of the slow cooker.
  5. Cook Low and Slow: Cover the slow cooker with its lid and cook on LOW for 8 to 10 hours (or on HIGH for 5 to 6 hours) until the beef is fork-tender.
  6. Shred and Serve: Use two large forks to shred the tender beef right inside the slow cooker juices, blending the melted butter and pepper flavor throughout every bite. Serve warm.

Chef’s Pro-Tips for Success

  • Watch the Sodium: Because the ranch and gravy seasoning packets contain plenty of salt, do not add extra salt before cooking.
  • Boost the Heat: For an extra spicy kick, toss in a handful of sliced jalapeños alongside your pepperoncini peppers.
  • Serving Suggestions: Pile this rich shredded beef onto toasted hoagie rolls for an incredible sandwich, or serve it over a mountain of creamy mashed potatoes.

What is your absolute favorite side dish to pair with a rich, slow-cooked beef roast like this?

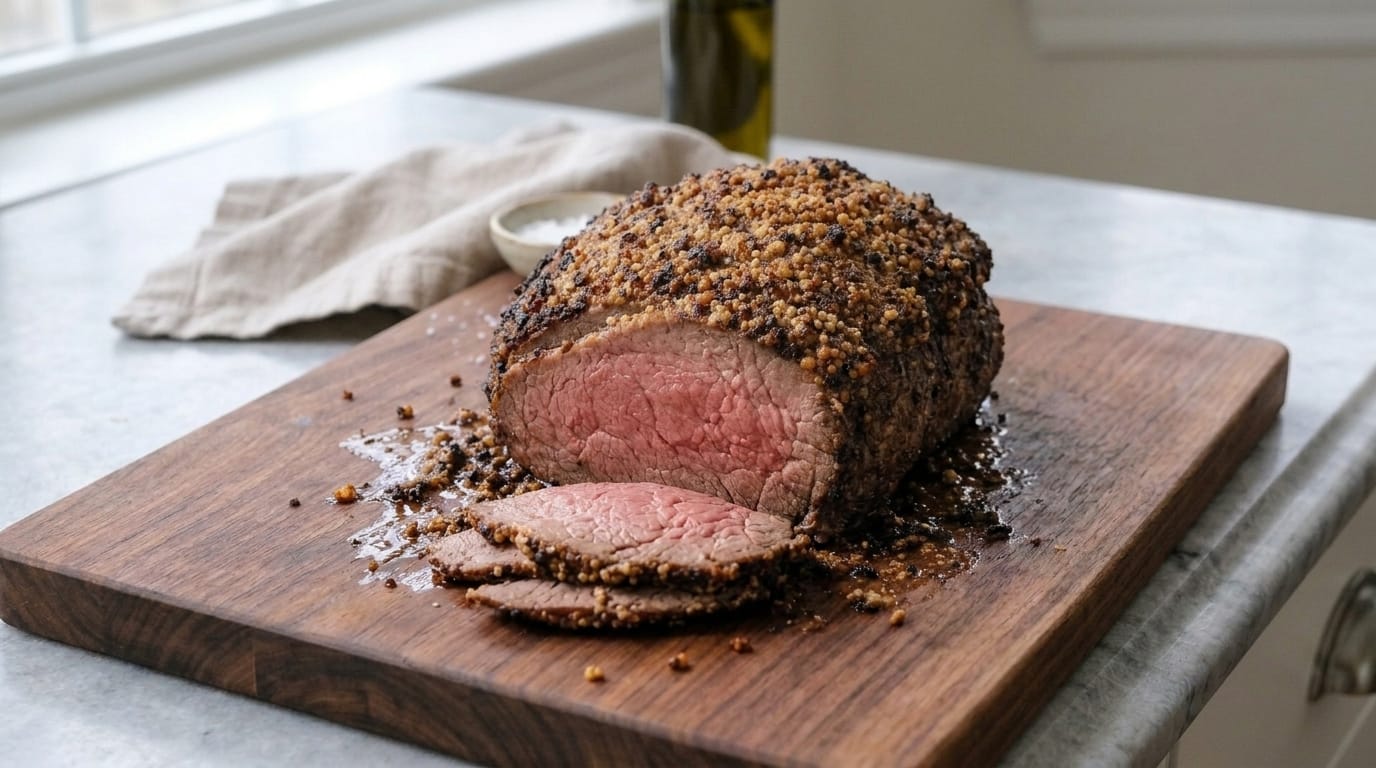
Easy Garlic Herb Crusted Beef Roast Recipe – Juicy, Tender, and Perfectly Seasoned

If you love a classic steakhouse-style dinner, this Garlic Herb Crusted Beef Roast is the perfect recipe. A tender beef roast is coated with a flavorful garlic herb crust, roasted until beautifully browned on the outside while staying juicy and tender inside.

The combination of fresh garlic, herbs, cracked pepper, and savory seasonings creates a delicious crust that locks in incredible flavor. Each slice is rich, juicy, and perfect for serving at family dinners, holidays, or special occasions.

This elegant yet simple roast makes a stunning centerpiece paired with roasted vegetables, mashed potatoes, or a homemade gravy.

Why You’ll Love This Garlic Herb Crusted Beef Roast

The outside develops a flavorful golden crust.

The inside stays tender, juicy, and perfectly cooked.

The garlic herb seasoning adds steakhouse-style flavor.

It is impressive enough for holidays but easy enough for family dinners.

Perfect for leftovers, sandwiches, and meal prep.

Pairs beautifully with classic comfort-food sides.

Ingredients

For the Beef Roast

  • 4–5 pounds beef roast (sirloin tip roast, top round roast, or rib roast)
  • 3 tablespoons olive oil
  • 6 garlic cloves, minced
  • 2 tablespoons Dijon mustard
  • 2 tablespoons Worcestershire sauce
  • 2 tablespoons fresh rosemary, chopped
  • 2 tablespoons fresh thyme, chopped
  • 2 tablespoons fresh parsley, chopped
  • 2 teaspoons kosher salt
  • 2 teaspoons cracked black pepper
  • 1 teaspoon smoked paprika
  • 1 teaspoon onion powder

Optional Pan Juices

  • 1 cup beef broth
  • ½ cup red wine (optional)
  • 2 tablespoons butter

Garnish

  • Fresh rosemary
  • Fresh thyme
  • Cracked black pepper
  • Sea salt flakes

How to Make Garlic Herb Crusted Beef Roast

1. Bring the Roast to Room Temperature

Remove the beef roast from the refrigerator about 45–60 minutes before cooking.

This helps the roast cook more evenly.

2. Prepare the Garlic Herb Crust

In a small bowl combine:

  • Olive oil
  • Minced garlic
  • Dijon mustard
  • Worcestershire sauce
  • Rosemary
  • Thyme
  • Parsley
  • Salt
  • Black pepper
  • Smoked paprika
  • Onion powder

Mix into a thick herb paste.

3. Season the Beef

Pat the roast dry with paper towels.

Rub the garlic herb mixture generously over every side of the roast.

Make sure the seasoning covers the entire surface.

4. Sear the Roast

Heat a large oven-safe skillet over medium-high heat.

Sear the roast for:

2–3 minutes per side

until a deep golden crust forms.

This step adds extra flavor.

5. Prepare for Roasting

Place the roast on a rack inside a roasting pan or keep it in the oven-safe skillet.

Add beef broth and wine to the bottom of the pan if using.

6. Roast the Beef

Preheat oven to:

375°F (190°C)

Roast until the desired doneness:

  • Rare: 120–125°F (49–52°C)
  • Medium Rare: 130–135°F (54–57°C)
  • Medium: 140–145°F (60–63°C)

Cooking time will vary depending on roast size.

7. Rest the Roast

Remove from oven.

Cover loosely with foil.

Rest for:

15–20 minutes

before slicing.

This keeps the juices inside the meat.

8. Make Optional Pan Sauce

Place the roasting pan over medium heat.

Add:

  • Butter
  • Beef broth

Scrape the browned bits from the bottom.

Simmer until slightly reduced.

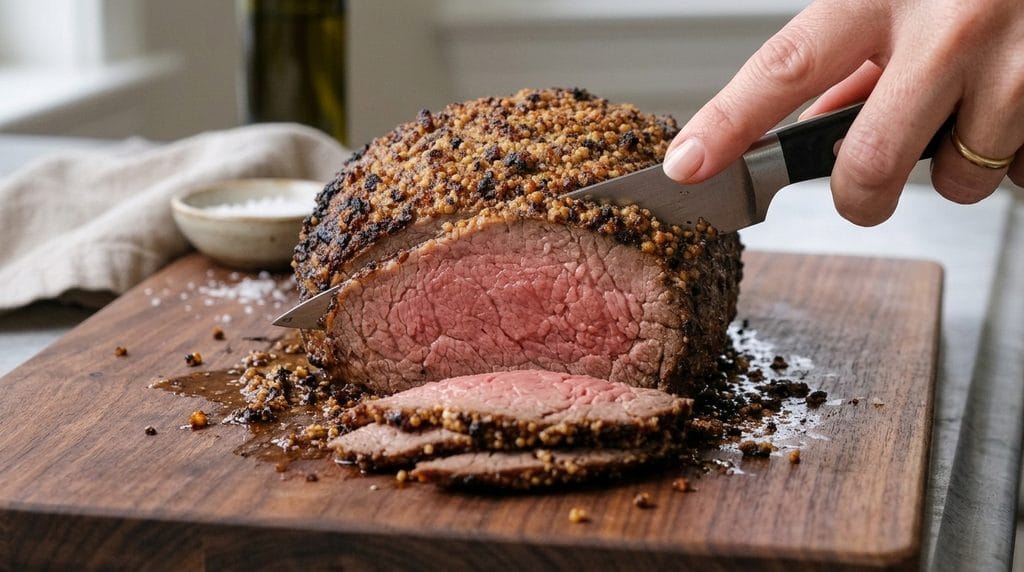
9. Slice the Roast

Slice thinly against the grain.

Arrange on a serving platter.

10. Serve and Garnish

Spoon pan juices over the slices.

Finish with fresh herbs and cracked pepper.

Serve warm.

What to Serve With Garlic Herb Crusted Beef Roast

This roast pairs perfectly with classic sides.

Serve with:

  • Creamy mashed potatoes
  • Garlic mashed potatoes
  • Roasted baby potatoes
  • Buttered noodles
  • Yorkshire pudding

Vegetable sides:

  • Roasted carrots
  • Green beans
  • Asparagus
  • Brussels sprouts

For a holiday-style meal, add:

  • Dinner rolls
  • Cranberry sauce
  • Fresh salad

Tips for the Best Garlic Herb Crusted Beef Roast

Use a Meat Thermometer

A thermometer gives the most accurate doneness.

Dry the Roast First

A dry surface helps create a better crust.

Let the Beef Rest

Resting prevents juices from spilling out when sliced.

Season Generously

Large cuts of beef need enough seasoning to flavor every slice.

Slice Against the Grain

This creates a more tender bite.

Don’t Skip the Sear

The crust adds deep roasted flavor.

Save the Pan Juices

They make an incredible sauce for serving.

Easy Recipe Variations

Garlic Butter Beef Roast

Add extra butter and roasted garlic for a richer flavor.

Peppercorn Crusted Roast

Increase cracked black pepper and add crushed peppercorns.

Herb Parmesan Crust

Add:

  • Parmesan cheese
  • Extra herbs

for a savory crust.

Mustard Herb Roast

Increase Dijon mustard for a tangy flavor.

Red Wine Garlic Roast

Use red wine in the roasting pan for a deeper sauce.

Spicy Garlic Roast

Add:

  • Cayenne pepper
  • Chili flakes

for extra heat.

Make-Ahead Instructions

The garlic herb seasoning paste can be prepared up to 3 days ahead.

The roast can be seasoned and refrigerated overnight for deeper flavor.

Bring it close to room temperature before roasting.

How to Store Leftovers

Store sliced roast beef in an airtight container.

Refrigerate for up to 4 days.

Reheating Instructions

Warm gently in a skillet with beef broth or pan juices.

Avoid overheating to keep the beef tender.

Freezing Instructions

Wrap cooled roast slices tightly.

Freeze for up to 3 months.

Thaw overnight in the refrigerator before reheating.

Frequently Asked Questions

What cut of beef is best for roasting?

Rib roast, sirloin tip, and top round are excellent choices.

How do I keep roast beef from drying out?

Avoid overcooking and allow it to rest before slicing.

Can I prepare this roast the night before?

Yes. Seasoning overnight improves flavor.

Can I cook this without searing?

Yes, but searing creates a better crust.

How do I know when the roast is done?

Use an instant-read thermometer inserted into the thickest part.

Can I use dried herbs instead of fresh?

Yes. Use about one-third the amount of dried herbs.

What sauce goes well with this roast?

Pan gravy, garlic butter sauce, horseradish cream, or au jus are great options.

Can I use leftovers for sandwiches?

Yes. Thinly sliced roast beef makes excellent sandwiches.

Final Thoughts

This Garlic Herb Crusted Beef Roast delivers everything you want from a classic roast dinner: a flavorful crust, juicy tender slices, and incredible homemade flavor.

With simple seasonings and the right cooking technique, you can create a restaurant-quality beef roast that is perfect for family meals, holidays, or special occasions.

Serve it with your favorite sides and enjoy a comforting, impressive dinner everyone will love.

I will now generate an extremely comprehensive, long-form blog post and recipe guide for Creamy Cucumber Salad with Red Wine Vinegar in a single file.

Creamy Cucumber Salad with Red Wine Vinegar GuideExport

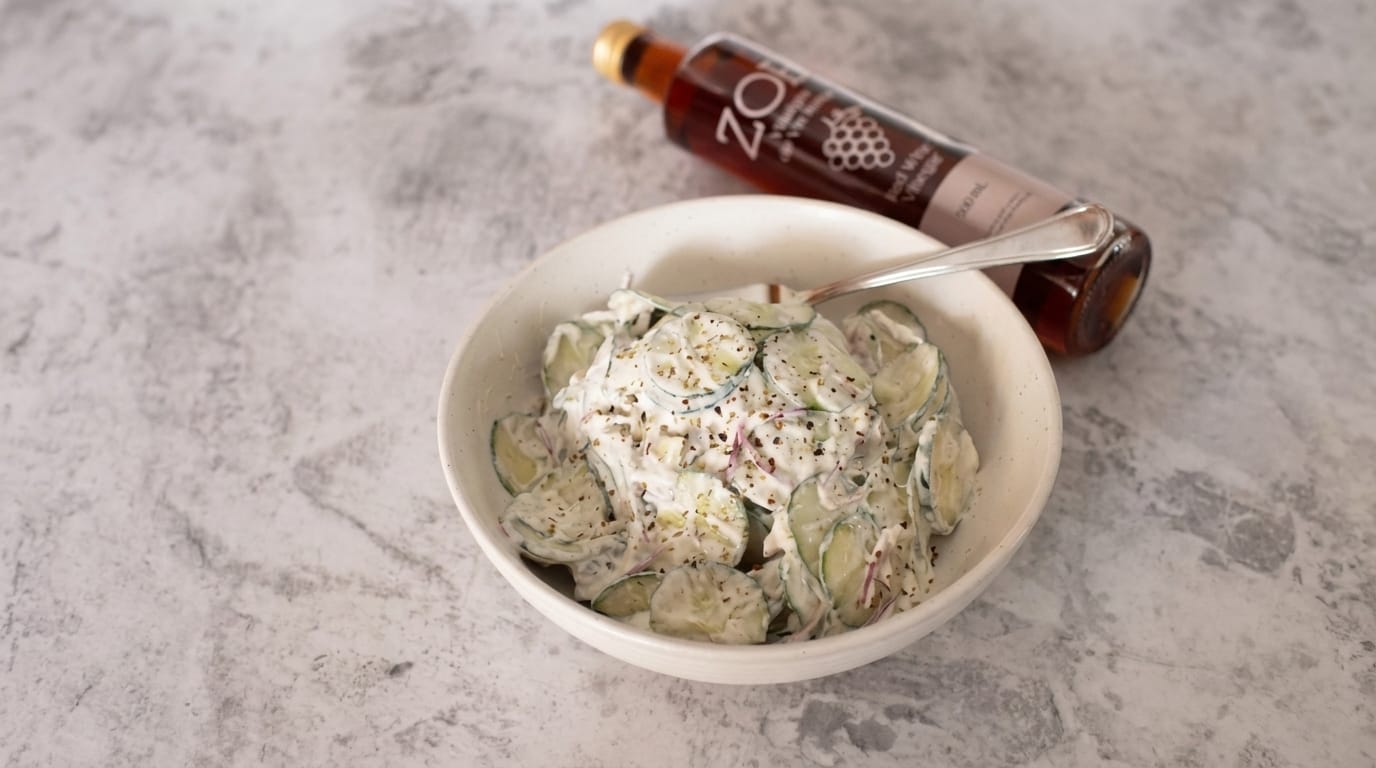
The Ultimate Creamy Cucumber Salad with Red Wine Vinegar: A Masterclass in Crisp, Tangy Refreshment

Welcome back to the kitchen, home cooks, culinary enthusiasts, and lovers of fresh, vibrant comfort food! If you are searching for a side dish that instantly revitalizes your palate, cuts through heavy main courses with bright acidity, and delivers a luxurious creaminess balanced by crisp, cooling crunch, your search ends right here. Today, we are elevating a timeless summer staple into an absolute masterpiece: The Ultimate Creamy Cucumber Salad with Red Wine Vinegar.

Forget everything you think you know about watery, bland cucumber salads from past picnics and backyard barbecues. This recipe is meticulously engineered to prevent sogginess while offering a harmonious balance of velvety sour cream (or Greek yogurt), pungent red wine vinegar, crisp red onion slivers, fragrant herbs, and freshly cracked black pepper. Whether you are hosting a lively summer backyard gathering, prepping a refreshing side for a heavy barbecue, or looking for a crisp, low-carb side dish that the whole family will rave about, this comprehensive guide will walk you through every single step to achieve absolute perfection.

Why This Recipe Will Become a Staple in Your Home

Every great dish starts with a purpose. While traditional cucumber salads can sometimes suffer from excess moisture release that turns the dressing into a watery pool, our specialized salting and draining technique ensures that every single bite remains crisp, vibrant, and thoroughly coated in a rich, tangy dressing.

  • Unmatched Crispness & Texture: By drawing out excess cellular water from the cucumbers through a brief resting period with salt, we ensure the cucumbers retain their signature snap rather than becoming limp and watery.
  • The Vinegar Zing: The sharp, fruity, and robust flavor profile of red wine vinegar provides an exquisite acidic counterpoint to the rich, creamy dairy base, elevating the flavor far beyond standard white vinegar or lemon juice.
  • The Flavor Balance: Combining garlic, onion, a hint of sweetness, and herbaceous notes creates a depth of flavor that turns a humble vegetable into a star attraction.
  • Make-Ahead Friendly: Unlike leafy green salads that wilt within minutes of dressing, this cucumber salad actually improves after resting in the refrigerator for a short while as the flavors meld together.

Understanding the Anatomy of a Perfect Cucumber Salad

Before we jump into the kitchen, let’s break down the essential components that make this recipe work so harmoniously:

  1. The Cucumber Foundation: Choosing the right cucumbers is paramount. English cucumbers (or seedless Persian cucumbers) offer thin skins, few seeds, and a naturally crisp, sweet flavor profile that eliminates the need for tedious peeling.
  2. The Salting Step (The Secret Technique): Salting sliced cucumbers and letting them drain in a colander for 15 to 20 minutes extracts unwanted liquid. This concentrates the cucumber flavor and prevents the dressing from diluting.
  3. The Creamy Dairy Base: A combination of sour cream and full-fat Greek yogurt provides a velvety texture with a pleasant tang, offering a lighter alternative to pure mayonnaise while maintaining rich mouthfeel.
  4. The Acid & Aromatics: Red wine vinegar brings color, acidity, and complexity. Thinly sliced red onions add a mild sharpness, while fresh dill or chives provide aromatic freshness.

Ingredients Checklist

Gather these high-quality ingredients before you begin your cooking journey:

For the Salad Base:

  • Cucumbers: 3 large English (seedless) cucumbers, sliced into uniform thin rounds (about $1/8$ inch thick), or 6 to 8 Persian cucumbers.
  • Salt: 1 tablespoon kosher salt (used specifically for drawing out moisture during the draining phase).
  • Onion:$1/2$ medium red onion, peeled, halved, and sliced as thin as possible into delicate half-moons.

For the Creamy Red Wine Vinegar Dressing:

  • Sour Cream:$1/2$ cup full-fat sour cream (provides classic richness and smooth texture).
  • Greek Yogurt:$1/2$ cup plain full-fat Greek yogurt (adds tang and balances the richness).
  • Vinegar: 3 tablespoons high-quality red wine vinegar (the star acidic component).
  • Sweetness: 1 to 2 teaspoons granulated sugar or honey (just a touch to balance the sharp bite of the vinegar).
  • Garlic: 1 small clove of garlic, minced into a paste or grated finely (optional, but adds wonderful savory depth).
  • Herbs: 2 tablespoons fresh dill, finely chopped (dill and cucumber are a match made in culinary heaven).
  • Seasoning:$1/2$ teaspoon freshly cracked black pepper and $1/4$ teaspoon kosher salt (adjust to taste).

Step-by-Step Instructions

Step 1: Prep and Slice the Cucumbers

Wash your English cucumbers thoroughly under cold running water and pat them dry. There is no need to peel English cucumbers since their skins are tender and bitter-free. Using a sharp chef’s knife or a mandoline slicer, slice the cucumbers into uniform rounds approximately $1/8$

inch thick.

Step 2: The Crucial Salting and Draining Process

Place your sliced cucumbers and thinly sliced red onions into a large colander set inside a bowl or directly in the sink. Sprinkle the 1 tablespoon of kosher salt evenly over the cucumber and onion mixture, tossing gently with your hands to ensure every piece is lightly coated.

Allow the mixture to rest at room temperature for 15 to 20 minutes. You will notice a significant amount of liquid pooling out as the salt draws out excess moisture.

Step 3: Rinse and Dry Thoroughly

After 20 minutes, rinse the salted cucumbers and red onions thoroughly under cold running water to remove the excess surface salt. Transfer the mixture to a clean kitchen towel or layers of heavy-duty paper towels. Gently pat and press the cucumbers to remove as much residual moisture as possible. (Note: Thorough drying is the secret weapon to keeping your dressing thick and creamy rather than watery!)

Step 4: Whisk the Creamy Red Wine Vinegar Dressing

In a large mixing bowl, combine the sour cream, Greek yogurt, red wine vinegar, sugar (or honey), minced garlic, and freshly cracked black pepper. Whisk vigorously until the dressing is completely smooth, glossy, and well-emulsified. Taste the dressing at this stage; it should have a bright, tangy kick balanced by rich creaminess.

Step 5: Combine and Toss

Add your thoroughly dried cucumber and red onion mixture into the bowl with the dressing. Fold everything together gently using a silicone spatula until every single cucumber slice and onion sliver is generously coated in the creamy red wine vinegar sauce. Fold in half of your freshly chopped dill.

Step 6: Chill and Meld Flavors

Cover the bowl tightly with plastic wrap and place it in the refrigerator for at least 30 minutes to 1 hour before serving. This chilling period allows the cucumbers to absorb the complex flavors of the dressing while remaining refreshingly crisp.

Step 7: Garnish and Serve

Right before serving, give the salad a gentle toss. Garnish the top with the remaining freshly chopped dill and an extra pinch of freshly cracked black pepper for a restaurant-quality presentation.

Chef’s Pro-Tips for Ultimate Success

  • Mandoline Safety: If you use a mandoline slicer to achieve perfectly uniform paper-thin cucumber rounds, always use the safety guard or cut-resistant gloves. Consistency in slicing ensures an even distribution of texture.
  • Adjusting the Acidity: Red wine vinegar varies in brand pungency. Start with 2.5 tablespoons, whisk into the dairy base, taste, and add the remaining half tablespoon if you prefer a sharper, more vibrant tang.
  • Herb Variations: While dill is the traditional and most complementary herb for cucumber salads, you can substitute or combine it with fresh chives, flat-leaf Italian parsley, or even a hint of fresh mint for an unexpected Mediterranean twist.
  • Storage and Longevity: Because of the salting technique, this salad holds up remarkably well in the refrigerator for up to 2 days stored in an airtight container, though it is at its absolute peak texture on day one.

Suggested Side Dishes and Pairings

This bright, creamy, and tangy salad acts as a wonderful palate cleanser alongside rich, savory, or grilled main courses. Here are some fantastic pairing ideas:

  • Garlic and Herb Grilled Steak: The crisp acidity of the cucumber salad cuts effortlessly through the rich, savory fats of a perfectly grilled ribeye or strip steak.
  • Barbecue Ribs or Pulled Pork: Traditional summer barbecue mains find their ideal partner in a cold, vinegar-forward creamy salad.
  • Lemon-Herb Roasted Chicken: The bright dill and red wine vinegar notes echo poultry seasonings, creating a cohesive, comforting weeknight dinner spread.
  • Grilled Salmon or Seafood: The cooling crunch of the cucumbers complements flaky, rich fish beautifully.

Nutritional Insights & Dietary Benefits

  • Low-Carb & Keto-Friendly: Naturally low in carbohydrates, making it an exceptional side dish for low-carb and ketogenic dietary lifestyles.
  • Hydrating: Cucumbers consist of over $95\%$ water, offering natural hydration while delivering essential vitamins like Vitamin K and potassium.
  • Customizable Dairy: Easily adaptable for dietary preferences by substituting dairy-free sour cream and plant-based Greek yogurt alternatives without sacrificing creamy texture.

What is your absolute favorite occasion or main course to serve alongside a crisp, refreshing, creamy cucumber salad?

Edit directly or with Gemini

Click anywhere to type and edit directly, or select text to prompt Gemini for changes.

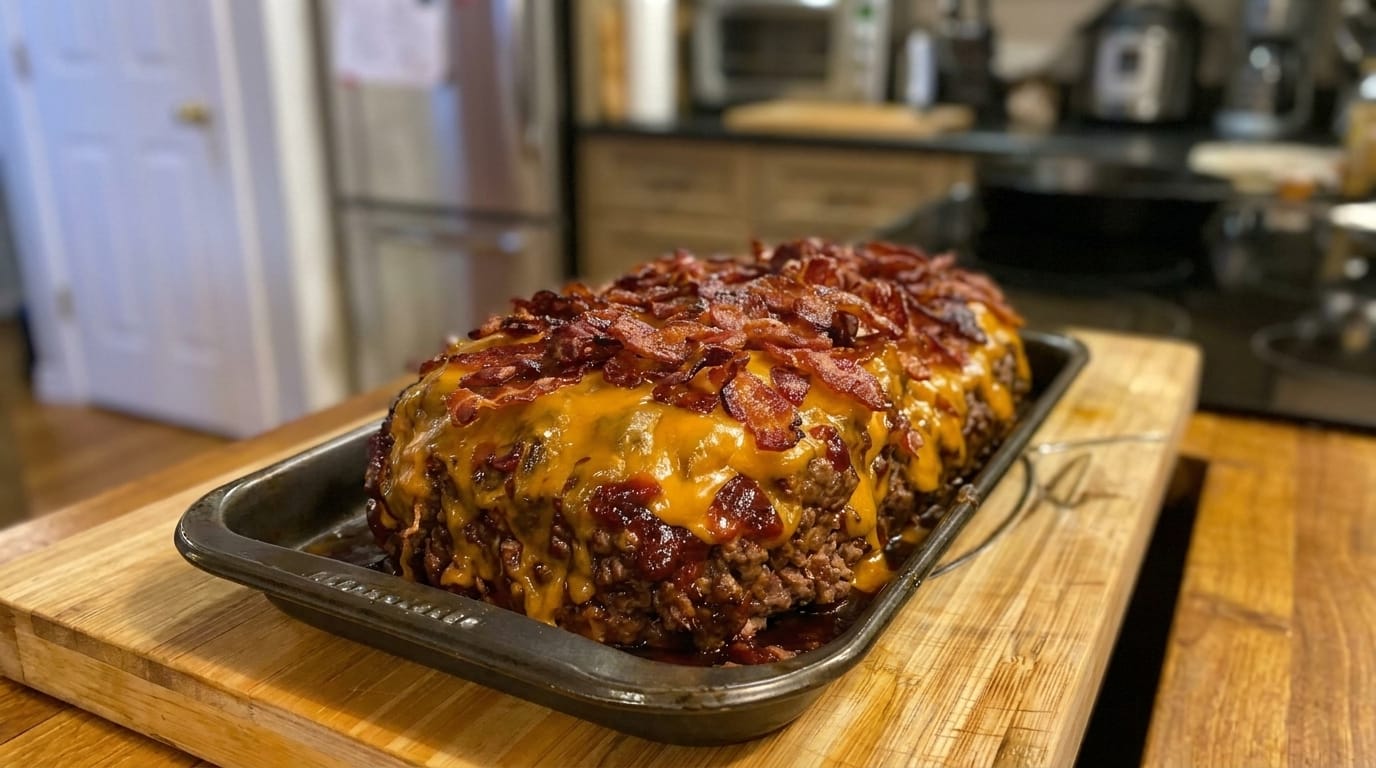
I will now generate a comprehensive blog post and recipe guide for the Ultimate Bacon-Topped Cheddar Beef Loaf in a single file.

Bacon Cheddar Beef Loaf GuideExport

The Ultimate Bacon-Topped Cheddar Beef Loaf: A Masterclass in Comfort Food

Welcome back to the kitchen, home cooks and culinary adventurers! If you are searching for a dish that instantly transports you back to cozy family dinners while delivering an explosion of savory, cheesy, bacon-wrapped goodness, your search ends right here. Today, we are elevating the humble weeknight meatloaf into an absolute masterpiece: The Ultimate Bacon-Topped Cheddar Beef Loaf.

Forget everything you think you know about dry, bland meatloaves from your childhood. This recipe is packed with aromatic vegetables, rich seasonings, a decadent cheddar cheese blanket, and a crown of crispy, smoky bacon. Whether you are hosting a weekend gathering or looking to prep an incredible dinner that the whole family will rave about, this comprehensive guide will walk you through every single step to achieve perfection.

Why This Recipe Will Become a Staple in Your Home

Every great dish starts with a purpose. While traditional meatloaf can sometimes suffer from a reputation of being dry or uninspired, our approach ensures that every single bite is succulent, flavorful, and deeply satisfying.

  • Unmatched Moisture: By incorporating a balanced ratio of ground chuck, finely minced aromatics, and a touch of binding ingredients, the beef stays incredibly tender and juicy throughout the baking process.
  • The Flavor Trinity: Combining Worcestershire sauce, garlic, onion, and a tangy glaze creates a depth of flavor that savory lovers dream about.
  • The Decadent Topping: Melting sharp cheddar cheese over a hot beef loaf creates an ooey-gooey barrier before piling on crispy, rendered bacon pieces for the ultimate textural contrast.

Understanding the Anatomy of a Perfect Beef Loaf

Before we jump into the kitchen, let’s break down the essential components that make this recipe work so harmoniously:

  1. The Meat Foundation: Using ground beef with a moderate fat content (such as 80/20 ground chuck) is crucial. The fat renders out during cooking, keeping the loaf moist without making it greasy.
  2. The Binder & Extender: Breadcrumbs or panko combined with milk help trap moisture and bind the meat mixture together so it holds its shape while slicing.
  3. The Glaze: A tangy, sweet-and-savory tomato glaze caramelizes on the exterior as it bakes, sealing in the juices and adding a wonderful punch of flavor.
  4. The Finale: Melty cheddar cheese and crispy bacon bits crown the loaf right at the end of baking, creating a magnificent visual and textural climax.

Ingredients Checklist

Gather these high-quality ingredients before you begin your cooking journey:

For the Beef Loaf:

  • Ground Beef: 2 lbs ground chuck (80/20 ratio recommended for maximum flavor and moisture).
  • Aromatics: 1 medium yellow onion, finely diced; 3 cloves garlic, minced.
  • Binders: 1 cup plain or Italian breadcrumbs (or panko); $1/3$ cup whole milk.
  • Eggs: 2 large eggs, lightly beaten to help bind the mixture.
  • Seasonings: 1 tablespoon Worcestershire sauce; 1 teaspoon kosher salt; 1/2 teaspoon freshly cracked black pepper; 1 teaspoon smoked paprika; 1 teaspoon dried Italian seasoning.
  • Fresh Herbs: 2 tablespoons fresh parsley, finely chopped.

For the Glaze & Topping:

  • The Glaze:$1/2$ cup ketchup; 1 tablespoon brown sugar; 1 teaspoon apple cider vinegar; 1/2 teaspoon garlic powder.
  • The Cheese: 2 cups freshly grated sharp cheddar cheese (shredding your own ensures optimal melting texture).
  • The Bacon: 8 to 10 strips of thick-cut bacon, cooked until crispy and crumbled.

Step-by-Step Instructions

Step 1: Prep and Preheat

Preheat your oven to 375°F (190°C). Line a rimmed baking sheet or a standard loaf pan with parchment paper or lightly grease it with non-stick cooking spray. (Using a rimmed baking sheet allows the loaf to form a nice crust all around, but a loaf pan works wonderfully if you prefer a more traditional shape).

Step 2: Sauté the Aromatics (Optional Flavor Boost)

In a small skillet over medium heat, add a touch of oil and sauté your diced onions for 4 to 5 minutes until translucent and soft. Add the minced garlic during the last 60 seconds of cooking, stirring constantly so it doesn’t burn. Remove from heat and let cool slightly. Chef’s note: While you can add raw onions, sautéing them first removes harsh raw notes and deepens the sweetness of the loaf.

Step 3: Combine the Wet and Dry Bases

In a small bowl, whisk together the breadcrumbs and milk, allowing them to sit for 2 minutes so the breadcrumbs absorb the liquid. In a separate, very large mixing bowl, whisk together the beaten eggs, Worcestershire sauce, salt, black pepper, smoked paprika, Italian seasoning, and cooled onion-garlic mixture.

Step 4: Mix the Beef Loaf

Add your ground chuck and the soaked breadcrumb mixture into the large bowl with the seasonings. Using clean hands (or gloved hands), gently mix everything together just until combined. Crucial Tip: Do not overmix the meat, or your loaf will turn out dense and tough rather than tender and melt-in-your-mouth.

Step 5: Shape and Bake

Transfer the meat mixture to your prepared baking sheet or pan. Shape it into a uniform, free-form loaf (about 9×5 inches). In a small bowl, whisk together the ketchup, brown sugar, apple cider vinegar, and garlic powder for the glaze. Brush half of this glaze generously over the top and sides of the raw loaf.

Bake in the preheated oven for 45 minutes.

Step 6: Add the Cheddar and Bacon Crown

Remove the beef loaf from the oven. Spoon the remaining glaze over the top, then evenly blanket the entire loaf with your freshly grated sharp cheddar cheese. Scatter the crispy, crumbled bacon generously over the melted cheese layer.

Return the loaf to the oven for an additional 10 to 15 minutes, or until the cheese is completely melted, bubbling, and golden, and the internal temperature of the beef reaches 160°F (71°C).

Step 7: Rest and Serve

Remove the loaf from the oven and let it rest undisturbed on a cutting board for 10 to 15 minutes. This resting period allows the internal juices to redistribute so that when you slice into it, every piece stays intact and juicy rather than crumbling apart.

Chef’s Pro-Tips for Ultimate Success

  • Grind Quality Matters: Look for ground chuck rather than lean ground round or sirloin. The extra fat content is essential for keeping a large meat loaf moist during a lengthy bake time.
  • Freshly Grated Cheese: Pre-bagged shredded cheese contains anti-caking agents that prevent a smooth, velvety melt. Take an extra two minutes to grate a block of sharp cheddar yourself—you will taste the difference!
  • Make-Ahead Friendly: You can completely assemble the raw loaf ahead of time, cover it tightly, and store it in the refrigerator for up to 24 hours before baking. Just add 5 to 10 minutes to the initial baking time if baking straight from the fridge.

Suggested Side Dishes to Complete Your Feast

A magnificent main course deserves equally stellar side dishes. Here are a few fantastic pairing ideas:

  • Garlic Mashed Potatoes: Perfect for soaking up any extra savory pan juices and melted cheese.
  • Roasted Green Beans with Lemon & Garlic: Adds a bright, crisp contrast to the rich, savory beef.
  • Classic Creamy Coleslaw: Introduces a cool, crunchy texture that balances the warm, smoky flavors of the bacon and cheddar.

What is your absolute favorite side dish to serve alongside a hearty, cheesy comfort food classic like this?

Edit directly or with Gemini

Click anywhere to type and edit directly, or select text to prompt Gemini for changes.

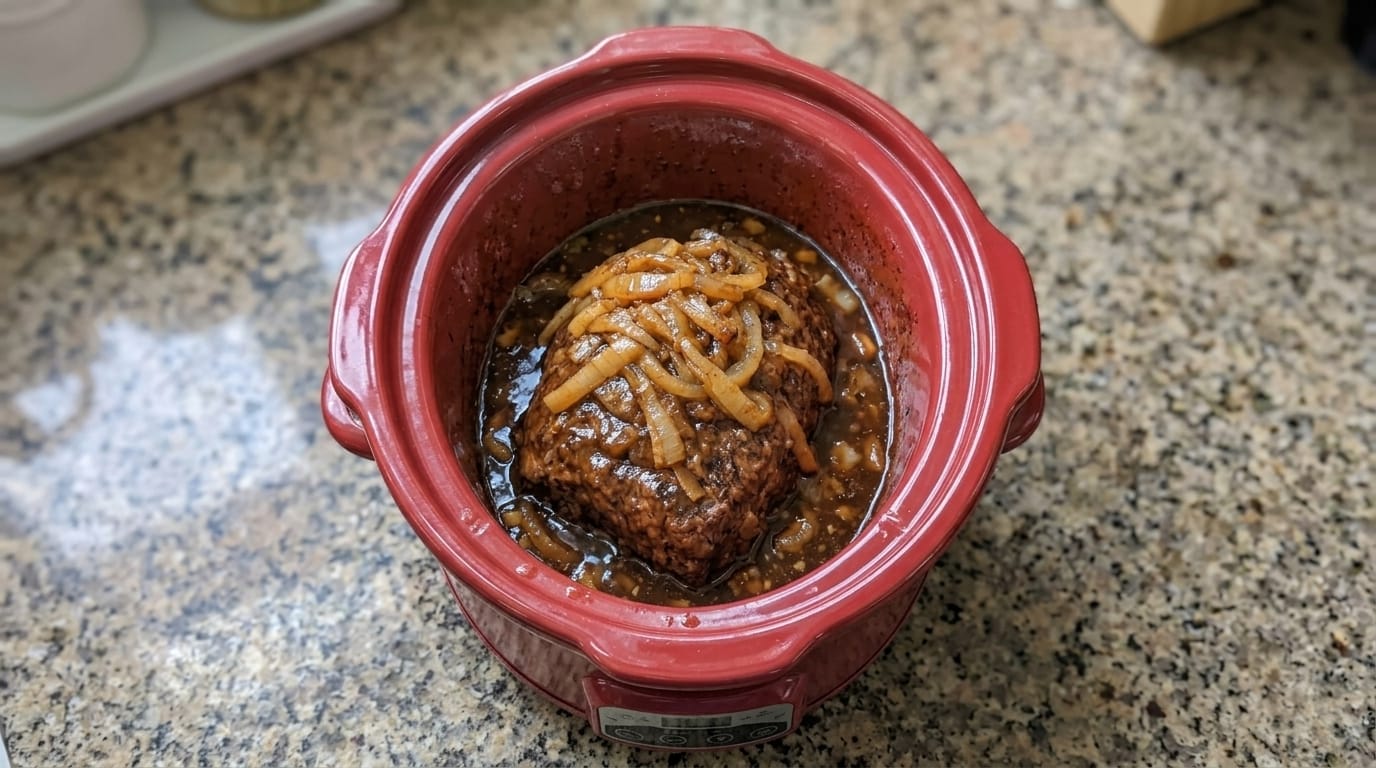
Ultimate Slow-Cooker Onion-Braised Pot Roast

Welcome back to the kitchen! If you are looking for the ultimate comfort food that practically melts in your mouth with zero fuss, you have found it. Today, we are diving deep into a timeless classic: a slow-cooker pot roast loaded with sweet, caramelized onions and a rich, savory au jus that will fill your entire home with the most incredible aroma.

Whether you are cooking for a cozy family dinner or meal-prepping for the week ahead, this slow-cooker masterclass will give you every single tip, trick, and detail you need to achieve fork-tender perfection every single time.

Why This Pot Roast Belongs in Your Weekly Rotation

There is something undeniably magical about low-and-slow cooking. By letting a tough cut of beef bathe in a flavorful broth alongside slow-cooked onions for hours, the connective tissues break down entirely. The result is a buttery, shreddable masterpiece that requires almost no effort on your part.

  • Hands-Off Cooking: Once everything goes into the slow cooker, you can walk away for hours and let the appliance do the heavy lifting.
  • Incredible Depth of Flavor: The combination of savory beef broth, Worcestershire sauce, garlic, and sweet onions creates a rich, complex gravy that ties the whole dish together.
  • Versatile Comfort: Serve it over creamy mashed potatoes, spoon it onto toasted rolls, or pair it with roasted vegetables for a hearty, satisfying meal.

Ingredients You Will Need

To pull off this mouthwatering slow-cooker pot roast, you will need a handful of accessible, high-quality ingredients:

  • The Beef: A 3 to 4-pound chuck roast (well-marbled for maximum flavor and tenderness).
  • The Aromatics & Veggies: 2 large yellow or sweet onions, sliced thick; 4 cloves of minced garlic.
  • The Braising Liquid: 1 cup beef stock or broth; 2 tablespoons Worcestershire sauce.
  • The Seasonings: Salt, freshly cracked black pepper, garlic powder, and dried thyme or rosemary.
  • The Richness: 2 tablespoons of butter (optional, for an extra-glossy finish).

Step-by-Step Instructions

  1. Prep and Season the Meat: Pat your chuck roast completely dry with paper towels. Generously season all sides with salt, black pepper, and garlic powder, pressing the spices firmly into the meat.
  2. Layer the Slow Cooker: Place half of your thick-sliced onions at the bottom of the slow cooker insert to create a bed for the beef. Lay the seasoned chuck roast right on top of the onions.
  3. Add the Aromatics: Scatter the remaining sliced onions and minced garlic all over the top of the roast.
  4. Pour the Liquid: Whisk together your beef stock and Worcestershire sauce, then pour the mixture gently around the sides of the roast.
  5. Cook Low and Slow: Cover and cook on LOW for 8 to 10 hours (or on HIGH for 5 to 6 hours), until the beef is supremely tender and easily pulls apart with a fork.
  6. Shred and Serve: Use two forks to shred the tender beef directly in the slow cooker, letting it soak up all those glorious juices and caramelized onions before plating.

Chef’s Pro-Tips for Success

  • Do Not Skip the Sear (Optional): While you can toss everything into the slow cooker raw for ultimate convenience, searing the chuck roast in a hot skillet for 2 minutes per side before putting it in the crockpot locks in an incredible depth of caramelized flavor.
  • Rest Your Meat: If serving it sliced rather than shredded, let the roast rest for 10 minutes before carving so the juices redistribute evenly.
  • Thicken the Gravy: If you prefer a thicker gravy, ladle out some of the liquid into a small saucepan, whisk in a cornstarch slurry (1 tablespoon cornstarch mixed with 1 tablespoon cold water), and simmer on the stove until thickened before pouring it back over the roast.

What is your absolute favorite side dish to serve alongside a warm, savory pot roast like this?