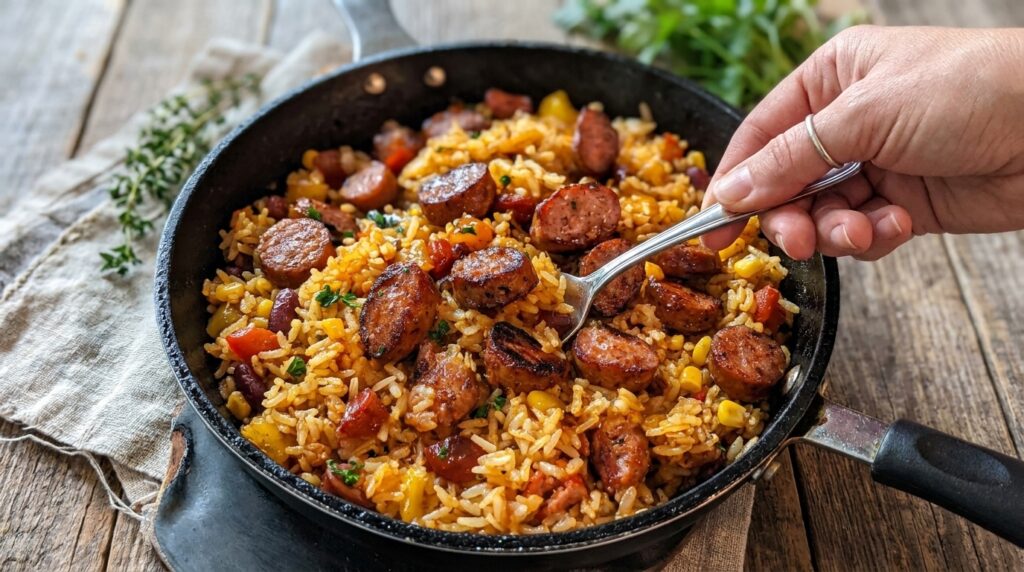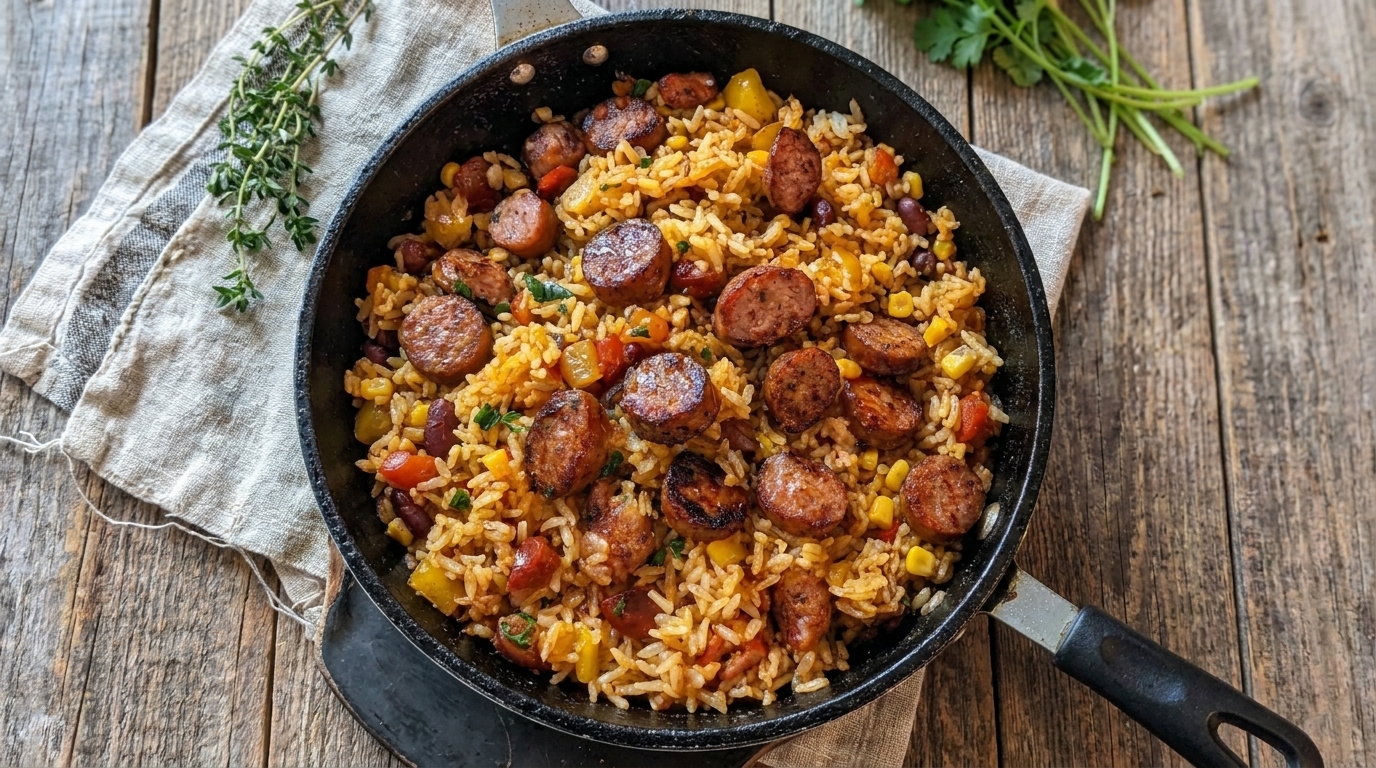
Easy Smoky Sausage Fried Rice Skillet Recipe – Savory, Colorful, and Flavor-Packed

If you are looking for a quick skillet dinner with smoky sausage, fluffy rice, colorful vegetables, garlic, and a savory sauce, this Smoky Sausage Fried Rice Skillet is an excellent recipe to make. Sliced sausage is browned until caramelized, then tossed with cold cooked rice, eggs, peppers, peas, carrots, green onions, and a smoky soy-based sauce.

This recipe is perfect for busy weeknights, meal prep, or using leftover rice. The key to great fried rice is using cold rice, cooking over fairly high heat, and avoiding too much liquid so the grains stay separate instead of becoming soft.

Serve it straight from the skillet with extra green onions, hot sauce, or a squeeze of lime for an easy one-pan meal.

Why You’ll Love This Smoky Sausage Fried Rice Skillet

The sausage adds smoky, savory flavor without requiring a long cooking time.

Cold leftover rice works especially well because the grains are firmer and fry more cleanly in the skillet.

Eggs and vegetables make the dish hearty enough to serve as a complete meal.

The sauce is simple but flavorful, combining soy sauce, Worcestershire, sesame oil, garlic, and smoked paprika.

It is also very flexible, so you can use whatever vegetables or cooked rice you have available.

Ingredients

For the Sausage

  • 14 ounces smoked sausage or kielbasa, sliced into ¼-inch rounds
  • 1 tablespoon neutral cooking oil

For the Fried Rice

  • 4 cups cold cooked long-grain rice
  • 3 large eggs
  • 1 tablespoon butter
  • 1 small yellow onion, diced
  • 1 red bell pepper, diced
  • 1 green bell pepper, diced
  • 1 cup frozen peas and carrots
  • 4 garlic cloves, finely minced
  • 3 green onions, sliced, divided

For the Sauce

  • 3 tablespoons low-sodium soy sauce
  • 1 tablespoon Worcestershire sauce
  • 1 teaspoon toasted sesame oil
  • 1 teaspoon smoked paprika
  • ½ teaspoon garlic powder
  • ¼ teaspoon onion powder
  • ¼ teaspoon freshly ground black pepper
  • 1 teaspoon hot sauce, optional

Optional Add-Ins

  • 1 cup corn
  • Sliced mushrooms
  • Chopped broccoli
  • Diced zucchini
  • Jalapeños
  • Crispy bacon
  • Shredded cabbage

For Garnishing

  • Extra green onions
  • Chopped parsley or cilantro
  • Sesame seeds, optional
  • Lime wedges
  • Hot sauce

How to Make Smoky Sausage Fried Rice Skillet

1. Prepare the Rice

For the best texture, use rice that has been cooked and completely chilled.

Break apart any large clumps with your hands or a fork before cooking.

2. Make the Sauce

In a small bowl, combine soy sauce, Worcestershire sauce, sesame oil, smoked paprika, garlic powder, onion powder, black pepper, and hot sauce if using.

Set aside.

3. Heat the Skillet

Place a large skillet or wok over medium-high heat.

Add the neutral oil.

Let the pan become hot.

4. Brown the Sausage

Add the sliced sausage in a single layer.

Cook for approximately 2–3 minutes without moving too much.

Flip and cook another 2–3 minutes until browned around the edges.

5. Remove the Sausage

Transfer the sausage to a plate.

Leave any flavorful oil in the skillet.

6. Cook the Onion

Add the diced onion.

Cook for approximately 2–3 minutes, stirring frequently.

7. Add the Bell Peppers

Add the red and green bell peppers.

Cook for another 2–3 minutes.

Keep them slightly crisp rather than cooking until very soft.

8. Add the Peas and Carrots

Stir in the frozen peas and carrots.

Cook for approximately 2 minutes until heated through.

9. Add the Garlic

Add the minced garlic.

Cook for approximately 30 seconds, stirring constantly.

10. Move the Vegetables Aside

Push the vegetables to one side of the skillet.

Add the butter to the empty side.

11. Scramble the Eggs

Crack the eggs into the buttered section.

Scramble gently for approximately 1–2 minutes until just set.

Break them into bite-sized pieces.

12. Combine Eggs and Vegetables

Stir the scrambled eggs into the vegetables.

13. Add the Cold Rice

Add the chilled rice.

Increase the heat slightly if necessary.

Use a spatula to break up any remaining clumps.

14. Fry the Rice

Cook for approximately 3–5 minutes, stirring and tossing frequently.

Let portions of the rice remain in contact with the hot skillet briefly so they develop a lightly toasted texture.

15. Add the Sausage

Return the browned sausage to the skillet.

Toss everything together.

16. Add the Sauce

Pour the prepared sauce around the edges of the skillet rather than directly into one spot.

Toss quickly to distribute it evenly.

17. Continue Stir-Frying

Cook for another 2–3 minutes.

The rice should be hot, lightly glossy, and evenly seasoned.

18. Add Green Onions

Stir in about two-thirds of the sliced green onions.

Reserve the rest for garnish.

19. Taste and Adjust

Taste the fried rice.

Add more soy sauce, black pepper, smoked paprika, or hot sauce if desired.

Be cautious with additional salt because sausage and soy sauce can already be quite salty.

20. Serve

Remove from the heat.

Garnish with remaining green onions, herbs, sesame seeds, and lime wedges if desired.

Serve immediately.

What to Serve With Smoky Sausage Fried Rice

This fried rice is hearty enough to serve by itself.

You can also pair it with:

  • Cucumber salad
  • Steamed broccoli
  • Roasted green beans
  • Asian-style slaw
  • Fried or poached eggs
  • Garlic shrimp
  • Grilled chicken
  • Egg rolls
  • Spring rolls

For an easy dinner, serve it directly from the skillet with hot sauce on the side.

Tips for the Best Sausage Fried Rice

Use cold cooked rice.

Long-grain rice works especially well.

Break apart rice clumps before adding them to the pan.

Use a large skillet or wok.

Cook over medium-high to high heat.

Brown the sausage separately first.

Do not overcrowd the pan.

Avoid adding too much sauce.

Cook the vegetables until just tender.

Add sesame oil sparingly because it is very flavorful.

Serve immediately after cooking.

Easy Recipe Variations

Spicy Sausage Fried Rice

Use spicy smoked sausage and add jalapeños, cayenne, or extra hot sauce.

Cajun Sausage Fried Rice

Add Cajun seasoning and extra bell peppers.

Chicken Sausage Fried Rice

Use fully cooked chicken sausage instead of smoked pork sausage.

Sausage Shrimp Fried Rice

Add ½ pound shrimp after browning the sausage and cook just until opaque.

Bacon Sausage Fried Rice

Add crispy bacon for extra smoky flavor.

Pineapple Sausage Fried Rice

Add 1 cup diced pineapple during the final few minutes for a sweet-savory variation.

Broccoli Sausage Fried Rice

Add chopped broccoli florets with the bell peppers.

Extra Egg Fried Rice

Increase to 4–5 eggs for an even heartier skillet.

How to Store Leftovers

Allow leftover fried rice to cool promptly before transferring it to an airtight container.

Refrigerate for up to 3–4 days.

To reheat, place the rice in a hot skillet with a small splash of water or oil.

Stir-fry for several minutes until thoroughly heated.

You can also microwave individual portions, stirring halfway through.

For freezing, portion cooled fried rice into freezer-safe containers and freeze for up to approximately 2 months.

Thaw overnight in the refrigerator or reheat from frozen until piping hot.

Frequently Asked Questions

What type of sausage should I use?

Smoked sausage, kielbasa, andouille, or another fully cooked sausage all work well.

Can I use freshly cooked rice?

You can, but cold rice gives a much better fried-rice texture.

If using fresh rice, spread it on a sheet pan and let it cool completely before frying.

Why is my fried rice mushy?

The rice may have been too warm or too wet, or too much sauce may have been added.

Use chilled rice and keep liquid ingredients limited.

Can I use brown rice?

Yes.

Cold cooked brown rice works well and gives the dish a slightly nuttier texture.

Can I make this without eggs?

Absolutely.

Simply omit them and add extra vegetables or sausage.

Can I use frozen vegetables?

Yes.

Frozen peas, carrots, corn, or mixed vegetables are convenient and work very well.

Can I make it spicy?

Yes.

Add hot sauce, cayenne, jalapeños, chili flakes, or use spicy sausage.

Can I meal prep this?

Yes.

Divide into individual containers and refrigerate for quick lunches or dinners throughout the week.

Final Thoughts

This Smoky Sausage Fried Rice Skillet combines browned sausage, fluffy rice, eggs, peppers, vegetables, garlic, soy sauce, Worcestershire, and smoky seasonings in one quick and satisfying meal.

The key is using cold rice, keeping the skillet hot, and adding just enough sauce to season the grains without making them soggy.

Serve it hot with extra green onions and your favorite hot sauce for a simple, colorful dinner that is perfect for busy weeknights or using up leftover rice.
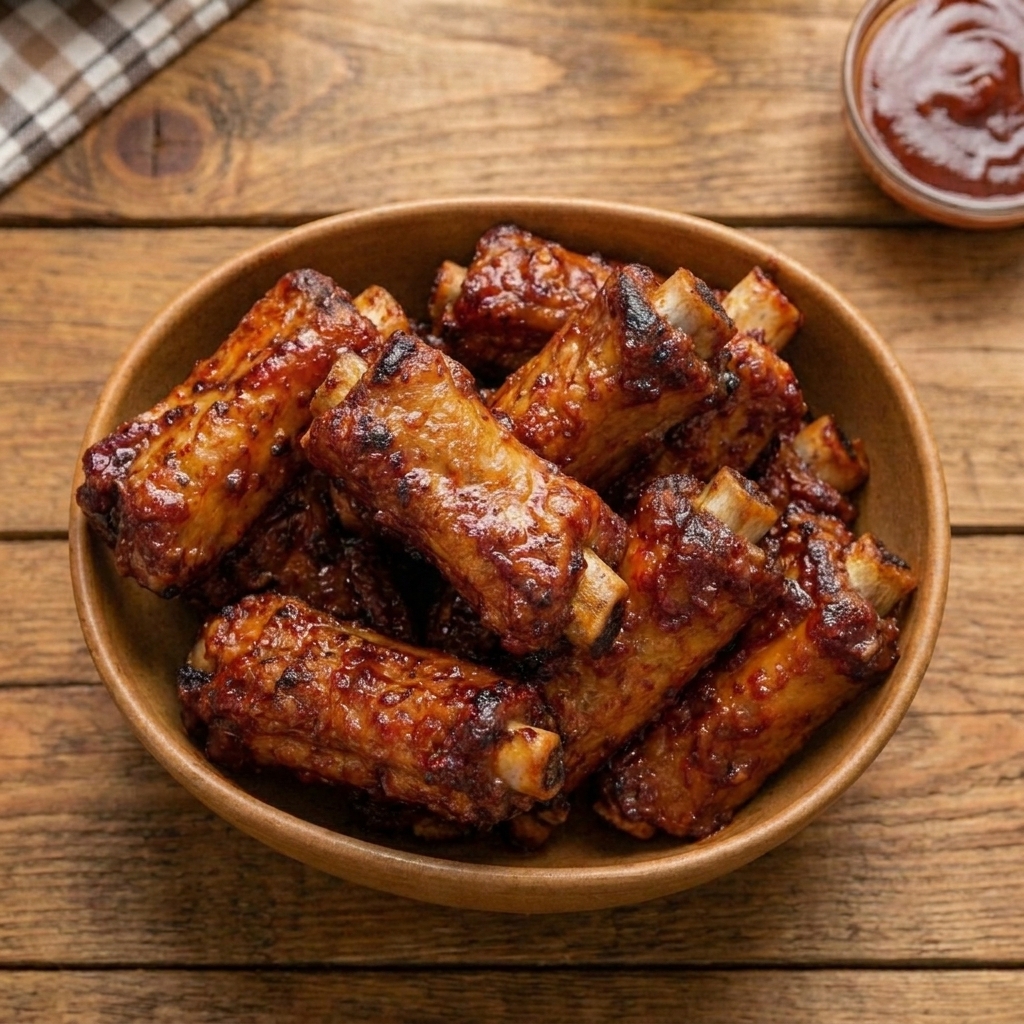
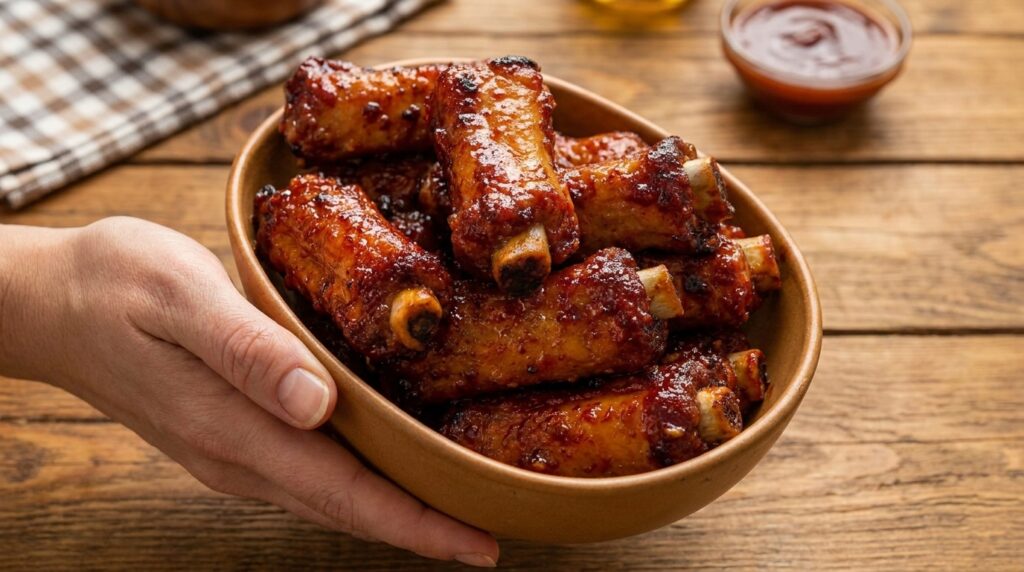
Easy Sticky Honey Garlic BBQ Pork Ribs Recipe – Tender, Caramelized, and Fall-Apart Delicious

If you are looking for tender pork ribs coated in a glossy, sweet, smoky, and garlicky glaze, these Sticky Honey Garlic BBQ Pork Ribs are an excellent recipe to make. The ribs are coated with a flavorful dry rub, slow-baked until tender, then brushed generously with a homemade honey garlic barbecue sauce and finished at high heat until sticky and caramelized.

This recipe is perfect for family dinners, summer gatherings, game day, cookouts, or weekends when you want restaurant-style ribs without needing a smoker. Baking the ribs low and slow keeps the meat juicy and tender, while the final glaze creates the dark, lacquered BBQ finish everyone loves.

Serve them with mashed potatoes, coleslaw, corn on the cob, baked beans, or crispy fries for a satisfying BBQ-style meal.

Why You’ll Love These Sticky Honey Garlic BBQ Pork Ribs

The ribs cook slowly at a relatively low temperature, giving the connective tissue time to soften without drying out the meat.

A combination of smoked paprika, garlic, onion, brown sugar, and spices creates a deeply seasoned crust before any sauce is added.

The homemade glaze balances honey, barbecue sauce, fresh garlic, Worcestershire, vinegar, and Dijon mustard for a sweet-savory flavor with plenty of depth.

Finishing the ribs uncovered at high heat caramelizes the sugars and creates the signature sticky exterior.

You can also prepare the ribs in advance and glaze them shortly before serving.

Ingredients

For the Pork Ribs

  • 2 racks baby back pork ribs, about 2½–3 pounds each
  • 1 tablespoon yellow mustard or olive oil, for binding the seasoning

For the Dry Rub

  • 3 tablespoons brown sugar
  • 1½ tablespoons smoked paprika
  • 2 teaspoons kosher salt
  • 1½ teaspoons garlic powder
  • 1 teaspoon onion powder
  • 1 teaspoon freshly ground black pepper
  • 1 teaspoon chili powder
  • ½ teaspoon ground cumin
  • ½ teaspoon dried oregano
  • ¼ teaspoon cayenne pepper, optional

For the Sticky Honey Garlic BBQ Sauce

  • 1 cup barbecue sauce
  • ⅓ cup honey
  • ¼ cup ketchup
  • 3 tablespoons brown sugar
  • 5 garlic cloves, finely minced
  • 2 tablespoons apple cider vinegar
  • 1½ tablespoons Worcestershire sauce
  • 1 tablespoon Dijon mustard
  • 1 tablespoon unsalted butter
  • 1 teaspoon smoked paprika
  • ½ teaspoon garlic powder
  • ¼ teaspoon freshly ground black pepper
  • ¼ teaspoon red pepper flakes, optional

For the Final Sticky Glaze

  • 2 tablespoons honey
  • 2 tablespoons barbecue sauce
  • 1 teaspoon melted butter, optional

For Garnishing

  • Chopped fresh parsley
  • Sliced green onions, optional
  • Sesame seeds, optional
  • Extra BBQ sauce

How to Make Sticky Honey Garlic BBQ Pork Ribs

1. Preheat the Oven

Preheat your oven to 300°F (150°C).

Line a large rimmed baking sheet with heavy-duty foil.

2. Prepare the Ribs

Pat the rib racks dry with paper towels.

Turn them bone-side up.

3. Remove the Membrane

Slide a butter knife underneath the thin membrane covering the back of the ribs.

Lift one corner, grab it with a paper towel, and pull it away.

Removing the membrane allows the seasoning to penetrate better and produces a more tender bite.

4. Apply the Binder

Rub a very thin layer of mustard or olive oil over both sides of the ribs.

You will not taste much mustard in the finished dish—it simply helps the seasoning adhere.

5. Make the Dry Rub

Combine brown sugar, smoked paprika, salt, garlic powder, onion powder, black pepper, chili powder, cumin, oregano, and cayenne.

Mix thoroughly.

6. Season the Ribs

Sprinkle the dry rub generously over both sides.

Use your hands to press it into the meat.

Pay particular attention to the meaty top side.

7. Wrap the Ribs

Place each rack on a large piece of foil, meat-side up.

Wrap tightly so steam cannot easily escape.

If necessary, use a second layer of foil.

8. Slow-Bake

Place the wrapped racks on the baking sheet.

Bake at 300°F for approximately 2½–3 hours.

Baby back ribs will often be tender toward the earlier end, while especially thick racks may need longer.

9. Make the Honey Garlic BBQ Sauce

While the ribs cook, place a saucepan over medium-low heat.

Add the butter.

Once melted, add the minced garlic.

Cook for approximately 30–60 seconds, stirring constantly.

10. Add the Sauce Ingredients

Add barbecue sauce, honey, ketchup, brown sugar, apple cider vinegar, Worcestershire sauce, Dijon mustard, smoked paprika, garlic powder, black pepper, and red pepper flakes if using.

Whisk until combined.

11. Simmer the Sauce

Bring to a gentle simmer.

Cook for approximately 8–10 minutes, stirring occasionally.

The sauce should become glossy and slightly thicker.

Remove from the heat.

12. Check the Ribs

Carefully open one foil packet.

Be cautious because hot steam will escape.

Use tongs to gently lift the rack from one end.

The ribs should bend noticeably, and the surface may begin cracking slightly.

A toothpick inserted between the bones should slide through with little resistance.

If the ribs remain firm, rewrap and bake another 20–30 minutes.

13. Increase the Oven Temperature

Once the ribs are tender, increase the oven temperature to 425°F (220°C).

Carefully discard or drain excess liquid from the foil packets.

14. Arrange the Ribs Uncovered

Place the ribs meat-side up on the foil-lined baking sheet.

15. Add the First Layer of Sauce

Brush the ribs generously with the honey garlic BBQ sauce.

Make sure the entire surface is coated.

16. Caramelize the Glaze

Bake uncovered for approximately 5–7 minutes.

The sauce should begin bubbling and becoming sticky.

17. Add the Second Layer

Remove the ribs briefly.

Brush with another generous layer of sauce.

18. Bake Again

Return to the oven for another 5–7 minutes.

The glaze should become darker, shinier, and slightly caramelized around the edges.

19. Make the Final Sticky Glaze

Mix the honey, barbecue sauce, and melted butter if using.

20. Brush the Ribs Again

Brush this mixture lightly over the finished ribs for an extra-glossy surface.

21. Broil if Desired

For more charred edges, broil for approximately 1–3 minutes.

Stay close to the oven.

Honey and brown sugar can burn very quickly under the broiler.

22. Rest the Ribs

Remove the ribs from the oven.

Let them rest for approximately 10 minutes before slicing.

23. Slice

Turn the ribs bone-side up if needed so you can clearly see where to cut.

Slice between the bones using a sharp knife.

24. Add Extra Sauce

Brush the cut ribs lightly with additional warm honey garlic BBQ sauce.

25. Garnish and Serve

Finish with parsley, green onions, or sesame seeds if desired.

Serve hot.

What to Serve With Sticky Honey Garlic BBQ Pork Ribs

These ribs pair beautifully with classic BBQ sides such as:

  • Creamy coleslaw
  • Baked beans
  • Mac and cheese
  • Corn on the cob
  • Garlic mashed potatoes
  • Potato salad
  • French fries
  • Potato wedges
  • Cornbread
  • Grilled vegetables

For something fresher, serve them with cucumber salad, garden salad, or vinegar-based slaw.

Tips for the Best Sticky Honey Garlic BBQ Pork Ribs

Remove the membrane before seasoning.

Season both sides generously.

Wrap the ribs tightly during slow baking.

Cook for tenderness rather than relying only on the clock.

Use smoked paprika for BBQ-style flavor.

Simmer the sauce before glazing.

Do not add the sugary glaze too early or it can burn.

Apply multiple thin layers of sauce rather than one excessively thick layer.

Watch carefully when broiling.

Let the ribs rest before cutting.

Serve extra warm BBQ sauce on the side.

Easy Recipe Variations

Spicy Honey Garlic Ribs

Add cayenne, red pepper flakes, or hot sauce to the glaze.

Bourbon-Style BBQ Ribs

Add a small amount of bourbon to the sauce and simmer thoroughly before glazing.

Smoky BBQ Ribs

Increase the smoked paprika and use a smoky barbecue sauce.

Garlic Butter BBQ Ribs

Stir an additional 2 tablespoons butter into the finished glaze.

Sweet Chili Honey Ribs

Replace part of the barbecue sauce with sweet chili sauce.

Maple Garlic Ribs

Replace half of the honey with pure maple syrup.

Asian-Inspired Sticky Ribs

Add soy sauce, fresh ginger, sesame oil, and a little rice vinegar to the glaze.

Slow Cooker Ribs

Season the ribs and cook on LOW until tender, then transfer to a baking sheet, brush with sauce, and caramelize in the oven.

How to Store Leftovers

Allow leftover ribs to cool before transferring them to an airtight container.

Refrigerate for up to 3–4 days.

For reheating, place the ribs in a baking dish with a small spoonful of sauce or water.

Cover with foil and warm at 300–325°F until heated through.

Remove the foil during the final few minutes and brush with more glaze.

For freezing, wrap cooled ribs tightly and place them in a freezer-safe container.

Freeze for up to approximately 2–3 months.

Thaw overnight in the refrigerator before reheating.

Frequently Asked Questions

What ribs work best for this recipe?

Baby back ribs work especially well because they are relatively lean, tender, and cook faster than larger spare ribs.

Can I use spare ribs?

Yes.

Spare ribs or St. Louis-style ribs work well but usually require a little more cooking time.

Do I have to remove the membrane?

It is strongly recommended.

Removing it improves texture and allows seasoning to reach the meat more effectively.

How do I know when ribs are tender?

The rack should bend easily when lifted, the meat may pull back slightly from the bones, and a toothpick should slide between the bones with little resistance.

Can I make the ribs ahead?

Yes.

Slow-bake the ribs until tender, refrigerate, then glaze and caramelize them shortly before serving.

Why did my BBQ sauce burn?

Honey and sugar burn quickly at high temperatures.

Apply the sauce near the end of cooking and watch closely during broiling.

Can I use bottled BBQ sauce?

Absolutely.

The homemade glaze in this recipe starts with prepared barbecue sauce and enhances it with honey, garlic, vinegar, Worcestershire, and seasonings.

Can I grill the ribs after baking?

Yes.

After slow-baking until tender, brush them with sauce and finish over a medium-hot grill for several minutes, turning and glazing carefully.

Final Thoughts

These Sticky Honey Garlic BBQ Pork Ribs combine slow-cooked tender pork with smoky spices, fresh garlic, honey, barbecue sauce, brown sugar, Worcestershire, and a glossy caramelized finish.

The key is cooking the ribs low and slow until tender before adding the sugary glaze, then applying several layers of sauce at high heat for that sticky BBQ coating.

Serve them with coleslaw, corn, baked beans, mashed potatoes, or mac and cheese for an irresistible family-style meal packed with sweet, smoky, garlicky flavor.

Cheesy Baked Chili Dogs

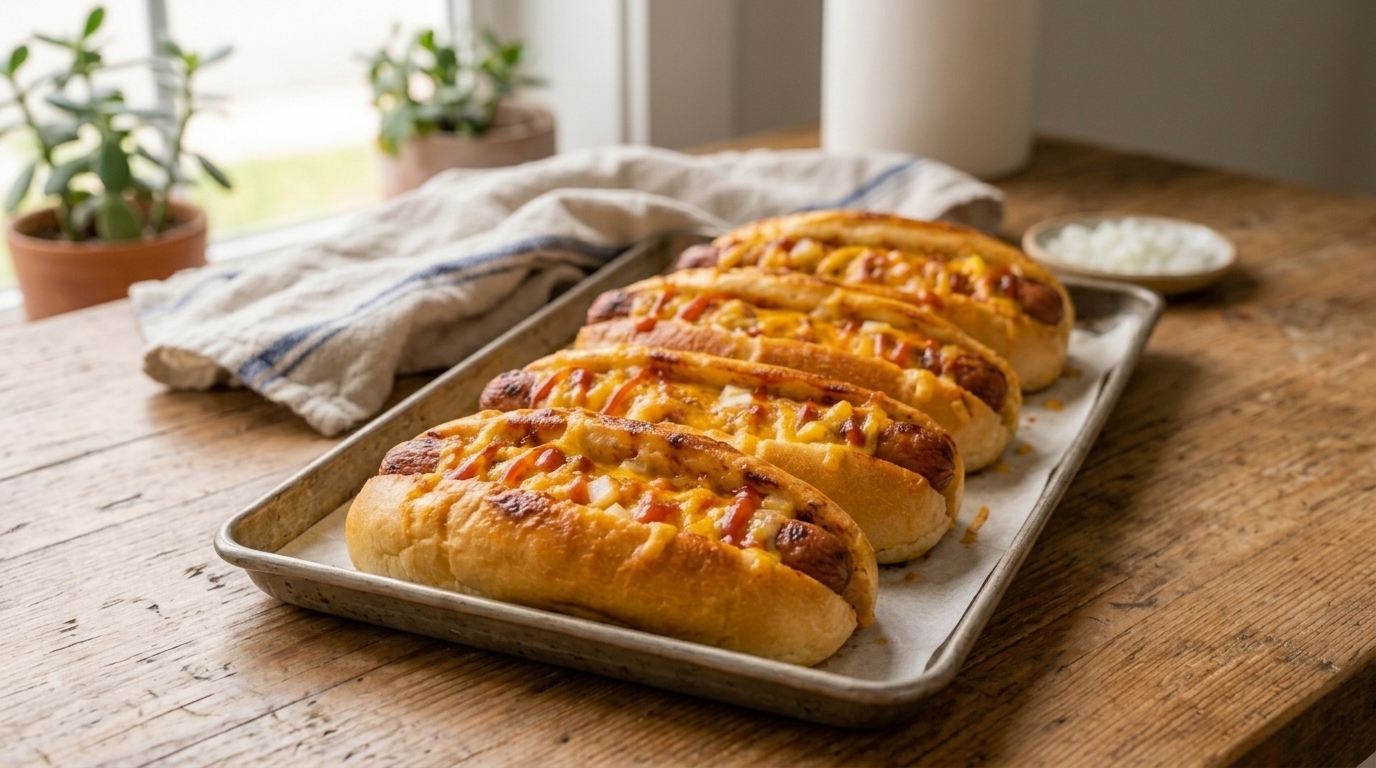
These Cheesy Baked Chili Dogs are loaded with juicy hot dogs, savory beef chili, melted cheddar cheese, ketchup, and mustard, all tucked into soft buns and baked until hot and golden. They are easy, hearty, and packed with classic comfort-food flavor, making them perfect for family dinners, game days, parties, or quick weekend meals.

Why You’ll Love It

  • Juicy hot dogs topped with hearty beef chili and melted cheese
  • Quick and easy to assemble with simple ingredients
  • Perfect for game days, parties, or casual family dinners
  • Easy to customize with onions, jalapeños, relish, or extra sauce

Ingredients Overview

Hot Dogs

  • 6 beef hot dogs
  • 6 hot dog buns
  • 1 tbsp melted butter
  • ½ tsp garlic powder

Beef Chili

  • ½ lb ground beef
  • 1 tsp olive oil
  • ½ small onion, finely chopped
  • 2 garlic cloves, minced
  • ½ cup tomato sauce
  • 1 tbsp tomato paste
  • 1 tsp chili powder
  • ½ tsp ground cumin
  • ½ tsp smoked paprika
  • ¼ tsp salt
  • ¼ tsp black pepper

Cheese & Toppings

  • 1½ cups shredded cheddar cheese
  • ¼ cup finely diced onion
  • ¼ cup ketchup
  • ¼ cup yellow mustard
  • 2 tbsp chopped pickles or relish, optional
  • Sliced jalapeños, optional

Garnish

  • Chopped green onions
  • Extra shredded cheddar
  • Freshly cracked black pepper

Step-by-Step Instructions

1. Prepare the Chili

Heat olive oil in a skillet over medium heat.

Add the chopped onion and cook for 2–3 minutes until softened.

Add the ground beef and cook for 5–6 minutes, breaking it into small crumbles until browned.

Drain excess grease if necessary.

2. Season the Beef

Add the garlic, tomato sauce, tomato paste, chili powder, cumin, smoked paprika, salt, and black pepper.

Stir well and simmer for 5–7 minutes, until the chili becomes thick and flavorful.

Remove from the heat.

3. Prepare the Hot Dogs

Preheat the oven to 375°F (190°C).

Arrange the hot dog buns in a baking dish or on a parchment-lined baking sheet.

Mix the melted butter with garlic powder and lightly brush the inside edges of the buns.

Place one hot dog inside each bun.

4. Add the Chili and Cheese

Spoon the beef chili generously over each hot dog.

Sprinkle shredded cheddar cheese over the chili.

Add diced onion if desired.

Arrange the hot dogs close together so they stay upright while baking.

5. Bake

Bake for 12–15 minutes, or until the hot dogs are heated through, the buns are lightly toasted, and the cheese is completely melted.

For extra golden cheese, broil for 1–2 minutes at the end while watching carefully.

6. Serve

Remove the chili dogs from the oven.

Drizzle generously with ketchup and yellow mustard.

Finish with chopped green onions, extra cheddar, relish, or jalapeños if desired.

Serve immediately while hot and cheesy.

Cooking Tips

  • Keep the chili thick so the buns do not become soggy.
  • Use freshly shredded cheddar for the smoothest melt.
  • Toasting the buns briefly helps them hold up to the chili and toppings.
  • Cook the beef into small crumbles so it spreads evenly over the hot dogs.
  • Add ketchup and mustard after baking for the freshest flavor and presentation.

Serving Suggestions

Serve these cheesy baked chili dogs with:

  • French fries
  • Potato wedges
  • Coleslaw
  • Baked beans
  • Pickles and potato chips

Storage

Store leftover chili dogs in an airtight container in the refrigerator for up to 3 days.

For the best texture, store extra chili separately when possible. Reheat assembled chili dogs in a 350°F (175°C) oven for 8–10 minutes until hot.

Leftover Ideas

  • Use leftover chili for loaded fries or nachos.
  • Chop leftover hot dogs and add them to a cheesy chili mac.
  • Spoon extra chili over baked potatoes with cheddar and sour cream.

FAQs

Can I use canned chili?
Yes. A thick canned beef chili works well when you need an even quicker version.

Can I make these ahead of time?
Yes. Prepare the chili ahead, then assemble and bake the hot dogs shortly before serving.

What cheese works best?
Sharp cheddar is classic, but Monterey Jack, pepper Jack, mozzarella, or a cheese blend also works well.

Can I add extra toppings?
Yes. Jalapeños, diced onions, relish, bacon, sour cream, or crushed tortilla chips are all delicious additions.

Final Thoughts

Cheesy Baked Chili Dogs combine juicy hot dogs, hearty seasoned beef chili, melted cheddar, and classic ketchup-and-mustard flavor in one easy comfort-food meal. Quick to assemble and perfect for feeding a crowd, they are an excellent choice for game days, parties, family dinners, or anytime you want a fun and satisfying baked hot dog.

#ChiliDogs #CheesyHotDogs #GameDayFood #EasyDinner #ComfortFood

Easy Cheesy Ground Beef Garlic Toast Melts Recipe – Crispy, Saucy, and Loaded with Melted Cheese

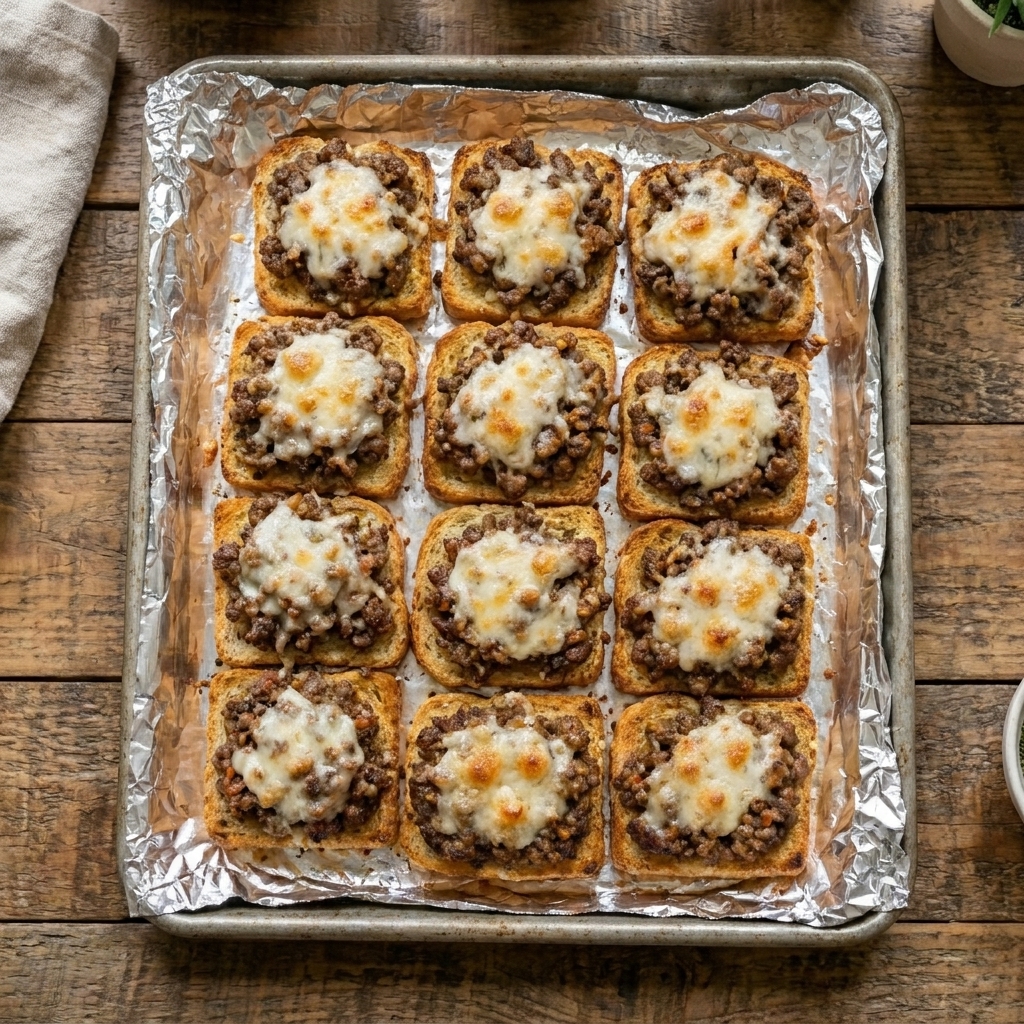
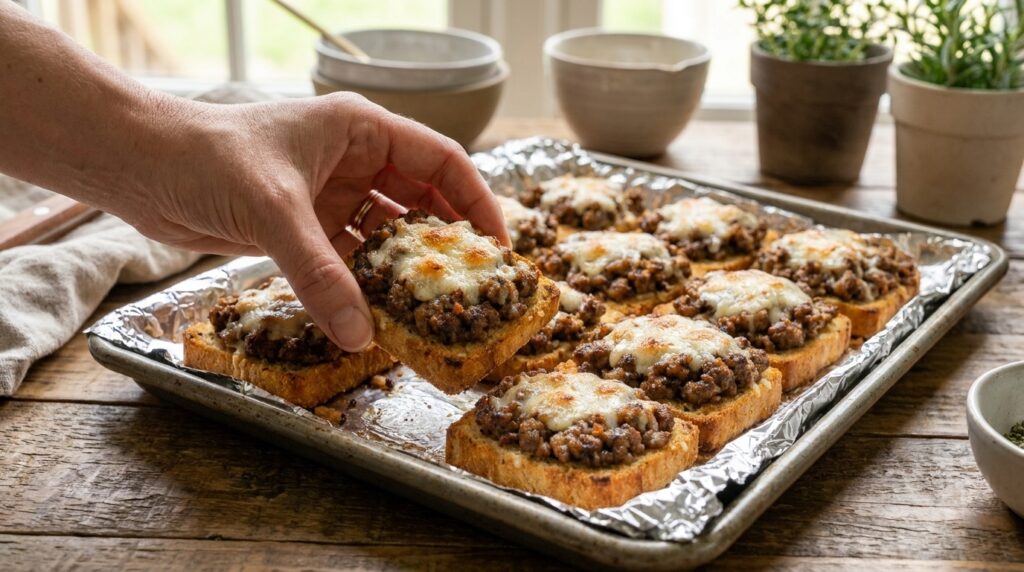
If you are looking for an easy comfort-food dinner with crispy garlic toast, savory ground beef, rich tomato flavor, and plenty of melted cheese, these Cheesy Ground Beef Garlic Toast Melts are an excellent recipe to make. Thick slices of garlic toast are topped with a seasoned beef mixture, mozzarella, cheddar, and Parmesan, then baked until the bread is crisp and the cheese is bubbling.

This recipe is perfect for busy weeknights, game day, casual family dinners, or whenever you need something quick that feels more exciting than an ordinary sandwich. The beef topping is thick enough to stay on the toast, while the garlic-butter bread adds a crisp, flavorful base.

Serve these melts with a fresh salad, fries, roasted vegetables, or extra marinara for dipping.

Why You’ll Love These Cheesy Ground Beef Garlic Toast Melts

The combination of crispy garlic bread, seasoned beef, and melted cheese makes these melts hearty and satisfying.

The beef mixture can be prepared ahead, so assembling dinner takes only a few minutes.

Using mozzarella and cheddar together gives you both stretchy melt and bold cheesy flavor.

They are also easy to customize with mushrooms, peppers, jalapeños, pepperoni, bacon, or different cheeses.

Because each piece is individually topped, these melts are also great for parties and casual entertaining.

Ingredients

For the Ground Beef Mixture

  • 1 pound ground beef
  • 1 tablespoon olive oil, if needed
  • 1 small yellow onion, finely diced
  • 3 garlic cloves, finely minced
  • 2 tablespoons tomato paste
  • ¾ cup marinara or tomato sauce
  • 1 tablespoon Worcestershire sauce
  • 1 teaspoon Italian seasoning
  • 1 teaspoon garlic powder
  • ½ teaspoon onion powder
  • ½ teaspoon smoked paprika
  • ½ teaspoon kosher salt
  • ¼ teaspoon freshly ground black pepper
  • ¼ teaspoon red pepper flakes, optional

For the Garlic Toast

  • 8 thick slices Texas toast, Italian bread, or French bread
  • 4 tablespoons unsalted butter, softened
  • 3 garlic cloves, finely minced
  • 1 tablespoon chopped fresh parsley
  • ½ teaspoon garlic powder
  • ½ teaspoon Italian seasoning
  • ¼ cup freshly grated Parmesan cheese

For the Cheese Topping

  • 1½ cups shredded mozzarella cheese
  • 1 cup shredded sharp cheddar cheese
  • ½ cup freshly grated Parmesan cheese

Optional Toppings

  • Sliced jalapeños
  • Sautéed mushrooms
  • Diced bell peppers
  • Sliced black olives
  • Crispy bacon
  • Pepperoni
  • Chopped green onions

For Garnishing

  • Fresh parsley
  • Extra Parmesan
  • Freshly cracked black pepper
  • Red pepper flakes, optional

How to Make Cheesy Ground Beef Garlic Toast Melts

1. Preheat the Oven

Preheat your oven to 400°F (200°C).

Line a large baking sheet with parchment paper.

2. Prepare the Onion

Finely dice the onion so it blends easily into the beef mixture.

Smaller pieces work best because the topping needs to sit neatly on the bread.

3. Heat the Skillet

Place a large skillet over medium-high heat.

Add olive oil if your ground beef is particularly lean.

4. Brown the Ground Beef

Add the ground beef.

Break it into small crumbles with a wooden spoon or spatula.

Cook for approximately 6–8 minutes, until browned and cooked through.

Ground beef should reach 160°F (71°C).

5. Add the Onion

Add the diced onion.

Cook for approximately 3–4 minutes, until softened.

6. Add the Garlic

Stir in the minced garlic.

Cook for approximately 30–60 seconds, just until fragrant.

7. Drain Excess Grease

If the beef has released a large amount of fat, carefully drain most of it.

Leaving too much grease can make the toast soggy.

8. Add Tomato Paste

Stir in the tomato paste.

Cook for approximately 1 minute.

This helps deepen the tomato flavor.

9. Add Marinara

Pour in the marinara or tomato sauce.

Add Worcestershire sauce.

Stir until evenly combined.

10. Season the Beef

Add Italian seasoning, garlic powder, onion powder, smoked paprika, salt, black pepper, and red pepper flakes if using.

11. Simmer the Filling

Reduce the heat to medium-low.

Cook for approximately 5–7 minutes, stirring occasionally.

The beef mixture should become thick and spoonable rather than watery.

This is important so the toast remains crisp.

12. Make the Garlic Butter

In a small bowl, combine softened butter, minced garlic, parsley, garlic powder, Italian seasoning, and Parmesan.

Mix until smooth.

13. Prepare the Bread

Arrange the bread slices on the prepared baking sheet.

Spread the garlic butter generously over the top of each slice.

14. Pre-Toast the Bread

Bake for approximately 5–7 minutes.

The edges should begin to crisp, but the bread should not be deeply browned yet.

Pre-toasting creates a barrier that helps prevent the beef mixture from soaking into the bread.

15. Add a Cheese Base

Sprinkle a small amount of mozzarella over each slice.

This creates another layer between the bread and beef while adding extra cheese.

16. Add the Ground Beef

Spoon the warm beef mixture evenly over the garlic toast.

Use approximately ⅓–½ cup per slice, depending on the size of your bread.

Spread it close to the edges without letting it fall over the sides.

17. Add Optional Toppings

Add mushrooms, peppers, jalapeños, bacon, pepperoni, or olives if desired.

18. Add Mozzarella

Sprinkle the remaining mozzarella generously over the beef.

19. Add Cheddar

Top with shredded cheddar.

20. Finish with Parmesan

Sprinkle Parmesan over the cheese.

21. Bake

Return the baking sheet to the oven.

Bake for approximately 8–10 minutes.

The cheese should be completely melted and bubbling.

22. Broil for Extra Browning

For a golden cheese topping, switch the oven to broil.

Broil for approximately 1–2 minutes.

Watch carefully so the bread does not burn.

23. Rest Briefly

Remove the melts from the oven.

Let them rest for approximately 2–3 minutes.

24. Garnish

Sprinkle with fresh parsley, extra Parmesan, cracked black pepper, and red pepper flakes if desired.

25. Serve

Serve immediately while the bread is crisp and the cheese is hot and melted.

What to Serve With Ground Beef Garlic Toast Melts

These cheesy melts are hearty enough to serve as a main meal.

Pair them with:

  • Caesar salad
  • Garden salad
  • Tomato cucumber salad
  • French fries
  • Potato wedges
  • Roasted broccoli
  • Green beans
  • Zucchini
  • Onion rings
  • Coleslaw

Warm marinara or garlic butter also makes an excellent dipping sauce.

Tips for the Best Ground Beef Garlic Toast Melts

Use thick bread so it can support the beef topping.

Drain excessive grease from the ground beef.

Simmer the beef mixture until thick.

Pre-toast the garlic bread.

Do not use too much marinara.

Use low-moisture mozzarella for better melting.

Freshly shred the cheese when possible.

Add cheese beneath the beef for extra protection against sogginess.

Serve immediately after baking.

Broil only briefly so the bread does not burn.

Easy Recipe Variations

Philly-Style Beef Garlic Melts

Add sautéed bell peppers, onions, and mushrooms.

Replace cheddar with provolone.

Bacon Cheeseburger Garlic Melts

Add crispy bacon and extra cheddar.

Finish with diced pickles after baking.

Spicy Jalapeño Beef Melts

Add jalapeños and pepper Jack cheese.

Pizza Beef Garlic Melts

Add pepperoni, mozzarella, oregano, and extra marinara.

Mushroom Swiss Beef Melts

Add sautéed mushrooms and replace mozzarella with Swiss cheese.

BBQ Beef Garlic Melts

Replace marinara with barbecue sauce and use cheddar and Monterey Jack.

Extra Cheesy Garlic Melts

Add provolone, Monterey Jack, or additional mozzarella.

Ground Turkey Garlic Melts

Replace the beef with ground turkey and cook it to 165°F (74°C).

How to Store Leftovers

Allow leftover melts to cool before transferring them to an airtight container.

Refrigerate for up to 3–4 days.

For the best texture, reheat them in a 375°F (190°C) oven for approximately 8–10 minutes.

An air fryer works especially well for restoring crispness.

Microwaving is convenient but will soften the garlic bread.

For meal prep, store the beef mixture separately and assemble fresh melts just before baking.

The cooked beef mixture can also be frozen for up to approximately 2–3 months.

Frequently Asked Questions

Can I use frozen garlic toast?

Yes.

Bake it briefly according to the package directions before adding the beef and cheese.

What bread works best?

Texas toast, thick Italian bread, French bread, or sturdy sourdough slices all work well.

How do I prevent the bread from becoming soggy?

Keep the beef filling thick, drain excess grease, and pre-toast the bread before adding toppings.

Can I make the beef mixture ahead?

Yes.

Prepare it up to several days ahead and refrigerate in an airtight container.

Reheat before assembling the melts.

Can I use ground turkey?

Absolutely.

Cook ground turkey to 165°F (74°C) before using.

What cheese works best?

Mozzarella, cheddar, provolone, Monterey Jack, Swiss, and pepper Jack are all excellent choices.

Can I make these in an air fryer?

Yes.

Pre-toast the bread, add the beef and cheese, then air fry at around 375°F until the cheese melts and the edges are crisp.

Can I add vegetables?

Yes.

Bell peppers, mushrooms, spinach, onions, jalapeños, and olives all work well.

Final Thoughts

These Cheesy Ground Beef Garlic Toast Melts combine crispy garlic-butter bread, savory seasoned beef, rich tomato sauce, mozzarella, cheddar, and Parmesan in one easy comfort-food dinner.

The key is keeping the beef mixture thick, pre-toasting the bread, and adding plenty of cheese without overloading the slices.

Serve them hot with salad, fries, roasted vegetables, or warm marinara for dipping for a quick, cheesy meal that works just as well for a family dinner as it does for game day or parties.

Easy Cheesy Chicken Bacon Stuffed Stromboli Recipe – Crispy, Gooey, and Flavor-Packed

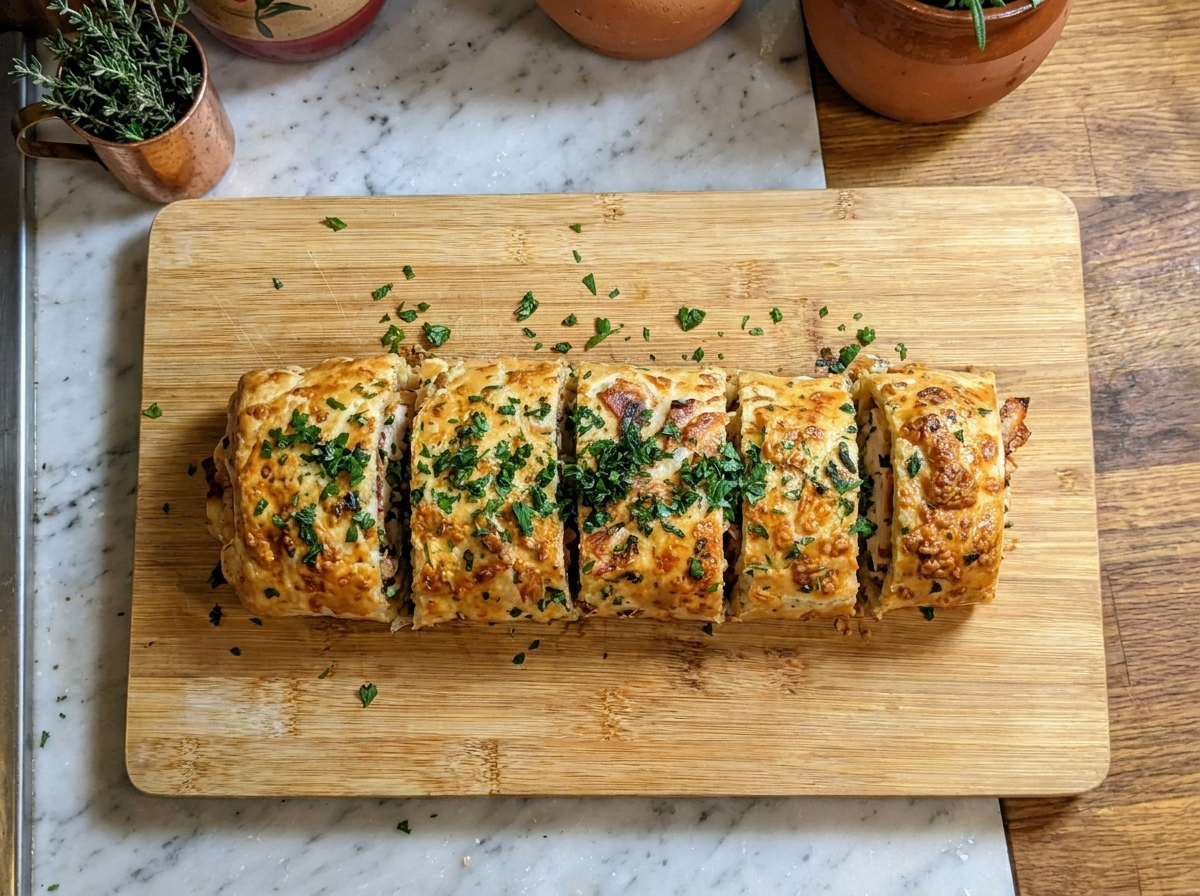
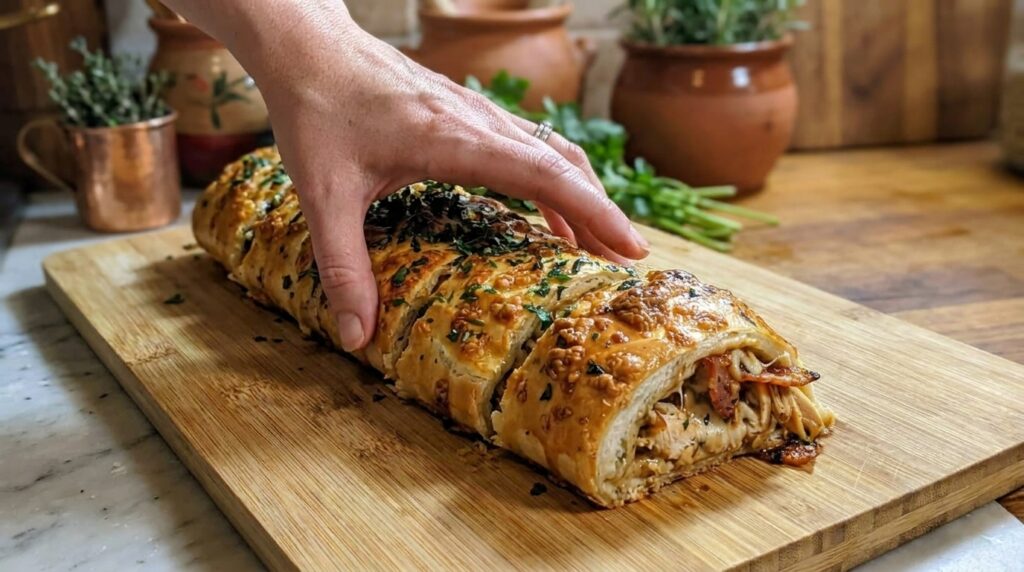
If you are looking for a hearty baked dinner packed with tender chicken, crispy bacon, melted cheese, garlic, and herbs, this Cheesy Chicken Bacon Stuffed Stromboli is an excellent recipe to make. Pizza dough is filled with seasoned chicken, smoky bacon, mozzarella, cheddar, Parmesan, and a creamy garlic spread, then rolled tightly and baked until golden and crisp.

This recipe is perfect for family dinners, game day, parties, movie nights, or anytime you want something warm, cheesy, and easy to slice and share. The crust becomes crisp on the outside while the filling stays rich and gooey inside.

Serve the stromboli with warm marinara, ranch, garlic butter, or your favorite dipping sauce.

Why You’ll Love This Cheesy Chicken Bacon Stuffed Stromboli

The combination of chicken, bacon, and melted cheese makes this stromboli rich and satisfying.

Using prepared pizza dough keeps the recipe simple while still giving you a homemade baked result.

Mozzarella gives the filling plenty of cheese pull, cheddar adds sharper flavor, and Parmesan adds a savory finish.

The stromboli can also be assembled ahead of time and baked shortly before serving.

It is easy to customize with spinach, jalapeños, mushrooms, onions, or extra cheese.

Ingredients

For the Chicken

  • 1½ pounds boneless, skinless chicken breasts
  • 1 tablespoon olive oil
  • 1 teaspoon kosher salt
  • ½ teaspoon freshly ground black pepper
  • 1 teaspoon garlic powder
  • ½ teaspoon onion powder
  • ½ teaspoon smoked paprika
  • 1 teaspoon Italian seasoning

For the Bacon

  • 8 slices bacon, cooked until crisp and chopped

For the Creamy Garlic Spread

  • 4 ounces cream cheese, softened
  • 2 tablespoons mayonnaise or sour cream
  • 2 garlic cloves, finely minced
  • ¼ cup freshly grated Parmesan cheese
  • 1 tablespoon chopped fresh parsley
  • ½ teaspoon Italian seasoning
  • ¼ teaspoon black pepper

For the Stromboli

  • 1 pound refrigerated or homemade pizza dough
  • 1½ cups shredded mozzarella cheese
  • 1 cup shredded sharp cheddar cheese
  • ½ cup shredded provolone or Monterey Jack cheese
  • ¼ cup freshly grated Parmesan cheese
  • 1 tablespoon all-purpose flour, for rolling

For the Garlic Butter Topping

  • 3 tablespoons unsalted butter, melted
  • 2 garlic cloves, finely minced
  • 1 tablespoon chopped parsley
  • ½ teaspoon garlic powder
  • ½ teaspoon Italian seasoning
  • 2 tablespoons grated Parmesan

For Serving

  • Warm marinara sauce
  • Ranch dressing
  • Garlic butter
  • Fresh parsley
  • Extra Parmesan

How to Make Cheesy Chicken Bacon Stuffed Stromboli

1. Preheat the Oven

Preheat your oven to 400°F (200°C).

Line a large baking sheet with parchment paper.

2. Prepare the Chicken

Pat the chicken dry.

Cut it into small bite-sized pieces.

Keeping the chicken pieces relatively small makes the stromboli easier to roll and slice.

3. Season the Chicken

Place the chicken in a bowl.

Add salt, black pepper, garlic powder, onion powder, smoked paprika, and Italian seasoning.

Toss until evenly coated.

4. Cook the Chicken

Heat the olive oil in a large skillet over medium-high heat.

Add the chicken.

Cook for approximately 6–8 minutes, stirring occasionally, until golden and cooked through.

Chicken should reach 165°F (74°C).

Transfer to a plate and let it cool slightly.

5. Cook the Bacon

Cook the bacon until crisp.

Transfer to paper towels or a wire rack to drain.

Once cool enough to handle, chop it into small pieces.

6. Make the Garlic Cream Cheese Spread

In a medium bowl, combine cream cheese, mayonnaise or sour cream, garlic, Parmesan, parsley, Italian seasoning, and black pepper.

Mix until smooth.

7. Prepare the Dough

Lightly flour your work surface.

Roll the pizza dough into a rectangle approximately 10×14 inches.

Try to keep the thickness even throughout.

8. Transfer to Parchment

For easier handling, move the rolled dough onto a sheet of parchment paper before filling.

9. Add the Garlic Spread

Spread the cream cheese mixture over the dough.

Leave approximately a 1-inch border around the edges.

10. Add Mozzarella

Sprinkle approximately half of the mozzarella over the cream cheese layer.

Starting with cheese helps hold the filling together.

11. Add the Chicken

Scatter the cooked chicken evenly across the cheese.

Avoid piling too much filling in the center.

12. Add the Bacon

Sprinkle the chopped bacon evenly over the chicken.

13. Add Remaining Cheese

Top with the remaining mozzarella, cheddar, provolone or Monterey Jack, and Parmesan.

14. Keep the Edges Clear

Make sure the outer border remains mostly free from filling.

Clean edges are easier to seal and reduce the chance of cheese leaking during baking.

15. Roll the Stromboli

Starting from one long side, carefully roll the dough tightly into a log.

Use the parchment paper to help guide the roll if necessary.

16. Seal the Seam

Pinch the long seam firmly closed.

Pinch both ends and tuck them slightly underneath.

17. Place Seam-Side Down

Transfer the stromboli to the prepared baking sheet with the seam underneath.

This helps keep it closed during baking.

18. Cut Steam Vents

Using a sharp knife, make 4–5 shallow diagonal slits across the top.

These allow steam to escape and help prevent the dough from splitting.

19. Make the Garlic Butter

Combine melted butter, minced garlic, parsley, garlic powder, and Italian seasoning.

20. Brush the Stromboli

Brush approximately half of the garlic butter over the top and sides.

21. Add Parmesan

Sprinkle grated Parmesan over the buttered dough.

22. Bake

Bake for approximately 25–35 minutes.

The crust should become deeply golden and cooked through.

If the top is browning too quickly, loosely cover it with foil during the final portion of baking.

23. Check the Bottom

The bottom crust should feel firm and baked rather than soft or doughy.

A very heavily filled stromboli may require a few additional minutes.

24. Add More Garlic Butter

Remove the stromboli from the oven.

Immediately brush with the remaining garlic butter.

25. Rest Before Slicing

Let the stromboli rest for approximately 8–10 minutes.

This is important because the melted cheese and filling need time to settle.

26. Slice

Using a sharp serrated knife, cut the stromboli into thick slices.

27. Garnish

Finish with fresh parsley and extra Parmesan.

28. Serve

Serve warm with marinara, ranch, or additional garlic butter for dipping.

What to Serve With Chicken Bacon Stromboli

This stromboli works as a full meal on its own, but it pairs beautifully with:

  • Warm marinara sauce
  • Caesar salad
  • Garden salad
  • Garlic bread
  • Roasted broccoli
  • Green beans
  • Roasted zucchini
  • French fries
  • Potato wedges

For parties, slice it into smaller pieces and serve with several dipping sauces.

Tips for the Best Chicken Bacon Stromboli

Let the chicken cool slightly before assembling.

Cook the bacon until crisp.

Do not overload the dough.

Keep the filling away from the edges.

Use low-moisture mozzarella to reduce excess liquid.

Roll firmly but not so tightly that the dough tears.

Seal the seam thoroughly.

Always place the seam underneath.

Cut steam vents before baking.

Let the stromboli rest before slicing.

Use parchment paper for easier transfer and cleanup.

Easy Recipe Variations

Chicken Bacon Ranch Stromboli

Replace the creamy garlic spread with a thin layer of ranch dressing or add ranch seasoning to the filling.

Buffalo Chicken Bacon Stromboli

Toss the cooked chicken with buffalo sauce before assembling.

Serve with ranch or blue cheese dressing.

Jalapeño Chicken Bacon Stromboli

Add sliced jalapeños and use pepper Jack cheese.

BBQ Chicken Bacon Stromboli

Toss the chicken with barbecue sauce and use cheddar and mozzarella.

Spinach Chicken Stromboli

Add 1 cup cooked spinach, squeezed very dry.

Mushroom Chicken Bacon Stromboli

Add sautéed mushrooms to the filling.

Make sure they are cooked until their moisture has evaporated.

Extra Cheesy Stromboli

Add additional mozzarella, provolone, or Monterey Jack.

Chicken Alfredo Stromboli

Use a thin layer of thick Alfredo sauce instead of the cream cheese spread.

How to Store Leftovers

Allow leftover stromboli to cool before transferring it to an airtight container.

Refrigerate for up to 3–4 days.

For the best texture, reheat slices in a 375°F (190°C) oven for approximately 8–10 minutes.

An air fryer also works very well at around 350–375°F for several minutes.

Microwaving is faster but softens the crust.

For freezing, wrap cooled individual slices tightly and place them in a freezer-safe container.

Freeze for up to approximately 2 months.

Thaw overnight in the refrigerator or reheat from frozen until hot throughout.

Frequently Asked Questions

Can I use rotisserie chicken?

Yes.

Use approximately 3 cups chopped cooked rotisserie chicken and skip the chicken-cooking step.

Can I use store-bought pizza dough?

Absolutely.

Refrigerated pizza dough works very well and saves time.

Why did my stromboli split open?

It may have been overfilled, rolled too tightly, or not vented properly.

Leave room around the edges and cut several steam slits before baking.

Why is the center doughy?

The stromboli may have been rolled too thickly or filled with too many wet ingredients.

Bake a little longer and keep sauces and vegetables relatively dry.

Can I make it ahead?

Yes.

Assemble the stromboli several hours ahead, cover, and refrigerate.

Brush with garlic butter just before baking.

What cheese works best?

Mozzarella is excellent for melt and stretch, while cheddar, provolone, Monterey Jack, and Parmesan add extra flavor.

Can I use turkey bacon?

Yes.

Cook it until crisp before adding it to the filling.

Can I make smaller strombolis?

Yes.

Divide the dough and filling into two smaller rolls and reduce the baking time slightly.

Final Thoughts

This Cheesy Chicken Bacon Stuffed Stromboli combines juicy seasoned chicken, crispy bacon, creamy garlic filling, mozzarella, cheddar, provolone, Parmesan, and golden pizza dough in one satisfying baked meal.

The key is keeping the filling relatively dry, avoiding overstuffing, sealing the dough well, and allowing the stromboli to rest before slicing.

Serve it warm with marinara or ranch for a cheesy, crispy, family-friendly dinner that is just as good for game day and parties as it is for an easy weeknight meal.

Slow Cooker Apple Dumplings

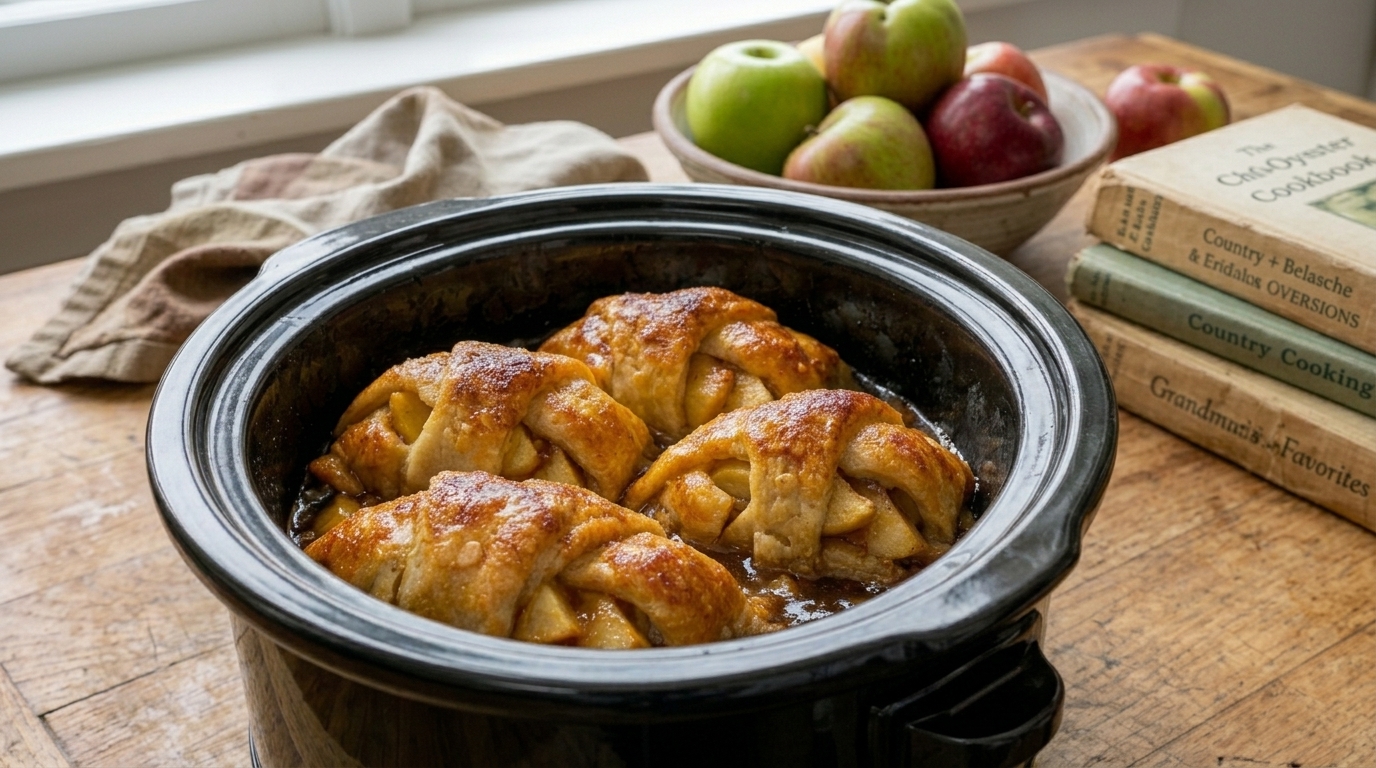
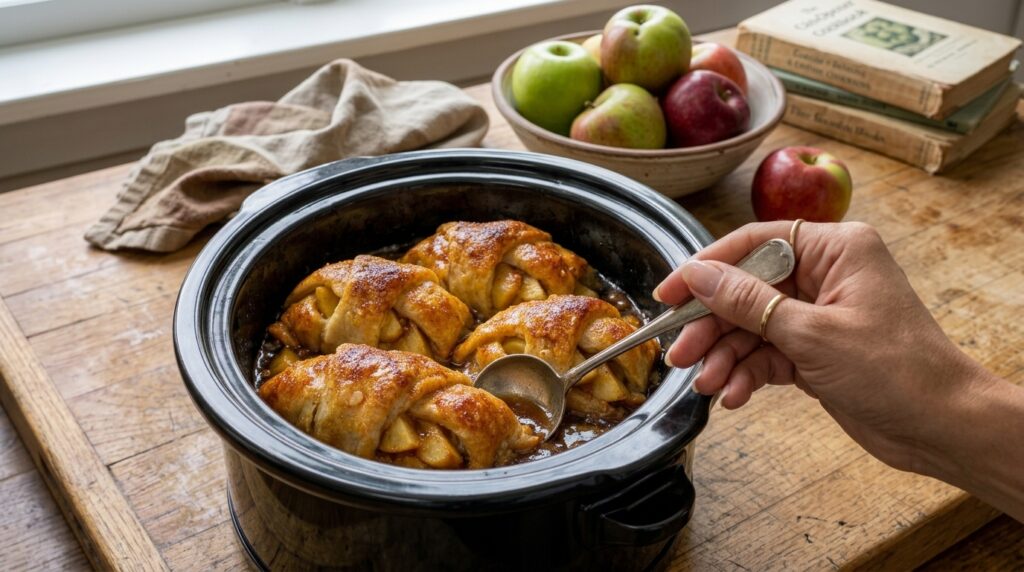
These Slow Cooker Apple Dumplings are filled with tender cinnamon-spiced apples wrapped in buttery crescent dough and slowly cooked in a rich brown sugar caramel sauce until soft, golden, and irresistibly gooey. With warm apple pie flavors and very little hands-on preparation, this comforting dessert is perfect for fall gatherings, holidays, family dinners, or whenever you are craving something warm and homemade.

Why You’ll Love It

  • Tender cinnamon apples wrapped in soft, buttery pastry
  • Rich brown sugar caramel sauce develops right in the slow cooker
  • Easy preparation with simple store-bought crescent dough
  • Perfect served warm with vanilla ice cream or whipped cream

Ingredients Overview

Apple Dumplings

  • 2 large Granny Smith apples
  • 2 cans refrigerated crescent roll dough, 8 oz each
  • 1 tsp ground cinnamon
  • 2 tbsp granulated sugar
  • 1 tsp fresh lemon juice

Cinnamon Caramel Sauce

  • ¾ cup unsalted butter, melted
  • 1 cup brown sugar, packed
  • 1 tsp ground cinnamon
  • 1 tsp vanilla extract
  • ¼ tsp ground nutmeg
  • Pinch of salt
  • ½ cup apple cider or apple juice

Garnish

  • Powdered sugar, optional
  • Extra ground cinnamon
  • Vanilla ice cream, optional

Step-by-Step Instructions

1. Prepare the Apples

Peel and core the apples.

Cut each apple into 8 thick wedges and place them in a bowl.

Toss with lemon juice, granulated sugar, and cinnamon until evenly coated.

2. Wrap the Apple Dumplings

Separate the crescent roll dough into individual triangles.

Place one apple wedge near the wide end of each triangle.

Roll the dough firmly around the apple, tucking the sides slightly around the fruit.

3. Arrange in the Slow Cooker

Lightly grease the inside of a 6-quart slow cooker.

Arrange the wrapped apple dumplings in a single layer or slightly overlapping if necessary.

Keep the seam side of each dumpling facing downward to help the pastry stay closed.

4. Make the Cinnamon Caramel Sauce

In a bowl, combine melted butter, brown sugar, cinnamon, vanilla, nutmeg, and salt.

Stir until smooth and well combined.

Spoon the mixture evenly over the apple dumplings.

Pour the apple cider around the edges of the slow cooker rather than directly over the pastry.

5. Slow Cook

Cover and cook on HIGH for 2–2½ hours, or until the apples are tender and the pastry is cooked through.

During the final 20–30 minutes, place a clean kitchen towel underneath the slow cooker lid to help absorb excess condensation and keep the tops less soggy.

6. Serve

Carefully transfer the warm apple dumplings to serving plates.

Spoon plenty of the cinnamon caramel sauce from the slow cooker over each dumpling.

Finish with powdered sugar or extra cinnamon and serve warm with vanilla ice cream if desired.

Cooking Tips

  • Granny Smith apples work especially well because their tart flavor balances the sweet caramel sauce.
  • Cut the apple wedges into similar sizes so they soften evenly.
  • Pour the apple cider around the dumplings instead of directly over them to keep the pastry from becoming overly wet.
  • Avoid repeatedly opening the slow cooker because heat escapes quickly.
  • For a slightly crispier finish, transfer the cooked dumplings to a baking sheet and broil briefly before serving.

Serving Suggestions

Serve these slow cooker apple dumplings with:

  • Vanilla ice cream
  • Fresh whipped cream
  • Warm caramel sauce
  • Chopped toasted pecans
  • Hot coffee or apple cider

Storage

Store leftover apple dumplings in an airtight container in the refrigerator for up to 3 days.

Reheat them in a 350°F (175°C) oven for about 8–10 minutes or microwave individual portions until warm. Spoon some of the leftover caramel sauce over them before serving.

Leftover Ideas

  • Chop leftover dumplings and serve them over vanilla ice cream.
  • Reheat them for breakfast with Greek yogurt and toasted nuts.
  • Turn leftovers into an easy apple dessert bowl with caramel sauce and whipped cream.

FAQs

Can I use another type of apple?
Yes. Honeycrisp, Braeburn, Fuji, or Pink Lady apples also work well, though sweeter apples will create a sweeter dessert.

Can I use puff pastry instead of crescent dough?
Yes. Puff pastry can be used, but it may remain softer in the slow cooker. For the crispest finish, briefly bake or broil the dumplings after slow cooking.

Can I prepare the dumplings ahead of time?
Yes. Prepare and wrap the apples several hours ahead and refrigerate them covered. Add the sauce and begin slow cooking when ready.

How do I keep the pastry from getting soggy?
Avoid pouring liquid directly over the dough, use only the recommended amount of cider, and absorb condensation under the lid during the final portion of cooking.

Final Thoughts

Slow Cooker Apple Dumplings combine tender spiced apples, buttery pastry, and warm cinnamon caramel sauce in an easy dessert that tastes like classic apple pie with much less effort. Warm, sweet, and wonderfully comforting, they are especially delicious served straight from the slow cooker with a scoop of vanilla ice cream.

#AppleDumplings #SlowCookerDesserts #AppleDessert #FallRecipes #EasyDesserts

Easy Philly Cheesesteak Casserole Recipe – Creamy, Cheesy, and Loaded with Beef & Peppers

If you love the savory flavors of a classic Philly cheesesteak but want an easy oven-baked dinner, this Philly Cheesesteak Casserole is a great way to turn those flavors into a hearty family meal. The version from The Fervent Mama uses ground beef or shaved steak with onions, red and green bell peppers, mushrooms, cream cheese, beef broth, mozzarella, and provolone, then bakes everything at 375°F until the cheese is melted and bubbly.

This expanded version keeps that creamy, cheesy foundation while adding a little extra seasoning and technique to create a deeply savory beef mixture with tender vegetables and plenty of melted cheese.

It is perfect for weeknight dinners, potlucks, meal prep, or serving to a crowd. You can eat it directly from the casserole dish for a lower-carb meal or spoon it onto toasted hoagie rolls, pasta, rice, or roasted potatoes.

Why You’ll Love This Philly Cheesesteak Casserole

You get the familiar combination of beef, peppers, onions, mushrooms, and melted cheese without having to assemble individual sandwiches.

Cream cheese gives the beef mixture a creamy texture while beef broth prevents the casserole from becoming dry.

Using both provolone and mozzarella provides plenty of melt while keeping the recognizable cheesesteak flavor.

It is also very flexible. The original recipe notes that you can use thinly sliced ribeye or sirloin instead of ground beef, add mushrooms or jalapeños, and even serve the casserole over rolls, pasta, or rice.

Ingredients

For the Beef

  • 1 pound ground beef, preferably 85–90% lean
  • 1 tablespoon olive oil
  • 1 teaspoon kosher salt
  • ½ teaspoon freshly ground black pepper
  • ½ teaspoon garlic powder
  • ½ teaspoon onion powder
  • ½ teaspoon smoked paprika
  • 1 teaspoon Worcestershire sauce

For the Vegetables

  • 1 medium yellow onion, diced
  • 1 green bell pepper, diced
  • 1 red bell pepper, diced
  • 8 ounces white or cremini mushrooms, sliced
  • 3 garlic cloves, finely minced

For the Creamy Filling

  • 8 ounces cream cheese, softened
  • ½ cup low-sodium beef broth
  • 1 teaspoon Dijon mustard, optional
  • ½ teaspoon dried oregano
  • ¼ teaspoon red pepper flakes, optional

For the Cheese Topping

  • 1 cup shredded mozzarella cheese
  • 1 cup shredded or sliced provolone cheese

For Garnishing

  • Chopped fresh parsley
  • Freshly cracked black pepper
  • Extra provolone or mozzarella, optional

How to Make Philly Cheesesteak Casserole

1. Preheat the Oven

Preheat your oven to 375°F (190°C).

Lightly grease a 9×13-inch baking dish with cooking spray or butter.

The original recipe also uses a 9×13-inch dish and bakes the casserole at 375°F.

2. Prepare the Vegetables

Dice the onion and bell peppers into relatively small pieces.

Slice the mushrooms evenly.

Keeping the vegetables similar in size helps everything cook evenly and makes the finished casserole easier to serve.

3. Heat the Skillet

Place a large skillet over medium-high heat.

Add the olive oil.

4. Brown the Ground Beef

Add the ground beef.

Break it into small crumbles with a wooden spoon or spatula.

Cook for approximately 6–8 minutes, until browned and no pink remains.

Ground beef should reach 160°F (71°C).

5. Drain Excess Grease

If the beef has released a lot of fat, carefully drain most of it from the skillet.

Leave a small amount behind for flavor.

6. Add the Onion and Peppers

Add the diced onion, green bell pepper, and red bell pepper.

Cook for approximately 4–5 minutes, stirring occasionally.

The vegetables should begin softening but still retain some texture.

7. Add the Mushrooms

Add the sliced mushrooms.

Continue cooking for approximately 4–5 minutes.

The mushrooms will release moisture before beginning to brown.

Continue cooking until much of that moisture has evaporated.

This helps prevent a watery casserole.

8. Add the Garlic

Stir in the minced garlic.

Cook for approximately 30–60 seconds, until fragrant.

9. Season the Filling

Add salt, black pepper, garlic powder, onion powder, smoked paprika, oregano, and red pepper flakes if using.

Stir well.

10. Add Worcestershire

Pour in the Worcestershire sauce.

Cook for approximately 1 minute.

This adds extra savory depth to the beef.

11. Add Beef Broth

Pour in the beef broth.

Stir and scrape up any browned bits from the bottom of the skillet.

Let the mixture simmer for approximately 2–3 minutes.

The source recipe similarly combines the meat and vegetables with beef broth and Worcestershire before adding cream cheese.

12. Add Cream Cheese

Reduce the heat to low.

Add the softened cream cheese in several pieces.

Stir gently until completely melted and incorporated into the beef and vegetables.

13. Add Dijon

If using Dijon mustard, stir it in now.

It adds subtle tang that balances the richness of the cream cheese and provolone.

14. Check the Consistency

The mixture should be creamy but not watery.

If there is excess liquid, let it simmer for another 2–3 minutes.

If it seems unusually dry, add another splash of beef broth.

15. Transfer to the Baking Dish

Spread the creamy beef and vegetable mixture evenly across the prepared 9×13-inch baking dish.

16. Add Mozzarella

Sprinkle the mozzarella evenly over the entire surface.

17. Add Provolone

Top with shredded provolone or slightly overlapping slices.

Using provolone gives the casserole the characteristic cheesesteak-style flavor.

The original recipe specifically uses both mozzarella and provolone.

18. Bake

Place the casserole in the preheated oven.

Bake uncovered for approximately 15–20 minutes.

The cheese should become completely melted and bubbling around the edges.

19. Broil for Extra Color

For a browned cheese topping, switch the oven to broil.

Broil for approximately 1–2 minutes.

Watch carefully because the cheese can brown quickly.

20. Rest

Remove the casserole from the oven.

Let it rest for approximately 5 minutes.

This gives the creamy filling time to settle and makes serving easier.

21. Garnish

Sprinkle with chopped parsley and freshly cracked black pepper.

22. Serve

Serve hot directly from the casserole dish or spoon onto toasted rolls, rice, pasta, or potatoes.

What to Serve With Philly Cheesesteak Casserole

One of the easiest ways to serve this casserole is with warm toasted hoagie rolls.

Spoon the creamy beef mixture onto the bread and add another slice of provolone if you want an extra-cheesy sandwich.

Other excellent options include:

  • Garlic bread
  • Toasted baguette slices
  • French fries
  • Potato wedges
  • Mashed potatoes
  • White rice
  • Buttered noodles
  • Roasted vegetables
  • Caesar salad
  • Garden salad

For a lower-carb meal, serve it with roasted broccoli, cauliflower, green beans, zucchini, or a fresh salad.

Tips for the Best Philly Cheesesteak Casserole

Brown the beef thoroughly before adding the vegetables.

Drain excess grease.

Cook the mushrooms until their released moisture evaporates.

Do not overcook the peppers—they should still have a little texture.

Use softened cream cheese so it melts easily.

Keep the heat low when adding cream cheese.

Use provolone for the most recognizable cheesesteak flavor.

Freshly shredded cheese generally melts more smoothly.

Let excess broth reduce before baking.

Rest the casserole for several minutes before serving.

Easy Recipe Variations

Steak Philly Cheesesteak Casserole

For a version closer to a traditional cheesesteak, replace the ground beef with 1–1½ pounds thinly sliced ribeye or sirloin.

Cook the meat quickly over high heat, remove it from the pan, prepare the vegetables, then return the steak before adding the cream cheese.

The source recipe specifically suggests thinly sliced ribeye or sirloin as an alternative to ground beef.

Loaded Philly Cheesesteak Casserole

Add:

  • Extra mushrooms
  • Jalapeños
  • Bacon
  • Extra onions
  • Pepper Jack cheese

Philly Cheesesteak Pasta Bake

Cook 8–12 ounces pasta until just al dente.

Fold it into the creamy beef mixture before transferring everything to the baking dish.

Add the cheeses and bake until bubbling.

The original recipe lists adding cooked pasta as one of its variations.

Spicy Philly Casserole

Add sliced jalapeños and red pepper flakes.

Replace part of the provolone with pepper Jack.

Extra Cheesy Version

Add white American cheese or additional mozzarella to the beef mixture before baking.

Low-Carb Philly Casserole

Serve the casserole without pasta, rice, or bread.

Pair it with cauliflower, zucchini, broccoli, or salad instead.

Chicken Philly Casserole

Replace the beef with diced chicken breast or thighs.

Cook chicken to 165°F (74°C) before assembling the casserole.

Philly Cheesesteak Potato Casserole

Layer the beef mixture over cooked roasted potatoes, top with cheese, and bake until bubbling.

How to Store Leftovers

Allow the casserole to cool before transferring leftovers to an airtight container.

Refrigerate for up to 4 days, which is also the storage guidance provided with the source recipe.

Reheat individual servings in the microwave or warm larger portions in a 350°F (175°C) oven.

If the filling becomes thick after refrigeration, add a small splash of beef broth before reheating.

The casserole can also be frozen after baking. The source recommends cooling it completely, wrapping tightly, and freezing for up to 2 months.

Thaw overnight in the refrigerator before reheating.

Frequently Asked Questions

Can I use steak instead of ground beef?

Yes.

Thinly sliced ribeye or sirloin works especially well.

Cook it quickly over high heat so it stays tender.

What cheese is best for Philly cheesesteak casserole?

Provolone is an excellent choice for the classic flavor.

Mozzarella adds extra melt, while white American or pepper Jack can also be used.

Can I add mushrooms?

Absolutely.

This version includes them because they pair particularly well with beef, peppers, and provolone.

Can I make the casserole ahead?

Yes.

Prepare the beef mixture, transfer it to the baking dish, add the cheese, and refrigerate covered until ready to bake.

The source indicates the casserole can be assembled and refrigerated for up to 24 hours before baking.

Why is my casserole watery?

The vegetables may have released too much moisture.

Cook the mushrooms thoroughly and allow excess broth to reduce before assembling.

Can I make it without cream cheese?

Yes.

You can omit it for a looser, more traditional cheesesteak-style filling, although the casserole will be less creamy.

Can I add pasta?

Yes.

Mix cooked penne, rotini, shells, or egg noodles into the beef mixture before baking.

Can I serve it on hoagie rolls?

Absolutely.

Spoon the casserole filling onto toasted hoagie rolls for a cheesesteak-inspired sandwich presentation.

Final Thoughts

This Philly Cheesesteak Casserole combines browned beef, onions, peppers, mushrooms, garlic, cream cheese, beef broth, mozzarella, and provolone in one rich and comforting baked dinner.

The source recipe keeps the method especially simple: brown the beef, sauté the vegetables, stir in broth and cream cheese, cover everything with cheese, and bake until bubbly.

For the best results, cook away excess moisture from the vegetables, keep the beef mixture creamy rather than watery, and finish with plenty of melted provolone. Serve it as a casserole, spoon it over rice or pasta, or pile it onto toasted hoagie rolls for the full cheesesteak experience.

Cheesy Baked Chicken with Peppers and Onions

This Cheesy Baked Chicken with Peppers and Onions features juicy seasoned chicken breasts baked with tender onions, colorful bell peppers, and plenty of melted cheese until golden and bubbling. The combination of savory herbs, sweet peppers, creamy melted cheese, and flavorful pan juices makes this an easy yet impressive dinner that is perfect for busy weeknights, family meals, or casual entertaining.

Why You’ll Love It

  • Juicy baked chicken covered with gooey melted cheese
  • Colorful peppers and onions add sweetness, texture, and flavor
  • Easy oven-baked preparation with minimal cleanup
  • Perfect with rice, potatoes, pasta, or a fresh salad

Ingredients Overview

Chicken

  • 4 boneless, skinless chicken breasts
  • 1 tbsp olive oil
  • 1 tsp garlic powder
  • 1 tsp Italian seasoning
  • 1 tsp paprika
  • ¾ tsp salt
  • ½ tsp black pepper

Peppers & Onions

  • 1 red bell pepper, sliced
  • 1 yellow bell pepper, sliced
  • 1 small yellow onion, thinly sliced
  • 1 tbsp olive oil
  • 2 garlic cloves, minced
  • ½ tsp Italian seasoning
  • ¼ tsp salt
  • ¼ tsp black pepper

Cheese Topping

  • 1½ cups shredded mozzarella cheese
  • ½ cup shredded cheddar cheese
  • ¼ cup grated Parmesan cheese
  • ½ tsp Italian seasoning

Garnish

  • 2 tbsp fresh parsley, chopped
  • Freshly cracked black pepper
  • Extra Parmesan cheese

Step-by-Step Instructions

1. Prepare the Chicken

Preheat the oven to 400°F (200°C).

Pat the chicken breasts dry with paper towels.

Season both sides with garlic powder, Italian seasoning, paprika, salt, and black pepper.

Arrange the chicken in a lightly greased baking dish.

2. Prepare the Peppers and Onions

Heat olive oil in a skillet over medium heat.

Add the sliced onion and bell peppers.

Cook for 4–5 minutes, stirring occasionally, until they begin to soften.

Add the minced garlic, Italian seasoning, salt, and black pepper.

Cook for another 30 seconds until fragrant.

3. Assemble the Dish

Arrange the sautéed peppers and onions around and over the seasoned chicken breasts.

Spoon any flavorful juices from the skillet into the baking dish.

Make sure the chicken remains mostly in a single layer so it cooks evenly.

4. Add the Cheese

Sprinkle mozzarella and cheddar generously over each chicken breast.

Finish with grated Parmesan and Italian seasoning.

The chicken should be well covered with cheese for a rich, golden topping.

5. Bake

Bake uncovered for 25–35 minutes, depending on the thickness of the chicken breasts.

The chicken is ready when the internal temperature reaches 165°F (74°C).

For a more golden, bubbly cheese topping, broil for 1–2 minutes at the end while watching carefully.

6. Serve

Remove the baking dish from the oven and let the chicken rest for about 5 minutes.

Spoon the roasted peppers, onions, and pan juices around each serving.

Finish with fresh parsley, extra Parmesan, and freshly cracked black pepper.

Cooking Tips

  • Use chicken breasts of similar thickness so they cook evenly.
  • Sauté the peppers and onions briefly before baking for deeper flavor.
  • Freshly grated cheese melts more smoothly than pre-shredded cheese.
  • Do not overcook the chicken; use a meat thermometer for the best results.
  • Broil briefly at the end for a beautifully browned cheese topping.

Serving Suggestions

Serve this cheesy baked chicken with:

  • Creamy mashed potatoes
  • Steamed white rice
  • Garlic butter pasta
  • Roasted vegetables
  • Fresh green salad

Storage

Store leftover chicken, peppers, and onions in an airtight container in the refrigerator for up to 3 days.

Reheat gently in a 350°F (175°C) oven or microwave until warmed through. Add a small splash of chicken broth before reheating if needed to keep the chicken moist.

Leftover Ideas

  • Slice leftover chicken and serve it over pasta with the peppers and onions.
  • Chop everything and turn it into a cheesy chicken rice bowl.
  • Use sliced chicken in toasted sandwiches or wraps with extra melted cheese.

FAQs

Can I use chicken thighs instead of chicken breasts?
Yes. Boneless, skinless chicken thighs work very well and stay especially juicy while baking.

Can I add more vegetables?
Yes. Mushrooms, zucchini, spinach, or broccoli can all be added.

Can I prepare this dish ahead of time?
Yes. Season the chicken and prepare the vegetables several hours ahead, then assemble and bake when ready.

What cheese works best for baked chicken?
Mozzarella provides the best stretchy melt, while cheddar and Parmesan add richer flavor.

Final Thoughts

Cheesy Baked Chicken with Peppers and Onions combines tender chicken, colorful vegetables, savory herbs, and bubbling melted cheese in one easy and satisfying meal. It is simple enough for busy weeknights yet flavorful and attractive enough for family gatherings or weekend dinners.

#CheesyChicken #BakedChicken #ChickenDinner #EasyDinner #FamilyMeals

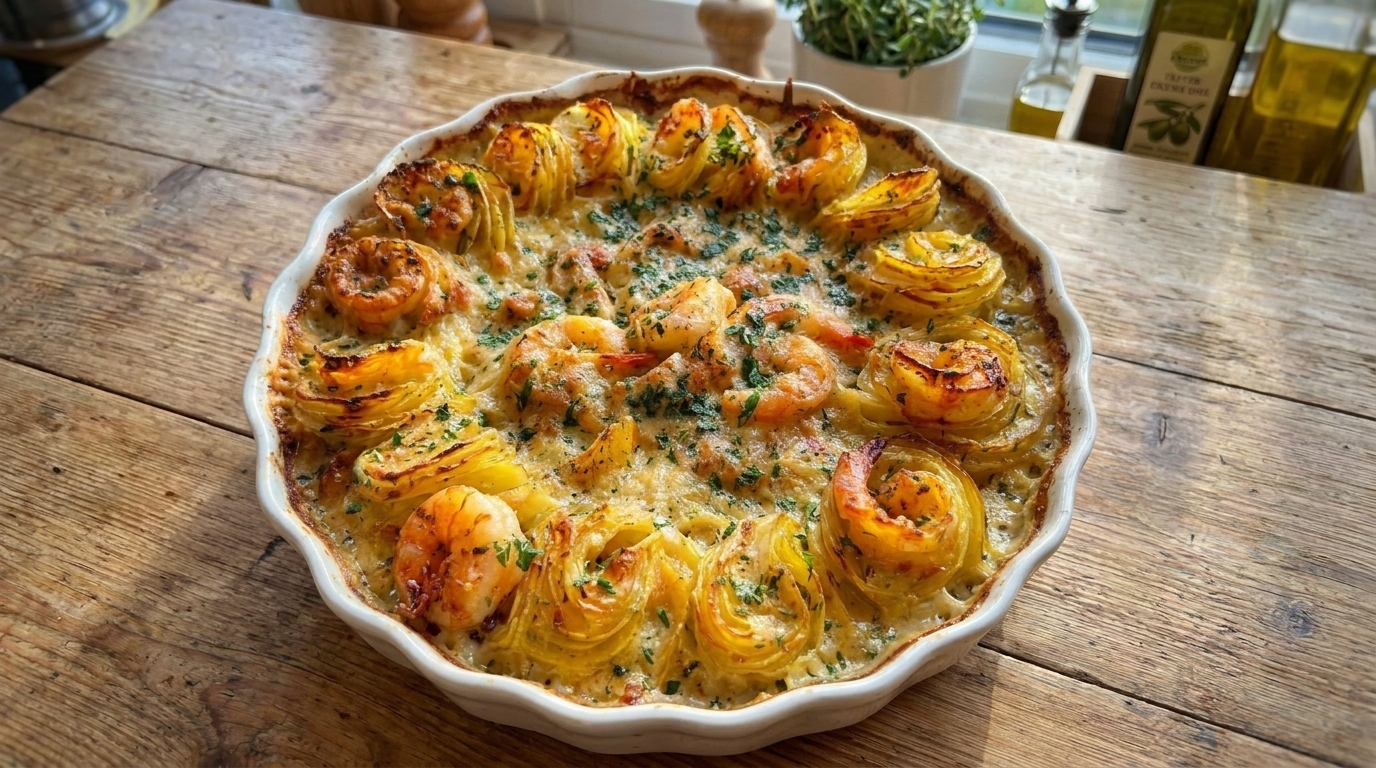
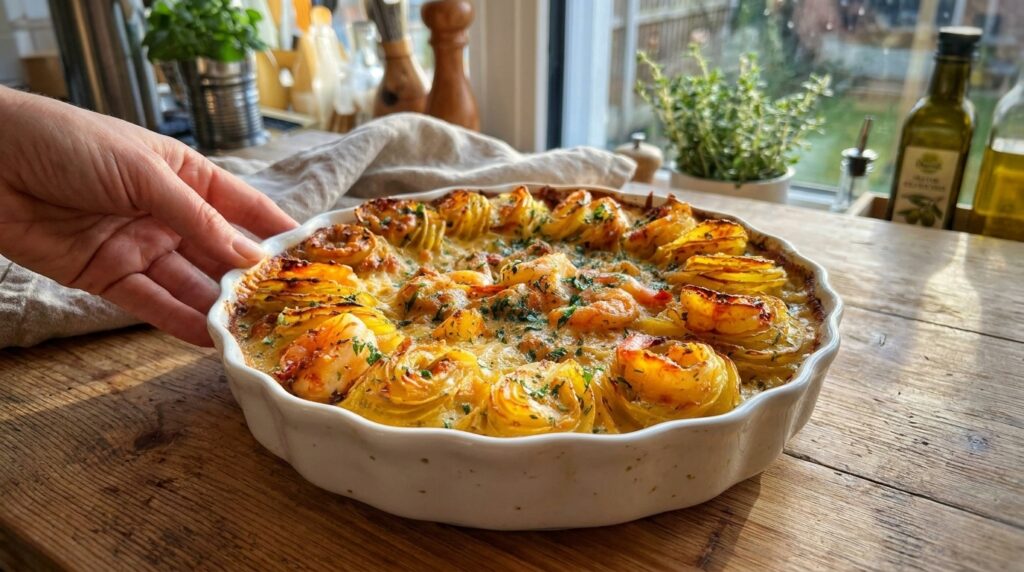
Easy Creamy Garlic Shrimp & Potato Gratin Recipe – Cheesy, Rich, and Comforting

If you are looking for a cozy baked dinner with tender potatoes, juicy shrimp, plenty of garlic, and a rich creamy cheese sauce, this Creamy Garlic Shrimp & Potato Gratin is an excellent recipe to make. Thinly sliced potatoes are layered with a silky garlic cream sauce, Parmesan, mozzarella, and tender shrimp, then baked until the potatoes are soft and the top is golden and bubbling.

This recipe is perfect for family dinners, holidays, date nights, or weekends when you want something a little more special than an ordinary potato casserole. The potatoes absorb the creamy garlic sauce as they bake, while the shrimp are added later so they stay tender instead of becoming rubbery.

Serve this gratin with a crisp salad, roasted vegetables, or warm garlic bread for a rich and satisfying seafood dinner.

Why You’ll Love This Creamy Garlic Shrimp & Potato Gratin

The combination of creamy potatoes and garlic butter shrimp makes this dish feel luxurious while still using familiar ingredients.

Thinly slicing the potatoes allows them to cook evenly and absorb plenty of flavor from the cream sauce.

The shrimp are added during the later stage of baking, which helps prevent overcooking.

Parmesan adds savory depth, while mozzarella creates a melty golden topping.

The whole casserole can also be customized with spinach, mushrooms, bacon, Cajun seasoning, or extra herbs.

Ingredients

For the Potatoes

  • 2 pounds Yukon Gold or russet potatoes
  • 1 tablespoon unsalted butter, for greasing
  • 1 teaspoon kosher salt
  • ½ teaspoon freshly ground black pepper
  • ½ teaspoon garlic powder

For the Shrimp

  • 1 pound large raw shrimp, peeled and deveined
  • 1 tablespoon olive oil
  • 1 tablespoon unsalted butter
  • 3 garlic cloves, finely minced
  • ½ teaspoon smoked paprika
  • ½ teaspoon garlic powder
  • ¼ teaspoon kosher salt
  • ¼ teaspoon black pepper
  • 1 tablespoon fresh lemon juice

For the Garlic Cream Sauce

  • 3 tablespoons unsalted butter
  • 5 garlic cloves, finely minced
  • 3 tablespoons all-purpose flour
  • 1½ cups whole milk
  • 1½ cups heavy cream
  • ½ cup low-sodium chicken or vegetable broth
  • 1 teaspoon Dijon mustard
  • 1 teaspoon Italian seasoning
  • ½ teaspoon dried thyme
  • ½ teaspoon onion powder
  • ½ teaspoon kosher salt
  • ¼ teaspoon freshly ground black pepper
  • ¼ teaspoon red pepper flakes, optional

For the Cheese

  • 1 cup freshly grated Parmesan cheese
  • 1½ cups shredded mozzarella cheese
  • ½ cup shredded Gruyère, cheddar, or Monterey Jack, optional

For Garnishing

  • Fresh parsley
  • Extra Parmesan
  • Freshly cracked black pepper
  • Lemon wedges
  • Red pepper flakes, optional

How to Make Creamy Garlic Shrimp & Potato Gratin

1. Preheat the Oven

Preheat your oven to 375°F (190°C).

Butter a 9×13-inch baking dish generously.

2. Prepare the Potatoes

Peel the potatoes if desired.

Using a sharp knife or mandoline, slice them approximately ⅛ inch thick.

Keeping the slices similar in thickness is important so they cook at the same rate.

3. Season the Potatoes

Place the sliced potatoes in a large bowl.

Season with salt, black pepper, and garlic powder.

Toss gently.

4. Prepare the Shrimp

Pat the shrimp thoroughly dry with paper towels.

Season with smoked paprika, garlic powder, salt, and black pepper.

5. Sauté the Shrimp Briefly

Heat the olive oil and 1 tablespoon butter in a skillet over medium-high heat.

Add the shrimp in a single layer.

Cook for only about 45–60 seconds per side, just until they begin turning pink.

They should still be slightly undercooked in the center.

6. Add Garlic and Lemon

Add 3 minced garlic cloves.

Cook for approximately 20–30 seconds.

Add the lemon juice and immediately remove the skillet from the heat.

Transfer the shrimp to a plate.

Do not fully cook them yet because they will finish in the oven.

7. Start the Cream Sauce

Place a medium saucepan over medium-low heat.

Add 3 tablespoons butter.

Once melted, add the remaining 5 minced garlic cloves.

Cook for approximately 30–60 seconds, stirring constantly.

8. Add the Flour

Sprinkle in the flour.

Whisk continuously for approximately 1 minute.

This creates a light roux that will thicken the sauce.

9. Add the Milk

Slowly pour in the milk while whisking continuously.

Make sure there are no lumps.

10. Add the Cream and Broth

Pour in the heavy cream and broth.

Whisk until smooth.

11. Season the Sauce

Add Dijon mustard, Italian seasoning, thyme, onion powder, salt, black pepper, and red pepper flakes if using.

12. Simmer Gently

Cook over medium-low heat for approximately 4–6 minutes, stirring often.

The sauce should thicken enough to lightly coat the back of a spoon.

13. Add Parmesan

Reduce the heat to low.

Stir in ½ cup Parmesan.

Mix until melted and smooth.

Do not aggressively boil the sauce after adding cheese.

14. Create the First Potato Layer

Arrange approximately one-third of the potato slices in overlapping rows across the bottom of the baking dish.

15. Add Cream Sauce

Spoon approximately one-third of the garlic cream sauce evenly over the potatoes.

16. Add Cheese

Sprinkle with a little Parmesan and mozzarella.

17. Repeat the Layers

Add another layer of potatoes.

Top with more cream sauce and cheese.

Repeat until all the potatoes are used.

Reserve some sauce and most of the mozzarella for the final stages.

18. Cover the Gratin

Cover the baking dish tightly with foil.

Place it in the oven.

19. Bake the Potatoes

Bake covered for approximately 45–55 minutes.

The potatoes should begin becoming tender.

20. Check for Tenderness

Carefully insert a knife through the center.

It should enter the potatoes fairly easily but they do not need to be completely soft yet.

If they are still firm, cover and bake for another 10 minutes.

21. Add the Shrimp

Remove the foil.

Arrange the partially cooked shrimp over and slightly between the potatoes.

Pour any juices from the shrimp plate over the casserole.

22. Add Remaining Sauce

Spoon the remaining garlic cream sauce over the shrimp and potatoes.

23. Add the Cheese Topping

Sprinkle the remaining mozzarella and Parmesan evenly over the top.

Add Gruyère, cheddar, or Monterey Jack if using.

24. Bake Uncovered

Return the casserole to the oven.

Bake uncovered for approximately 12–18 minutes.

The shrimp should finish cooking, the potatoes should be completely tender, and the cheese should be bubbling.

Shrimp should reach 145°F (63°C).

25. Broil for Extra Browning

For a deeply golden top, broil for approximately 1–2 minutes.

Watch carefully.

26. Rest the Gratin

Remove the baking dish from the oven.

Let it rest for approximately 10–15 minutes.

This is important because the sauce thickens as it rests and the layers become easier to serve.

27. Garnish and Serve

Finish with fresh parsley, extra Parmesan, cracked black pepper, and red pepper flakes if desired.

Serve with fresh lemon wedges.

What to Serve With Creamy Garlic Shrimp & Potato Gratin

Because this dish is rich and filling, lighter sides work especially well.

Try:

  • Arugula salad
  • Caesar salad
  • Cucumber tomato salad
  • Roasted asparagus
  • Green beans
  • Broccoli
  • Roasted zucchini
  • Brussels sprouts

Warm garlic bread or crusty bread is also excellent for soaking up the creamy sauce.

Tips for the Best Shrimp & Potato Gratin

Slice the potatoes very thinly and evenly.

A mandoline makes this much easier.

Use Yukon Gold potatoes for a creamy texture or russets for a softer, starchier gratin.

Pat the shrimp completely dry.

Do not fully cook the shrimp before baking.

Keep the cheese sauce over gentle heat.

Use freshly grated Parmesan.

Cover the gratin during the first stage so the potatoes steam and soften.

Add the shrimp only near the end.

Always let the casserole rest before serving.

Easy Recipe Variations

Cajun Shrimp Potato Gratin

Season the shrimp with Cajun seasoning and add a pinch to the cream sauce.

Spinach Shrimp Gratin

Stir 2 cups fresh spinach into the cream sauce before layering.

Mushroom Garlic Shrimp Gratin

Sauté 8 ounces sliced mushrooms until golden and layer them with the potatoes.

Bacon Shrimp Potato Gratin

Add ½ cup crispy crumbled bacon between the potato layers.

Lobster and Shrimp Gratin

Replace half of the shrimp with chopped cooked lobster.

Garlic Parmesan Gratin

Increase the Parmesan to 1½ cups and omit the mozzarella for a more savory cheese profile.

Spicy Shrimp Gratin

Add cayenne, jalapeños, or extra red pepper flakes.

Broccoli Shrimp Gratin

Add small blanched broccoli florets when you add the shrimp.

How to Store Leftovers

Allow the gratin to cool before transferring leftovers to an airtight container.

Refrigerate for up to 2–3 days.

For the best texture, reheat individual portions in a 325°F (165°C) oven until hot throughout.

Cover loosely with foil during the first part of reheating so the potatoes do not dry out.

You can also microwave portions in short intervals, although the shrimp may become slightly firmer.

Freezing is not ideal because cream sauces can separate and potatoes may become grainy after thawing.

Frequently Asked Questions

Can I use frozen shrimp?

Yes.

Thaw them completely in the refrigerator and pat very dry before seasoning.

Can I use cooked shrimp?

Yes, but do not sauté them first.

Add cooked shrimp only during the final 5–8 minutes of baking so they do not become rubbery.

What potatoes are best?

Yukon Gold potatoes are excellent because they hold their shape while becoming creamy.

Russet potatoes also work and produce a softer gratin.

Why are my potatoes still hard?

The slices were likely too thick or needed additional covered baking time.

Cover the casserole and continue baking until a knife slides easily through the center.

Can I assemble the gratin ahead?

You can assemble the potato and cream layers several hours ahead and refrigerate.

For the best shrimp texture, add the shrimp only during the final baking stage.

Can I use half-and-half instead of heavy cream?

Yes.

The sauce will be lighter but still creamy.

Can I add more cheese?

Absolutely.

Gruyère, cheddar, Monterey Jack, mozzarella, and Parmesan all work well.

How do I know the shrimp are cooked?

They should be opaque, lightly curled, and reach 145°F (63°C).

Final Thoughts

This Creamy Garlic Shrimp & Potato Gratin combines tender layered potatoes, juicy shrimp, garlic, cream, Parmesan, mozzarella, herbs, and a golden bubbly cheese topping in one rich and comforting casserole.

The key is slicing the potatoes thinly, baking them until almost tender before adding the shrimp, and cooking the seafood only long enough to reach 145°F so it stays juicy.

Serve it with roasted vegetables or a crisp salad for an elegant seafood dinner that is creamy, garlicky, cheesy, and perfect for sharing.

Easy Honey Garlic Chicken Rice Bake

When weeknight busyness hits, nothing saves dinner quite like a one-pan casserole where protein, grains, and sauce cook together in sweet, savory harmony. This Honey Garlic Chicken Rice Bake is the ultimate solution for hassle-free cooking. Juicy chicken thighs are nestled into a bed of fragrant jasmine rice, then drenched in a homemade honey garlic soy sauce that infuses every single grain of rice as it bakes in the oven.

The true magic of this dish lies in its simplicity and efficiency. Instead of dirtying multiple pots and pans to sear meat, boil rice, and simmer a sauce, everything cooks together inside a single baking dish. As the casserole bakes under a tight seal of foil, the rice absorbs the rich chicken broth and honey garlic glaze, while the chicken cooks to tender, succulent perfection. A quick broil at the very end caramelizes the sticky glaze on top of the chicken skin, giving you restaurant-quality flavor with virtually no cleanup.

Recipe At-a-GlanceDetails
Prep Time15 minutes
Cook Time45 minutes
Broil Time3 to 5 minutes
Total Time1 hour
Servings5 to 6 servings
CourseMain Dish
CuisineAsian-Inspired / American Comfort

Why You Will Love This One-Pan Meal

  • Minimal Cleanup: Cooking the raw rice and chicken together in one pan means you only have a single baking dish to wash after dinner.
  • Infused Flavor: Because the rice cooks directly in the honey garlic broth and chicken drippings, every bite is packed with sweet, savory, and aromatic garlic flavors.
  • Budget-Friendly Protein: Bone-in or boneless chicken thighs are economical, forgiving to cook, and remain juicy throughout the baking process.
  • Crowd-Pleasing Taste Profile: The balance of sticky wildflower honey, savory soy sauce, fresh garlic, and toasted sesame oil is a hit with both kids and adults alike.

Essential Kitchen Equipment

Having the right tools ready ensures your bake turns out perfectly cooked without dry rice or burnt edges:

  • 9×13-Inch Baking Dish: Glass, ceramic, or metal baking pans work well. Ceramic or cast-iron casserole dishes distribute heat most evenly.
  • Heavy-Duty Aluminum Foil: Creating a tight seal over the baking dish is critical. The foil traps steam inside, which is what cooks the raw rice through.
  • Whisk & Measuring Pitcher: For blending the honey, soy sauce, garlic, and broth into a smooth liquid base.
  • Fine-Mesh Strainer: Essential for rinsing starch off the raw rice before adding it to the pan.

Ingredients & Substitution Guide

This recipe uses everyday pantry staples to create a deep, complex, takeout-style glaze and fluffy rice bed.

IngredientQuantityPurpose & Substitution Notes
Chicken Thighs2 to 2.5 lbs (5–6 pieces)Bone-in, skin-on thighs yield maximum juiciness and flavor. Boneless thighs or skinless breasts also work (adjust cook time down slightly for breasts).
Long-Grain White Rice1.5 cupsJasmine or Basmati rice work best. Uncooked rice absorbs the broth evenly without becoming gummy.
Chicken Broth2.5 cupsLow-sodium chicken broth gives you control over the overall saltiness of the dish.
Honey1/3 cupLiquid honey creates the signature sticky sweetness and helps caramelize the chicken under the broiler.
Low-Sodium Soy Sauce1/3 cupProvides savory umami depth. Use Tamari or Coconut Aminos for a gluten-free option.
Fresh Garlic6 cloves, mincedDo not skimp on garlic! Freshly minced garlic provides the punchy aromatic base.
Toasted Sesame Oil1 tbspAdds a nutty, rich aroma that elevates the overall sauce profile.
Apple Cider Vinegar1 tbspCuts through the heavy sweetness of the honey and balances the savory soy sauce.
Ground Ginger1/2 tspAdds a subtle warm spice background. 1 tsp of fresh grated ginger can be used instead.
Unsalted Butter2 tbsp, meltedStirred into the rice and broth base for extra richness and individual grain separation.
Salt & Black PepperTo tasteUsed to season the chicken skin before layering.
Green Onions & Sesame SeedsFor garnishAdds freshness, crunch, and visual appeal before serving.

Step-by-Step Cooking Instructions

Step 1: Prep the Oven and Season the Chicken

Preheat your oven to 375°F (190°C). Grease a 9×13-inch baking dish lightly with cooking spray or butter. Pat the chicken thighs completely dry with paper towels—removing excess surface moisture helps the skin crisp up later. Season both sides of the chicken thighs with kosher salt, black pepper, and a light pinch of garlic powder.

Step 2: Rinse and Layer the Rice

Place the long-grain white rice in a fine-mesh strainer and rinse under cold tap water for about 30 seconds until the water runs clear. This step removes excess surface starches, preventing the baked rice from becoming clumpy or mushy.

Spread the rinsed, drained rice evenly across the bottom of your prepared 9×13-inch baking dish. Drizzle the melted butter over the raw rice and toss gently to coat the grains.

Step 3: Whisk the Honey Garlic Sauce Base

In a large measuring cup or mixing bowl, whisk together the chicken broth, low-sodium soy sauce, honey, minced garlic, apple cider vinegar, toasted sesame oil, and ground ginger until the honey is fully dissolved into the liquid.

Carefully pour about two-thirds of this liquid mixture directly over the raw rice in the baking dish. Gently stir the rice in the pan to ensure it is evenly submerged in the liquid and spread out in an even layer.

Step 4: Layer the Chicken and Add Remaining Sauce

Arrange the seasoned chicken thighs on top of the rice and broth mixture, skin-side up. Make sure the chicken pieces are spread out in a single layer rather than overlapping.

Spoon or pour the remaining one-third of the honey garlic sauce directly over the top of each chicken thigh so the meat and skin are thoroughly coated in glaze.

Step 5: Seal Tightly and Bake

Cover the baking dish very tightly with heavy-duty aluminum foil. Crimp the edges tightly around the rim of the pan so no steam can escape. Note: A tight foil seal is the secret to perfectly fluffy rice—if steam escapes, the top layer of rice will remain hard and undercooked.

Bake in the preheated oven at 375°F for 40 to 45 minutes, until the rice has absorbed the liquid and the chicken reaches an internal temperature of 165°F (74°C) at its thickest point.

Step 6: Broil for Sticky Caramelized Skin

Carefully remove the aluminum foil from the baking dish (be cautious of hot escaping steam!). Turn your oven setting to BROIL on High.

Place the uncovered baking dish back into the oven on the top rack, about 6 inches below the broiler element. Broil for 3 to 5 minutes, watching constantly, until the honey garlic glaze on the chicken skin turns sticky, bubbly, and dark golden brown with slightly charred edges.

Step 7: Fluff and Serve

Remove the dish from the oven and let it rest for 5 minutes. Carefully lift the chicken thighs onto a clean plate or cutting board. Use a fork to gently fluff the hot honey garlic rice underneath, incorporating any rich sauce drippings left in the bottom of the pan.

Return the chicken thighs to the top of the fluffy rice. Garnish generously with thinly sliced green onions and toasted sesame seeds before serving warm.

Pro Culinary Tips for Flawless Results

  • Rinse Your Rice: Skipping the rice-rinsing step is the number one reason casserole rice turns out gummy or sticky. Rinsing strips away loose starch so every grain bakes up fluffy and distinct.
  • Don’t Use Minute Rice or Brown Rice Without Adjustments: Instant rice will turn to mush during a 45-minute bake, whereas brown rice requires significantly more liquid and nearly double the baking time. Stick to standard long-grain white, Jasmine, or Basmati rice for this specific recipe setup.
  • Crimp the Foil Extra Tight: The liquid in the pan needs steam to cook the rice grains through. Double-wrap the dish with foil if your foil sheets are narrow, making sure there are no open gaps around the corners.
  • Check Internal Temperature: Bone-in chicken thighs are best cooked to an internal temperature of 175°F to 185°F. Unlike chicken breasts, thigh meat becomes even more tender and juicy at higher temperatures as collagen breaks down.

Creative Recipe Variations

  • Add Fresh Vegetables: Toss 1.5 cups of fresh broccoli florets, diced bell peppers, or sliced carrots into the rice layer before baking. Tip: Cut vegetables into medium-large pieces so they don’t get too soft during the 45-minute bake.
  • Spicy Honey Garlic Kick: Add 1 to 2 tablespoons of Sriracha sauce or 1/2 teaspoon of crushed red pepper flakes into the honey garlic liquid base for a sweet-and-spicy “swicy” twist.
  • Pineapple Honey Garlic Bake: Replace 1/2 cup of the chicken broth with pineapple juice, and scatter 1 cup of drained pineapple tidbits into the rice layer for a tropical flavor addition.
  • Boneless Skinless Chicken Option: If using boneless, skinless chicken breasts or thighs, reduce the initial covered baking time to 30–35 minutes so the leaner meat does not dry out.

Ideal Side Dishes and Serving Options

Because this casserole contains both your protein and starch in one pan, pairing it with light, vibrant vegetable sides creates a complete, balanced meal:

  • Steamed or Roasted Veggies: Garlic-sauteed snap peas, steamed edamame, roasted baby bok choy, or charred broccoli florets.
  • Fresh Asian-Inspired Slaw: A crisp cabbage slaw dressed in a light rice vinegar and sesame oil dressing cuts through the rich sweetness of the honey glaze.
  • Fresh Cucumber Salad: Thinly sliced cucumbers tossed in rice vinegar, soy sauce, and a pinch of sugar offer a refreshing, cooling contrast.

Storage, Reheating & Meal Prep Guidelines

  • Refrigerator Storage: Allow leftovers to cool to room temperature. Transfer the chicken and rice into airtight food storage containers and keep refrigerated for up to 3 to 4 days.
  • Meal Prep Advantage: This dish is exceptionally friendly for weekly meal prep. The rice continues to absorb the savory honey garlic flavors as it sits, making day-two leftovers taste even better!
  • Reheating in the Microwave: Place a portion of rice and chicken on a microwave-safe plate. Cover with a damp paper towel to trap steam and microwave on high for 1.5 to 2 minutes, stirring the rice halfway through.
  • Reheating in the Oven: Place leftover chicken and rice into an oven-safe dish, add 2 tablespoons of chicken broth or water over the rice to restore moisture, cover with foil, and bake at 350°F (175°C) for 15 to 20 minutes until piping hot.
  • Freezer Instructions: Cooked honey garlic chicken and rice can be frozen in airtight containers for up to 2 months. Thaw overnight in the refrigerator before reheating.

Estimated Nutritional Information

NutrientPer Serving (1 Thigh + Rice)
Calories520 kcal
Protein34 g
Carbohydrates56 g
Fat16 g
Saturated Fat5 g
Cholesterol110 mg
Sodium720 mg
Dietary Fiber1.5 g
Sugar16 g

(Note: Nutritional values are estimates based on standard recipe ingredients using 6 bone-in chicken thighs. Exact values may vary depending on protein cuts and specific sauce brands used.)