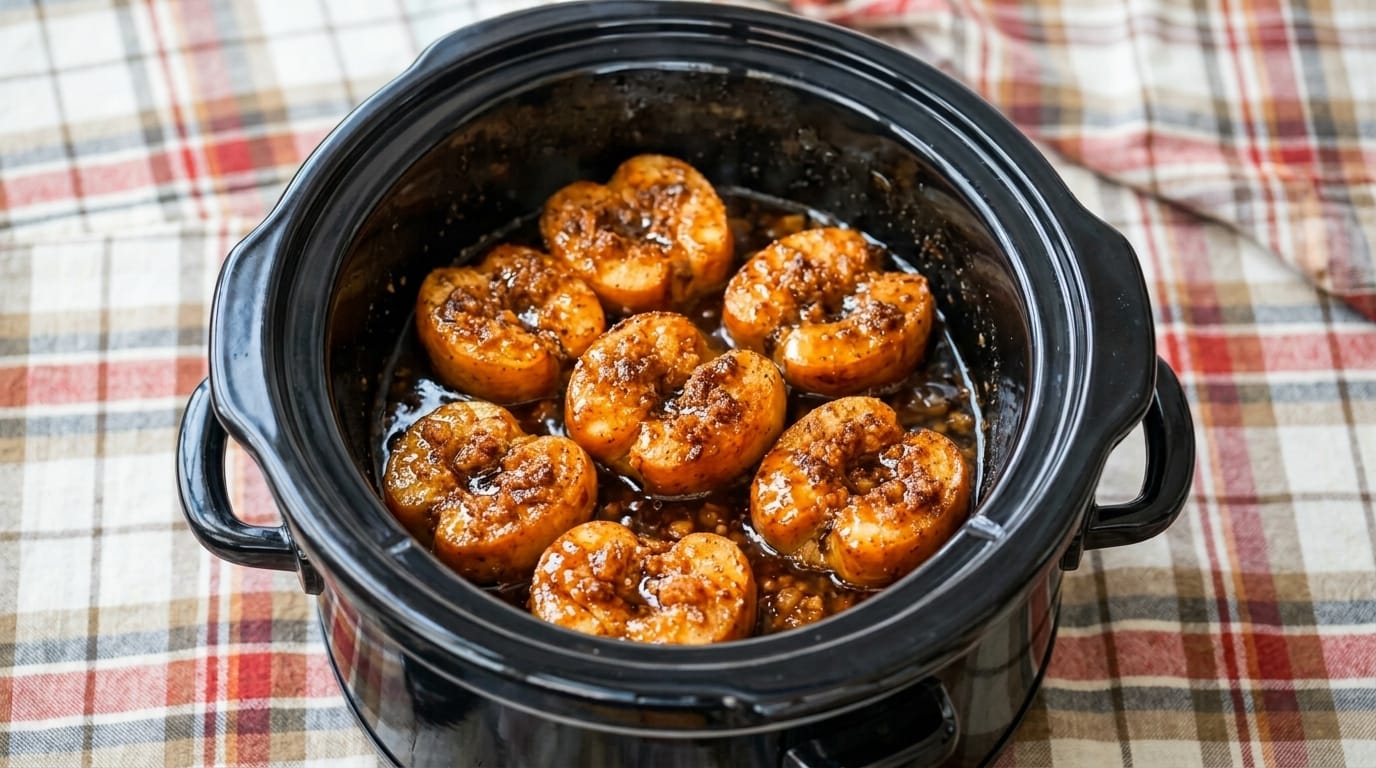
Ultimate Slow-Cooker Spiced Cinnamon Apples

Welcome to your ultimate, deeply comprehensive guide for preparing a warm, fragrant, and exceptionally comforting dessert masterpiece: Slow-Cooker Spiced Cinnamon Apples. If you want a masterclass in achieving tender, caramel-infused apple halves swimming in a rich buttery syrup laced with cinnamon and brown sugar, this extended guide is built for you.

Why Slow-Cooker Apples Are a Fall Favorite

There is nothing quite like the scent of warm cinnamon and baked apples filling your home. Cooking apples slowly in a crockpot breaks down their natural sugars, creating an intensely flavorful treat without standing over a hot stove.

  • Tender Consistency: The slow, gentle heat cooks the apples evenly until they are fork-tender and melt in your mouth.
  • Rich Caramel Sauce: As the butter, brown sugar, and apple juices combine during the long cook time, they reduce into a glossy, decadent syrup.
  • Effortless Versatility: Serve them warm as a cozy dessert on their own, spoon them over vanilla ice cream, or layer them into oatmeal and pancakes.

Comprehensive Ingredient Selection

To build a magnificent batch of slow-cooker spiced apples, quality and freshness matter immensely. Gather these ingredients before you begin:

  • The Fruit: 6 to 8 firm baking apples (such as Honeycrisp, Granny Smith, or Braeburn), peeled, halved, and cored.
  • The Sweetness & Spice:
    • 1/2 cup packed dark brown sugar.
    • 1 tablespoon ground cinnamon.
    • 1/4 teaspoon ground nutmeg.
  • The Richness & Liquid:
    • 1/4 cup (1/2 stick) unsalted butter, cut into small pats.
    • 2 tablespoons apple cider or water.
    • 1 teaspoon vanilla extract.
    • A tiny pinch of salt to balance the sweetness.

Step-by-Step Culinary Masterclass

Phase 1: Prep and Core the Apples

  1. Peel and Core: Wash your baking apples thoroughly. Peel them if desired (leaving skins on helps them hold their shape better, but peeling makes them extra tender), then cut each apple in half and use a melon baller or spoon to scoop out the core and seeds.
  2. Arrange in the Slow Cooker: Place the apple halves cut-side up in a single, snug layer inside your clean slow cooker insert.

Phase 2: Seasoning and Buttering

  1. Mix the Spices: In a small bowl, whisk together the dark brown sugar, ground cinnamon, ground nutmeg, and salt.
  2. Fill and Top: Spoon the spiced sugar mixture generously into the hollowed centers and over the tops of each apple half.
  3. Add Butter and Liquid: Dot the top of the apples with the small pats of unsalted butter, then pour the apple cider and vanilla extract around the base of the slow cooker.

Phase 3: Slow Cooking to Perfection

  1. Cover and Cook: Cover the slow cooker with its lid and cook on LOW for 3 to 4 hours (or on HIGH for 2 hours) until the apples are fork-tender and the sugar-butter mixture has melted into a rich, bubbling syrup.
  2. Serve Warm: Carefully spoon the tender spiced apple halves into bowls, drenching them generously with the warm caramel syrup from the bottom of the slow cooker.

Master Chef Pro-Tips for Perfection

  • Choose the Right Apples: Firmer apples like Honeycrisp or Granny Smith hold their shape wonderfully during long cooking times without turning into complete applesauce.
  • Basting for Extra Flavor: If you are home while they cook, spoon some of the warm buttery syrup from the bottom of the crockpot over the apples halfway through the cooking time.
  • Serving Suggestions: These spiced apples are phenomenal served warm alongside a scoop of vanilla bean ice cream, topped with chopped pecans, or spooned over Greek yogurt.

What is your favorite variety of apple to use when making warm cinnamon desserts?

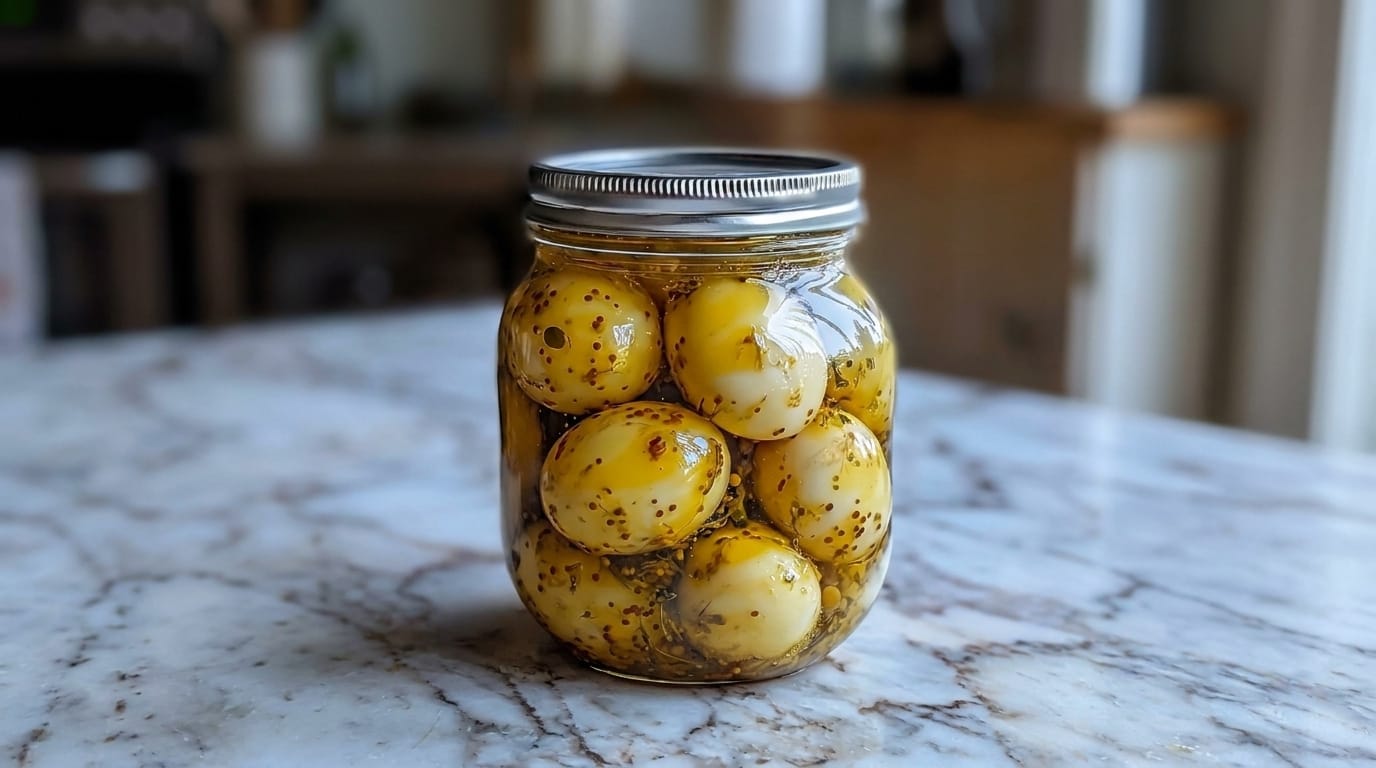
Ultimate Tangy Mustard-Spiced Pickled Quail Eggs

Welcome to your ultimate, deeply comprehensive guide for preparing a tangy, savory, and exceptionally flavorful delicacy: Tangy Mustard-Spiced Pickled Quail Eggs. If you want a masterclass in preserving bite-sized protein with a vibrant pickling liquid packed with mustard seeds, garlic, and dill, this extended guide is built for you.

Why Pickled Quail Eggs Are a Game-Changer

Pickled eggs have a rich history as a staple bar snack and country pantry favorite, but scaling them down to delicate quail eggs transforms them into an elite gourmet appetizer.

  • Bite-Sized Perfection: Quail eggs offer a high yolk-to-white ratio that is exceptionally creamy, absorbing the tangy pickling brine all the way to the center.
  • Make-Ahead Marvel: Because they sit in the jar absorbing flavors over time, they actually taste better the longer they marinate in the refrigerator.
  • Stunning Visual Appeal: Packing the speckled white eggs into a clear glass jar alongside golden mustard seeds and rich pickling spices creates a gorgeous, rustic presentation.

Comprehensive Ingredient Selection

To build a magnificent jar of pickled quail eggs, quality and freshness matter immensely. Gather these ingredients before you begin:

  • The Protein: 24 to 30 fresh quail eggs, hard-boiled and peeled.
  • The Pickling Brine:
    • 1 cup distilled white vinegar or apple cider vinegar.
    • 1 cup water.
    • 1 tablespoon pickling salt or fine sea salt.
    • 1 tablespoon sugar (optional, to balance the sharp acidity).
  • The Spices & Aromatics:
    • 1 tablespoon yellow or brown mustard seeds.
    • 1 teaspoon whole black peppercorns.
    • 2 cloves of fresh garlic, smashed.
    • 1 teaspoon dill weed or a fresh sprig of dill.
    • A pinch of red pepper flakes for an optional kick of heat.

Step-by-Step Culinary Masterclass

Phase 1: Boiling and Peeling the Quail Eggs

  1. Boil the Eggs: Lower your quail eggs gently into a pot of gently boiling water. Cook for exactly 3 to 4 minutes to achieve firm yet tender yolks.
  2. Ice Bath Shock: Transfer the boiled quail eggs immediately into a bowl filled with ice water. Let them chill for 10 minutes to halt the cooking process and shrink the eggs slightly inside their shells.
  3. Gentle Peeling: Gently tap each egg all over on a hard surface to crack the delicate shell, then peel them starting from the wider bottom end under a trickle of cool water or submerged in a bowl. Pat them dry.

Phase 2: Preparing the Brine

  1. Simmer the Liquids: In a small saucepan, combine the distilled white vinegar, water, pickling salt, sugar, mustard seeds, peppercorns, smashed garlic, and spices.
  2. Dissolve and Infuse: Bring the mixture to a gentle simmer over medium heat, stirring until the salt and sugar dissolve completely and the spices release their aromatic oils into the liquid. Remove from heat and let it cool slightly.

Phase 3: Packing the Jar and Marinating

  1. Pack the Eggs: Carefully place your peeled hard-boiled quail eggs into a clean, sterilized glass canning jar, packing them snugly without crushing them.
  2. Pour the Brine: Pour the warm pickling brine—along with all the mustard seeds, garlic, and spices—over the quail eggs, ensuring every single egg is completely submerged beneath the liquid.
  3. Seal and Chill: Seal the jar tightly with its lid and let it cool completely at room temperature. Transfer the jar to the refrigerator and let them marinate for at least 48 hours before tasting to allow the pickle brine to fully penetrate the eggs.

Master Chef Pro-Tips for Perfection

  • Storage Safety: Because these are refrigerator pickled eggs and not processed for shelf-stable canning, they must be stored continuously in the refrigerator and consumed within 2 to 3 weeks.
  • The Peeling Trick: Quail egg inner membranes can be tricky; peeling them while submerged in water helps the shell slide off cleanly without damaging the egg whites.
  • Serving Suggestions: Serve these tangy mustard-spiced eggs straight from the jar as a snack, chop them up into a gourmet potato salad, or include them on an artisanal charcuterie board.

What is your favorite spice or herb to infuse into homemade pickled eggs?

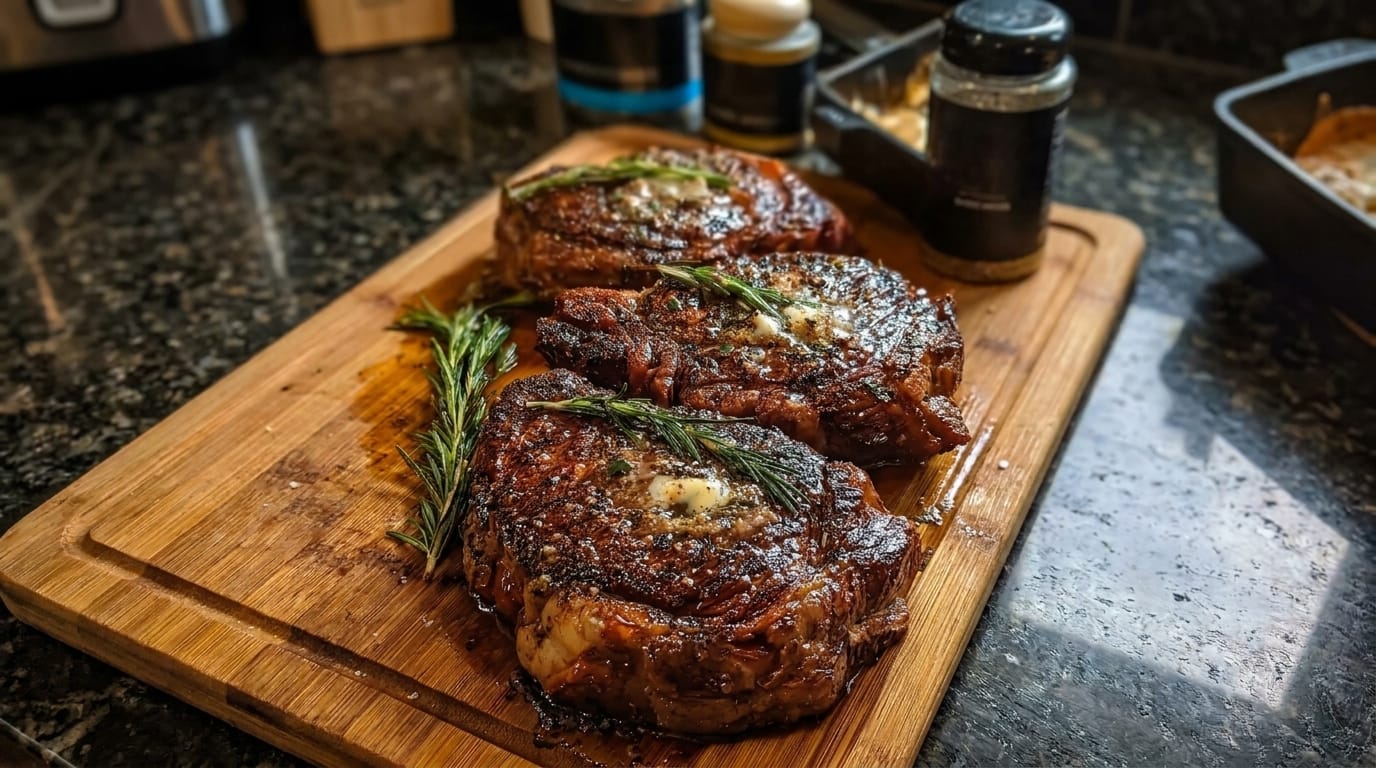
Ultimate Herb-Buttered Ribeye Steaks

Welcome to your ultimate, deeply comprehensive guide for preparing a restaurant-quality, exceptionally flavorful culinary masterpiece: Herb-Buttered Ribeye Steaks. If you want a masterclass in achieving a deeply caramelized, savory crust on the outside while maintaining a succulent, buttery-soft interior topped with melting herb butter, this extended guide is built for you.

Why Ribeye is the King of Steaks

Among all cuts of beef, the ribeye holds a legendary status among steak enthusiasts. Cut from the rib section of the steer, it boasts unmatched marbling—those intricate veins of intramuscular fat running throughout the meat.

  • Incredible Juiciness: As the steak cooks, that rich marbling melts away, naturally basting the muscle fibers from the inside out and ensuring a moist, tender bite every single time.
  • The Ultimate Sear: High-heat searing creates a dark, savory crust packed with caramelized goodness that contrasts beautifully with the tender center.
  • The Butter Finish: Topping a hot ribeye with a pat of garlic-herb butter melts into the crevices, taking the flavor profile to an entirely new dimension of richness.

Comprehensive Ingredient Selection

To build a magnificent plate of ribeye steaks, quality and freshness matter immensely. Gather these ingredients before you begin:

  • The Beef: 3 thick-cut ribeye steaks (at least 1.5 inches thick), well-marbled and preferably prime or high-choice grade.
  • The Herb Butter:
    • 1/2 cup (1 stick) unsalted butter, softened to room temperature.
    • 3 cloves of fresh garlic, finely minced.
    • 2 tablespoons fresh rosemary and thyme leaves, finely chopped.
    • A pinch of flaky sea salt and cracked black pepper.
  • The Seasoning & Searing:
    • 1 tablespoon high-smoke-point oil (such as avocado, canola, or grapeseed oil).
    • Coarse kosher salt and freshly cracked black pepper.
    • Additional fresh sprigs of rosemary for garnish and pan aromatics.

Step-by-Step Culinary Masterclass

Phase 1: Preparation and Temperature

  1. Bring to Room Temperature: Remove your ribeye steaks from the refrigerator 35 to 45 minutes before cooking. Allowing the meat to lose its chill is essential for even cooking from edge to center.
  2. Pat Dry: Thoroughly pat every steak dry with paper towels. Surface moisture is the enemy of a great crust, so ensuring a completely dry surface guarantees a golden-brown sear.
  3. Season Generously: Season all sides of the steaks liberally with coarse kosher salt and freshly cracked black pepper just before cooking, pressing the spices into the meat.

Phase 2: Searing to Perfection

  1. Heat the Skillet: Place a heavy cast-iron skillet over high heat until it is smoking hot. Add your high-smoke-point oil, swirling to coat the bottom evenly.
  2. The Sear: Carefully lay the ribeye steaks into the hot skillet away from you to prevent splashing. Sear undisturbed for 2 to 3 minutes to build a deep, caramelized crust, then flip.
  3. Basting with Butter: Once flipped, reduce the heat to medium. Add your softened herb butter, minced garlic, and fresh rosemary sprigs directly into the pan. As the butter melts and foams up, use a large spoon to continuously scoop the hot, fragrant herb butter over the top of the steaks (a technique known as basting).

Phase 3: Temperature Control and Resting

  1. Monitor Doneness: Use a digital meat thermometer inserted into the thickest part of the steak to check internal temperature:
    • Rare: 120°F to 125°F (49°C to 52°C)
    • Medium-Rare: 130°F to 135°F (54°C to 57°C)
    • Medium: 140°F to 145°F (60°C to 63°C)
  2. The Crucial Rest: Transfer the cooked ribeye steaks to a warm wooden cutting board. Top each steak with an extra pat of herb butter and fresh rosemary sprigs. Tent loosely with foil and let rest for 8 to 10 minutes so the juices redistribute evenly throughout the muscle.

Master Chef Pro-Tips for Perfection

  • Do Not Skimp on Thickness: Always choose thick-cut steaks (1.5 inches or more). Thin steaks overcook in the center long before you can develop a proper crust on the outside.
  • Cast Iron is Best: A heavy cast-iron skillet retains heat better than standard pans, giving you that quintessential steakhouse crust.
  • Slice Against the Grain: When serving, slice the steak perpendicular to the direction of the muscle fibers for the most tender bite possible.

What is your favorite side dish to serve alongside a perfectly seared ribeye steak, like garlic mashed potatoes or roasted asparagus?

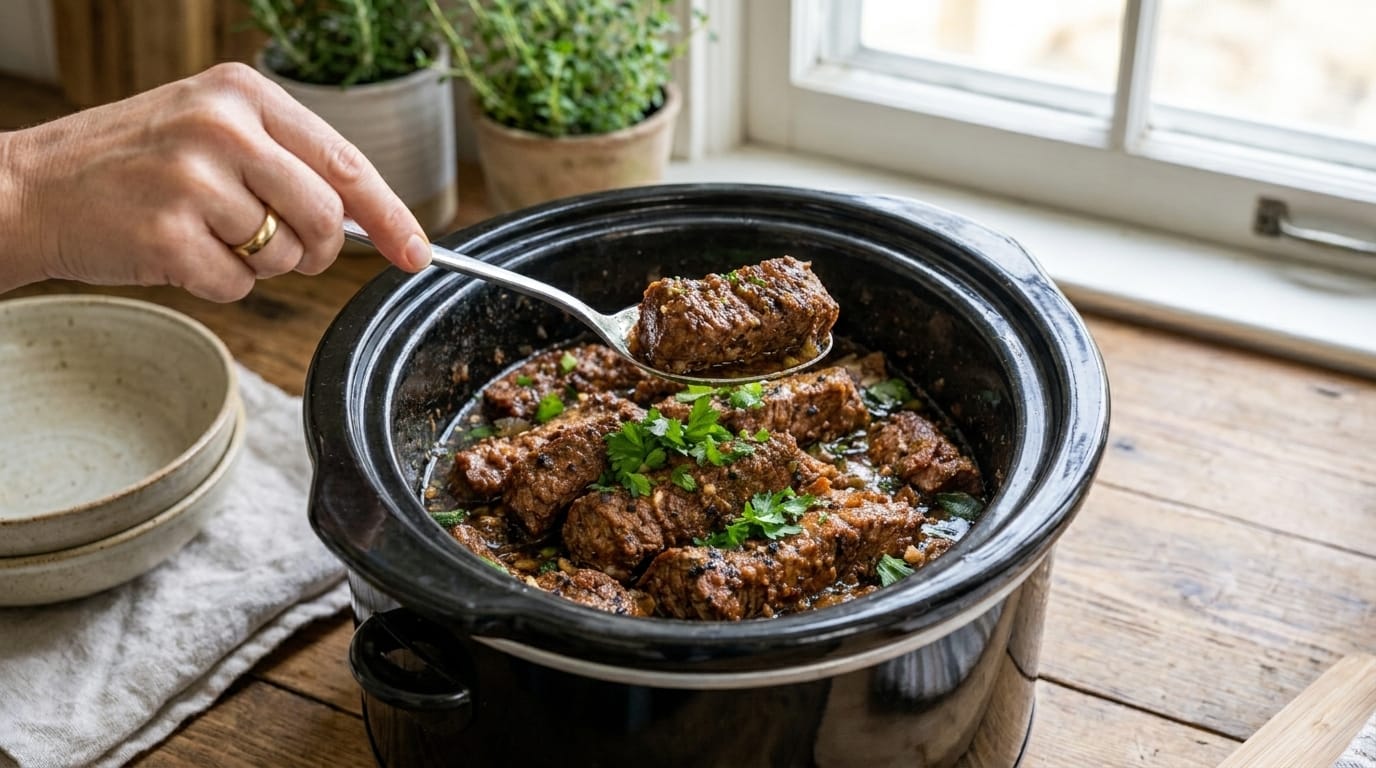
Slow Cooker Garlic Herb Beef Bites – Tender, Juicy & Packed with Rich Flavor

Slow Cooker Garlic Herb Beef Bites are the ultimate comfort food for anyone who loves tender, flavorful beef with a rich homemade sauce. This recipe transforms simple pieces of beef into melt-in-your-mouth bites that are slowly cooked with garlic, herbs, butter, onions, and savory seasonings until every piece becomes incredibly tender.

The dish in the image features beautifully browned beef pieces sitting in a slow cooker with a rich, dark, flavorful sauce. The deep color comes from slow cooking, caramelized beef, garlic, and herbs blending together over several hours. Each bite is juicy, tender, and coated with a delicious savory glaze.

This recipe is perfect for busy weeknight dinners because the slow cooker does most of the work. After a quick sear for extra flavor, the beef gently cooks until it becomes fork-tender. Serve these garlic herb beef bites over creamy mashed potatoes, rice, egg noodles, or alongside roasted vegetables for a complete family meal.


Why You’ll Love These Slow Cooker Garlic Herb Beef Bites

These beef bites deliver everything you want from a slow-cooked dinner: incredible flavor, minimal effort, and a comforting homemade taste.

The slow cooking process allows tougher cuts of beef to become extremely tender while absorbing the flavors of garlic, herbs, broth, and seasonings.

The garlic butter sauce is the highlight of this recipe. It creates a rich coating that combines savory beef flavor with aromatic herbs and a subtle buttery finish.

This recipe is also extremely versatile. You can serve it as a main dish with traditional sides, use it for meal prep, or turn leftovers into sandwiches, wraps, or beef bowls.


Ingredients

For the Beef Bites

  • 3 pounds beef chuck roast or stew beef, cut into 1½-inch cubes
  • 2 tablespoons olive oil
  • 2 teaspoons salt
  • 1 teaspoon black pepper
  • 2 teaspoons garlic powder
  • 1 teaspoon onion powder
  • 1 teaspoon smoked paprika
  • 2 tablespoons all-purpose flour (optional, for better browning)

For the Garlic Herb Sauce

  • 5 tablespoons unsalted butter
  • 8 cloves garlic, minced
  • 1 large yellow onion, sliced
  • 2 cups beef broth
  • 2 tablespoons Worcestershire sauce
  • 1 tablespoon soy sauce
  • 1 tablespoon tomato paste
  • 1 tablespoon Dijon mustard
  • 2 teaspoons dried thyme
  • 2 teaspoons dried rosemary
  • 1 teaspoon dried parsley
  • ½ teaspoon crushed red pepper flakes (optional)
  • 1 teaspoon black pepper

For Thickening the Sauce

  • 2 tablespoons cornstarch
  • 3 tablespoons cold water

For Garnishing

  • Fresh parsley, chopped
  • Fresh thyme leaves
  • Extra cracked black pepper

How to Make Slow Cooker Garlic Herb Beef Bites

1. Prepare the Beef

Start by cutting the beef into evenly sized pieces.

Using similar-sized chunks helps the beef cook evenly so every bite reaches the same tender texture.

Pat the beef dry with paper towels.

Removing excess moisture is important because dry beef develops a much better crust when seared.

Season the beef with salt, black pepper, garlic powder, onion powder, and smoked paprika.

If using flour, lightly toss the seasoned beef with flour. This helps create a deeper browned exterior and slightly thickens the final sauce.


2. Sear the Beef for Maximum Flavor

Heat olive oil in a large skillet over medium-high heat.

Once the oil is hot, add the beef pieces in a single layer.

Do not overcrowd the pan. Work in batches if necessary.

Sear the beef for approximately 2 to 3 minutes per side until a deep golden-brown crust forms.

The goal is not to cook the beef completely but to create extra flavor through browning.

Transfer the browned beef pieces to the slow cooker.


3. Prepare the Garlic Herb Butter Sauce

Reduce the skillet heat to medium.

Add the butter.

Once melted, add the minced garlic and sliced onion.

Cook for approximately 1 to 2 minutes until the garlic becomes fragrant and the onions begin to soften.

Be careful not to burn the garlic because it can become bitter.

Add the tomato paste and cook for another minute.

Cooking tomato paste briefly helps develop a richer flavor.


4. Add the Liquid Ingredients

Pour the beef broth into the skillet.

Use a wooden spoon to scrape up any browned bits from the bottom of the pan.

These caramelized pieces contain incredible flavor and will make the sauce much richer.

Add:

  • Worcestershire sauce
  • Soy sauce
  • Dijon mustard
  • Thyme
  • Rosemary
  • Parsley
  • Black pepper

Stir everything together.


5. Transfer Everything to the Slow Cooker

Pour the garlic herb sauce over the beef in the slow cooker.

Make sure the beef pieces are mostly coated with the liquid and seasonings.

Cover with the lid.


Slow Cook the Beef

6. Cook Until Tender

Cook on:

LOW: 7 to 8 hours
HIGH: 4 to 5 hours

Low cooking is recommended because it allows the beef fibers to slowly soften, creating the tender texture shown in the image.

The beef is ready when it easily breaks apart with a fork.

If the beef still feels chewy, continue cooking for another 30 to 60 minutes.

Tough beef usually needs more cooking time.


7. Thicken the Sauce

Once the beef is tender, mix cornstarch and cold water in a small bowl.

Stir until completely smooth.

Pour the slurry into the slow cooker.

Gently stir without breaking apart the beef.

Cover and cook on HIGH for another 15 to 20 minutes until the sauce thickens.

The final sauce should coat the beef pieces with a glossy, rich finish.


8. Finish With Fresh Herbs

Before serving, sprinkle fresh parsley and thyme over the beef.

Add extra cracked black pepper if desired.

The fresh herbs brighten the rich slow-cooked flavor and add a beautiful finishing touch.


What to Serve With Garlic Herb Beef Bites

These beef bites pair perfectly with comforting side dishes.

Creamy Mashed Potatoes

Mashed potatoes are one of the best choices because they soak up the flavorful garlic herb sauce.

Rice

Serve over white rice, jasmine rice, or brown rice for an easy meal.

Egg Noodles

Buttery noodles make an excellent pairing with the savory beef sauce.

Roasted Vegetables

Try:

  • Broccoli
  • Carrots
  • Green beans
  • Brussels sprouts
  • Asparagus

Crusty Bread

Warm bread is perfect for soaking up every drop of the sauce.


Tips for the Best Slow Cooker Garlic Herb Beef Bites

Choose the Right Cut of Beef

Chuck roast is ideal because it contains enough connective tissue and marbling to become tender during slow cooking.

Sear Before Slow Cooking

While optional, searing creates deeper flavor and a more appealing color.

Cut Beef Evenly

Uniform pieces cook more consistently.

Avoid Adding Too Much Liquid

The beef releases its own juices while cooking, so the sauce becomes richer over time.

Use Fresh Garlic

Fresh garlic creates a much stronger and more aromatic flavor.

Cook Low and Slow

The slow cooker works best when you give the beef enough time to become tender.

Let the Sauce Thicken

Do not rush the final thickening step. A few extra minutes creates a better coating.


Easy Recipe Variations

Creamy Garlic Beef Bites

Add:

  • ½ cup heavy cream
  • ½ cup Parmesan cheese

during the final 15 minutes of cooking for a creamy version.


Mushroom Garlic Beef Bites

Add 8 ounces sliced mushrooms with the onions.

The mushrooms absorb the garlic herb sauce beautifully.


Spicy Garlic Beef Bites

Add:

  • Extra red pepper flakes
  • Cayenne pepper
  • Hot sauce

for a spicy version.


Garlic Butter Steak Bites

Use sirloin steak cubes instead of chuck roast.

Reduce cooking time because steak cooks faster.


BBQ Garlic Beef Bites

Add ½ cup barbecue sauce to the slow cooker sauce for a smoky sweet variation.


How to Store Leftovers

Allow the beef to cool completely.

Store in an airtight container with the sauce.

Refrigerate for up to 4 days.

Keeping the beef stored in the sauce helps maintain moisture and flavor.


How to Reheat

Warm the beef gently in a saucepan over medium-low heat.

Add a splash of beef broth if the sauce becomes too thick.

You can also microwave individual portions in short intervals, stirring occasionally.


Can You Freeze Garlic Herb Beef Bites?

Yes, these beef bites freeze very well.

Place cooled beef and sauce into freezer-safe containers.

Freeze for up to 3 months.

Thaw overnight in the refrigerator before reheating.

The flavors often become even better after freezing because the beef continues absorbing the sauce.


Final Thoughts

Slow Cooker Garlic Herb Beef Bites are the perfect example of a comforting homemade meal that requires very little effort. Tender chunks of beef slowly cook with garlic, butter, herbs, and savory seasonings until they become rich, juicy, and completely irresistible.

The combination of browned beef, aromatic garlic, fresh herbs, and a flavorful sauce creates a dinner that feels special while remaining simple enough for any weeknight.

Serve these beef bites over mashed potatoes, rice, or noodles, add your favorite vegetables, and enjoy a cozy meal that brings restaurant-quality flavor straight to your kitchen.

Ultimate Cheesy Spinach Egg Muffins

Welcome to your ultimate, deeply comprehensive guide for preparing a healthy, protein-packed, and exceptionally comforting culinary masterpiece: Cheesy Spinach Egg Muffins. If you want a masterclass in achieving golden, fluffy, bite-sized breakfast treats that are loaded with melted cheese and fresh spinach while remaining completely foolproof, this extended guide is built for you.

Why These Egg Muffins Belong in Your Routine

Breakfast is often called the most important meal of the day, yet finding quick, nutrient-dense options that don’t sacrifice flavor can feel like an ongoing challenge. These portable, baked egg muffins bridge the gap between wholesome nutrition and pure culinary satisfaction.

  • High-Protein Energy: Built primarily with farm-fresh eggs, these muffins provide a sustained protein boost that keeps you full and energized throughout your busy morning hours.
  • Completely Customizable: While spinach and cheese form a classic, vibrant combination, this base recipe welcomes endless variations, allowing you to clean out your refrigerator by adding leftover cooked meats, mushrooms, bell peppers, or herbs.
  • Meal Prep Champion: You can bake a large batch in under half an hour, store them in the refrigerator or freezer, and simply reheat them for a hot, satisfying breakfast in seconds.

Comprehensive Ingredient Selection

To build a magnificent batch of cheesy spinach egg muffins, quality and freshness matter immensely. Gather these ingredients before you begin:

  • The Core Protein: 6 to 8 large whole eggs, ensuring a rich texture and vibrant yellow color.
  • The Dairy & Richness:
    • 1/4 cup whole milk, heavy cream, or cottage cheese to guarantee a tender, fluffy crumb.
    • 1 cup shredded cheese (such as sharp cheddar, mozzarella, or crumbled feta) for an incredible melt and savory depth.
  • The Greens & Aromatics:
    • 2 cups fresh baby spinach, washed, dried, and roughly chopped.
    • 2 tablespoons finely diced yellow onion or green onions.
    • 1 clove of fresh garlic, minced.
  • The Seasonings:
    • 1/2 teaspoon kosher salt or sea salt.
    • 1/4 teaspoon freshly cracked black pepper.
    • A pinch of garlic powder and smoked paprika for extra dimension.

Step-by-Step Culinary Masterclass

Phase 1: Preparation and Oven Setup

  1. Preheat the Oven: Preheat your oven to 375°F (190°C). Proper preheating is essential so that the eggs begin rising immediately upon entering the heat.
  2. Grease the Muffin Tin: Thoroughly grease a standard 12-cup muffin tin with non-stick cooking spray, melted butter, or high-smoke-point oil. Alternatively, line the cups with silicone baking liners to ensure zero sticking.

Phase 2: Mixing the Egg Base

  1. Whisk the Eggs: In a large mixing bowl, crack your large eggs and add the whole milk or cream. Whisk vigorously for 1 to 2 minutes until thoroughly combined and slightly frothy, which incorporates air for a fluffier texture.
  2. Season the Mixture: Stir in the salt, black pepper, garlic powder, and smoked paprika directly into the liquid egg mixture, ensuring the spices are evenly distributed.

Phase 3: Layering the Fillings and Baking

  1. Distribute the Greens and Cheese: Divide your chopped fresh spinach, diced onions, minced garlic, and the majority of your shredded cheese evenly among the greased muffin cups, letting the ingredients settle into the bottom of each well.
  2. Pour the Egg Liquid: Carefully pour the seasoned egg mixture over the fillings in each muffin cup, filling them about three-quarters of the full capacity to allow room for the eggs to puff up during baking. Top with the remaining pinches of cheese.
  3. Bake to Golden Perfection: Place the muffin tin into the center of your preheated oven and bake for 20 to 22 minutes, or until the egg muffins are fully set in the center, puffed up nicely, and golden brown on top.
  4. Cool and Release: Remove the tin from the oven and let the muffins rest in the pan for 5 minutes. They will deflate slightly as they cool. Run a thin knife or spatula around the edges to release them onto a cooling rack or serving plate.

Master Chef Pro-Tips for Perfection

  • Prevent Deflation: Whisking air into your eggs and using a touch of milk or cottage cheese helps create structure, preventing the muffins from turning rubbery or collapsing flat upon cooling.
  • Wring Out Excess Moisture: If you use frozen spinach instead of fresh, make sure to thaw and squeeze out every drop of excess water using paper towels before adding it to your muffin cups, preventing soggy eggs.
  • Storage and Reheating: Store leftover baked egg muffins in an airtight container in the refrigerator for up to 4 days. Reheat them in the microwave for 30 to 45 seconds for a quick, steaming hot breakfast.

What is your absolute favorite cheese to incorporate into fluffy, baked breakfast egg muffins?

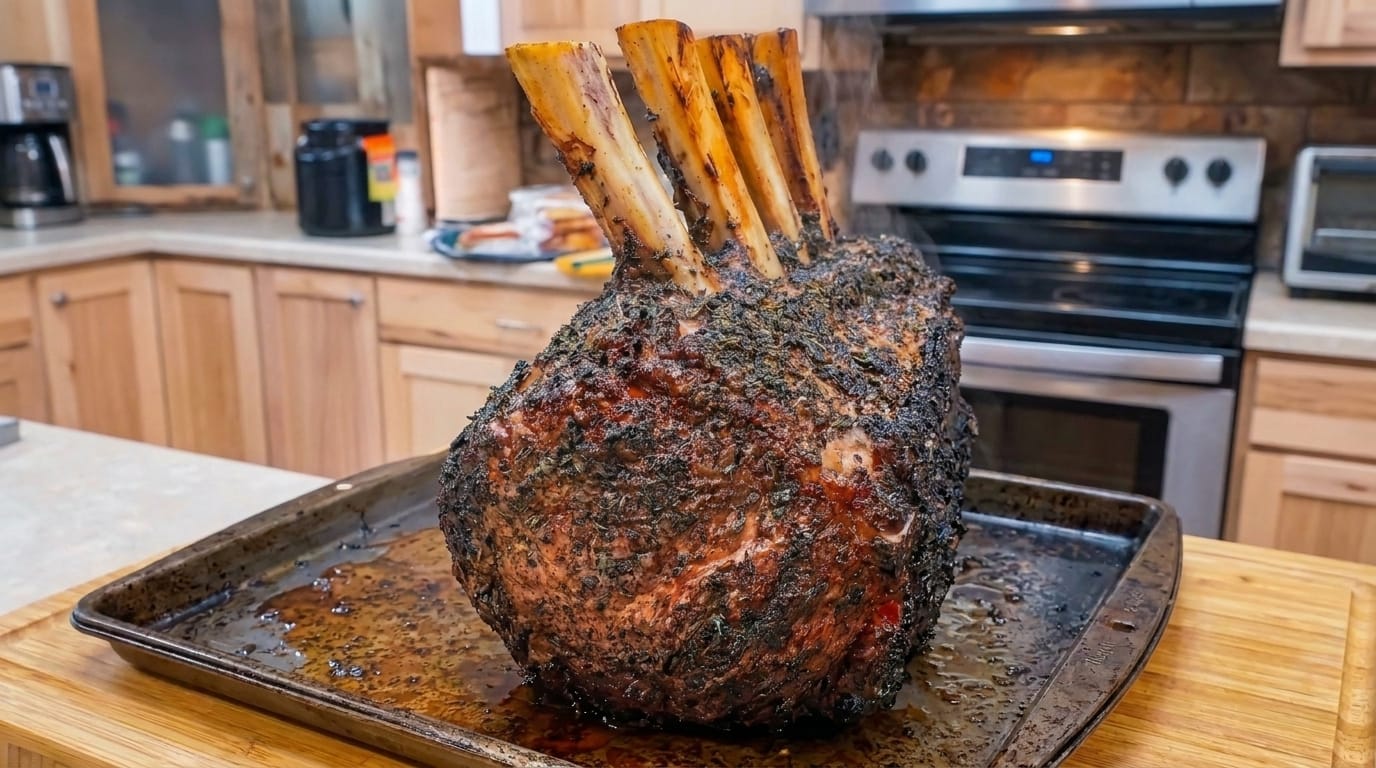
Ultimate Herb-Crusted Prime Rib Roast

Welcome to your ultimate, deeply comprehensive guide for preparing a show-stopping, majestic culinary centerpiece: Herb-Crusted Prime Rib Roast. If you want a masterclass in achieving a deeply caramelized, savory herb exterior while maintaining a succulent, buttery-soft pink interior that will amaze your family and guests, this extended guide is built for you.

Why This Roast is the King of Special Occasions

The prime rib roast—often referred to as a standing rib roast—is widely considered the ultimate crown jewel of holiday dinners, milestone celebrations, and epic weekend feasts. When treated with respect and cooked using precise temperature control, it delivers an eating experience unlike any other cut of beef.

  • Exceptional Marbling: Because prime rib is cut from the rib primal section, it features intricate marbling of fat throughout the muscle grain. As it cooks, this internal fat melts and bastes the meat from the inside out, guaranteeing phenomenal juiciness.
  • The Crust-to-Center Contrast: An herb-and-garlic paste roasted at high temperatures creates a dark, savory crust packed with flavor, contrasting perfectly with the tender, juicy beef slices inside.
  • Complete Showmanship: Serving a towering bone-in standing rib roast on a carving board instantly elevates any dining table into a fine-dining restaurant experience.

Comprehensive Ingredient Selection

To build a magnificent prime rib roast, quality and freshness matter immensely. Gather these ingredients before you begin:

  • The Beef: A 4 to 7-bone standing rib roast (prime grade or high-choice grade), preferably bone-in and Frenched (with the bone ends cleaned of meat for presentation).
  • The Herb Paste & Aromatics:
    • 1/4 cup extra-virgin olive oil or softened unsalted butter to bind the crust.
    • 6 cloves of fresh garlic, finely minced or mashed into a paste.
    • 3 tablespoons fresh rosemary leaves, finely chopped.
    • 3 tablespoons fresh thyme leaves, stripped and chopped.
    • 2 tablespoons coarse sea salt or kosher salt.
    • 1 tablespoon freshly cracked black pepper.
    • 1 teaspoon Dijon mustard (optional, for added tang and binder).

Step-by-Step Culinary Masterclass

Phase 1: Preparation and Dry Brining

  1. Bring to Temperature: Remove your prime rib roast from the refrigerator at least 2 to 3 hours before cooking. Allowing the meat to lose its chill ensures even cooking throughout the thick roast.
  2. Dry Brining (Recommended): Generously salt the entire surface of the beef with coarse salt 24 hours in advance, placing it uncovered on a wire rack inside the refrigerator. This draws out surface moisture, seasons deep within the muscle, and sets you up for an exceptional crust.
  3. Pat Dry: If you did not dry brine overnight, pat the roast completely dry with paper towels immediately before applying the seasoning paste.

Phase 2: Applying the Herb Crust

  1. Mix the Paste: In a small mixing bowl, combine the extra-virgin olive oil (or softened butter), minced garlic, chopped rosemary, chopped thyme, coarse salt, and black pepper until a thick, fragrant paste forms.
  2. Coat the Beef: Rub the herb paste thoroughly over all sides of the prime rib roast, pressing it firmly into the fat cap and exposed meat. If your bones are Frenched, you can wrap them in small squares of aluminum foil to prevent them from charring too darkly during roasting.

Phase 3: The Roasting Process

  1. Preheat the Oven: Preheat your oven to a high searing temperature of 450°F (230°C) for the first 15 to 20 minutes to lock in juices and build the outer crust, then drop the temperature down to 325°F (165°C) for slow, gentle cooking. Alternatively, use the low-and-slow reverse sear method.
  2. Monitor Internal Temperature: Insert a digital meat thermometer into the very center of the thickest part of the roast, avoiding bone contact.
    • Rare: Pull at 120°F to 125°F (49°C to 52°C)
    • Medium-Rare: Pull at 130°F to 135°F (54°C to 57°C)
    • Medium: Pull at 140°F to 145°F (60°C to 63°C)
  3. The Crucial Rest: Remove the prime rib from the oven when it is 5 degrees below your target temperature. Transfer it to a warm cutting board, tent loosely with aluminum foil, and let it rest for 25 to 30 minutes. This resting window allows the muscle fibers to relax and the juices to redistribute evenly across every slice.

Master Chef Pro-Tips for Perfection

  • Do Not Skip the Bones: Even though boneless roasts are easier to carve, cooking your prime rib bone-in acts as a natural insulation barrier, protecting the meat near the bone from overcooking while adding deep, savory flavor to the roast.
  • Make a Quick Au Jus: Deglace the roasting pan with a splash of red wine or beef broth, scraping up all those caramelized brown bits from the bottom, and simmer it down into a rich, savory au jus to drizzle over the slices.
  • Carving Technique: Slice the roast by cutting along the natural seam of the bone, removing the entire rack of ribs in one piece, and then slicing individual portions against the grain to your desired thickness.

What side dish do you prefer to pair alongside a magnificent prime rib roast, such as roasted garlic potatoes or creamed spinach?

Ultimate Mini Shepherd’s Pie Bites

Welcome to your ultimate guide for preparing a delightful, bite-sized comfort food masterpiece: Mini Shepherd’s Pie Bites. If you want a crowd-pleasing appetizer or single-serving meal that packs all the savory goodness of a traditional shepherd’s pie into golden, individual portions, this comprehensive recipe masterclass is designed just for you.

Why This Recipe Works

Shepherd’s pie is a beloved classic, but turning it into individual bites takes comfort food to a whole new level. By layering savory ground beef or lamb and rich vegetables inside a flaky crust, then topping it with golden piped mashed potatoes, you get a gorgeous presentation and an explosion of flavor in every bite.

  • Portion-Controlled Comfort: Serving individual mini pies makes them fantastic for parties, gatherings, or fun weeknight dinners where everyone gets their own personal pie.
  • The Ultimate Texture Contrast: A buttery, crisp outer crust meets savory seasoned meat and a creamy, golden-brown whipped potato topping.
  • Effortless Convenience: Simple ingredients and straightforward assembly mean you can whip up a big batch of these show-stopping treats with ease.

Essential Ingredients

To recreate this savory masterpiece in your own kitchen, gather the following high-quality ingredients:

  • The Crust: 1 sheet of store-bought puff pastry or pie crust, cut into circles to fit muffin tins.
  • The Filling: 1 lb ground beef (or ground lamb), browned with finely diced onions, carrots, and peas.
  • The Topping: 2 cups creamy mashed potatoes (made with butter, milk, salt, and pepper).
  • The Seasonings: 2 tablespoons tomato paste, 1 tablespoon Worcestershire sauce, garlic powder, salt, and black pepper.
  • The Finish: A sprinkle of grated Parmesan cheese and fresh parsley for garnish.

Step-by-Step Cooking Instructions

  1. Preheat and Prep: Preheat your oven to 400°F (200°C) and lightly grease a muffin tin.
  2. Make the Filling: In a skillet over medium heat, brown your ground beef with diced onions and carrots until tender. Stir in the peas, tomato paste, Worcestershire sauce, salt, pepper, and a splash of beef broth to create a rich filling.
  3. Form the Crusts: Roll out your pastry dough and cut circles to press gently into each cup of the greased muffin tin, forming small pastry cups.
  4. Layer the Meat: Spoon the savory ground beef and vegetable filling into each pastry cup, filling them about three-quarters full.
  5. Add the Mashed Potato Topping: Spoon or pipe creamy mashed potatoes generously on top of the meat filling in each cup. Sprinkle a touch of Parmesan cheese over the potatoes.
  6. Bake: Bake in the preheated oven for 20 to 25 minutes until the pastry edges are golden brown and the potato peaks are lightly browned and crisp. Let cool slightly before removing from the tin and serving.

Chef’s Pro-Tips for Success

  • Use Thick Mashed Potatoes: Ensure your mashed potatoes are thick and hold their shape well so they pipe or spoon neatly onto the mini pies without sagging.
  • Broil for Color: If the potato peaks need a bit more golden color at the end of baking, switch your oven to broil for the last 1 to 2 minutes, watching closely so they don’t burn.
  • Garnish and Serve: Top each mini bite with a fresh leaf of parsley right before serving for a vibrant pop of color.

What is your favorite comfort food classic to transform into fun, bite-sized appetizers?

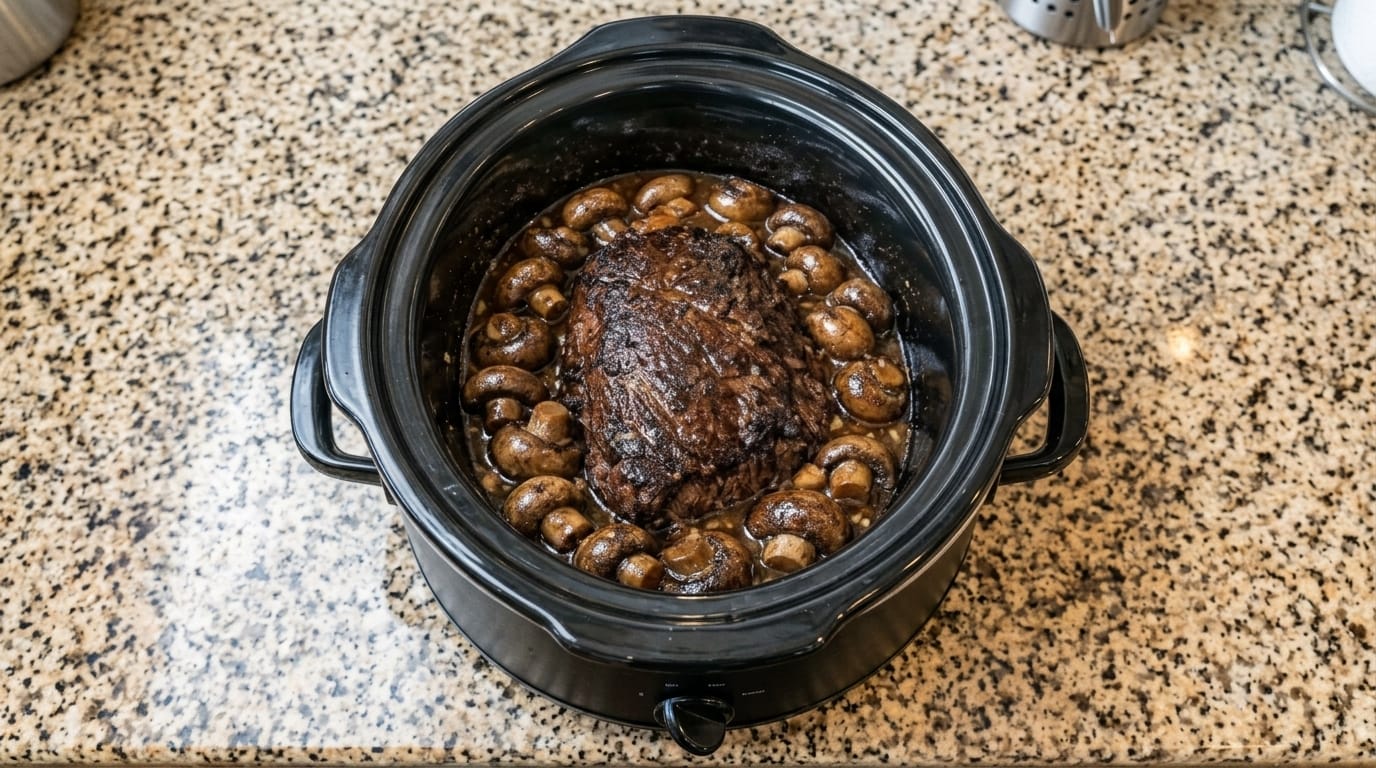
Ultimate Slow-Cooker Garlic Butter Mushroom Beef Roast

Welcome to your ultimate guide for preparing a rich, earthy, and exceptionally comforting slow-cooker masterpiece: Slow-Cooker Garlic Butter Mushroom Beef Roast. If you want a hands-off meal that delivers melt-in-your-mouth tenderness infused with savory garlic, rich butter, and caramelized whole mushrooms, this comprehensive recipe masterclass is designed just for you.

Why This Recipe Works

Cooking a roast low and slow in a crockpot is the gold standard for transforming tough cuts of meat into culinary perfection. By surrounding the beef with whole button mushrooms and a luscious garlic butter broth, every single bite absorbs an incredible depth of savory flavor.

  • Ultimate Tenderness: A well-marbled chuck roast breaks down completely over hours of gentle heat, yielding fork-tender meat that shreds effortlessly.
  • Rich, Earthy Flavors: As the whole mushrooms roast alongside the beef, they release their natural juices into the broth, creating an extraordinary gravy.
  • Effortless Convenience: With minimal active prep time, you can load your slow cooker in the morning and come home to a gourmet feast.

Essential Ingredients

To recreate this savory masterpiece in your own kitchen, gather the following high-quality ingredients:

  • The Beef: A 3 to 4-pound beef chuck roast, well-marbled for maximum moisture and flavor.
  • The Mushrooms: 16 oz whole white button mushrooms or cremini mushrooms, cleaned and trimmed.
  • The Aromatics & Sauce: 4 cloves minced garlic; 1/2 cup beef stock or broth; 2 tablespoons Worcestershire sauce.
  • The Fat & Richness: 1/2 cup (1 stick) of unsalted butter, cut into pats and placed over the roast.
  • The Seasonings: Salt, freshly cracked black pepper, garlic powder, and dried thyme or rosemary.

Step-by-Step Cooking Instructions

  1. Prep the Slow Cooker: Place your clean slow cooker insert on a stable countertop and ensure it is ready for loading.
  2. Season the Beef: Pat your chuck roast completely dry with paper towels, then season all sides generously with salt, black pepper, garlic powder, and dried thyme.
  3. Position the Roast: Place the seasoned chuck roast directly into the center of the slow cooker insert.
  4. Add the Mushrooms and Garlic: Scatter the whole button mushrooms all around the roast, filling the gaps in the slow cooker. Sprinkle the minced garlic evenly over the meat and mushrooms.
  5. Add Liquid and Butter: Pour the beef stock and Worcestershire sauce around the edges of the roast. Arrange the pats of butter directly across the top of the beef.
  6. Cook Low and Slow: Cover the slow cooker with its lid and cook on LOW for 8 to 10 hours (or on HIGH for 5 to 6 hours) until the beef is fork-tender and the mushrooms are tender and juicy.
  7. Serve: Spoon the tender mushrooms and rich garlic butter sauce generously over slices or shredded portions of the pot roast.

Chef’s Pro-Tips for Success

  • Do Not Overcrowd Liquid: Mushrooms naturally release a lot of moisture as they cook, so keeping the added beef broth to just half a cup ensures your sauce stays concentrated and flavorful rather than watery.
  • Thicken the Sauce: If you prefer a gravy consistency, ladle out the cooking juices into a saucepan, whisk in a cornstarch slurry, and simmer until thick and glossy.
  • Serving Suggestions: Serve this savory mushroom roast over a bed of buttery mashed potatoes, egg noodles, or alongside roasted asparagus.

What is your absolute favorite variety of mushroom to use in slow-cooked beef dishes?

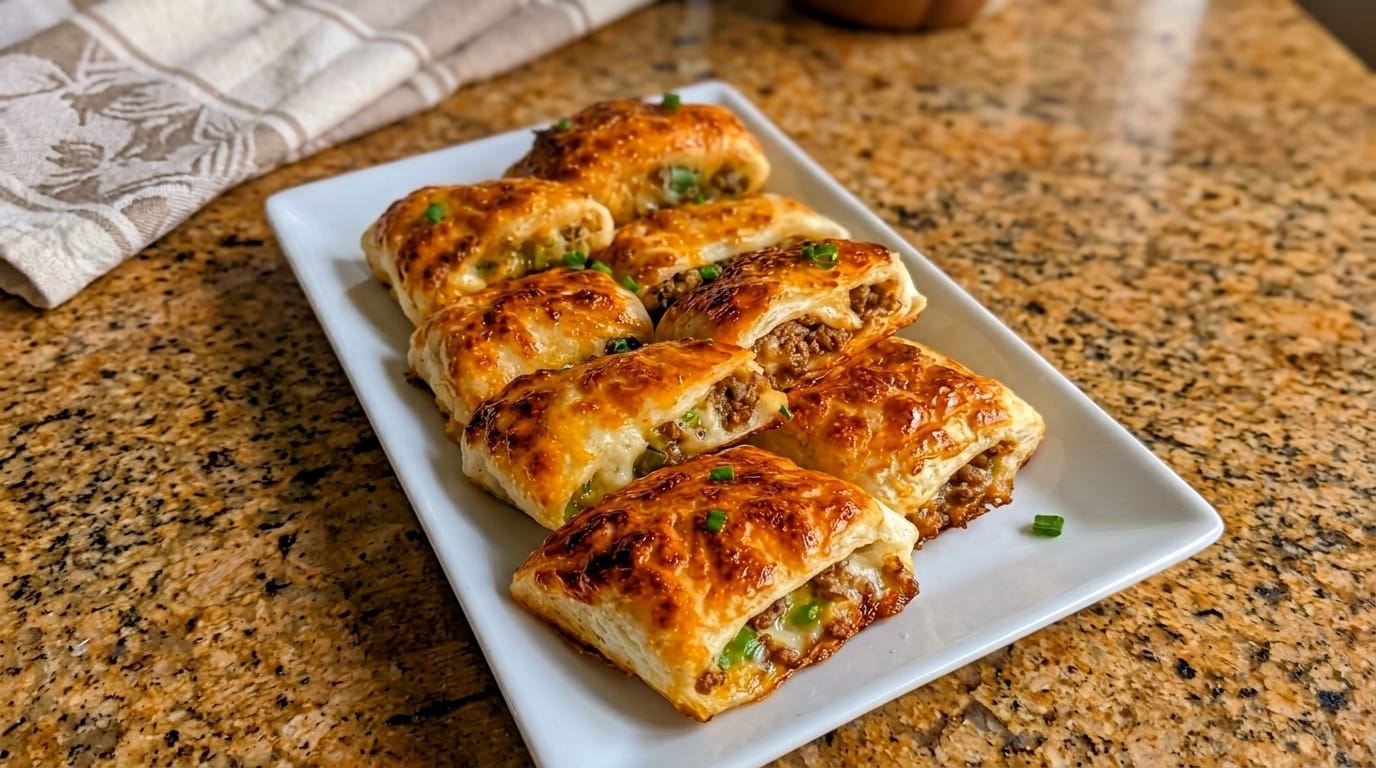
Ultimate Cheesy Beef Puff Pastry Pockets

Welcome to your ultimate guide for preparing a golden, flaky, and exceptionally savory comfort food masterpiece: Cheesy Beef Puff Pastry Pockets. If you want a show-stopping appetizer or hearty meal that delivers an incredible cheese pull and rich beef filling with minimal effort, this comprehensive recipe masterclass is designed just for you.

Why This Recipe Works

Puff pastry pockets are a favorite because they turn simple ingredients into bakery-quality treats. By wrapping seasoned ground beef and gooey cheese inside buttery, flaky layers of pastry, you get a sensational texture contrast that satisfies every craving.

  • Flaky Perfection: Baking high-quality puff pastry yields a golden, shattering crust that provides an incredible crunch with every bite.
  • The Ultimate Cheese Pull: Loaded with melting cheese that stretches and oozes, making every portion visually stunning and deliciously rich.
  • Effortless Convenience: With simple ingredients and straightforward steps, you can assemble and bake these golden pockets in no time.

Essential Ingredients

To recreate this savory masterpiece in your own kitchen, gather the following high-quality ingredients:

  • The Pastry: 1 sheet of store-bought puff pastry, thawed.
  • The Protein: 1 lb ground beef (or ground chicken), browned and seasoned.
  • The Cheese: 1.5 cups shredded mozzarella or cheddar cheese.
  • The Aromatics & Veggies: 1/4 cup diced onions, 1/4 cup chopped green bell peppers, and 2 cloves minced garlic.
  • The Seasonings: Salt, black pepper, garlic powder, and an egg beaten with a splash of water for the egg wash.

Step-by-Step Cooking Instructions

  1. Preheat and Prep: Preheat your oven to 400°F (200°C) and line a baking sheet with parchment paper.
  2. Cook the Filling: In a skillet over medium heat, brown the ground beef along with the diced onions, bell peppers, and minced garlic until fully cooked. Drain excess fat and season with salt, pepper, and garlic powder.
  3. Roll Out the Pastry: Gently roll out your thawed puff pastry sheet on a lightly floured surface. Cut it into uniform rectangles or squares.
  4. Assemble the Pockets: Spoon a generous portion of the seasoned beef mixture onto one half of each pastry rectangle, topping it generously with shredded cheese.
  5. Seal and Score: Fold the pastry over the filling to create pockets. Crimp the edges tightly with a fork to seal, and brush the tops with the egg wash for a golden shine.
  6. Bake: Bake in the preheated oven for 18 to 22 minutes until the pastry is puffed, golden brown, and crisp. Let cool slightly before slicing and serving.

Chef’s Pro-Tips for Success

  • Keep the Pastry Cold: If your puff pastry becomes too warm and sticky while working with it, pop it back into the refrigerator for 10 minutes before baking to ensure maximum flakiness.
  • Seal Securely: Make sure to press the edges down firmly so the melted cheese stays locked inside the pockets while baking.
  • Garnish and Serve: Sprinkle freshly chopped green onions or chives over the top right before serving for a pop of color and fresh flavor.

What is your favorite dipping sauce to serve alongside a warm, flaky pastry pocket?

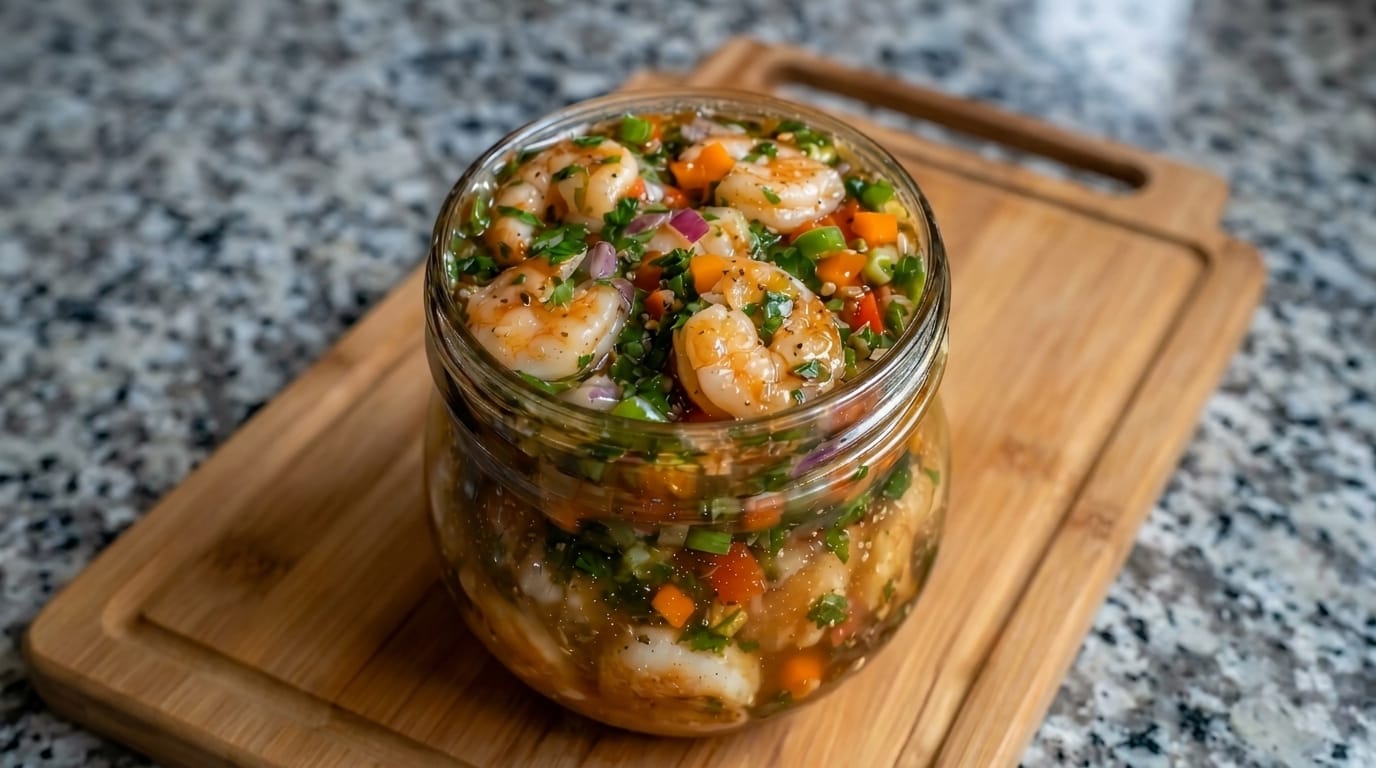
Ultimate Marinated Seafood Shrimp Jar

Welcome to your ultimate guide for preparing a vibrant, refreshing, and protein-packed culinary masterpiece: Marinated Seafood Shrimp Jar. If you want a brilliant make-ahead appetizer or light meal that delivers explosive flavor with minimal effort, this comprehensive recipe masterclass is designed just for you.

Why This Recipe Works

Marinated seafood jars have taken social media by storm because they offer an irresistible combination of visual appeal and bold flavor. By soaking tender shrimp in a tangy, aromatic marinade alongside fresh vegetables, you get a dish that tastes better with every single hour it sits.

  • Make-Ahead Magic: The flavors deepen as it marinates in the refrigerator, making it the ultimate stress-free dish for gatherings or weekly meal prep.
  • The Perfect Flavor Contrast: The bright, acidic punch of citrus and vinegar cuts through the savory, succulent shrimp and crunchy diced vegetables.
  • Stunning Presentation: Layering the vibrant pink shrimp, green herbs, and colorful peppers inside a glass jar creates an eye-catching look that pops on any table.

Essential Ingredients

To recreate this savory masterpiece in your own kitchen, gather the following high-quality ingredients:

  • The Seafood: 1 pound large cooked shrimp, peeled, deveined, and tails removed.
  • The Marinade Base: 1/3 cup extra-virgin olive oil; 1/4 cup fresh lemon juice or white wine vinegar; 1 tablespoon Worcestershire sauce.
  • The Crunch & Veggies: 1/2 cup finely diced bell peppers (red, orange, or green); 1/4 cup finely chopped red onion; 2 tablespoons sliced green onions.
  • The Herbs & Seasonings: 2 tablespoons freshly chopped cilantro or parsley; 2 cloves minced garlic; salt, freshly cracked black pepper, and a pinch of red pepper flakes for heat.

Step-by-Step Cooking Instructions

  1. Prep the Shrimp: Ensure your shrimp are fully cooked, peeled, and dried gently with paper towels. Cut larger shrimp in half if desired for easier eating.
  2. Whisk the Marinade: In a medium bowl, whisk together the extra-virgin olive oil, lemon juice (or vinegar), minced garlic, Worcestershire sauce, salt, black pepper, and red pepper flakes until well combined.
  3. Mix the Vegetables: Stir the diced bell peppers, chopped red onion, green onions, and fresh herbs directly into the marinade mixture.
  4. Layer in the Jar: Carefully pack the cooked shrimp and the vegetable marinade into a clean glass jar, alternating layers to ensure the flavors distribute evenly throughout.
  5. Chill and Marinate: Seal the jar tightly and place it in the refrigerator for at least 2 hours (or up to 24 hours) to allow all the flavors to meld together.
  6. Serve: Spoon the chilled marinated shrimp into small bowls or serve straight from the jar with toothpicks or crackers on the side.

Chef’s Pro-Tips for Success

  • Do Not Over-Marinate with Citrus: If using raw shrimp, you would need to cure them in citrus juice (like ceviche), but starting with pre-cooked shrimp keeps the texture firm and prevents the meat from becoming mushy over long storage.
  • Customize the Heat: Feel free to add thin slices of fresh jalapeño or serrano peppers into the jar if you love a spicy kick.
  • Serving Suggestions: Serve this marinated shrimp over a crisp bed of mixed greens, spoon it over avocado halves, or enjoy it with crusty baguette slices to soak up the flavorful oil.

What is your favorite type of seafood to preserve or marinate in a glass jar for easy snacking?