Slow Cooker Garlic Onion Beef Roast – Tender, Juicy & Packed With Rich Flavor

Slow Cooker Garlic Onion Beef Roast is the ultimate comfort food recipe featuring a beautifully seasoned beef roast cooked slowly with caramelized onions, garlic, and a rich savory broth until it becomes incredibly tender and flavorful.

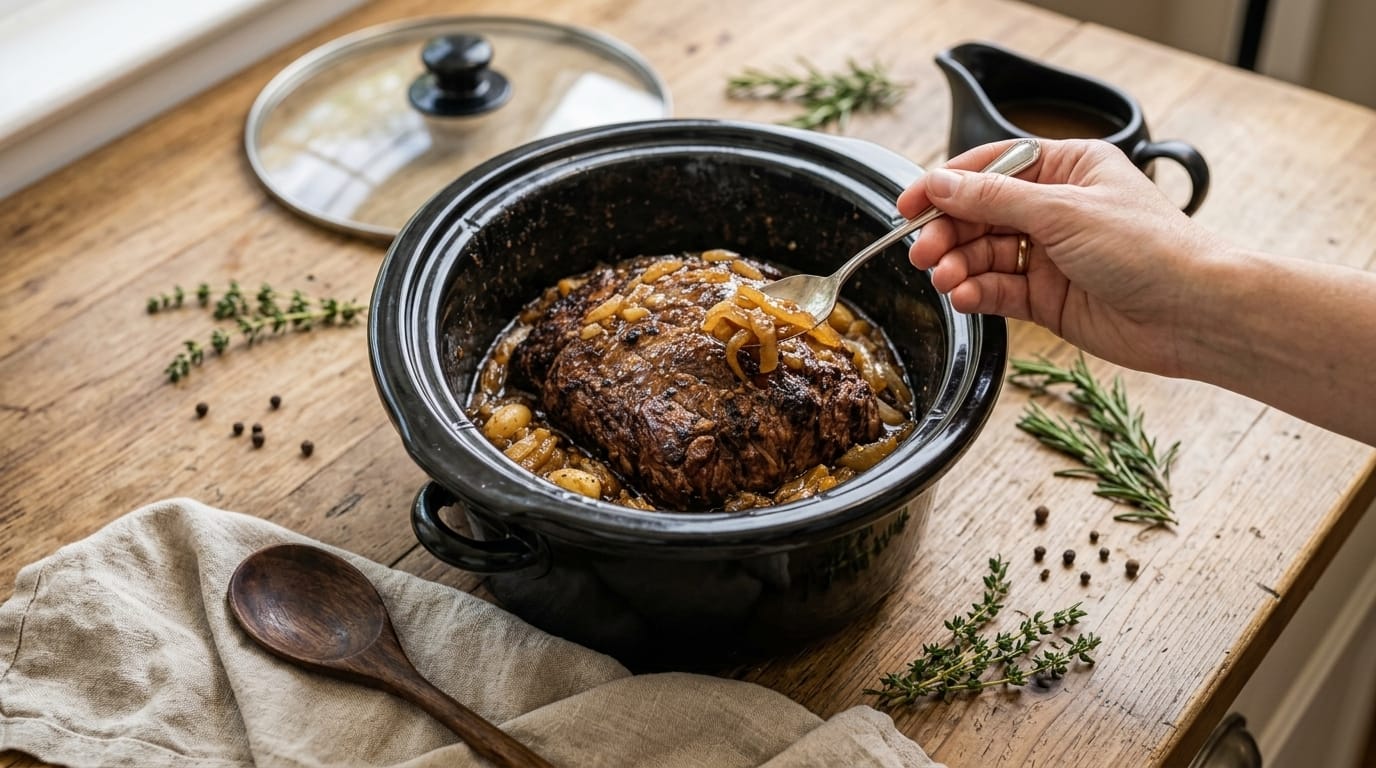
The image shows a perfectly cooked beef roast surrounded by soft onions and a deep, glossy sauce. The roast has a beautifully browned exterior while the slow cooking process creates a juicy, fork-tender texture inside. The combination of garlic, onions, herbs, and beef juices creates a rich homemade flavor that makes this dish perfect for family dinners and special occasions.

This recipe is ideal for busy days because the slow cooker does most of the work. After a quick sear to build flavor, the beef gently cooks for hours until it practically melts apart. Serve it with creamy mashed potatoes, roasted vegetables, rice, or crusty bread to soak up the delicious gravy.


Why You’ll Love This Slow Cooker Garlic Onion Beef Roast

This beef roast is everything you want in a comforting homemade meal.

The slow cooking method allows the tough fibers in the beef to slowly break down, creating incredibly tender meat that can easily be sliced or shredded.

The garlic and onions create a naturally sweet and savory sauce that becomes richer as the roast cooks. The onions almost melt into the gravy, adding incredible depth and flavor.

This recipe is also easy to customize. You can add vegetables, adjust the herbs, or turn the leftovers into sandwiches, wraps, tacos, or beef bowls.

It is the perfect recipe for:

  • Sunday family dinners
  • Holiday meals
  • Meal prep
  • Cozy winter dinners
  • Special gatherings

Ingredients

For the Beef Roast

  • 4 to 5 pounds beef chuck roast
  • 2 tablespoons olive oil
  • 2 teaspoons kosher salt
  • 1 teaspoon black pepper
  • 2 teaspoons garlic powder
  • 1 teaspoon onion powder
  • 1 teaspoon smoked paprika
  • 2 tablespoons all-purpose flour (optional)

For the Garlic Onion Sauce

  • 3 large yellow onions, thinly sliced
  • 8 cloves garlic, minced
  • 3 tablespoons butter
  • 2½ cups beef broth
  • 3 tablespoons Worcestershire sauce
  • 2 tablespoons soy sauce
  • 2 tablespoons tomato paste
  • 1 tablespoon Dijon mustard
  • 2 teaspoons fresh thyme leaves
  • 1 teaspoon fresh rosemary, chopped
  • 2 bay leaves
  • 1 teaspoon black pepper

For Thickening the Gravy

  • 3 tablespoons cornstarch
  • 4 tablespoons cold water

For Garnishing

  • Fresh parsley, chopped
  • Fresh thyme
  • Extra cracked black pepper

How to Make Slow Cooker Garlic Onion Beef Roast

1. Prepare the Roast

Remove the beef roast from the refrigerator about 30 minutes before cooking.

Pat the roast completely dry with paper towels.

Drying the surface helps create a better crust when searing.

Season all sides generously with:

  • Salt
  • Black pepper
  • Garlic powder
  • Onion powder
  • Smoked paprika

If using flour, lightly coat the roast after seasoning.

The flour helps create a beautiful browned exterior and adds body to the final gravy.


2. Sear the Beef

Heat olive oil in a large skillet or Dutch oven over medium-high heat.

Once the pan is hot, place the roast inside.

Sear for approximately:

4–5 minutes per side

until the outside develops a deep golden-brown crust.

Do not skip this step.

Searing creates rich caramelized flavors that make the final roast taste much more complex.

Once browned, transfer the roast to the slow cooker.


3. Caramelize the Onions

Using the same skillet, reduce heat to medium.

Add butter.

Once melted, add the sliced onions.

Cook for:

8–10 minutes

until the onions soften and begin turning golden.

Add minced garlic and cook for another:

30 seconds

until fragrant.

The combination of caramelized onions and garlic creates the signature flavor of this roast.


4. Create the Cooking Sauce

Add tomato paste to the onions.

Cook for one minute while stirring.

This helps develop a deeper, richer flavor.

Pour in the beef broth.

Use a wooden spoon to scrape the browned pieces from the bottom of the pan.

These browned bits contain concentrated flavor from the beef.

Add:

  • Worcestershire sauce
  • Soy sauce
  • Dijon mustard
  • Thyme
  • Rosemary
  • Black pepper

Stir everything together.


5. Add Everything to the Slow Cooker

Place half of the onion mixture at the bottom of the slow cooker.

Place the seared roast on top.

Add the remaining onions and sauce over the beef.

Add bay leaves.

Cover with the lid.


6. Slow Cook Until Tender

Cook the roast:

LOW: 8–10 hours
HIGH: 5–6 hours

Low cooking is recommended because it allows the beef to slowly become tender without drying out.

The roast is ready when:

  • A fork easily pierces the meat
  • The beef pulls apart easily
  • The texture is soft and juicy

If the roast is still tough, continue cooking.

Tough beef usually needs more time, not less.


7. Rest the Roast

Carefully remove the cooked roast from the slow cooker.

Place it on a cutting board or serving platter.

Allow it to rest for:

10–15 minutes

Resting allows the juices to redistribute throughout the meat.

You can slice the roast into thick pieces or shred it into tender chunks.


8. Make the Garlic Onion Gravy

Remove the bay leaves from the slow cooker liquid.

Transfer the cooking liquid and onions into a saucepan.

Bring to a gentle simmer.

Mix cornstarch and cold water in a small bowl.

Whisk until smooth.

Slowly add the mixture to the simmering gravy.

Cook for:

3–5 minutes

until thickened.

Taste and adjust seasoning with salt and pepper.

For extra richness, stir in one tablespoon of butter before serving.


9. Serve the Beef Roast

Place the roast on a serving platter.

Spoon the garlic onion gravy generously over the top.

Garnish with fresh parsley and thyme.

Serve warm.


What to Serve With Garlic Onion Beef Roast

Creamy Mashed Potatoes

Mashed potatoes are the classic pairing because they soak up the rich onion gravy perfectly.

Roasted Potatoes

Crispy roasted potatoes create a delicious contrast with the tender beef.

Rice

Serve over:

  • White rice
  • Brown rice
  • Garlic butter rice

Vegetables

Great side options include:

  • Green beans
  • Roasted carrots
  • Broccoli
  • Asparagus
  • Brussels sprouts

Bread

Serve with:

  • Dinner rolls
  • Garlic bread
  • Crusty French bread

Perfect for soaking up the flavorful gravy.


Tips for the Best Slow Cooker Beef Roast

Choose Chuck Roast

Chuck roast is ideal because it contains enough marbling and connective tissue to become tender during slow cooking.

Sear Before Slow Cooking

This creates deeper flavor and a richer color.

Do Not Rush the Cooking Time

The magic happens during slow cooking.

Slice Against the Grain

If slicing the roast, cut against the grain for a more tender bite.

Use Fresh Garlic

Fresh garlic provides a stronger and more aromatic flavor.

Let the Roast Rest

Resting keeps the meat juicy.


Easy Recipe Variations

Mushroom Garlic Onion Roast

Add:

  • 8 ounces sliced mushrooms

with the onions for an earthy flavor.


Creamy Garlic Beef Roast

Add:

  • ½ cup heavy cream
  • ½ cup Parmesan cheese

to the gravy at the end.


Red Wine Garlic Roast

Replace 1 cup of beef broth with red wine for a deeper restaurant-style flavor.


Spicy Garlic Onion Roast

Add:

  • Crushed red pepper flakes
  • Cayenne pepper

for extra heat.


Vegetable Loaded Roast

Add:

  • Carrots
  • Potatoes
  • Celery

directly into the slow cooker for a complete one-pot meal.


How to Store Leftovers

Allow the roast to cool completely.

Store beef and gravy together in an airtight container.

Refrigerate for up to:

4 days

Keeping the beef in the gravy helps maintain moisture.


How to Reheat

Warm the beef gently in a saucepan over medium-low heat.

Add a splash of beef broth if the gravy becomes too thick.

You can also reheat individual portions in the microwave.

Avoid overheating because it can dry out the meat.


Can You Freeze Garlic Onion Beef Roast?

Yes, this roast freezes beautifully.

Place cooled beef and gravy into freezer-safe containers.

Freeze for up to:

3 months

Thaw overnight in the refrigerator before reheating.

The flavor often improves after freezing because the beef continues absorbing the sauce.


Final Thoughts

Slow Cooker Garlic Onion Beef Roast is a timeless comfort meal that turns simple ingredients into an unforgettable dinner. The tender beef, sweet caramelized onions, rich garlic flavor, and savory homemade gravy create a dish that feels special while remaining easy to prepare.

Whether you serve it for a family Sunday dinner, holiday gathering, or a cozy weeknight meal, this recipe delivers the perfect combination of tenderness, flavor, and comfort.

Pair it with mashed potatoes, roasted vegetables, and warm bread for a classic homemade dinner everyone will love.
Cheesy Beef and Bell Pepper Casserole – Easy, Comforting & Flavor-Packed Dinner

Cheesy Beef and Bell Pepper Casserole is a delicious one-pan comfort meal loaded with seasoned ground beef, colorful bell peppers, rich tomato flavor, and plenty of melted cheese. This easy baked casserole combines the classic flavors of a cheesesteak-inspired dish with the warmth and convenience of a family-friendly dinner.

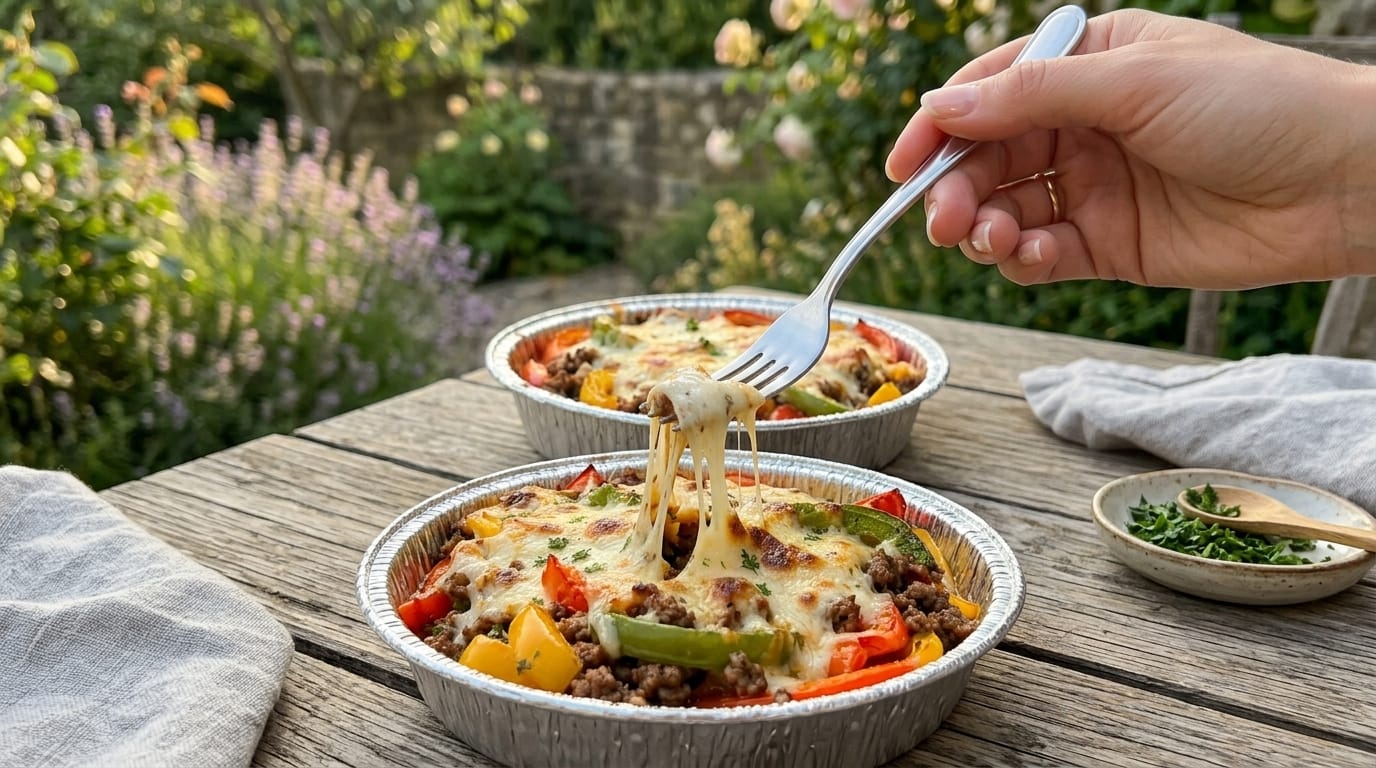
The image shows a beautiful casserole-style dish filled with seasoned beef, vibrant red, yellow, and green peppers, and a generous layer of golden melted cheese baked until bubbly and slightly caramelized. Every bite combines savory beef, sweet roasted peppers, creamy melted cheese, and flavorful seasonings.

This recipe is perfect for busy weeknights, meal prep, family dinners, or gatherings. It requires simple ingredients, comes together easily, and delivers a hearty meal that everyone will enjoy.


Why You’ll Love This Cheesy Beef and Bell Pepper Casserole

This casserole is the perfect combination of simple preparation and incredible flavor.

The ground beef provides a rich savory base, while the bell peppers add natural sweetness, color, and texture. The combination of mozzarella and cheddar cheese creates a creamy, stretchy topping that makes this dish extra comforting.

Unlike complicated casseroles that require many steps, this recipe is straightforward. The beef and vegetables are cooked together, layered with cheese, and baked until golden and delicious.

It is also very versatile. You can serve it on its own, with rice, pasta, potatoes, or even use leftovers for wraps, sandwiches, or meal bowls.


Ingredients

For the Beef and Pepper Filling

  • 2 pounds ground beef (80/20 recommended)
  • 2 tablespoons olive oil
  • 1 large yellow onion, diced
  • 4 cloves garlic, minced
  • 1 red bell pepper, sliced
  • 1 green bell pepper, sliced
  • 1 yellow bell pepper, sliced
  • 1 tablespoon tomato paste
  • 1 cup crushed tomatoes
  • 2 tablespoons Worcestershire sauce
  • 1 tablespoon soy sauce
  • 1 teaspoon smoked paprika
  • 1 teaspoon garlic powder
  • 1 teaspoon onion powder
  • 1 teaspoon Italian seasoning
  • 1 teaspoon salt
  • ½ teaspoon black pepper
  • ½ teaspoon red pepper flakes (optional)

For the Cheese Topping

  • 1½ cups shredded mozzarella cheese
  • 1 cup shredded cheddar cheese
  • ½ cup grated Parmesan cheese
  • 2 tablespoons fresh parsley, chopped

How to Make Cheesy Beef and Bell Pepper Casserole

1. Prepare the Oven

Preheat your oven to:

375°F (190°C)

Lightly grease a baking dish with cooking spray or a small amount of olive oil.

A 9×13-inch casserole dish works perfectly for this recipe.


2. Cook the Ground Beef

Heat a large skillet over medium-high heat.

Add olive oil.

Once hot, add the ground beef.

Cook for approximately 6–8 minutes, breaking it apart with a wooden spoon until browned and fully cooked.

Drain excess grease if needed.

Browning the beef properly is important because it creates deeper flavor and prevents the casserole from becoming watery.


3. Add Onion and Garlic

Add diced onion to the cooked beef.

Cook for 3–4 minutes until softened.

Add minced garlic and cook for another 30 seconds until fragrant.

Garlic adds a rich savory aroma that forms the base of the casserole flavor.


4. Cook the Bell Peppers

Add the sliced red, green, and yellow bell peppers to the skillet.

Cook for approximately 5–7 minutes until they begin to soften.

You want the peppers to become tender while still keeping some texture.

The different colors add sweetness and make the casserole visually appealing.


5. Season the Beef Mixture

Add:

  • Tomato paste
  • Crushed tomatoes
  • Worcestershire sauce
  • Soy sauce
  • Smoked paprika
  • Garlic powder
  • Onion powder
  • Italian seasoning
  • Salt
  • Black pepper
  • Red pepper flakes if using

Stir everything together.

Allow the mixture to simmer for 5 minutes.

This allows the flavors to combine and creates a rich, savory filling.


6. Transfer to Baking Dish

Pour the beef and pepper mixture into the prepared casserole dish.

Spread it evenly using a spatula.

The filling should be distributed evenly so every serving contains plenty of beef, peppers, and sauce.


7. Add the Cheese Layer

Sprinkle mozzarella cheese evenly over the top.

Add cheddar cheese for extra flavor and color.

Finish with Parmesan cheese.

The combination of cheeses creates a golden, bubbly topping with a delicious cheesy crust.


8. Bake the Casserole

Place the casserole into the preheated oven.

Bake for:

20–25 minutes

until:

  • Cheese is fully melted
  • Top is golden brown
  • Edges are bubbling

For extra browning, turn on the broiler for the final 1–2 minutes.

Watch carefully because cheese can brown quickly.


9. Rest Before Serving

Remove the casserole from the oven.

Allow it to rest for 5–10 minutes before serving.

This helps the filling set slightly and makes serving easier.

Garnish with fresh parsley before bringing it to the table.


What to Serve With Cheesy Beef and Bell Pepper Casserole

This casserole is filling on its own, but it pairs beautifully with many sides.

Rice

Serve over:

  • White rice
  • Brown rice
  • Garlic butter rice

The rice absorbs the flavorful beef sauce perfectly.


Pasta

Mix the casserole filling with cooked pasta for a delicious beef and cheese pasta bake.

Great options include:

  • Penne
  • Rotini
  • Egg noodles
  • Bowtie pasta

Potatoes

Serve alongside:

  • Mashed potatoes
  • Roasted potatoes
  • Crispy potato wedges

Vegetables

Balance the richness with:

  • Green salad
  • Roasted broccoli
  • Green beans
  • Asparagus

Tips for the Best Cheesy Beef and Pepper Casserole

Use Quality Ground Beef

An 80/20 blend gives the best flavor because the fat keeps the beef juicy.

Slice Peppers Evenly

Uniform slices cook more evenly and create a better texture.

Do Not Overcook the Peppers

Slightly tender peppers add better texture than completely soft peppers.

Use Freshly Shredded Cheese

Freshly shredded cheese melts smoother than many pre-shredded varieties.

Season in Layers

Seasoning the beef, vegetables, and sauce separately creates better overall flavor.

Let It Rest

A short resting time makes the casserole easier to serve.


Easy Recipe Variations

Cheesy Philly Beef Casserole

Add:

  • Mushrooms
  • Extra onions
  • Provolone cheese

for a cheesesteak-inspired version.


Spicy Beef Pepper Casserole

Add:

  • Jalapeños
  • Chili flakes
  • Hot sauce

for extra heat.


Low-Carb Version

Replace tomato sauce with a creamy cheese sauce and add extra vegetables.

Serve without rice or pasta.


Mexican-Inspired Beef Casserole

Add:

  • Taco seasoning
  • Black beans
  • Corn
  • Monterey Jack cheese

Serve with sour cream and salsa.


Creamy Garlic Beef Casserole

Add:

  • ½ cup cream cheese
  • ½ cup heavy cream

to create a rich creamy sauce.


How to Store Leftovers

Allow the casserole to cool completely.

Store leftovers in an airtight container.

Refrigerate for up to:

4 days

The flavors often become even better after resting overnight.


How to Reheat

Oven Method

Cover with foil and bake at:

350°F for 15–20 minutes

until warmed through.

Microwave Method

Heat individual portions in 30-second intervals until hot.

Add extra cheese before reheating if desired.


Can You Freeze This Casserole?

Yes, this casserole freezes very well.

Prepare the casserole as directed but do not bake.

Cover tightly and freeze for up to:

3 months

When ready to cook:

  1. Thaw overnight in the refrigerator.
  2. Bake according to the recipe instructions.
  3. Add a few extra minutes if needed.

You can also freeze baked leftovers in individual portions.


Final Thoughts

Cheesy Beef and Bell Pepper Casserole is a simple, satisfying dinner that combines everything people love about comfort food: seasoned beef, colorful vegetables, rich sauce, and plenty of melted cheese.

The sweet roasted peppers pair beautifully with the savory beef, while the golden cheese topping creates the perfect finishing touch.

Whether you are cooking for your family, preparing meals ahead of time, or looking for an easy weeknight dinner, this casserole delivers big flavor with minimal effort. It is the kind of recipe that brings everyone back for seconds.

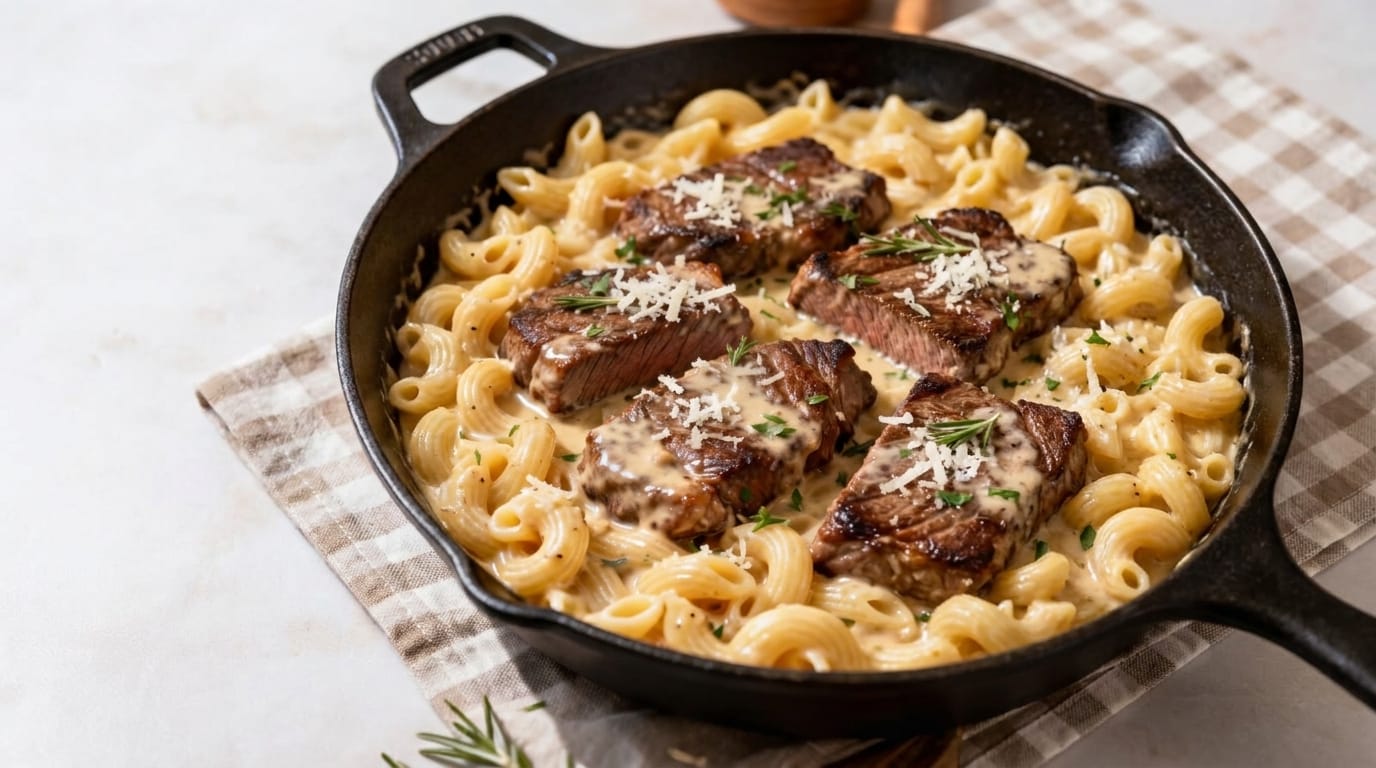
The Ultimate Masterclass Guide to Creamy Garlic Butter Steak and Pasta Skillet: A Culinary Deep-Dive

Welcome to the definitive guide on creating the most decadent, restaurant-quality comfort dish imaginable: Creamy Garlic Butter Steak and Pasta Skillet. If you have ever wanted to transform a simple weeknight dinner into an extraordinary gourmet experience, this comprehensive deep-dive covers everything you need to know. From the science of searing the perfect steak to tossing al dente pasta in a velvety, rich garlic cream sauce, this blog post is tailored for food creators, home cooks, and recipe bloggers who demand absolute perfection in every bite.

1. Introduction: The Magic of Creamy Garlic Butter Steak and Pasta

There are few dishes in the culinary world that evoke as much immediate satisfaction as a skillet bubbling with rich cream, tender pasta, and succulent seared steak. When you combine perfectly caramelized steak medallions with chewy pasta coated in a luxurious, garlic-infused cream sauce and freshly grated Parmesan, you elevate ordinary home cooking to an art form.

The Creamy Garlic Butter Steak and Pasta Skillet recipe featured here is a masterpiece of complementary textures and deep, savory aromas. The exterior of each steak achieves a wonderful golden-brown crust while keeping the interior juicy, all resting over a bed of creamy, comforting pasta. Perfect for your latest food blog post, family dinner, or social media showcase, this recipe is guaranteed to become an instant favorite.

2. Why This Recipe Stands Out

In a digital sea of endless dinner recipes, why does this specific dish capture everyone’s attention?

  • Unmatched Flavor Depth: The combination of seared steak drippings, roasted garlic, rich butter, heavy cream, and sharp Parmesan creates layers of restaurant-quality flavor.
  • All-in-One Comfort: It marries the best of both worlds—tender, juicy steak and a velvety pasta dish—prepared right in a single cast-iron skillet for easy cleanup.
  • Visual Appeal: The glistening steak slices resting on twirled pasta, smothered in creamy sauce and crowned with fresh herbs and grated cheese, make it an absolute showstopper for food photography and short-form video content.
  • Customizable and Adaptable: Easily tailored using your favorite cut of steak or pasta shapes.

3. Comprehensive Ingredients Breakdown

To achieve restaurant-quality results at home, ingredient quality and proportion are paramount. Here is your complete shopping list for the Creamy Garlic Butter Steak and Pasta Skillet:

For the Steak and Pasta Skillet:

  • Steak: 1.5 lbs sirloin, ribeye, or tenderloin steaks (cut into thick, manageable medallions for optimal searing).
  • Pasta: 8 oz short pasta (such as cavatappi, penne, or rigatoni), cooked al dente according to package instructions.
  • Steak Seasoning: 1 tablespoon olive oil, 1 teaspoon kosher salt, 1 teaspoon freshly cracked black pepper, 1 teaspoon garlic powder, and 1 teaspoon smoked paprika.
  • Butter: 3 tablespoons unsalted butter (divided for searing and sauce).

For the Creamy Garlic Herb Sauce:

  • Garlic: 5 cloves, freshly minced.
  • Heavy Cream: 1.5 cups heavy whipping cream for that luxurious, velvety texture.
  • Chicken Broth: 1/2 cup low-sodium chicken broth to balance the richness of the cream.
  • Parmesan Cheese: 1/2 cup freshly grated Parmigiano-Reggiano cheese (plus extra for garnish).
  • Fresh Herbs: Fresh rosemary sprigs and chopped parsley for garnish.
  • Seasoning: Salt and pepper to taste.

4. Step-by-Step Preparation Guide

Follow this meticulous roadmap to ensure your steak is tender and juicy, your pasta is perfectly coated, and your cream sauce is flawlessly smooth.

Step 1: Prepping and Searing the Steak

Pat your steak medallions dry with paper towels and season all sides generously with salt, pepper, garlic powder, and smoked paprika. Heat a large cast-iron skillet over high heat with 1 tablespoon of olive oil and 1 tablespoon of butter. Sear the steak medallions for 3 to 4 minutes per side until a deep, gorgeous crust forms. Remove the steak from the skillet and let it rest on a clean plate while you prepare the pasta and sauce.

Step 2: Boiling the Pasta

In a separate pot of boiling salted water, cook your chosen pasta until it reaches al dente texture. Reserve 1/2 cup of the starchy pasta water before draining the pasta.

Step 3: Building the Garlic Cream Sauce

In the same cast-iron skillet used for the steak (retaining those wonderful brown bits), melt another 2 tablespoons of butter over medium heat. Add the minced garlic and sauté for about 1 minute until fragrant. Pour in the low-sodium chicken broth to deglaze the pan, scraping up any caramelized bits with a wooden spoon.

Step 4: Adding Cream and Cheese

Pour in the heavy cream and bring the mixture to a gentle simmer. Reduce the heat to medium-low and whisk in the freshly grated Parmesan cheese until it melts completely into the liquid, creating a smooth, rich sauce.

Step 5: Combining Pasta and Sauce

Add the cooked, drained pasta directly into the skillet with the creamy garlic sauce, tossing gently to ensure every piece of pasta is thoroughly coated. If the sauce is too thick, splash in a little of the reserved starchy pasta water to reach your desired consistency.

Step 6: Assembling and Garnishing

Slice your rested steak medallions and arrange them neatly on top of the creamy pasta bed in the skillet. Garnish with fresh rosemary sprigs, chopped parsley, and a final dusting of freshly grated Parmesan cheese and cracked black pepper. Serve hot straight from the skillet!

5. Pro Tips for Culinary Perfection

  • Rest Your Meat: Never slice your steak immediately after cooking. Resting allows the muscle fibers to relax and reabsorb juices, keeping every bite tender and moist.
  • Keep Sauce Heat Moderate: When reducing heavy cream, maintain a gentle simmer rather than a rolling boil to prevent the dairy from separating or scorching.
  • Deglaze the Skillet: Those browned bits left behind in the cast-iron pan from searing the steak are pure gold—make sure to scrape them up when adding broth for maximum flavor depth.

6. Serving Suggestions and Pairings

To transform your Creamy Garlic Butter Steak and Pasta Skillet into an even grander feast, consider these pairing options:

  • Garlic Bread or Crostini: Essential for mopping up any remaining creamy garlic sauce in the skillet.
  • Crisp Caesar Salad: A fresh, crunchy salad provides a wonderful textural and acidic contrast to the rich, creamy pasta.
  • Refreshing Beverage: Pair with sparkling water infused with lemon or a light iced tea to balance the rich savory notes.

Enjoy sharing and savoring this incredible culinary creation on your website!

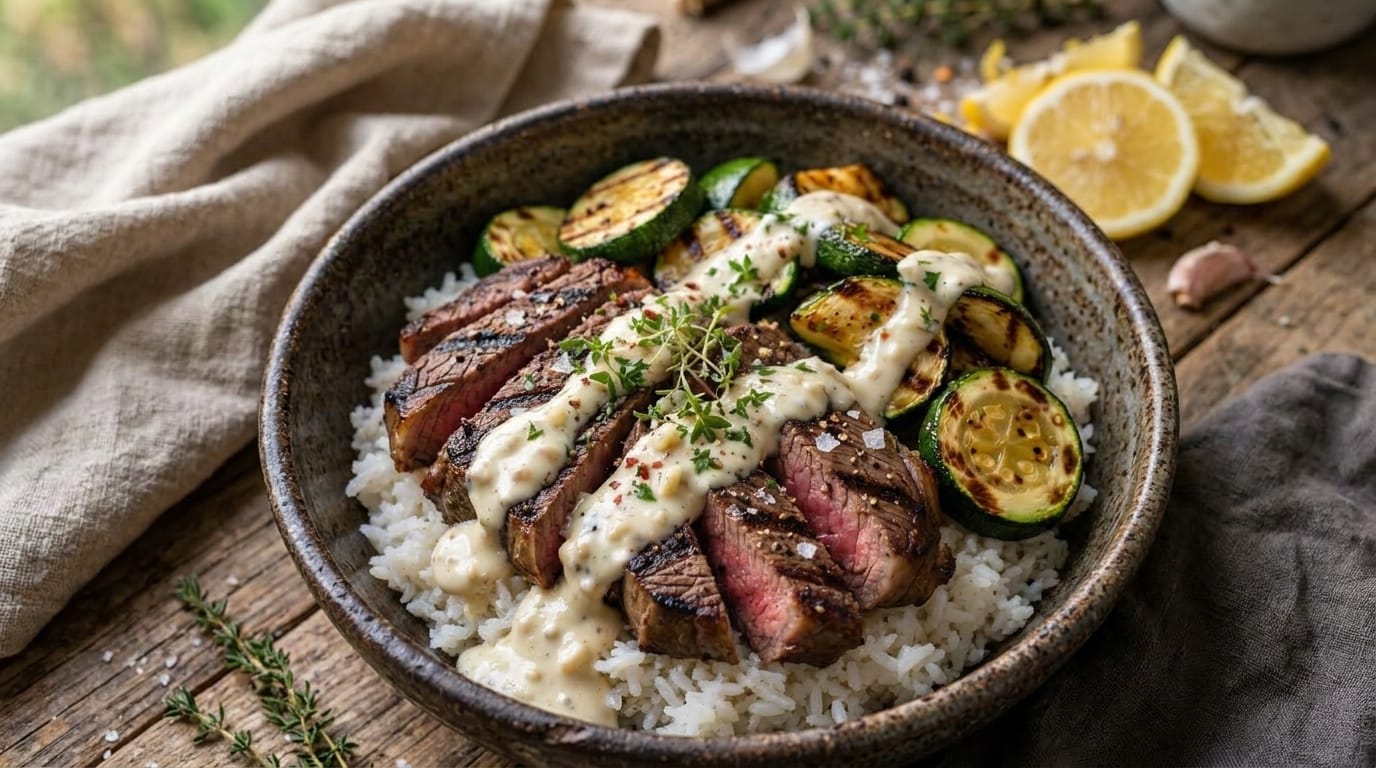
The Ultimate Masterclass Guide to Charred Steak and Grilled Zucchini Rice Bowls with Creamy Garlic Herb Sauce: A Culinary Deep-Dive

Welcome to the definitive guide on creating the most vibrant, flavor-packed comfort dish imaginable: Charred Steak and Grilled Zucchini Rice Bowls with Creamy Garlic Herb Sauce. If you have ever wanted to elevate standard weeknight dining into an extraordinary, restaurant-quality culinary experience, this comprehensive deep-dive covers everything you need to know. From the science of achieving a perfect crust on your steak to balancing smoky grilled zucchini, fluffy rice, and a luscious garlic herb cream sauce, this blog post is tailored for food creators, home cooks, and recipe bloggers who demand absolute perfection in every bite.

1. Introduction: The Magic of Charred Steak and Grilled Zucchini Rice Bowls

There are few dishes in the culinary world that capture the essence of vibrant, satisfying comfort food quite like a loaded rice bowl. But when you combine perfectly seared, juicy steak with smoky charred zucchini rounds over a bed of fluffy rice, and smother it all in a velvety, tangy creamy garlic herb sauce, you transcend ordinary cooking.

The Charred Steak and Grilled Zucchini Rice Bowls with Creamy Garlic Herb Sauce recipe featured here is a masterpiece of complementary textures, striking colors, and deep, savory flavors. The contrast between the warm, caramelized steak, smoky vegetables, and cool, creamy sauce creates an unforgettable dining experience. Perfect for your latest food blog post, dinner party, or social media showcase, this recipe is guaranteed to become an instant crowd favorite.

2. Why This Recipe Stands Out

In a digital sea of endless dinner recipes, why does this specific dish capture everyone’s attention?

  • Unmatched Flavor Harmony: The marriage of smoky, charred steak, tender grilled zucchini, and a rich garlic herb cream sauce delivers complex layers of flavor in every spoonful.
  • Nutrient-Dense and Balanced: Packed with high-quality protein, wholesome grains, fresh seasonal vegetables, and aromatic herbs, it satisfies completely while keeping you energized.
  • Visual Appeal: The brilliant green grill marks on the zucchini, the fresh herbs, and the glistening pink-centered steak make it an absolute showstopper for food photography and short-form video content.
  • Customizable and Adaptable: Easily tailored to fit your favorite grain bases or seasonal vegetable additions.

3. Comprehensive Ingredients Breakdown

To achieve restaurant-quality results at home, ingredient quality and proportion are paramount. Here is your complete shopping list for the Charred Steak and Grilled Zucchini Rice Bowls with Creamy Garlic Herb Sauce:

For the Steak and Base:

  • Steak: 1.5 lbs flank steak, sirloin, or ribeye (well-marbled for maximum tenderness and flavor).
  • Steak Seasoning: 1 tablespoon olive oil, 1 teaspoon kosher salt, 1 teaspoon freshly cracked black pepper, 1 teaspoon garlic powder, and 1 teaspoon smoked paprika.
  • Base: 3 cups cooked jasmine rice or basmati rice.
  • Zucchini: 2 medium zucchinis, sliced into neat 1/2-inch rounds for grilling.
  • Zucchini Seasoning: 1 tablespoon olive oil, salt, pepper, and a pinch of garlic flakes.

For the Creamy Garlic Herb Sauce:

  • Dairy Base: 1/2 cup sour cream or Greek yogurt for a rich, tangy foundation.
  • Mayonnaise: 1/4 cup high-quality mayonnaise for silky smoothness.
  • Fresh Herbs: 1/2 cup packed fresh parsley and thyme leaves, finely minced.
  • Garlic: 3 cloves, freshly minced or grated into a paste.
  • Lemon Juice: 2 tablespoons fresh lemon juice for bright acidity.
  • Seasoning: Salt and pepper to taste, plus a pinch of red pepper flakes.

4. Step-by-Step Preparation Guide

Follow this meticulous roadmap to ensure your steak is tender and juicy, your zucchini is perfectly charred, and your sauce is flawlessly creamy.

Step 1: Prepping and Seasoning the Steak

Pat your steak dry with paper towels. Rub all sides evenly with olive oil, kosher salt, black pepper, garlic powder, and smoked paprika. Let the steak sit at room temperature for 15 to 20 minutes to ensure even cooking.

Step 2: Grilling the Zucchini Rounds

Toss the zucchini rounds in olive oil, salt, pepper, and garlic flakes. Heat a cast-iron grill pan over medium-high heat. Add the zucchini slices and let them sear undisturbed for 2 to 3 minutes per side until deep, smoky grill marks develop and the zucchini becomes tender. Remove from heat and set aside.

Step 3: Searing the Steak

In the same hot cast-iron skillet, add a touch of oil if needed. Sear the steak for 4 to 5 minutes on the first side until a rich, dark crust forms, then flip and cook for another 3 to 4 minutes for medium-rare (internal temperature of 130°F / 54°C). Remove the steak from the pan and let it rest for 8 to 10 minutes before slicing against the grain.

Step 4: Crafting the Creamy Garlic Herb Sauce

In a mixing bowl, combine the sour cream (or Greek yogurt), mayonnaise, minced parsley, thyme, grated garlic, fresh lemon juice, salt, pepper, and red pepper flakes. Whisk vigorously until smooth, creamy, and fully emulsified.

Step 5: Assembling the Rice Bowls

Divide the warm cooked rice among your serving bowls. Arrange the smoky grilled zucchini rounds neatly on top of the rice alongside the sliced steak.

Step 6: Drizzle and Serve

Generously ladle or drizzle the vibrant creamy garlic herb sauce over the steak and bowl components. Garnish with fresh thyme sprigs and serve immediately!

5. Pro Tips for Culinary Perfection

  • Rest Your Meat: Never slice your steak immediately after cooking. Resting allows the muscle fibers to relax and reabsorb the juices, keeping every slice exceptionally moist.
  • Slice Against the Grain: When cutting your steak, look at the direction of the muscle fibers and slice perpendicularly to ensure tender, melt-in-your-mouth bites.
  • High Heat for Grill Marks: To get that authentic restaurant-style char on your zucchini and steak, ensure your skillet is smoking hot before adding them.

6. Serving Suggestions and Pairings

To transform your Charred Steak and Grilled Zucchini Rice Bowls with Creamy Garlic Herb Sauce into an even grander feast, consider these pairing options:

  • Lemon Wedges: Serve with fresh lemon wedges on the side for an extra burst of citrus acidity.
  • Crusty Bread: Pair with warm garlic bread to mop up any leftover sauce in the bowl.
  • Refreshing Beverage: Pair with sparkling water infused with fresh mint and lemon to complement the savory garlic and herb notes.

Enjoy sharing and savoring this incredible culinary creation on your website!

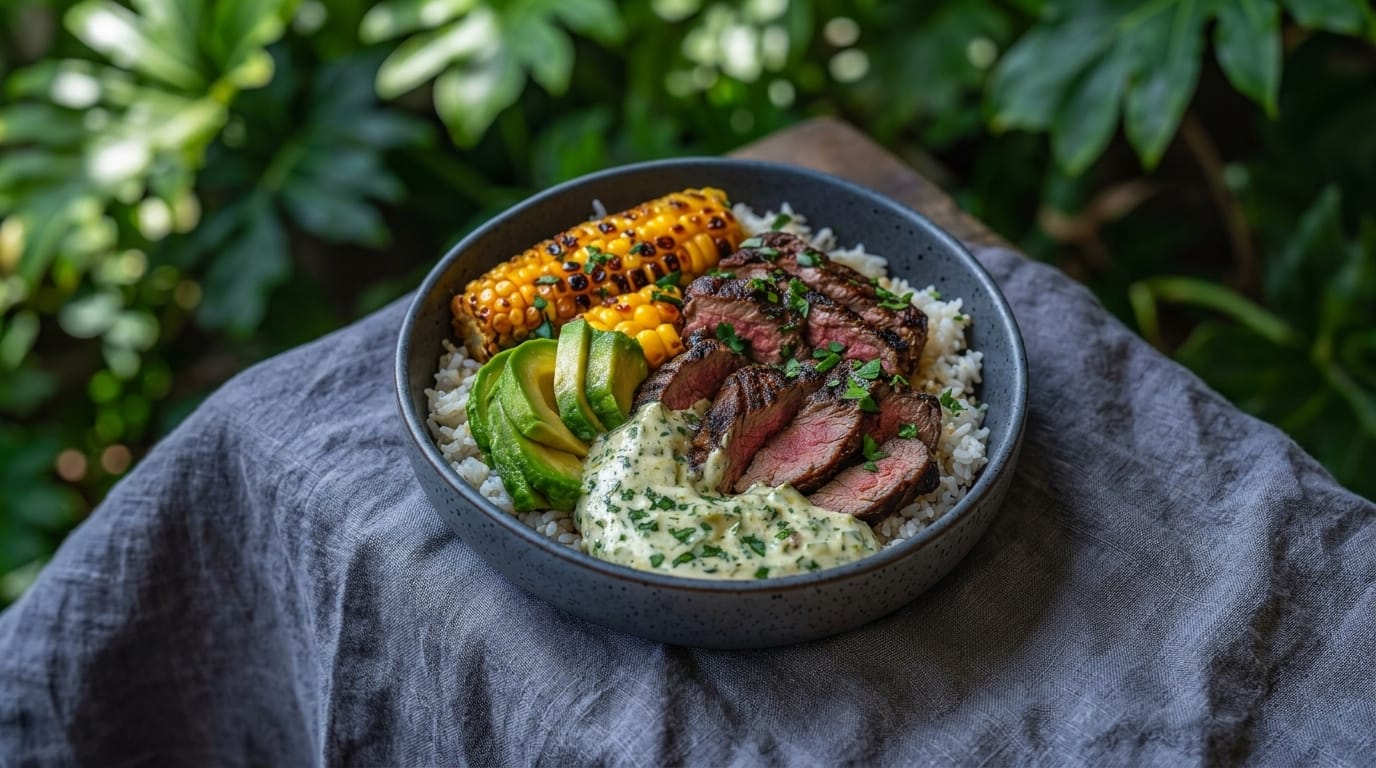
The Ultimate Masterclass Guide to Charred Steak and Sweet Corn Rice Bowls with Creamy Herb Sauce: A Culinary Deep-Dive

Welcome to the definitive guide on creating the most vibrant, flavor-packed comfort dish imaginable: Charred Steak and Sweet Corn Rice Bowls with Creamy Herb Sauce. If you have ever wanted to elevate standard weeknight dining into an extraordinary, restaurant-quality culinary experience, this comprehensive deep-dive covers everything you need to know. From the science of achieving a perfect crust on your steak to balancing smoky grilled corn, fluffy rice, creamy avocado, and a luscious herb sauce, this blog post is tailored for food creators, home cooks, and recipe bloggers who demand absolute perfection in every bite.

1. Introduction: The Magic of Charred Steak and Sweet Corn Rice Bowls

There are few dishes in the culinary world that capture the essence of vibrant, satisfying comfort food quite like a loaded rice bowl. But when you combine perfectly seared, juicy steak with smoky charred sweet corn, buttery avocado slices, and smother it all in a tangy, velvety creamy herb sauce, you transcend ordinary cooking.

The Charred Steak and Sweet Corn Rice Bowls with Creamy Herb Sauce recipe featured here is a masterpiece of complementary textures, striking colors, and deep, savory flavors. The contrast between the warm, caramelized steak, smoky corn, and cool, creamy sauce creates an unforgettable dining experience. Perfect for your latest food blog post, dinner party, or social media showcase, this recipe is guaranteed to become an instant crowd favorite.

2. Why This Recipe Stands Out

In a digital sea of endless dinner recipes, why does this specific dish capture everyone’s attention?

  • Unmatched Flavor Harmony: The marriage of smoky, charred steak, sweet charred corn, rich avocado, and a herbaceous cream sauce delivers complex layers of flavor in every spoonful.
  • Nutrient-Dense and Balanced: Packed with high-quality protein, wholesome grains, healthy fats from avocado, and fresh herbs, it satisfies completely while keeping you energized.
  • Visual Appeal: The brilliant golden-yellow of the charred corn, the deep green of fresh herbs and avocado, and the glistening pink-centered steak make it an absolute showstopper for food photography and short-form video content.
  • Customizable and Adaptable: Easily tailored to fit your favorite grain bases or seasonal vegetable additions.

3. Comprehensive Ingredients Breakdown

To achieve restaurant-quality results at home, ingredient quality and proportion are paramount. Here is your complete shopping list for the Charred Steak and Sweet Corn Rice Bowls with Creamy Herb Sauce:

For the Steak and Base:

  • Steak: 1.5 lbs flank steak, sirloin, or ribeye (well-marbled for maximum tenderness and flavor).
  • Steak Seasoning: 1 tablespoon olive oil, 1 teaspoon kosher salt, 1 teaspoon freshly cracked black pepper, 1 teaspoon garlic powder, and 1 teaspoon smoked paprika.
  • Base: 3 cups cooked jasmine rice or cilantro-lime rice.
  • Corn: 2 fresh ears of corn (shucked) or 1.5 cups sweet corn kernels for charring.
  • Avocado: 2 ripe avocados, sliced into neat fans.

For the Creamy Herb Sauce:

  • Dairy Base: 1/2 cup sour cream or Greek yogurt for a rich, tangy foundation.
  • Mayonnaise: 1/4 cup high-quality mayonnaise for silky smoothness.
  • Fresh Herbs: 1/2 cup packed fresh cilantro and parsley leaves, finely minced.
  • Garlic: 2 cloves, minced or grated into a paste.
  • Lime Juice: 2 tablespoons fresh lime juice for bright acidity.
  • Seasoning: Salt and pepper to taste, plus a pinch of cumin.

4. Step-by-Step Preparation Guide

Follow this meticulous roadmap to ensure your steak is tender and juicy, your corn is perfectly charred, and your sauce is flawlessly creamy.

Step 1: Prepping and Seasoning the Steak

Pat your steak dry with paper towels. Rub all sides evenly with olive oil, kosher salt, black pepper, garlic powder, and smoked paprika. Let the steak sit at room temperature for 15 to 20 minutes to ensure even cooking.

Step 2: Charring the Sweet Corn

Heat a cast-iron skillet or grill pan over high heat. Add the shucked ears of corn (or corn kernels) and let them sear undisturbed for a few minutes until deep, smoky char marks develop on all sides. Remove from heat, and if using whole ears, slice the kernels off the cob. Set aside.

Step 3: Searing the Steak

In the same hot cast-iron skillet, add a touch of oil if needed. Sear the steak for 4 to 5 minutes on the first side until a rich, dark crust forms, then flip and cook for another 3 to 4 minutes for medium-rare (internal temperature of 130°F / 54°C). Remove the steak from the pan and let it rest for 8 to 10 minutes before slicing against the grain.

Step 4: Crafting the Creamy Herb Sauce

In a mixing bowl, combine the sour cream (or Greek yogurt), mayonnaise, minced cilantro, parsley, grated garlic, fresh lime juice, salt, pepper, and a pinch of cumin. Whisk vigorously until smooth, vibrant green, and fully emulsified.

Step 5: Assembling the Rice Bowls

Divide the warm cooked rice among your serving bowls. Arrange the smoky charred sweet corn and fresh avocado slices neatly on top of the rice. Place the beautifully sliced steak next to them.

Step 6: Drizzle and Serve

Generously ladle or drizzle the vibrant creamy herb sauce over the steak and bowl components. Garnish with an extra sprinkle of fresh chopped parsley and serve immediately!

5. Pro Tips for Culinary Perfection

  • Rest Your Meat: Never slice your steak immediately after cooking. Resting allows the muscle fibers to relax and reabsorb the juices, keeping every slice exceptionally moist.
  • Slice Against the Grain: When cutting your steak, look at the direction of the muscle fibers and slice perpendicularly to ensure tender, melt-in-your-mouth bites.
  • High Heat for Char: To get that authentic restaurant-style char on your corn and steak, ensure your skillet is smoking hot before adding the ingredients.

6. Serving Suggestions and Pairings

To transform your Charred Steak and Sweet Corn Rice Bowls with Creamy Herb Sauce into an even grander feast, consider these pairing options:

  • Lime Wedges: Serve with fresh lime wedges on the side for an extra burst of citrus acidity.
  • Pickled Red Onions: Add a bright, tangy crunch to cut through the rich creamy sauce.
  • Crisp Sparkling Water or Mocktail: Pair with a refreshing mint-lime cooler to complement the bold southwestern and Mediterranean flavor notes.

Enjoy sharing and savoring this incredible culinary creation on your website!

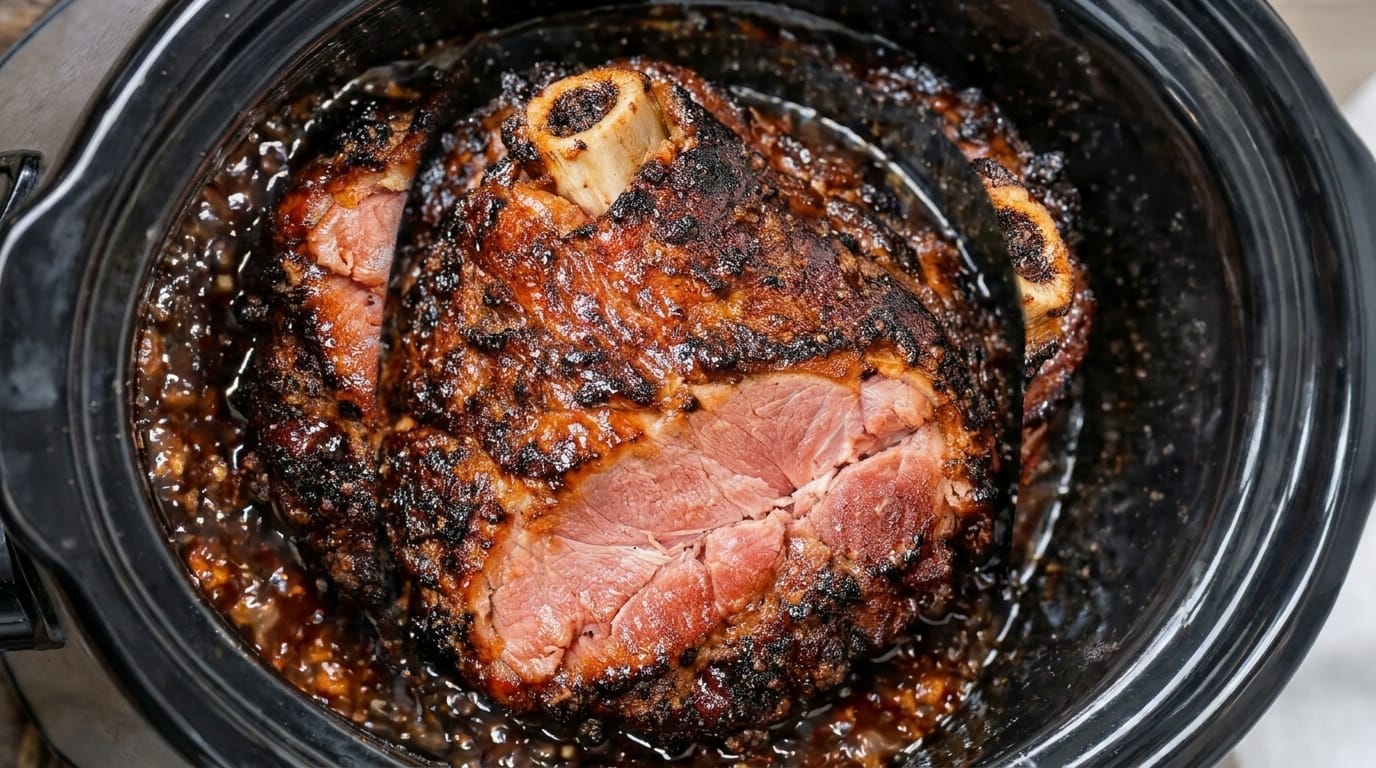
The Ultimate Masterclass Guide to Slow-Cooker Honey Glazed Bone-In Shank: A Culinary Deep-Dive

Welcome to the definitive guide on creating the most succulent, fall-off-the-bone comfort dish imaginable: Slow-Cooker Honey Glazed Bone-In Shank. If you have ever wanted to transform a tough, rustic cut of meat into an extraordinary, melt-in-your-mouth dining experience with minimal effort, this comprehensive deep-dive covers everything you need to know. From the science of slow-braising tough connective tissue to achieving a sticky, caramelized honey glaze, this blog post is tailored for food creators, home cooks, and recipe bloggers who demand absolute perfection in every bite.

1. Introduction: The Magic of Slow-Cooker Honey Glazed Bone-In Shank

There are few dishes in the culinary world that evoke as much immediate warmth and satisfaction as meat cooked low and slow until it yields effortlessly to a fork. But when you take a rich bone-in shank, bath it in a savory aromatic broth, and finish it with a glossy, sweet honey glaze that caramelizes to perfection, you transcend ordinary home cooking.

The Slow-Cooker Honey Glazed Bone-In Shank recipe featured here is a masterpiece of textures and deep, savory-sweet aromas. The marrow-rich bone infuses the surrounding meat with incredible depth, while the slow-cooker breaks down collagen into meltingly tender perfection. Coated in a sticky honey glaze, this dish is guaranteed to become an instant favorite and a viral hit on your food blog or social media channels.

2. Why This Recipe Stands Out

In a digital sea of endless dinner recipes, why does this specific dish capture everyone’s attention?

  • Unmatched Melt-in-Your-Mouth Texture: Slow-cooking over several hours breaks down tough muscle fibers and collagen, resulting in meat that pulls apart with absolute ease.
  • The Sweet and Savory Balance: The robust, savory profile of the shank is perfectly complemented by the sticky sweetness of the honey glaze and aromatic spices.
  • Hands-Off Convenience: Your slow-cooker does 95% of the heavy lifting, making gourmet-level dining entirely accessible for busy weeknights or stress-free entertaining.
  • Visual Appeal: The exposed bone, glistening caramelized crust, and rich pan juices make it an absolute showstopper for food photography and short-form video content.

3. Comprehensive Ingredients Breakdown

To achieve restaurant-quality results at home, ingredient quality and proportion are paramount. Here is your complete shopping list for the Slow-Cooker Honey Glazed Bone-In Shank:

For the Main Cut and Base:

  • Meat: 1 large bone-in shank (beef or lamb shank, approximately 3 to 4 lbs, offering deep flavor from the central marrow bone).
  • Aromatics: 1 large yellow onion (sliced), 4 cloves of garlic (smashed), and 2 sprigs of fresh rosemary.
  • Liquid Base: 1 cup low-sodium beef broth or vegetable stock to keep the slow-cooker moist and build a rich braising liquid.
  • Seasonings: 1 tablespoon kosher salt, 1 teaspoon freshly cracked black pepper, 1 teaspoon smoked paprika, and 1 teaspoon garlic powder.

For the Sticky Honey Glaze:

  • Honey: 1/2 cup pure honey for that gorgeous, glossy sweetness.
  • Soy Sauce or Tamari: 2 tablespoons for a touch of umami depth to balance the honey.
  • Apple Cider Vinegar: 1 tablespoon to cut through the sweetness with a subtle tang.
  • Dijon Mustard: 1 tablespoon for a hint of sharpness and complexity in the glaze.

4. Step-by-Step Preparation Guide

Follow this meticulous roadmap to ensure your bone-in shank turns out exceptionally tender, beautifully glazed, and packed with flavor.

Step 1: Prepping Your Kitchen and Ingredients

Pat the bone-in shank dry with paper towels. Rub the dry seasonings (salt, pepper, smoked paprika, and garlic powder) all over the surface of the meat, pressing them firmly into the grain so the flavors penetrate deeply.

Step 2: Layering the Slow-Cooker Base

At the bottom of your slow-cooker insert, create a bed of sliced yellow onions, smashed garlic cloves, and fresh rosemary sprigs. This prevents the meat from sticking and infuses the braising liquid with foundational aromatics.

Step 3: Positioning the Shank

Place the seasoned bone-in shank directly on top of the onion and herb bed, with the bone facing upward if possible. Pour the low-sodium beef broth around the sides of the meat (avoiding washing off the dry rub on top).

Step 4: The Low and Slow Braise

Cover the slow-cooker with its lid. Cook on LOW for 7 to 8 hours (or on HIGH for 4 to 5 hours), until the meat is fork-tender and beginning to pull away from the bone.

Step 5: Whisking the Honey Glaze

While the shank finishes cooking, whisk together the honey, soy sauce, apple cider vinegar, and Dijon mustard in a small bowl until smooth.

Step 6: Glazing and Caramelizing

Carefully transfer the cooked shank from the slow-cooker to a foil-lined baking sheet or an oven-safe cast-iron skillet. Generously brush the honey glaze all over the exterior of the meat. Place it under your oven’s broiler for 3 to 5 minutes, watching closely, until the honey bubbles, browns, and forms a sticky, caramelized crust.

Step 7: Serve and Enjoy

Drizzle any remaining pan juices over the top, slice or pull the tender meat away from the bone, and serve warm with your favorite sides!

5. Pro Tips for Culinary Perfection

  • Don’t Rush the Cook: Cooking on the LOW setting for a longer duration yields a much more tender texture than rushing it on high heat.
  • Watch the Broiler: Honey has a high sugar content and can burn very quickly under direct broiler heat. Keep your oven door cracked and watch it constantly during those final 3 to 5 minutes.
  • Save the Braising Liquids: Strain the leftover onions and juices from the slow-cooker to create a deeply flavorful au jus gravy for drizzling over your serving plates.

6. Serving Suggestions and Pairings

To transform your Slow-Cooker Honey Glazed Bone-In Shank into a full feast, consider these incredible pairing options:

  • Creamy Mashed Potatoes or Polenta: The ultimate canvas for soaking up the rich pan juices and sweet honey glaze.
  • Roasted Root Vegetables: Carrots, parsnips, and brussels sprouts roasted to earthy perfection complement the savory-sweet profile of the meat.
  • Crusty Artisan Bread: Perfect for mopping up every last drop of delicious sauce from your plate.

Enjoy sharing and savoring this incredible culinary creation on your website!

The Ultimate Masterclass Guide to Cheesy Garlic Butter Stuffed Pizza Rolls: A Culinary Deep-Dive

Welcome to the definitive guide on creating the most decadent, flavor-packed comfort snack imaginable: Cheesy Garlic Butter Stuffed Pizza Rolls. If you have ever wanted to elevate standard party food into an extraordinary, gourmet dining experience, this comprehensive deep-dive covers everything you need to know. From the science of achieving golden, flaky dough to the secrets of a stretchy, melted cheese pull infused with savory garlic butter, this blog post is tailored for food creators, home cooks, and recipe bloggers who demand absolute perfection in every bite.

1. Introduction: The Magic of Cheesy Garlic Butter Stuffed Pizza Rolls

There are few dishes in the culinary world that evoke as much immediate nostalgia and satisfaction as stuffed pizza dough. But when you take golden-baked dough rolls packed with savory beef (avoiding pork), rich melted mozzarella, and tangy sauce, then brush them generously with liquid gold garlic herb butter, you transcend ordinary snacking.

The Cheesy Garlic Butter Stuffed Pizza Rolls recipe featured here is a masterpiece of complementary textures and deep, savory aromas. The exterior achieves a wonderful buttery, garlic-crusted finish, while the interior yields an incredible, gooey cheese pull. Perfect for game days, family gatherings, or your latest food blog post, this recipe is guaranteed to become an instant viral hit.

2. Why This Recipe Stands Out

In a digital sea of endless snack recipes, why does this specific dish capture everyone’s attention?

  • Unmatched Flavor Depth: The combination of roasted garlic, rich melted butter, seasoned beef, and stretchy mozzarella creates layers of irresistible flavor.
  • Crowd-Pleasing Appeal: Universally loved by kids and adults alike, making it the ultimate party appetizer or weekend treat.
  • Visual Appeal: The dramatic cheese pull, glistening garlic butter glaze, and vibrant parsley garnish make it an absolute showstopper for food photography and short-form video content.
  • Customizable Filling: Easy to adapt with your favorite fillings while keeping the core technique intact.

3. Comprehensive Ingredients Breakdown

To achieve bakery-quality results at home, ingredient quality and proportion are paramount. Here is your complete shopping list for the Cheesy Garlic Butter Stuffed Pizza Rolls:

For the Dough and Filling:

  • Pizza Dough: 1 lb store-bought or homemade pizza dough (divided into equal portions).
  • Savory Protein: 1 cup cooked ground beef (seasoned with Italian herbs, salt, and pepper as a delicious non-pork alternative).
  • Cheese: 2 cups shredded low-moisture mozzarella cheese for that ultimate stretchy pull.
  • Pizza Sauce: 1/2 cup thick, rich marinara or pizza sauce (plus extra for dipping).

For the Garlic Herb Butter Glaze:

  • Butter: 1/4 cup unsalted butter, melted.
  • Garlic: 2 cloves, freshly minced or pressed.
  • Italian Seasoning: 1 teaspoon dried oregano and basil blend.
  • Parmesan Cheese: 1/4 cup grated Parmesan cheese for sprinkling on top.
  • Garnish: Fresh chopped parsley for vibrant color contrast upon serving.

4. Step-by-Step Preparation Guide

Follow this meticulous roadmap to ensure your pizza rolls turn out perfectly sealed, exceptionally golden, and drenched in a flawless garlic butter glaze.

Step 1: Prepping Your Kitchen and Oven

Preheat your oven to 400°F (200°C) and line a large baking sheet with parchment paper. Lightly flour your work surface to ensure the pizza dough doesn’t stick during rolling.

Step 2: Portioning and Flattening the Dough

Divide your pizza dough into equal portions (about 6 to 8 pieces). Roll each piece into a small rectangle or oval shape, approximately 1/4-inch thick.

Step 3: Layering the Fillings

Spoon a small stripe of pizza sauce down the center of each dough piece, followed by a generous spoonful of seasoned cooked ground beef and a heavy handful of shredded mozzarella cheese. Be careful not to overfill, or the rolls may leak during baking.

Step 4: Rolling and Sealing

Carefully pull the edges of the dough over the filling to create a tight cylinder or log shape. Pinch the seams firmly and tuck in the ends to seal everything inside securely. Place them seam-side down on your prepared baking sheet.

Step 5: Baking to Golden Perfection

Bake in the preheated oven for 15 to 18 minutes, or until the dough turns a gorgeous golden-brown and the cheese is fully melted inside.

Step 6: Applying the Garlic Butter Glaze

While the rolls are baking, whisk together the melted unsalted butter, minced garlic, and Italian seasoning. As soon as the pizza rolls come out of the oven, brush the garlic butter mixture generously all over the hot crust. Sprinkle with grated Parmesan cheese and fresh chopped parsley.

Step 7: Serve and Enjoy

Serve warm alongside a bowl of warm marinara sauce for dipping and experience the ultimate cheese pull!

5. Pro Tips for Culinary Perfection

  • Seal the Edges Well: Ensure you pinch the dough seams tightly so the melted cheese stays securely trapped inside while baking.
  • Brush While Hot: Apply the garlic butter glaze immediately after the rolls come out of the oven so the heat opens the pores of the crust and absorbs all that rich flavor.
  • Quality Cheese Matters: Use low-moisture, block-shredded mozzarella rather than pre-shredded bagged cheese for a much smoother, stretchier melt.

6. Serving Suggestions and Pairings

To transform your Cheesy Garlic Butter Stuffed Pizza Rolls into a full feast, consider these incredible pairing options:

  • Warm Marinara or Garlic Dipping Sauce: Essential for elevating every single bite.
  • Crisp Side Salad: A fresh Caesar or Mediterranean cucumber salad helps balance the richness of the buttery rolls.
  • Game Day Spread: Pair with buffalo wings and vegetable platters for the ultimate entertaining menu.

Enjoy sharing and savoring this incredible culinary creation on your website!

Garlic Butter Roasted Cauliflower Steaks – Tender, Cheesy & Flavor-Packed Vegetarian Comfort Food

Garlic Butter Roasted Cauliflower Steaks are a delicious way to transform a simple cauliflower head into a stunning, flavorful main dish or side. Thick slices of cauliflower are roasted until golden brown, caramelized, and tender, then finished with a rich garlic butter seasoning that creates an irresistible savory flavor.

The image shows beautifully roasted cauliflower steaks with a golden crispy exterior, melted cheesy topping, and fresh green onion garnish. The edges are caramelized while the inside remains tender, creating the perfect combination of textures in every bite.

This recipe is perfect for weeknight dinners, holiday tables, healthy meal options, or anyone looking for a creative vegetable dish that feels satisfying and indulgent. With simple ingredients like garlic, butter, cheese, and herbs, cauliflower becomes a restaurant-style dish that everyone will enjoy.


Why You’ll Love These Garlic Butter Roasted Cauliflower Steaks

These cauliflower steaks are packed with flavor while being surprisingly easy to prepare.

The roasting process brings out the natural sweetness of cauliflower and creates beautifully browned edges that add incredible depth.

The garlic butter coating gives every bite a rich, savory taste, while the melted cheese adds creaminess and a delicious golden finish.

This recipe is also versatile. Serve it as a vegetarian main course, a low-carb alternative to steak, or a flavorful side dish alongside chicken, beef, or seafood.

It is simple enough for everyday meals but impressive enough for special occasions.


Ingredients

For the Cauliflower Steaks

  • 1 large head cauliflower
  • 3 tablespoons olive oil
  • 3 tablespoons melted butter
  • 5 cloves garlic, minced
  • 1 teaspoon garlic powder
  • 1 teaspoon onion powder
  • 1 teaspoon smoked paprika
  • 1 teaspoon Italian seasoning
  • 1 teaspoon salt
  • ½ teaspoon black pepper

For the Cheesy Topping

  • 1 cup shredded mozzarella cheese
  • ½ cup shredded cheddar cheese
  • ¼ cup grated Parmesan cheese
  • 1 tablespoon fresh parsley, chopped
  • 2 tablespoons chopped green onions

Optional Finishing Ingredients

  • Red pepper flakes for spice
  • Fresh basil
  • Extra melted garlic butter
  • Lemon zest

How to Make Garlic Butter Roasted Cauliflower Steaks

1. Prepare the Cauliflower

Preheat your oven to 425°F (220°C).

Line a large baking sheet with parchment paper or lightly grease it.

Remove the outer leaves from the cauliflower.

Keep the stem intact because it helps hold the cauliflower slices together.

Place the cauliflower upright on a cutting board.

Using a sharp knife, cut the cauliflower into thick slices about:

1 to 1½ inches thick

These thick slices are called cauliflower steaks.

Some smaller florets may fall away from the sides, but you can roast those alongside the steaks.


2. Make the Garlic Butter Seasoning

In a small bowl, combine:

  • Melted butter
  • Olive oil
  • Minced garlic
  • Garlic powder
  • Onion powder
  • Smoked paprika
  • Italian seasoning
  • Salt
  • Black pepper

Mix until everything is well combined.

The butter adds richness, while the olive oil helps the cauliflower roast evenly and develop a beautiful golden crust.


3. Season the Cauliflower Steaks

Place the cauliflower steaks on the prepared baking sheet.

Brush both sides generously with the garlic butter mixture.

Make sure the seasoning gets into the cracks and surface of the cauliflower.

This helps every bite become flavorful.

Allow the cauliflower to sit for a few minutes after seasoning so it can absorb the flavors.


4. Roast the Cauliflower

Place the baking sheet into the oven.

Roast for:

20–25 minutes

Carefully flip the cauliflower steaks halfway through cooking.

Continue roasting until:

  • The edges are golden brown
  • The surface is caramelized
  • The center is tender when pierced with a fork

The high oven temperature creates the beautiful roasted texture shown in the image.


5. Add the Cheese Topping

Once the cauliflower steaks are almost finished cooking, remove them from the oven.

Sprinkle each steak generously with:

  • Mozzarella cheese
  • Cheddar cheese
  • Parmesan cheese

Return the baking sheet to the oven.

Bake for another:

5–7 minutes

until the cheese melts and becomes golden.

For an extra crispy cheese topping, switch the oven to broil for 1–2 minutes, watching carefully.


6. Garnish and Serve

Remove the cauliflower steaks from the oven.

Sprinkle with fresh parsley and chopped green onions.

Add extra cracked black pepper or red pepper flakes if desired.

Serve warm while the cheese is melted and the edges are crispy.


What to Serve With Garlic Butter Cauliflower Steaks

These cauliflower steaks pair beautifully with many dishes.

As a Vegetarian Meal

Serve with:

  • Creamy mashed potatoes
  • Rice pilaf
  • Quinoa
  • Fresh salad
  • Roasted vegetables

With Meat Dishes

They make an excellent side dish with:

  • Garlic butter steak
  • Grilled chicken
  • Roasted beef
  • Salmon
  • Shrimp

With Sauces

Try serving with:

  • Garlic aioli
  • Ranch dressing
  • Creamy herb sauce
  • Marinara sauce
  • Spicy mayo

Tips for the Best Cauliflower Steaks

Choose a Large Cauliflower

A larger cauliflower head creates thicker, stronger steaks that hold together better.

Keep the Stem Attached

The stem helps prevent the slices from falling apart.

Cut Thick Slices

Thin slices cook quickly but may break apart.

Thicker steaks create the best texture.

Use High Heat

Roasting at a high temperature creates caramelization and prevents the cauliflower from becoming watery.

Season Generously

Cauliflower has a mild flavor, so bold seasoning makes a big difference.

Do Not Overcook

The goal is tender cauliflower with a slight bite, not mushy texture.


Easy Recipe Variations

Crispy Parmesan Cauliflower Steaks

Add extra Parmesan cheese and breadcrumbs before roasting for a crispy coating.


Spicy Garlic Cauliflower Steaks

Add:

  • Cayenne pepper
  • Chili flakes
  • Hot sauce

to the garlic butter mixture.


Mediterranean Cauliflower Steaks

Top with:

  • Feta cheese
  • Olives
  • Fresh herbs
  • Lemon juice

for a Mediterranean-inspired version.


Loaded Cauliflower Steaks

Add toppings like:

  • Crispy bacon pieces
  • Sour cream drizzle
  • Green onions
  • Extra cheese

for a loaded baked potato-style flavor.


Creamy Garlic Cauliflower Steaks

After roasting, drizzle with a creamy garlic sauce made with:

  • Heavy cream
  • Parmesan
  • Garlic
  • Butter

for an extra indulgent version.


How to Store Leftovers

Allow the cauliflower steaks to cool completely.

Store in an airtight container.

Refrigerate for up to:

3–4 days

The texture is best when reheated in the oven or air fryer.


How to Reheat

Oven Method

Place cauliflower steaks on a baking sheet.

Heat at:

375°F for 10–15 minutes

until warmed through.

Air Fryer Method

Reheat at:

375°F for 5–7 minutes

for crispy edges.

Avoid microwaving if possible because it can make the cauliflower soft.


Can You Freeze Cauliflower Steaks?

Yes, roasted cauliflower steaks can be frozen.

Allow them to cool completely.

Place them in freezer-safe containers or bags.

Freeze for up to:

2 months

Thaw before reheating.

For the best texture, reheat in the oven or air fryer.


Final Thoughts

Garlic Butter Roasted Cauliflower Steaks are proof that simple vegetables can become an incredible centerpiece. With golden roasted edges, a tender center, rich garlic butter flavor, and a cheesy topping, this dish delivers comfort and satisfaction in every bite.

Whether you are looking for a healthy vegetarian dinner, a low-carb alternative, or an impressive side dish, these cauliflower steaks are easy to make and full of flavor.

Serve them alongside your favorite meals or enjoy them on their own for a delicious homemade dish that feels both wholesome and indulgent.

Easy Homemade Meatloaf with Roasted Potatoes – Juicy, Flavorful & Comforting Family Dinner

This classic Homemade Meatloaf with Roasted Potatoes is the ultimate comfort food meal featuring a juicy, tender beef meatloaf topped with a rich caramelized glaze and served alongside golden roasted potatoes. It is a simple, hearty dinner that brings together familiar flavors in a way that feels warm, satisfying, and perfect for the whole family.

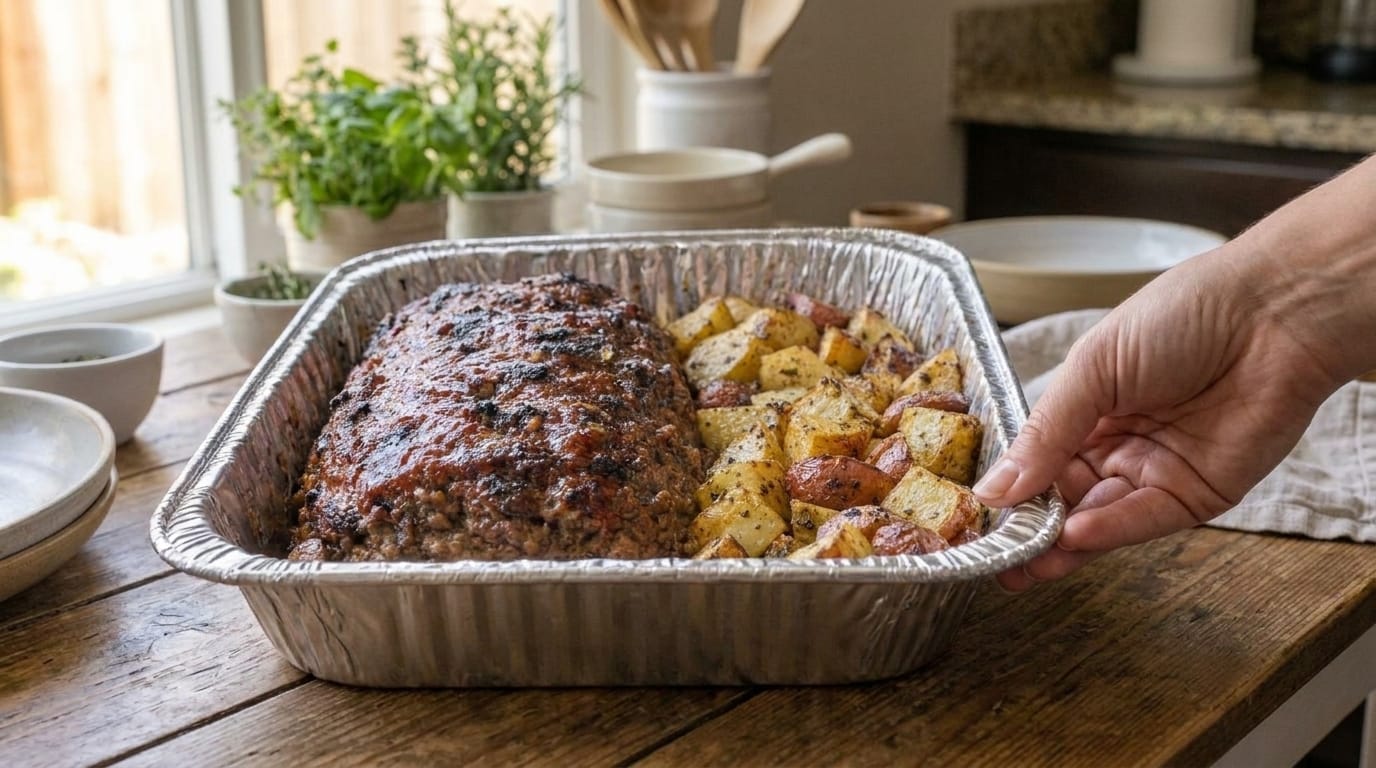
The image shows a beautifully baked meatloaf with a glossy, deeply browned topping paired with seasoned roasted potatoes. The meatloaf develops a flavorful crust while staying moist and tender inside, while the potatoes become crispy on the outside and soft in the center.

This recipe is perfect for busy weeknight dinners, Sunday family meals, meal prep, or gatherings. Everything cooks together in one baking dish, making preparation and cleanup simple while creating a complete meal packed with homemade flavor.


Why You’ll Love This Meatloaf with Roasted Potatoes

There are many reasons why this recipe has remained a family favorite for generations.

The meatloaf is incredibly juicy thanks to the combination of ground beef, breadcrumbs, eggs, milk, and seasonings. These ingredients work together to create a tender texture while preventing the meat from becoming dry.

The sweet and savory glaze on top caramelizes beautifully during baking, creating a flavorful crust that makes every slice delicious.

The roasted potatoes cook alongside the meatloaf, absorbing the delicious juices and seasonings while developing crispy golden edges.

This recipe is also budget-friendly, easy to customize, and perfect for leftovers.


Ingredients

For the Meatloaf

  • 2 pounds ground beef (80/20 recommended)
  • 1 cup breadcrumbs
  • ½ cup milk
  • 2 large eggs
  • 1 medium yellow onion, finely diced
  • 4 cloves garlic, minced
  • ¼ cup fresh parsley, chopped
  • 2 tablespoons Worcestershire sauce
  • 2 tablespoons ketchup
  • 1 tablespoon Dijon mustard
  • 1 teaspoon Italian seasoning
  • 1 teaspoon garlic powder
  • 1 teaspoon onion powder
  • 1½ teaspoons salt
  • 1 teaspoon black pepper
  • ½ teaspoon smoked paprika

For the Meatloaf Glaze

  • ½ cup ketchup
  • 2 tablespoons brown sugar
  • 1 tablespoon Worcestershire sauce
  • 1 tablespoon apple cider vinegar
  • 1 teaspoon Dijon mustard
  • ½ teaspoon smoked paprika

For the Roasted Potatoes

  • 2 pounds baby potatoes, halved
  • 3 tablespoons olive oil
  • 3 cloves garlic, minced
  • 1 teaspoon Italian seasoning
  • 1 teaspoon paprika
  • 1 teaspoon garlic powder
  • ½ teaspoon onion powder
  • 1 teaspoon salt
  • ½ teaspoon black pepper
  • 2 tablespoons fresh parsley, chopped

How to Make Homemade Meatloaf with Roasted Potatoes

1. Prepare the Oven and Baking Dish

Preheat your oven to 375°F (190°C).

Lightly grease a large baking dish or sheet pan.

For easier cleanup, you can line the pan with parchment paper or foil.


2. Prepare the Meatloaf Mixture

In a small bowl, combine breadcrumbs and milk.

Allow them to sit for about 5 minutes.

This step creates a soft breadcrumb mixture called a panade, which helps keep the meatloaf moist and tender.

In a large mixing bowl, add:

  • Ground beef
  • Soaked breadcrumbs
  • Eggs
  • Onion
  • Garlic
  • Parsley
  • Worcestershire sauce
  • Ketchup
  • Dijon mustard
  • Italian seasoning
  • Garlic powder
  • Onion powder
  • Salt
  • Pepper
  • Smoked paprika

3. Mix the Meatloaf

Using clean hands or a wooden spoon, gently mix everything together.

Do not overmix.

Overworking the meat can make the meatloaf dense and tough.

Mix just until the ingredients are evenly combined.


4. Shape the Meatloaf

Transfer the mixture onto the prepared baking dish.

Shape it into a loaf approximately:

  • 8 inches long
  • 4 inches wide
  • 3 inches tall

Creating a slightly rounded top helps the glaze spread evenly and allows the meatloaf to brown beautifully.


5. Prepare the Meatloaf Glaze

In a small bowl, mix together:

  • Ketchup
  • Brown sugar
  • Worcestershire sauce
  • Apple cider vinegar
  • Dijon mustard
  • Smoked paprika

Stir until smooth.

Spread the glaze evenly over the top of the meatloaf.

The glaze will caramelize during baking, creating the shiny, flavorful crust shown in the image.


6. Prepare the Roasted Potatoes

While the meatloaf is prepared, wash and cut the baby potatoes into halves or quarters depending on size.

Place potatoes in a bowl.

Add:

  • Olive oil
  • Garlic
  • Italian seasoning
  • Paprika
  • Garlic powder
  • Onion powder
  • Salt
  • Black pepper

Toss until every potato piece is evenly coated.


7. Arrange Potatoes Around the Meatloaf

Place the seasoned potatoes around the meatloaf in the baking dish.

Try to leave some space between potatoes so they roast instead of steam.

The potatoes will absorb some of the delicious meatloaf flavors while roasting.


8. Bake Until Perfectly Cooked

Place the baking dish into the oven.

Bake for approximately:

50–60 minutes

The meatloaf should reach an internal temperature of 160°F (71°C).

The potatoes should be golden brown and fork tender.

If the potatoes need more color, you can increase the oven temperature to 425°F for the final 5–10 minutes.


9. Rest Before Slicing

Remove the meatloaf from the oven.

Allow it to rest for 10–15 minutes before slicing.

Resting allows the juices to redistribute, creating cleaner slices and a more tender texture.

Sprinkle fresh parsley over the potatoes and meatloaf before serving.


What to Serve With Meatloaf and Roasted Potatoes

This meal is already complete, but you can add extra sides for a larger dinner.

Vegetables

Great options include:

  • Green beans
  • Roasted broccoli
  • Glazed carrots
  • Steamed asparagus
  • Corn

Sauces

Serve with:

  • Extra ketchup glaze
  • Brown gravy
  • Garlic herb sauce
  • Mushroom gravy

Bread

Add:

  • Dinner rolls
  • Garlic bread
  • Homemade biscuits

Tips for the Best Homemade Meatloaf

Use Ground Beef with Some Fat

An 80/20 ground beef blend creates a juicy meatloaf.

Very lean beef can result in a dry texture.

Do Not Overmix

Mix gently to keep the meatloaf soft and tender.

Let the Breadcrumbs Soak

The breadcrumb and milk mixture helps lock in moisture.

Add Enough Seasoning

Meatloaf needs bold seasoning because the flavor must spread throughout the entire loaf.

Rest Before Cutting

Cutting immediately can cause the juices to escape.


Easy Recipe Variations

Cheesy Stuffed Meatloaf

Add a layer of shredded mozzarella or cheddar inside the meatloaf before shaping.

The cheese melts into a delicious surprise center.


Bacon Wrapped Meatloaf

Wrap the meatloaf with bacon strips before baking.

The bacon adds smoky flavor and keeps the meat extra moist.


BBQ Meatloaf

Replace the ketchup glaze with your favorite barbecue sauce.

This creates a smoky, sweet flavor.


Italian Style Meatloaf

Add:

  • Parmesan cheese
  • Basil
  • Extra Italian seasoning

Serve with marinara sauce.


Turkey Meatloaf

Replace ground beef with ground turkey.

Add extra olive oil or vegetables to maintain moisture.


How to Store Leftovers

Allow the meatloaf and potatoes to cool completely.

Store in airtight containers.

Refrigerate for up to 4 days.

The flavors often become even better the next day.


How to Reheat

For the best texture:

Oven Method

Cover slices with foil and warm at 325°F for 15–20 minutes.

Microwave Method

Heat individual portions in 30-second intervals until warmed through.

Add a small amount of sauce or gravy to prevent drying.


Can You Freeze Meatloaf?

Yes, meatloaf freezes very well.

Allow it to cool completely.

Wrap individual slices tightly in plastic wrap and place them in freezer-safe bags.

Freeze for up to 3 months.

Thaw overnight in the refrigerator before reheating.


Final Thoughts

Homemade Meatloaf with Roasted Potatoes is a timeless comfort meal that delivers incredible flavor with simple ingredients. The juicy seasoned beef, caramelized glaze, and crispy golden potatoes create a complete dinner that feels both nostalgic and satisfying.

Whether you are cooking for your family, preparing meals for the week, or looking for a cozy homemade dinner, this recipe is a perfect choice. With its rich flavors, easy preparation, and comforting presentation, this classic meatloaf dinner is sure to become a regular favorite at your table.

Slow Cooker Garlic Herb Pot Roast – Tender, Juicy & Full of Rich Comforting Flavor

Slow Cooker Garlic Herb Pot Roast is the ultimate classic comfort food featuring a beautifully seared beef roast cooked slowly until it becomes incredibly tender and melts apart with every bite. This hearty dish combines a deeply browned beef chuck roast with garlic, onions, carrots, herbs, and a rich savory broth that transforms into a flavorful homemade gravy.

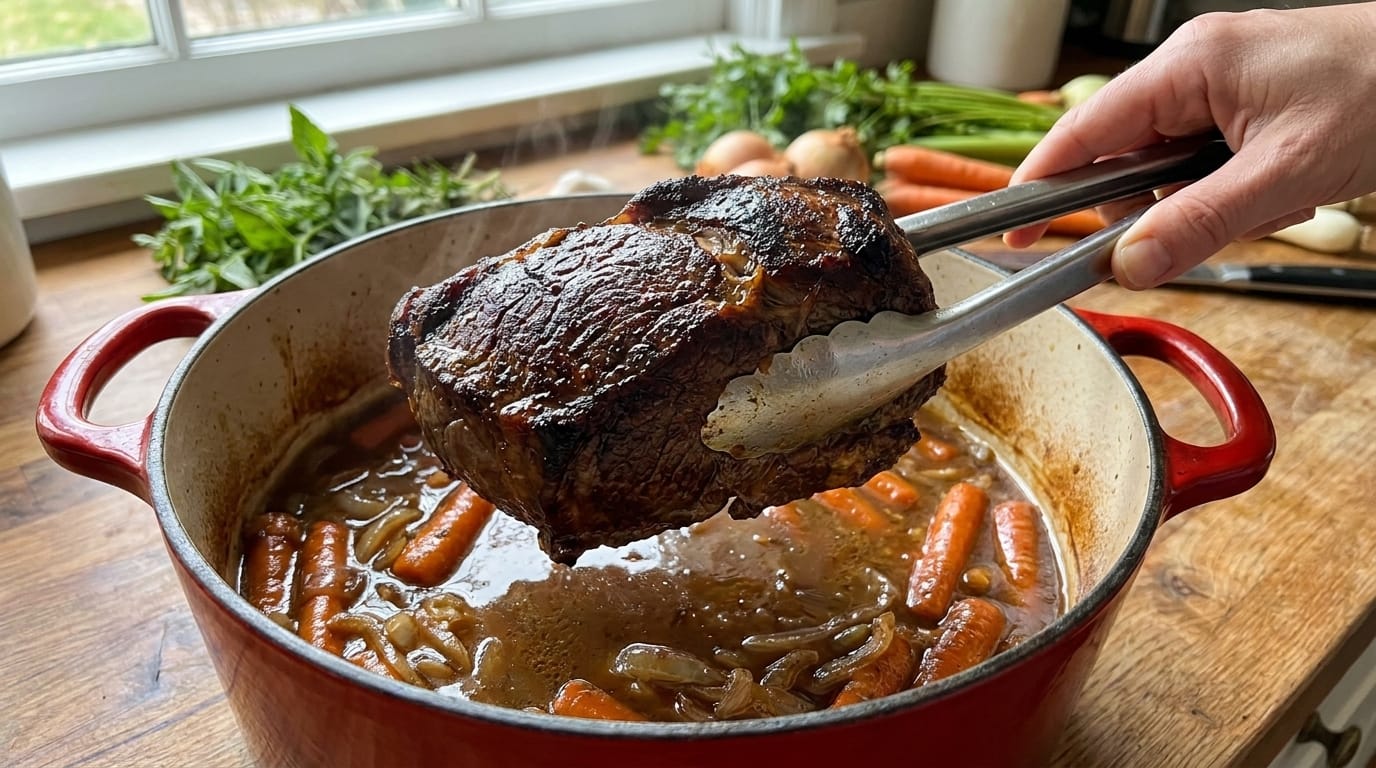
The image shows a beautifully caramelized pot roast with a dark, glossy crust surrounded by tender vegetables and a rich cooking liquid. The secret to achieving this incredible flavor is a combination of proper seasoning, searing the beef before slow cooking, and allowing the roast enough time to gently break down until it reaches that perfect fall-apart texture.

This recipe is ideal for Sunday dinners, family gatherings, holiday meals, or cozy weeknight dinners. The slow cooker or Dutch oven does most of the work, leaving you with a restaurant-quality meal that tastes like it has been cooking all day.

Serve this garlic herb pot roast over creamy mashed potatoes, buttered noodles, or alongside roasted vegetables for a comforting meal everyone will love.


Why You’ll Love This Garlic Herb Pot Roast

There is a reason pot roast has remained a family favorite for generations. It is simple, filling, and creates incredible flavor from humble ingredients.

The long cooking process allows the beef to become exceptionally tender while absorbing the flavors of garlic, herbs, and savory broth.

The combination of fresh garlic, rosemary, thyme, and Worcestershire sauce creates a rich and aromatic sauce that perfectly complements the beef.

This recipe is also very practical. You can prepare everything ahead of time, let it cook slowly throughout the day, and come home to a warm, comforting dinner.

The leftovers are just as delicious and can be used for sandwiches, soups, tacos, or beef bowls.


Ingredients

For the Pot Roast

  • 4 to 5 pound beef chuck roast
  • 2 tablespoons olive oil
  • 2 teaspoons kosher salt
  • 1½ teaspoons black pepper
  • 2 teaspoons garlic powder
  • 1 teaspoon onion powder
  • 1 teaspoon smoked paprika
  • 2 tablespoons all-purpose flour (optional, for better browning)

For the Vegetables

  • 1 large yellow onion, sliced
  • 5 cloves garlic, minced
  • 5 large carrots, peeled and cut into chunks
  • 1½ pounds baby potatoes, halved
  • 2 celery stalks, chopped

For the Garlic Herb Cooking Sauce

  • 2½ cups beef broth
  • 3 tablespoons Worcestershire sauce
  • 2 tablespoons tomato paste
  • 1 tablespoon Dijon mustard
  • 2 tablespoons butter
  • 2 teaspoons fresh rosemary, chopped
  • 2 teaspoons fresh thyme leaves
  • 1 teaspoon dried parsley
  • 2 bay leaves
  • 1 teaspoon black pepper

For the Gravy

  • 3 tablespoons cornstarch
  • 4 tablespoons cold water
  • Salt and pepper, to taste

For Garnishing

  • Fresh parsley, chopped
  • Fresh thyme leaves
  • Extra cracked black pepper

How to Make Slow Cooker Garlic Herb Pot Roast

1. Prepare the Beef Roast

Remove the chuck roast from the refrigerator approximately 30 minutes before cooking.

Allowing the meat to come closer to room temperature helps it cook more evenly.

Pat the roast completely dry using paper towels.

This step is important because moisture prevents the outside of the beef from developing a deep golden crust.

Season all sides generously with:

  • Salt
  • Black pepper
  • Garlic powder
  • Onion powder
  • Smoked paprika

If using flour, lightly coat the roast after seasoning.

The flour helps create a beautiful browned exterior and also contributes to a richer gravy later.


2. Sear the Roast

Heat olive oil in a large Dutch oven or heavy skillet over medium-high heat.

Once the pan is hot, add the roast.

Sear for approximately 4 to 5 minutes per side until the surface develops a deep brown crust.

Do not rush this step.

The browned layer created during searing adds a huge amount of flavor through caramelization.

Turn the roast carefully and brown all sides, including the edges.

Transfer the roast to a plate.


3. Cook the Aromatics

Reduce the heat to medium.

Add butter to the same pan.

Add sliced onions and cook for approximately 3 to 4 minutes until they begin to soften.

Add minced garlic and cook for another 30 seconds until fragrant.

Be careful not to burn the garlic because it can become bitter.

Stir in tomato paste and cook for one minute.

Cooking the tomato paste briefly intensifies its flavor and gives the sauce a deeper color.


4. Deglaze the Pan

Pour in the beef broth.

Use a wooden spoon to scrape the browned bits from the bottom of the pan.

These caramelized pieces contain concentrated beef flavor and will make the final gravy much richer.

Add:

  • Worcestershire sauce
  • Dijon mustard
  • Rosemary
  • Thyme
  • Parsley
  • Black pepper

Stir everything together.


5. Arrange Everything in the Slow Cooker

Place the chopped carrots, potatoes, and celery at the bottom of the slow cooker.

These vegetables create a flavorful base and absorb the delicious cooking juices.

Place the seared roast on top of the vegetables.

Pour the garlic herb broth mixture over the roast.

Add bay leaves.

Cover with the lid.


6. Slow Cook the Pot Roast

Cook the roast:

LOW: 8 to 10 hours
HIGH: 5 to 6 hours

Low cooking is highly recommended because it gives the connective tissue enough time to break down.

The roast is ready when:

  • A fork easily slides into the meat
  • The beef pulls apart without resistance
  • The vegetables are tender

Avoid opening the lid frequently because heat escapes and increases cooking time.


7. Remove and Rest the Roast

Carefully transfer the cooked roast onto a large serving platter.

Allow it to rest for approximately 10 to 15 minutes before slicing or shredding.

Resting allows the juices to redistribute, making the meat even more tender and flavorful.

Remove any large pieces of excess fat if desired.


8. Make the Garlic Herb Gravy

Remove the bay leaves from the cooking liquid.

Transfer approximately 3 cups of the cooking broth into a saucepan.

Bring it to a gentle simmer.

Mix cornstarch and cold water together until smooth.

Slowly whisk the slurry into the simmering broth.

Cook for approximately 3 to 5 minutes until the gravy thickens.

Taste and adjust seasoning with salt and pepper.

For an extra rich finish, stir in one tablespoon of butter before serving.


9. Serve the Pot Roast

Place the tender roast on a serving platter.

Arrange the cooked carrots and potatoes around the beef.

Spoon plenty of garlic herb gravy over the top.

Finish with fresh parsley and thyme.

Serve warm.


What to Serve With Garlic Herb Pot Roast

Creamy Mashed Potatoes

Mashed potatoes are the perfect pairing because they soak up the rich homemade gravy.

Buttered Egg Noodles

The noodles provide a comforting base that works beautifully with the tender beef.

Roasted Vegetables

Serve with:

  • Green beans
  • Broccoli
  • Brussels sprouts
  • Asparagus
  • Roasted carrots

Fresh Bread

Crusty bread or dinner rolls are perfect for dipping into the flavorful gravy.


Tips for the Best Pot Roast

Choose Chuck Roast

Chuck roast is ideal because it has enough marbling and connective tissue to become tender during slow cooking.

Sear Before Cooking

Searing creates deeper flavor and gives the roast a beautiful dark crust.

Do Not Add Too Much Liquid

The beef and vegetables release additional moisture during cooking.

Too much liquid can dilute the flavor.

Cook Slowly

Pot roast becomes tender because of time, not high heat.

Cut Vegetables Large

Large vegetable pieces hold their shape better during long cooking.

Let the Roast Rest

Resting helps keep the meat juicy when sliced.


Easy Recipe Variations

Mushroom Garlic Herb Pot Roast

Add 8 ounces sliced mushrooms with the onions for extra earthy flavor.

Creamy Garlic Pot Roast

Stir ½ cup heavy cream into the gravy before serving for a richer sauce.

Red Wine Pot Roast

Replace 1 cup of beef broth with red wine for a deeper, restaurant-style flavor.

Spicy Garlic Pot Roast

Add crushed red pepper flakes or cayenne pepper for extra heat.

BBQ Pot Roast

Add ½ cup barbecue sauce to the cooking liquid for a smoky sweet version.


How to Store Leftovers

Allow leftovers to cool completely.

Store the beef, vegetables, and gravy together in an airtight container.

Refrigerate for up to 4 days.

Keeping the meat in the gravy helps maintain moisture.


How to Reheat

Place leftovers in a saucepan over medium-low heat.

Add a splash of beef broth if needed.

Heat gently until warmed through.

Avoid high heat because it can dry out the beef.


Can You Freeze Pot Roast?

Yes, pot roast freezes very well.

Place cooled beef and gravy in freezer-safe containers.

Freeze for up to 3 months.

Thaw overnight in the refrigerator before reheating.

The gravy helps protect the meat and keeps it flavorful.


Final Thoughts

Slow Cooker Garlic Herb Pot Roast is the perfect example of a comforting homemade meal made with simple ingredients. A well-seasoned beef roast slowly cooks with garlic, herbs, onions, carrots, and potatoes until everything becomes rich, tender, and full of flavor.

The deeply browned crust, buttery garlic sauce, and fall-apart texture make this dish ideal for family dinners, special occasions, and cozy weekends at home.

Serve it with creamy mashed potatoes, vegetables, and plenty of homemade gravy for a classic comfort meal that brings everyone together around the table.