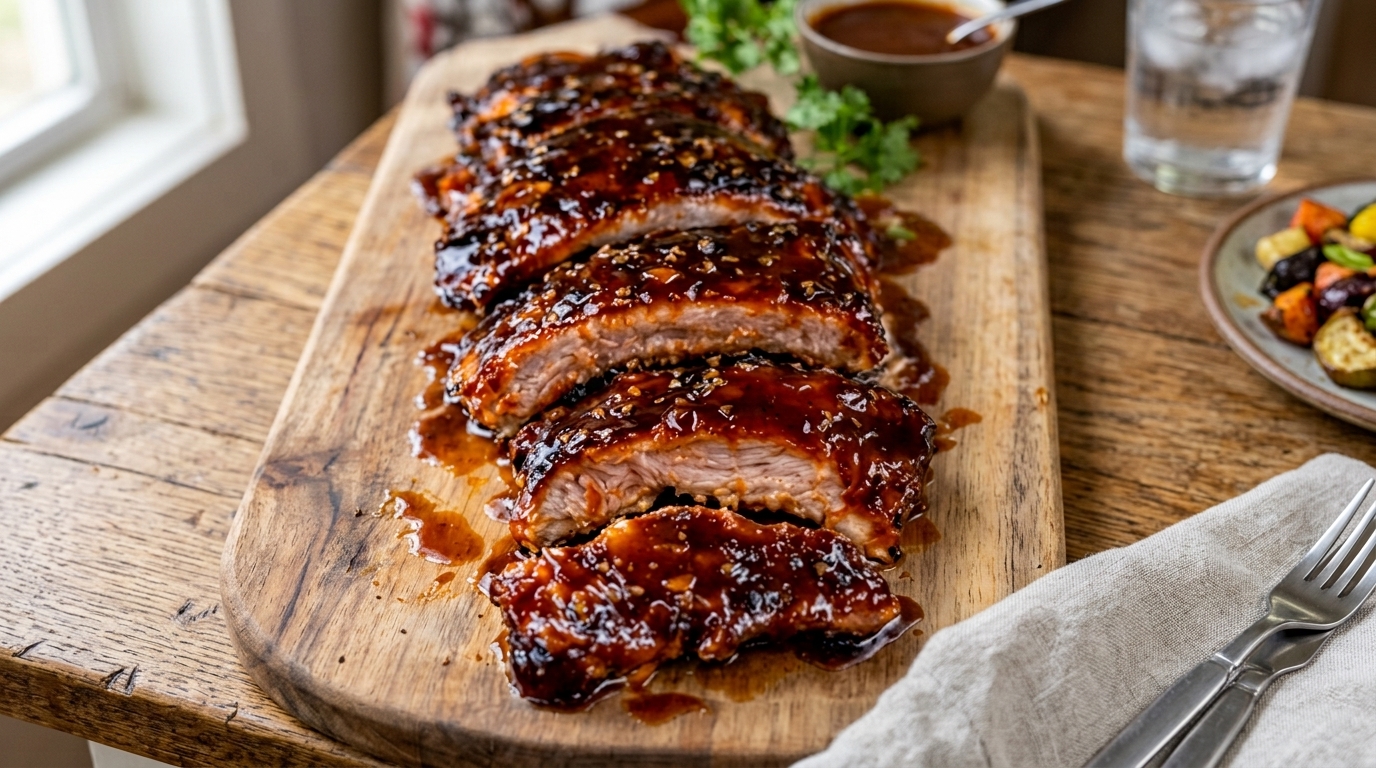
Easy Slow Smoked & Sauced Honey Garlic Ribs Recipe – Sticky, Tender & Packed with Smoky Flavor

Slow Smoked & Sauced Honey Garlic Ribs are the kind of barbecue recipe that delivers everything you want from great ribs: tender meat, deep smoky flavor, caramelized edges, and a glossy sweet-and-savory sauce that clings to every bite. The ribs are seasoned with a flavorful dry rub, smoked slowly until tender, then brushed with a sticky honey garlic glaze and finished until beautifully lacquered.

This recipe is perfect for backyard cookouts, weekend barbecue dinners, family gatherings, game days, holidays, or any time you want to serve something impressive from the smoker. The cooking process takes a few hours, but most of that time is hands-off while the smoker does the work.

The combination of honey, garlic, barbecue sauce, soy sauce, and a touch of acidity creates a glaze that balances sweetness, savoriness, and richness. Pair these ribs with coleslaw, cornbread, baked beans, potato salad, grilled vegetables, or fries for a complete barbecue meal.

Why You’ll Love These Slow Smoked & Sauced Honey Garlic Ribs

The biggest reason to love these ribs is the texture. Cooking them slowly at a low temperature allows the connective tissue to soften gradually, creating meat that is tender and juicy without completely falling apart.

The honey garlic sauce adds another layer of flavor. Honey caramelizes beautifully over the heat, while fresh garlic adds savory depth. Barbecue sauce provides body, and soy sauce enhances the overall richness.

Smoking also gives the ribs a depth that oven-baked ribs cannot fully duplicate. Mild hardwood smoke penetrates the meat during the early stages of cooking, creating an authentic barbecue flavor before the glaze is added.

This recipe is also easy to customize. You can make the ribs sweeter, spicier, smokier, or more garlicky depending on your preference.

Ingredients

For the Ribs

  • 2 racks baby back ribs or St. Louis-style ribs, about 4–5 pounds total
  • 1 tablespoon yellow mustard or olive oil, for binding the seasoning
  • 2 teaspoons kosher salt
  • 1½ teaspoons black pepper
  • 2 teaspoons smoked paprika
  • 1½ teaspoons garlic powder
  • 1 teaspoon onion powder
  • 1 tablespoon brown sugar
  • ½ teaspoon chili powder
  • ¼ teaspoon cayenne pepper, optional

For Spritzing

  • ½ cup apple juice
  • 2 tablespoons apple cider vinegar

For the Honey Garlic Sauce

  • ½ cup barbecue sauce
  • ⅓ cup honey
  • 4 garlic cloves, finely minced
  • 2 tablespoons soy sauce
  • 1 tablespoon apple cider vinegar
  • 1 tablespoon unsalted butter
  • 1 teaspoon Worcestershire sauce
  • ½ teaspoon smoked paprika
  • ¼ teaspoon red pepper flakes, optional

Optional for Serving

  • Chopped fresh parsley
  • Sliced green onions
  • Extra honey garlic sauce
  • Pickles
  • Lemon wedges

How to Make Slow Smoked & Sauced Honey Garlic Ribs

1. Prepare the Ribs

Place the ribs bone-side up on a clean cutting board.

Check the back of each rack for the thin membrane covering the bones. Removing this membrane helps the seasoning penetrate more evenly and creates a more pleasant texture after smoking.

Slide the tip of a butter knife underneath one corner of the membrane until you can lift enough to grab it.

Using a paper towel for grip, pull the membrane slowly away from the rack.

If it tears, simply lift another section and continue until most or all of it has been removed.

Pat both sides of the ribs thoroughly dry with paper towels.

2. Season the Ribs

Lightly coat the ribs with yellow mustard or olive oil.

The mustard does not make the ribs taste strongly of mustard. It mainly acts as a binder that helps the dry seasoning adhere to the meat.

In a small bowl, combine the salt, black pepper, smoked paprika, garlic powder, onion powder, brown sugar, chili powder, and optional cayenne.

Sprinkle the seasoning generously over both sides of the ribs.

Press the rub gently into the meat rather than rubbing aggressively, which can cause the seasoning to fall off.

For deeper flavor, you can season the ribs several hours ahead or refrigerate them overnight.

3. Preheat the Smoker

Preheat your smoker to 225°F.

Good wood choices for these ribs include apple, cherry, pecan, maple, or hickory. Apple and cherry provide a mild, slightly sweet smoke that pairs especially well with honey garlic sauce.

If using hickory, consider combining it with a milder wood because hickory produces a stronger smoke flavor.

Allow the smoker temperature to stabilize before adding the ribs.

4. Begin Smoking the Ribs

Place the ribs directly on the smoker grate with the bone side facing downward.

Close the smoker and cook at 225°F for approximately 2½–3 hours.

During this first stage, the ribs absorb the majority of their smoke flavor and begin forming a flavorful exterior bark.

Avoid repeatedly opening the smoker lid because this allows heat and smoke to escape.

5. Spritz the Ribs

Combine the apple juice and apple cider vinegar in a spray bottle or small bowl.

After the ribs have smoked for approximately 90 minutes, lightly spritz the surface.

Repeat about every 45–60 minutes if the ribs appear dry.

You only need a light coating. Excessive spritzing can cool the surface and slow the cooking process.

The apple juice adds a touch of sweetness, while the vinegar helps balance the richness of the pork.

6. Wrap the Ribs

After about 3 hours of smoking, check the ribs.

The surface should have developed a deep reddish-brown color, and the rub should be firmly set.

Place each rack on a large sheet of heavy-duty aluminum foil.

Before wrapping, add a small splash of apple juice around the ribs. You can also drizzle about 1 tablespoon of honey over each rack if you prefer sweeter ribs.

Wrap the ribs tightly so steam remains trapped inside.

Return them to the smoker and continue cooking at 225°F for approximately 1½–2 hours.

This wrapped stage helps tenderize the meat by trapping moisture around the ribs.

7. Make the Honey Garlic Sauce

While the ribs continue cooking, prepare the sauce.

Add the barbecue sauce, honey, minced garlic, soy sauce, apple cider vinegar, Worcestershire sauce, smoked paprika, and optional red pepper flakes to a small saucepan.

Place over medium-low heat and stir until combined.

Bring the mixture to a gentle simmer and cook for approximately 5 minutes.

Stir frequently so the honey does not scorch.

Remove from the heat and stir in the butter.

The butter gives the sauce a smoother texture and glossy finish.

Taste the sauce. Add a little more honey if you want additional sweetness or more vinegar if you prefer a sharper balance.

8. Check the Ribs for Tenderness

Carefully unwrap one rack after the wrapped cooking stage.

Use caution because hot steam will escape from the foil.

The meat should have pulled back slightly from the ends of the bones.

To test tenderness, gently lift the rack from the center with tongs. It should bend easily, and the surface should begin cracking slightly.

You can also insert a toothpick between the bones. It should slide into the meat with very little resistance.

Ribs do not have a single perfect internal temperature like chicken or steak. Tenderness is a better indicator of doneness, although well-cooked ribs often reach somewhere around 195–205°F internally.

9. Sauce the Ribs

Remove the ribs from the foil and return them directly to the smoker.

Brush a generous but even layer of honey garlic sauce over the top and sides.

Close the smoker and cook for approximately 15 minutes.

Brush the ribs with a second thin layer of sauce.

Continue cooking for another 10–15 minutes.

The goal is to allow the sauce to become sticky, glossy, and slightly caramelized without burning.

Because honey contains a lot of sugar, avoid very high heat during this stage.

10. Rest the Ribs

Remove the finished ribs from the smoker and place them on a cutting board.

Allow them to rest for approximately 10–15 minutes.

Resting helps the juices settle within the meat and allows the glaze to become slightly firmer and stickier.

Do not cover the ribs tightly with foil while resting because trapped steam can soften the exterior.

11. Slice and Serve

Turn the ribs bone-side up so you can clearly see where each bone runs.

Using a sharp knife, slice carefully between the bones.

Arrange the ribs on a serving platter and brush lightly with additional warm honey garlic sauce if desired.

Garnish with chopped parsley or sliced green onions.

Serve immediately while the ribs are warm, juicy, and sticky.

What to Serve With Slow Smoked & Sauced Honey Garlic Ribs

Classic barbecue sides work perfectly with these ribs.

Creamy coleslaw is one of the best options because its cool, tangy flavor cuts through the richness of the smoky pork and sweet glaze.

Baked beans, mac and cheese, potato salad, cornbread, and crispy fries are also excellent choices.

For vegetables, try grilled corn on the cob, roasted broccoli, grilled zucchini, green beans, or a fresh garden salad.

Pickles are another great addition because their acidity balances the honey garlic sauce.

For a large barbecue spread, serve the ribs alongside smoked chicken, sausages, grilled vegetables, and several different sauces.

Tips for the Best Slow Smoked & Sauced Honey Garlic Ribs

Remove the membrane from the back of the ribs whenever possible. This allows the seasoning to contact the meat more directly and improves the final texture.

Keep the smoker temperature steady. Low and slow cooking is what helps ribs become tender.

Do not oversmoke the meat. Most smoke absorption happens during the first few hours, so there is no need to produce heavy smoke throughout the entire cooking process.

Use thin layers of sauce near the end. Several light coats caramelize better than one extremely thick layer.

Do not sauce the ribs too early. Honey and barbecue sauce contain sugars that can burn during a long cook.

Always judge rib doneness by tenderness rather than cooking time alone. Rack thickness, smoker temperature, weather conditions, and rib type can all affect timing.

Let the ribs rest before slicing to preserve moisture.

Easy Recipe Variations

For Spicy Honey Garlic Ribs, increase the red pepper flakes and add 1 tablespoon of hot sauce to the glaze.

For Honey Bourbon Ribs, add 2 tablespoons of bourbon to the sauce and simmer for several minutes before brushing it over the meat.

For Extra Garlic Ribs, increase the fresh garlic in the sauce to 6 cloves.

For Asian-Style Honey Garlic Ribs, increase the soy sauce slightly and add 1 teaspoon of grated fresh ginger and a few drops of sesame oil.

For Maple Garlic Ribs, replace half of the honey with pure maple syrup.

For a smokier glaze, stir an additional ½ teaspoon of smoked paprika into the sauce.

How to Store and Reheat Slow Smoked & Sauced Honey Garlic Ribs

Allow leftover ribs to cool before storing.

Place them in an airtight container or wrap them tightly in foil and refrigerate for up to 3–4 days.

For the best reheating results, place the ribs in a baking dish with a small splash of apple juice or water.

Cover with foil and heat at 300°F for approximately 20–25 minutes, or until warmed through.

During the final few minutes, uncover the ribs and brush with additional honey garlic sauce.

You can also reheat ribs on a grill or smoker over low heat.

Avoid reheating at very high temperatures because this can dry out the meat and burn the sauce.

For longer storage, wrap cooled ribs tightly and freeze for up to 2–3 months. Thaw overnight in the refrigerator before reheating.

Frequently Asked Questions

How long should ribs smoke at 225°F?

Most racks need approximately 5–6 hours total, although exact timing depends on their thickness and type.

Use tenderness rather than time alone to determine when they are ready.

Can I use baby back ribs or spare ribs?

Yes. Baby back ribs and St. Louis-style ribs both work well.

Baby backs are generally smaller and may cook slightly faster, while St. Louis ribs are meatier and often require a little more time.

When should I add honey garlic sauce to smoked ribs?

Add the sauce during the final 20–30 minutes.

Applying it too early can cause the sugars in the honey and barbecue sauce to burn.

How do I know when smoked ribs are tender?

The rack should bend easily when lifted, the surface should begin to crack slightly, and a toothpick should slide between the bones with little resistance.

Final Thoughts

These Easy Slow Smoked & Sauced Honey Garlic Ribs combine tender slow-smoked pork with a sticky, glossy glaze full of honey, garlic, barbecue flavor, and savory seasoning.

The low-and-slow cooking process develops deep smoky flavor, while wrapping helps the ribs become tender and juicy. Finishing them with several layers of honey garlic sauce creates the beautifully caramelized exterior that makes barbecue ribs so irresistible.

Serve them with coleslaw, baked beans, mac and cheese, cornbread, grilled vegetables, or your favorite barbecue sides. Whether you are cooking for a summer gathering, family dinner, game day, or weekend barbecue, these smoky honey garlic ribs are the kind of recipe that deserves a permanent place in your smoker rotation.
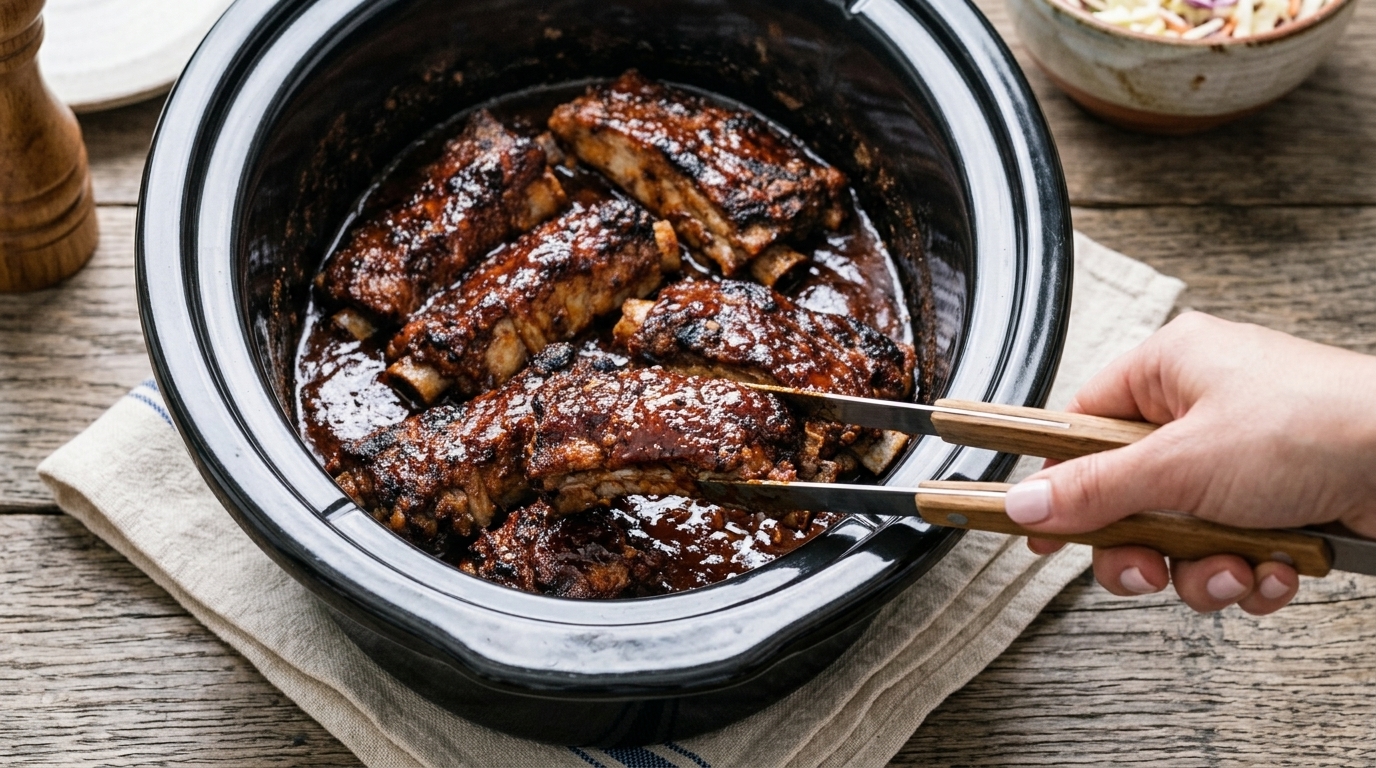
Slow-Cooker BBQ Ribs: Fall-Off-The-Bone Tender Ribs With Incredible Flavor

There’s nothing quite like a plate of juicy, tender BBQ ribs covered in a rich, smoky sauce. The kind of ribs where the meat slowly pulls away from the bone, the glaze is sticky and flavorful, and every bite feels like something you’d order at your favorite barbecue restaurant.

The best part? You don’t need a smoker or hours of standing over a grill to make amazing ribs at home. These Slow-Cooker BBQ Ribs deliver all the classic barbecue flavors with the convenience of your slow cooker. With a simple seasoning blend, your favorite BBQ sauce, and a few hours of slow cooking, you can create ribs that are incredibly tender, juicy, and packed with smoky-sweet flavor.

Perfect for weekend dinners, family gatherings, game days, or summer celebrations, this recipe is an easy way to enjoy restaurant-style BBQ without complicated cooking techniques.


Why You’ll Love These Slow-Cooker BBQ Ribs

This recipe is a must-try for anyone who loves comforting, flavorful meals.

Easy Preparation

Most of the work happens before cooking. Simply season the ribs, add the sauce, and let your slow cooker create tender, flavorful ribs while you handle everything else.

Fall-Off-The-Bone Tender

Slow cooking allows the ribs to gently break down, creating meat that becomes incredibly soft and juicy.

Big BBQ Flavor

A combination of spices and rich barbecue sauce creates a perfect balance of smoky, sweet, tangy, and savory flavors.

Perfect for Any Occasion

These ribs are great for:

  • Family dinners
  • Backyard BBQ parties
  • Holiday meals
  • Game day gatherings
  • Weekend comfort food

Great Leftovers

Extra ribs can easily be turned into sandwiches, wraps, salads, or delicious meal-prep options.


Ingredients You’ll Need

Making delicious slow-cooker BBQ ribs requires simple ingredients that create amazing flavor.

Main Ingredient

Pork Baby Back Ribs

  • 3–4 pounds baby back ribs or spare ribs

Baby back ribs are tender and cook beautifully in the slow cooker, but spare ribs also work well if you prefer a meatier cut.


BBQ Seasoning Ingredients

Brown Sugar

Adds sweetness and helps create a flavorful caramelized coating.

Paprika

Provides color and a mild smoky flavor.

Garlic Powder

Adds savory depth.

Onion Powder

Enhances the overall BBQ flavor.

Chili Powder

Adds gentle warmth and complexity.

Salt

Balances all the flavors.

Black Pepper

Adds a little spice and enhances the seasoning.

Smoked Paprika (Optional)

Creates a deeper smoky barbecue taste.


BBQ Sauce Ingredients

  • 2 cups barbecue sauce
  • 2 tablespoons honey or maple syrup
  • 1 tablespoon apple cider vinegar
  • 1 tablespoon Worcestershire sauce

The sauce creates a sticky, flavorful coating that makes these ribs irresistible.


How to Make Slow-Cooker BBQ Ribs

Step 1: Prepare the Ribs

Start by removing the thin membrane from the back of the ribs.

This step helps the seasoning absorb better and makes the ribs more tender.

Pat the ribs dry with paper towels.

Cut the ribs into smaller sections that fit easily inside your slow cooker.


Step 2: Make the Dry Rub

In a small bowl, combine:

  • Brown sugar
  • Paprika
  • Garlic powder
  • Onion powder
  • Chili powder
  • Salt
  • Black pepper
  • Smoked paprika

Mix well until all spices are evenly combined.

Rub the seasoning mixture generously over both sides of the ribs, making sure every piece is coated.

For the best flavor, allow the ribs to sit with the seasoning for 30 minutes before cooking.


Step 3: Prepare the BBQ Sauce

In another bowl, combine:

  • BBQ sauce
  • Honey
  • Apple cider vinegar
  • Worcestershire sauce

Mix until smooth.

This combination creates a rich sauce with sweetness, tanginess, and a deep barbecue flavor.


Step 4: Slow Cook the Ribs

Lightly grease your slow cooker.

Arrange the ribs inside, placing them meat-side facing outward when possible.

Pour the BBQ sauce mixture over the ribs, making sure they are well coated.

Cover and cook:

  • Low setting: 6–8 hours
  • High setting: 3–4 hours

The ribs are ready when the meat is tender and easily pulls away from the bone.


Step 5: Add the Final BBQ Glaze

For a restaurant-style finish, carefully remove the ribs from the slow cooker and place them on a baking sheet.

Brush with extra BBQ sauce.

Broil for 3–5 minutes until the sauce becomes sticky and slightly caramelized.

This final step creates that beautiful glossy BBQ coating.


Tips for the Best Slow-Cooker BBQ Ribs

Remove the Membrane

The membrane on the back of ribs can become chewy. Removing it helps create more tender ribs and allows the seasoning to penetrate the meat.


Don’t Add Too Much Liquid

Ribs naturally release juices while cooking. Adding too much liquid can dilute the BBQ flavor.

A thick sauce works best.


Cook Low and Slow

The secret to tender ribs is patience. Cooking them slowly allows the connective tissues to break down and creates that fall-apart texture everyone loves.


Finish Under the Broiler

The slow cooker creates tenderness, but the broiler creates that sticky BBQ finish.

This small extra step makes the ribs taste like they came straight from a barbecue restaurant.


Choose Quality BBQ Sauce

A good BBQ sauce makes a big difference. Choose a flavor you enjoy, whether you prefer:

  • Sweet and smoky
  • Spicy
  • Honey BBQ
  • Classic barbecue

What to Serve With Slow-Cooker BBQ Ribs

These ribs pair perfectly with classic BBQ side dishes.

Creamy Coleslaw

The fresh crunch and tangy flavor balance the richness of the ribs.

Corn on the Cob

A classic barbecue side that everyone loves.

Mashed Potatoes

Perfect for soaking up the extra BBQ sauce.

Baked Beans

A smoky, hearty side that complements the ribs beautifully.

Dinner Rolls

Great for making small BBQ sandwiches with leftover meat.

Fresh Salad

A crisp green salad adds freshness to the meal.


How to Store Leftover BBQ Ribs

Store leftover ribs in an airtight container in the refrigerator for up to 4 days.

To reheat:

  • Place ribs in a baking dish.
  • Add a little extra BBQ sauce.
  • Cover with foil.
  • Warm in the oven until heated through.

You can also freeze cooked ribs for up to 3 months. Wrap them tightly before freezing to maintain their flavor and texture.


Delicious Ways to Use Leftover BBQ Ribs

Leftover ribs can become completely new meals.

Try using the meat in:

  • BBQ rib sandwiches
  • Loaded baked potatoes
  • BBQ tacos
  • Mac and cheese bowls
  • BBQ pizza toppings
  • Rice bowls
  • Breakfast hash

The flavorful BBQ meat adds instant richness to simple dishes.


Frequently Asked Questions

Can I use beef ribs instead of pork ribs?

Yes. Beef ribs can be cooked using the same method, although cooking times may vary depending on their size.

Do I need to brown the ribs first?

No. Browning is optional, but it can add extra depth of flavor. The slow cooker still creates tender and delicious ribs without this step.

Can I prepare the ribs ahead of time?

Yes. Season the ribs and prepare the sauce the night before. Store them in the refrigerator and start cooking when ready.

Why are my ribs not falling apart?

They may need more cooking time. Every slow cooker is different, and ribs become tender when cooked long enough for the connective tissues to break down.

Can I make these ribs spicy?

Absolutely. Add cayenne pepper, hot sauce, or spicy BBQ sauce for extra heat.


Final Thoughts

These Slow-Cooker BBQ Ribs are proof that incredible barbecue flavor doesn’t require complicated equipment or hours at the grill. With simple ingredients, a flavorful seasoning blend, and the magic of slow cooking, you can create tender, juicy ribs that your whole family will love.

Whether you’re hosting a backyard gathering or simply craving a comforting homemade meal, these ribs are guaranteed to impress. The combination of smoky spices, sweet BBQ sauce, and perfectly tender meat makes this recipe a true crowd favorite.

Let your slow cooker do the work, and enjoy a plate of delicious BBQ ribs that taste like they came straight from your favorite barbecue spot.

Easy Smoked Turkey Roulade Recipe – Juicy, Smoky & Perfect for Special Dinners

Smoked Turkey Roulade is an impressive way to transform turkey breast into a flavorful, juicy centerpiece that is easier to carve and serve than a whole turkey. A boneless turkey breast is carefully flattened, seasoned with garlic, herbs, butter, and spices, rolled tightly into a beautiful spiral, then slowly smoked until tender and infused with deep wood-fired flavor.

The result is turkey that stays moist inside while developing a savory, lightly smoky exterior. When sliced, the roulade reveals attractive layers that make it perfect for holiday dinners, Thanksgiving, Christmas, Sunday meals, or backyard gatherings when you want something a little more special than traditional roasted turkey.

Another advantage of this smoked turkey roulade recipe is its versatility. You can keep the filling simple with herb butter, add spinach and cheese, include a savory stuffing mixture, or customize the seasoning to suit your favorite barbecue flavors. Serve it with mashed potatoes, roasted vegetables, gravy, cranberry sauce, or fresh salad for a memorable meal.

Why You’ll Love This Smoked Turkey Roulade

One of the biggest challenges when cooking turkey breast is preventing it from becoming dry. Rolling the turkey into a roulade helps create an even thickness, allowing the meat to cook more consistently throughout.

The butter and herb filling also provides additional moisture and flavor from the inside while the smoker gently cooks the turkey from the outside.

Smoking adds another dimension that you simply cannot achieve with ordinary oven roasting. Mild hardwood smoke gives the turkey a subtle barbecue character without overpowering the delicate meat.

This recipe is also excellent for entertaining. Once rested, the turkey can be sliced into neat rounds that look elegant on a serving platter and make portioning incredibly easy.

Ingredients

For the Turkey

  • 1 boneless, skinless turkey breast, about 3–4 pounds
  • 1 tablespoon olive oil
  • 1½ teaspoons kosher salt
  • 1 teaspoon freshly ground black pepper
  • 1 teaspoon garlic powder
  • 1 teaspoon onion powder
  • 1 teaspoon smoked paprika
  • ½ teaspoon dried thyme

For the Garlic Herb Butter Filling

  • 5 tablespoons unsalted butter, softened
  • 4 garlic cloves, finely minced
  • 1 tablespoon chopped fresh rosemary
  • 1 tablespoon chopped fresh thyme
  • 2 tablespoons chopped fresh parsley
  • ½ teaspoon salt
  • ¼ teaspoon black pepper
  • 1 teaspoon fresh lemon zest

For the Outside Seasoning

  • 1 tablespoon olive oil or melted butter
  • 1 teaspoon smoked paprika
  • ½ teaspoon garlic powder
  • ½ teaspoon dried thyme
  • ½ teaspoon black pepper

Optional for Serving

  • Fresh rosemary or thyme
  • Turkey gravy
  • Cranberry sauce
  • Lemon wedges

How to Make Smoked Turkey Roulade

1. Prepare the Turkey Breast

Place the turkey breast on a clean cutting board and pat it thoroughly dry with paper towels.

Using a long, sharp knife, carefully butterfly the turkey breast by slicing horizontally through the thickest part without cutting completely through the opposite side.

Open the turkey like a book.

Place a sheet of plastic wrap or parchment paper over the turkey and gently pound it with a meat mallet until it reaches an even thickness of approximately ½–¾ inch.

Work gradually from the thicker areas toward the thinner edges.

Creating an even thickness is extremely important because it allows the roulade to roll properly and helps the meat cook evenly.

2. Season the Turkey

Season the inside of the flattened turkey breast with salt, black pepper, garlic powder, onion powder, smoked paprika, and dried thyme.

Use your hands to distribute the seasonings evenly across the entire surface.

Allow the seasoned turkey to sit while you prepare the herb butter.

3. Make the Garlic Herb Butter

In a small bowl, combine softened butter, minced garlic, rosemary, thyme, parsley, salt, black pepper, and lemon zest.

Mix until the herbs and garlic are evenly distributed throughout the butter.

The butter should be soft enough to spread easily but not melted.

Using softened butter allows you to coat the turkey evenly without having the filling run out while rolling.

4. Add the Filling

Spread the garlic herb butter evenly over the inside surface of the turkey breast.

Leave approximately a ½-inch border around the edges.

Do not make the filling excessively thick. Too much filling can squeeze out while the turkey is being rolled.

The herb butter will slowly melt as the turkey cooks, seasoning the meat from inside and helping it remain juicy.

5. Roll the Turkey Roulade

Starting from one of the longer sides, carefully roll the turkey breast into a tight cylinder.

Try to maintain steady pressure as you roll so there are no large gaps inside.

Once rolled, position the turkey seam-side down.

Cut several pieces of kitchen butcher’s twine and tie the roulade securely at approximately 1½- to 2-inch intervals.

The twine is important because it prevents the roulade from unrolling during cooking and helps maintain its round shape.

Tie an additional piece lengthwise if necessary for extra support.

6. Season the Outside

Lightly coat the outside of the turkey roulade with olive oil or melted butter.

Combine the smoked paprika, garlic powder, dried thyme, and black pepper.

Sprinkle the seasoning mixture evenly over every side of the turkey.

Gently press the seasoning onto the surface so it adheres well.

For even deeper flavor, you can prepare the roulade several hours in advance and refrigerate it uncovered or lightly covered until you are ready to smoke.

7. Preheat the Smoker

Preheat your smoker to 250°F.

For turkey, mild smoking woods generally work best. Apple, cherry, pecan, or maple wood will add flavorful smoke without overwhelming the meat.

Hickory can also be used, but consider mixing it with a milder wood because its smoke flavor is considerably stronger.

Allow the smoker temperature to stabilize before adding the turkey.

8. Smoke the Turkey Roulade

Place the roulade directly on the smoker grate with the seam facing downward.

Insert a reliable meat thermometer into the thickest part of the turkey, making sure the probe reaches the center without passing completely through.

Close the smoker and cook at approximately 250°F.

A 3- to 4-pound roulade will generally require around 2½–3½ hours, although cooking time can vary depending on thickness, smoker temperature, outdoor conditions, and the individual piece of turkey.

Always cook according to internal temperature rather than relying only on time.

9. Monitor the Internal Temperature

Allow the turkey to smoke undisturbed as much as possible.

Avoid repeatedly opening the smoker because this releases heat and smoke and increases the cooking time.

Begin checking the turkey as it approaches the final stage of cooking.

The turkey should ultimately reach a safe internal temperature of 165°F in the thickest part.

If the exterior reaches your preferred level of smokiness before the interior is ready, you can loosely wrap the roulade in foil and continue cooking until it reaches temperature.

10. Rest the Smoked Turkey

Once the thickest section reaches 165°F, carefully remove the roulade from the smoker.

Place it on a cutting board and loosely tent it with aluminum foil.

Allow it to rest for approximately 15–20 minutes.

Resting is an essential step. The juices inside the turkey redistribute as the meat rests, helping each slice remain moist instead of releasing all its juices immediately onto the cutting board.

11. Slice and Serve

Remove all the butcher’s twine carefully.

Using a sharp carving knife, slice the roulade into approximately ½-inch-thick rounds.

Arrange the slices slightly overlapping on a serving platter.

Garnish with fresh rosemary, thyme, or parsley if desired.

Serve warm with gravy, cranberry sauce, roasted vegetables, potatoes, or your favorite holiday sides.

What to Serve With Smoked Turkey Roulade

Creamy mashed potatoes are a classic pairing because they complement the smoky turkey and are perfect for serving with gravy.

Roasted potatoes, sweet potatoes, stuffing, green beans, Brussels sprouts, glazed carrots, and roasted asparagus are also excellent choices.

For a holiday meal, serve the turkey with cranberry sauce and traditional stuffing. The sweet acidity of cranberry sauce provides an especially good contrast to the savory smoked meat.

If you are serving this roulade during warmer weather, lighter sides such as grilled vegetables, coleslaw, corn salad, or a fresh garden salad work beautifully.

Warm dinner rolls or crusty bread are another welcome addition to the table.

Tips for the Best Smoked Turkey Roulade

Pound the turkey to an even thickness before rolling. Uneven turkey can result in some portions cooking faster than others.

Do not overfill the roulade. A thin, even layer of herb butter provides plenty of flavor without making the turkey difficult to roll.

Tie the turkey securely with butcher’s twine. Proper tying helps the roulade maintain its shape and ensures more even cooking.

Use a meat thermometer rather than depending on cooking time. Turkey breast can quickly become dry if significantly overcooked.

Choose mild smoking wood. Turkey absorbs smoke relatively easily, so excessive smoke can overpower the flavor of the meat.

Avoid constantly opening the smoker. Maintaining a steady temperature creates more consistent results.

Most importantly, allow the finished turkey to rest before slicing.

Easy Recipe Variations

For Spinach and Cheese Turkey Roulade, add a thin layer of cooked, well-drained spinach and shredded mozzarella or provolone over the herb butter.

For Stuffed Turkey Roulade, spread a thin layer of prepared savory stuffing over the turkey before rolling.

For Bacon Turkey Roulade, wrap thin slices of bacon around the outside before securing everything with butcher’s twine.

For Cranberry Herb Turkey Roulade, scatter a small amount of dried cranberries over the herb filling for a sweet-and-savory holiday variation.

For a stronger barbecue flavor, add your favorite poultry barbecue rub to the exterior seasoning.

For Garlic Parmesan Turkey Roulade, add about ⅓ cup freshly grated Parmesan to the herb butter filling.

How to Store and Reheat Smoked Turkey Roulade

Allow leftover turkey to cool before transferring it to an airtight container.

Store it in the refrigerator for up to 3–4 days.

For best results, keep the roulade whole or in larger pieces until reheating. This helps prevent the meat from drying out.

To reheat, place sliced turkey in a covered baking dish with a few tablespoons of chicken or turkey broth.

Heat at 325°F until warmed through.

You can also reheat individual portions gently in the microwave. Cover the turkey and use shorter heating intervals to avoid drying it out.

For longer storage, wrap the turkey tightly and freeze for up to 2–3 months. Thaw overnight in the refrigerator before reheating.

Frequently Asked Questions

What temperature should I smoke a turkey roulade?

A smoker temperature of approximately 250°F works very well. It gives the turkey enough time to absorb smoke while cooking gently and evenly.

What internal temperature should smoked turkey reach?

Turkey should reach an internal temperature of 165°F in the thickest portion before serving.

Always measure near the center of the roulade with a reliable instant-read or probe thermometer.

What wood is best for smoking turkey?

Apple, cherry, pecan, and maple are excellent options because they provide mild smoke flavors that complement poultry.

Hickory can also work, but its stronger flavor should be used more carefully.

Can I prepare the turkey roulade ahead of time?

Yes. You can assemble and tie the roulade the day before smoking.

Keep it tightly covered in the refrigerator and remove it while the smoker is preheating. Then season the exterior if needed and smoke according to the recipe.

Final Thoughts

This Easy Smoked Turkey Roulade combines juicy turkey breast, aromatic garlic herb butter, savory seasoning, and gentle wood smoke to create an impressive centerpiece without the work of preparing an entire turkey.

Rolling the breast provides beautiful presentation while helping the turkey cook evenly, and the herb butter adds moisture and flavor throughout the center.

Whether you are preparing Thanksgiving dinner, Christmas lunch, a family celebration, or simply experimenting with your smoker, this Smoked Turkey Roulade is a delicious alternative to traditional roasted turkey. Slice it into beautiful rounds, serve it with your favorite sides, and spoon a little gravy over the top for a comforting meal worthy of any special occasion.

Easy Healthy Breakfast Tacos Recipe – Fresh, Protein-Packed & Perfect for Busy Mornings

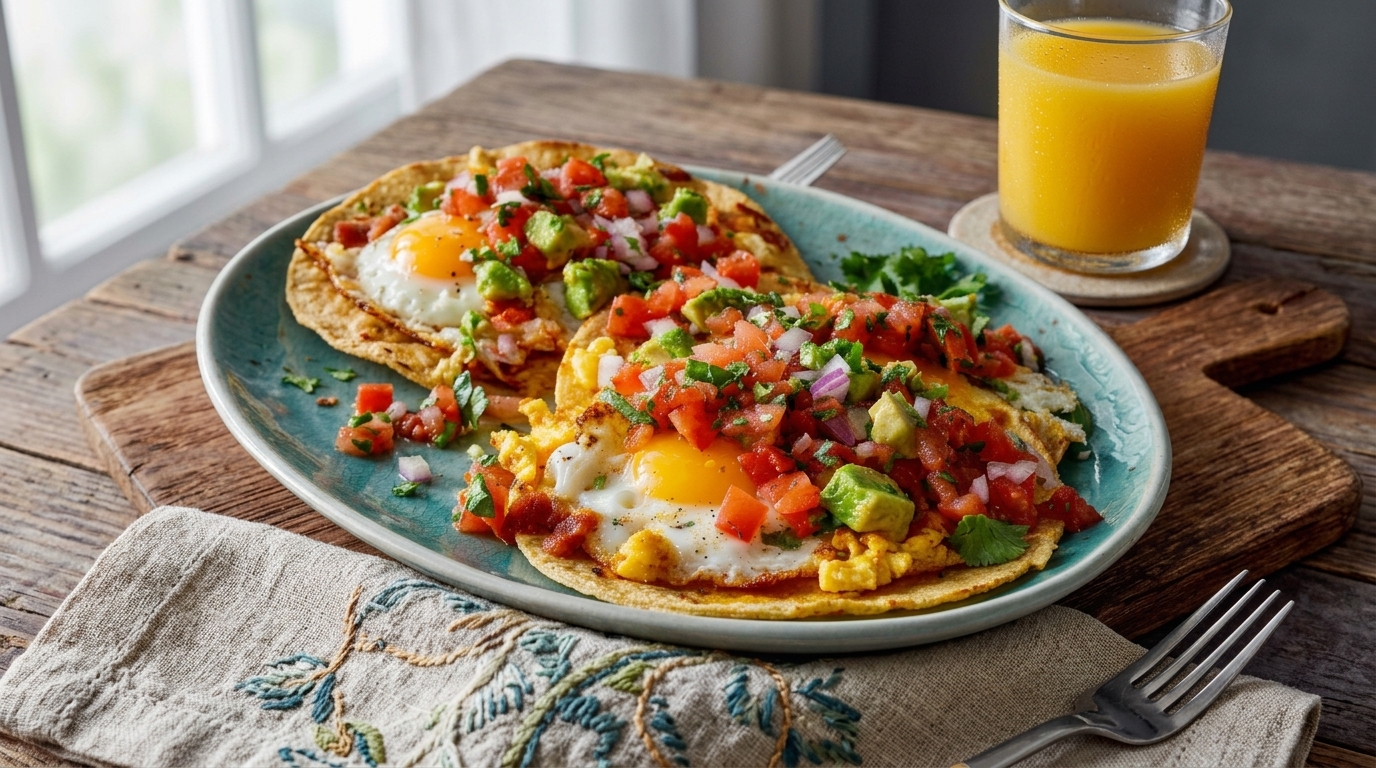
These Healthy Breakfast Tacos are a fresh, flavorful, protein-packed way to start your day without relying on heavy or overly processed breakfast foods. Warm tortillas are filled with fluffy scrambled eggs, seasoned black beans, colorful vegetables, creamy avocado, and a little cheese for a satisfying breakfast that feels indulgent while still being balanced and nourishing.

Breakfast tacos are perfect for busy weekday mornings because the ingredients cook quickly and can easily be prepared ahead of time. They also work beautifully for weekend brunch, meal prep, or even breakfast-for-dinner. You can keep them light with corn tortillas and vegetables, boost the protein with extra egg whites or lean turkey sausage, or make them vegetarian with beans and sautéed vegetables.

The best part is how customizable they are. Once you have the basic method, you can change the fillings depending on what you have in your refrigerator. Add spinach, peppers, tomatoes, salsa, avocado, Greek yogurt, or fresh herbs to create a breakfast that is colorful, filling, and full of flavor.

Why You’ll Love These Healthy Breakfast Tacos

These breakfast tacos combine protein, healthy fats, fiber, and vegetables in one easy handheld meal. Eggs provide high-quality protein, black beans add additional protein and fiber, and avocado contributes creamy texture and heart-healthy fats.

They are also extremely quick to prepare. From start to finish, you can have a full batch ready in around 20 to 25 minutes. That makes them ideal for mornings when you want something homemade without spending too much time cooking.

Another reason to love this recipe is that nothing feels boring or overly “healthy.” The tacos are colorful, savory, creamy, and satisfying. Warm tortillas, soft eggs, melted cheese, avocado, and fresh salsa create plenty of texture and flavor while still keeping the overall meal balanced.

Ingredients

For the Egg Filling

  • 6 large eggs
  • 2 egg whites
  • 2 tablespoons milk
  • ½ teaspoon salt
  • ¼ teaspoon black pepper
  • ¼ teaspoon garlic powder
  • 1 teaspoon olive oil

For the Vegetables

  • ½ red bell pepper, diced
  • ½ green bell pepper, diced
  • ¼ small red onion, finely chopped
  • 1 cup baby spinach, roughly chopped
  • ½ cup cherry tomatoes, halved
  • 1 teaspoon olive oil
  • Pinch of salt
  • Pinch of black pepper

For the Black Beans

  • 1 cup cooked black beans, drained and rinsed
  • ¼ teaspoon ground cumin
  • ¼ teaspoon smoked paprika
  • 1 tablespoon water

For Assembling the Tacos

  • 8 small corn or whole-wheat tortillas
  • ½ cup shredded reduced-fat cheddar or Mexican-style cheese
  • 1 ripe avocado, sliced
  • ½ cup fresh salsa or pico de gallo
  • ¼ cup plain Greek yogurt, optional
  • 2 tablespoons chopped fresh cilantro
  • Lime wedges, for serving

How to Make Healthy Breakfast Tacos

1. Prepare All the Ingredients

Breakfast tacos cook quickly, so it is helpful to prepare everything before turning on the stove.

Dice the bell peppers, chop the onion, halve the tomatoes, roughly chop the spinach, slice the avocado, and drain and rinse the black beans.

Crack the eggs and egg whites into a medium mixing bowl.

Add the milk, salt, black pepper, and garlic powder.

Whisk for about 30 seconds until the yolks and whites are completely combined and the mixture looks slightly frothy.

Adding egg whites increases the protein while keeping the filling lighter, but you can use only whole eggs if preferred.

2. Sauté the Vegetables

Heat 1 teaspoon olive oil in a large nonstick skillet over medium heat.

Add the diced red bell pepper, green bell pepper, and red onion.

Cook for about 3 to 4 minutes, stirring occasionally.

The vegetables should soften slightly while still keeping a little texture.

Add the chopped spinach and cherry tomatoes.

Season with a small pinch of salt and black pepper.

Cook for another 1 to 2 minutes, just until the spinach wilts.

Transfer the vegetables to a plate and set aside.

Avoid overcooking the tomatoes because you want them to stay slightly juicy rather than completely breaking down.

3. Warm the Black Beans

In a small saucepan or skillet, combine the black beans, cumin, smoked paprika, and 1 tablespoon water.

Cook over medium-low heat for about 3 to 4 minutes, stirring occasionally.

You are simply warming the beans and giving them a little extra flavor.

Use the back of a spoon to lightly mash a few beans if desired. This helps the beans stay inside the tacos and creates a slightly creamy texture.

Keep warm over low heat while you prepare the eggs.

4. Scramble the Eggs

Return the large skillet to the stove and reduce the heat to medium-low.

Add 1 teaspoon olive oil.

Pour in the egg mixture.

Allow the eggs to sit undisturbed for about 20 seconds before gently pushing them from the edges toward the center with a silicone spatula.

Continue slowly folding the eggs as they cook.

The key to soft, fluffy scrambled eggs is gentle heat. Cooking over very high heat can make the eggs dry and rubbery.

Remove the skillet from the heat when the eggs are almost completely set but still look slightly glossy.

They will continue cooking from the residual heat.

Fold the sautéed vegetables into the scrambled eggs.

Taste and adjust the salt or pepper if necessary.

5. Warm the Tortillas

Warm the tortillas before assembling the tacos.

You can heat them one at a time in a dry skillet over medium heat for about 20 to 30 seconds per side.

Alternatively, stack them on a microwave-safe plate, cover with a slightly damp paper towel, and microwave for approximately 30 seconds.

Warm tortillas are more flexible and less likely to crack when folded.

Corn tortillas provide a classic taco flavor, while whole-wheat tortillas tend to be slightly softer and higher in fiber.

6. Assemble the Breakfast Tacos

Lay the warm tortillas on a clean work surface or serving platter.

Spoon a small amount of seasoned black beans onto the center of each tortilla.

Top with the scrambled egg and vegetable mixture.

Sprinkle each taco with a small amount of shredded cheese.

The warm eggs will help soften and slightly melt the cheese.

Add a few slices of avocado and spoon fresh salsa or pico de gallo over the top.

Finish with chopped cilantro.

If desired, add a small spoonful of plain Greek yogurt. Greek yogurt gives you the creamy effect of sour cream while adding extra protein.

7. Add Fresh Lime and Serve

Squeeze fresh lime juice over each taco just before serving.

The acidity helps brighten the eggs, beans, avocado, and cheese and gives the entire taco a fresher flavor.

Serve the tacos immediately while the tortillas and egg filling are still warm.

What to Serve With Healthy Breakfast Tacos

These breakfast tacos are substantial enough to enjoy by themselves, but they also pair well with simple sides.

For a fresh breakfast, serve them with sliced oranges, berries, melon, pineapple, or a fruit salad.

If you are serving breakfast tacos for brunch, add roasted breakfast potatoes, sweet potato hash, yogurt and granola, or a fresh green salad.

They are also excellent with extra salsa, pico de gallo, guacamole, or a simple tomato-avocado salad on the side.

For drinks, pair the tacos with freshly brewed coffee, iced coffee, orange juice, or a fruit smoothie.

Tips for the Best Healthy Breakfast Tacos

Cook the eggs over gentle heat. Slow scrambling creates softer, more tender eggs.

Warm the tortillas. Warm tortillas taste better and fold much more easily.

Do not overload each taco. Using too much filling makes breakfast tacos difficult to eat and causes the tortillas to tear.

Drain the beans thoroughly. Excess liquid can make the tacos soggy.

Use fresh salsa when possible. Pico de gallo adds brightness, freshness, and extra vegetables without weighing down the tacos.

Add avocado just before serving. Fresh avocado provides the best color and texture.

Prepare the vegetables ahead. You can chop the peppers, onions, and spinach the night before to make morning preparation much faster.

Easy Healthy Breakfast Taco Variations

High-Protein Breakfast Tacos

Increase the egg whites to 4 and add diced grilled chicken, turkey sausage, or lean ground turkey.

Southwest Breakfast Tacos

Add corn, black beans, jalapeño, smoked paprika, and fresh salsa to create a Southwest-inspired flavor.

Veggie Breakfast Tacos

Add mushrooms, zucchini, spinach, peppers, and tomatoes for an extra vegetable-packed version.

Avocado Egg Breakfast Tacos

Skip the beans and cheese and use extra avocado, scrambled eggs, tomatoes, and fresh cilantro for a simpler filling.

Spicy Breakfast Tacos

Add sliced jalapeños, red pepper flakes, hot sauce, or spicy salsa.

Mediterranean Breakfast Tacos

Use spinach, tomatoes, scrambled eggs, avocado, feta cheese, and fresh parsley.

Meal Prep and Storage

Breakfast tacos are best assembled just before eating because storing the finished tacos can make the tortillas soggy.

Instead, prepare the individual components ahead of time.

Store the scrambled egg and vegetable mixture in an airtight container in the refrigerator for up to 3 days.

Keep the beans, salsa, tortillas, avocado, and toppings separate.

When ready to eat, gently reheat the egg mixture and beans in the microwave or in a skillet over low heat.

Warm the tortillas separately and assemble the tacos fresh.

Avocado is best sliced right before serving because it can turn brown during storage.

How to Make These Breakfast Tacos Even Healthier

Use corn tortillas or high-fiber whole-wheat tortillas instead of larger flour tortillas.

Increase the vegetables by adding extra spinach, peppers, tomatoes, mushrooms, or zucchini.

Use a combination of whole eggs and egg whites to maintain flavor while increasing protein.

Choose reduced-fat cheese or simply use a smaller amount of full-flavored cheese.

Swap sour cream for plain Greek yogurt.

You can also reduce the cheese completely and rely on avocado for a rich, creamy texture.

Final Thoughts

These Easy Healthy Breakfast Tacos prove that a nutritious breakfast can still be colorful, comforting, and packed with flavor.

With fluffy eggs, seasoned black beans, sautéed vegetables, creamy avocado, melted cheese, fresh salsa, and warm tortillas, every bite delivers a satisfying combination of textures and flavors.

They are quick enough for weekday mornings yet attractive and customizable enough for weekend brunch with family and friends.

Prepare the vegetables ahead for an even faster breakfast, set out several toppings, and let everyone assemble their own tacos. Whether you keep them vegetarian, add extra protein, or turn up the heat with spicy salsa, these healthy breakfast tacos are an easy recipe you can enjoy again and again.

Easy Garlic Butter Lobster Tail and Seared Scallops – Elegant Restaurant-Style Seafood Dinner

If you want an impressive seafood dinner that looks luxurious but is surprisingly easy to prepare at home, this Garlic Butter Lobster Tail and Seared Scallops recipe is a beautiful choice. Tender lobster meat is brushed with seasoned garlic butter and cooked until juicy and lightly golden, while plump sea scallops are quickly seared until caramelized on the outside and tender in the center.

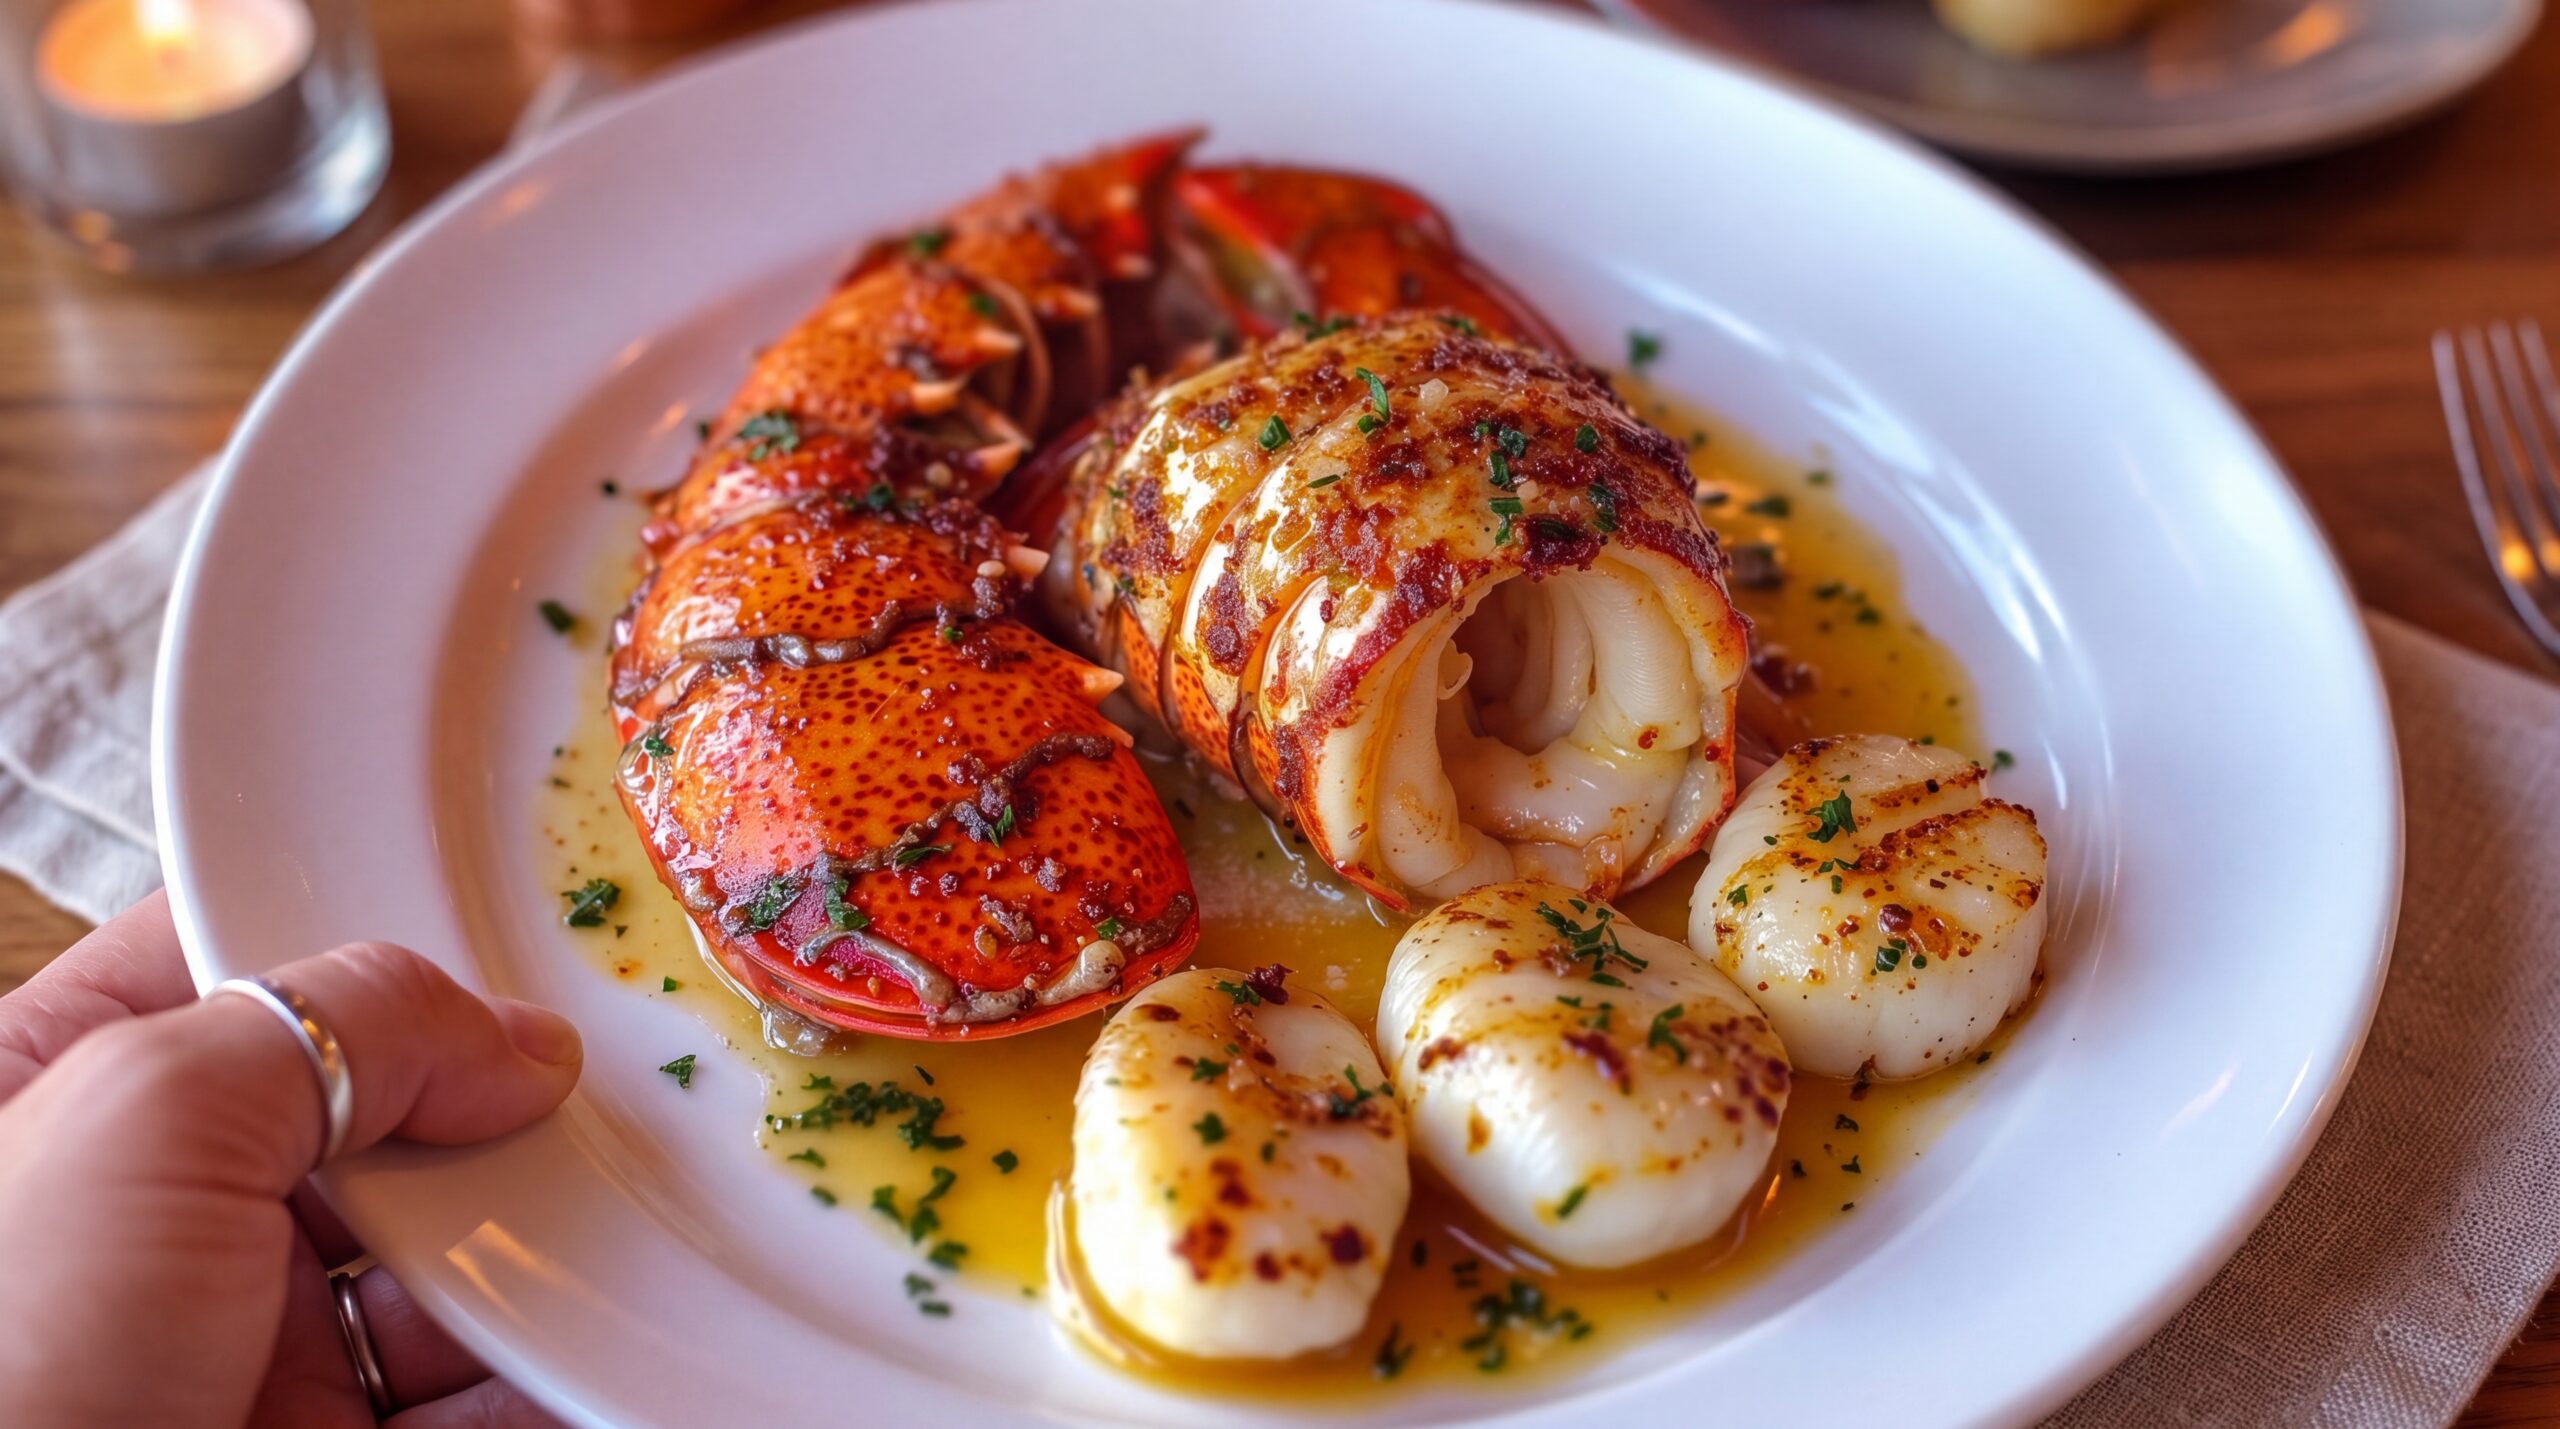
The dish shown has everything that makes a restaurant-quality seafood dinner irresistible: bright red lobster shells, succulent white lobster meat, golden-edged scallops, fresh herbs, and plenty of warm buttery sauce pooling underneath. Despite its elegant appearance, the cooking process is straightforward because both lobster and scallops need only a short amount of cooking time.

Serve this surf-inspired seafood plate for date night, Valentine’s Day, anniversaries, Christmas dinner, birthdays, or any occasion when you want something special without spending hours in the kitchen.

Why You’ll Love This Lobster and Scallops Recipe

Lobster and scallops naturally have a mild sweetness that pairs beautifully with butter, garlic, lemon, and fresh herbs. Instead of covering those delicate flavors with a heavy sauce, this recipe uses a simple garlic-herb butter that enhances the seafood.

Another reason this recipe works so well is the contrast in texture. The lobster is tender and juicy, while properly seared scallops develop a lightly caramelized exterior with a soft, almost buttery center.

It is also much quicker than it looks. Once everything is prepared, the scallops take only a few minutes in the skillet and lobster tails usually need less than 15 minutes in the oven.

Ingredients

For the Lobster Tails

  • 2 lobster tails, about 5–8 ounces each
  • 3 tablespoons unsalted butter, melted
  • 2 cloves garlic, finely minced
  • ½ teaspoon paprika
  • ¼ teaspoon smoked paprika
  • ½ teaspoon salt
  • ¼ teaspoon freshly ground black pepper
  • 1 teaspoon fresh lemon juice
  • 1 tablespoon chopped fresh parsley

For the Seared Scallops

  • 8–10 large sea scallops
  • 1 tablespoon olive oil
  • 1 tablespoon unsalted butter
  • ½ teaspoon salt
  • ¼ teaspoon black pepper
  • ¼ teaspoon garlic powder

For the Garlic Butter Sauce

  • 4 tablespoons unsalted butter
  • 3 cloves garlic, minced
  • 2 tablespoons fresh lemon juice
  • ¼ teaspoon red pepper flakes, optional
  • 1 tablespoon chopped fresh parsley
  • ¼ teaspoon salt
  • Freshly ground black pepper to taste

How to Make Garlic Butter Lobster Tail and Seared Scallops

1. Prepare the Lobster Tails

Preheat your oven to 425°F (220°C).

Place each lobster tail on a cutting board with the hard shell facing upward.

Using sharp kitchen shears, carefully cut lengthwise down the center of the top shell. Stop before reaching the tail fan.

Gently pull the shell apart with your fingers. Carefully loosen the lobster meat from the sides of the shell without completely removing it.

Lift the meat upward and rest it on top of the shell while keeping it attached near the tail.

This technique gives lobster tails the attractive restaurant-style presentation seen in the image and also allows the butter and seasonings to coat more of the meat.

If you notice a dark intestinal vein running through the lobster, remove it before cooking.

2. Make the Seasoned Lobster Butter

In a small bowl, combine melted butter, minced garlic, paprika, smoked paprika, salt, black pepper, lemon juice, and parsley.

Stir until combined.

Brush the mixture generously over every exposed part of the lobster meat.

Don’t worry if some seasoned butter drips into the shell—it will flavor the lobster from underneath as it cooks.

3. Bake the Lobster

Place the prepared lobster tails on a baking sheet or shallow baking dish.

Bake at 425°F for approximately 8–12 minutes, depending on their size.

The lobster meat should change from translucent to opaque white, while the shell becomes bright red.

Avoid overcooking lobster. The thickest part of the meat should reach approximately 135–140°F (57–60°C) and will continue cooking slightly from residual heat.

For additional color, you can place the lobster under the broiler for approximately 1 minute at the end.

Watch carefully because butter can brown very quickly under intense heat.

4. Prepare the Scallops

While the lobster cooks, prepare your scallops.

Remove the small side muscle from each scallop if it is still attached. It feels slightly tougher than the main scallop and simply pulls away.

This next step is especially important: pat the scallops extremely dry with paper towels.

Surface moisture is the enemy of good browning. Wet scallops will steam rather than develop the beautiful golden crust visible in the photo.

Season both sides lightly with salt, black pepper, and garlic powder.

5. Sear the Scallops

Place a large stainless-steel or cast-iron skillet over medium-high heat.

Allow the pan to become properly hot before adding one tablespoon of olive oil.

Arrange the scallops in the skillet, leaving space between them.

Once they touch the pan, resist the temptation to move them.

Cook for approximately 1½–2 minutes on the first side.

When a deep golden crust has formed, flip each scallop.

Add one tablespoon of butter to the skillet and cook the second side for another 1–2 minutes.

Tilt the pan slightly and spoon the melted butter over the scallops.

Properly cooked scallops should have caramelized surfaces and tender, opaque centers. Overcooked scallops quickly become firm and rubbery, so remove them from the skillet as soon as they’re done.

6. Prepare the Garlic Butter Sauce

Reduce the skillet heat to medium-low.

Add four tablespoons of butter.

Once melted, stir in the minced garlic and optional red pepper flakes.

Cook for approximately 30 seconds, just until the garlic becomes fragrant.

Do not allow the garlic to become dark brown because burnt garlic can make the entire sauce bitter.

Stir in lemon juice, parsley, salt, and freshly ground pepper.

Cook for another 30 seconds before removing the skillet from the heat.

Taste the sauce and adjust with additional lemon or salt if necessary.

7. Assemble the Seafood Plate

Place one lobster tail on each plate.

Arrange several golden scallops alongside it.

Generously spoon the warm garlic butter over the lobster and scallops, allowing some sauce to pool around the seafood.

Finish with chopped parsley and freshly ground black pepper.

For an elegant final touch, serve each plate with a fresh lemon wedge.

What to Serve With Lobster and Scallops

Because lobster and scallops are rich and buttery, simple sides complement them best.

Creamy mashed potatoes are excellent for soaking up the extra garlic butter. Roasted baby potatoes, Parmesan risotto, buttered rice, or garlic pasta are also wonderful options.

For vegetables, consider roasted asparagus, steamed broccoli, sautéed spinach, garlic green beans, or roasted Brussels sprouts.

A crisp green salad with lemon vinaigrette provides a refreshing contrast to the buttery seafood.

For a steakhouse-style meal, pair the lobster and scallops with grilled steak for an impressive surf-and-turf dinner.

Tips for Perfect Lobster and Scallops

Dry your scallops thoroughly. This is one of the most important steps for creating a golden crust.

Use large sea scallops. Smaller bay scallops are delicious but don’t produce the same dramatic seared presentation.

Don’t crowd the skillet. Leave space around every scallop so moisture can escape.

Start with a hot pan. Scallops need immediate high heat to caramelize instead of steaming.

Don’t overcook the lobster. Lobster becomes chewy when cooked too long.

Use fresh garlic. Garlic is a major flavor in this simple sauce, so freshly minced cloves provide the best result.

Add lemon at the end. Fresh lemon brightens the richness of the butter without overwhelming the delicate seafood.

Easy Recipe Variations

For Cajun lobster and scallops, add ½ teaspoon Cajun seasoning to both the lobster butter and scallop seasoning.

For a slightly spicy version, increase the red pepper flakes in the garlic butter.

You can also add large shrimp to the plate. Sear them in the same skillet immediately after cooking the scallops.

For extra richness, add a splash of heavy cream and Parmesan to the garlic butter to create a creamy seafood sauce.

If lobster tails aren’t available, the same garlic butter works beautifully with jumbo shrimp, crab legs, or additional scallops.

Storage and Reheating

Seafood tastes best immediately after cooking, but leftovers can be refrigerated in an airtight container for up to 2 days.

Reheat gently in a covered skillet over low heat with a small amount of butter. Avoid high heat, which can easily make lobster and scallops rubbery.

The microwave can also be used, but heat the seafood in short intervals at reduced power rather than cooking continuously.

Freezing cooked scallops and lobster is possible, but the texture will not be quite as tender after thawing.

Final Thoughts

This Garlic Butter Lobster Tail and Seared Scallops recipe proves that an elegant restaurant-style seafood dinner doesn’t have to be complicated. Sweet lobster, beautifully caramelized scallops, fresh garlic, lemon, herbs, and warm melted butter come together to create a dish that feels luxurious from the very first bite.

The key is keeping the cooking simple: dry the scallops well, use a properly heated pan, watch the lobster carefully, and don’t overcook either type of seafood. Spoon plenty of fragrant garlic butter over everything before serving, and you’ll have a gorgeous centerpiece suitable for date night, holidays, celebrations, or an unforgettable weekend dinner.

Easy Homemade Golden Butter Cake Recipe – Soft, Rich & Perfectly Moist

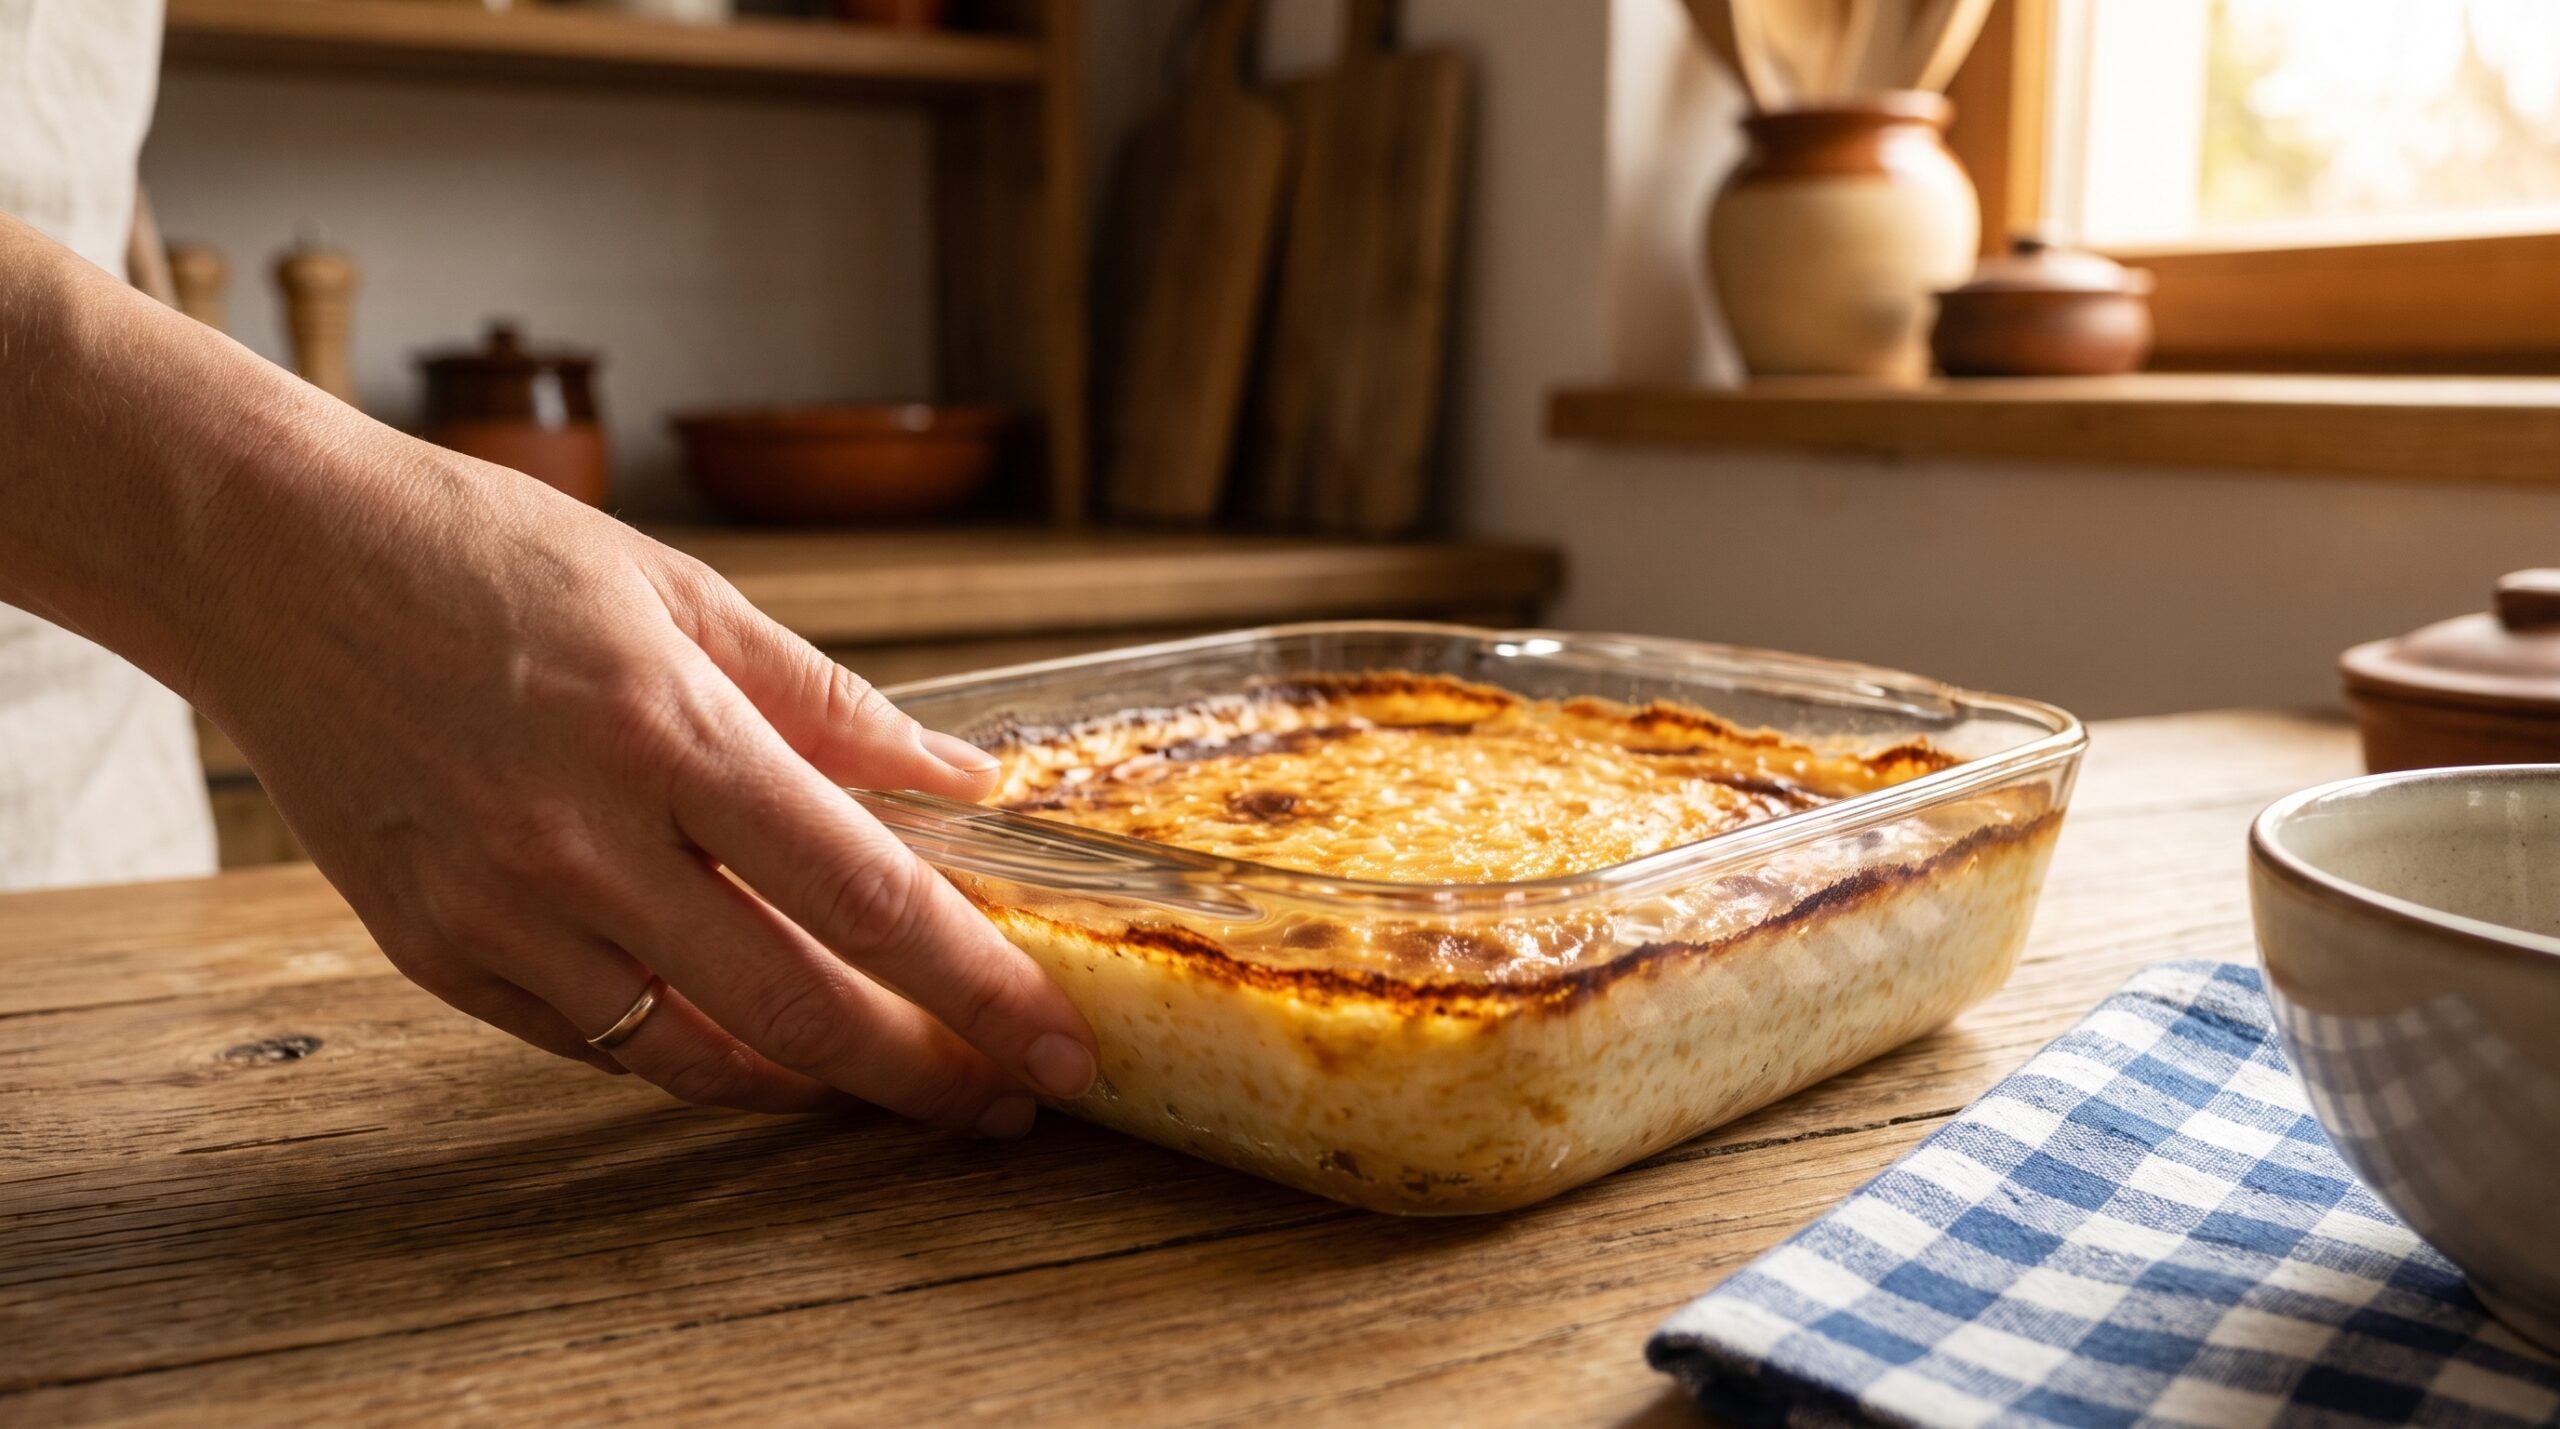
Homemade Golden Butter Cake is a timeless dessert with a rich buttery flavor, tender crumb, and beautiful golden color. It is the kind of classic cake that works for almost any occasion, from birthdays and family gatherings to afternoon tea or a simple weekend dessert.

What makes this cake special is its simplicity. Instead of relying on complicated ingredients or techniques, it gets its incredible flavor from real butter, vanilla, eggs, and a carefully balanced batter. The result is soft, moist, lightly sweet, and wonderfully fragrant.

This cake is delicious on its own with a dusting of powdered sugar, but it is also an excellent base for frosting, berries, whipped cream, chocolate ganache, or fruit preserves. Once you master this homemade version, it can easily become one of your favorite reliable cake recipes.

Why You’ll Love This Homemade Golden Butter Cake

This Golden Butter Cake has everything you want from a classic homemade cake.

The texture is tender and fluffy without being dry, while the butter gives every bite a rich, comforting flavor. The golden exterior develops beautifully in the oven, creating a slightly firmer edge around the soft center.

It is also extremely versatile. You can bake it as a simple snack cake, layer it with frosting for celebrations, or dress individual slices with strawberries and whipped cream for an elegant dessert.

Another advantage is that most of the ingredients are basic pantry and refrigerator staples. You do not need special equipment beyond a mixer, mixing bowls, and a cake pan.

Ingredients

For the Golden Butter Cake

  • 2 1/2 cups all-purpose flour
  • 2 1/2 teaspoons baking powder
  • 1/2 teaspoon salt
  • 1 cup unsalted butter, softened
  • 1 3/4 cups granulated sugar
  • 4 large eggs, room temperature
  • 2 teaspoons pure vanilla extract
  • 1 cup whole milk, room temperature
  • 1/4 cup sour cream
  • 2 tablespoons vegetable oil

Optional Toppings

  • Powdered sugar
  • Vanilla buttercream
  • Fresh strawberries
  • Fresh raspberries
  • Whipped cream
  • Chocolate ganache
  • Caramel sauce

How to Make Homemade Golden Butter Cake

1. Prepare the Oven and Cake Pan

Preheat your oven to 350°F or 175°C.

Grease a 9×13-inch baking pan with butter or nonstick cooking spray. For easier removal, you can also line the bottom with parchment paper.

If you prefer a layered cake, divide the batter between two greased and parchment-lined 9-inch round cake pans.

Preparing the pan properly is important because butter cake has a soft crumb and can stick if the pan is not well greased.

Set the prepared pan aside while you make the batter.

2. Combine the Dry Ingredients

In a medium mixing bowl, whisk together the all-purpose flour, baking powder, and salt.

Whisk for about 20 to 30 seconds so the baking powder and salt are evenly distributed throughout the flour.

This helps the cake rise evenly instead of creating areas that are denser than others.

Set the dry mixture aside.

3. Cream the Butter and Sugar

Place the softened butter into a large mixing bowl.

Using a hand mixer or stand mixer, beat the butter on medium speed for about 1 minute until smooth and creamy.

Gradually add the granulated sugar.

Continue beating the butter and sugar together for approximately 3 to 5 minutes.

Do not rush this step.

The mixture should become noticeably lighter in color and fluffy in texture. Creaming butter and sugar incorporates tiny air pockets into the batter, helping give the finished cake a soft and tender crumb.

Make sure the butter is softened but not melted. Butter that is too warm will not trap air properly and may result in a heavier cake.

4. Add the Eggs

Add the eggs one at a time.

Beat well after each addition before adding the next egg.

Scrape down the sides and bottom of the bowl occasionally with a spatula so everything mixes evenly.

Using room-temperature eggs is helpful because they combine more easily with the butter mixture.

Once all four eggs are incorporated, add the vanilla extract and mix briefly.

The batter should look smooth, creamy, and slightly fluffy.

5. Combine the Milk and Sour Cream

In a small bowl or measuring cup, combine the whole milk and sour cream.

Whisk until mostly smooth.

The sour cream helps add moisture and richness to the cake, while the milk provides the liquid needed for a tender batter.

Add the vegetable oil to the milk mixture.

Although butter provides most of the flavor in this cake, a small amount of oil helps the cake remain moist even after it cools.

6. Combine the Wet and Dry Ingredients

Reduce the mixer speed to low.

Add approximately one-third of the flour mixture to the butter mixture and mix just until incorporated.

Pour in half of the milk mixture and mix briefly.

Add another third of the flour, followed by the remaining milk mixture.

Finish with the final portion of flour.

Mix only until you no longer see dry streaks.

Avoid overmixing after adding the flour. Excessive mixing develops gluten, which can make a cake firm or chewy instead of soft and tender.

Use a spatula to gently fold the batter a few times, scraping the bottom of the bowl to make sure everything is evenly combined.

7. Transfer the Batter to the Pan

Pour the cake batter into the prepared baking pan.

Use a spatula to gently spread the batter into an even layer.

Tap the pan lightly against the counter once or twice to remove any large air pockets.

The batter should look thick, creamy, and smooth.

8. Bake Until Golden

Place the cake on the center rack of the preheated oven.

Bake a 9×13-inch cake for approximately 30 to 38 minutes.

If using two 9-inch round pans, begin checking the cakes after about 25 minutes.

The cake is ready when the top is beautifully golden, the center springs back gently when touched, and a toothpick inserted into the middle comes out clean or with only a few moist crumbs.

Avoid opening the oven repeatedly during the first 20 minutes because sudden temperature changes can interfere with the cake’s rise.

9. Cool the Cake Properly

Remove the cake from the oven and place the pan on a wire rack.

Allow it to cool in the pan for approximately 15 minutes.

If you are making a layer cake, carefully run a thin knife around the edges and turn the cakes onto wire racks.

Allow the cake to cool completely before adding frosting.

Frosting a warm cake can cause the frosting to melt and slide off.

10. Decorate and Serve

Once cooled, the Golden Butter Cake can be served in several different ways.

For a simple everyday dessert, dust the top lightly with powdered sugar.

For celebrations, spread vanilla buttercream over the cake.

You can also serve slices with fresh strawberries, raspberries, whipped cream, or a drizzle of warm chocolate sauce.

Cut into generous slices and enjoy.

What to Serve With Homemade Golden Butter Cake

Golden Butter Cake is wonderful with a hot cup of coffee or tea, making it perfect for afternoon gatherings or brunch.

For a fresh dessert, serve it with sliced strawberries, blueberries, raspberries, or peaches.

Whipped cream pairs beautifully with the buttery flavor, especially when fresh berries are added.

If you want something richer, serve the cake with vanilla ice cream, chocolate ganache, caramel sauce, or a warm fruit compote.

Tips for the Best Golden Butter Cake

Use room-temperature ingredients whenever possible. Butter, eggs, milk, and sour cream combine more smoothly when they are approximately the same temperature.

Cream the butter and sugar thoroughly. This is one of the most important steps for creating a light texture.

Measure your flour correctly. Scooping flour directly with a measuring cup can pack in too much flour and make the cake dry. Spoon the flour into the measuring cup and level it with a knife, or use a kitchen scale.

Do not overmix once the flour is added. Mix just until everything comes together.

Avoid overbaking. Begin checking the cake several minutes before the expected finish time because ovens can vary.

Easy Recipe Variations

Lemon Butter Cake

Add 1 tablespoon finely grated lemon zest to the batter and replace 2 tablespoons of milk with fresh lemon juice.

Almond Butter Cake

Replace 1 teaspoon of vanilla extract with almond extract for a sweet bakery-style flavor.

Chocolate Chip Butter Cake

Fold about 1 cup mini chocolate chips into the finished batter before baking.

Berry Butter Cake

Gently fold fresh blueberries or raspberries into the batter. Tossing the berries with a small amount of flour first can help prevent them from sinking.

Chocolate-Frosted Golden Cake

Top the cooled cake with chocolate buttercream for a classic yellow cake and chocolate frosting combination.

How to Store Homemade Butter Cake

Store the unfrosted cake in an airtight container at room temperature for up to 3 days.

If the cake is topped with a frosting that contains perishable ingredients, refrigerate it in a covered container.

For longer storage, individual slices can be wrapped tightly in plastic wrap and frozen for up to 2 months.

Allow frozen cake to thaw at room temperature before serving.

Frequently Asked Questions

Why is my butter cake dry?

Dry cake is usually caused by too much flour or overbaking. Measure flour carefully and remove the cake from the oven as soon as a toothpick comes out with only a few moist crumbs.

Can I make this cake without sour cream?

Yes. Plain full-fat Greek yogurt can be substituted for the sour cream using the same amount.

Can I make cupcakes with this batter?

Yes. Divide the batter among lined cupcake tins, filling each about two-thirds full. Bake at 350°F for approximately 18 to 22 minutes.

Why should the ingredients be room temperature?

Room-temperature ingredients blend together more evenly and create a smoother batter. This helps produce a more consistent and tender cake texture.

Can I make the cake ahead of time?

Absolutely. You can bake the cake one day ahead, allow it to cool completely, and store it tightly covered. Frost or decorate it shortly before serving.

Final Thoughts

Homemade Golden Butter Cake is a classic dessert that deserves a place in every home baker’s recipe collection. It is buttery, soft, moist, beautifully golden, and simple enough to prepare without complicated decorating or baking techniques.

The combination of real butter, vanilla, eggs, milk, and sour cream creates a tender cake with just the right amount of richness. Serve it simply with powdered sugar or transform it into a celebration cake with frosting and fresh fruit.

Whether you make it for birthdays, holidays, afternoon tea, family gatherings, or simply because you are craving something sweet, this easy Golden Butter Cake is a dependable recipe you can return to again and again.

Easy Buttery Bliss Brioche Rolls Recipe – Soft, Fluffy, Rich, and Bakery-Style

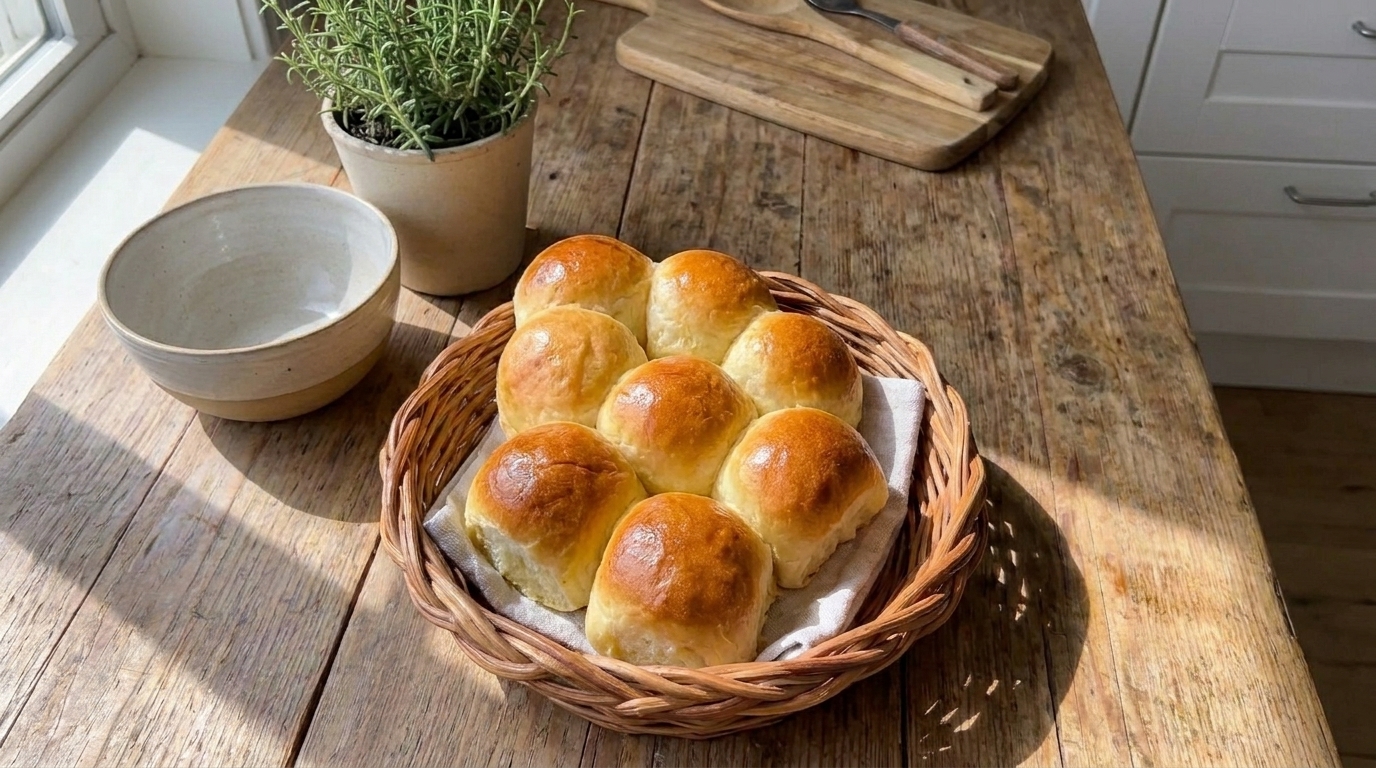
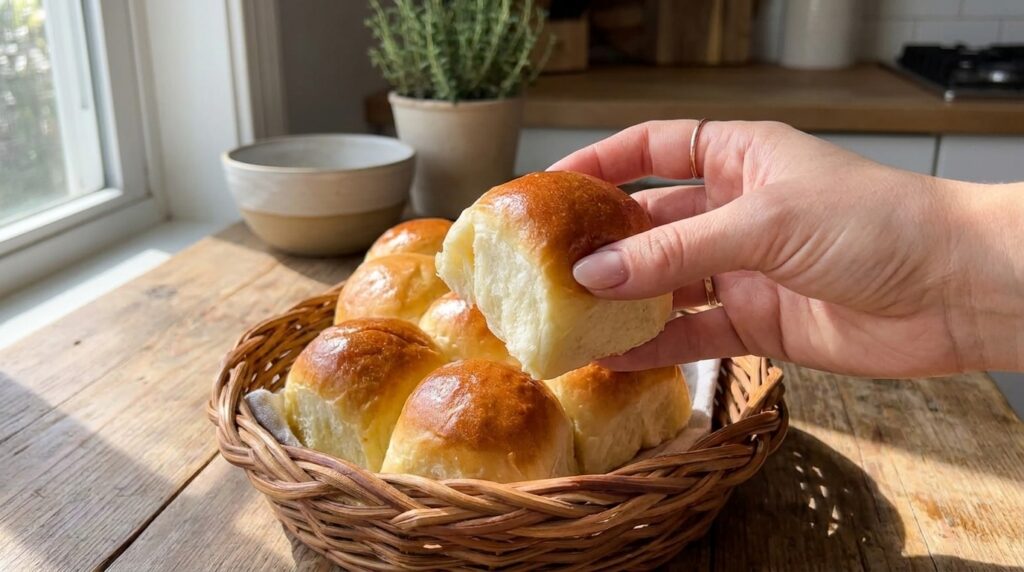
If you are looking for homemade dinner rolls that are incredibly soft, buttery, and beautifully golden, these Buttery Bliss Brioche Rolls are the kind of bread that can make any meal feel extra special. Made with an enriched dough containing butter, eggs, and milk, these rolls bake up with a tender crumb, delicate sweetness, and rich flavor that is far more luxurious than ordinary dinner rolls.

These brioche rolls are perfect for holiday dinners, Sunday meals, brunches, family gatherings, or simply serving alongside a comforting homemade dinner. Their golden tops and fluffy interiors make them beautiful enough for special occasions, but the ingredients are simple enough for home bakers to master with a little patience.

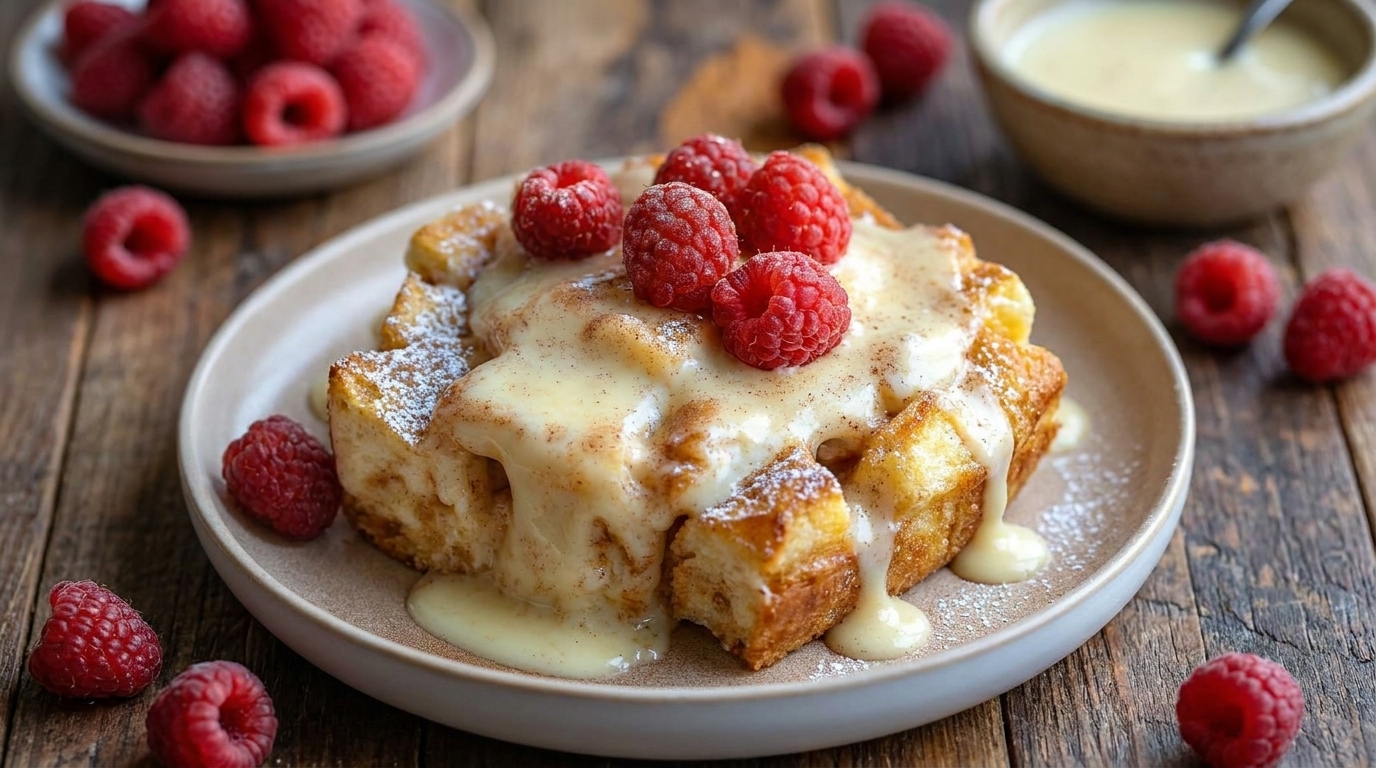
One of the best things about homemade brioche rolls is their versatility. Serve them warm with butter and honey, use them for breakfast sandwiches, pair them with soups and roasts, or turn leftovers into sliders, French toast, or bread pudding.

Why You’ll Love These Buttery Bliss Brioche Rolls

These easy brioche rolls have the rich flavor of traditional bakery-style brioche while being shaped into convenient individual portions.

The dough is enriched with eggs, milk, sugar, and plenty of butter, giving the rolls their signature soft texture and slightly sweet flavor. A slow, thorough kneading process develops enough gluten to support all that richness while keeping the crumb light and fluffy.

They also make an impressive addition to the dinner table. Brushing the tops with egg wash before baking creates a deep golden shine, while melted butter brushed over the warm rolls gives them an irresistibly soft and glossy finish.

Ingredients

For the Brioche Dough

  • 3¾ cups all-purpose flour, plus more as needed
  • 2¼ teaspoons active dry yeast or instant yeast
  • ¼ cup granulated sugar
  • 1 teaspoon salt
  • ¾ cup whole milk, warmed to about 105–110°F
  • 3 large eggs, room temperature
  • 1 teaspoon vanilla extract, optional
  • 10 tablespoons unsalted butter, very soft and cut into small pieces

For the Egg Wash

  • 1 large egg
  • 1 tablespoon whole milk

For Finishing

  • 2 tablespoons unsalted butter, melted
  • Flaky sea salt, optional
  • Honey or softened butter, for serving

How to Make Buttery Bliss Brioche Rolls

1. Activate the Yeast

If using active dry yeast, pour the warm milk into a small bowl.

The milk should feel comfortably warm but not hot. A temperature of approximately 105–110°F is ideal.

Stir in 1 tablespoon of the sugar and sprinkle the yeast over the top.

Let the mixture stand for approximately 5–10 minutes.

The yeast should become foamy and slightly bubbly. This indicates that it is active and ready to use.

If nothing happens after 10 minutes, the yeast may be expired or the milk may have been too hot or too cold. Starting again with fresh yeast is better than risking a dough that will not rise.

If using instant yeast, you can usually mix it directly with the flour, although blooming it in warm milk is still a helpful way to confirm that it is active.

2. Combine the Dough Ingredients

In the bowl of a stand mixer fitted with the dough hook, combine the flour, remaining sugar, and salt.

Add the activated yeast mixture.

Add the eggs and vanilla extract if using.

Mix on low speed for approximately 2–3 minutes until a rough, shaggy dough forms.

At first, the dough may look sticky and uneven. This is completely normal.

Scrape down the sides of the bowl as necessary so all of the flour becomes incorporated.

3. Knead the Dough

Increase the mixer speed to medium-low.

Knead the dough for approximately 5–7 minutes before adding the butter.

During this stage, the dough should gradually become smoother and begin pulling away from the sides of the bowl.

Brioche dough needs strong gluten development because the large amount of butter added later can weaken the dough structure.

If mixing by hand, knead on a lightly floured surface until the dough begins to feel smooth and elastic.

Try not to add too much extra flour. Brioche dough is naturally softer and stickier than standard bread dough.

4. Add the Butter Gradually

Reduce the mixer speed to low.

Add the softened butter a few pieces at a time.

Wait until each addition is mostly incorporated before adding more.

At first, the dough may appear greasy, sticky, or even slightly separated. Continue mixing patiently.

Once all the butter has been added, increase the speed to medium-low and knead for approximately 8–12 minutes.

The finished dough should become smooth, glossy, elastic, and slightly tacky.

To test whether the gluten has developed enough, gently stretch a small piece of dough between your fingers.

If it stretches into a thin, almost translucent sheet without tearing immediately, it has reached the windowpane stage and is ready for the first rise.

5. Let the Dough Rise

Lightly grease a large bowl with butter or neutral oil.

Shape the dough into a loose ball and place it inside.

Cover the bowl with plastic wrap or a clean kitchen towel.

Allow the dough to rise in a warm, draft-free place for approximately 1½–2 hours, or until nearly doubled in size.

Because brioche dough contains a large amount of butter, eggs, and sugar, it may rise a little more slowly than basic bread dough.

Do not rush this stage.

A warm room temperature of approximately 75–80°F helps the yeast work efficiently.

6. Chill the Dough

Once the dough has risen, gently press it down to release some of the trapped gas.

Cover the bowl tightly and refrigerate the dough for at least 1 hour.

For even better flavor and easier handling, refrigerate it overnight.

Chilling firms the butter inside the dough, making the brioche much easier to shape.

Cold fermentation also allows the flavor to develop more deeply.

If you are short on time, you can shape the rolls without chilling, but the dough will be noticeably softer and stickier.

7. Shape the Brioche Rolls

Lightly grease a 9×13-inch baking dish or line a large baking pan with parchment paper.

Transfer the chilled dough to a lightly floured work surface.

Divide it into approximately 12 equal portions.

For the most evenly sized rolls, use a kitchen scale and weigh the dough before dividing it.

Shape each portion into a smooth ball.

To create surface tension, cup your hand around each piece and gently roll it against the work surface in small circular motions.

Arrange the shaped rolls in the prepared baking dish, leaving a small amount of space between them.

As they rise and bake, they will expand and gently touch one another.

8. Let the Rolls Rise Again

Cover the shaped rolls loosely with plastic wrap or a clean kitchen towel.

Allow them to rise in a warm place for approximately 1–2 hours.

The rolls should become noticeably puffy and increase significantly in size.

When gently pressed with a fingertip, the dough should slowly spring back rather than immediately bouncing back.

Avoid overproofing. If the dough becomes extremely fragile and collapses when touched, it has risen too long.

9. Prepare the Egg Wash

Preheat your oven to 375°F (190°C).

In a small bowl, whisk together the egg and milk until completely combined.

Using a pastry brush, gently brush a thin layer of egg wash over the tops of the risen rolls.

Be careful not to press down on the dough or deflate it.

The egg wash gives brioche its signature shiny, deeply golden crust.

For an extra decorative finish, sprinkle a very small amount of flaky sea salt over the tops before baking.

10. Bake Until Golden

Place the rolls in the preheated oven.

Bake for approximately 20–25 minutes.

The tops should become deeply golden brown and the rolls should look puffed and glossy.

If the tops are browning too quickly before the centers are fully baked, loosely cover them with aluminum foil during the final few minutes.

For the most accurate doneness test, check the center of one roll with an instant-read thermometer.

Enriched breads such as brioche are generally fully baked when the internal temperature reaches approximately 190–195°F (88–91°C).

Remove the baking dish from the oven.

11. Brush with Melted Butter

While the rolls are still hot, immediately brush the tops with melted butter.

This final butter coating softens the crust and gives the rolls an extra-rich flavor and beautiful shine.

Allow them to cool in the pan for approximately 10–15 minutes.

Serve warm for the softest and most luxurious texture.

What to Serve With Buttery Bliss Brioche Rolls

These brioche rolls pair beautifully with almost any comforting main course.

Serve them alongside roast chicken, pot roast, beef stew, turkey, baked ham, meatloaf, or creamy chicken dishes. Their soft interior is excellent for soaking up gravy, sauces, and pan juices.

They are also wonderful with soups such as tomato soup, creamy potato soup, chicken soup, French onion soup, or mushroom soup.

For breakfast or brunch, split the rolls and serve them with butter, jam, honey, fruit preserves, or chocolate spread.

They can also be used to make breakfast sandwiches with eggs, cheese, and bacon or sausage.

For parties and gatherings, slice them in half and use them as soft slider buns.

Tips for the Best Buttery Bliss Brioche Rolls

Use room-temperature eggs and properly softened butter. Cold ingredients make it harder for the dough to blend smoothly.

Do not melt the butter before adding it to the dough. The butter should be very soft but still hold its shape.

Add the butter gradually. Adding all of it at once can overwhelm the dough and make proper gluten development difficult.

Be patient while kneading. Brioche dough often looks messy before it becomes smooth and elastic.

Avoid adding too much flour. The dough should remain soft and slightly tacky. Excess flour can make the finished rolls dense and dry.

Chilling the dough makes shaping much easier and also improves flavor.

Give both rises enough time. Underproofed brioche can be heavy and dense instead of light and fluffy.

Brush the rolls gently with egg wash so you do not deflate them before baking.

Finally, brush the warm rolls with melted butter immediately after they leave the oven for an especially soft finish.

Easy Recipe Variations

For Honey Butter Brioche Rolls, replace 2 tablespoons of the granulated sugar with honey and brush the baked rolls with a mixture of melted butter and honey.

For Garlic Herb Brioche Rolls, mix melted butter with minced garlic, parsley, and thyme and brush it over the warm rolls after baking.

For Cheesy Brioche Rolls, sprinkle shredded Parmesan, cheddar, or Gruyère over the tops during the final 5 minutes of baking.

For Cinnamon Brioche Rolls, sprinkle the dough portions with cinnamon sugar before shaping them for a lightly sweet breakfast variation.

For Sesame Brioche Rolls, sprinkle sesame seeds over the egg-washed tops before baking.

For Everything Brioche Rolls, top the rolls with everything bagel seasoning before placing them in the oven.

For Mini Brioche Slider Rolls, divide the dough into 18–24 smaller portions and reduce the baking time slightly.

How to Store Leftovers

Allow the brioche rolls to cool completely before storing them.

Place them in an airtight container or resealable food-storage bag.

Store at room temperature for up to 2–3 days.

Because homemade brioche does not contain commercial preservatives, it tastes best during the first couple of days.

To refresh a roll, warm it in the microwave for approximately 10–15 seconds or place it in a 300°F (150°C) oven for several minutes.

You can also freeze the baked rolls for up to 2–3 months.

Once completely cool, wrap them securely and place them in a freezer-safe container or bag.

Thaw at room temperature and warm gently before serving.

The dough can also be refrigerated overnight after the first rise, making these rolls convenient to prepare ahead for holidays or special dinners.

Frequently Asked Questions

What makes brioche different from regular dinner rolls?

Brioche is an enriched bread dough made with generous amounts of butter, eggs, milk, and sometimes sugar.

These ingredients give it a richer flavor, softer crumb, and more tender texture than standard bread rolls.

Why is my brioche dough so sticky?

Brioche dough is naturally soft and sticky because of its high butter and egg content.

Avoid adding large amounts of additional flour.

As the dough is kneaded and chilled, it should become easier to handle.

Can I make brioche rolls without a stand mixer?

Yes.

Brioche can be kneaded by hand, although it requires more time and patience.

The dough will initially be quite sticky, so use a bench scraper to help handle it rather than adding too much flour.

Can I make the dough overnight?

Absolutely.

After the first rise, cover the dough tightly and refrigerate it overnight.

The next day, divide, shape, proof, and bake the rolls.

This method can actually improve the flavor.

Why did my brioche rolls turn out dense?

Dense brioche can result from inactive yeast, insufficient kneading, adding too much flour, or not allowing the dough enough time to rise.

Make sure your yeast is fresh and give the dough enough time to become visibly puffy during both proofing stages.

Can I use bread flour?

Yes.

Bread flour can create a slightly chewier structure and may make the dough easier to handle.

You can replace all-purpose flour with the same amount of bread flour or use a combination of both.

How do I know when the rolls have proofed enough?

The rolls should appear noticeably puffy and almost doubled in size.

When lightly pressed with a fingertip, the indentation should slowly begin to spring back.

Can I make these rolls sweeter?

Yes.

Increase the sugar to approximately ⅓ cup for a sweeter breakfast-style brioche.

You can also brush the warm rolls with honey butter after baking.

Final Thoughts

These easy Buttery Bliss Brioche Rolls are everything homemade dinner rolls should be: soft, fluffy, golden, tender, and packed with rich buttery flavor.

Although brioche requires a little extra kneading and rising time, the process is straightforward and the result is worth the patience. The combination of eggs, milk, butter, and slow fermentation creates a beautifully soft bread that feels special enough for holidays while still being versatile enough for everyday meals.

Serve these rolls warm with butter, honey, soup, roast chicken, holiday dinners, or your favorite comfort foods, and enjoy that irresistible bakery-style softness in every buttery bite.

Best Bread Pudding Recipe – Turn Stale Bread Into a Rich, Decadent Dessert

If you have a loaf of bread that has gone a little stale, do not throw it away. This Best Bread Pudding Recipe transforms simple leftover bread into a warm, soft, custardy dessert filled with vanilla, cinnamon, butter, and just the right amount of sweetness.

Bread pudding is one of those classic desserts that proves the simplest ingredients can create something incredibly comforting. Cubes of day-old bread soak up a rich mixture of eggs, milk, cream, sugar, vanilla, and warm spices before baking until the top becomes beautifully golden while the center stays moist and tender.

It is perfect for holidays, Sunday dinners, potlucks, brunches, or cozy evenings at home. Serve it warm with vanilla ice cream, whipped cream, caramel sauce, or a simple dusting of powdered sugar for an easy dessert that tastes far more luxurious than its humble ingredients suggest.

Why You’ll Love This Bread Pudding

One of the best things about bread pudding is that it gives leftover bread a completely new life. Slightly dry bread actually works better than very fresh bread because it absorbs the custard without immediately falling apart.

This recipe also creates the ideal balance of textures. The center becomes soft and creamy, almost like baked French toast, while the exposed pieces of bread on top develop slightly crisp, caramelized edges.

It is also incredibly customizable. You can add raisins, chocolate chips, chopped pecans, apples, dried cranberries, or even a splash of bourbon depending on the flavor you want.

Best of all, most of the ingredients are pantry and refrigerator staples, making this an excellent dessert when you want something impressive without a complicated shopping list.

Ingredients

For the Bread Pudding

  • 10 cups stale bread, cut into 1-inch cubes
  • 4 tablespoons unsalted butter, melted
  • 4 large eggs
  • 2 cups whole milk
  • 1 cup heavy cream
  • ¾ cup granulated sugar
  • ¼ cup packed light brown sugar
  • 2 teaspoons pure vanilla extract
  • 1½ teaspoons ground cinnamon
  • ¼ teaspoon ground nutmeg
  • ¼ teaspoon salt
  • ½ cup raisins, optional
  • ½ cup chopped pecans or walnuts, optional

For the Simple Vanilla Sauce

  • 4 tablespoons unsalted butter
  • ½ cup brown sugar
  • ½ cup heavy cream
  • 1 teaspoon vanilla extract
  • Pinch of salt

Optional for Serving

  • Powdered sugar
  • Vanilla ice cream
  • Whipped cream
  • Caramel sauce
  • Fresh berries

How to Make the Best Bread Pudding

1. Choose and Prepare the Bread

Start with bread that is at least one day old.

Brioche, challah, French bread, Italian bread, or a sturdy white loaf all work especially well. Brioche and challah make the richest bread pudding because they already contain butter and eggs.

Cut the bread into approximately 1-inch cubes.

You will need around 10 cups.

If your bread is still very fresh, spread the cubes across a baking sheet and bake at 300°F for 10 to 15 minutes until they feel dry on the outside but are not browned.

Drying the bread helps it absorb more custard.

2. Prepare the Baking Dish

Preheat your oven to 350°F (175°C).

Lightly grease a 9×13-inch baking dish with butter or nonstick cooking spray.

Place the bread cubes evenly inside the prepared dish.

If you are using raisins or chopped nuts, scatter them throughout the bread rather than placing everything only on top.

Drizzle the melted butter over the bread.

3. Make the Custard

In a large mixing bowl, crack the eggs and whisk until the yolks and whites are completely combined.

Add the whole milk, heavy cream, granulated sugar, brown sugar, vanilla extract, cinnamon, nutmeg, and salt.

Whisk thoroughly until the sugar begins to dissolve and the mixture looks smooth.

The combination of milk and heavy cream gives the pudding richness while still keeping the custard soft rather than overly heavy.

4. Pour the Custard Over the Bread

Slowly pour the custard mixture evenly over the bread cubes.

Try to cover as much of the bread as possible.

Use the back of a spoon or clean hands to gently press the bread down into the liquid.

Do not crush the bread. You simply want to make sure the upper pieces have a chance to absorb some custard.

Allow the mixture to rest for approximately 20 to 30 minutes before baking.

This soaking time is very important.

The bread needs time to absorb the custard so you get a moist, creamy center instead of dry pieces surrounded by liquid.

5. Check Before Baking

After soaking, most of the custard should have been absorbed.

Some liquid may still be visible around the edges of the dish, which is completely normal.

Gently press down any pieces of bread that still appear dry.

If desired, sprinkle an extra teaspoon of brown sugar over the top. This helps create slightly caramelized edges as the pudding bakes.

6. Bake Until Golden and Set

Place the baking dish in the preheated oven.

Bake for approximately 40 to 50 minutes.

The exact cooking time will depend on your baking dish and the type of bread you use.

The bread pudding is ready when the top is golden brown and slightly crisp while the center is set but still soft.

Insert a knife near the center. It should come out mostly clean, although a little moisture is fine.

You do not want to bake the pudding until it becomes completely dry.

7. Allow It to Rest

Remove the bread pudding from the oven and let it rest for about 10 to 15 minutes before serving.

Resting gives the hot custard time to settle and makes the pudding easier to slice or spoon into individual servings.

The pudding is wonderful warm, but it can also be served at room temperature.

How to Make the Vanilla Sauce

1. Melt the Butter

Add the butter to a small saucepan over medium-low heat.

Allow it to melt completely.

2. Add the Sugar and Cream

Stir in the brown sugar and heavy cream.

Cook over medium-low heat for approximately 3 to 5 minutes, stirring frequently.

The sugar should dissolve and the sauce should become smooth and slightly thicker.

Do not allow it to boil aggressively.

3. Finish With Vanilla

Remove the pan from the heat.

Stir in the vanilla extract and a small pinch of salt.

Allow the sauce to cool for several minutes. It will continue to thicken slightly as it sits.

Drizzle the warm sauce generously over each serving of bread pudding.

What to Serve With Bread Pudding

Warm bread pudding is delicious enough on its own, but toppings make it feel extra special.

For classic comfort food, serve each portion with a scoop of vanilla ice cream. The cold ice cream melting into the warm custardy bread creates an incredible combination.

Fresh whipped cream is another simple option.

You can also drizzle the pudding with caramel sauce, vanilla sauce, maple syrup, or even chocolate sauce.

For something lighter, top it with strawberries, raspberries, blueberries, or sliced bananas.

A dusting of powdered sugar makes a beautiful finishing touch when serving this dessert to guests.

Tips for the Best Bread Pudding

Use stale bread. Slightly dry bread absorbs custard better than fresh bread.

Do not skip the soaking time. Letting the bread sit in the custard before baking produces a softer, more evenly textured pudding.

Use sturdy bread. Very thin sandwich bread can become mushy. Brioche, challah, French bread, or Italian bread gives better structure.

Do not overbake. Bread pudding should remain soft and moist in the center.

Use both white and brown sugar. Granulated sugar provides sweetness, while brown sugar adds a subtle caramel flavor.

Add heavy cream for richness. You can make bread pudding entirely with milk, but cream gives it a more luxurious texture.

Easy Bread Pudding Variations

Chocolate Chip Bread Pudding

Add ¾ cup semisweet or dark chocolate chips throughout the bread before pouring over the custard.

Cinnamon Raisin Bread Pudding

Increase the raisins to 1 cup and add an extra ½ teaspoon cinnamon.

Apple Cinnamon Bread Pudding

Fold in 1½ cups peeled, diced apples and add a pinch of extra cinnamon.

Pecan Bread Pudding

Add ¾ cup toasted chopped pecans for extra crunch and nutty flavor.

Bourbon Bread Pudding

Add 1 to 2 tablespoons bourbon to the custard or vanilla sauce for a deeper, more complex flavor.

Caramel Bread Pudding

Drizzle warm caramel sauce over the finished pudding just before serving.

Storage and Reheating

Allow leftover bread pudding to cool before covering the baking dish or transferring individual portions to an airtight container.

Store in the refrigerator for up to 3 to 4 days.

To reheat, place an individual serving in the microwave for approximately 30 to 60 seconds.

For larger portions, cover the baking dish loosely with foil and warm at 325°F until heated through.

If the pudding seems slightly dry after refrigeration, add a spoonful of milk, cream, or vanilla sauce before reheating.

Bread pudding can also be frozen for up to approximately 2 months. Wrap individual portions tightly, freeze, and thaw overnight in the refrigerator before warming.

Final Thoughts

This Best Bread Pudding Recipe is one of the easiest and most delicious ways to transform stale bread into something truly special.

Instead of wasting leftover bread, you can turn it into a warm dessert filled with creamy vanilla custard, cinnamon, buttery edges, and rich caramel-like sweetness.

The recipe is simple enough for beginners but comforting and impressive enough to serve for holidays or family gatherings.

Enjoy it straight from the oven with a little powdered sugar, or make it truly decadent with warm vanilla sauce and a scoop of ice cream.

Once you see how easy it is to turn ordinary stale bread into this rich, soft, golden dessert, you may start looking forward to having leftover bread in the kitchen.

Easy Creamy Chicken Alfredo Lasagna Roll-Ups Recipe – Cheesy, Rich, and Perfect for Family Dinner

If you are craving a comforting pasta dinner filled with creamy sauce, tender chicken, and plenty of melted cheese, these Creamy Chicken Alfredo Lasagna Roll-Ups are a delicious twist on classic lasagna. Tender lasagna noodles are spread with a rich chicken and cheese filling, rolled into individual portions, covered with homemade Alfredo sauce, and baked until hot, bubbly, and golden.

This recipe has all the cozy flavors of chicken Alfredo and traditional lasagna combined into one beautiful baked dish. Each roll-up is packed with creamy ricotta, shredded chicken, mozzarella, Parmesan, garlic, and herbs, while the silky Alfredo sauce keeps everything moist and indulgent.

One of the best things about homemade lasagna roll-ups is that they are easy to portion and serve. They are perfect for family dinners, weekend meals, potlucks, holidays, or entertaining guests, and they can also be prepared ahead of time and baked when you are ready to eat.

Why You’ll Love These Creamy Chicken Alfredo Lasagna Roll-Ups

These easy lasagna roll-ups give you all the comfort of traditional lasagna without needing to build multiple heavy layers.

Each noodle is filled individually, which means every serving gets an even amount of chicken, cheese, sauce, and pasta. The creamy Alfredo sauce coats the noodles while mozzarella and Parmesan melt into a rich, bubbly topping.

They are also very customizable. You can add spinach, mushrooms, broccoli, bacon, sun-dried tomatoes, extra garlic, or different cheeses depending on what your family enjoys.

This recipe is especially useful when you have leftover cooked chicken or rotisserie chicken that you want to turn into a completely new meal.

Ingredients

For the Lasagna Roll-Ups

  • 12 lasagna noodles
  • 2½ cups cooked chicken, shredded or finely chopped
  • 1½ cups whole-milk ricotta cheese
  • 1 cup shredded mozzarella cheese
  • ½ cup freshly grated Parmesan cheese
  • 1 large egg
  • 2 tablespoons freshly chopped parsley
  • 1 teaspoon Italian seasoning
  • ½ teaspoon garlic powder
  • ½ teaspoon salt
  • ¼ teaspoon freshly ground black pepper

For the Creamy Alfredo Sauce

  • 4 tablespoons unsalted butter
  • 5 garlic cloves, finely minced
  • 2 cups heavy cream
  • 1 cup freshly grated Parmesan cheese
  • ½ teaspoon Italian seasoning
  • ¼ teaspoon garlic powder
  • ¼ teaspoon freshly ground black pepper
  • ¼ teaspoon salt, or to taste
  • Pinch of nutmeg, optional

For Topping

  • 1½ cups shredded mozzarella cheese
  • ¼ cup freshly grated Parmesan cheese
  • 2 tablespoons freshly chopped parsley
  • Red pepper flakes, optional

How to Make Creamy Chicken Alfredo Lasagna Roll-Ups

1. Cook the Lasagna Noodles

Bring a large pot of generously salted water to a rolling boil.

Add the lasagna noodles one at a time so they do not stick together.

Cook according to the package directions until just al dente. The noodles should be flexible enough to roll but still have a little firmness because they will continue cooking in the oven.

Avoid overcooking them, as very soft noodles can tear when you spread the filling or roll them.

Drain the noodles carefully.

Lay them in a single layer on parchment paper, wax paper, or a lightly greased baking sheet.

Keeping the noodles separated prevents them from sticking together while you prepare the filling and sauce.

2. Prepare the Chicken Filling

Place the shredded chicken in a large mixing bowl.

Add the ricotta cheese, mozzarella, Parmesan, egg, parsley, Italian seasoning, garlic powder, salt, and black pepper.

Stir gently until everything is evenly combined.

The mixture should be thick, creamy, and easy to spread.

Taste is not recommended at this stage because the filling contains raw egg, so rely on the measured seasoning.

If the filling seems unusually stiff, you can mix in 1–2 tablespoons of Alfredo sauce once it is prepared.

3. Make the Creamy Alfredo Sauce

Preheat your oven to 375°F (190°C).

Place a medium saucepan or deep skillet over medium-low heat.

Add the butter and allow it to melt completely.

Add the minced garlic and cook for approximately 30–60 seconds, stirring constantly.

The garlic should become fragrant but should not turn dark brown.

Slowly pour in the heavy cream.

Add the Italian seasoning, garlic powder, black pepper, salt, and a small pinch of nutmeg if using.

Bring the mixture to a very gentle simmer.

Avoid boiling the cream aggressively because high heat can cause the sauce to separate.

Allow it to cook for approximately 2–3 minutes.

4. Add the Parmesan to the Alfredo Sauce

Reduce the heat to low.

Gradually sprinkle in the freshly grated Parmesan cheese while whisking or stirring constantly.

Continue stirring until the cheese has completely melted and the sauce is smooth.

Allow the sauce to gently simmer for another 2–4 minutes until it thickens enough to lightly coat the back of a spoon.

Taste and adjust the seasoning if necessary.

Remember that Parmesan is naturally salty, so add extra salt carefully.

If the sauce becomes too thick, add a small splash of heavy cream or milk.

Remove the sauce from the heat.

5. Prepare the Baking Dish

Lightly grease a 9×13-inch baking dish.

Spread approximately 1 cup of Alfredo sauce evenly across the bottom.

This layer keeps the lasagna noodles moist while baking and prevents them from sticking to the dish.

Make sure the entire bottom is lightly covered with sauce.

6. Fill the Lasagna Noodles

Place one cooked lasagna noodle flat on your work surface.

Spread approximately ⅓ cup of the chicken and ricotta filling evenly over the noodle.

Leave a small border around the edges so the filling does not squeeze out excessively when rolled.

Starting from one short end, gently roll the noodle into a spiral.

Do not roll too tightly.

A slightly loose roll gives the filling room to stay inside and helps prevent the noodle from tearing.

Repeat with the remaining noodles and filling.

7. Arrange the Roll-Ups

Place each filled lasagna roll-up seam-side down in the prepared baking dish.

Arrange them closely together without stacking them.

Depending on the shape of your baking dish, you can arrange the rolls in rows.

Once all of the roll-ups are in place, spoon the remaining Alfredo sauce over the top.

Try to cover most of the exposed pasta so the edges do not dry out while baking.

8. Add the Cheese Topping

Sprinkle the shredded mozzarella evenly over the Alfredo-covered roll-ups.

Add the remaining Parmesan cheese.

For an especially cheesy finish, make sure a little mozzarella falls between the rolls as well as across the tops.

Cover the baking dish loosely with aluminum foil.

Try to avoid pressing the foil directly against the cheese.

9. Bake Until Hot and Bubbling

Transfer the baking dish to the preheated oven.

Bake covered for approximately 20 minutes.

Remove the foil and continue baking for another 10–15 minutes.

The sauce should be bubbling around the edges and the cheese should be completely melted.

For a more golden topping, broil the lasagna roll-ups for approximately 1–2 minutes at the very end.

Watch them closely while broiling because mozzarella can brown quickly.

10. Rest and Serve

Remove the baking dish from the oven.

Allow the Chicken Alfredo Lasagna Roll-Ups to rest for approximately 5–10 minutes before serving.

Resting allows the filling and sauce to settle slightly, making the individual rolls easier to lift from the baking dish.

Sprinkle with freshly chopped parsley.

Add a small amount of red pepper flakes if you enjoy a little heat.

Serve each roll-up with extra Alfredo sauce spooned over the top.

What to Serve With Creamy Chicken Alfredo Lasagna Roll-Ups

These creamy lasagna roll-ups are rich and filling, so lighter side dishes work especially well.

Serve them with a crisp Caesar salad, garden salad, arugula salad, or mixed greens tossed with a simple lemon vinaigrette.

Roasted or steamed vegetables are another excellent choice. Broccoli, asparagus, green beans, Brussels sprouts, zucchini, or roasted cauliflower all help balance the richness of the Alfredo sauce.

Garlic bread, breadsticks, or toasted Italian bread are perfect for soaking up any sauce left on the plate.

For a larger family dinner, you can serve the roll-ups alongside roasted vegetables and a fresh salad for a complete Italian-inspired meal.

Tips for the Best Creamy Chicken Alfredo Lasagna Roll-Ups

Cook the lasagna noodles only until al dente. Overcooked noodles become fragile and can tear during rolling.

Lay the cooked noodles flat immediately after draining so they do not stick together.

Use finely shredded or chopped chicken. Large chunks make the roll-ups harder to roll neatly.

Freshly grated Parmesan is especially important for Alfredo sauce. Pre-shredded cheese often contains anti-caking ingredients that can create a grainy texture.

Keep the heat low when adding Parmesan to the cream sauce. High temperatures can cause the cheese to clump or the sauce to separate.

Do not overfill the noodles. Too much filling can squeeze out during rolling and baking.

Cover the roll-ups during the first stage of baking to keep the pasta moist.

Allow the finished dish to rest before serving so the cheese filling has time to firm slightly.

Easy Recipe Variations

For Chicken Spinach Alfredo Lasagna Roll-Ups, add approximately 2 cups of chopped fresh spinach to the chicken filling. You can also use thawed frozen spinach, but squeeze out as much moisture as possible first.

For Chicken Mushroom Alfredo Roll-Ups, sauté 8 ounces of sliced mushrooms until golden and add them to the chicken filling.

For Broccoli Chicken Alfredo Roll-Ups, mix 1 cup of finely chopped cooked broccoli into the filling.

For Bacon Chicken Alfredo Roll-Ups, add 5–6 slices of cooked, crumbled bacon to the chicken mixture.

For Sun-Dried Tomato Chicken Alfredo Roll-Ups, add approximately ⅓ cup finely chopped sun-dried tomatoes to the filling.

For Extra Cheesy Alfredo Roll-Ups, add shredded provolone, fontina, or additional mozzarella to the filling and topping.

For a spicy version, stir red pepper flakes into the Alfredo sauce or add a small pinch of cayenne pepper.

How to Store Leftovers

Allow leftover lasagna roll-ups to cool before transferring them to an airtight container.

Store them in the refrigerator for up to 3–4 days.

For the best texture, keep a little extra Alfredo sauce with the roll-ups so the pasta stays moist.

To reheat individual portions, place one or two roll-ups in a microwave-safe dish.

Add a spoonful of Alfredo sauce, milk, or cream, cover loosely, and heat in short intervals until warmed through.

For larger portions, place the roll-ups in an oven-safe baking dish, cover with foil, and reheat at 350°F (175°C) until hot.

These lasagna roll-ups can also be frozen for approximately 2–3 months.

For best results, freeze them in a tightly covered freezer-safe baking dish.

Thaw overnight in the refrigerator before reheating.

Because Alfredo sauce contains dairy, the texture may change slightly after freezing, but gentle reheating helps restore its creaminess.

Frequently Asked Questions

Can I use rotisserie chicken?

Yes.

Rotisserie chicken is one of the easiest options for this recipe.

Remove the skin and bones, shred the meat finely, and measure approximately 2½ cups for the filling.

Can I make these lasagna roll-ups ahead of time?

Absolutely.

Assemble the entire dish, cover tightly, and refrigerate it for up to approximately 24 hours before baking.

When ready to cook, let the dish sit at room temperature while the oven preheats.

You may need to add approximately 5–10 minutes to the baking time because the ingredients will be cold.

Can I use jarred Alfredo sauce?

Yes.

Store-bought Alfredo sauce can save time.

You will need approximately 3 cups of prepared sauce for the recipe.

A homemade sauce usually provides richer flavor, but a good-quality jarred sauce works well for busy evenings.

Why did my lasagna noodles tear?

They may have been overcooked or allowed to stick together after draining.

Cook them only until al dente and immediately lay them flat in a single layer.

Can I use cottage cheese instead of ricotta?

Yes.

Small-curd cottage cheese can replace ricotta.

For a smoother texture, blend it briefly before mixing it with the chicken and other ingredients.

Can I add vegetables?

Absolutely.

Spinach, mushrooms, broccoli, peas, asparagus, or sun-dried tomatoes all work well.

Cook vegetables with high moisture content before adding them to the filling.

How many roll-ups should I serve per person?

For most adults, approximately 2–3 roll-ups make a satisfying main course depending on the size of the noodles and the side dishes being served.

Final Thoughts

These easy Creamy Chicken Alfredo Lasagna Roll-Ups combine everything you love about cheesy lasagna and creamy chicken Alfredo in one comforting baked pasta dish.

Tender noodles, savory chicken, creamy ricotta, mozzarella, Parmesan, garlic, and silky Alfredo sauce create rich layers of flavor in every individual roll.

Serve them hot with garlic bread, roasted vegetables, or a crisp salad, and spoon plenty of extra Alfredo sauce over the top for a cozy family dinner that is just as impressive for guests as it is easy to enjoy on a weeknight.

Juicy Lemon Herb Baked Chicken – Easy, Healthy & Flavorful Dinner

Lemon Herb Baked Chicken is one of those simple recipes that proves you do not need complicated ingredients to make an incredibly flavorful dinner. Juicy chicken breasts are coated with olive oil, fresh lemon, garlic, and aromatic herbs, then baked until tender and beautifully golden.

This recipe is light, fresh, and packed with bright Mediterranean-inspired flavors. The combination of lemon juice, lemon zest, garlic, oregano, thyme, and parsley creates a delicious marinade that keeps the chicken flavorful from the outside all the way through.

It is also a great option for busy weeknights, healthy meal prep, family dinners, or anytime you want a protein-packed meal without spending hours in the kitchen.

Serve this Lemon Herb Baked Chicken with roasted vegetables, rice, potatoes, salad, quinoa, or your favorite pasta for an easy and satisfying meal.

Why You’ll Love This Lemon Herb Baked Chicken

There are plenty of reasons this recipe can become a regular part of your weekly dinner rotation.

It requires only a handful of everyday ingredients, most of which you may already have in your kitchen.

The marinade is simple but incredibly flavorful. Fresh lemon adds brightness, garlic gives the chicken a savory base, and dried herbs create that classic Mediterranean-style flavor.

Because the chicken is baked instead of fried, the recipe is also naturally lighter.

Another major advantage is how versatile it is. You can serve the chicken whole, slice it over salads, add it to grain bowls, use it in wraps, or prepare several portions for meal prep.

Ingredients

For the Chicken

  • 4 boneless, skinless chicken breasts
  • 3 tablespoons olive oil
  • Juice of 1 large lemon
  • Zest of 1 lemon
  • 4 cloves garlic, finely minced
  • 1 teaspoon dried oregano
  • 1 teaspoon dried thyme
  • 1 teaspoon dried parsley
  • 1/2 teaspoon dried rosemary
  • 1 teaspoon paprika
  • 1 teaspoon salt
  • 1/2 teaspoon black pepper

Optional Garnishes

  • Fresh chopped parsley
  • Lemon slices
  • Fresh thyme
  • Fresh rosemary
  • Crushed red pepper flakes

How to Make Lemon Herb Baked Chicken

1. Prepare the Chicken

Preheat your oven to 400°F or 200°C.

Lightly grease a baking dish with olive oil or cooking spray.

Pat the chicken breasts dry using paper towels. Removing excess moisture helps the marinade coat the chicken more effectively.

If the chicken breasts are especially thick, place them between sheets of parchment paper and gently pound them to an even thickness.

This is an important step because chicken breasts with uneven thickness can cook inconsistently. The thin end may become dry before the thickest section is fully cooked.

Aim for chicken breasts that are approximately 3/4 inch to 1 inch thick.

2. Prepare the Lemon Herb Marinade

In a small bowl, combine the olive oil, fresh lemon juice, lemon zest, minced garlic, oregano, thyme, parsley, rosemary, paprika, salt, and black pepper.

Whisk everything together until well combined.

The lemon juice provides acidity and fresh flavor, while the olive oil helps carry the herbs and seasonings across the surface of the chicken.

Lemon zest is especially useful because it contains concentrated citrus oils and adds strong lemon flavor without introducing additional acidity.

3. Season the Chicken

Place the chicken breasts into a large bowl or resealable food-safe bag.

Pour the lemon herb marinade over the chicken.

Massage or turn the chicken until every piece is completely coated.

For the best flavor, allow the chicken to marinate for approximately 30 minutes in the refrigerator.

You can marinate it for several hours if you want stronger flavor, but avoid leaving chicken in a highly acidic lemon marinade for too long because the texture can eventually become soft or slightly mushy.

If you are short on time, you can bake the chicken immediately after seasoning.

4. Arrange the Chicken for Baking

Transfer the marinated chicken breasts into the prepared baking dish.

Arrange them in a single layer with a little space between each piece.

Pour any remaining herb mixture from the bowl over the top.

Arrange a few thin lemon slices around or over the chicken if desired.

Do not stack the chicken because overlapping pieces will cook unevenly.

5. Bake the Chicken

Place the baking dish into the preheated oven.

Bake for approximately 20 to 26 minutes.

The exact cooking time will depend on the size and thickness of your chicken breasts.

Smaller chicken breasts may cook in around 18 to 20 minutes, while larger ones can require closer to 25 to 30 minutes.

The most reliable way to determine whether chicken is finished is by using an instant-read meat thermometer.

Insert the thermometer into the thickest portion of the chicken.

The chicken is safely cooked when the internal temperature reaches 165°F or 74°C.

Avoid continuing to cook it far beyond this temperature, as overcooking is one of the most common reasons baked chicken becomes dry.

6. Optional Broiling Step

For additional golden color, switch the oven to broil during the final 1 to 2 minutes.

Watch the chicken closely because broilers work very quickly.

This step is completely optional but can give the surface a slightly caramelized appearance.

7. Let the Chicken Rest

Remove the chicken from the oven and allow it to rest for approximately 5 to 10 minutes before slicing.

Resting is one of the easiest ways to keep baked chicken juicy.

When meat cooks, its juices move toward the center. Cutting immediately allows those juices to escape onto the cutting board.

Allowing the chicken to rest gives the juices time to redistribute throughout the meat.

8. Garnish and Serve

Spoon some of the flavorful juices from the baking dish over the chicken.

Finish with freshly chopped parsley and fresh lemon slices.

You can also add a little extra lemon zest or freshly cracked black pepper before serving.

Serve warm with your favorite sides.

Tips for Juicy Baked Chicken

Use Evenly Sized Chicken Breasts

Chicken breasts that are approximately the same size will cook more evenly.

If one piece is much thicker than the others, pound it slightly or slice it horizontally.

Do Not Skip the Olive Oil

Because chicken breast is naturally lean, olive oil helps keep the exterior moist and provides better flavor.

Use Fresh Lemon

Freshly squeezed lemon juice provides much better flavor than bottled lemon juice.

You also need fresh lemons if you want to use the zest, which gives this recipe much of its citrus aroma.

Avoid Overcooking

This is the most important tip.

Use a thermometer and remove the chicken once it reaches the proper internal temperature.

A few extra minutes in the oven can make a noticeable difference in texture.

What to Serve With Lemon Herb Baked Chicken

This chicken works with a wide variety of side dishes.

For a light and healthy dinner, serve it with:

  • Roasted broccoli
  • Green beans
  • Asparagus
  • Greek salad
  • Cucumber tomato salad
  • Steamed vegetables

For a more filling meal, try:

  • Garlic mashed potatoes
  • Roasted baby potatoes
  • Brown rice
  • White rice
  • Quinoa
  • Couscous
  • Orzo
  • Buttered noodles

You can also slice the chicken and serve it over a Mediterranean grain bowl with cucumber, tomato, greens, hummus, and feta cheese.

Easy Lemon Herb Chicken Variations

Lemon Herb Chicken Thighs

Boneless or bone-in chicken thighs can be used instead of chicken breasts.

They contain a little more fat and naturally stay very juicy during baking.

Cooking times will need to be adjusted depending on whether you use boneless or bone-in thighs.

Spicy Lemon Chicken

Add 1/2 teaspoon crushed red pepper flakes or a small pinch of cayenne pepper to the marinade.

Garlic Lover’s Version

Increase the garlic from four cloves to six cloves for a stronger garlic flavor.

Mediterranean Lemon Chicken

Add sliced cherry tomatoes, olives, red onion, and feta cheese to the baking dish.

Lemon Herb Chicken and Vegetables

Turn this recipe into an easy sheet-pan dinner by adding zucchini, bell peppers, broccoli, asparagus, or baby potatoes around the chicken.

Make sure harder vegetables such as potatoes are cut into small pieces so they cook in time.

How to Store Lemon Herb Baked Chicken

Allow the cooked chicken to cool before transferring it into an airtight container.

Store it in the refrigerator for up to 4 days.

For meal prep, divide the chicken among containers with rice, quinoa, roasted vegetables, or salad ingredients.

Keeping a few lemon wedges separately allows you to add fresh lemon flavor just before eating.

How to Reheat Without Drying Out the Chicken

Chicken breast can dry out if reheated aggressively.

Place sliced chicken into a covered skillet over low heat with a small splash of chicken broth or water.

Warm gently until heated through.

You can also microwave it in short intervals, preferably covered with a microwave-safe lid.

Adding a spoonful of the original cooking juices helps keep it moist.

Frequently Asked Questions

Can I use chicken thighs?

Yes. Chicken thighs are a delicious option and work especially well with the lemon herb marinade.

Can I marinate the chicken overnight?

You can prepare the marinade ahead of time, but because it contains fresh lemon juice, it is generally better not to leave the chicken in it for an excessively long period. A few hours is usually enough to develop plenty of flavor.

Why is my baked chicken dry?

The most common reason is overcooking.

Use an instant-read thermometer and remove the chicken when the thickest portion reaches 165°F.

Can I prepare this recipe for meal prep?

Absolutely. Lemon Herb Baked Chicken is an excellent meal-prep protein because it can be paired with rice, quinoa, vegetables, pasta, or salads.

Can I use bottled lemon juice?

Fresh lemon is strongly recommended. Fresh juice has a cleaner flavor, and fresh lemon zest contributes much of the citrus aroma in this recipe.

Final Thoughts

Lemon Herb Baked Chicken is a simple, dependable recipe that delivers plenty of flavor without requiring complicated preparation.

Fresh lemon, garlic, olive oil, and aromatic herbs transform ordinary chicken breasts into a juicy, savory dinner with a refreshing citrus finish.

It is easy enough for a busy weeknight but flavorful enough to serve when you want something a little more special.

Pair it with roasted vegetables for a healthy dinner, serve it alongside potatoes or rice for something more comforting, or slice the leftovers for meal-prep bowls and salads.

Once you learn how easy it is to make tender, juicy Lemon Herb Baked Chicken at home, this recipe can easily become one of your go-to healthy chicken dinners.